How to hide images in the Photos app on iPhone and iPad
We all have images cluttering our iPhone. Maybe they're memes, cooking recipes, or a motivational picture that you got in the Mail. It's the type of images that you wouldn't hang in your digital photo frame, but you don't want to get rid of them, in case you need them. Fortunately, iOS 14 and iPadOS 14 have a solution for these types of pictures: A hidden folder. Here's how you can hide images in the Photos app on iPhone and iPad.
What does hiding a photo do, exactly?
When you hide an image from your Photos library, it effectively disappears from your main photos view (which includes Moments, Collections, and Years). The image will still be available in Albums and searches, however.
Where can I find my Hidden album?
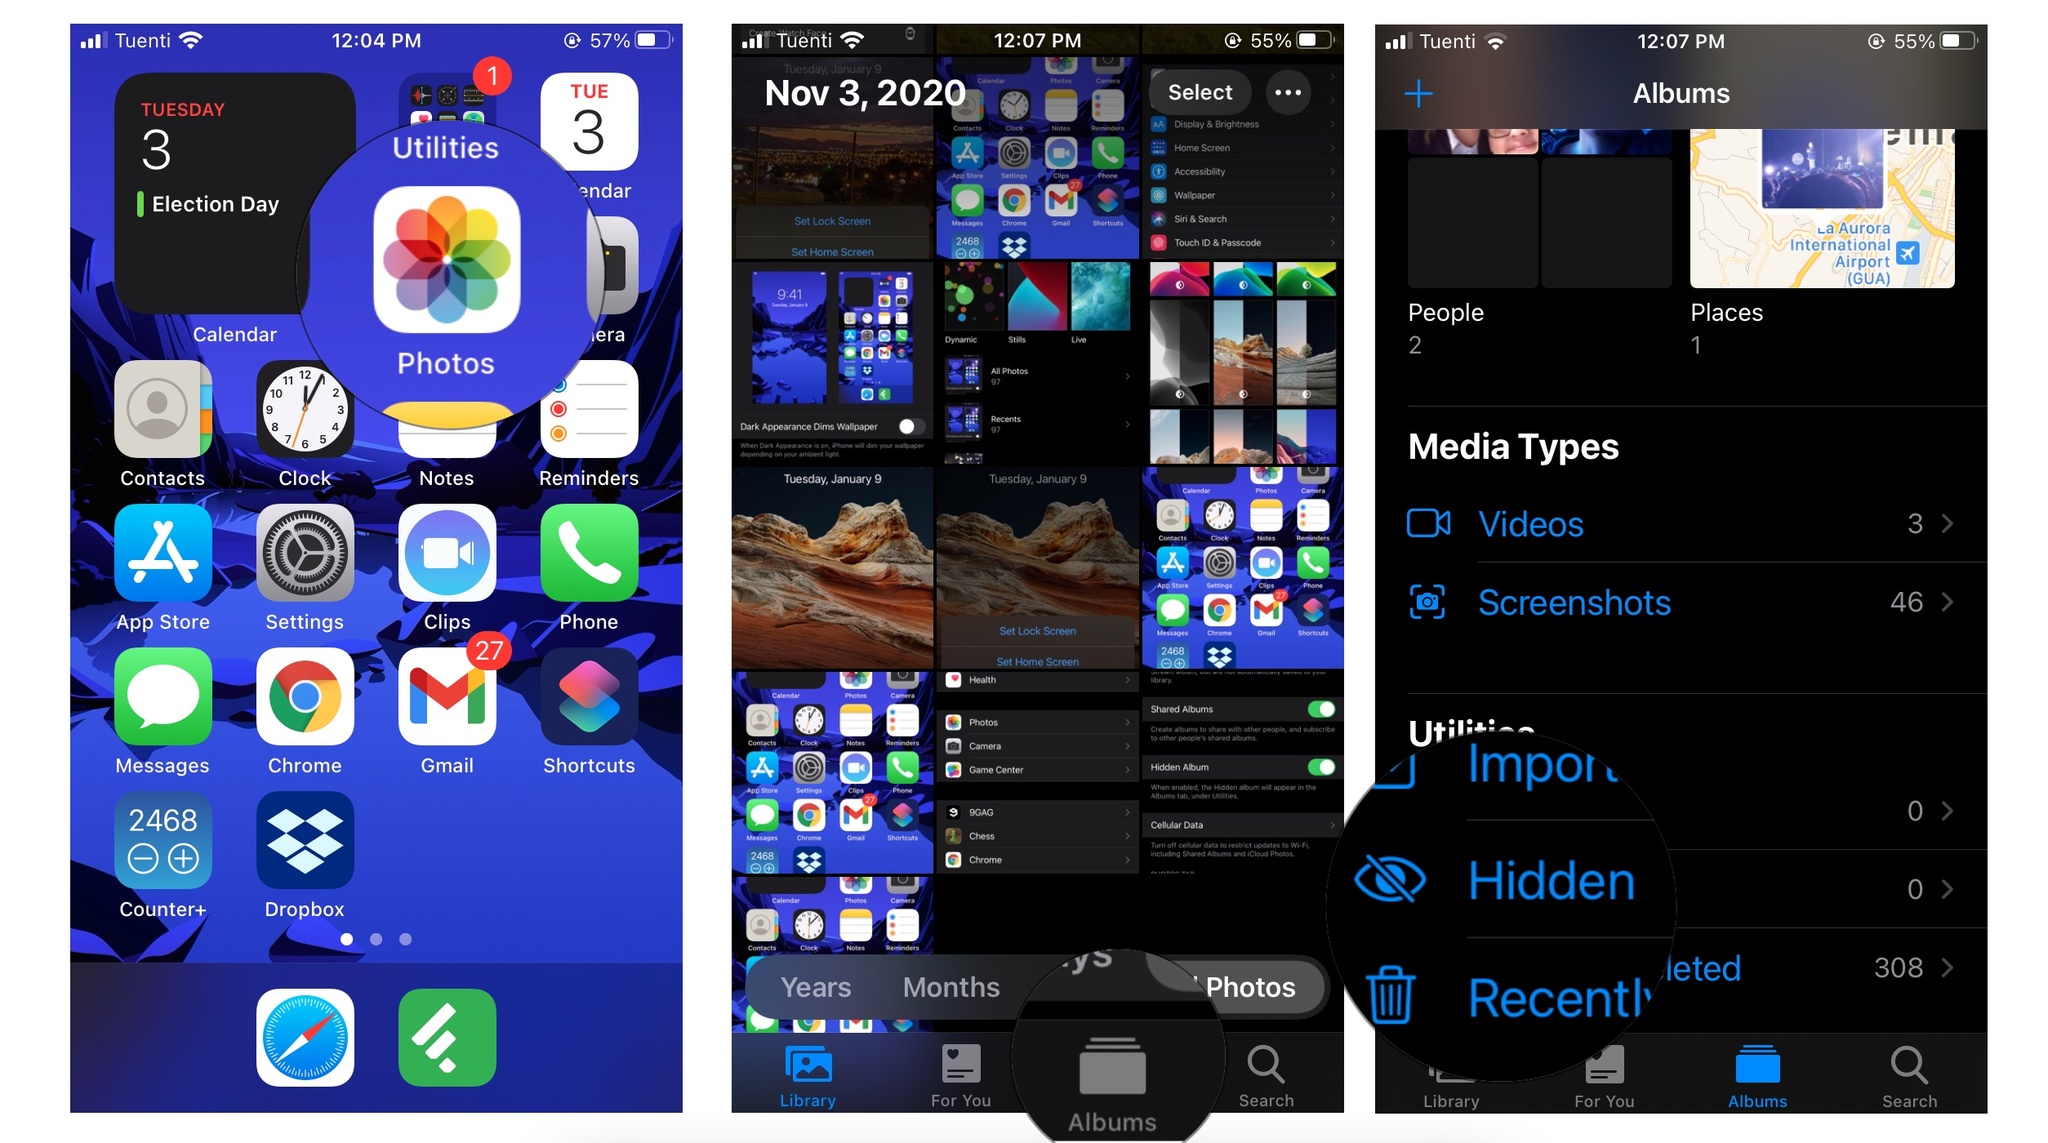
The Hidden album is located in the Photos app, in the Albums tab, right at the bottom. However, it's possible that you can't see it there. Fear not, what happens is that Apple gives you the option to hide your Hidden album too. If you don't see it, here's what you need to do.
How to hide or show your Hidden album
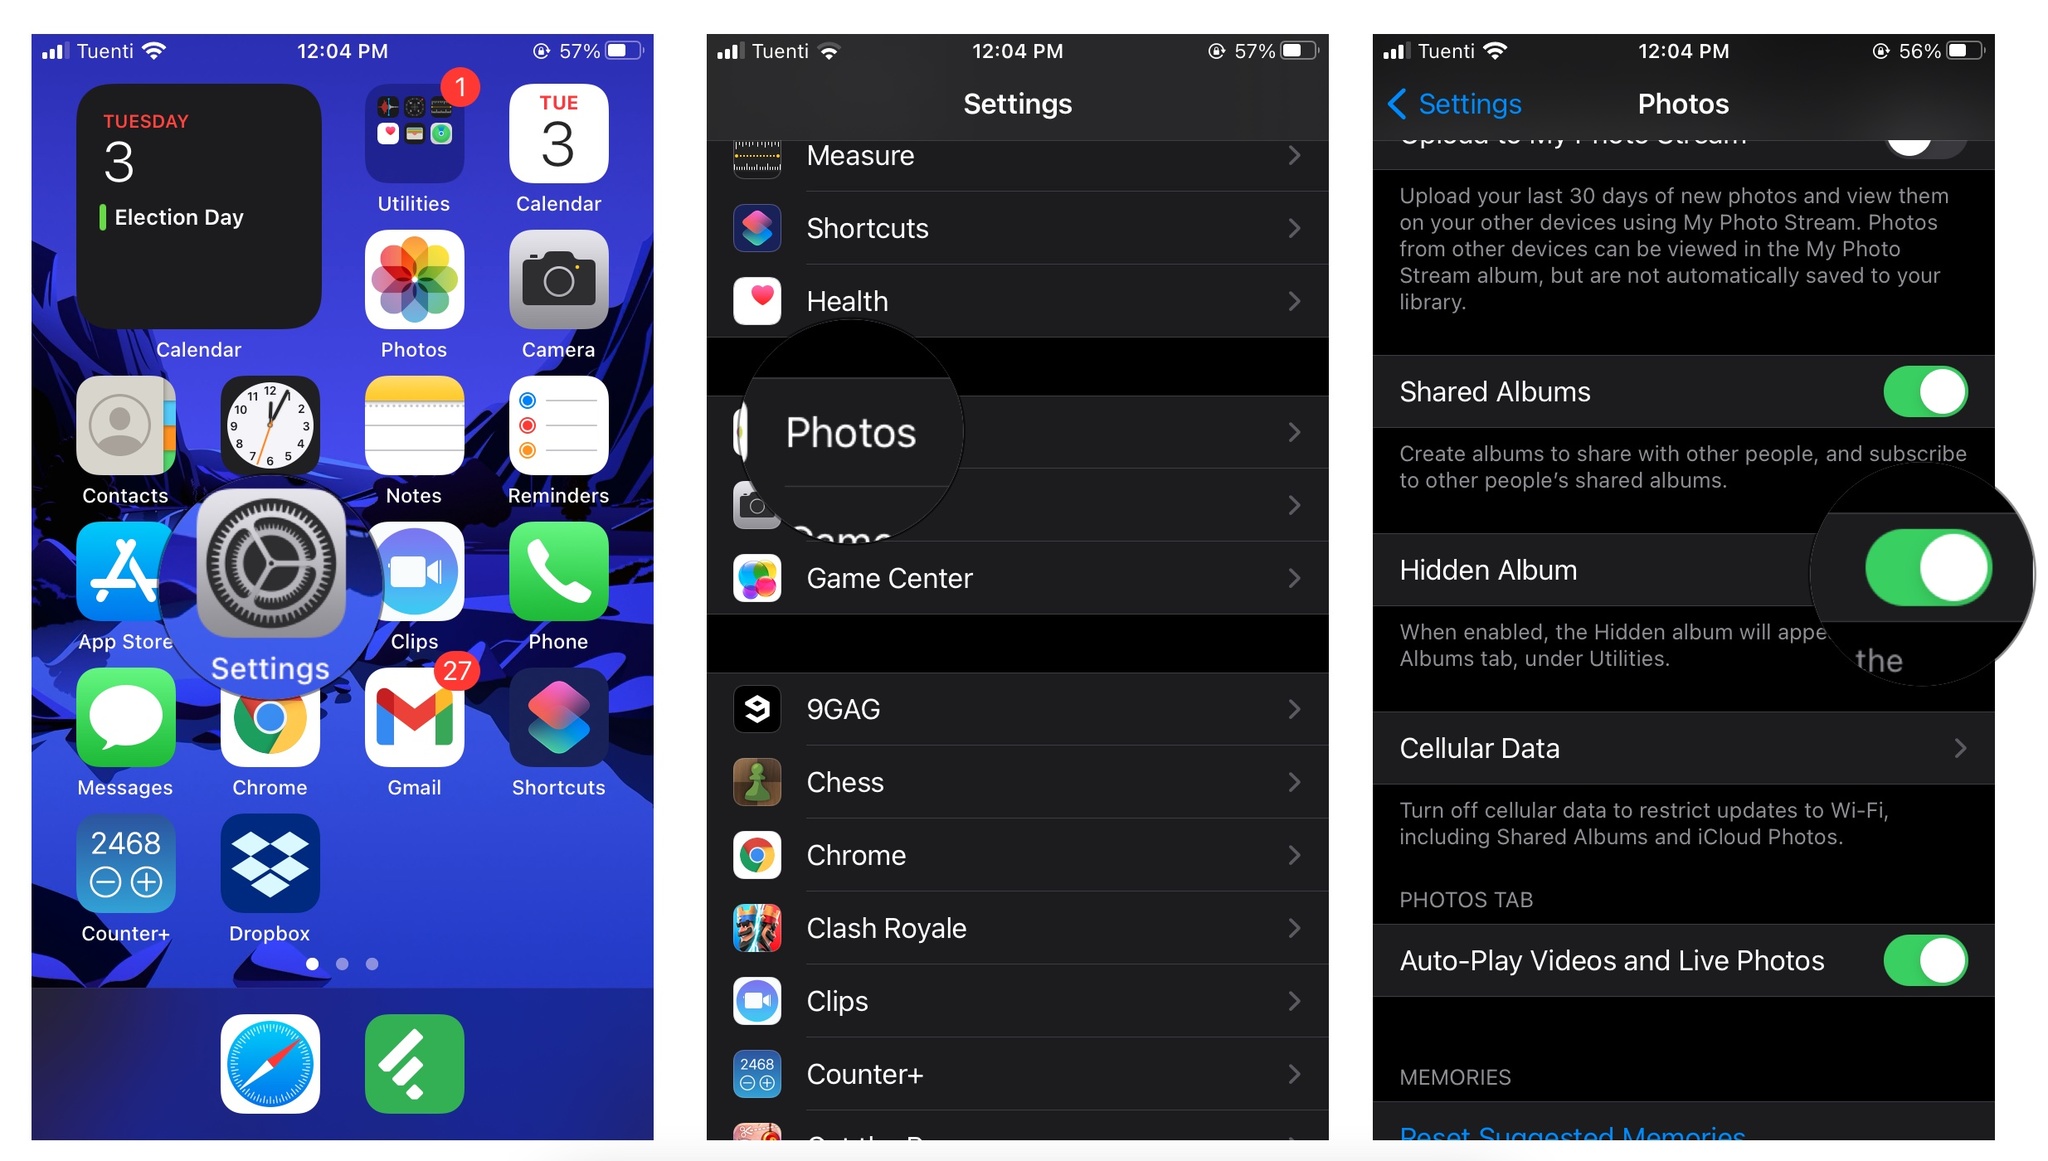
- Open the Settings app.
- Scroll down and tap on Photos.
- Scroll down again until you find Hidden Album.
- Toggle Hidden album on or off if you want to show or hide it.
Find your Hidden album
- Open the Photos app.
- Tap on the Albums tab.
- Scroll down and tap on Hidden under the utilities section.
How to hide images in the Photos app on iPhone and iPad
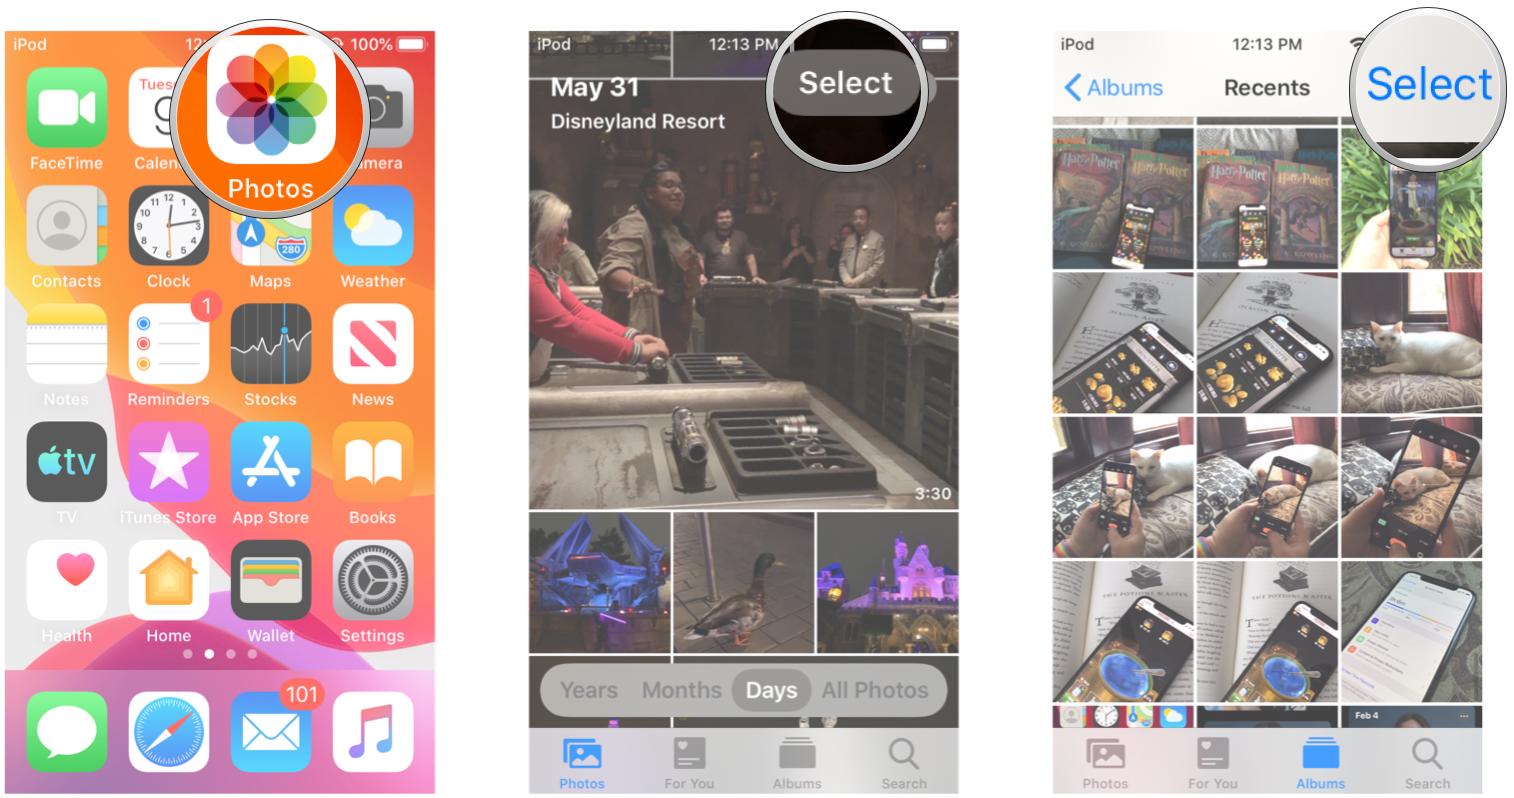
- Launch Photos on your iPhone or iPad.
- In either the Days, All Photos, or standard Albums view, tap on the Select button.
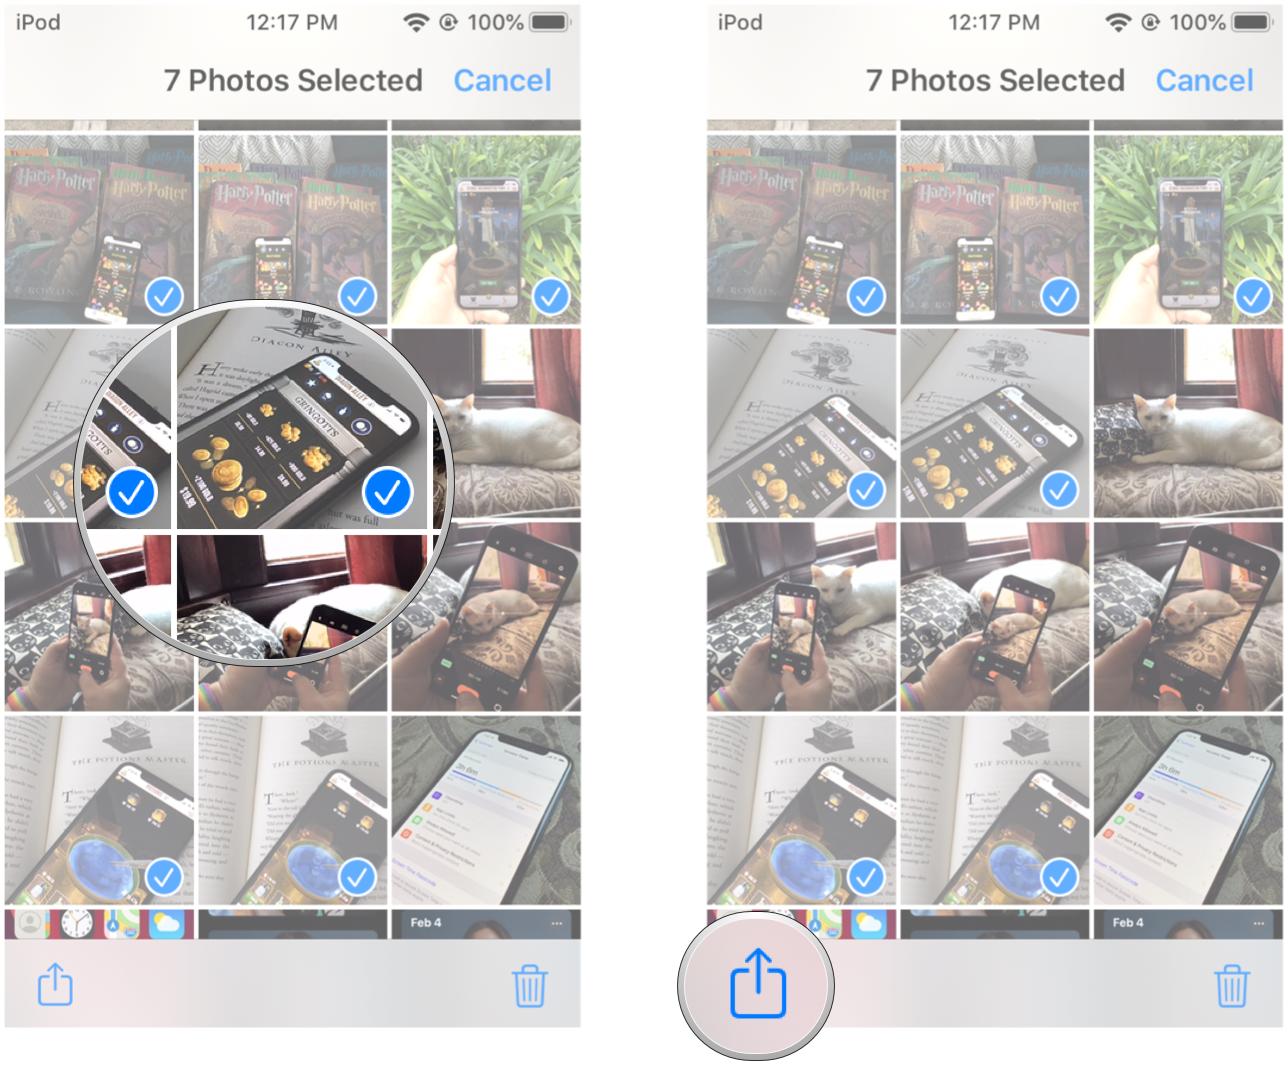
- Tap on the photos that you want to hide.
- Optionally, you can also just view individual photos and hide one-by-one instead of a batch.
- Tap the Share button.
- Scroll down in the Share Sheet.
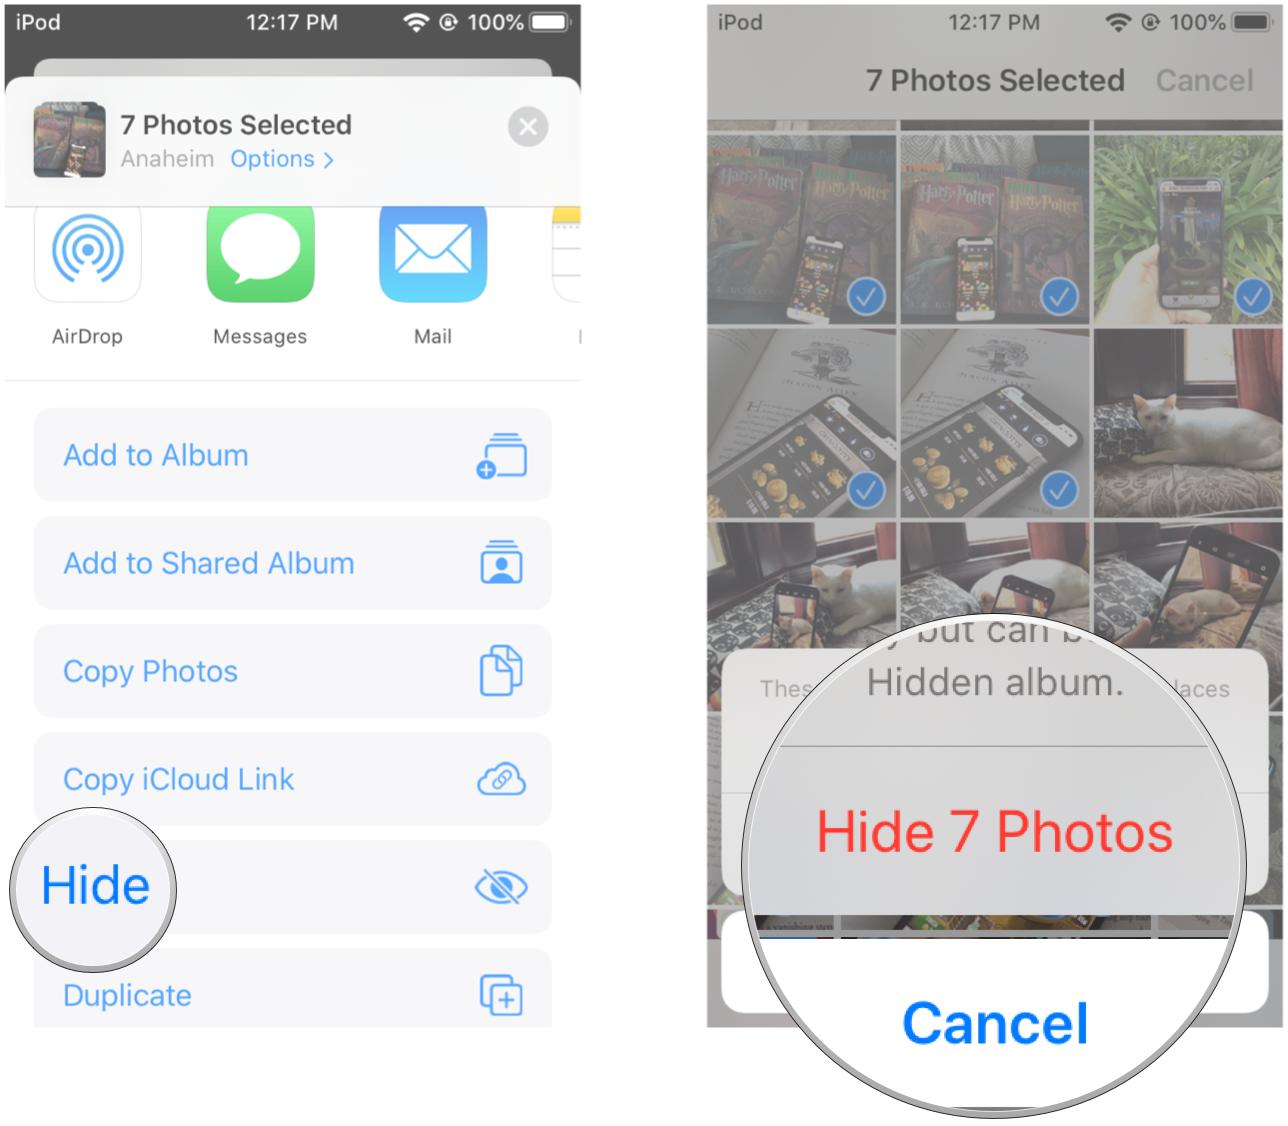
- Tap on Hide.
- Confirm that you want to hide the photos, or tap Cancel if you change your mind.
How to unhide images in the Photos app
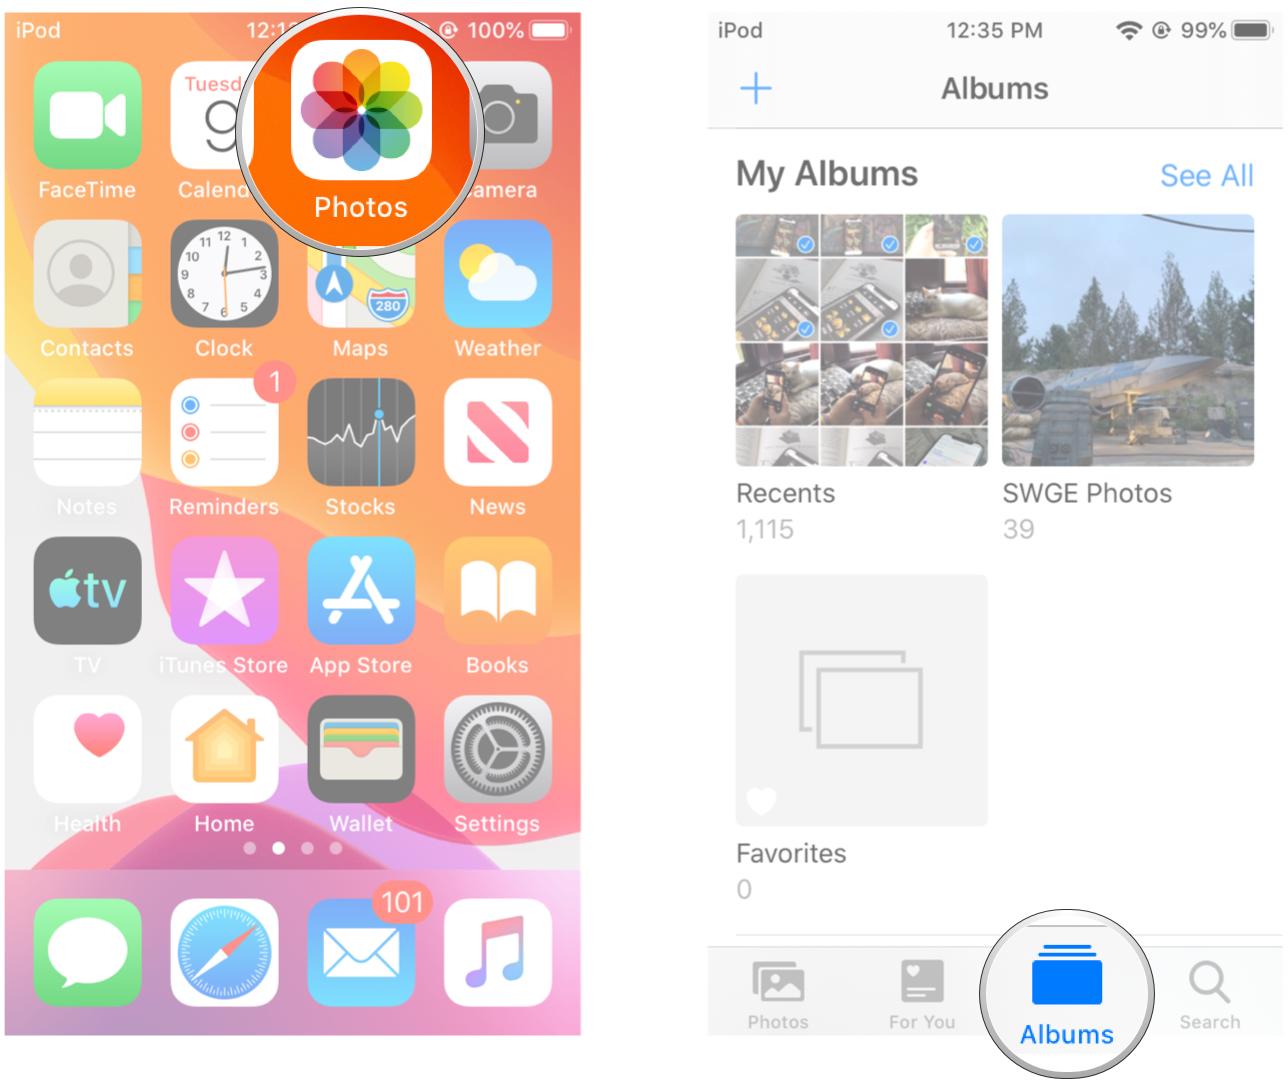
- Launch Photos on your iPhone or iPad.
- Tap Albums.
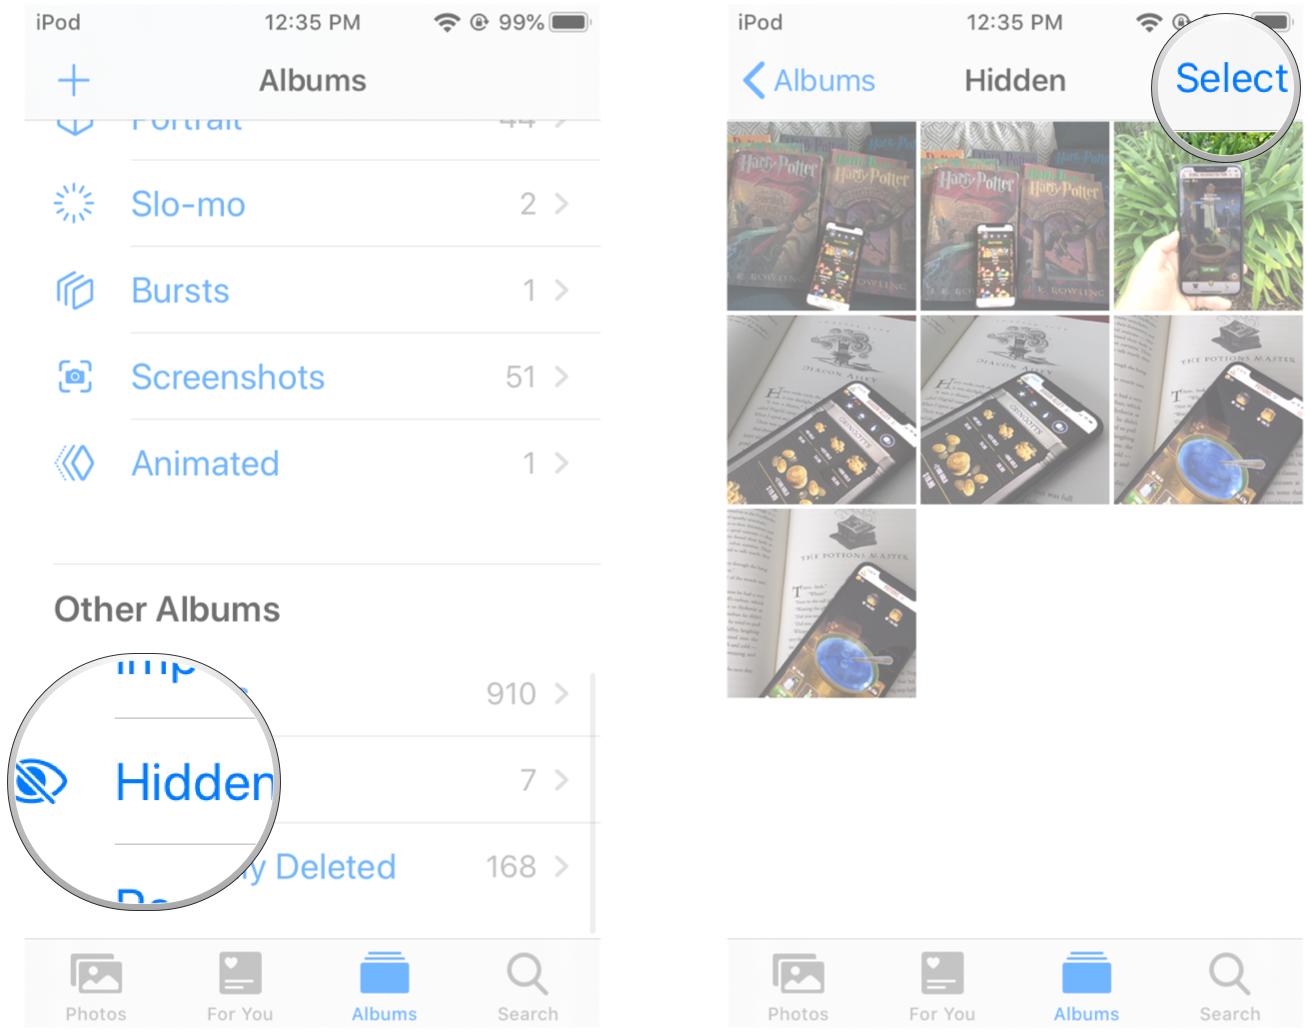
- Scroll down to the bottom and tap on Hidden.
- Tap Select.
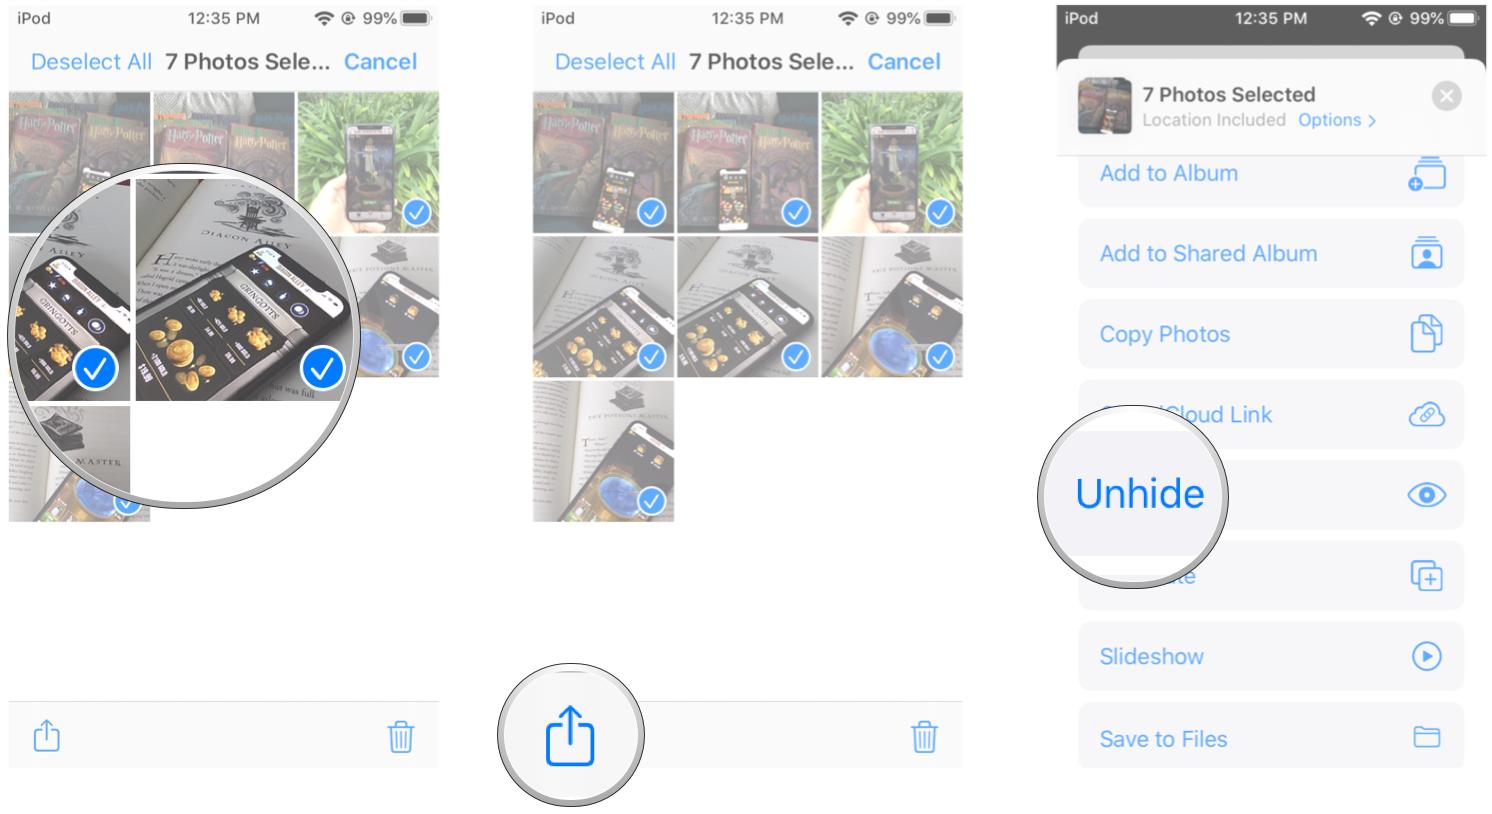
- Choose the photos or videos that you want to unhide.
- Tap the Share button.
- Scroll down and tap Unhide.
Questions?
Let us know in the comments down below!
Updated October 2020: Updated for iOS 14.
iMore offers spot-on advice and guidance from our team of experts, with decades of Apple device experience to lean on. Learn more with iMore!
