How to use the iPhone Guided Access feature
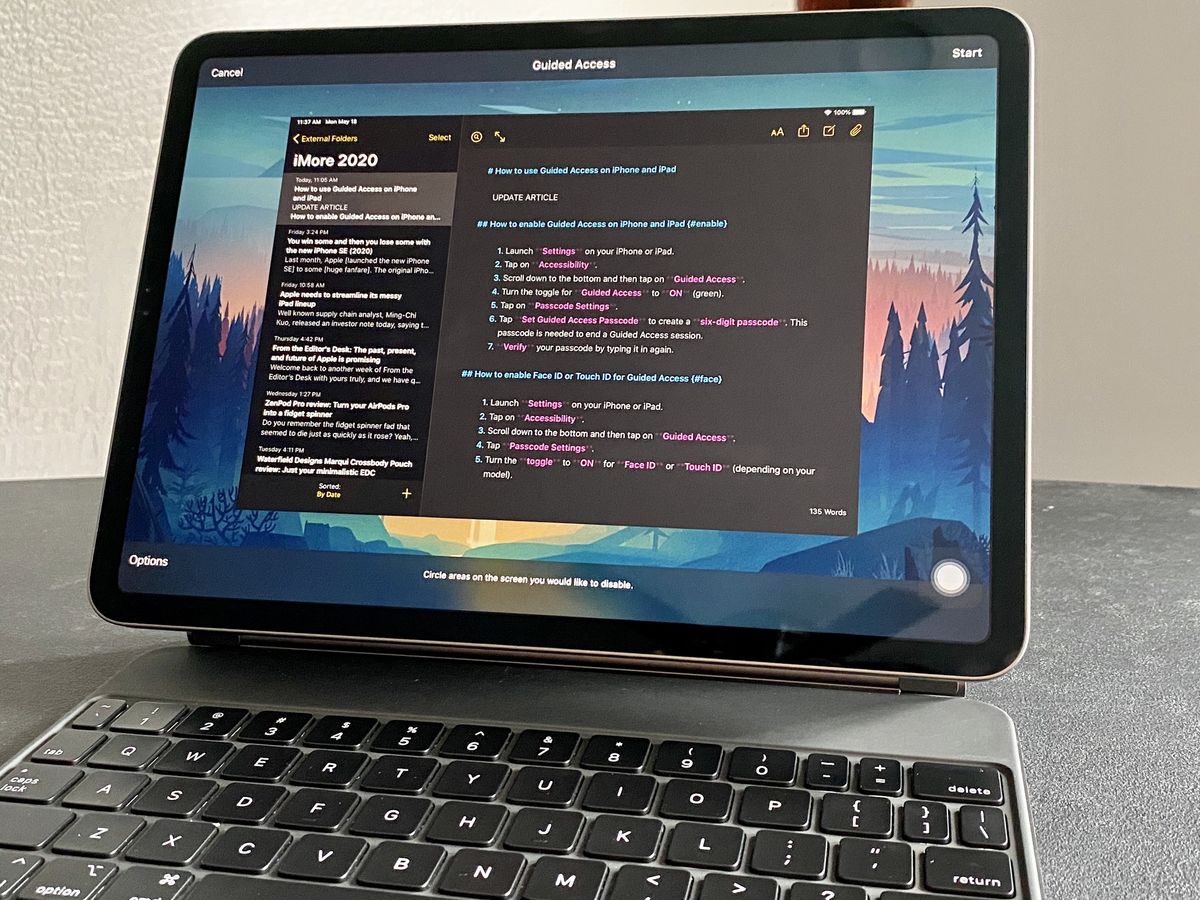
Have you ever come across a time when you have to hand off your device to someone else so that they could use it? Yes, we all have been in that situation, but there's also the possibility of them poking around in other apps, which could contain sensitive information or things you don't want others to see. Whether you're using your most powerful iPad at work and need to use it to display info to others, or you let your child use your iPhone to watch a video, you can lock the device to just that particular app with an Accessibility feature called Guided Access.
Guided Access is originally an Accessibility feature, but it has proven itself to be a useful tool for anyone who doesn't want others to snoop around on their best iPhone or favorite iPad. By locking the device to a single app, no one besides you can exit out of it, because you can even use Touch ID or Face ID for security, as well as a specific six-digit passcode for Guided Access.
Whether it's a writing app, drawing app, music app, math app, or a story, video, or reading app, iPhone's Guided Access feature helps make sure that all attention remains only on that app. It also prevents you from accidentally exiting to the Home screen or another app when you don't mean to. Think of it as a kind of "guest mode," because you can let someone else use an app like Safari without worrying about them going through your other apps or messages.
How to enable iPad or iPhone Guided Access
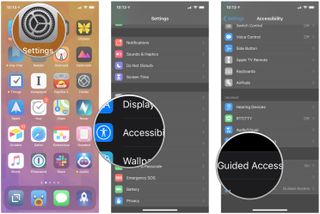
- Launch Settings on your iPhone or iPad.
- Tap on Accessibility.
- Scroll down to the bottom and then tap on Guided Access.
- Turn the toggle for Guided Access to ON (green).
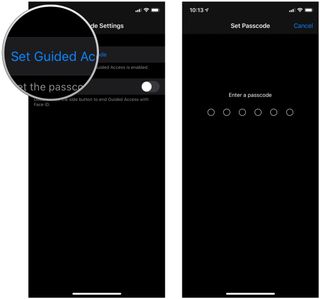
- Tap on Passcode Settings.
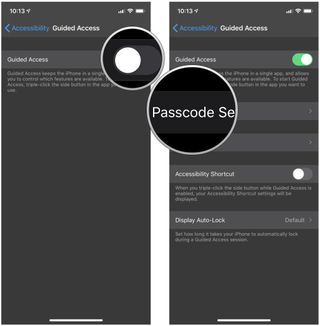
- Tap Set Guided Access Passcode to create a six-digit passcode. This passcode is needed to end a Guided Access session.
- Verify your passcode by typing it in again.
How to enable Face ID or Touch ID for Guided Access
- Launch Settings on your iPhone or iPad.
- Tap on Accessibility.
- Scroll down to the bottom and then tap on Guided Access.

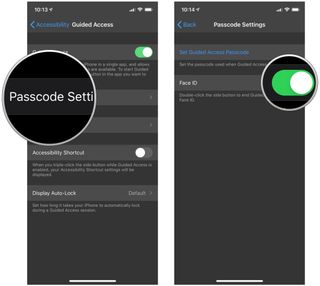
- Tap Passcode Settings.
- Turn the toggle to ON for Face ID or Touch ID (depending on your model).
How to use Guided Access
- Launch the app you'd like the user to have access to. In this case, we used Music.
- On iPhone or iPad with a Home button, triple-click the Home button, or on iPhone or iPad with Face ID, triple-click the Side button to launch Guided Access.
- Circle any areas of the screen that you would like to make inaccessible.
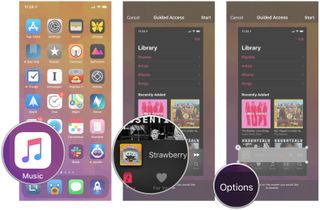
- Tap on Options in the bottom left corner to choose whether or not you want to grant access to the Sleep/Wake button, Volume buttons, touch screen, and motion. Tap Done to save your selections.
- Tap on Start at the top of the screen to begin Guided Access.
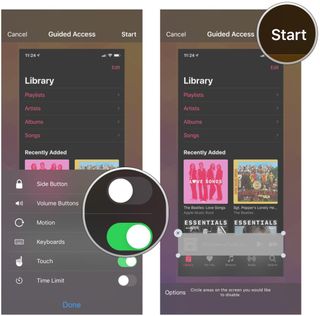
Once Guided Access is enabled, anyone trying to leave the specific app you've locked it to will receive a banner message telling them to triple-click the Home button to exit. If they don't know the pre-set passcode, they won't be able to exit Guided Access.
Lock it down to a single app with Guided Access
As you can see, using the Guided Access feature on your device, such as the iPhone 13, definitely comes in handy. When it's enabled, you can let someone use your device for a particular app without having to look over their shoulder to make sure they're not looking where they shouldn't be looking. It's originally an Accessibility feature, but it has other use cases too. It's easy to set up and use.
February 2022: These steps are still accurate to enable and use Guided Access in iOS 15.
Master your iPhone in minutes
iMore offers spot-on advice and guidance from our team of experts, with decades of Apple device experience to lean on. Learn more with iMore!
Christine Romero-Chan was formerly a Senior Editor for iMore. She has been writing about technology, specifically Apple, for over a decade at a variety of websites. She is currently part of the Digital Trends team, and has been using Apple’s smartphone since the original iPhone back in 2007. While her main speciality is the iPhone, she also covers Apple Watch, iPad, and Mac when needed. When she isn’t writing about Apple, Christine can often be found at Disneyland in Anaheim, California, as she is a passholder and obsessed with all things Disney, especially Star Wars. Christine also enjoys coffee, food, photography, mechanical keyboards, and spending as much time with her new daughter as possible.


