How to view and organize documents in the Files app in iOS 11
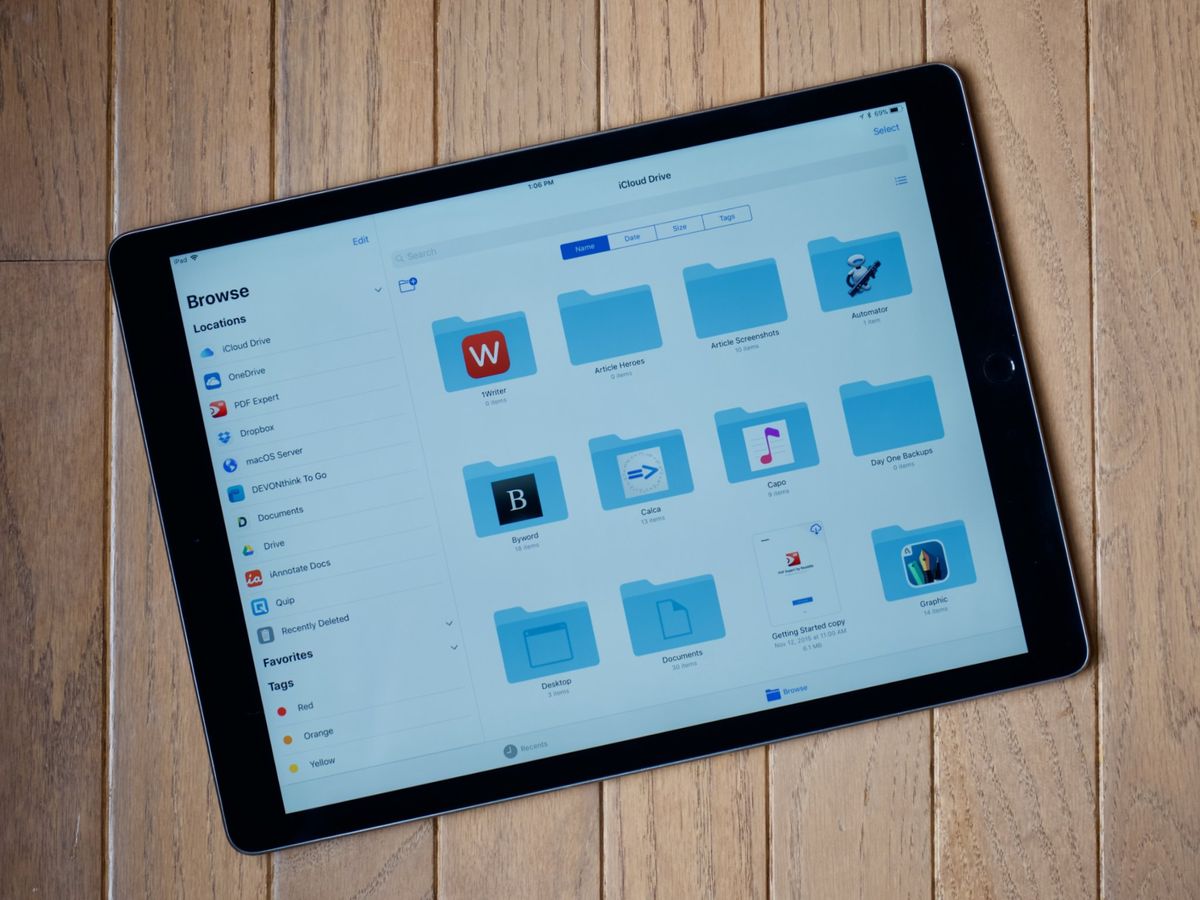
The Files app is new to iOS 11 and is a way for you to house and organize your documents so that you can take your work with you wherever you go. Sure, there are Pages, Keynote, and Numbers, but Files lets you have all that and more in one convenient place.
Here's how to view and organize your documents in the Files app in the iOS 11.
- How to organize and view in list or doc view
- How to create folders
- How to add tags
- How to search for specific files
- How to view recently opened or added files
- How to save files locally
How to organize and view in list or document view
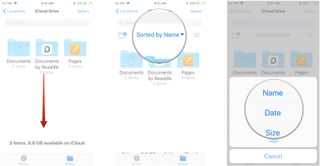
Sorted by
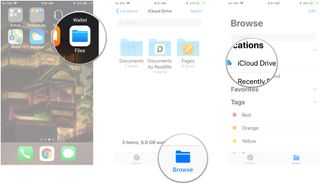
- Launch the Files app from your Home screen.
- Tap Browse at the bottom of the screen if it's not already there.
- Tap the source you'd like to browse. In this example, I'm using iCloud Drive.
- Swipe down in the middle of the screen to make the sorting options appear.
- Tap Sorted by [sorting option]. It may say "Sorted by Name" or date or whatever.
- Tap the sorting option you'd prefer to use.
- Name
- Date
- Size
- Tags
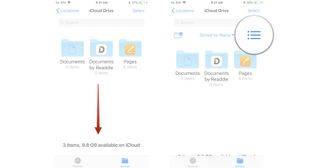
List view
- Launch the Files app from your Home screen.
- Tap Browse at the bottom of the screen if it's not already there.
- Tap the source you'd like to browse. In this example, I'm using iCloud Drive.
- Swipe down in the middle of the screen to make the sorting options appear.
- Tap the list button on the upper right side of the screen. It looks like three horizontal lines.
How to create folders
Creating folders in the Files app is a great way to organize like files so that you can keep everything neat and tidy.
- Launch the Files app from your Home screen.
- Tap Browse if it's not on the Browse screen already. It'll always default there when you first open the app, but if it's already been open awhile, it could be anywhere.
- Tap the source from which you'd like to browse. I'm using iCloud Drive here.

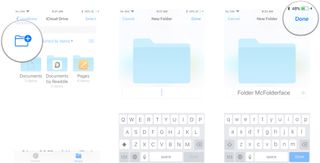
- Swipe down on the middle of the screen to make the options appear.
- Tap the add folder button on the upper left of the screen. It's a folder icon with a plus sign on it.
- Type a name for your folder.
- Tap Done on the top right of the screen.
How to add tags
- Launch the Files app from your Home screen.
- Tap Browse at the bottom of the screen if it's not already there.
- Tap a source from which you'd like to browse.

- Tap a folder.
- Tap and hold on a document for a few seconds and then release. Don't press at all if you have an iPhone with 3D Touch capabilities.
- Tap the right arrow twice on the small, black menu that appears.
- Tap tags.
- Tap a tag or create a new one. You can tap multiple tags if you like.
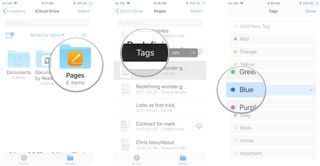
Now when you sort by tags, your files will be grouped into the corresponding colors.
How to search for specific files
- Launch the Files app from your Home screen.
- Tap the Search bar.
- Enter a search query and tap the file that comes up or tap Search in the bottom right corner of the screen.
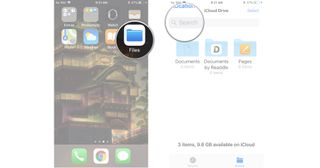
How to view recently opened or added files
- Launch the Files app from the Home screen.
- Tap Recents at the bottom of the screen.
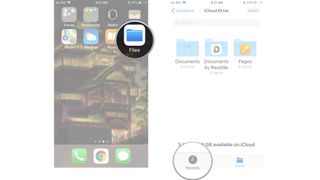
Your recent files will all be displayed and will be sorted based on tags and share documents.
How to save files locally
If you want a "hard copy" of a file on your iPhone or iPad, you can download it from iCloud Drive or wherever you may have it stored.
- Launch the Files app from your Home screen.
- Tap Browse at the bottom of the screen if it's not already there.
- Tap a source from which you'd like to browse.

- Tap a folder.
- Tap the download button next to the file you want to save locally. It looks like a cloud with a downward arrow.
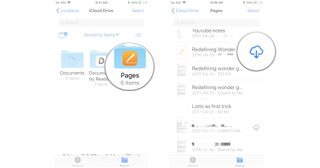
Questions?
Any questions about the Files app? Let us know in the comments below.
Master your iPhone in minutes
iMore offers spot-on advice and guidance from our team of experts, with decades of Apple device experience to lean on. Learn more with iMore!
Mick is a staff writer who's as frugal as they come, so he always does extensive research (much to the exhaustion of his wife) before making a purchase. If it's not worth the price, Mick ain't buying.
