How to manage email and mailboxes in Mail for iPhone and iPad
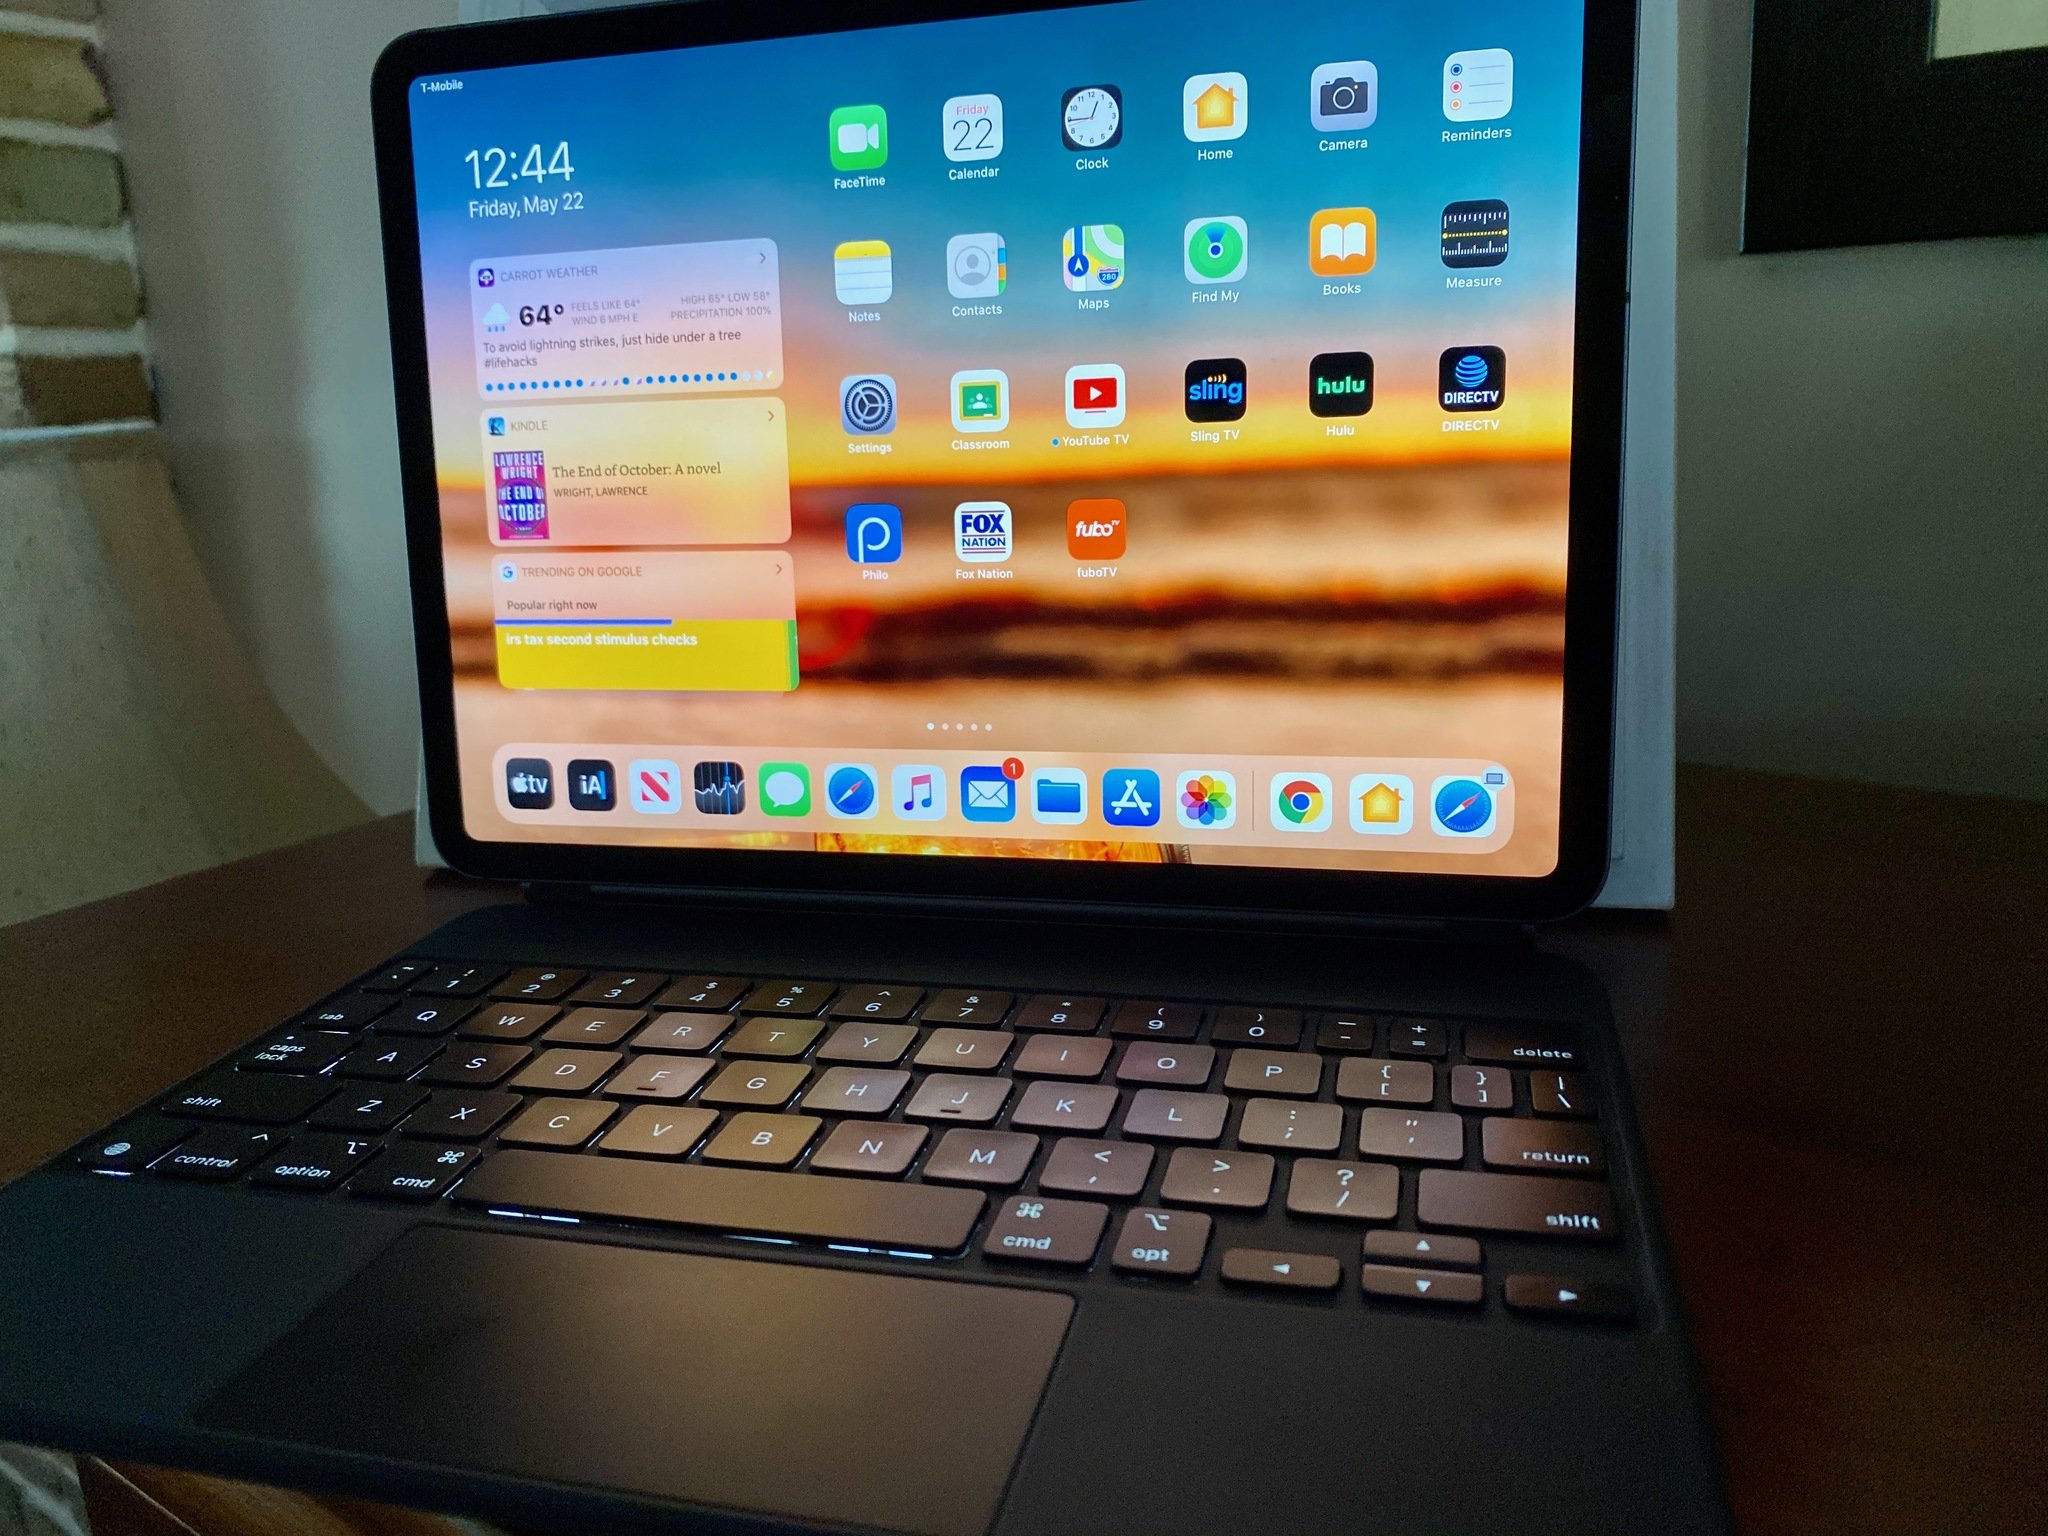
You might be using the Mail app, but there are many tricks you can learn to start using it like a pro. You can do all sorts of things, like managing your mailboxes, create VPI lists, and many other shortcuts that are easier to do on your iPhone than on your Mac. Here's how you can manage email and mailboxes in Mail for iPhone and iPad.
Here are a couple of ways that you can master your mailbox for your iPhone and iPad
How to mark an email as read or unread on iPhone and iPad
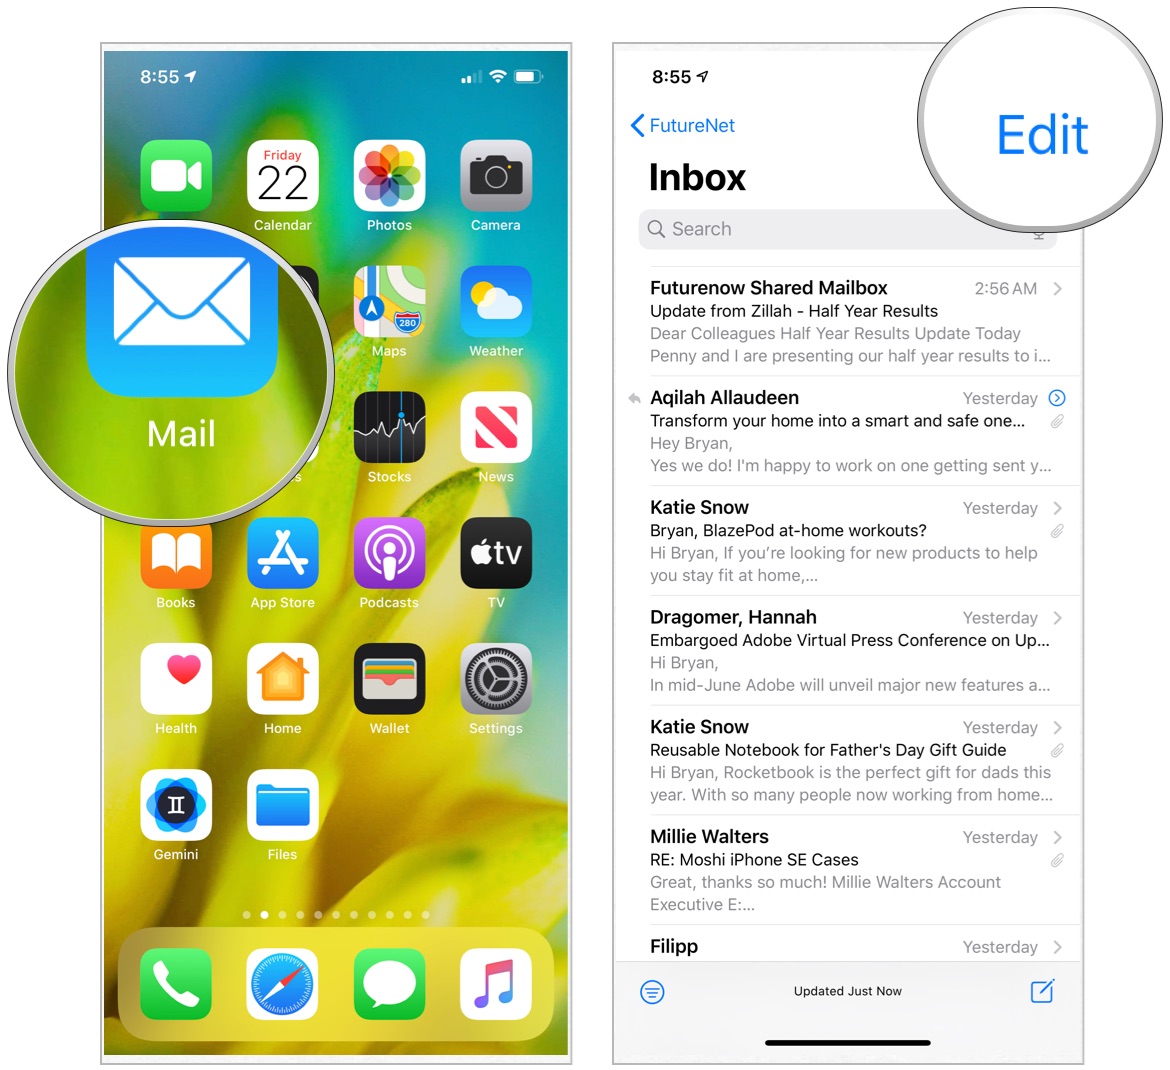
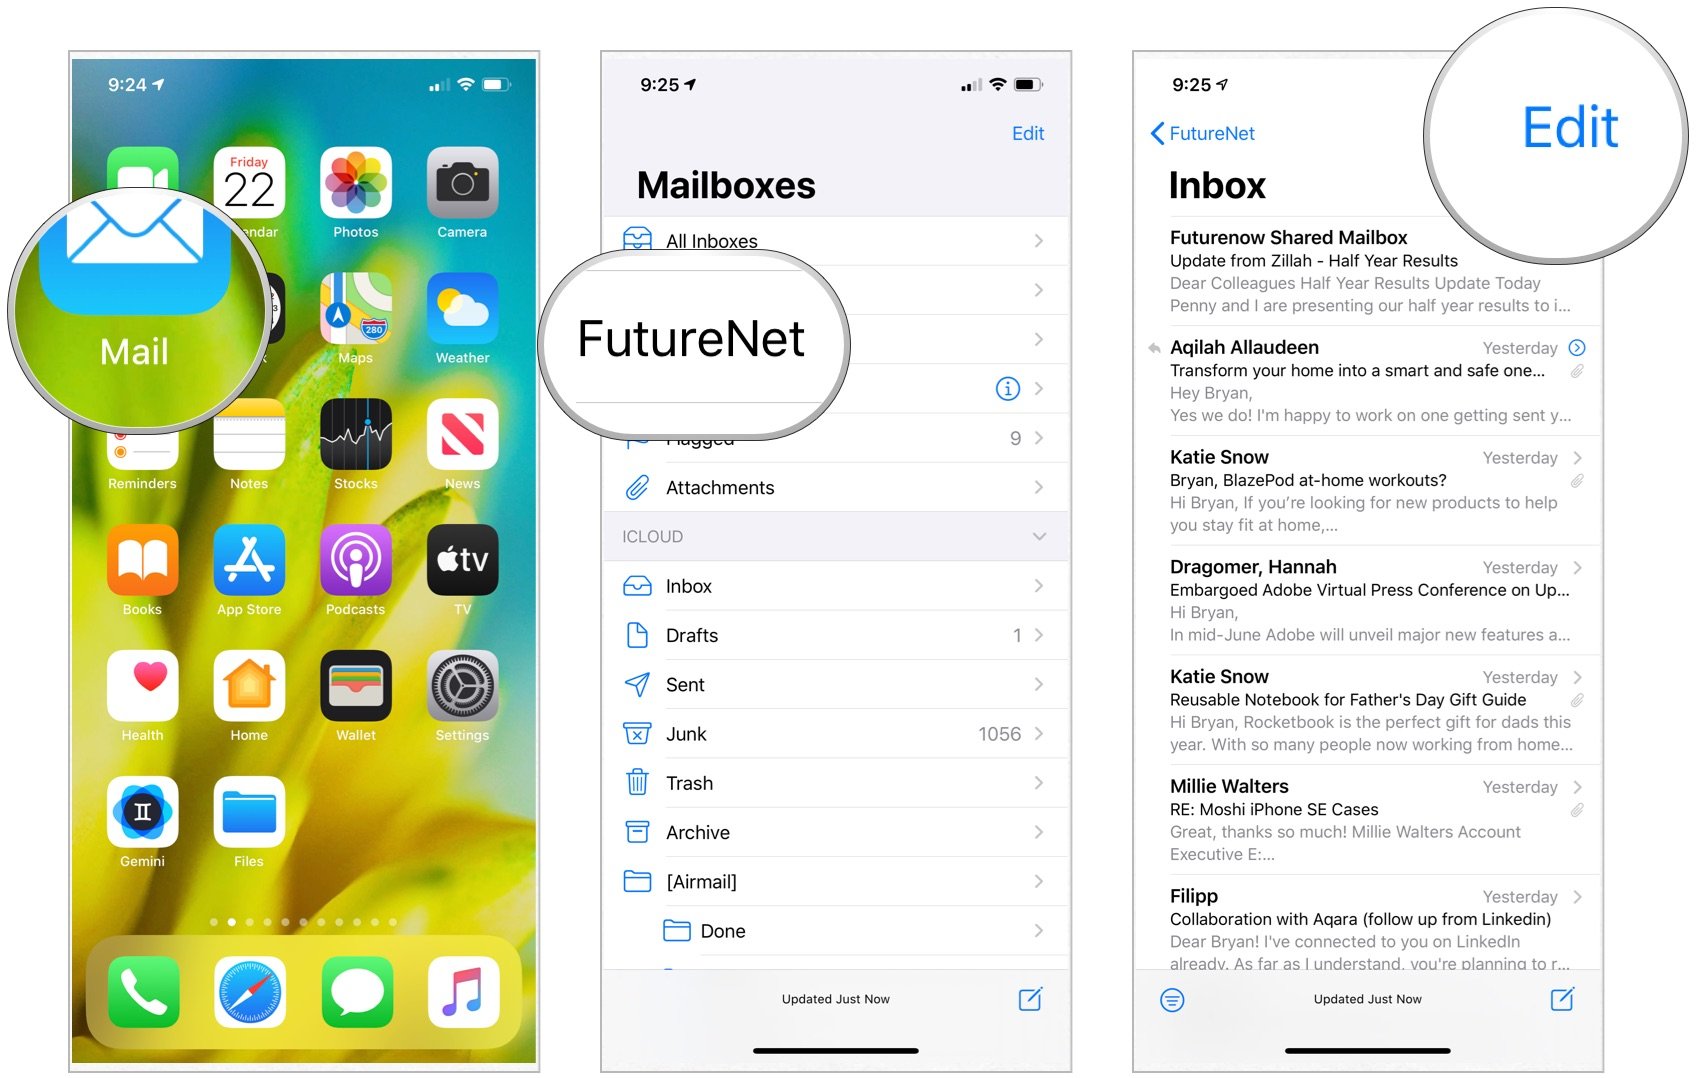
- Launch the Mail app from the Home screen of your iPhone or iPad.
- Tap Edit in the upper right corner.
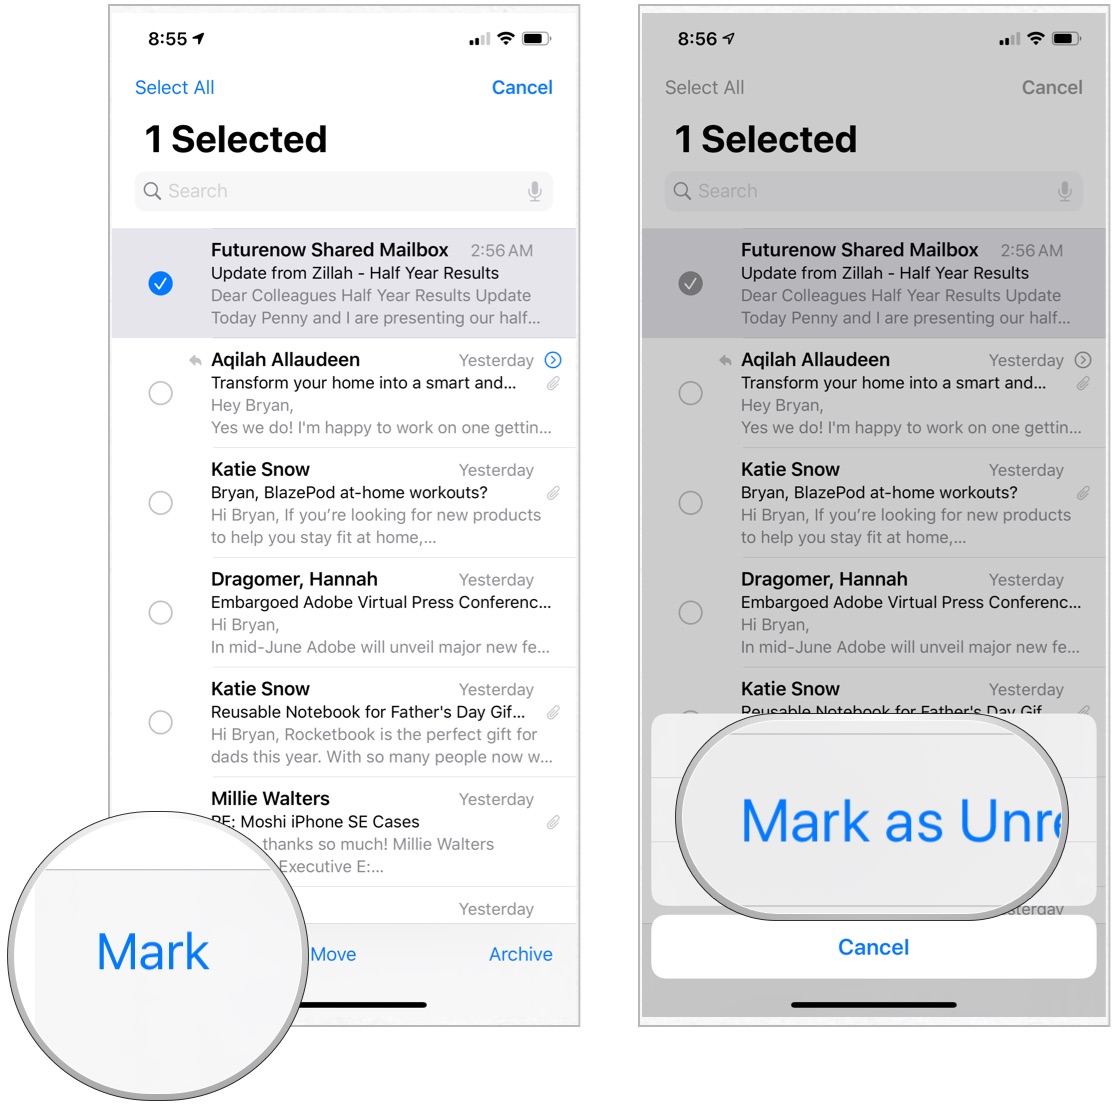
- Choose any email messages you'd like to mark as read.
- Select Mark in the lower left corner.
- Tap Mark as Read. If the messages you chose were already read, you can instead tap Mark as Unread.
How to flag an email message on iPhone and iPad
- Launch the Mail app from the Home screen of your iPhone or iPad.
- Tap Edit in the upper right corner of your screen.
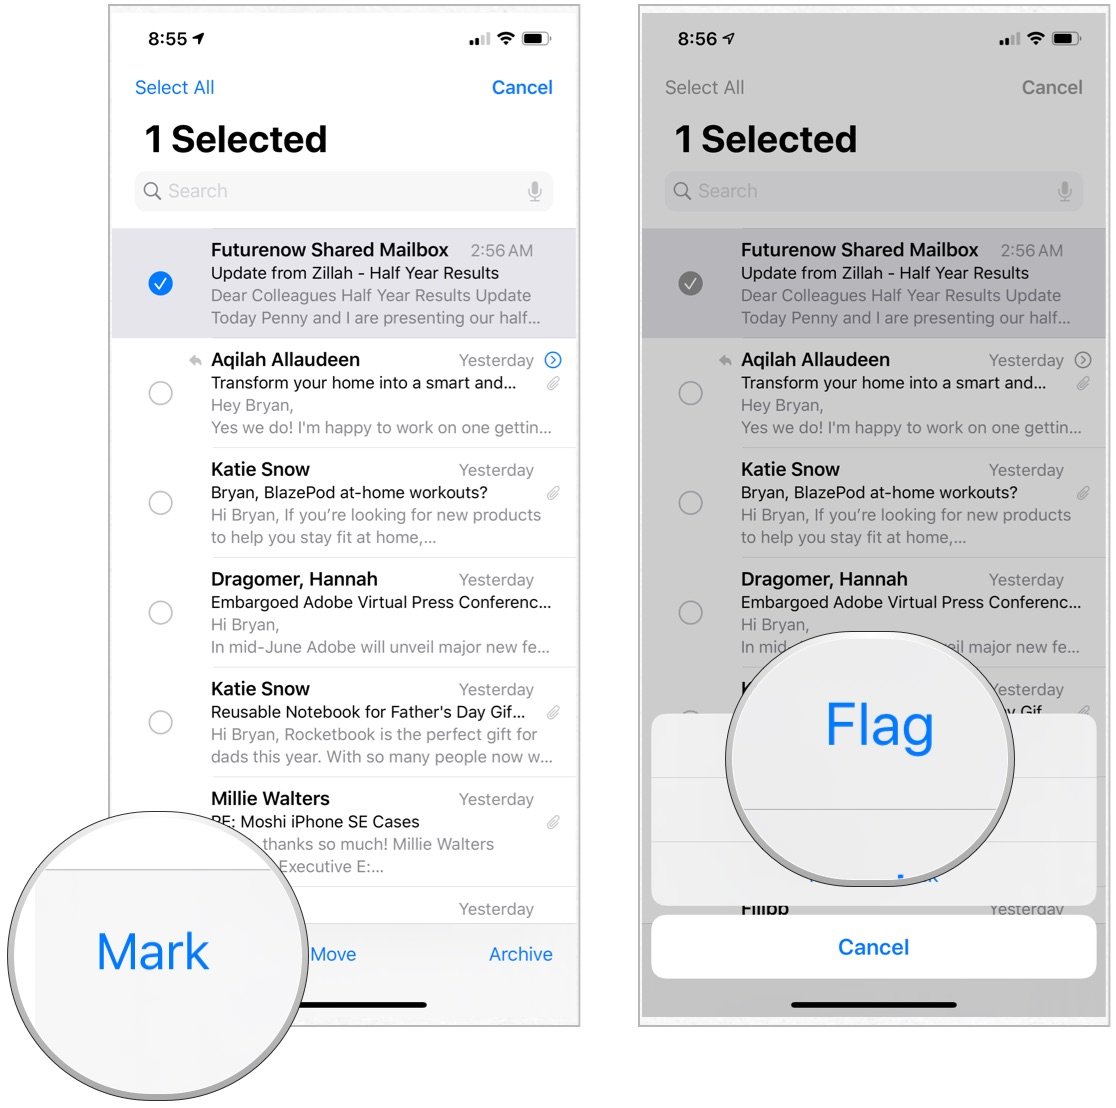
- Select the message(s) you'd like to flag.
- Choose Mark in the lower left corner of your screen.
- Tap Flag. If the messages you chose were already flagged, you can instead tap Unflag.
Once you have a message (or messages) flagged, a special Flagged mailbox will appear in your Mailboxes list. Tap on it to see a list of all your flagged messages.
How to add new mailboxes on iPhone and iPad
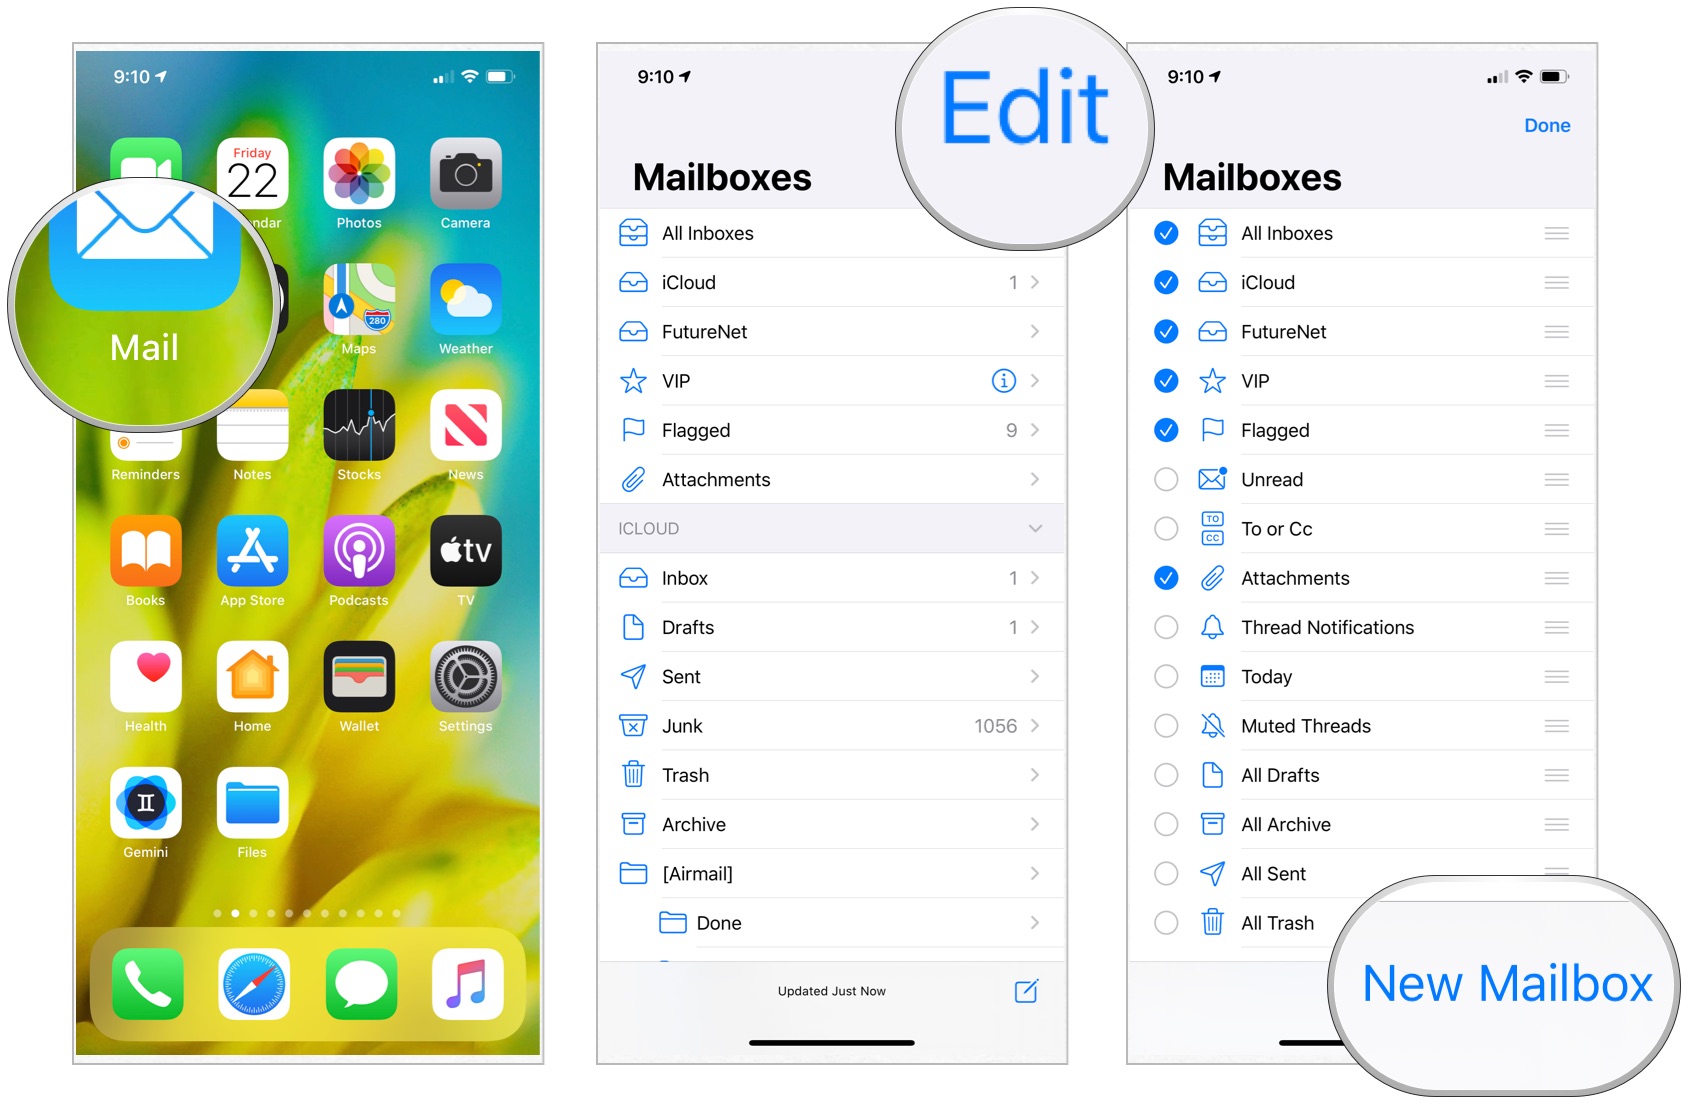
- Launch the Mail app from the Home screen of your iPhone or iPad.
- Tap Edit in the upper right corner of your screen.
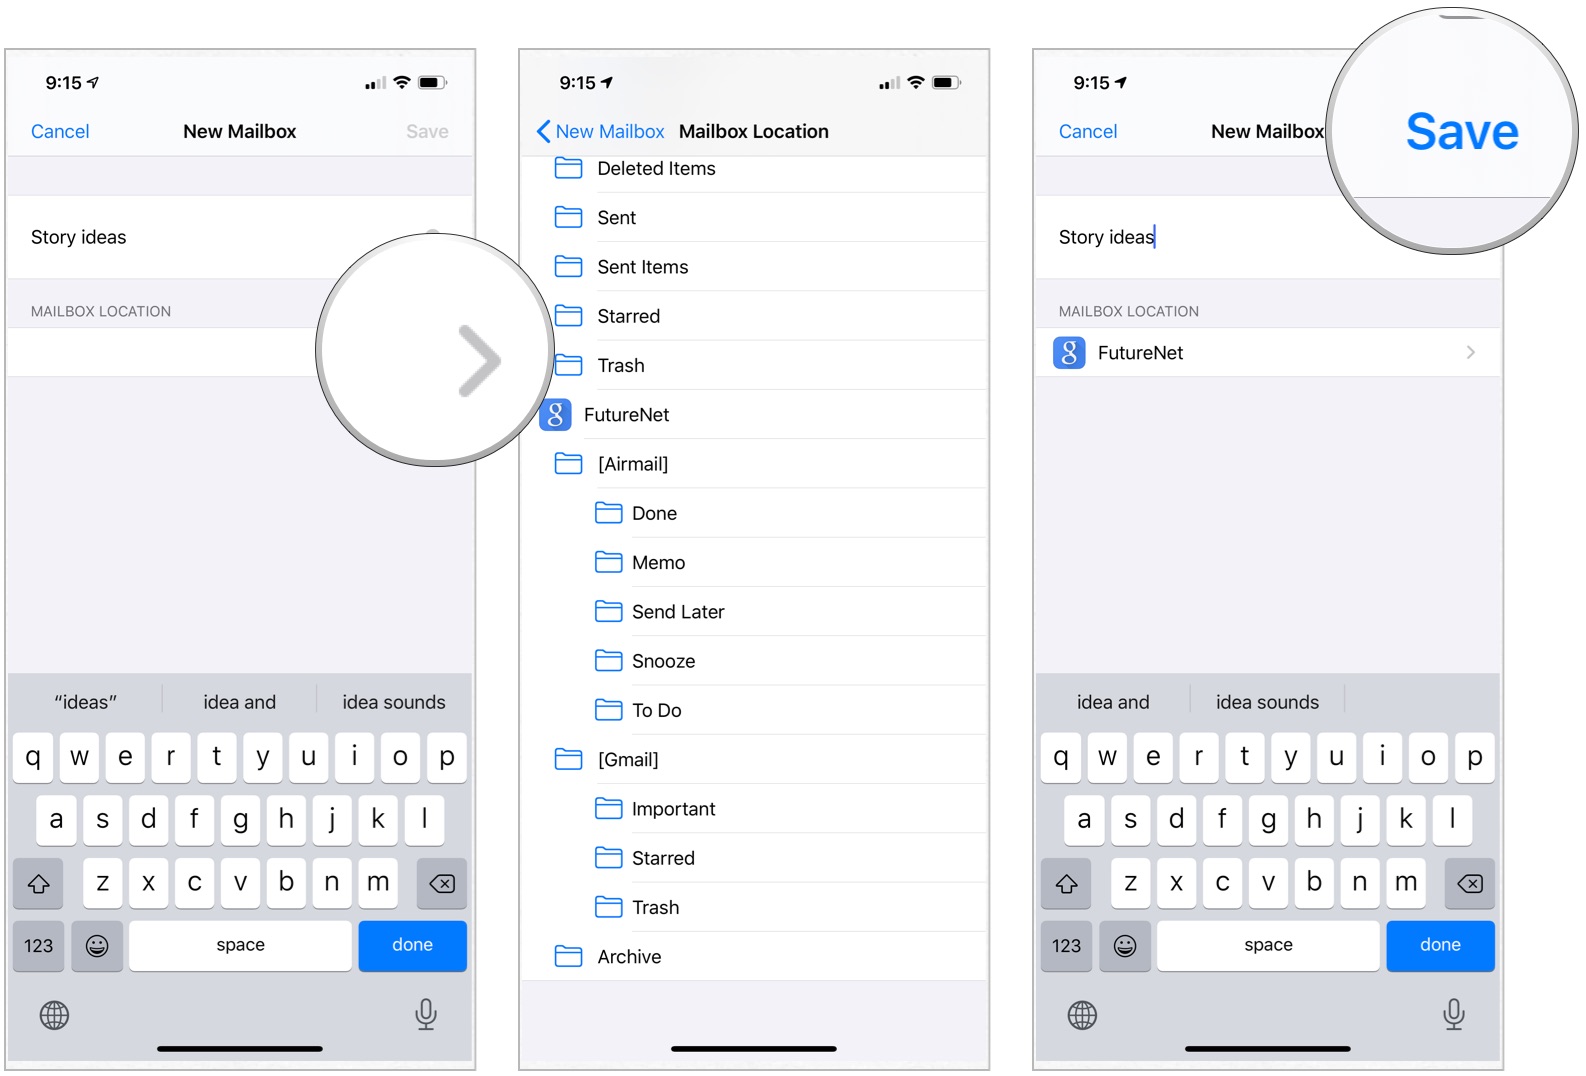
- Choose New Mailbox in the lower right corner of your screen.
- Type a name for your mailbox in the Name field.
- Tap the Mailbox Location field to attach your new folder to an account.
- Choose a main mailbox in which you'd like to locate your new mailbox.
- Select Save, followed by Done.
How to manage email and mailboxes in Mail for iPhone and iPad
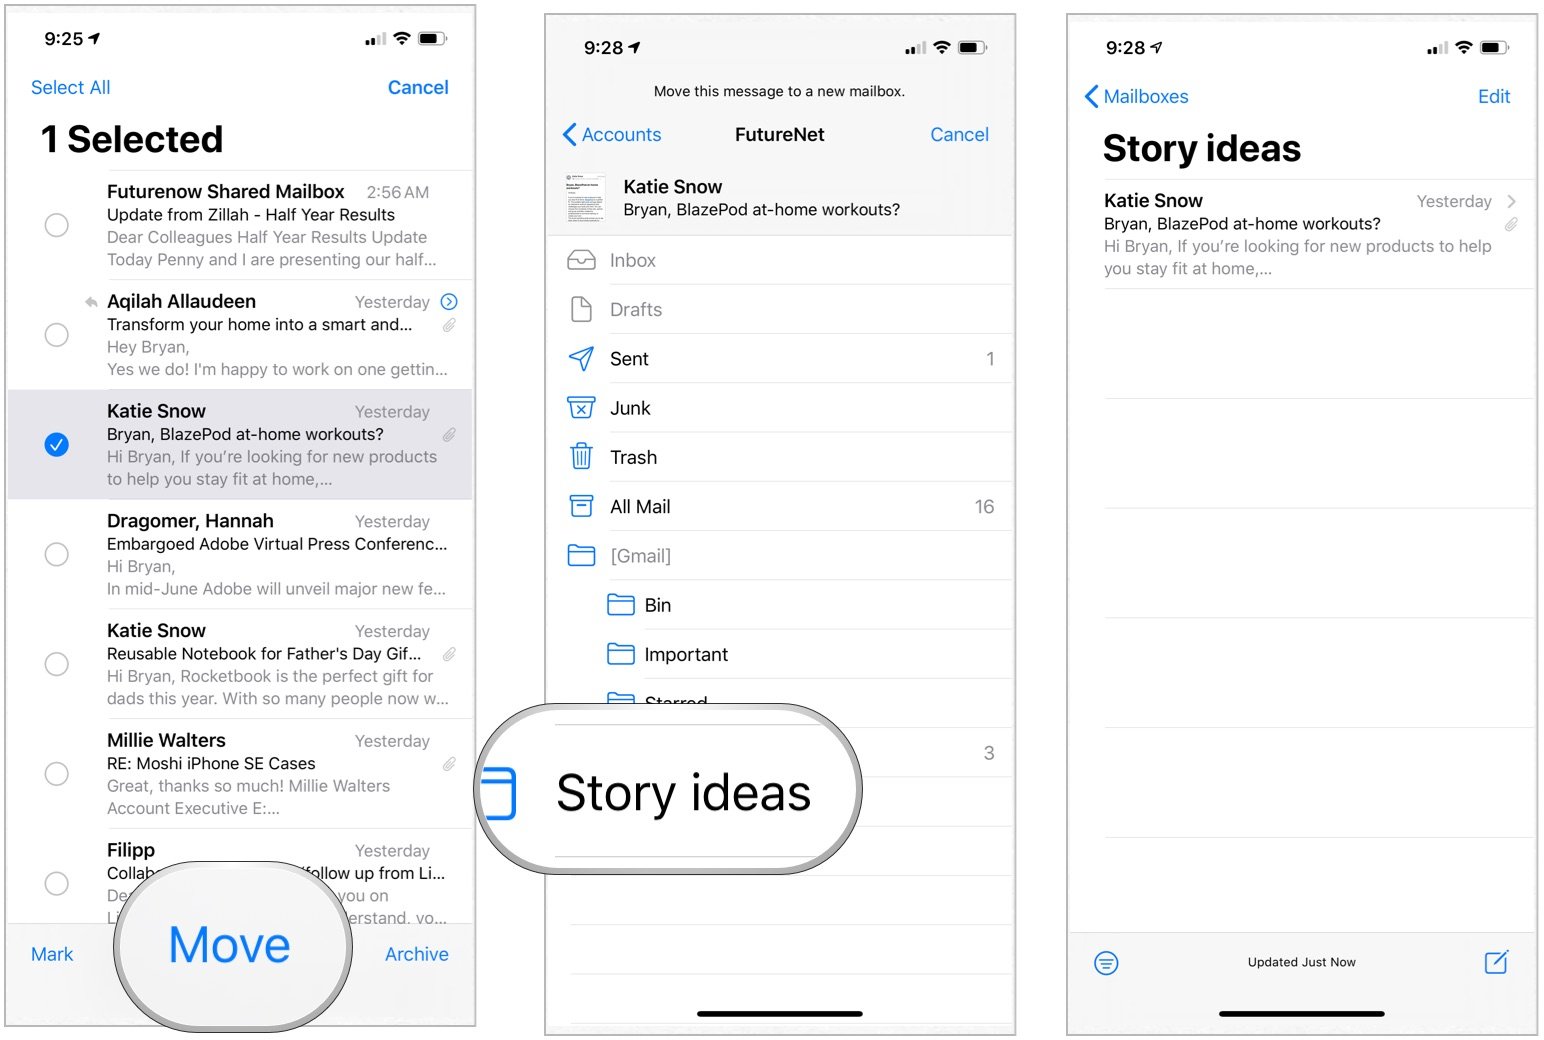
- Launch the Mail app from the Home screen of your iPhone or iPad.
- Choose the mailbox where the message you want to move is located.
- Tap Edit.
- Tap the message(s) you'd like to move.
- Choose Move.
- Select the mailbox to which you'd like to move the message(s).
How to add contacts to your VIP list on iPhone and iPad
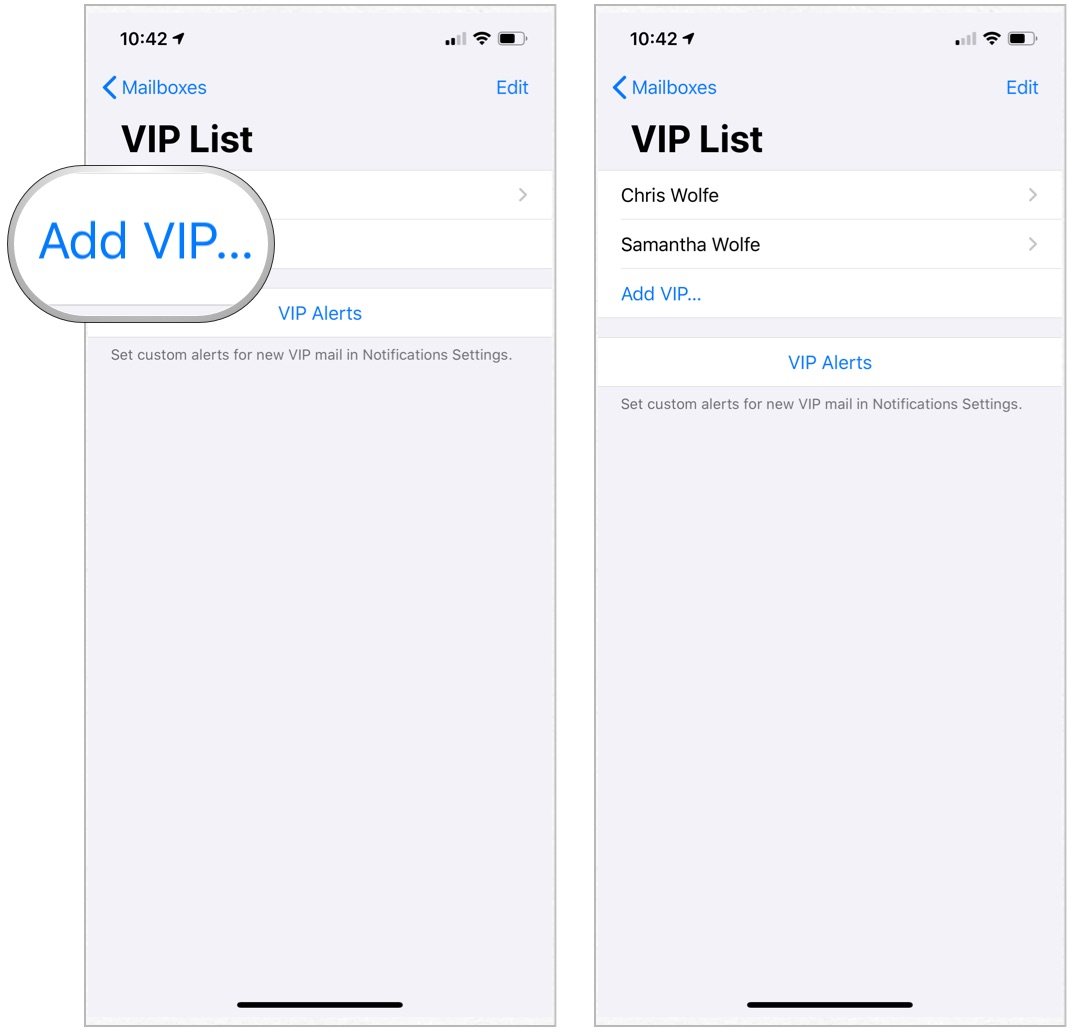
For those you email often, you may want to add to your VIP list. By doing so, their messages are stored in a separate location in the Mail app, making them easier to find.
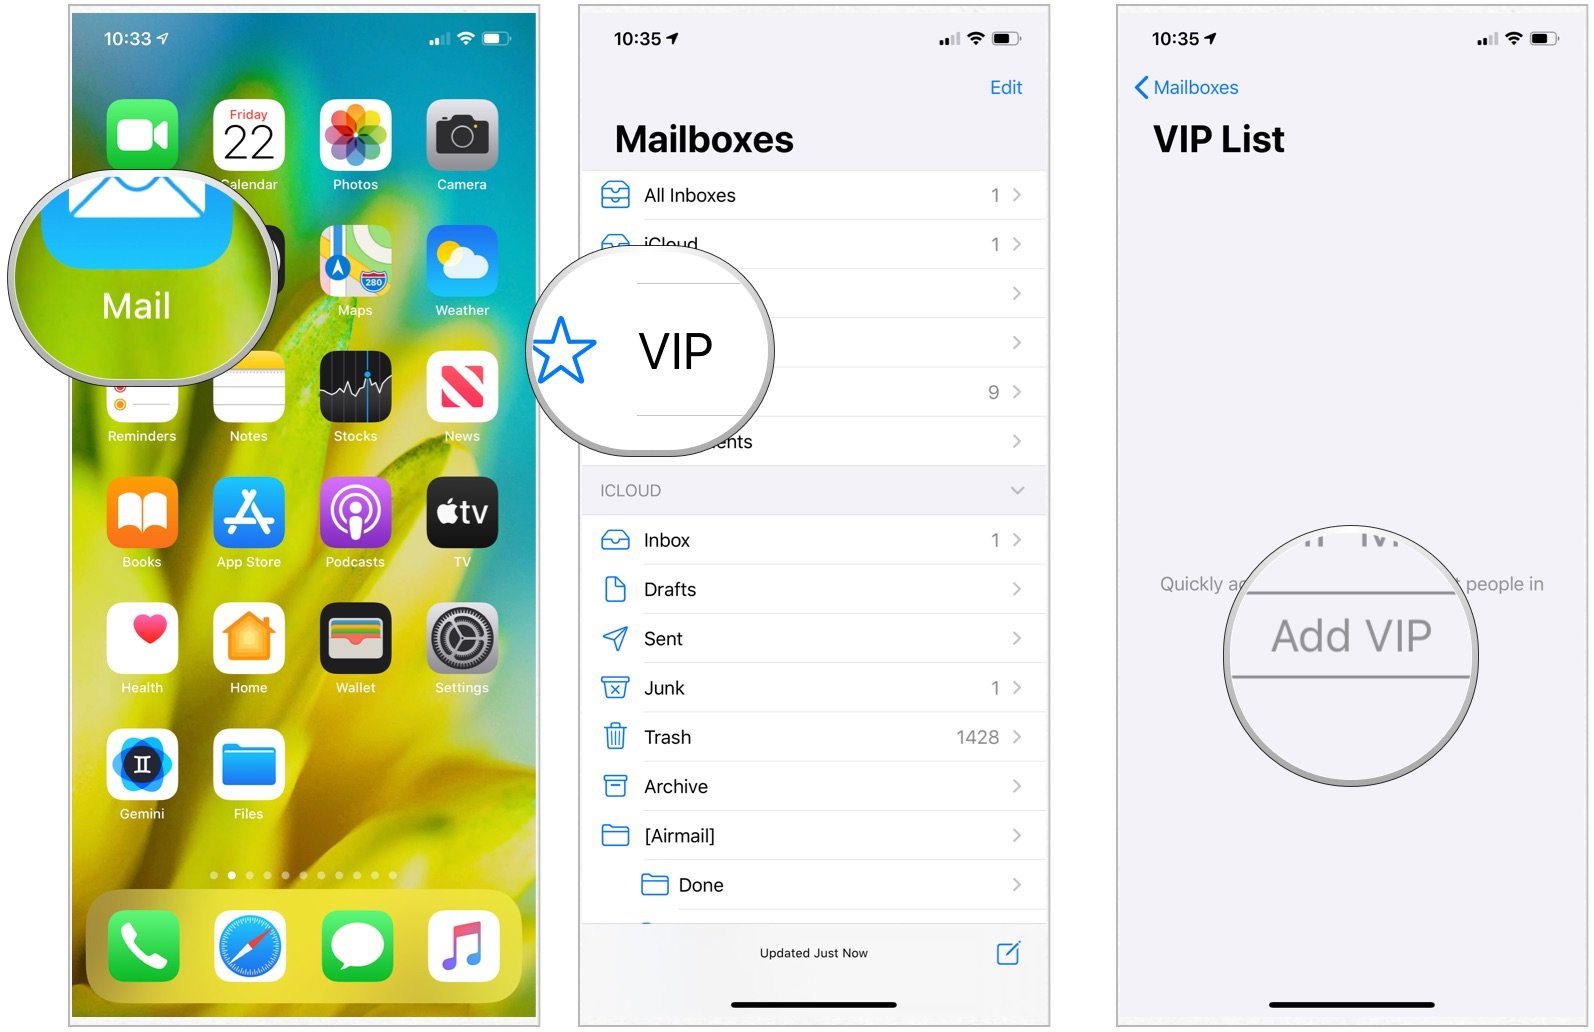
- Launch the Mail app from the Home screen of your iPhone or iPad.
- Choose the VIP directly underneath your regular inbox.
- Tap Add VIP.
- Select a person from your Contacts list to add to the VIP list.
- Choose Add VIP to add more.
Setting VIP list alerts
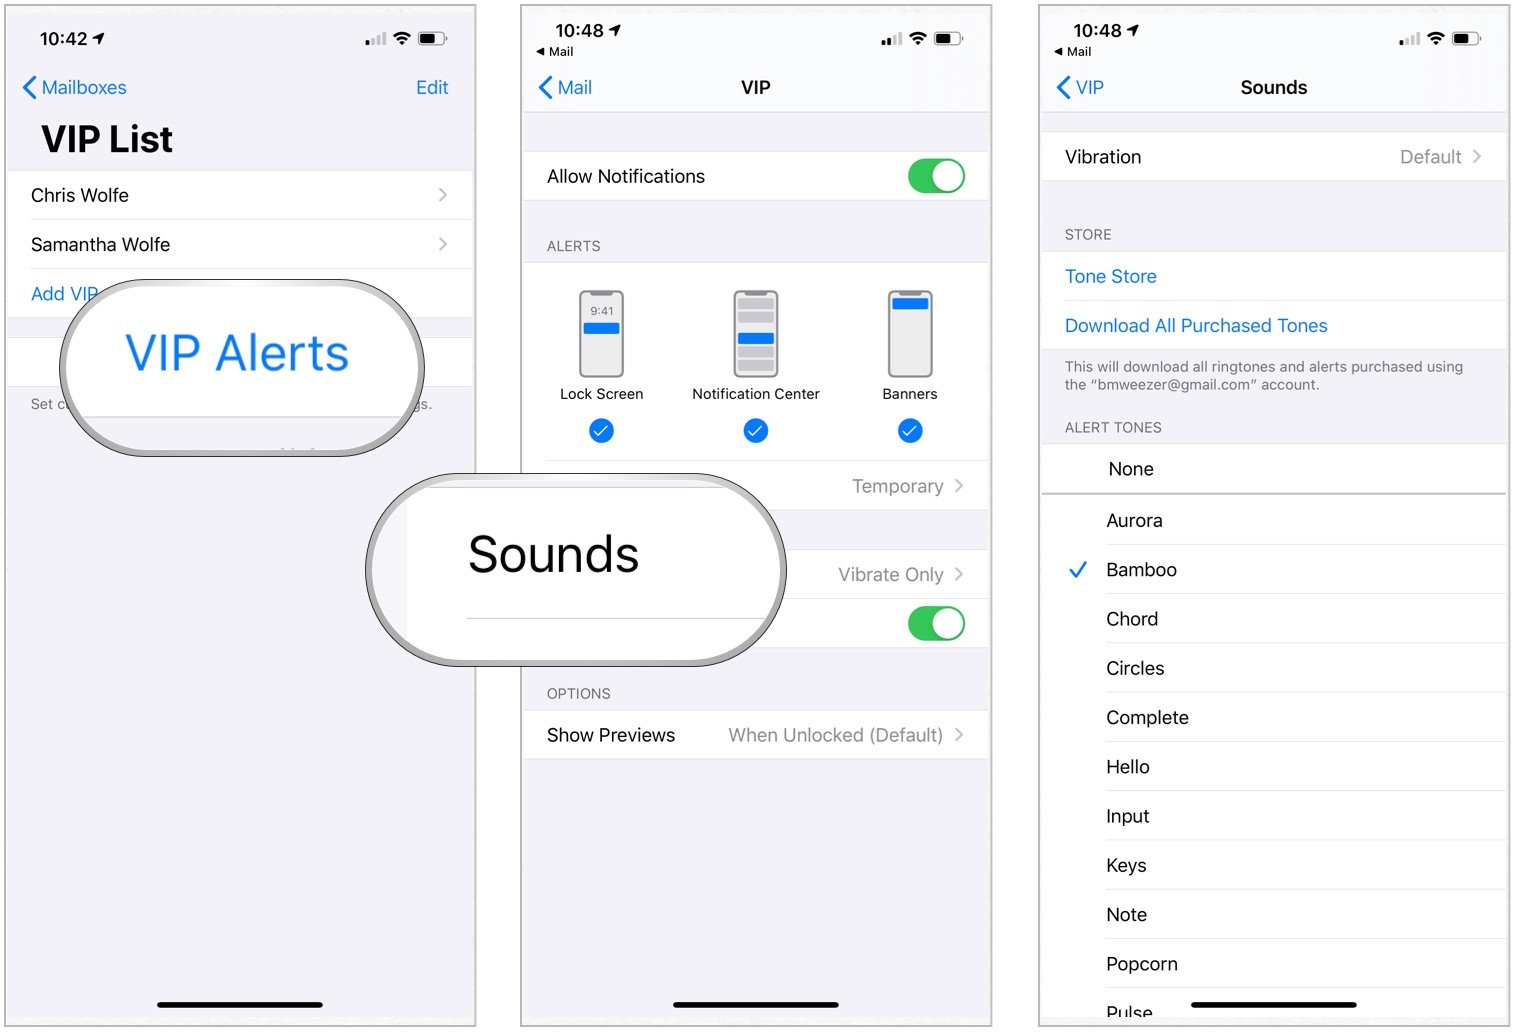
Through the Notifications Settings, you can set custom alerts for VIP mail. To do so:
- Tap VIP Alerts on the VIP List page.
- Toggle on Allow Notifications at the top.
- Make changes to Alerts, including Banner Style, Sounds, Badges, and how Show Previews are performed.
How to filter inboxes in the Mail app for iPhone and iPad
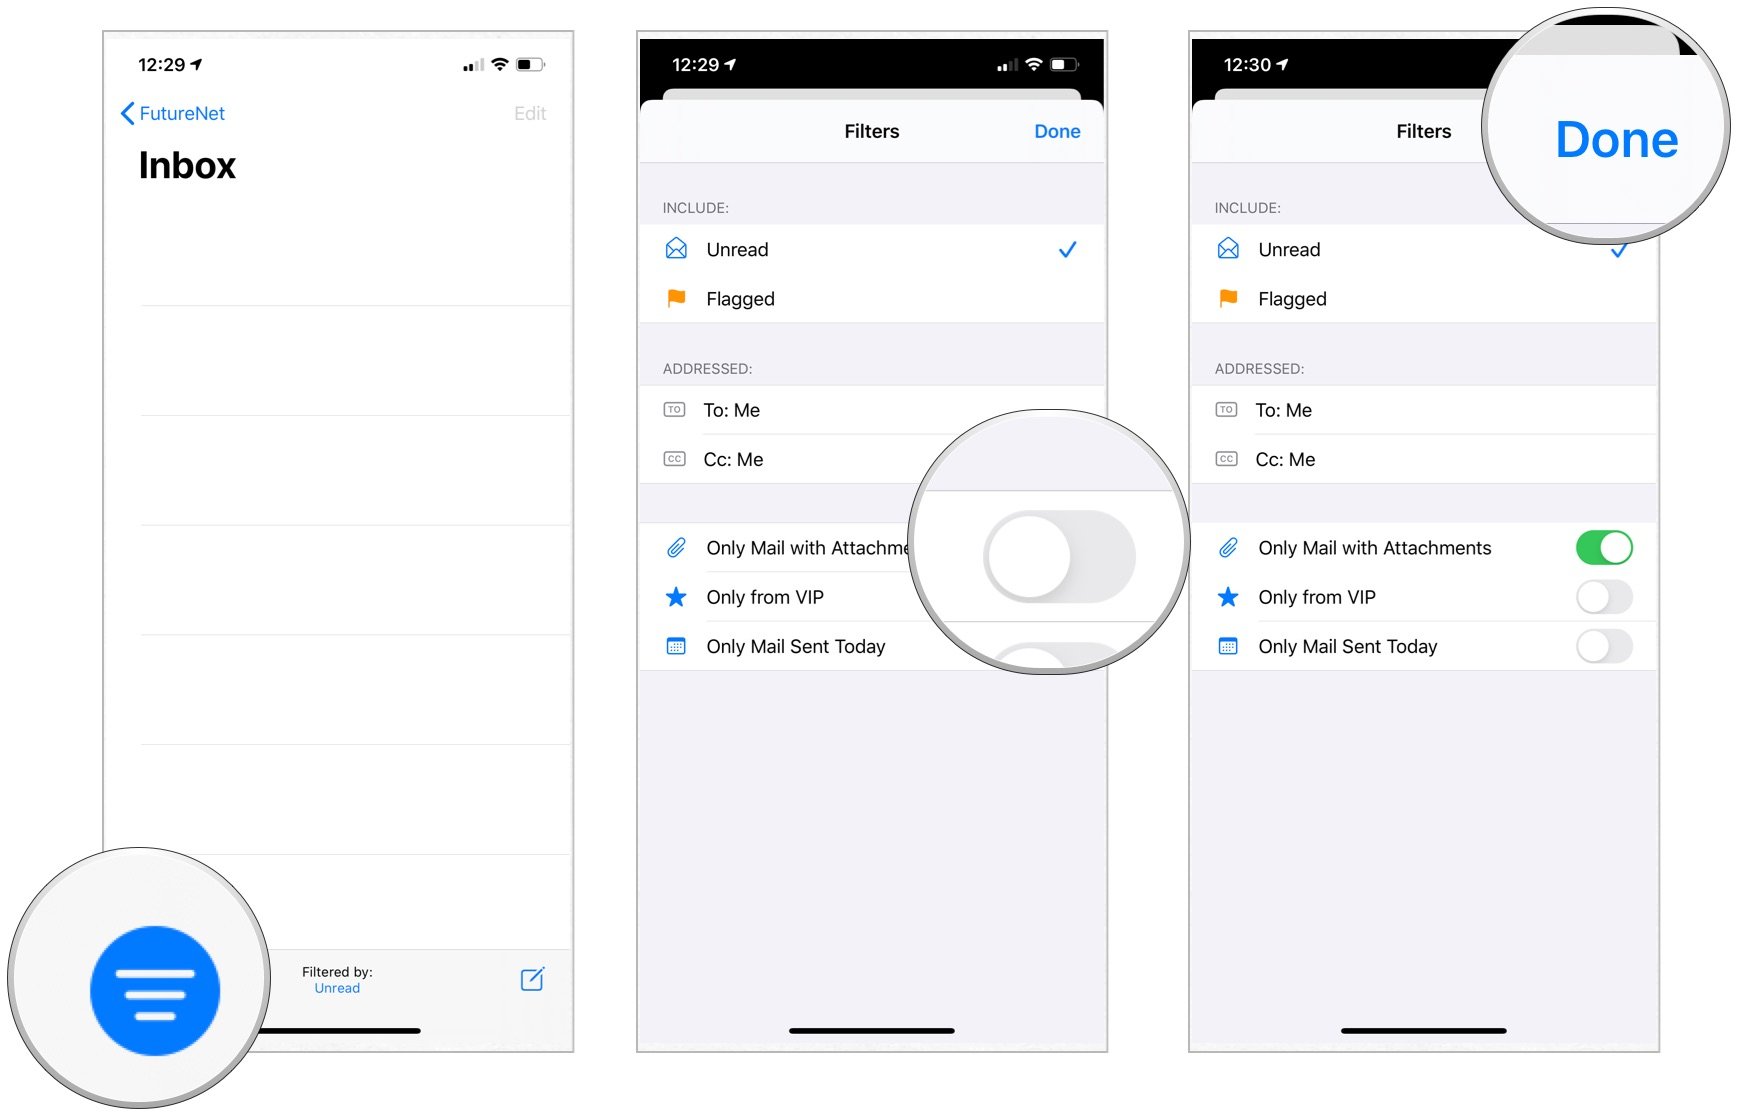
To better organize your emails, you can apply filters. In addition to the Unread/Read, Flagged/Unflagged options mentioned above, you can also filter by emails addressed directly or CC'd to you. You can also filter by only emails that have attachments or only emails from your VIP list. To help narrow it down even further, you can select which inboxes you want to be filtered.
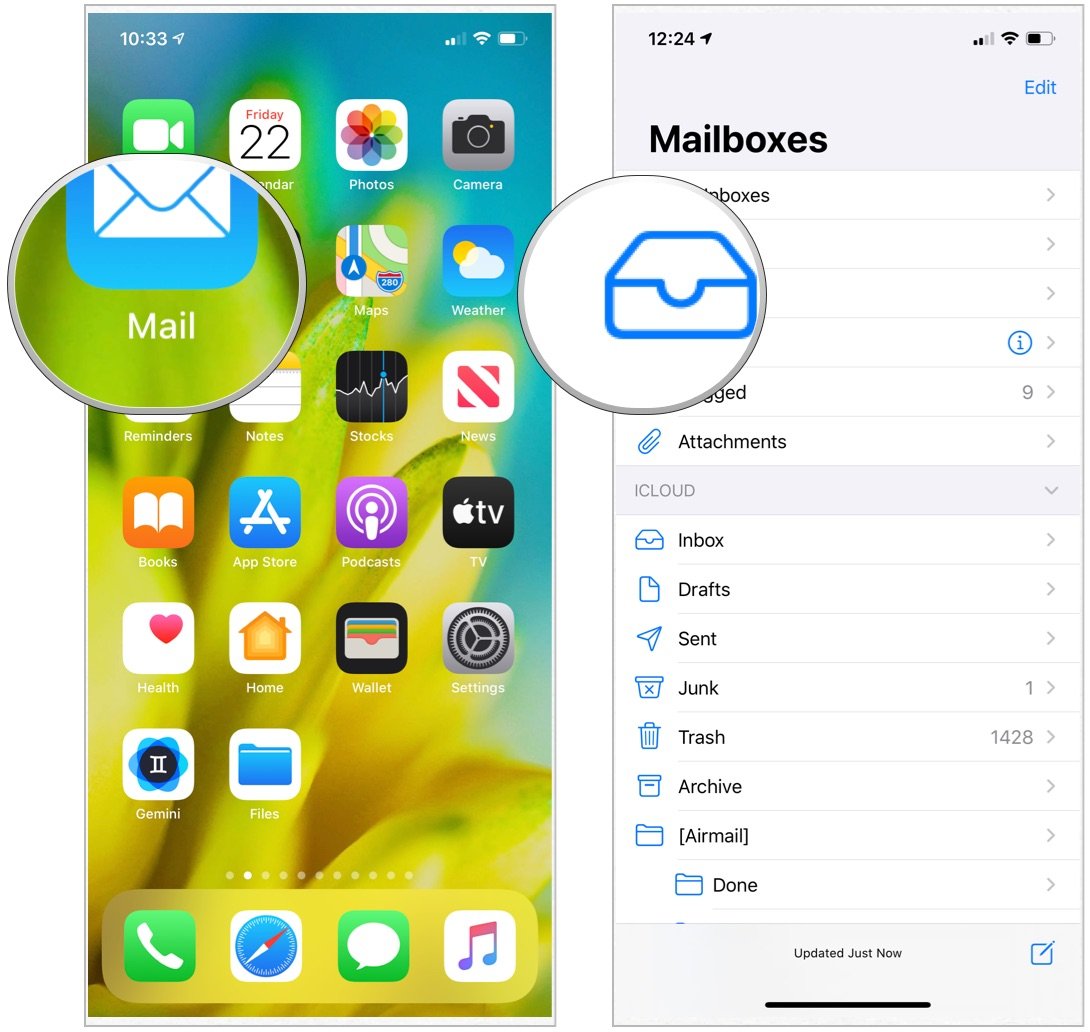
- Launch the Mail app from the Home screen of your iPhone or iPad.
- Choose your mail account under Mailboxes.
- Tap an inbox (or tap All Inboxes).
- Choose the Filter button in the bottom left corner of the screen. It looks like a circle with three lines inside of it.
- Tap Filtered By in the bottom center of the screen.
- Select the category you want to filter. You can filter by Unread, Flagged, To: Me, Cc: Me, Only Mail with Attachments, Only from VIP, and Only Mail Sent Today.
- Tap Done in the upper right corner of the screen.
How to unsubscribe to mailing lists in the Mail app for iPhone and iPad
You can unsubscribe to mailing lists that you, for whatever the reason, are subscribed to. Instead of going through the rigamarole of tapping through a half-dozen web pages asking why you are leaving, you can unsubscribe in literally two taps.
iMore offers spot-on advice and guidance from our team of experts, with decades of Apple device experience to lean on. Learn more with iMore!
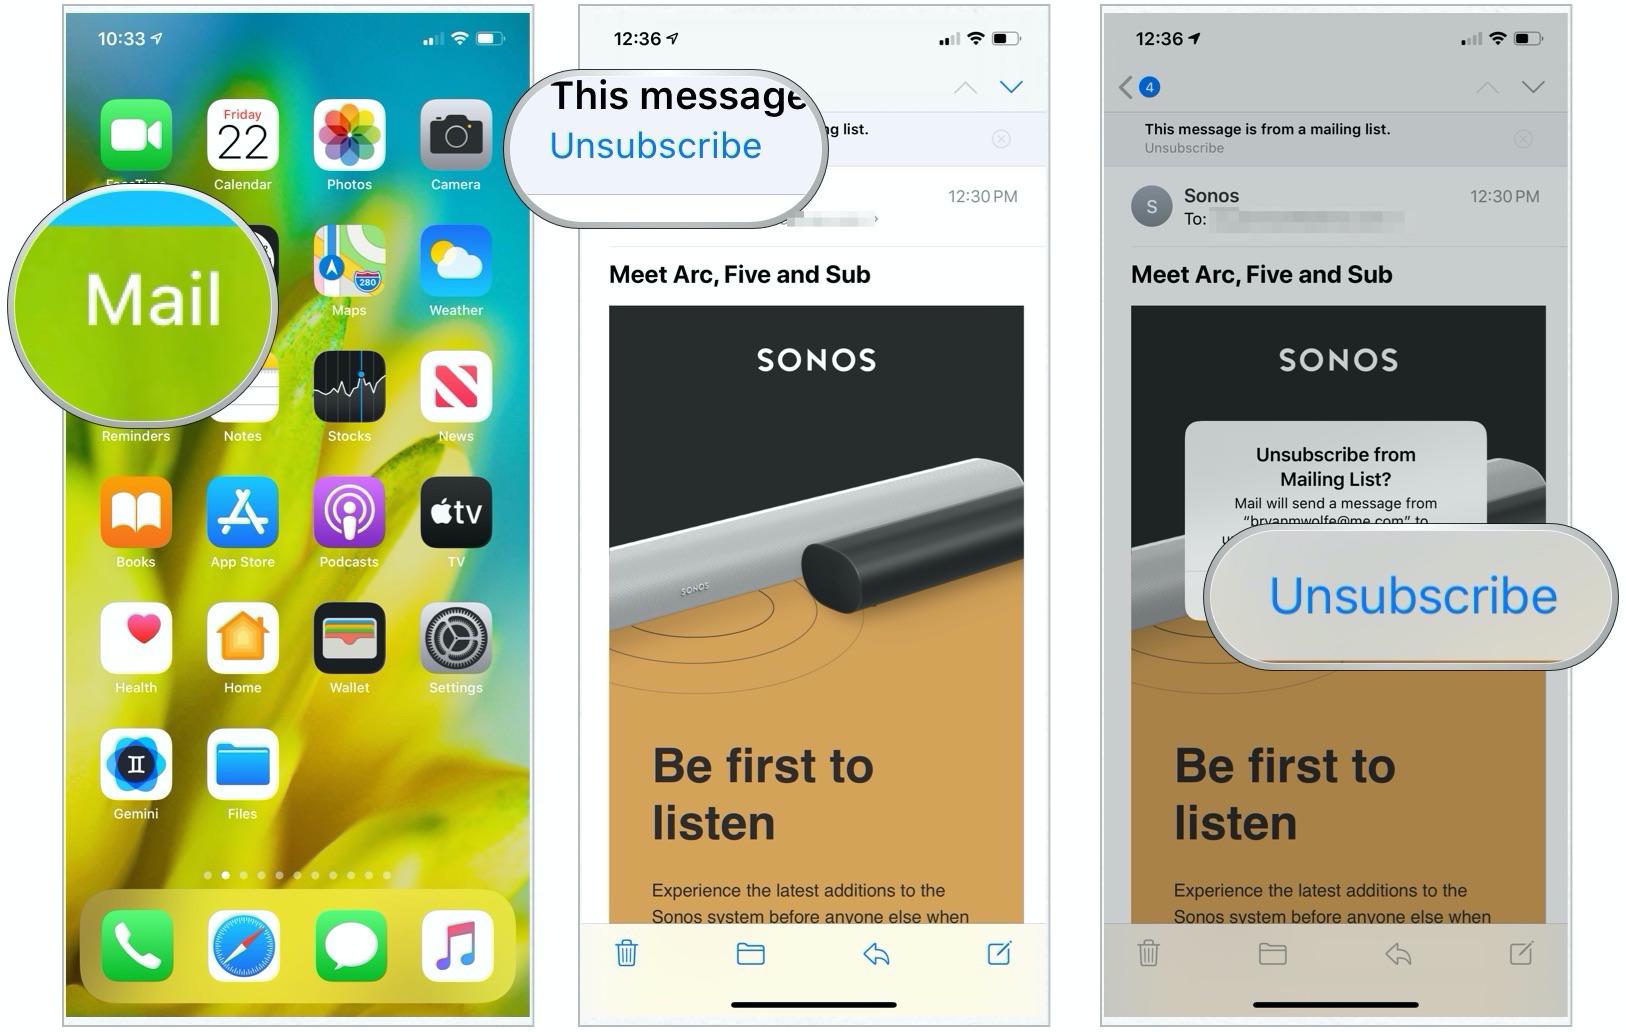
- Open the Mail app on your iPhone or iPad.
- Select an email from a mailing list that you don't want to receive anymore.
- Tap Unsubscribe at the top of the email.
- Choose Unsubscribe when prompted to confirm.
Questions?
Do you have questions about how to manage email and mailboxes in Mail for iPhone? Let us know in the comments below.
Updated October 2020: Includes iOS 14 and iPadOS 14 settings.

Bryan M. Wolfe has written about technology for over a decade on various websites, including TechRadar, AppAdvice, and many more. Before this, he worked in the technology field across different industries, including healthcare and education. He’s currently iMore’s lead on all things Mac and macOS, although he also loves covering iPhone, iPad, and Apple Watch. Bryan enjoys watching his favorite sports teams, traveling, and driving around his teenage daughter to her latest stage show, audition, or school event in his spare time. He also keeps busy walking his black and white cocker spaniel, Izzy, and trying new coffees and liquid grapes.
