How to use iPhoto to polish and perfect your iPhone portraits
Portraits are one of the most popular genres of photography and likely to be one of the most common types of iPhoneography you'll want to share from Camera Roll. Of course, whether its family or friends, or even your own self-portrait destined for your social profile, everyone always wants to look as good as possible -- better than reality even. Cousin Judy may untag herself if she sees even one unsightly blemish on her skin. Tim from across the street may complain endlessly if he thinks he looks too pale. And if there's so much as a wrinkle around your own eyes...
The good news is that in just a matter of minutes, you can turn those not-so-hot photos into portraits you can't wait to show off!
To do so, we're going to use Apple's iPhoto photo editing app for iPhone and iPad. I will be using the iPad version for the purpose of this tutorial, but you should be able to easily follow along with the iPhone version as well.
We're going to edit the following photo that my husband took of me. Feel free to save a larger version from here and follow along with the edits.

Before we jump into the actual editing, let's discuss why this photo needs editing. You never want to jump blindly into an editing session. It's much better to know what needs to be changed and what you don't like about the original so that you end up with a photo that looks natural and not over-processed.
As the subject of this photo, I hate it and would never share it as is, if it wasn't for this tutorial. You can see wrinkles under my eyes, I have blemishes on my face and the color of my skin is far from flattering. In general, there is way too much detail in my face and it makes me feel self-consious. Granted, as the subject, I'm going to be much more critical, but you should approach every portrait as if you are the subject because the person who is the subject will be very critical and possibly hate it if you share a "bad" photo of them on Facebook or Twitter.
Exposure
Ok, now that we know what's wrong with the photo, let's start editing it. First, let's adjust the exposure and contrast.
Master your iPhone in minutes
iMore offers spot-on advice and guidance from our team of experts, with decades of Apple device experience to lean on. Learn more with iMore!
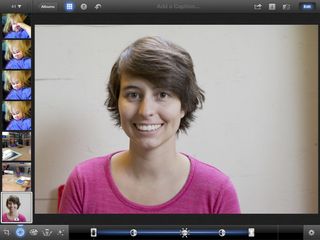
Personally, I like portraits to be on the lighter side as it generally has a forgiving impact on skin. It also makes the photo look brighter and happier. For this photo, I increased the exposure slightly and followed up by increasing the contrast a little as well.
White balance and skin tone
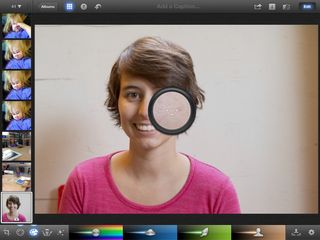
What I really like about iPhoto is that it has a white balance tool that lets you adjust the colors for skin tones. To access it, tap the button next to the Settings button in the lower right. It will likely look like a lens and say WB. The 2nd to last icon (the one with a figure of a headshot) is the tool you need to adjust by skin tone. When you select it, a loupe will appear on the the screen. Drag this to an area of the photo that has skin. Experiment and try different locations and choose the change that you like best. For this photo, this tool added a lot of much-needed warmth to the photograph.
After using the WB skin tone tool, adjust the last slider (the brown one with a head). This lets you fine tune the skin tones in your image. You can also hold down your finger on an area of the photo that has skin and swipe left or right. Going right makes the skins tones warmer, and going left makes them cooler. I'm a fan of warm photos, so I adjusted a little to the right.
In addition to improving the color of my skin, this step also made my hair look better.
Remove blemishes
Now it's time to tackle those blemishes.

Choose the Brushes tab in iPhoto and select the first brush called Repair. This awesome little tool will make pimples and blemishes disappear! The trick is to zoom in as much as you can since the brush size will always be the size of your finger. Find the blemish and simply touch it -- iPhoto will clean it right off!
On this photo, I cleaned up that spot below my nose that you see in the screenshot, a few areas of my chin, the scar between my eyes and the two freckles on my lips that I hate (don't judge!).
Soften skin
The next adjustment we're going to make is to soften all of my skin. In my opinion, this is where the magic happens. The soften brush is the last brush in the Brushes menu.

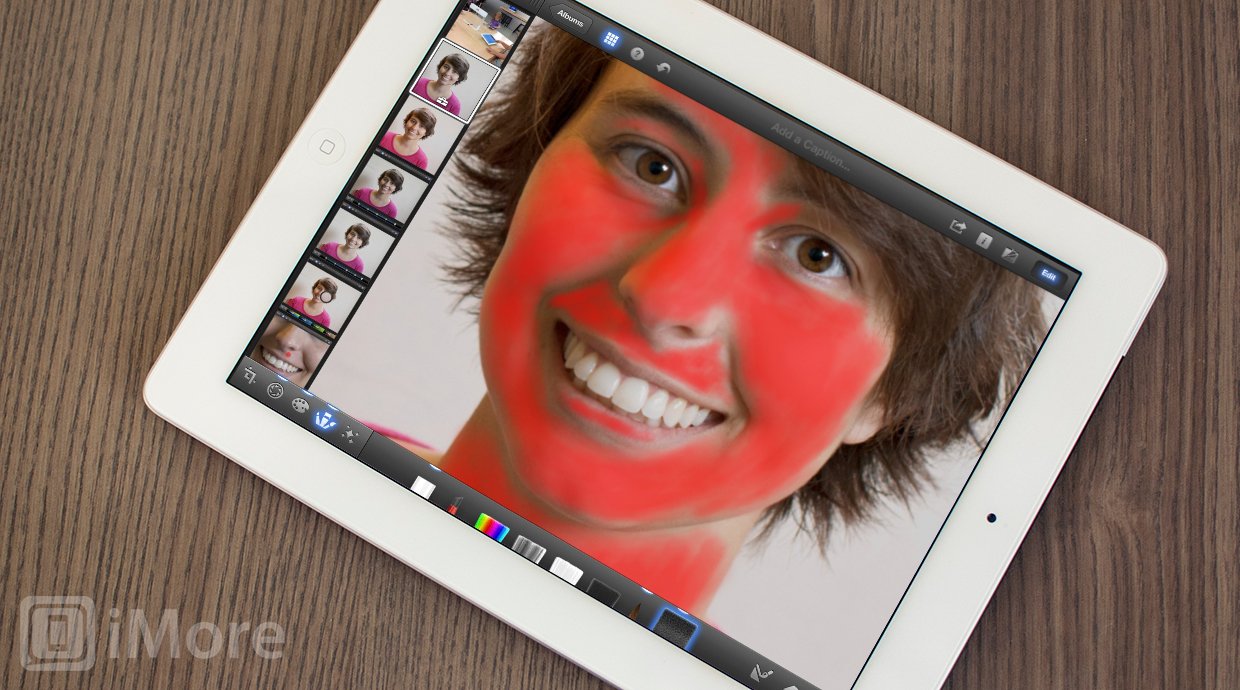
The trick to using these types of brushes is to make sure your strokes are visible. To do so, tap the Setting button and toggle Show Strokes to ON. What this does is display all your strokes in red so that you know exactly where you applied the brush and at what opacity.
For portraits, you want to hit all areas of skin while avoiding boundaries and edges. The Soften tool is essentially adding a blur to your photo, so if you aren't careful, you can make the person's face look blurry. This is not the effect we're going for -- we want soft, silky skin!
Take your time when doing this step. Zoom in nice and close at edges. Here's a screenshot that's zoomed in on my face so you can better see which areas to avoid.
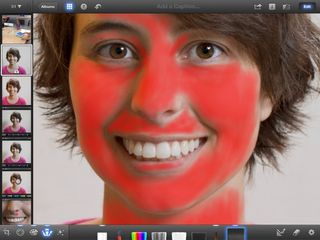
It's also important to note that you need to get all the skin in the photo, not just the face. If arms or other areas of the body are showing, make sure you apply the Soften brush to these areas as well. It looks unnatural to only have a face with soft skin.
Once you think you're done, turn off your strokes and take a look at the results. I recommend first setting the strength to High so that you can get a good idea of how well of job you did with the application of the brush. If some areas look missed or blotchy, then turn the strokes back on and fix it.
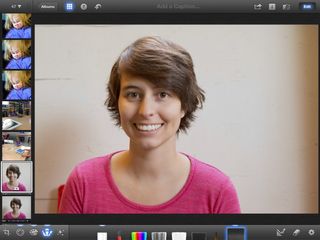
Once you're certain that your brush application is perfect, I recommend ultimately switching the strength to Low. Remember, the goal is to make skin look soft, not fake.
Here's the result of the Soften brush.
Sharpen eyes
The final edit we're going to make is to my eyes. Specifically, we're going to sharpen them.

In every portrait, the most important aspect is they eyes. Notice the catchlights in my eyes -- this is extremely desirable and you should check out my article on how to take great portraits for tips on getting catchlights.
Because the eyes are such an important element, it looks great when they are the sharpest part of the photo and really helps those catchlights stand out. The brush next to the soften brush is the Sharpen brush. Select it.
We're going to use the Sharpen brush exactly like the Soften one. Turn on brush strokes and zoom in on the eyes. Apply the brush to the entire eye while layering it on as thick as possible on the iris and pupil. For the Sharpen brush, I've learned to set the strength to High for best results.
Final image
Here's the final result!

To really get a feel for how much work we did, let's take a look at the before and after, side by side.
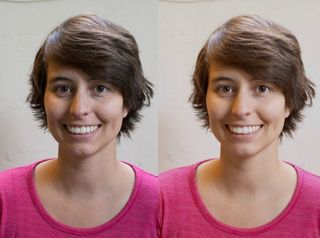
What a huge difference! Now that's a portrait of myself that I wouldn't mind sharing and possibly using as a profile picture on one of my social networks. It's amazing what you can do to a portrait when you know what you're doing, isn't it?
Now go out, shoot, edit, and share!
Now that you've learned how to turn those snapshots into beautiful portraits, it's time to put your skills to the test! Make sure you check out our tips for taking great portraits, then use the techniques demonstrated in this tutorial to edit your photographs into perfection. Once you're done, please share your work with us in the Photography forums. And as always... have fun!
How to get more help with iPhone photography
- How to get started with iPhone photography
- How to make your iPhone photography more striking with the “rule of thirds”
- How to make your iPhone photographs more powerful with negative space
- How to take amazing macros with your iPhone
- How to take stunning panoramas with your iPhone
- How to take awesome HDR photos with your iPhone
- How to take great looking portraits with your iPhone camera
- How to take fantastic photos of your kids with your iPhone
- How to take dreamy iPhone photos of your newborn baby
- How to take irresistible photos of your pets with your iPhone
- How to take spectacular photos of your car with your iPhone
- How to use iPhoto to darken and add drama to your iPhone photography
- How to use iPhoto to polish and perfect your iPhone portraits
- All iPhone Camera app how-tos
- All iPhone Photos app how-tos
- iPhone photography forum
Former app and photography editor at iMore, Leanna has since moved on to other endeavors. Mother, wife, mathamagician, even though she no longer writes for iMore you can still follow her on Twitter @llofte.

