How to Add or Remove Video, Audio, and More in a .MKV File
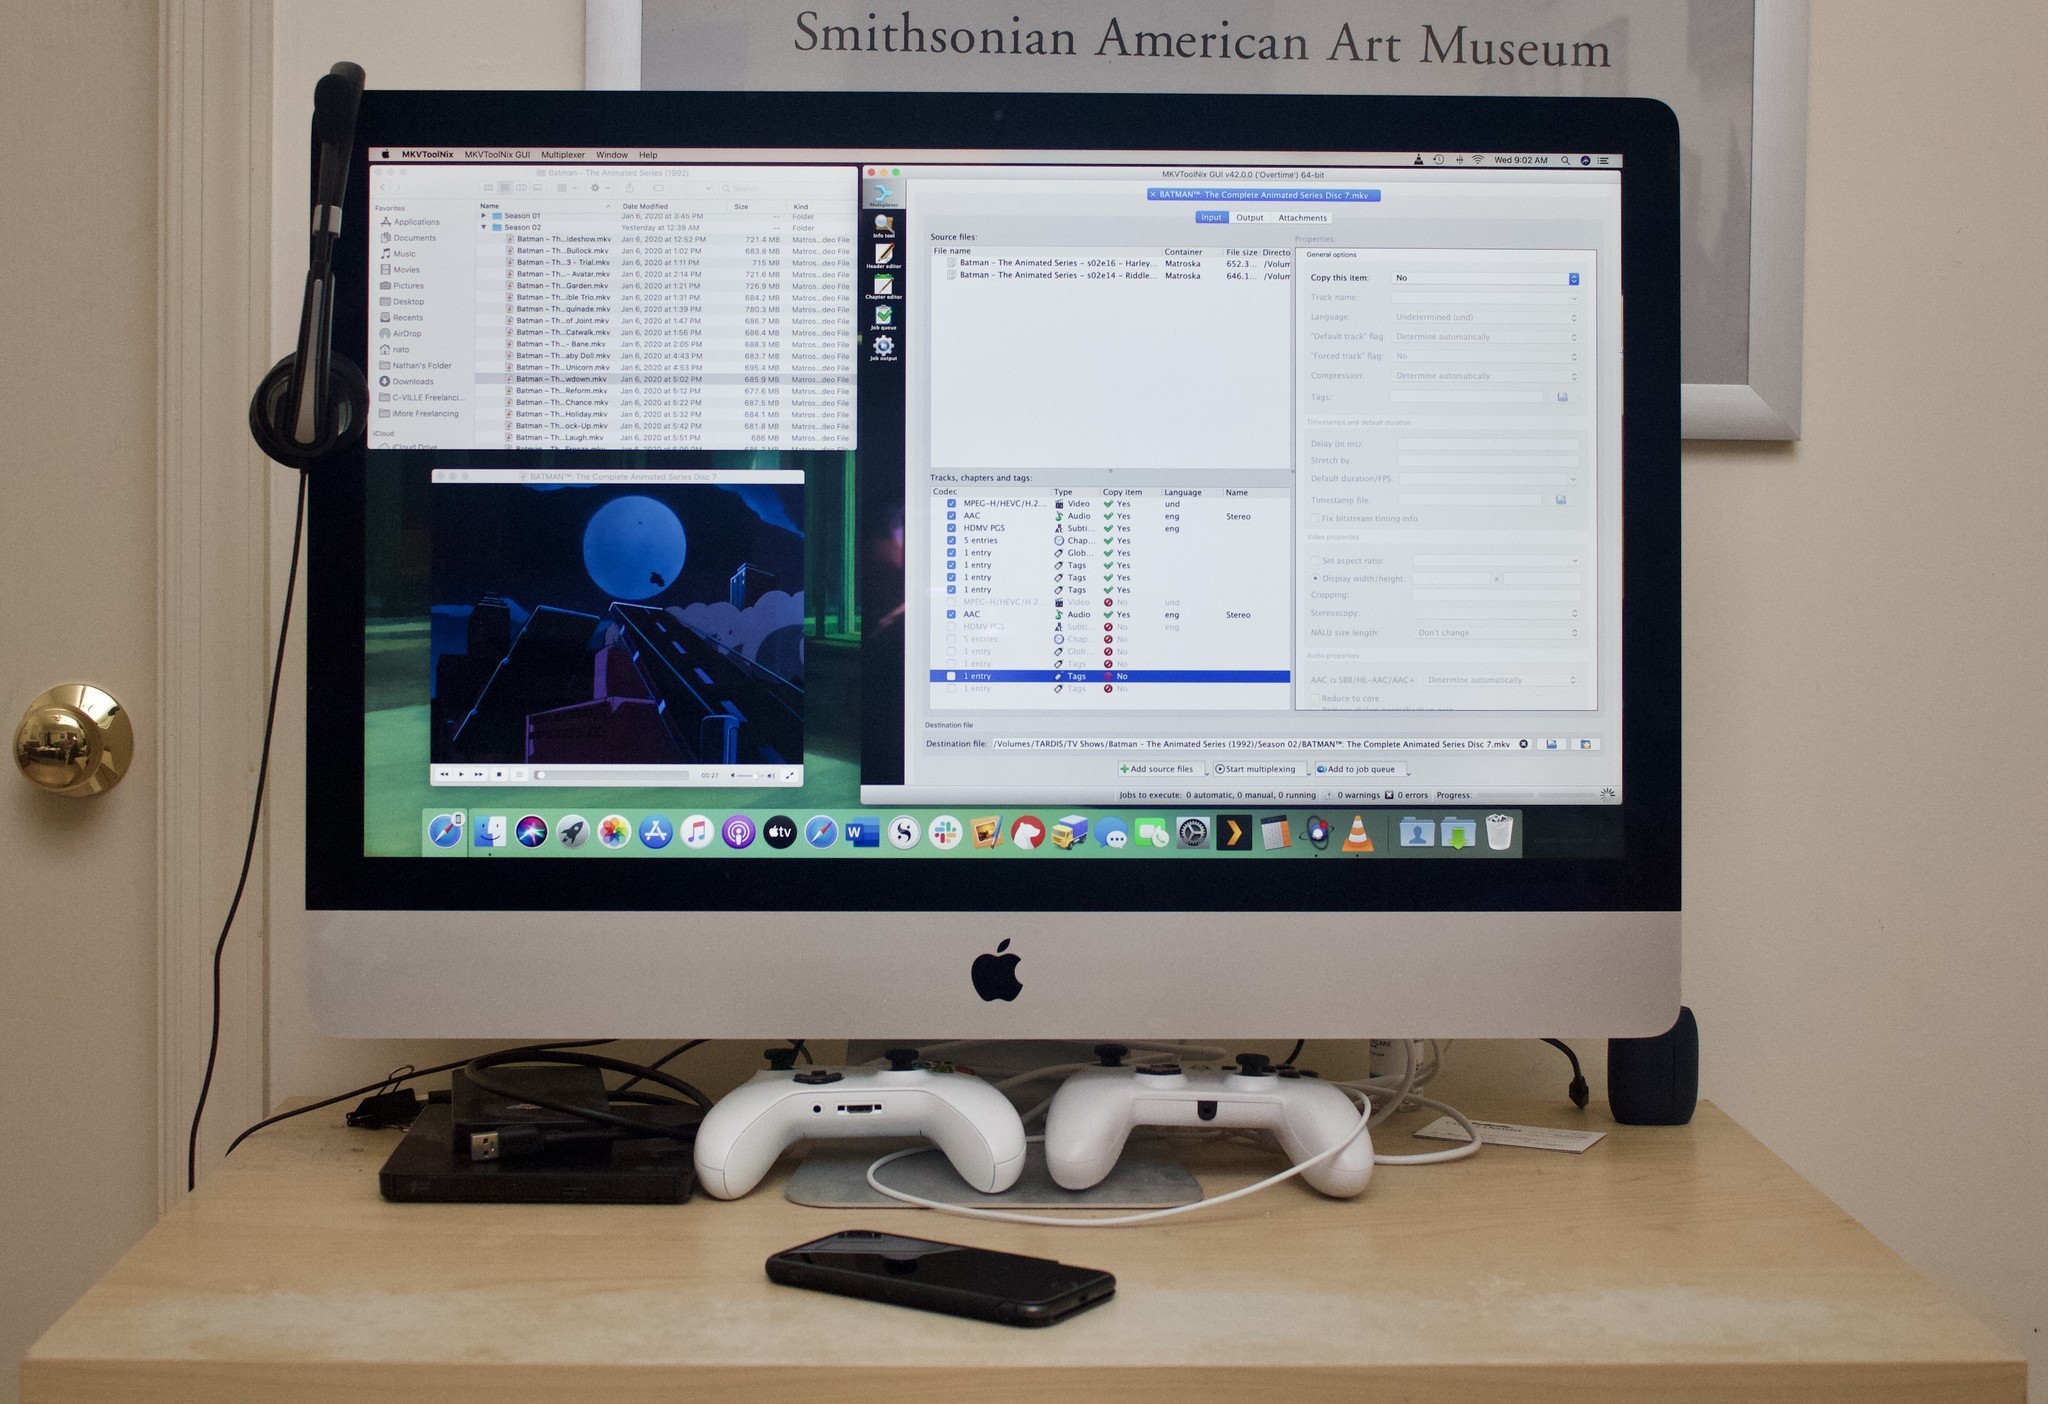
Matroska is an open-source media format that takes its name from Russian nesting dolls. A single MKV container file can hold multiple video and audio tracks, subtitles, and more, making the format ideal for digitally backing up DVDs and Blu-rays. It's fairly easy to play MKVs with free software such as VLC and Plex. But adding to or changing a Matroska file's contents requires a little extra work. Follow our simple guide, and with one free program and a few minutes' time, you'll have full control over what your Matroska files do and don't contain.
Why would you change an MKV file's contents?
If you want to rip your Blu-ray collection for backups or your personal media server, or just share videos you've made with the world, MKVs can easily bundle the high-def video, high-quality audio, and multiple subtitles from those discs in a single, manageable file. But some Blu-rays make weird choices when deciding how to squeeze all their content onto a given disc.
For example, the TV episode you can watch with or without creators' commentary on your Blu-ray player may actually be two nearly identical files on the disc itself — one with no commentary audio, and one with only the commentary. If you're backing up that disc for your own personal library, keeping two files wastes space and adds confusion. You're better off plucking the commentary audio from one file and grafting it onto the other.
You could also edit an MKV to add someone else's commentary to a beloved movie or show – perhaps from a favorite podcast, comedians like Rifftrax, or a director commentary on MP3 released separately from the film as a special bonus. You might also want to add a new subtitle track to a video: a more accurate fan-made translation of foreign dialogue, or maybe just subtitles in a language not included on the original disc.
Is it legal to make or alter MKV files?
That depends. If that MKV file contains video and audio you made yourself, you're absolutely fine. If you're working with copies of physical media you own, strictly for your own personal use, you probably won't incur the wrath of any movie studios or law enforcement agencies. But if you're mucking around with stuff you've swiped, via download or disc rip, without first paying for or owning it – which we emphatically do not recommend – you're on your own.
What do I need to edit an MKV file's contents on a Mac?
- Obviously, you'll need one or more MKV files to work with, along with any outside audio, video, or subtitle files you might want.
- MKVToolNix. This free set of MKV editing tools includes powerful command line versions installed and run via Terminal. But if you're allergic to UNIX commands, the Mac-friendly GUI edition provides more than enough abilities to get most jobs done. We'll be using the GUI edition here.
- VLC. This MKV-friendly open-source video player represents the fastest, easiest way to check your work once you're finished.
How to add audio to an MKV file
1. Download MKVToolNix.
You'll find instructions for downloading MKVToolNix at the project's site. You can get either the command line tools or the GUI version via Homebrew in the Terminal, but if you understand half or fewer of the words I just wrote, just grab the regular Mac installer instead. (Make sure you first click the "Signature" link next to the download link to get and validate the installer's checksum for extra protection against viruses.)
2. Gather your files.
You'll need at least two files to start with:
Master your iPhone in minutes
iMore offers spot-on advice and guidance from our team of experts, with decades of Apple device experience to lean on. Learn more with iMore!
- The MKV file to which you want to add your audio track (or subtitle track, etc.). We'll call this the destination.
- The MKV file from which you want to extract the item in question. We'll refer to this file as the source.
Make sure you clearly label your source and destination in the Finder before you start, so that you're not yanking any tracks out of, nor sewing them into, the wrong files. This won't affect the actual process any; it'll just help keep you, the squishy human point of failure in this operation, from getting confused.
Here, the files with shorter names and "Commentary" in them are the sources, while the files with longer names and episode titles are the destinations.
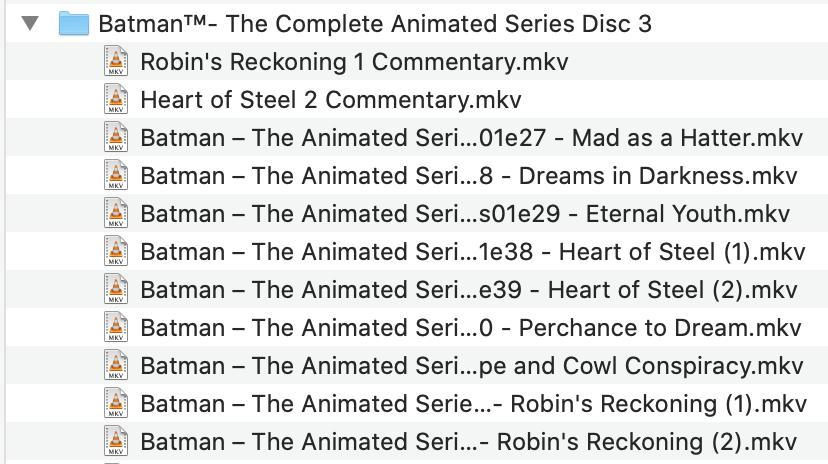
(Yes, I legally own the discs in these examples, and I'm not sharing copies of these files with anyone else. You'd have to be crazy to risk angering Batman.)
If you already have an isolated audio file and don't need to pull one out of another MKV, you can follow the same process we'll outline below. Matroska supports an absurd number of video, audio, and subtitle formats. For audio, that includes everything from MP3 and AAC to the DTS and Dolby AC-3 files found on DVDs and Blu-rays. For subtitles, Matroska can handle the popular SRT and (forgive me in advance, but I assure you that this is totally a real file type) ASS formats. Just check whatever program you plan to use to play your MKVs to make sure that it supports these formats as well.
3. Smoosh the files together.
Open MKVToolNix GUI, and you should see something like this:
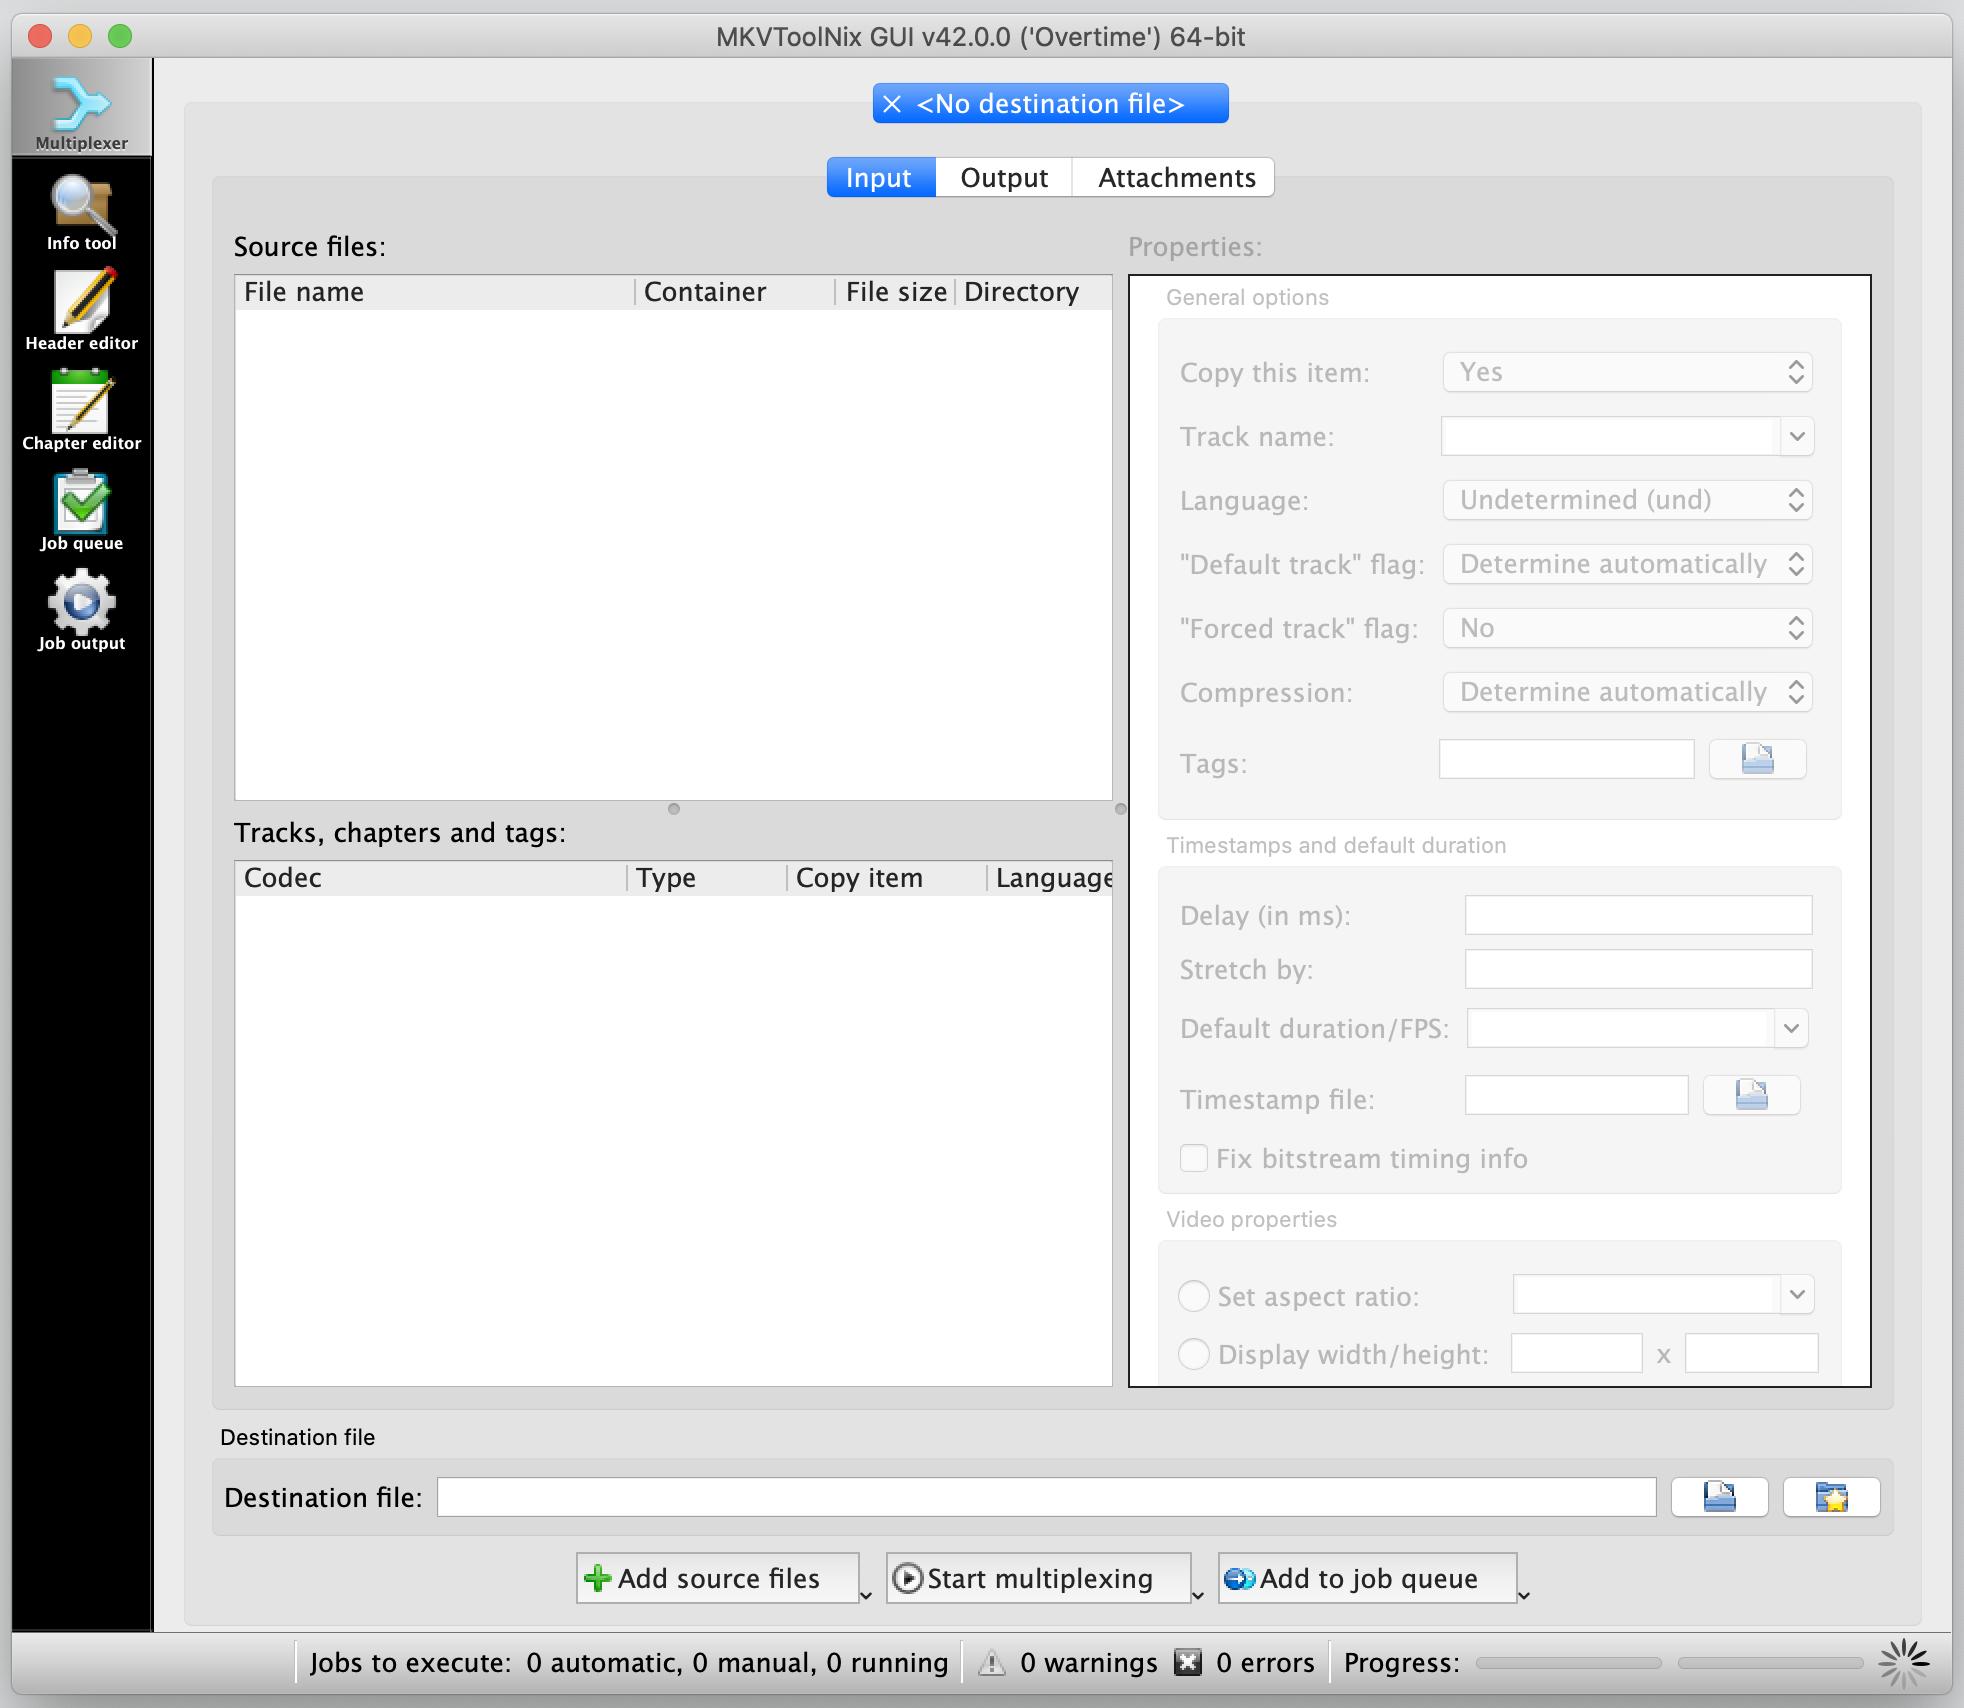
The various file(s) you'll be bundling into a single Matroska file appear in the "Source files" box at the top left; their collective contents appear in the "Tracks, chapters, and tags" box just below it.
Drag and drop your destination file first and your source file second into this window:
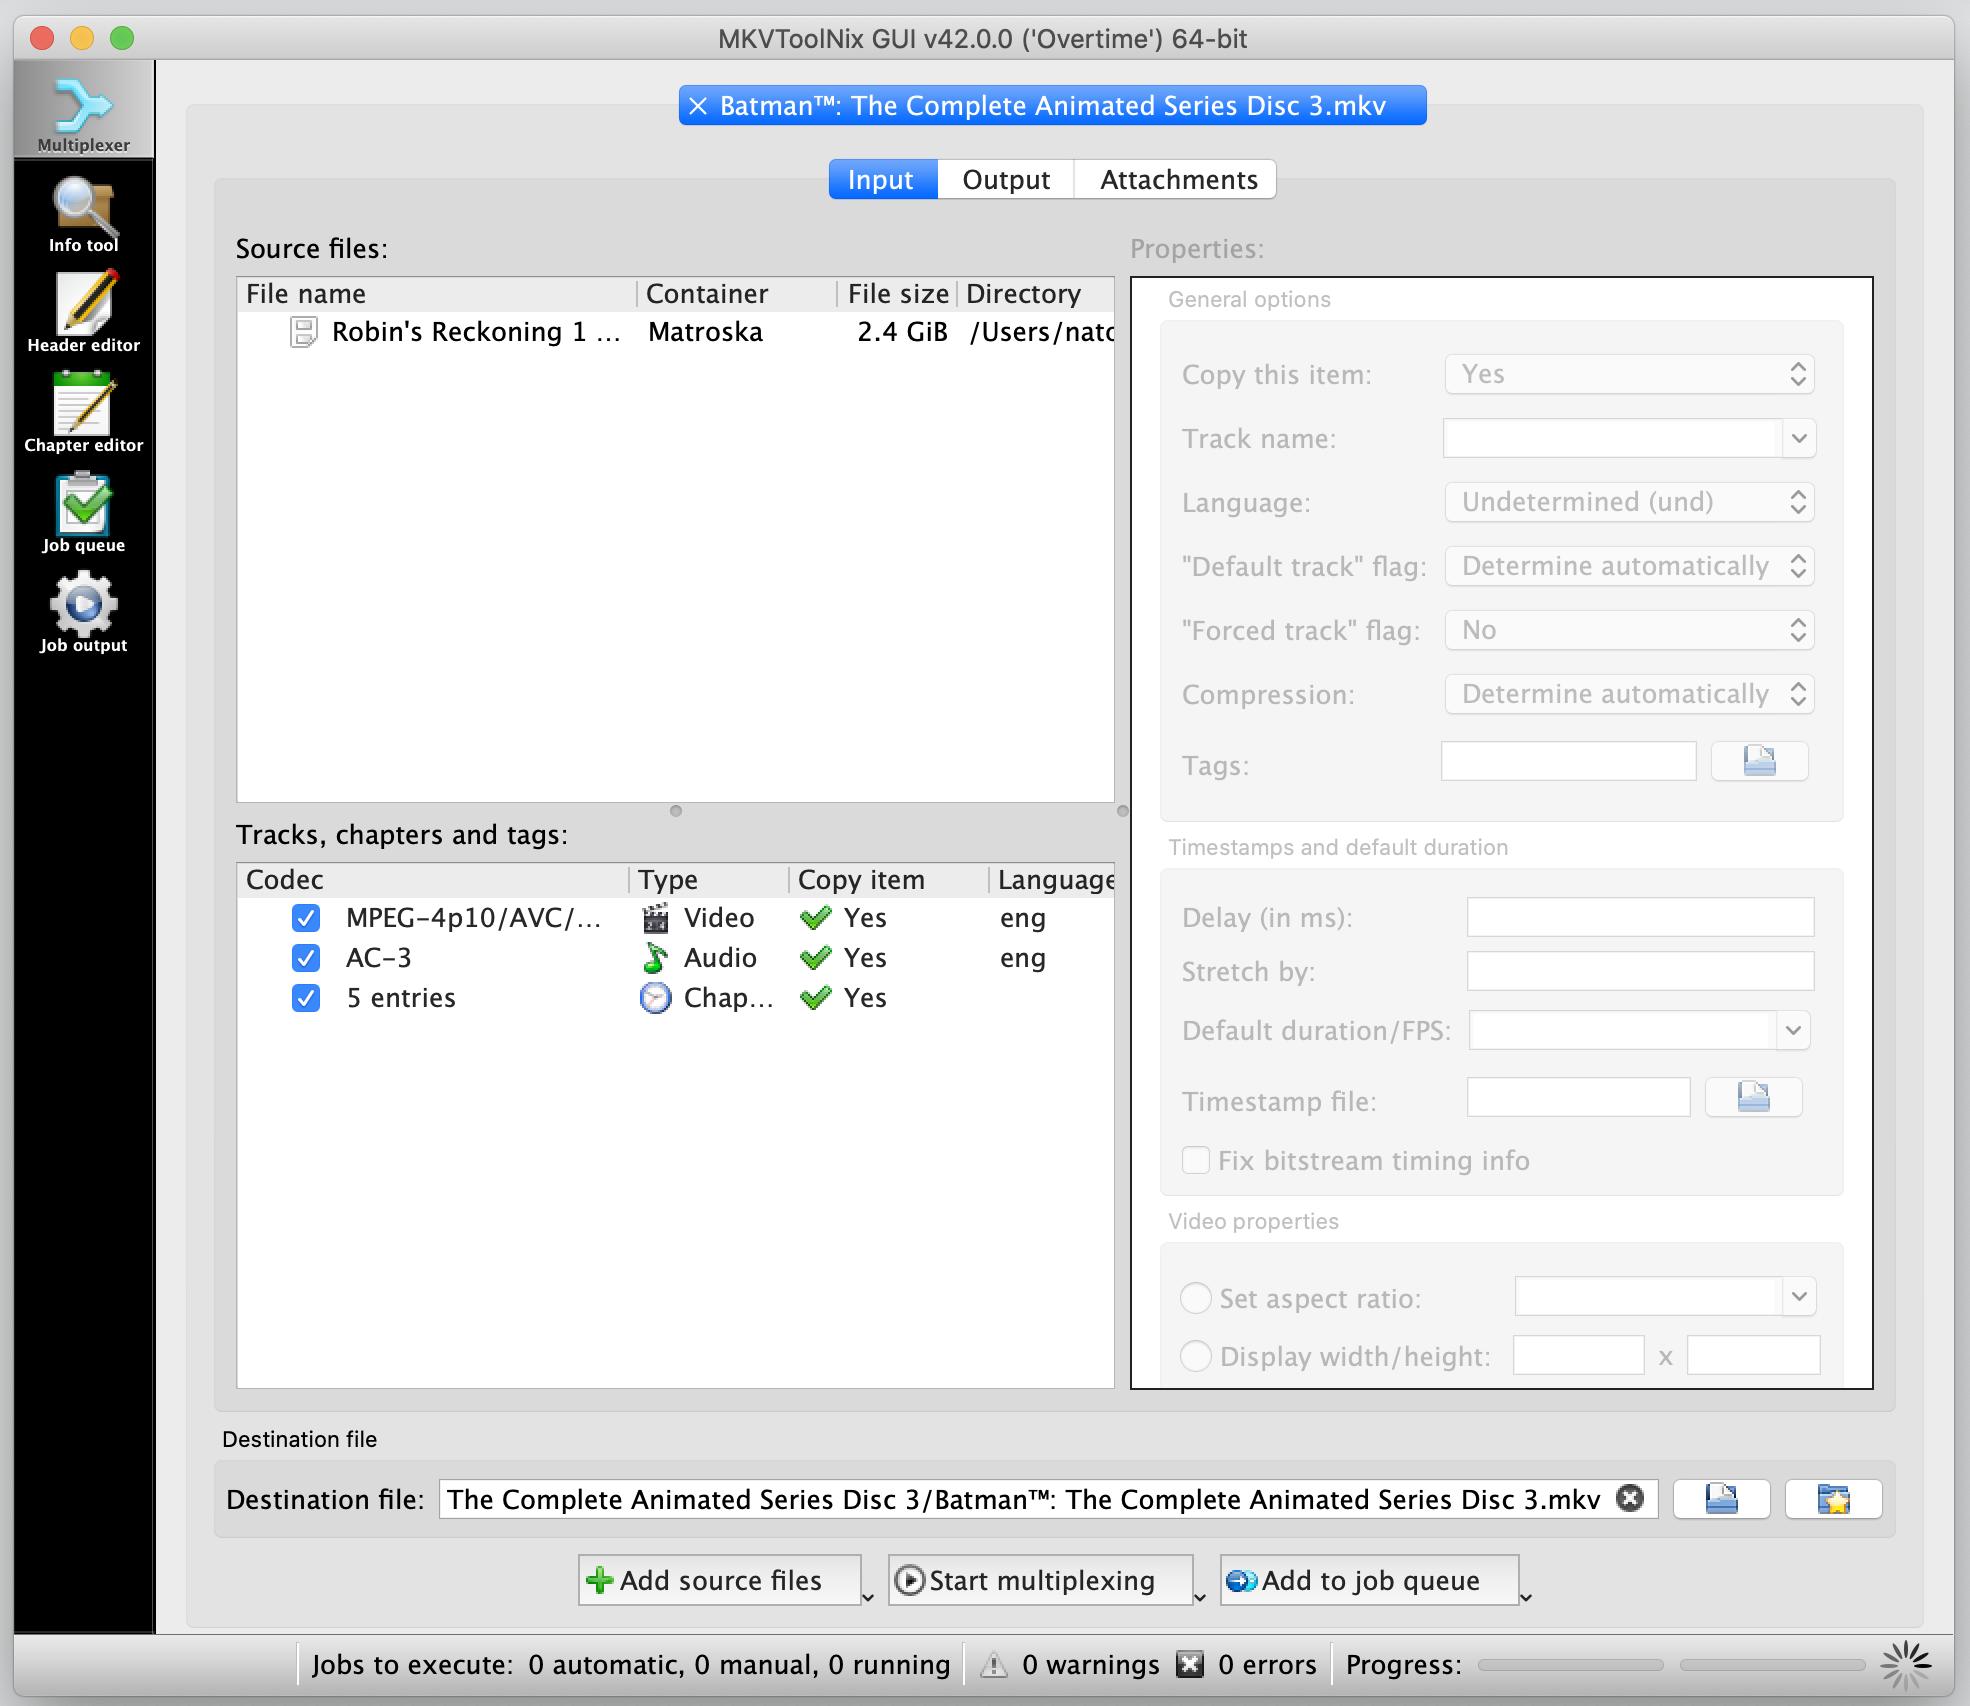
When you drag the source file in, you'll see this window pop up:
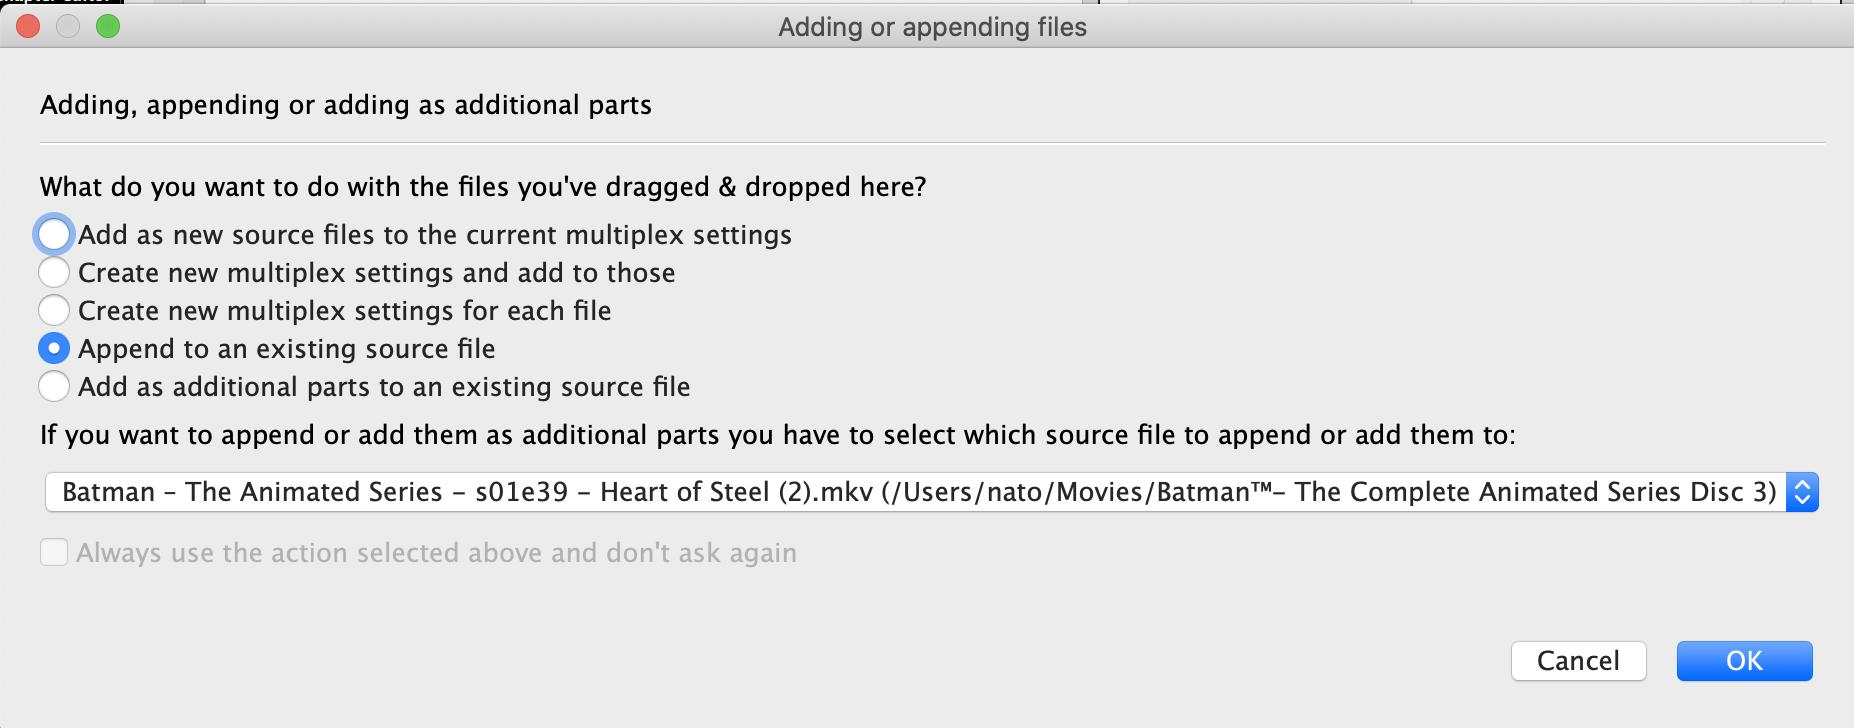
In my tests, the default option at the top of that list, "Add as new source files to the current multiplex settings," worked just fine for my purposes, and likely will for yours.
After that, you'll see both files appear in the top left box. In the "Tracks, chapters, and tags" box, you'll see everything in both containers — likely a video track, one or more audio tracks, plus chapters and subtitles, for each of the files you dragged in.
4. Pick which contents to keep or discard
Uncheck anything in the bottom left window that you don't want included in the final file. When you do, you'll see its entry under the "Copy item" column heading flip from "Yes" to "No."

If you're not sure which components are which, keep in mind that the contents are listed in the order in which you dragged them into the MKVToolNix window, so the destination file's innards should appear first, followed by the source file's.
Since I wanted to add a single audio commentary to an existing video file, I kept everything from my source file's contents checked, and unchecked everything but the audio file in question from my destination file. If you want, you can reorder the contents by dragging the new audio file up next to the existing one(s), but you don't need to do so for the finished file to work correctly.
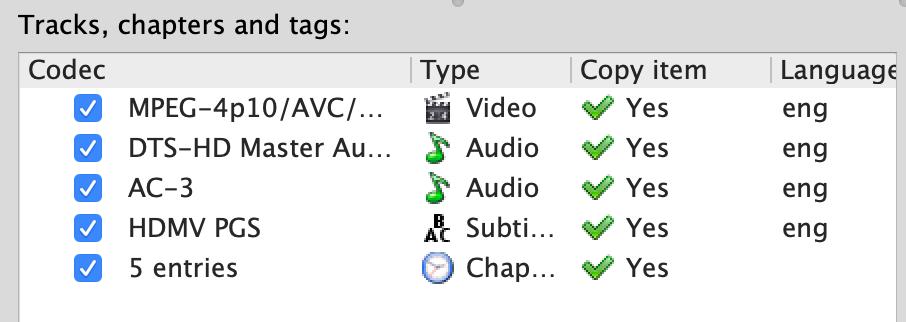
That's all you need to do! When you're ready, just click the "Start multiplexing" button seen at the bottom of the image below.

You'll see a pinwheel in the lower right corner of the MKVToolNix window start to spin, as a progress bar fills up. The program won't make a sound or flash an alert when it's finished; the pinwheel just stops spinning, and the bar is full. (If you see a warning indicator appear, you can safely ignore it. In my tests, warnings had no effect on the finished file.)
A few seconds later, you'll have a brand new MKV file with all the original contents, plus the file or files you added. You're not altering or re-compressing any of the contents — just taking them out of one box and putting them in another, in essence. So you don't need to worry about losing any quality in the things you're moving.
Open the new file in VLC and make sure everything you want is there; you can go to Audio > Audio Tracks in the menubar, then select each audio track to hear it as the video plays.
If you're satisfied with the final product, trash the source and destination files, rename the new combined file if you so desire, and enjoy your improved viewing experience.
Got any MKV-tinkering tips or tricks we didn't include here? Feel free to share them in the comments below.

Nathan Alderman is an iMore contributor. He’s been using Apple computers since his first Apple IIe in 1985, and writing professionally about Macs and their software since 2005. During his 12 years freelancing for Macworld, he covered email clients, web browsers, web design programs, writing apps, and games, and he’s continued to follow those interests at iMore since 2017. An editor and writing coach in his full-time career, he spends his dwindling spare time writing fiction for fun, volunteering for democracy, and contributing to podcasts on The Incomparable Network. Nathan adores his wife and wrangles his alarmingly large children in bucolic Crozet, VA.
