How to automatically mount network drives on macOS

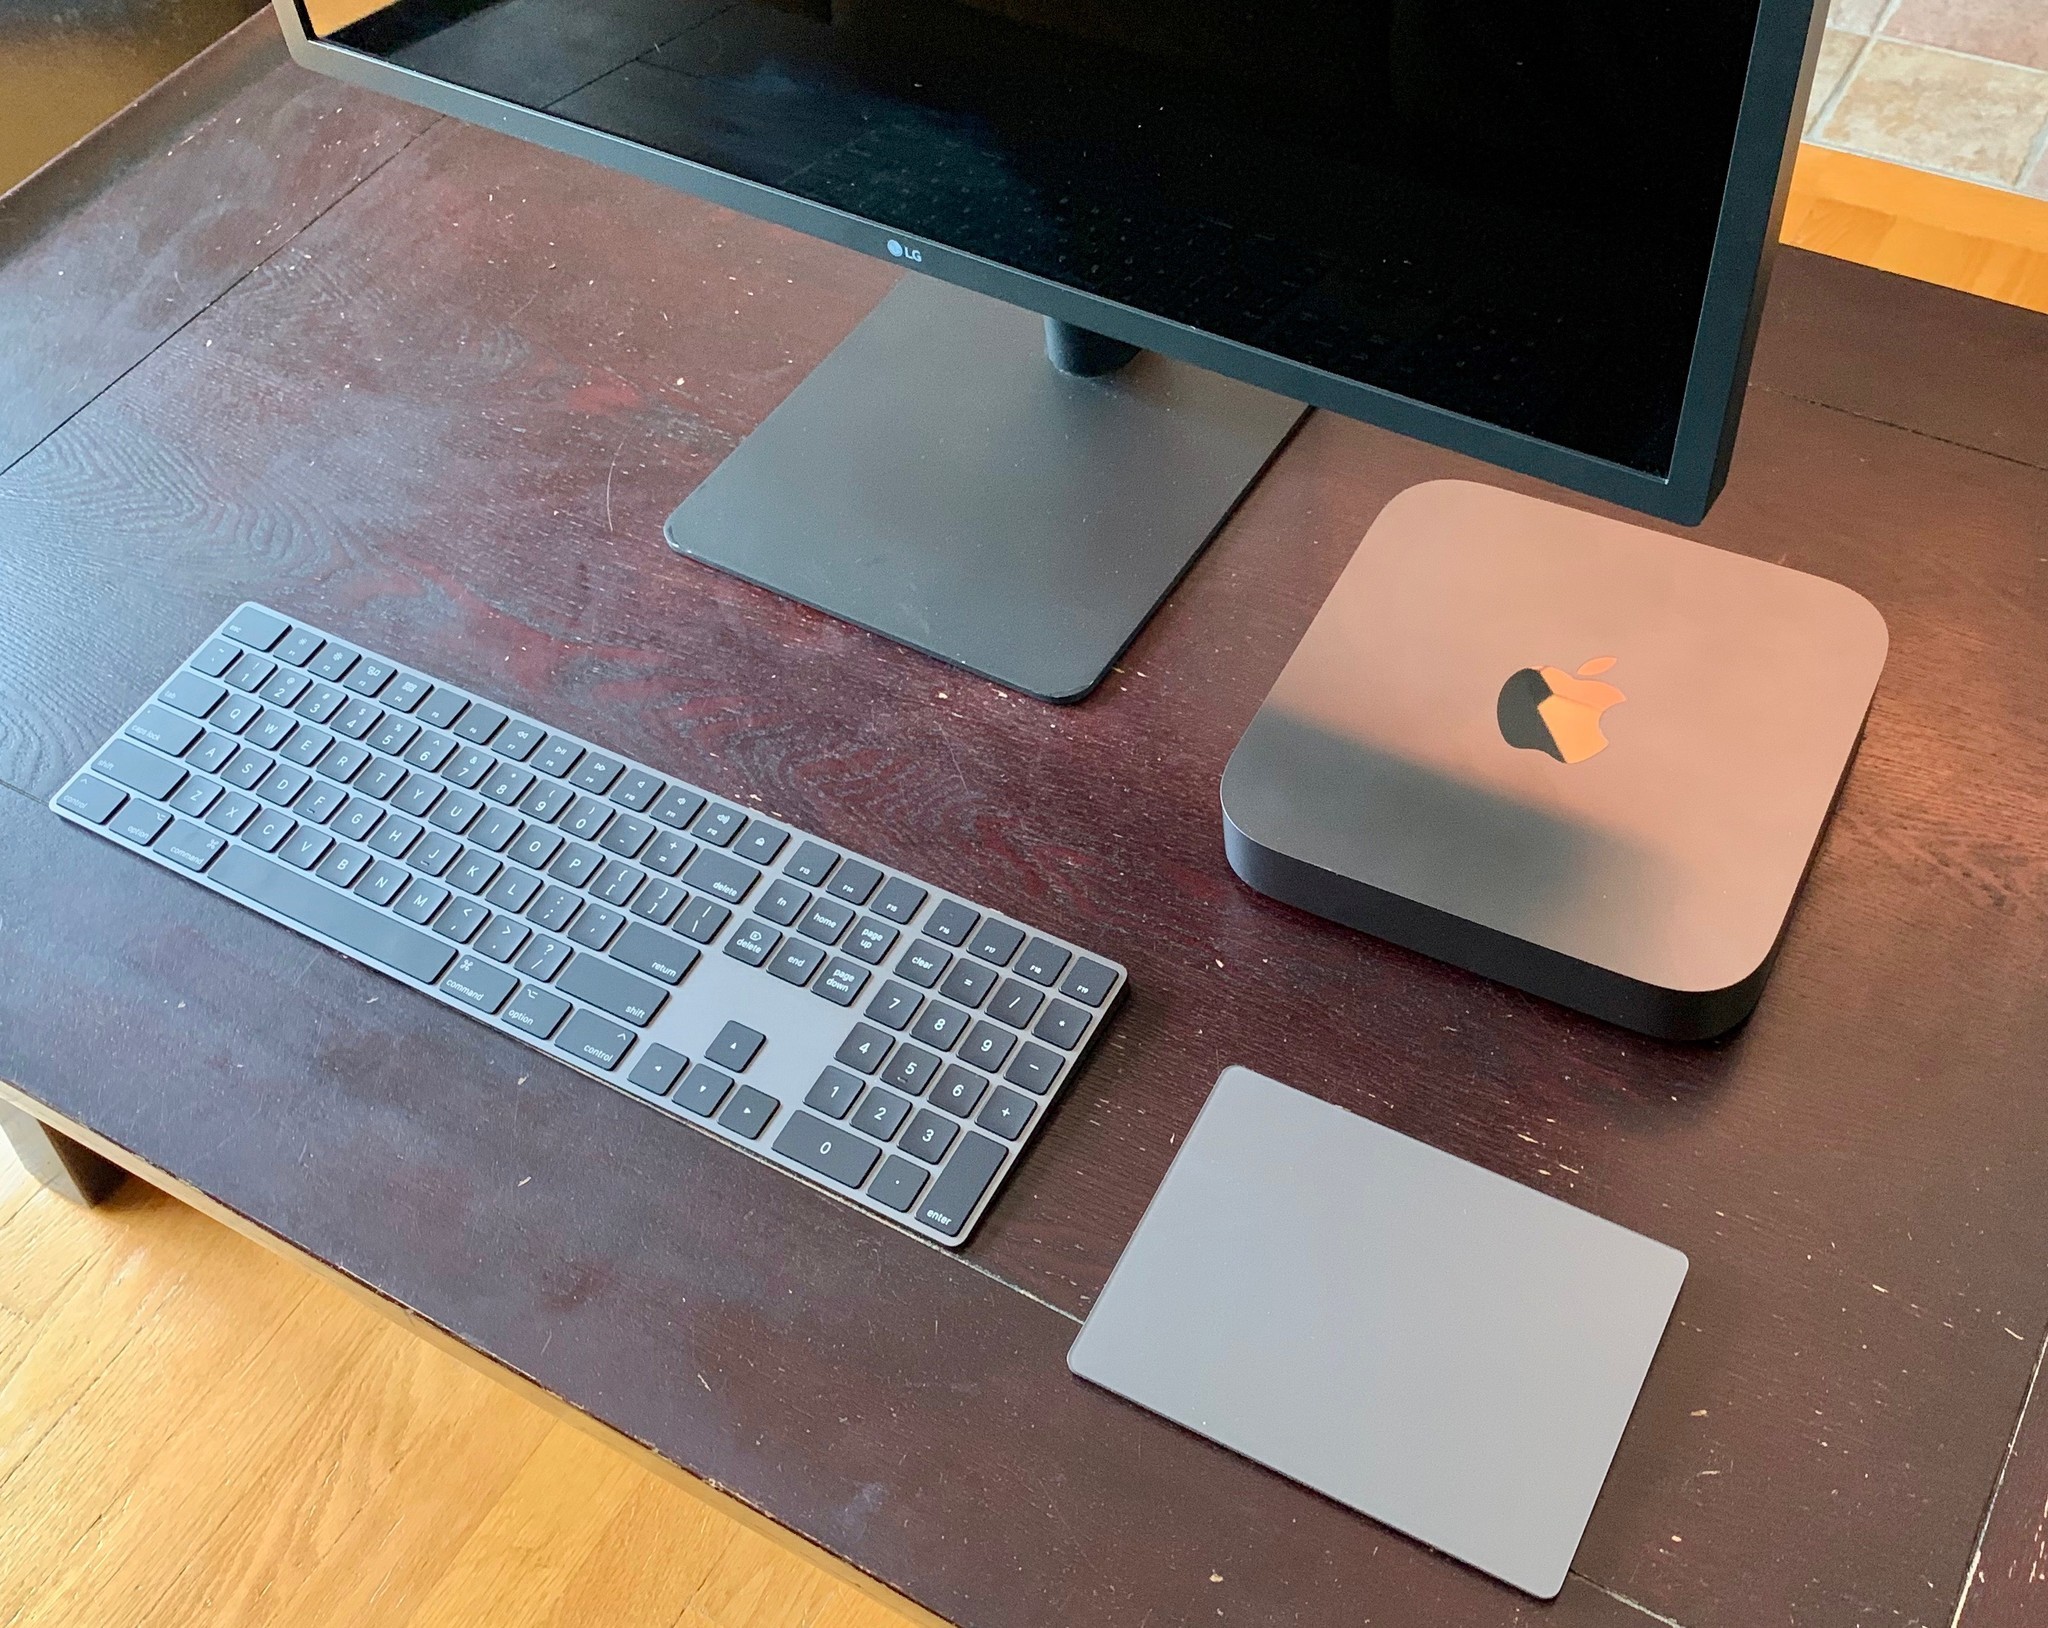
I love my Mac environment, from using macOS to continuity, to iCloud, it allows for me to be able to have a flexible workflow. Whether I'm working on my Mac mini at the start of my day in my office or changing to my back deck using my MacBook Pro in the afternoon, macOS's features allow it to happen since all of my files are accessible to me via iCloud. But iCloud can't help with very large video files, Photo libraries, or Final Cut Pro libraries. Local disk space is what you need to rely on.
- Running out of local disk space
- Networked drives
- Making permanent connections
- Making the extra disk space usable
- Some extras
- Final thoughts
Running out of local disk space
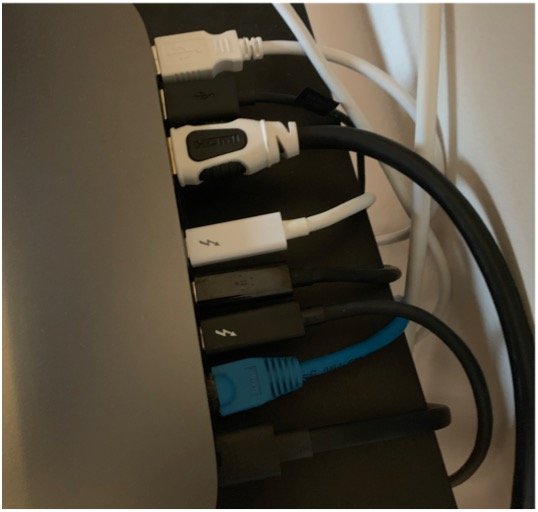
Apple making Macs more appliance-like have the major drawback of not being able to install larger drives when you need more disk space. Apple has bet big on using dongled peripherals but that too has its limits (my poor Mac mini has no free TB3 nor USB ports left).

So how can you get more working space without having to buy a brand new Mac with the disk capacities you require? Depending on the type of work you're doing, you can probably connect a network drive and use it like you would locally. Here's how.
Networked drives
A networked drive can range from a specialized appliance that offers data redundant storage such as a Synology Diskstation to a lone PC that has a shared folder visible on the network. If you plan on running your application off of files on a networked drive, you'll be limited to the bandwidth of the networked device.
Accessing Pages files, PDFs, and general text-based documents, a WiFi or 1 gigabit wired ethernet connection might be enough for you.
You could run FCP libraries from that type of ethernet connection or even WiFi, but in reality, you're going to have a bad time. The speed is much too slow.
If you need networked access to very large files, you'll need faster network speeds. For example, a new Mac mini has the ability to be attached with a Cat6 wire to your network at 10-gigabit speeds. Your networked files would be accessible at near HDD speeds (not SSD speeds mind you). So plan accordingly for your requirements.
Master your iPhone in minutes
iMore offers spot-on advice and guidance from our team of experts, with decades of Apple device experience to lean on. Learn more with iMore!
You can get more information on how to share your files on a network from a Mac.
Making permanent connections
Once you've set up a networked drive or device, you can have your Mac attach to it each time you log in. Here's how.
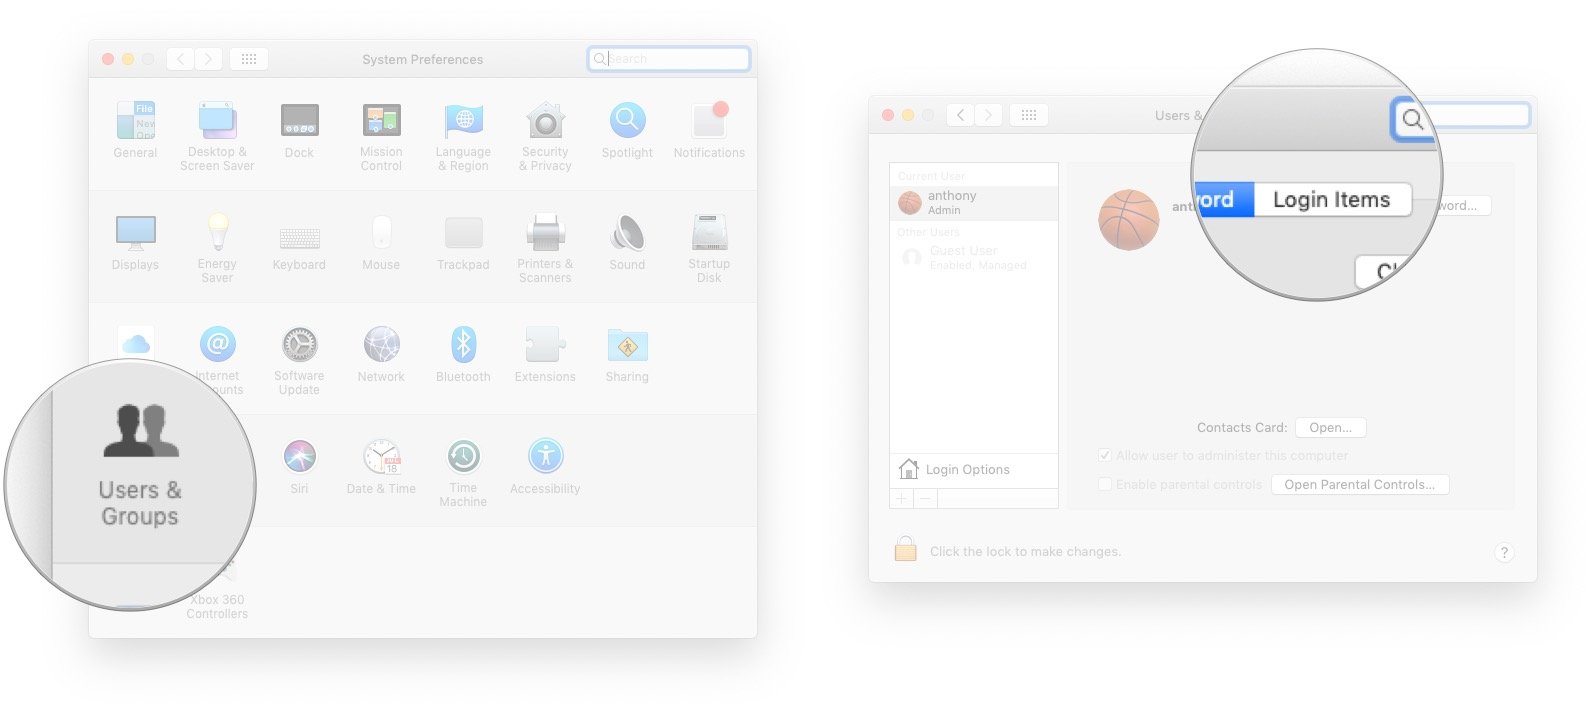
- From the Mac you want to mount a networked drive, start System Preferences.
- Select Users &Groups.
- Click Login Items.

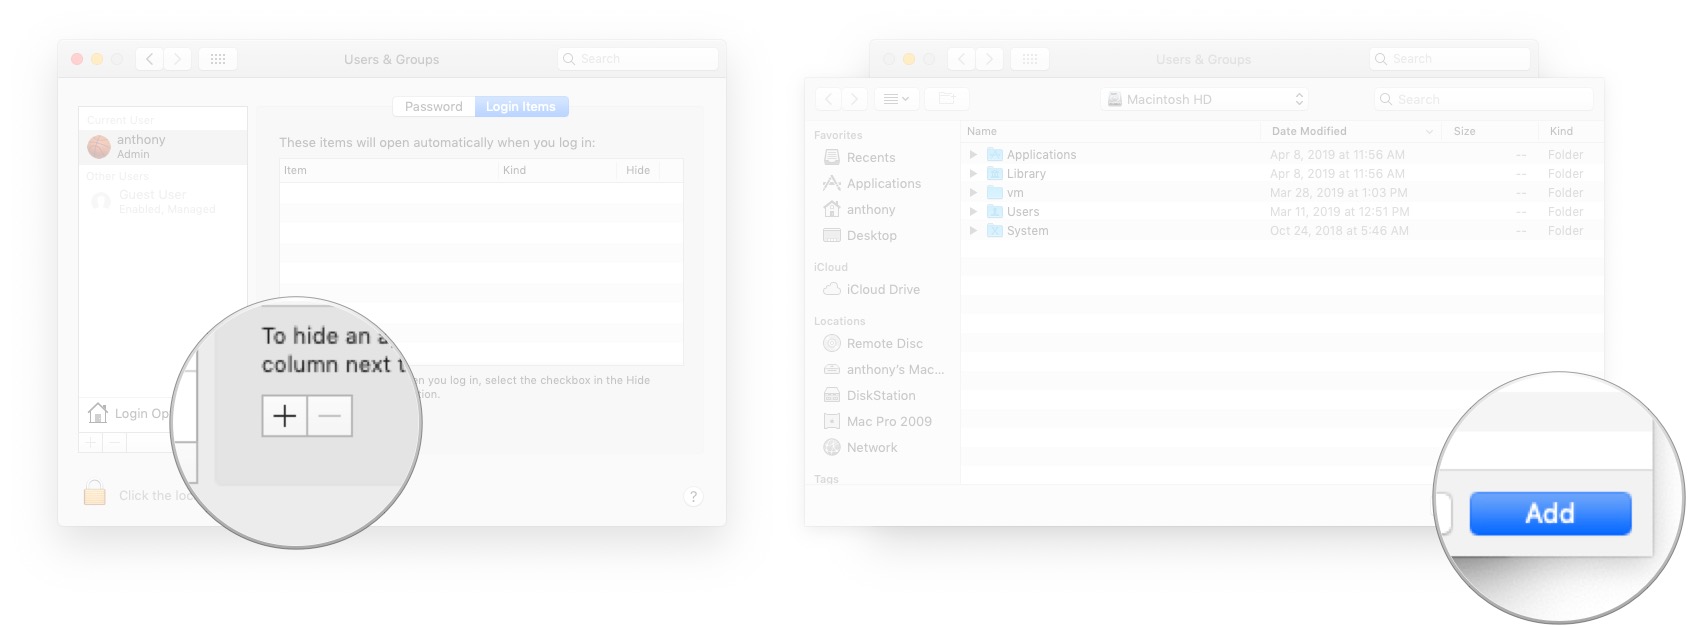
- Click +.
- Navigate to your networked Server.
- Highlight the share you'd like to have automatically mount.
- Click Add.

Now each time you log in, that remote drive will be mounted.
Making the extra disk space usable
Now that you have the network drive permanently mounted, you can assign your various programs to use that location for default file storage. Typically, the mount will be in /Volumes/NameOfShareYouSelected. So for example, if you want to open a new Photo Library from the networked location, do the following.
- Option-Click Photos.
- Click Create New.
- Navigate to your Mounted Drive.
- Click Ok.
Now you'll have a Photo Library running from your remote drive no longer using local disk space.
Some extras
If you're really in need of freeing up local disk space, you can also set up Symbolic Links in your home folder to have all of your documents, downloads, music, etc, run from the remote disk. Note that these types of customized home folders should only be used if you use a stationary Mac like a Mac mini or an iMac.
Final thoughts
With the sort of experience I'm having with maxing out my Mac mini's Thunderbolt 3 ports, I'd be lying if said I wasn't worried about Apple's upcoming Mac Pro that is rumored to be "modular". Will it be limited also to dongles or only Apple-approved expansion modules? Probably. Swapping in a 2 TB HDD will always be cheaper than buying an Apple certified 2TB expansion HDD with an Apple-branded modular enclosure. That being said, hopefully, there will still be a way to make your Mac computing flexible to fit your needs. Let us know your thoughts in the comments.

