How to create HDR photos with Aurora HDR [ebook excerpt]
Friend of iMore and contributor Jeff Carlson is an ace photographer and recently wrote a new book on MacPhun's new Aurora HDR software. Over the holidays, he's graciously allowing us to run an excerpt from the new ebook, Aurora HDR and Aurora HDR Professional: A Photoversity Guide ($8). In the book, Jeff offers tips for capturing the best source photos and then walks you through not just building HDR images, but using Aurora HDR's professional tools to creating holiday photos both hyper-realisitic and fanciful.
MacPhun's Aurora HDR application for the Mac makes it easy to create and edit HDR (High Dynamic Range) photos. You've certainly seem them: brilliant landscapes with ethereal glows, or architectural photos where you can see every detail. HDR is broader than that, though, allowing you to balance details in a scene without going overboard.
The secret to HDR is combining two or more exposures (which Aurora HDR calls brackets) to create one image with more tonal information than what a camera can capture. In the past, merging those photos and manipulating the results was almost a dark art. With assistance from photographer Trey Ratcliff, who popularized the technique, MacPhun has built a tool that can be used by any photographer.
Import Brackets
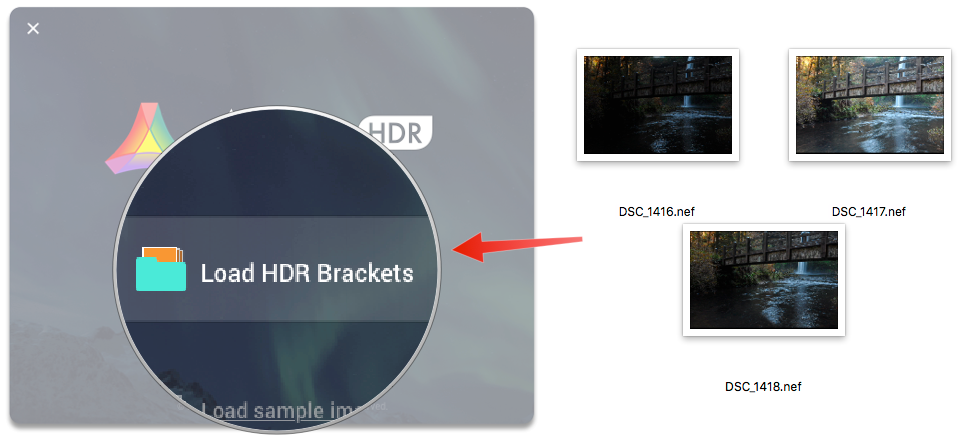
When you first open Aurora HDR, click the Load HDR Brackets button to select the images you want in a standard Open dialog, or drag the image files onto the window. You can also get your feet wet with three of Trey Ratcliff's images by clicking the Load Sample Images button.
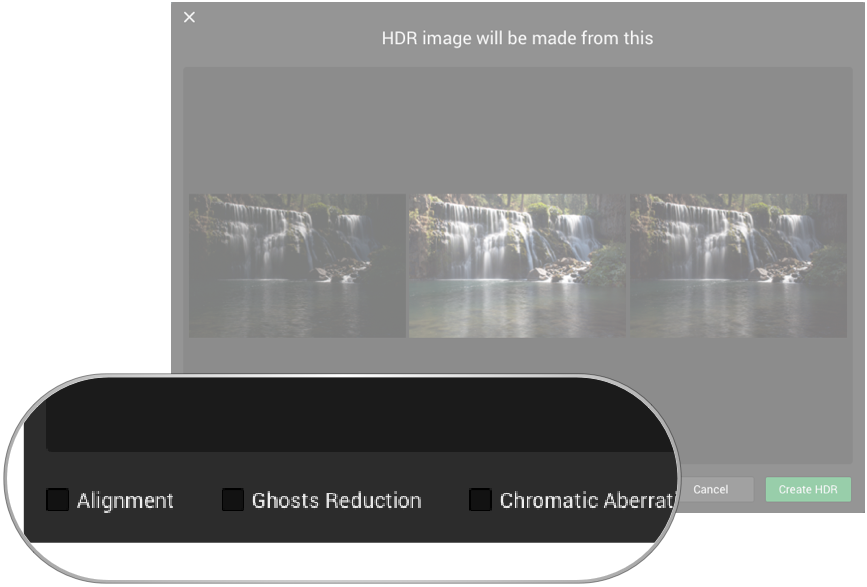
Aurora HDR then displays thumbnails of the images you chose. Before you click the Create HDR button, though, pay attention to the checkboxes at the bottom:
- Alignment: If you shot the brackets handheld, select this option to align the shots before merging them into an HDR photo.
- Ghosts Reduction: One catch with merging multiple images is that the world doesn't stand still for your images. If it's windy, even just a little, leaves or grass can change position between exposures, which appear as translucent "ghosts." Select this option to reduce the effect.
- Chromatic Aberration Reduction: One common artifact when creating HDR images is chromatic aberration, which manifests itself as halos (often purple-fringed) around edges. This Pro-only option corrects for it. (Note: These features can be applied only when you load brackets; if you want the application to reduce chromatic aberration later, for instance, you need to start over.)
After a short wait while Aurora HDR processes the photos, the HDR image appears, along with the tools on the right and presets along the bottom of the screen.
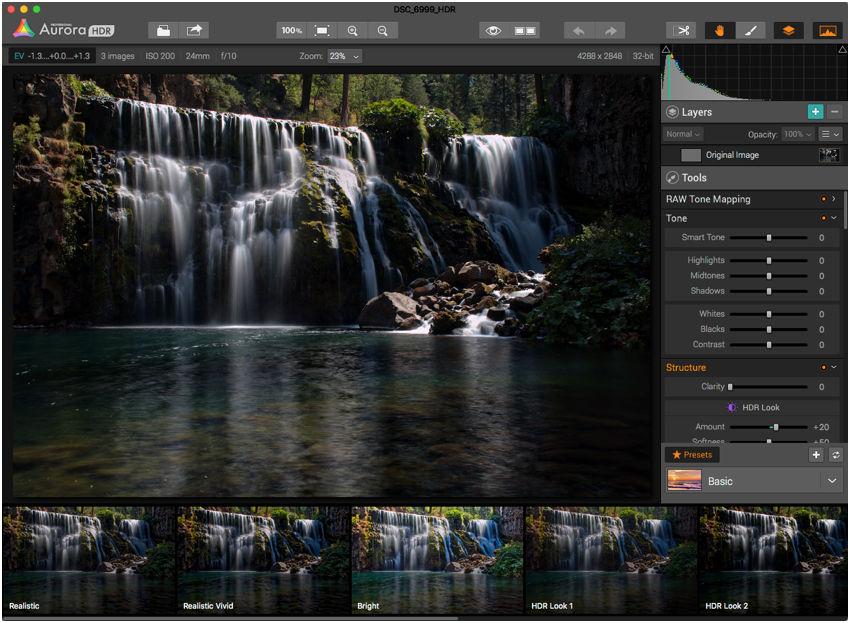
There you go! In most cases, the result is pretty good without any further editing.
Master your iPhone in minutes
iMore offers spot-on advice and guidance from our team of experts, with decades of Apple device experience to lean on. Learn more with iMore!
Fun with Presets
The easiest way to make great HDR images is to take advantage of the dozens of presets that have been fine-tuned to deliver treatments ranging from realistic enhancements to almost painterly abstractions. The Aurora HDR Professional version includes an entire category of presets created by Trey Ratcliff himself.
However, don't think of presets as just sets of canned effects: More often they're great jumping-off points for your own additional editing.
A row of presets runs along the bottom of the Aurora HDR window, showing previews of the photo with those settings. Click one to apply the look. Clicking the Compare button in the toolbar gives you a split before-and-after preview.
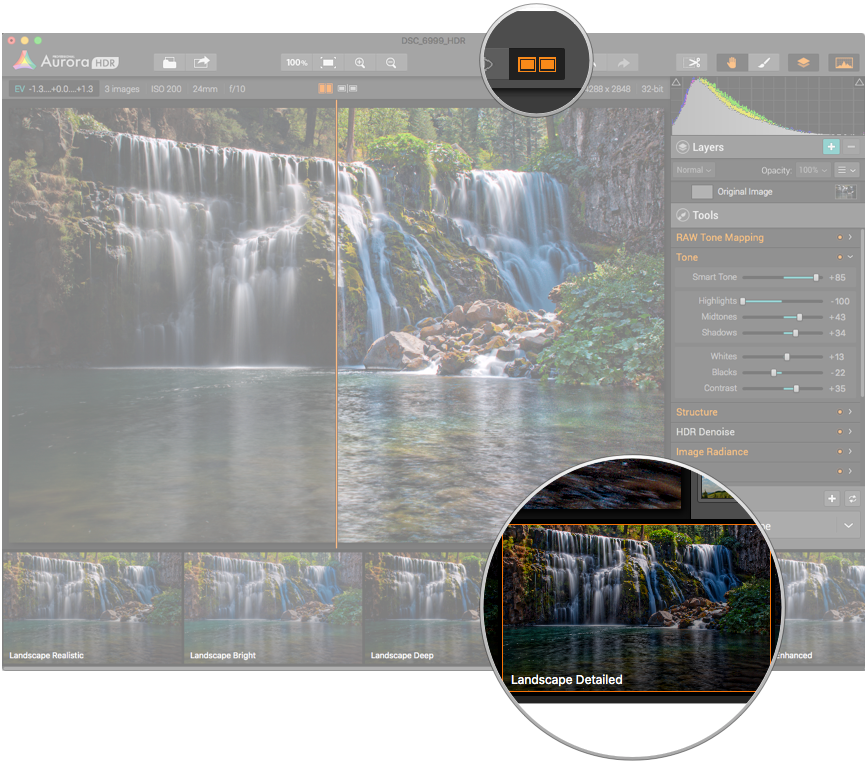
Tip: Press the Tab key, or choose View > Toggle Presets, to temporarily hide the presets and view more of your image.
In addition to the presets that come with the application, you can save your own based on settings you make, and also share them with friends who also own Aurora HDR.
Layers and Masks
Aurora HDR includes a huge number of settings for adjusting tone, color, structure, and more. These editing capabilities elevate it above being a simple conversion utility for merging multiple exposures—but the layer and mask features kick it into orbit.
In nearly every photo I capture, some element stands out that I want to devote more attention to. A reflection could be a little brighter. Noise in the sky would be better toned down. Or, specifically in the case of creating HDR images, I may want to combine the effects of two presets in one photo.
Layers and masks let me do that. If you've used Adobe Photoshop (or Photoshop Elements) or other image-editing software that supports layers, you'll feel right at home. If you're coming from an iPhoto/Photos for OS X background, prepare to be amazed and inspired.
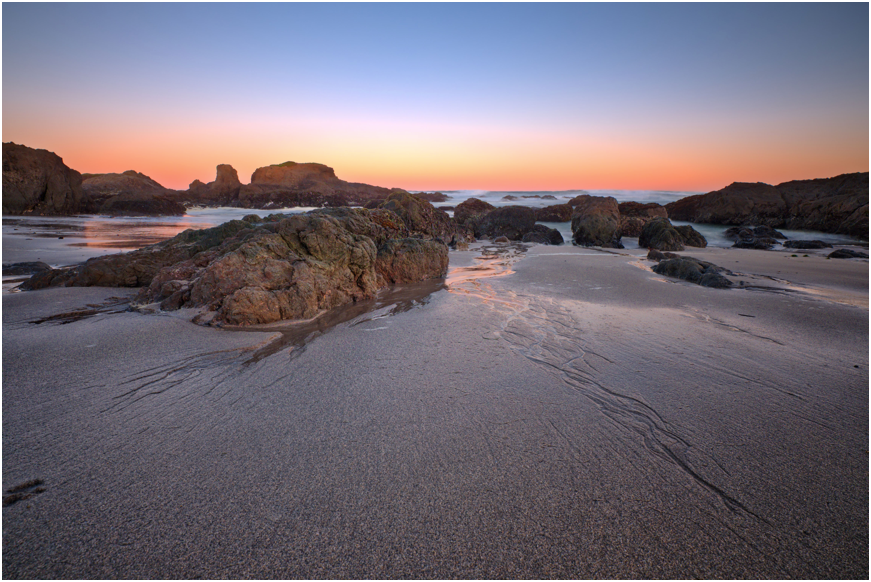
In beach sunrise photo below, I want to draw attention to the design carved into the sand by the water rivulets, and also brighten the foreground. Applying the Basic Bright preset gives me detail and more illumination, but at the cost of making the sky too noisy. So instead, I'll apply the preset on a new layer and make sure it applies to just the beach by making a mask.
- Click the plus (+) button in the Layers panel to create a new layer, and then give it a unique name. The image itself isn't copied; instead, think of it as a container for settings (or what Photoshop calls an adjustment layer).
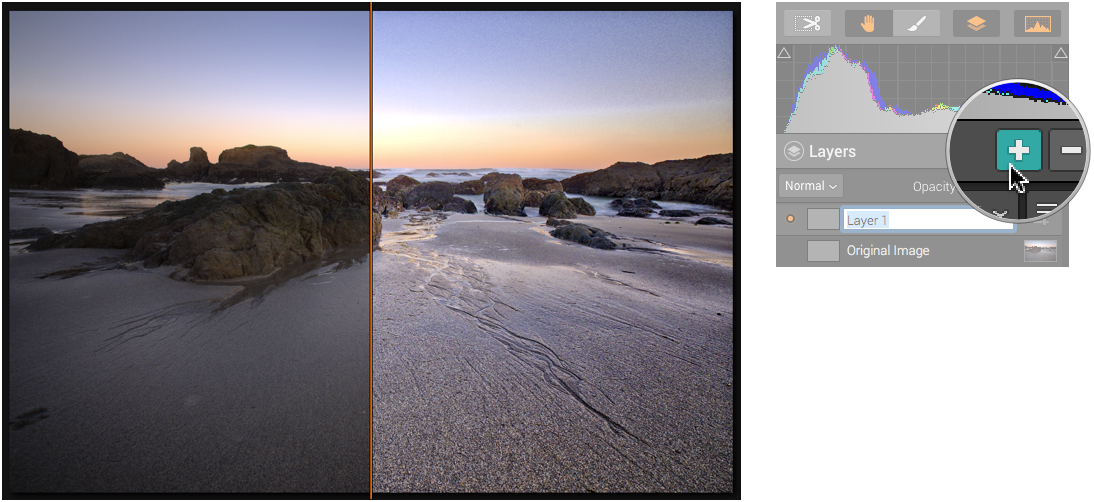
- With the layer still selected, click a preset to apply it. The result is initially the same as when we chose the preset for the Original Image layer.
- From the toolbar, select the Brush tool, and change its characteristics using the Brush drop-down menu. The brush's opacity is set to 50%, but I recommend increasing that to 100%, at least at first, so you don't end up going over the same areas multiple times.
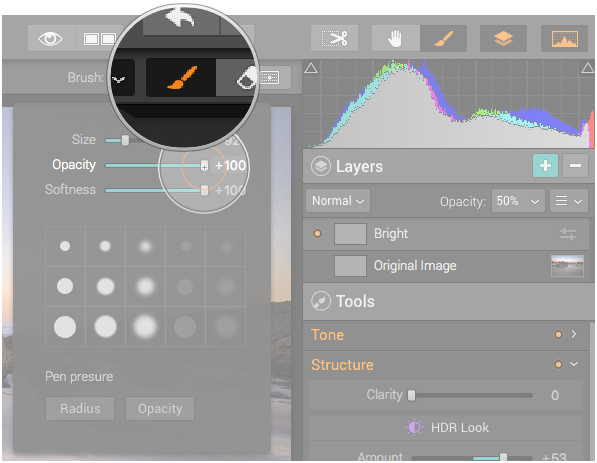
- Brush the area that reveals the effect, in this case the beach and rocks, but not the sky. Notice that the layer thumbnail reveals a rough approximation of the masked area.
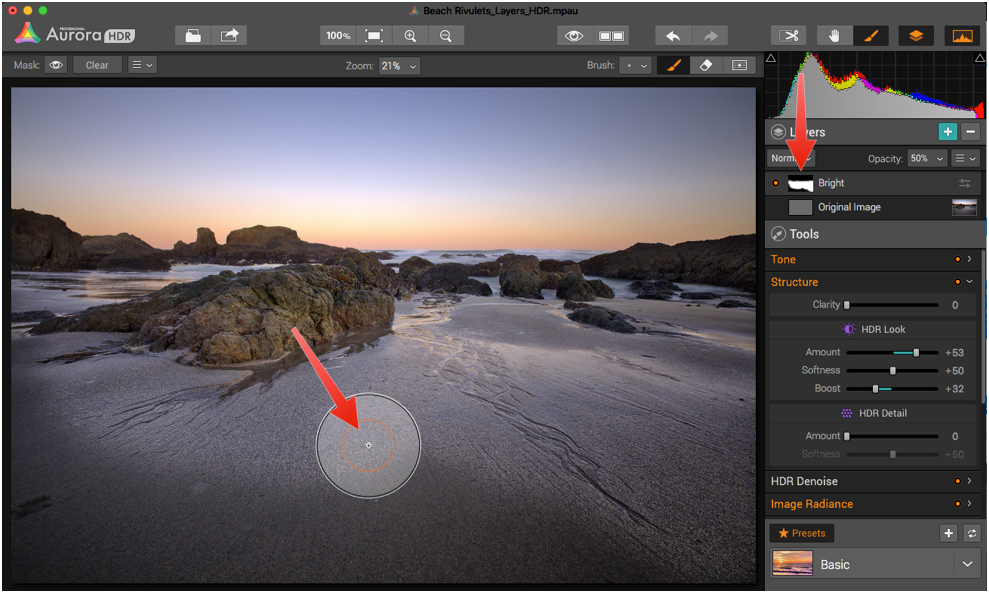
As you draw, press the bracket keys ( [ and ] ) to reduce or increase the size of the brush instead of returning to the drop-down menu. If you need to change other aspects, Control-click to view the menu wherever the mouse pointer is.
To erase brush strokes, click the Eraser button next to the Brush button just above the image. (Actually, clicking the Brush button toggles to the Eraser, too.)
Using these techniques, you can selectively edit areas, apply new effects, and otherwise make the photo more dynamic than what you started with. In the final image, I've also made the sky more vibrant and removed digital noise using the HDR Denoise tool.
Jeff Carlson's Aurora HDR and Aurora HDR Professional: A Photoversity Guide costs $8 (normally $15) and is available as a downloadable 53-page, full-color PDF. MacPhun's Aurora HDR costs $39.99; a free demo version is also available. Aurora HDR Professional, which includes pro features such as native RAW support and the Trey Ratcliff presets, costs $99.
Author and photographer Jeff Carlson (@jeffcarlson, jeff@necoffee.com) is the author of _Photos for OS X and iOS_ (Peachpit Press) and _Take Control of Your Digital Photos on the Mac_ (Take Control Books), among many other books. He’s also a columnist for the Seattle Times, a contributing editor at TidBITS (tidbits.com), and writes for publications such as Macworld and Lynda.com.

