How to Customize Finder Windows on your Mac
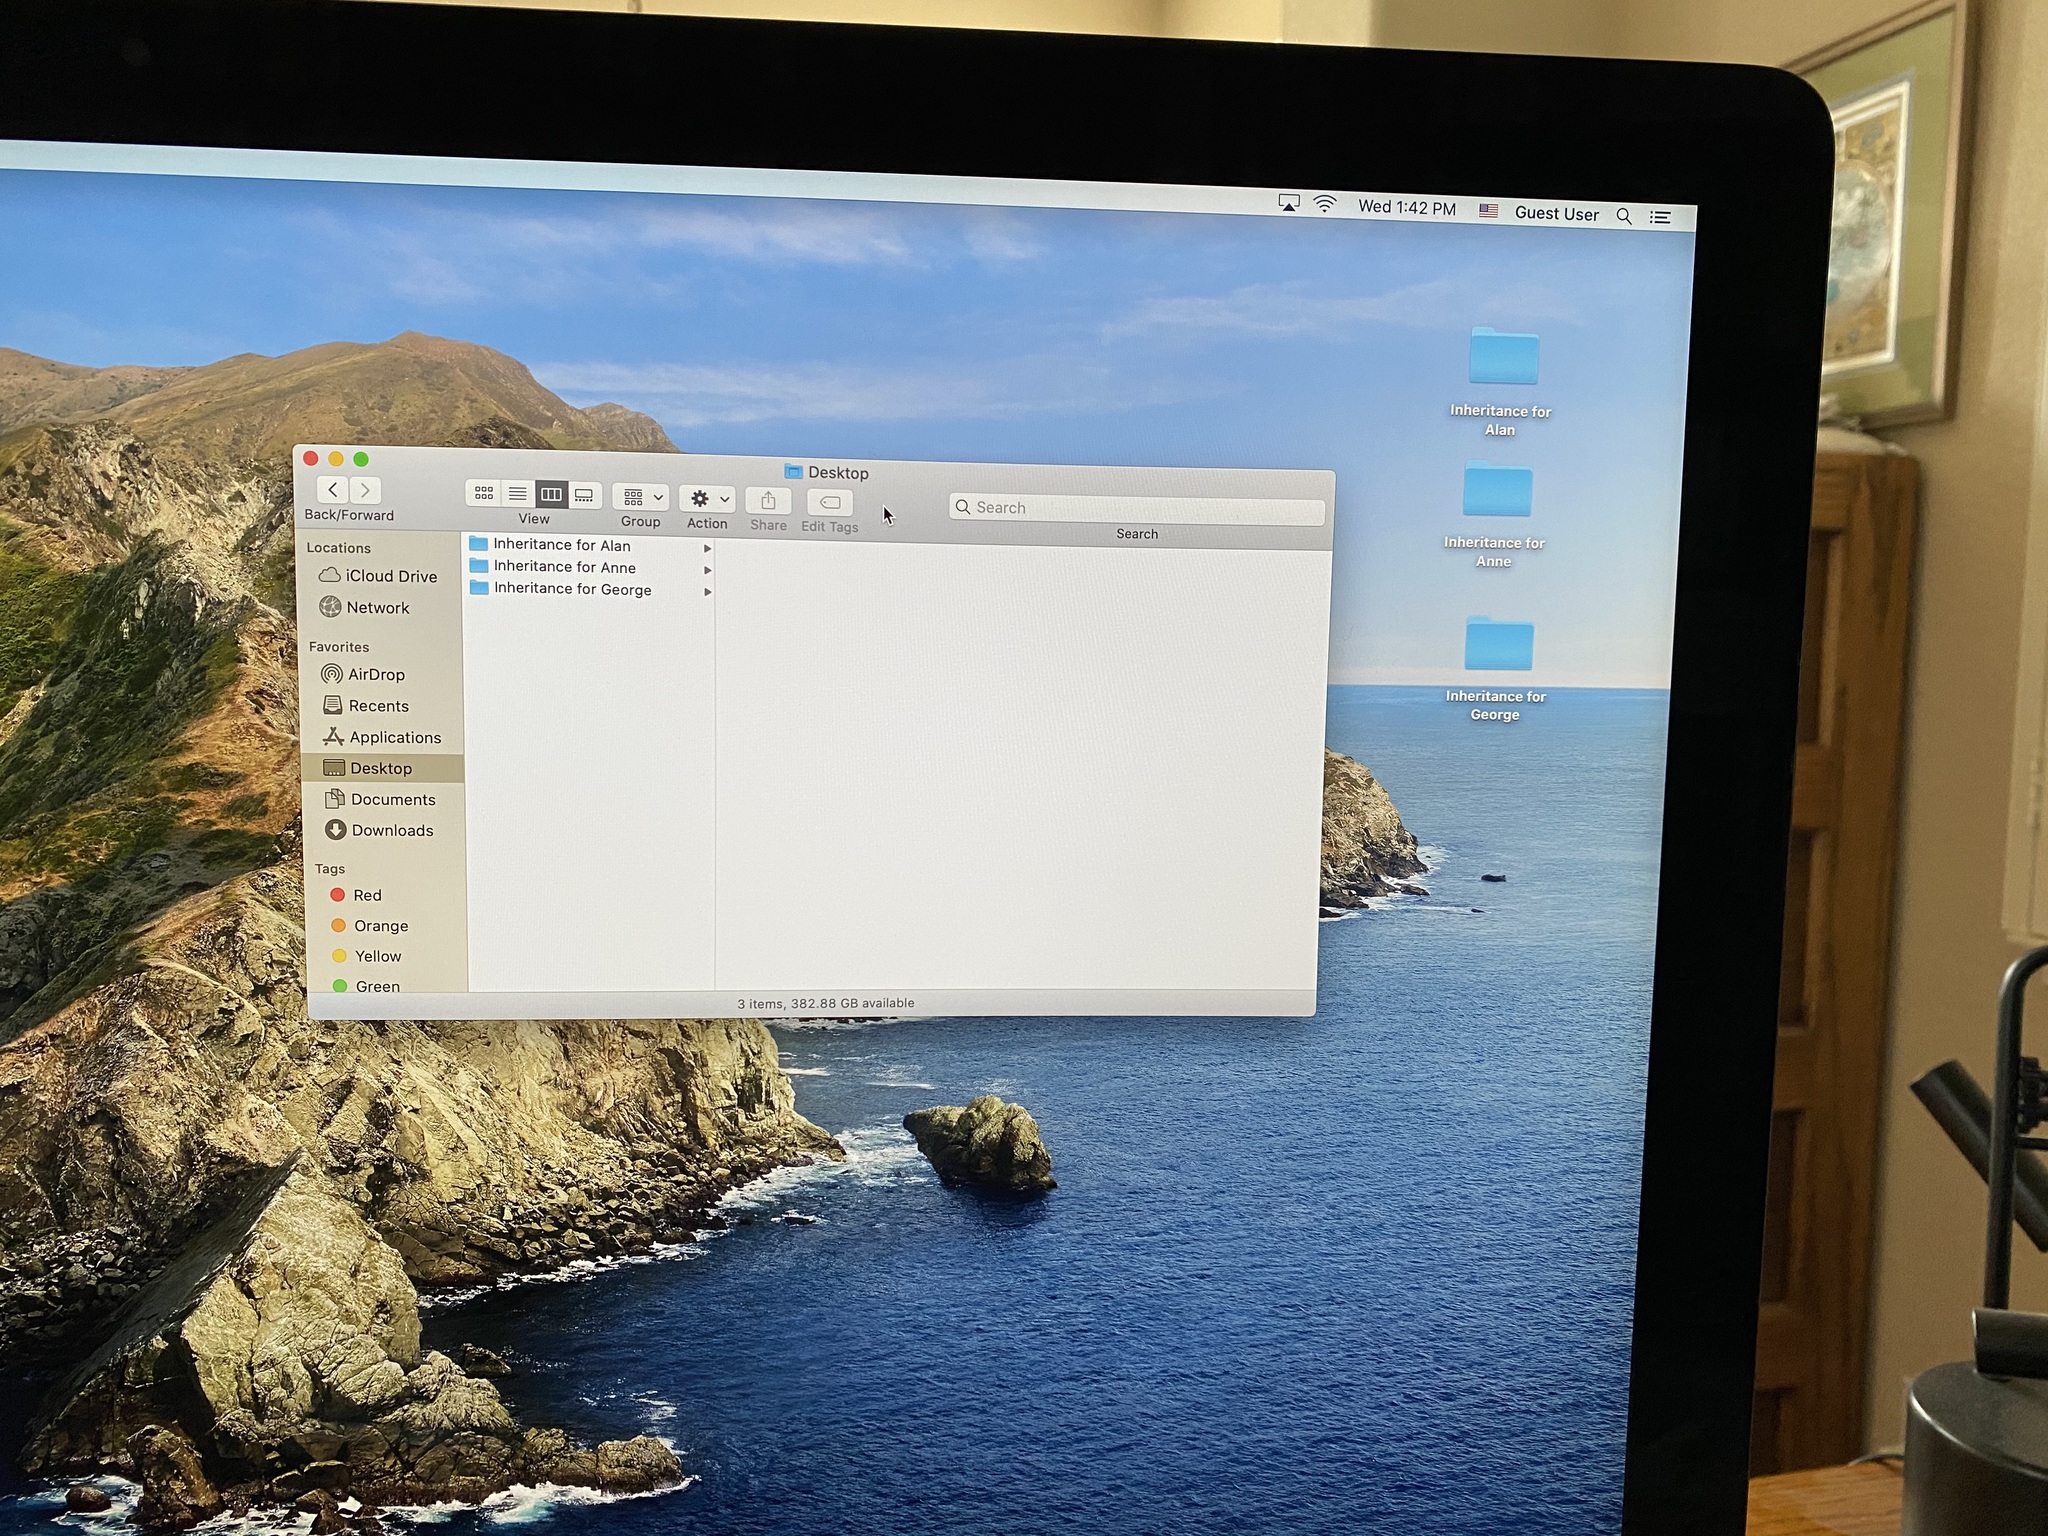
If you've already checked out iMore's overview of how to use the Finder on your Mac and you'd like to go a little deeper, then you've come to the right place.
The Finder is your view into the contents of your Mac, iCloud Drive, and other storage devices. You can customize this view in a number of different ways, using menu commands and dragging items around in a Finder window.
When you create a new account on a Mac, a Finder window has a default look. But you can change the way a window looks to suit your needs...or your fancy.
The Toolbar
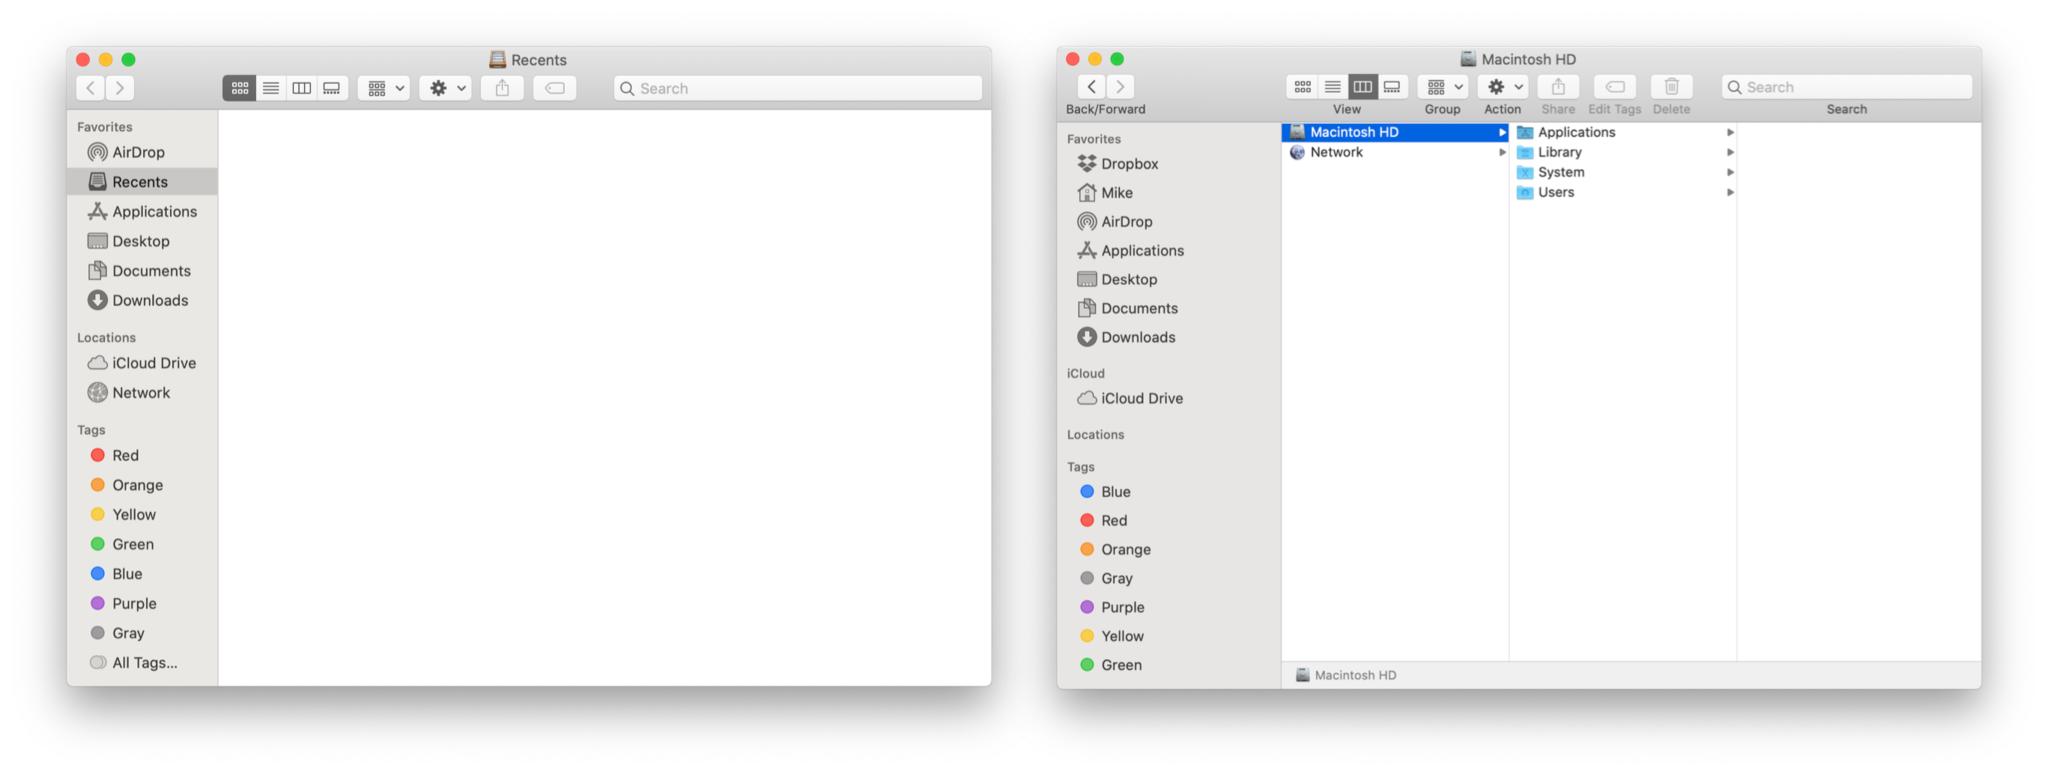
Confused about that row of buttons below the Finder window's name? It's called the Toolbar and it contains buttons for common commands when working with the contents of Finder windows. If you don't know what those buttons do, you can hover the pointer on top of them for a moment and a tool tip will appear. Better yet, you can add labels.
- From the View menu choose Customize Toolbar....
- In the sheet that appears, from the Show pop-up menu, choose Icon and Text.
- Click Done.
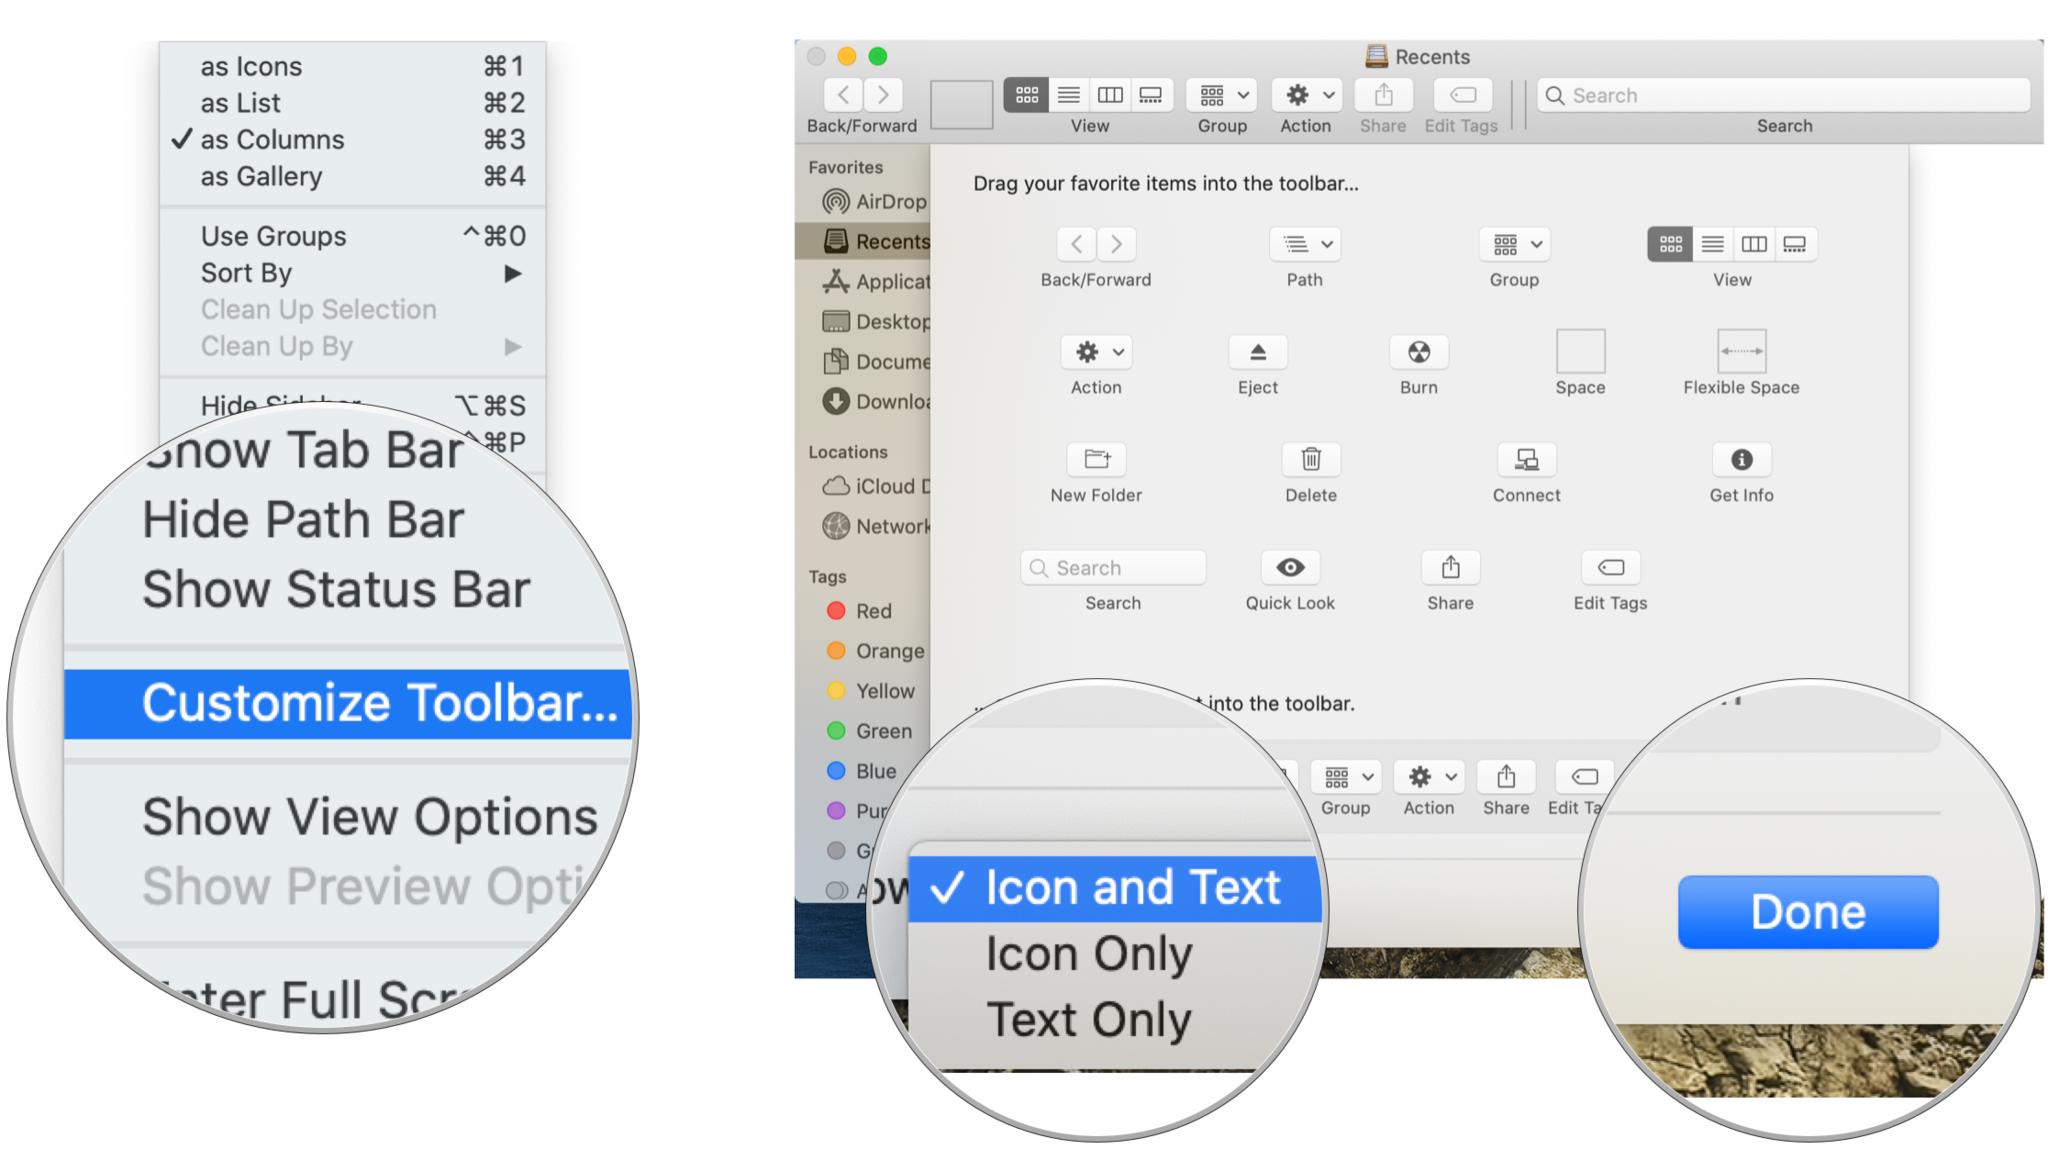
You can also add, delete, or rearrange individual Toolbar buttons by dragging them into, out of, or within the Toolbar.
Show and hide the Toolbar
You can hide the Toolbar on any Finder window. If you do so, the Sidebar (which we will get to in the next section) will also be hidden. The Toolbar and Sidebar will still be visible on other open Finder windows.
- From the View menu, choose Hide Toolbar.
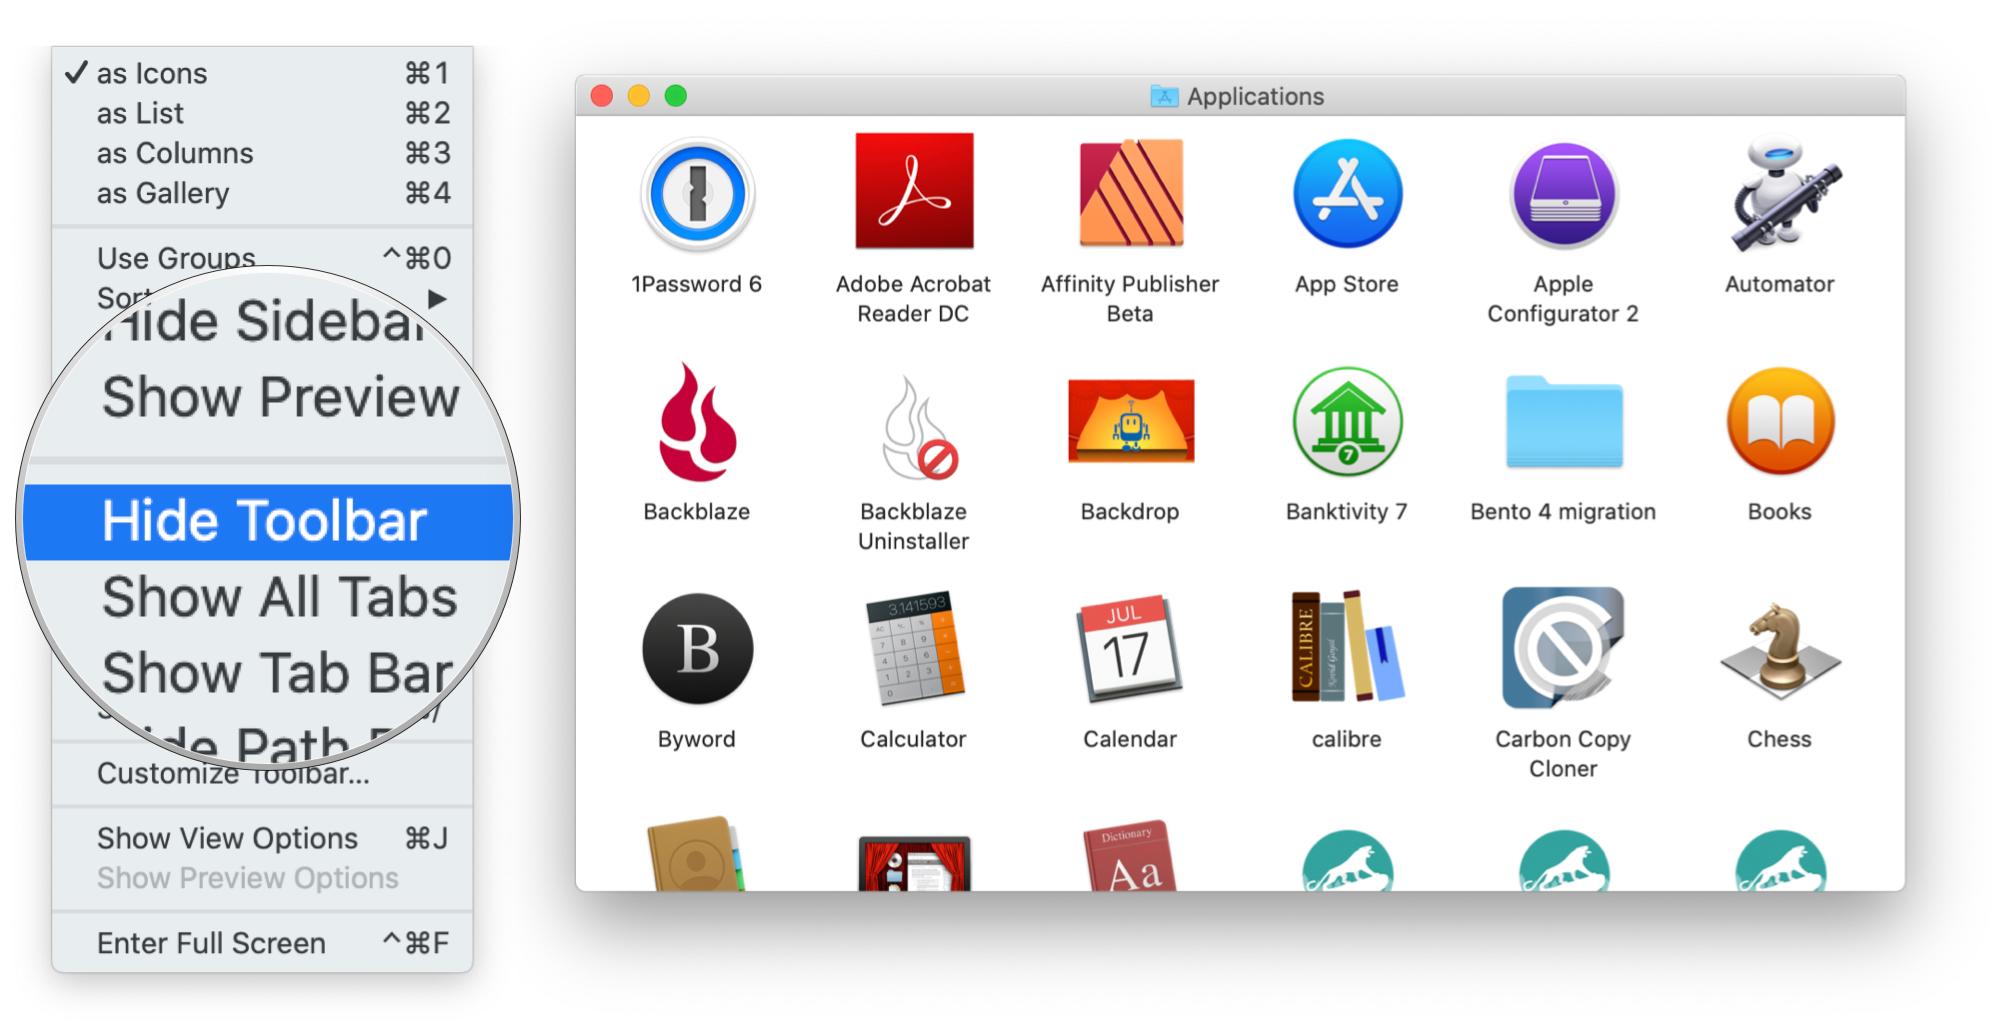
If the Toolbar is hidden, the Hide Toolbar command changes to Show Toolbar. Showing the Toolbar for a Finder window will also show its Sidebar.
Master your iPhone in minutes
iMore offers spot-on advice and guidance from our team of experts, with decades of Apple device experience to lean on. Learn more with iMore!
The Sidebar
The far left side of the Finder window contains a column with a light gray background called the Sidebar. By default it shows some Favorites (both tasks and folders on your Mac), Locations (such as iCloud Drive or devices on your network) and Tags that you can apply to folders and files.
The Sidebar and some of its categories (Favorites, Tags, etc.) can be customized.
iMore's overview article covers how to display certain items in the sidebar, but you can do even more.
Show and hide a Sidebar category
- Place the pointer on the name of a category; to its right the word Hide will appear.
- Click Hide.
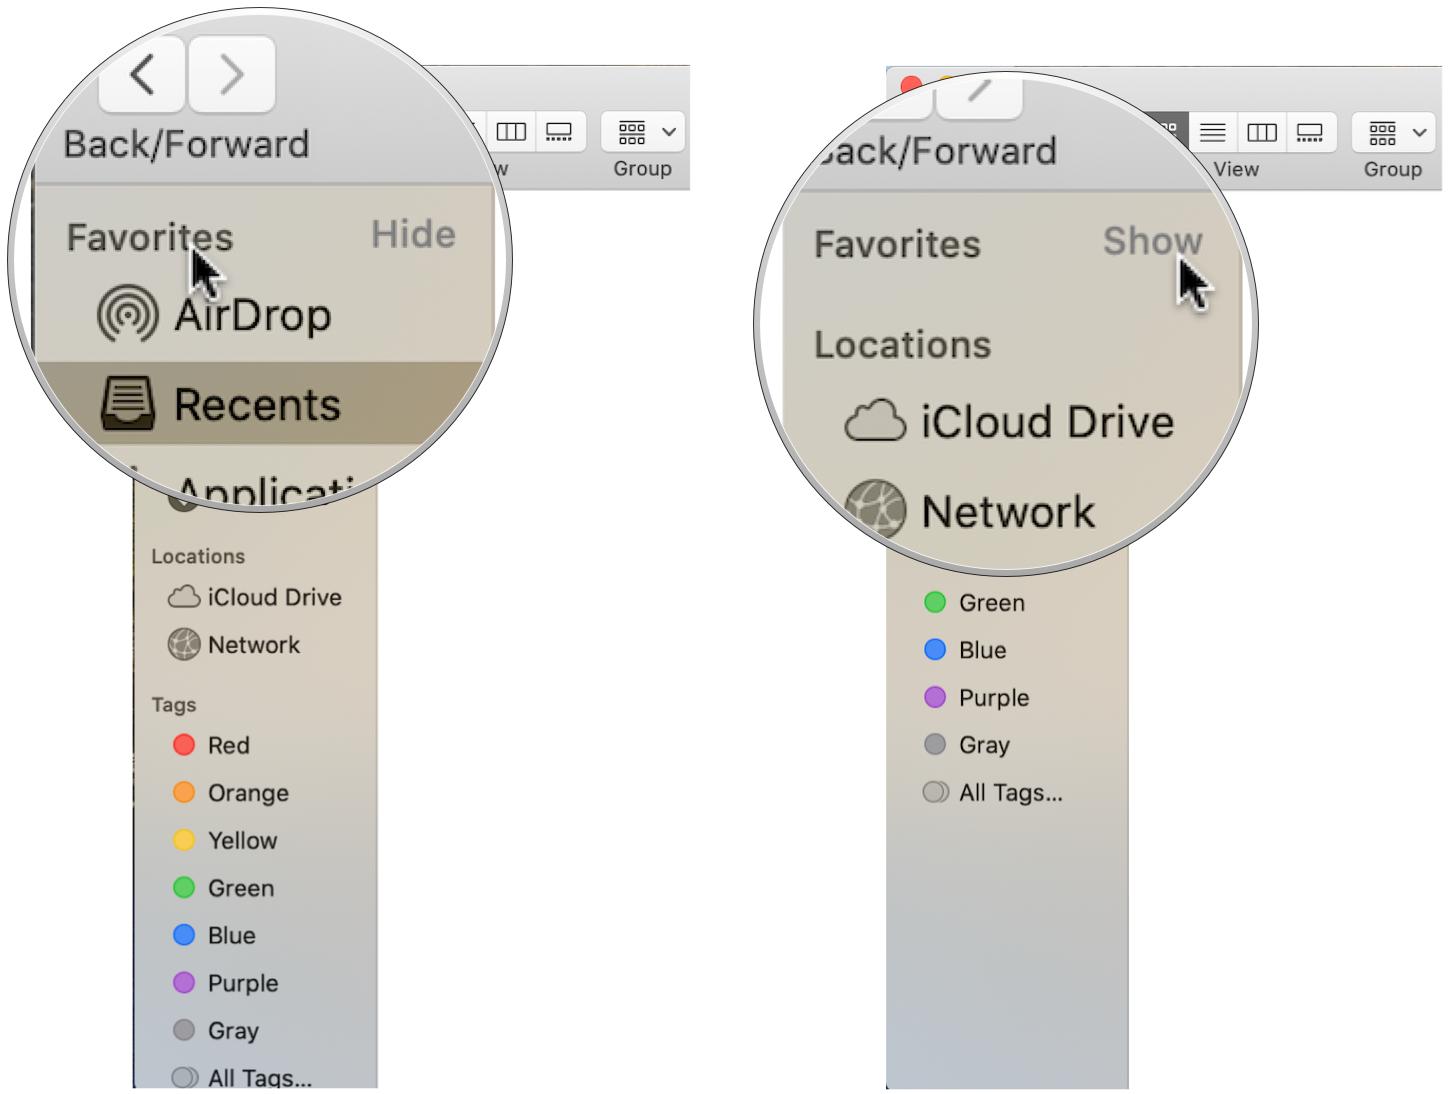
If the contents of a category are hidden, placing the pointer on the category name will display the word "Show". Click Show to reveal the contents of the category.
Rearrange categories and their contents
- Place the pointer on the name of a category, and drag it to a new location in the Sidebar.
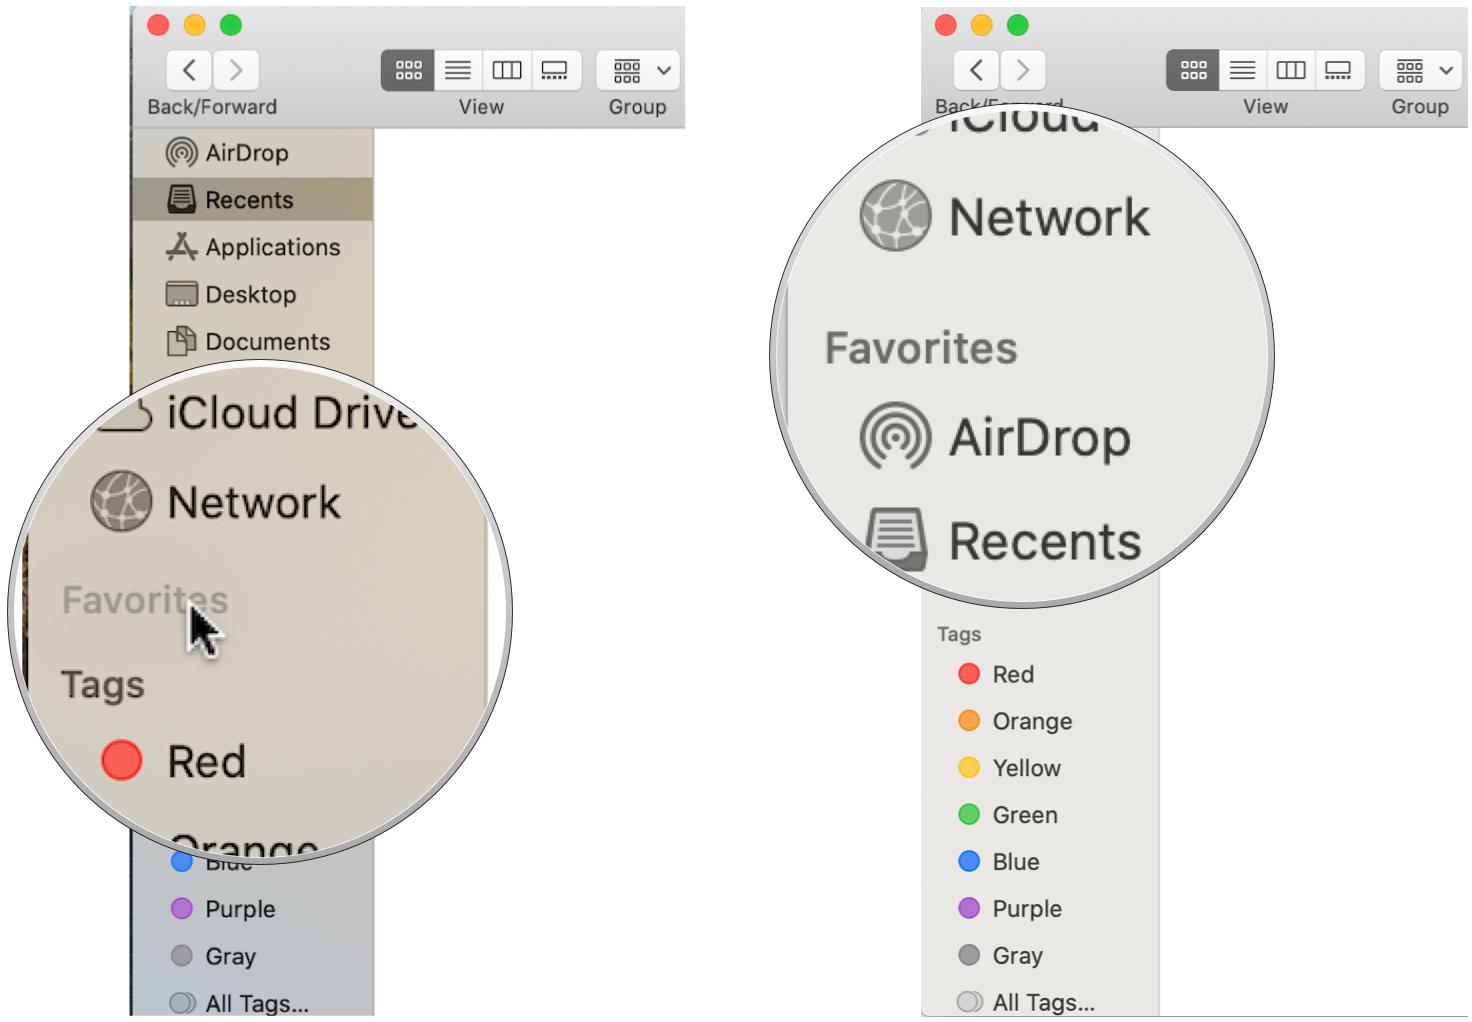
- Place the pointer on a category item in Favorites or Tags and drag it to a new location within the category.
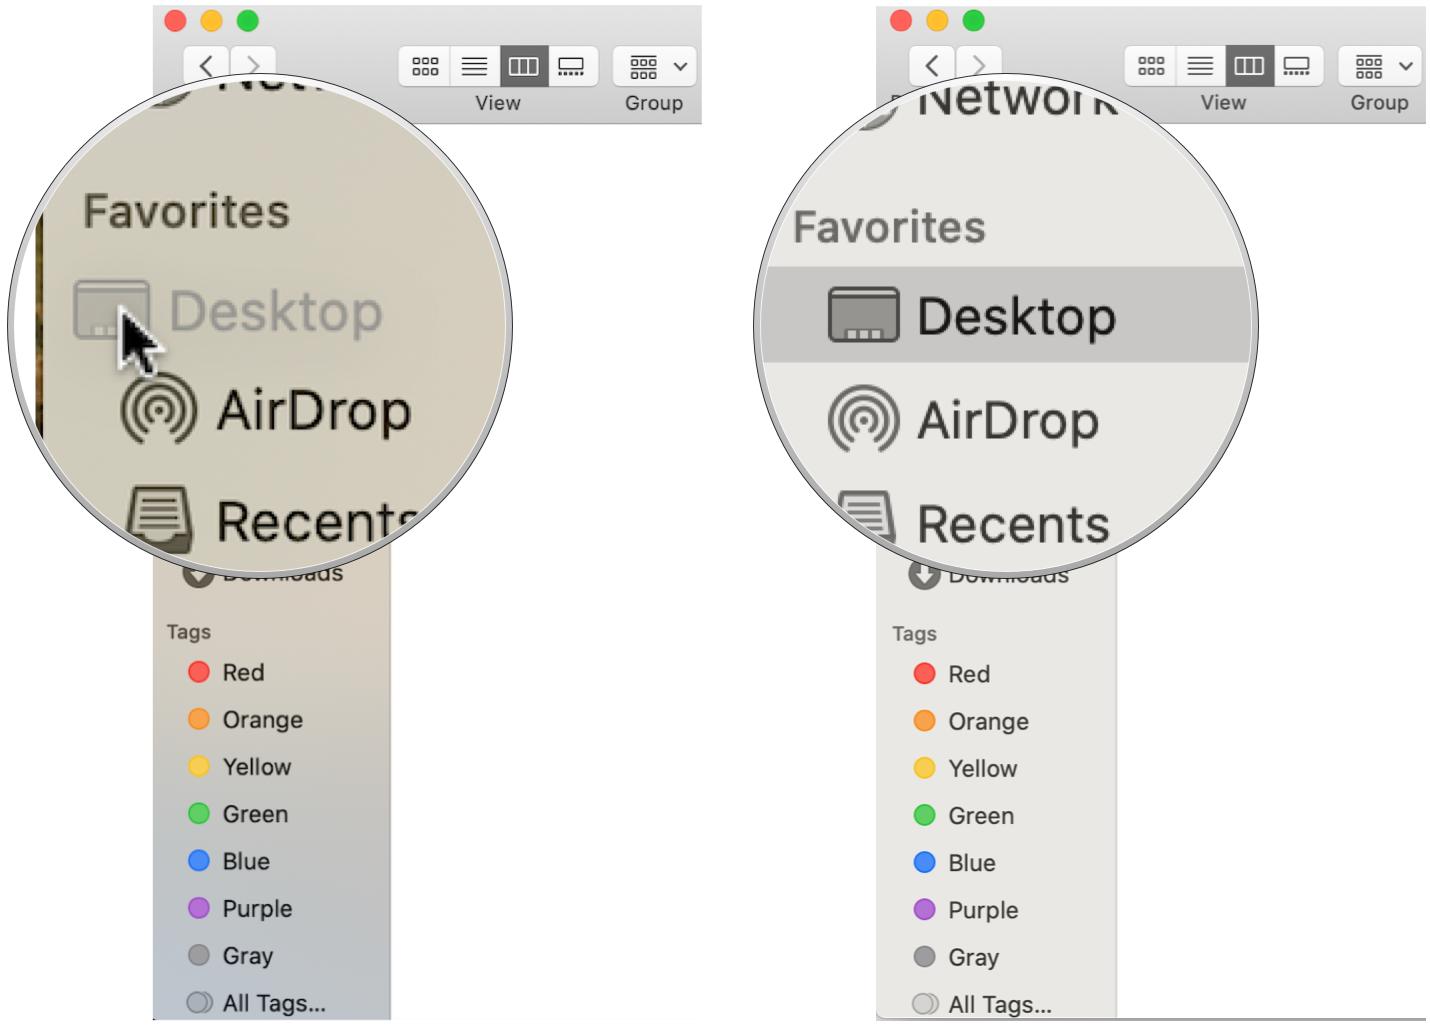
Add and delete category items
In addition to the categories that you can display in Finder Preferences, you can drag individual folders into the Sidebar for quick access.
- To add a folder to the Sidebar, drag a folder to the Favorites category in the Sidebar.
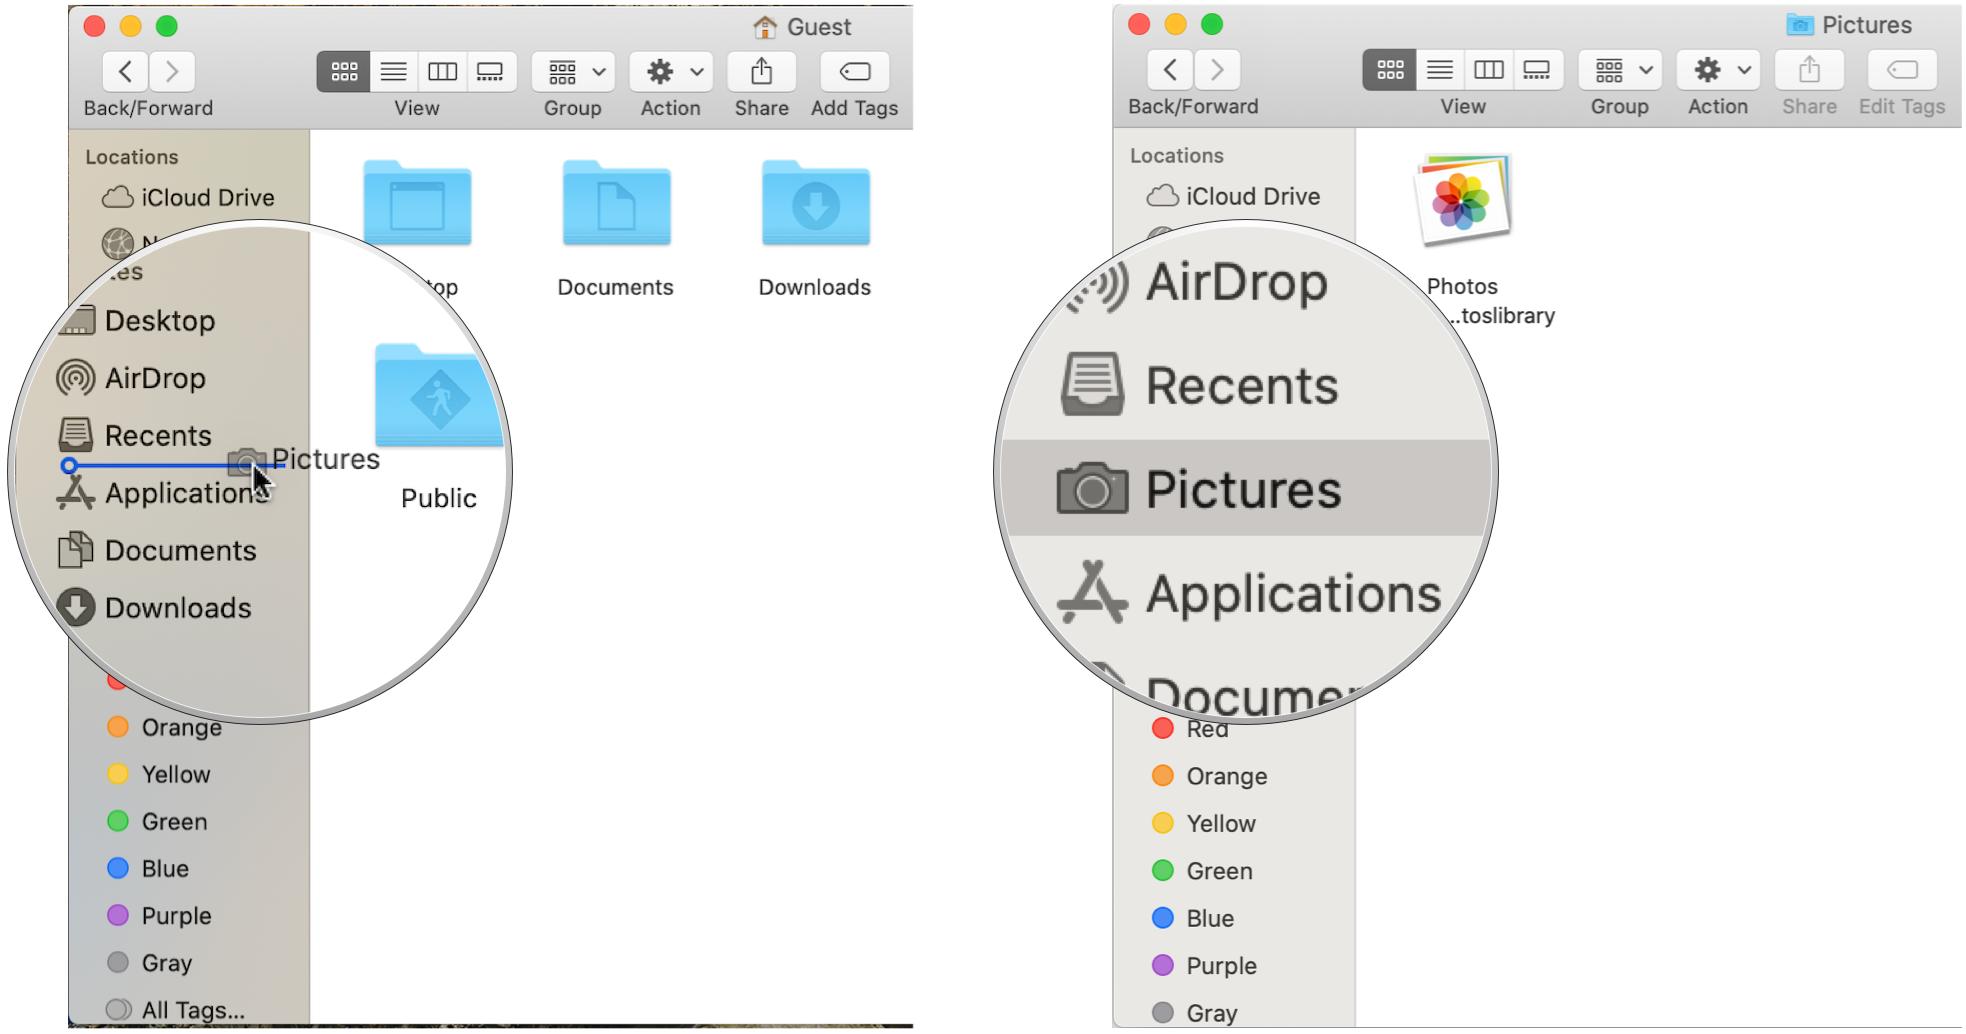
You can also drag folders from your iCloud Drive into the iCloud category.
- To remove a folder from Favorites, drag it out of the Sidebar.
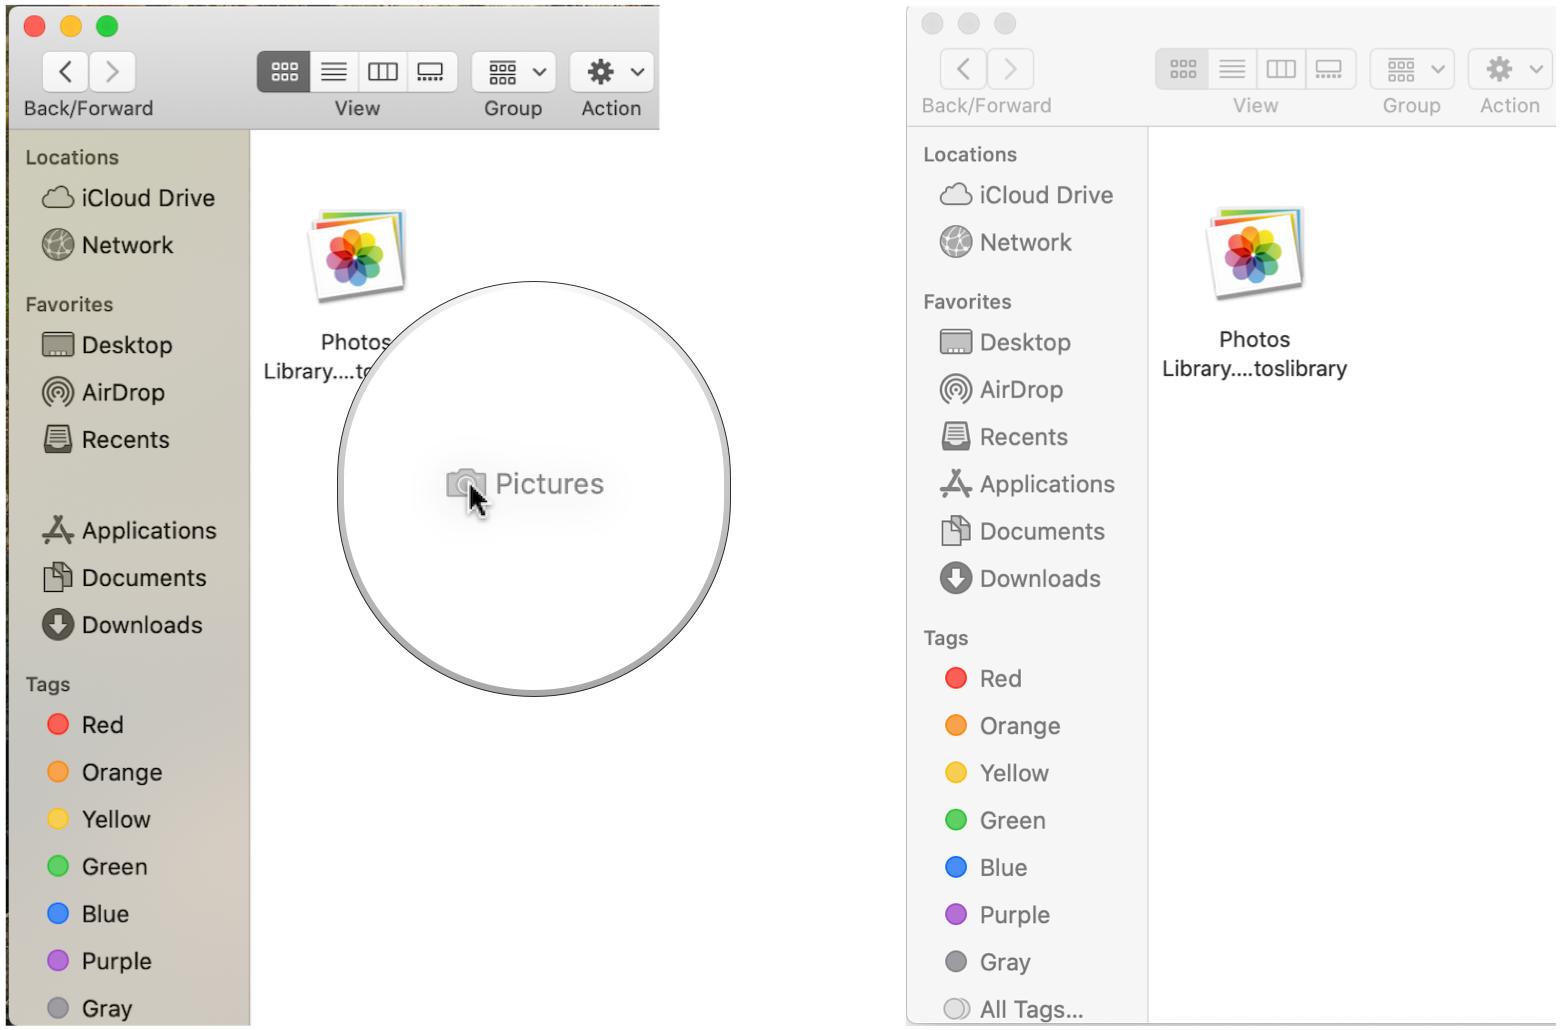
Dragging a folder into the sidebar or removing it from the sidebar does not affect its actual location on your Mac. A folder dragged into the Sidebar is merely an alias (or pointer) to the original folder. If you delete the original folder (and empty the trash), it'll automatically be deleted from the Sidebar.
Change the width of the Sidebar
Got an item in the Sidebar with a truncated name because the Sidebar is too narrow? Change the width of the Sidebar.
- Place the pointer on the vertical line dividing the Sidebar from the contents of the window and when the pointer turns into a double-headed arrow, drag to the right.
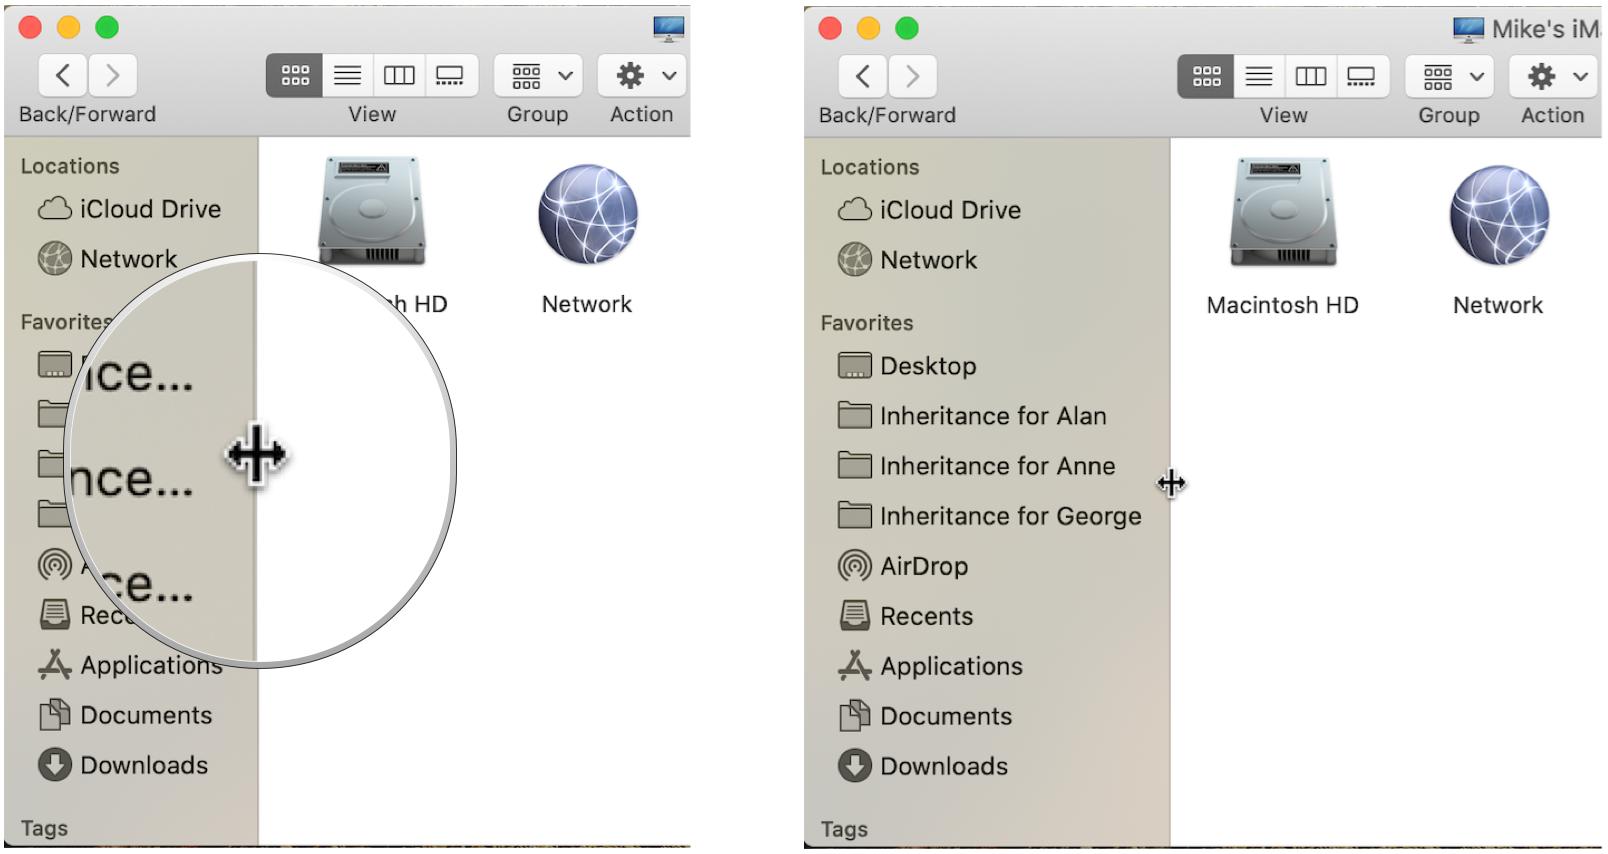
Needless to say, you can make the Sidebar narrower by dragging to the left.
Show and hide the Sidebar
Lastly, if you want to hide the Sidebar, that's easy enough to do. Like hiding the Toolbar, hiding the Sidebar on one window, doesn't hide it on any other open Finder window.
- From the View menu, choose Hide Sidebar.
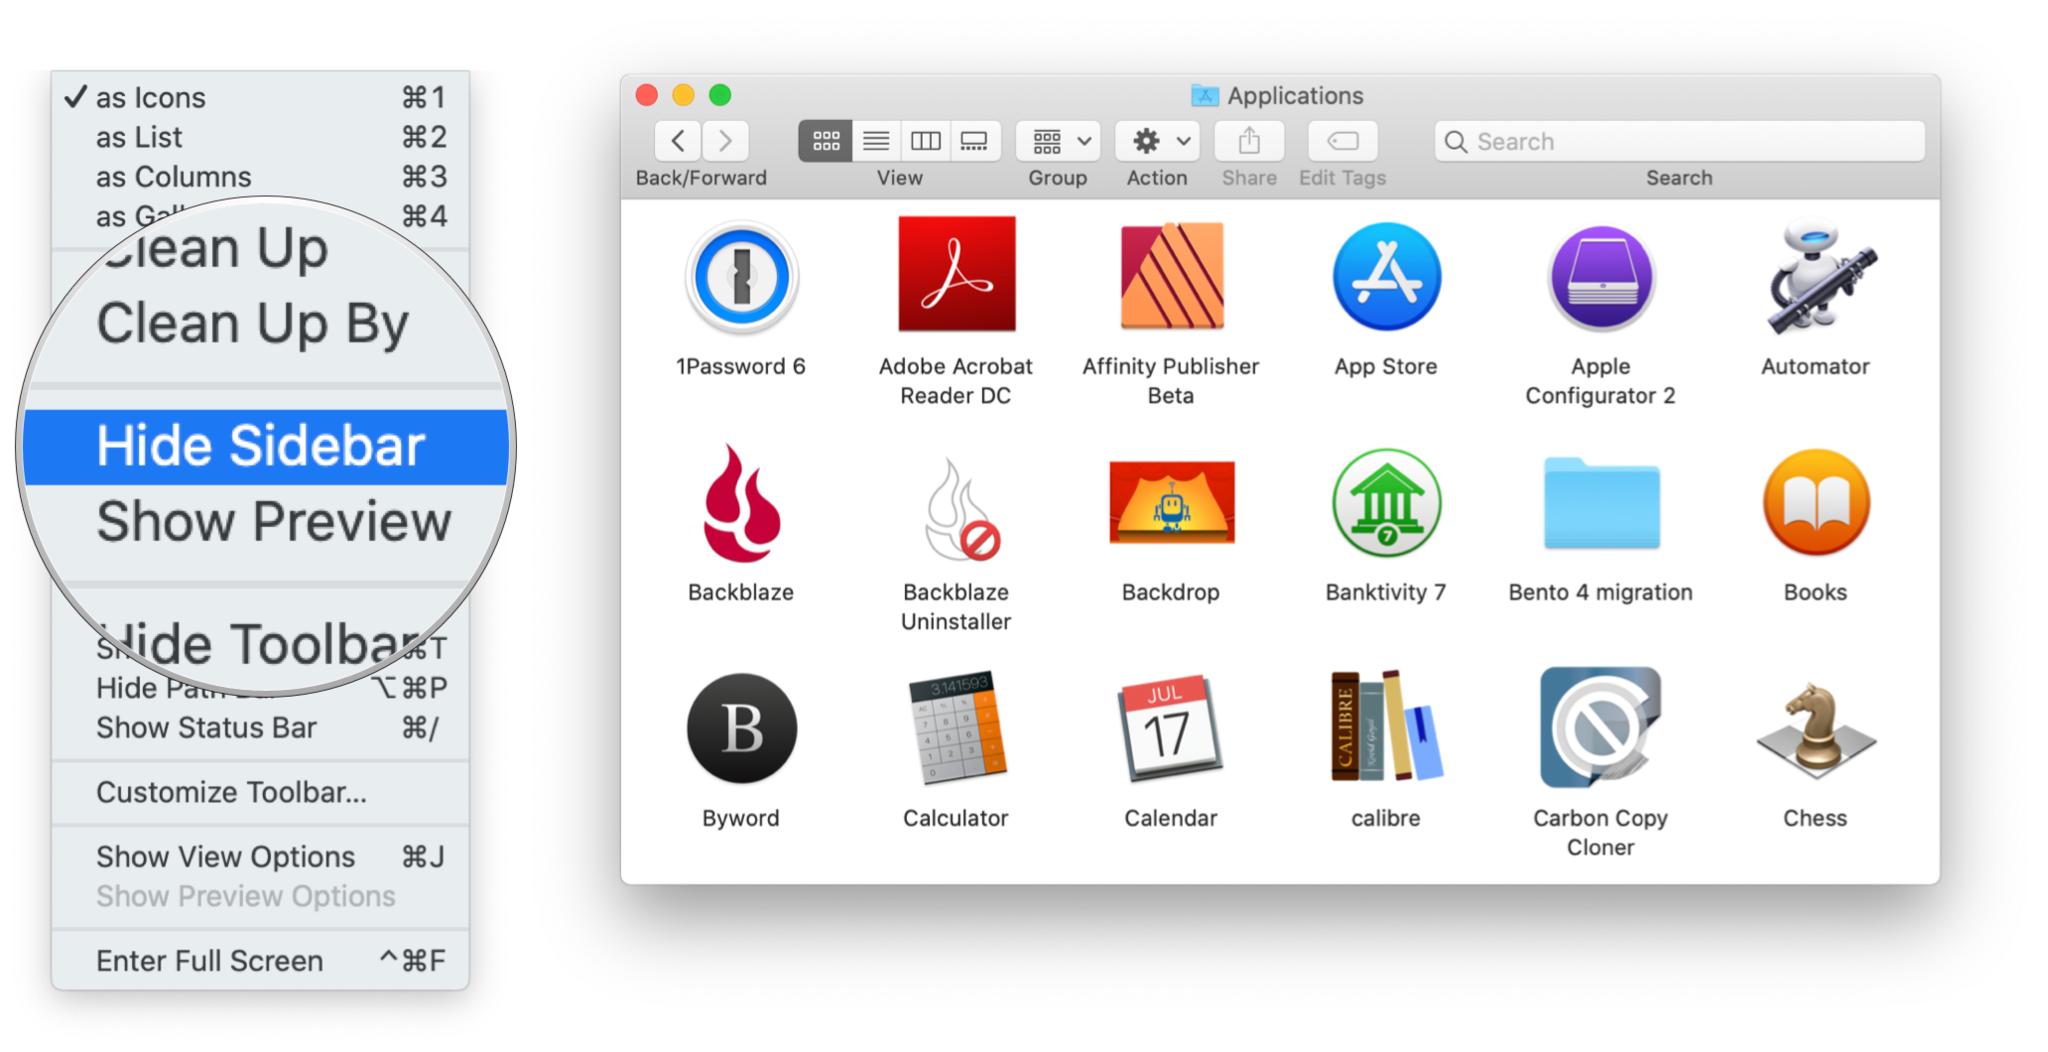
If the Sidebar is hidden and the Toolbar is visible, then the Hide Sidebar command changes to Show Sidebar.
Show the Path Bar
It's easy to get lost in the Finder, particularly if you're trying to navigate your way through a series of nested folders. Column View (which we'll discuss later) is one way to trace your path through your Mac's storage, but you can also view a file or folder's location using the Path Bar.
- From the View menu, choose Show Path Bar.
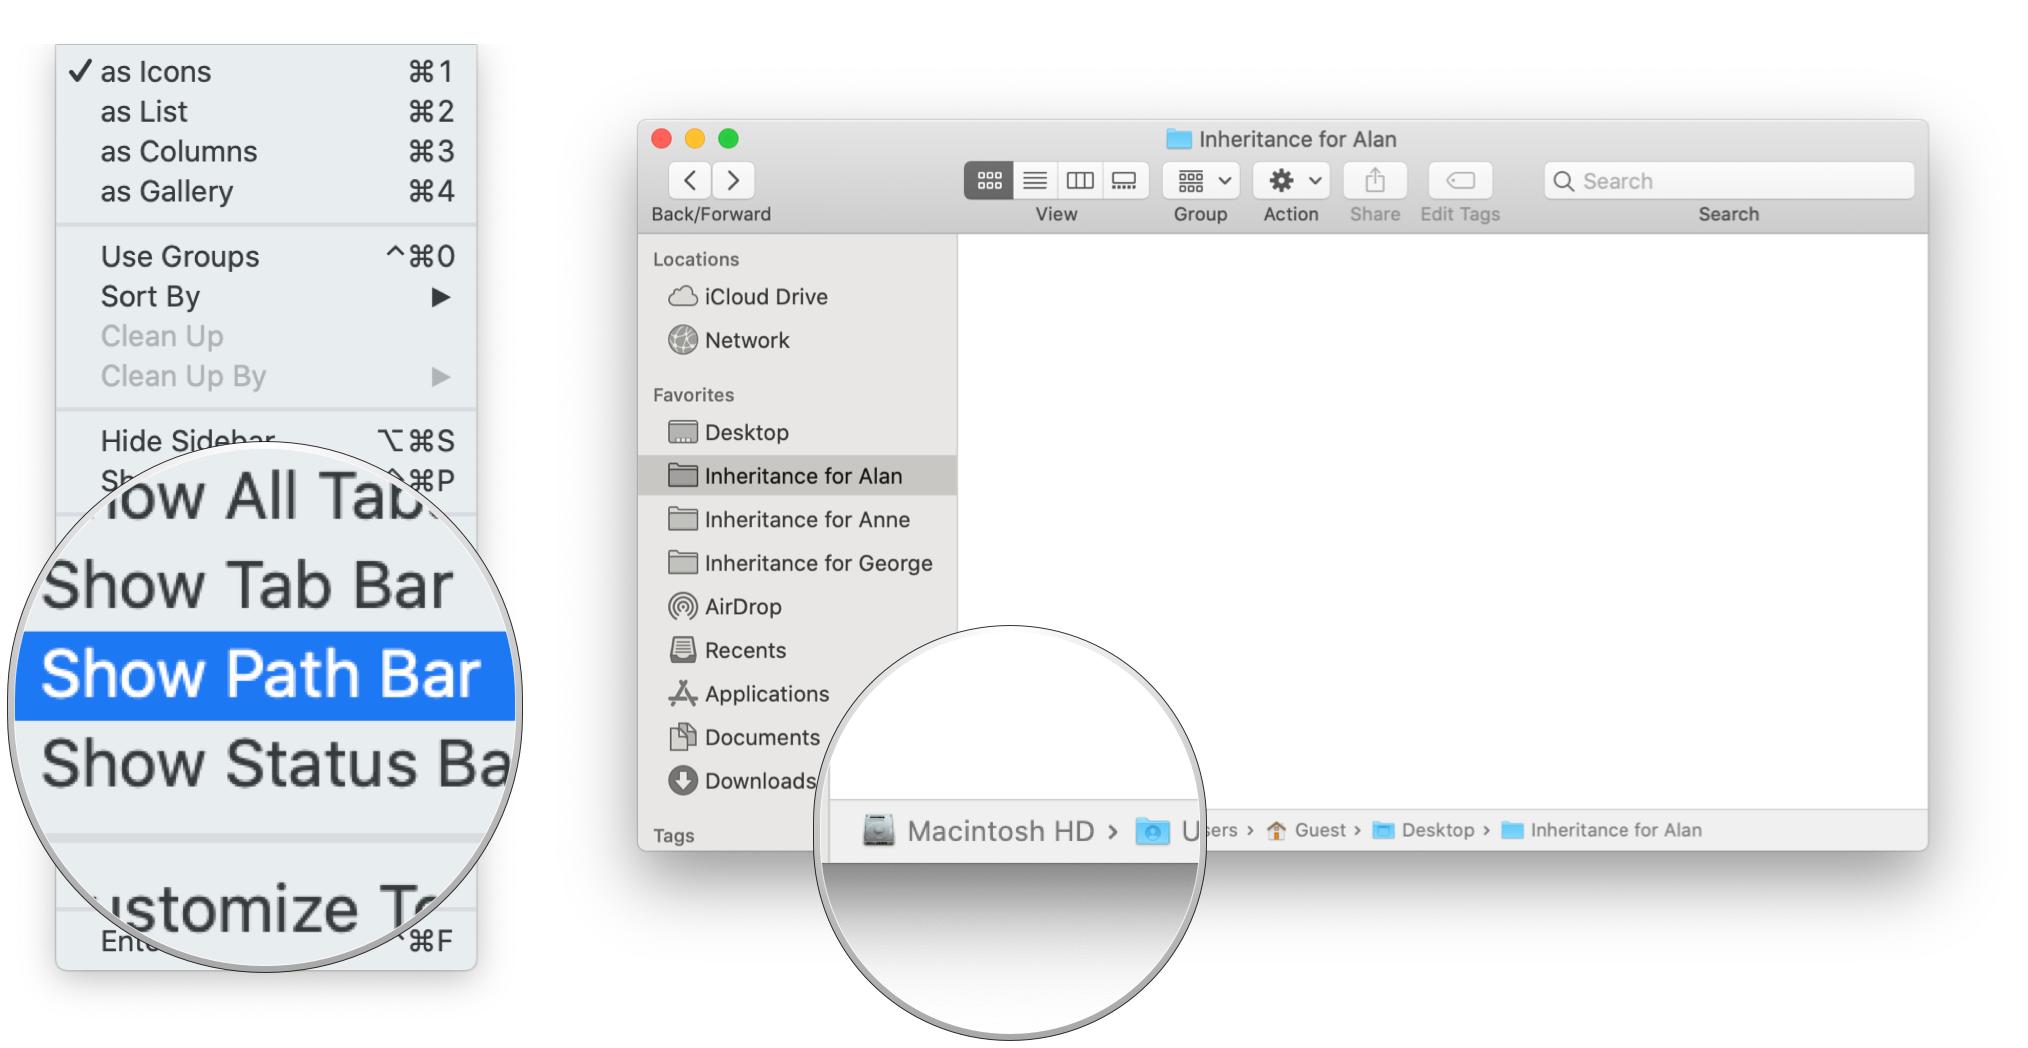
The bar at the bottom of the window shows the location of the item you've selected in the Finder window. Double-clicking a file in the Path Bar will open it; double-clicking a folder in the Path Bar will display the contents of that folder.
Unlike showing and hiding the Sidebar or Toolbar, showing or hiding the Path Bar applies to all Finder windows.
Show the Status Bar
If you're a longtime Mac user, you may remember the days of the Status Bar, which would tell you at a glance how many items were in a selected folder along with the amount of free storage space on your Mac.
The Status Bar still exists, but it's hidden by default. To see it, do this:
- From the View menu, choose Show Status Bar.
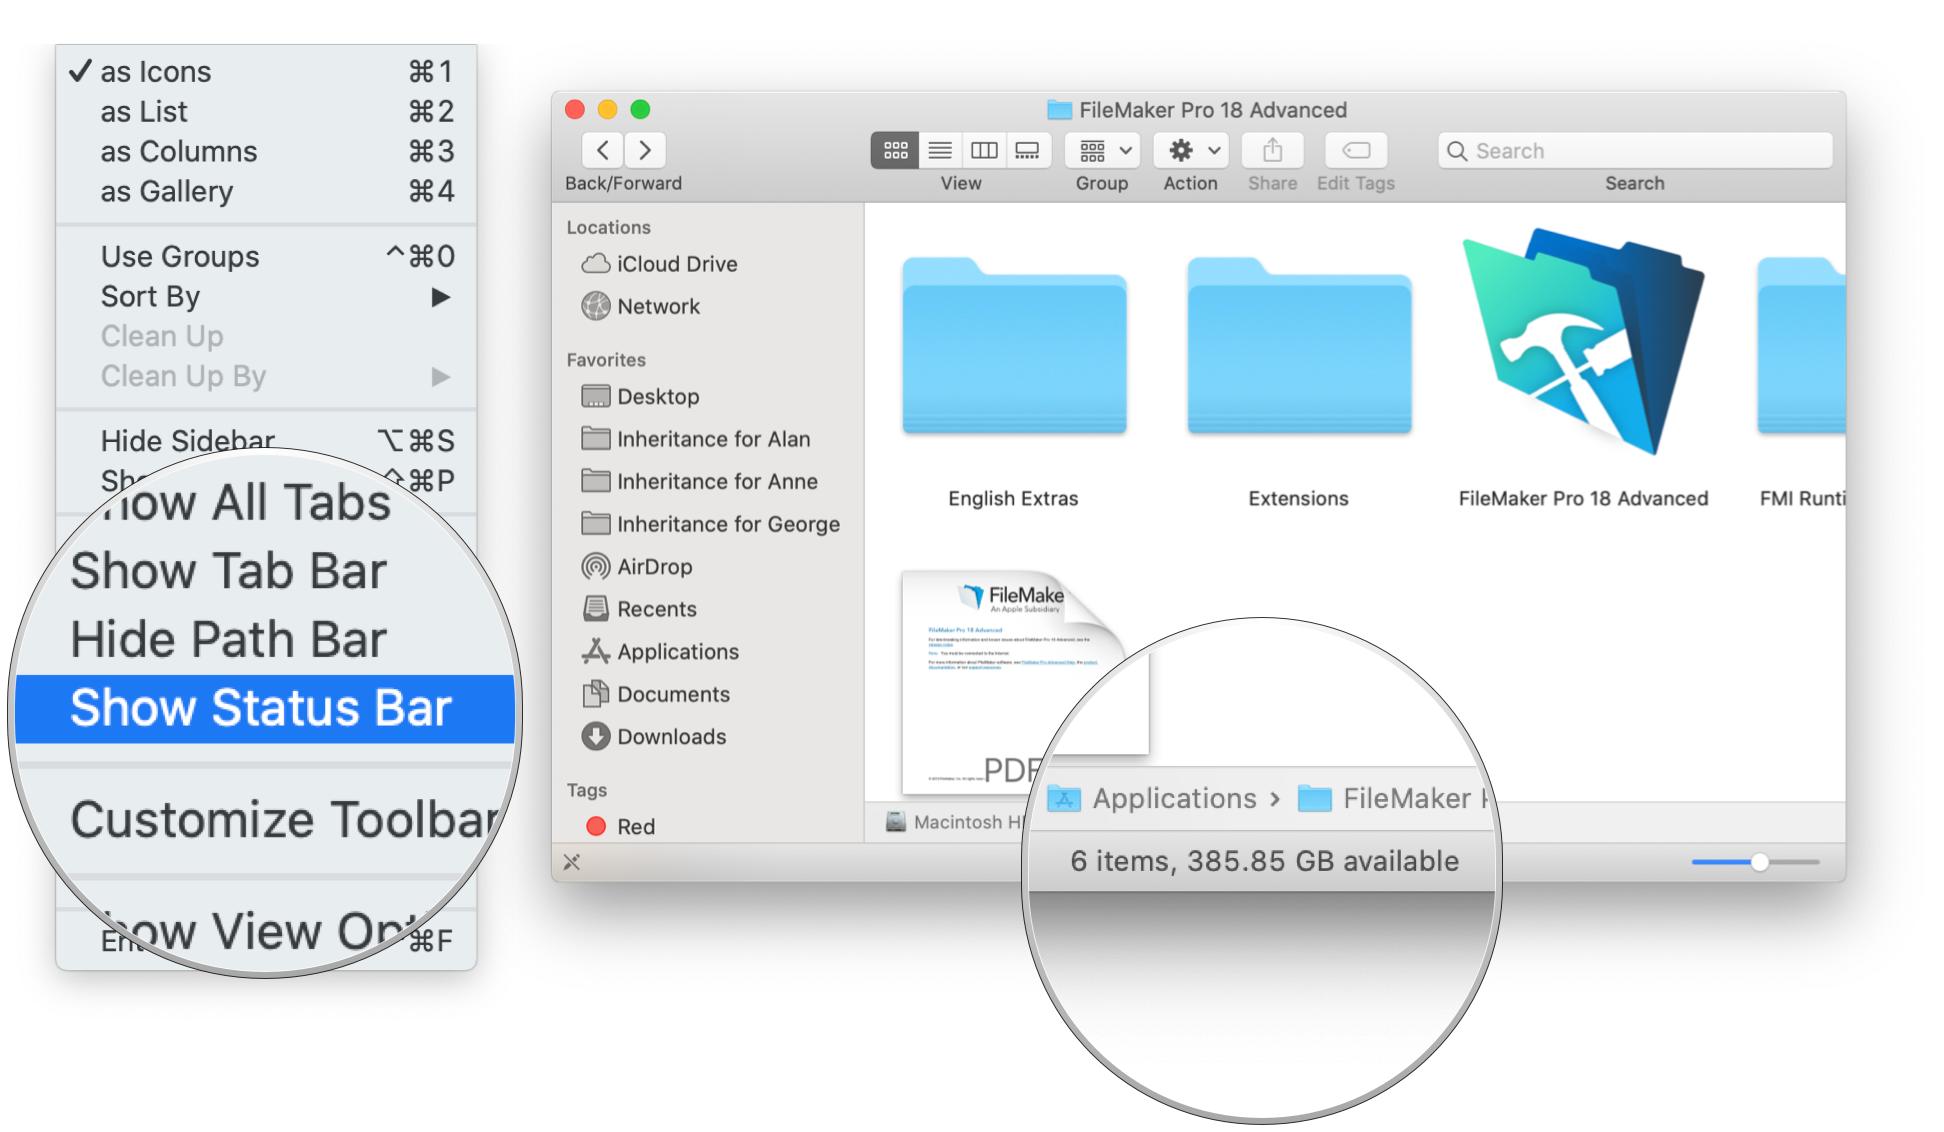
If you are viewing the contents of a window in Icon View, a slider appears at the right end of the status bar; drag it to make the icons in the window larger or smaller. The icon size can be different for each Finder window.
Like the Path Bar, showing or hiding the Status Bar applies to all Finder windows.
Create and use tabs
If you've used a web browser in the last decade or so, you're probably familiar with tabs. Using tabs helps reduce window clutter. Rather than open a separate window for each web page you want to view, each web page can be viewed in a tab, and multiple tabs can be part of one window.
So, too, with the Finder. Each Finder window can hold multiple tabs, which will appear right above the contents of the window. Here's how to enable and use it.
- From the View menu, choose Show Tab Bar.
- To create a new tab, click the add button at the right end of the Tab Bar.
- To close a tab, click the x to the left of the tab's name. Option-clicking the x will close all tabs in the window except the one you clicked.
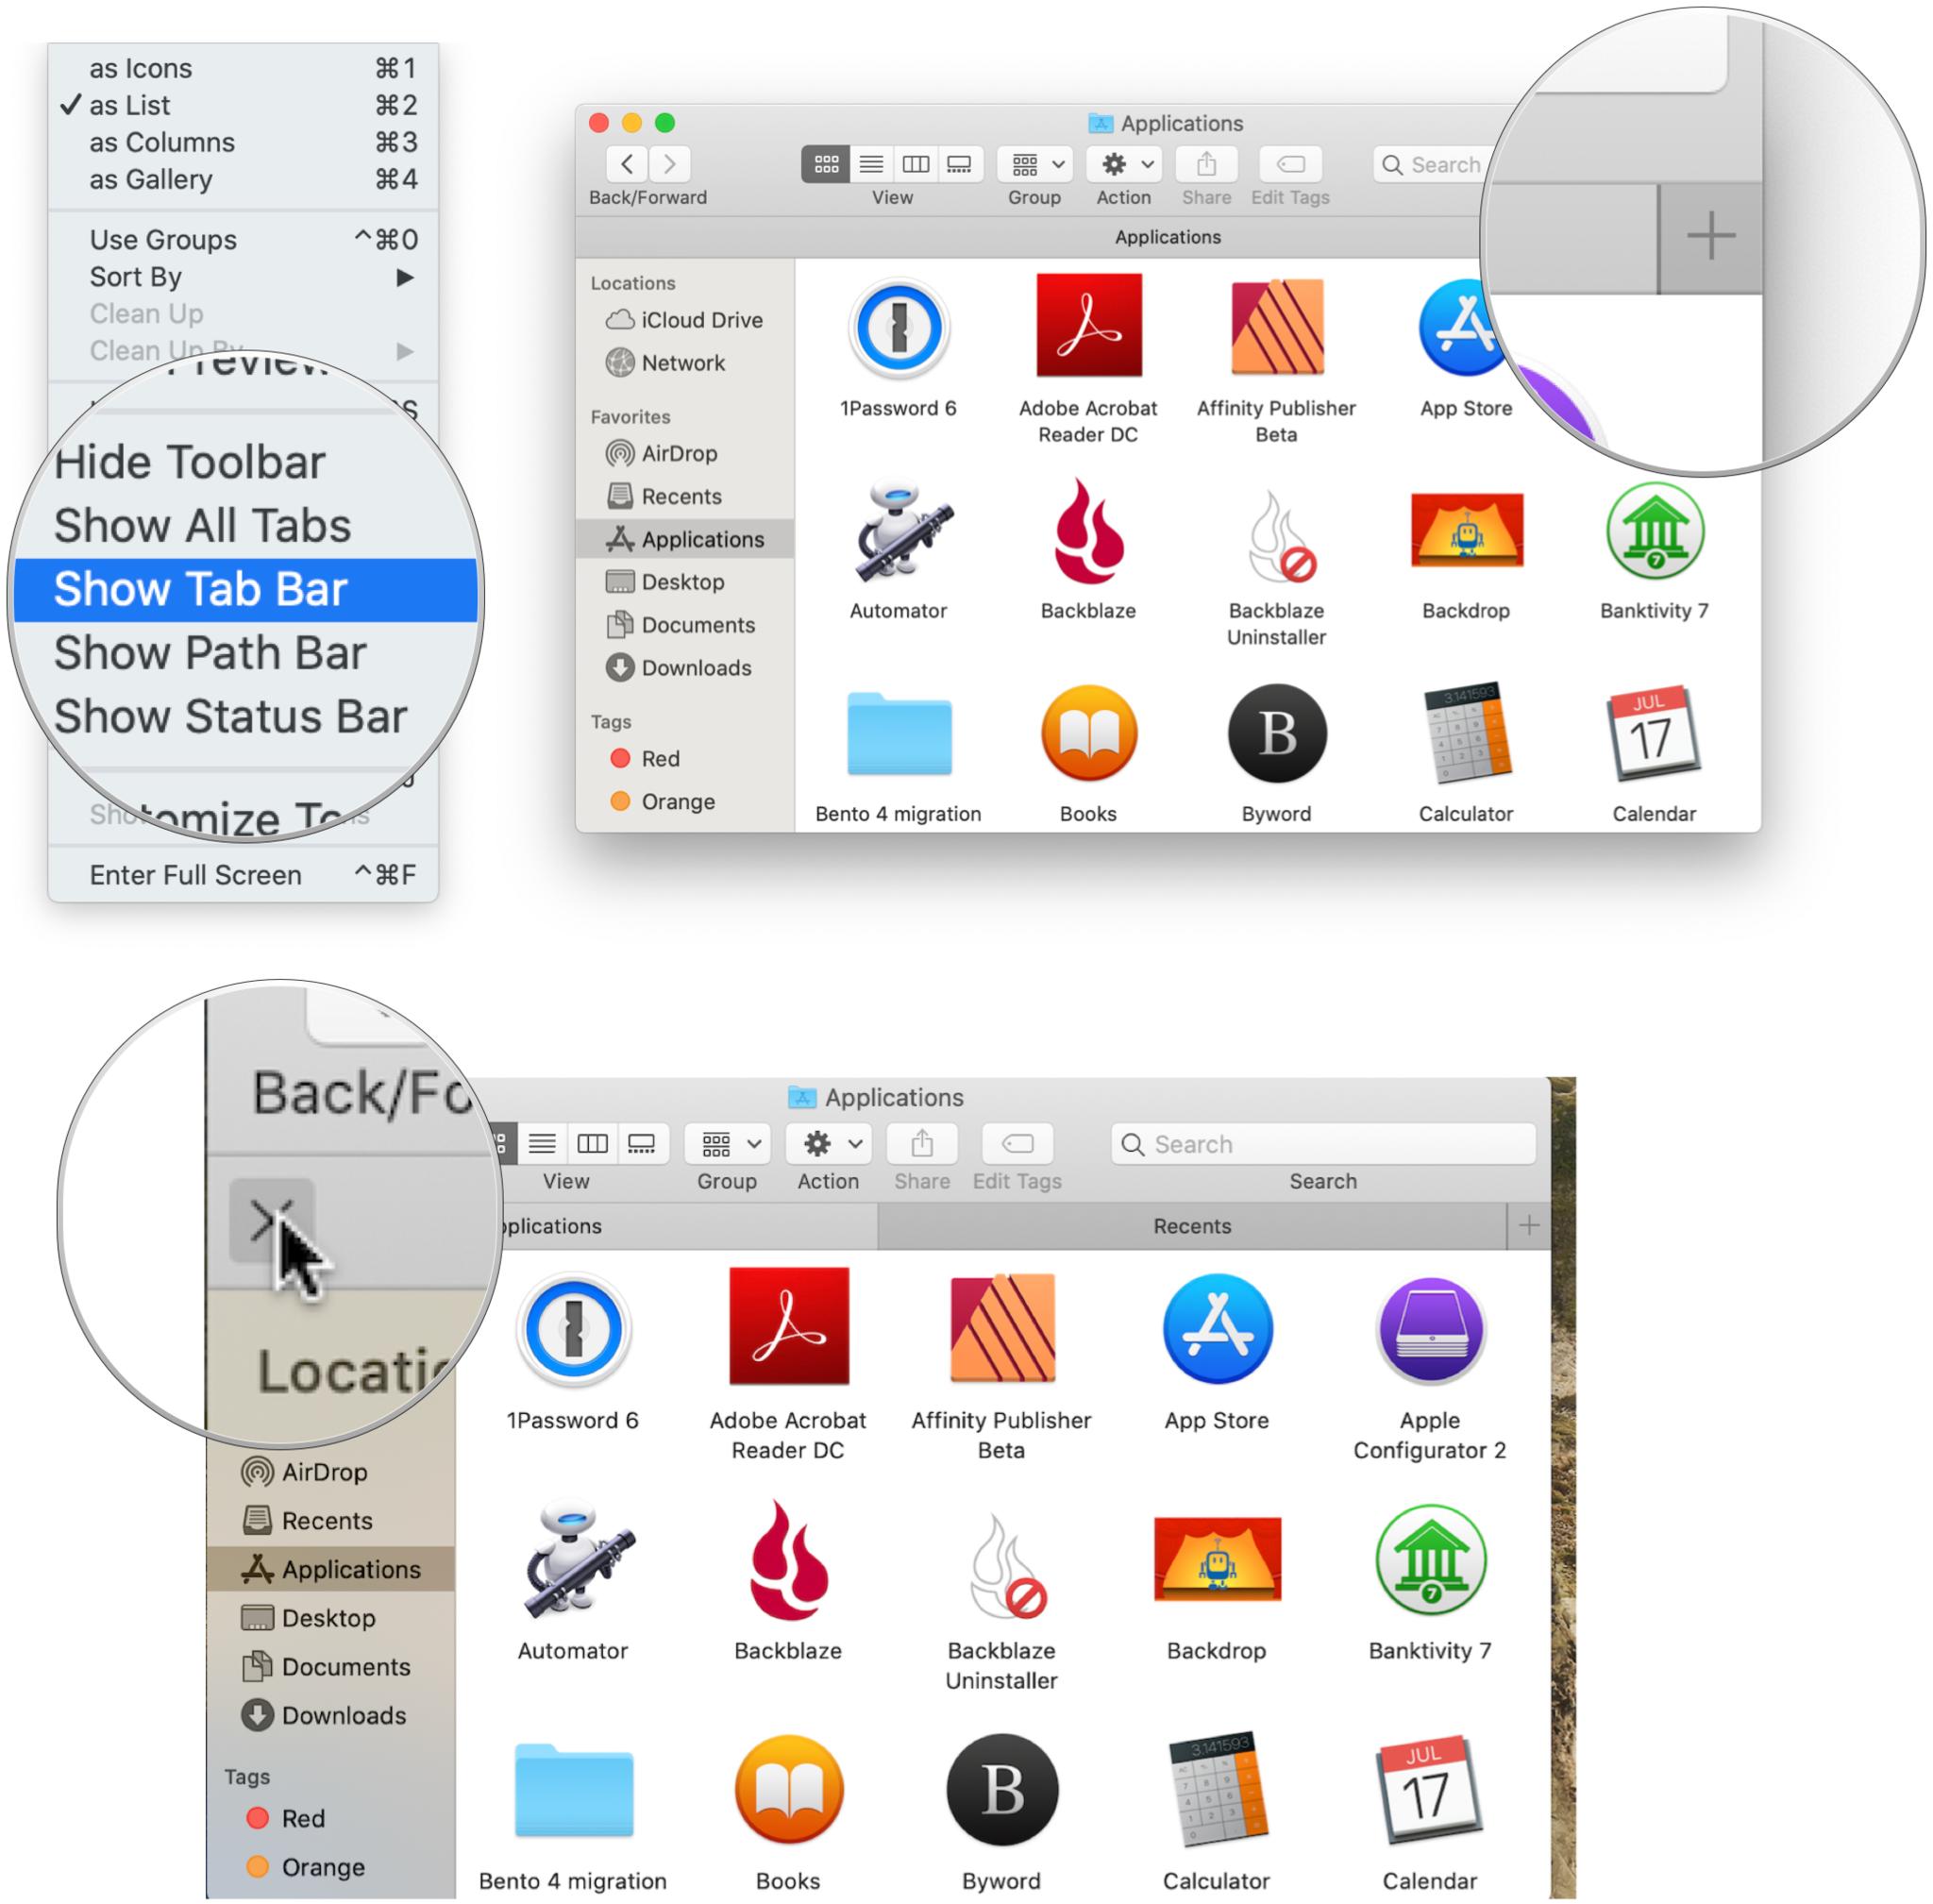
You can make as many tabs as you like, and you can drag them from right to left along the Tab Bar to rearrange them.
Make it Your Finder
Now that you know how to customize Finder windows, experiment a bit and find the best set of options for you. As always, feel free to ask questions or share what works for you in the comments below.
Mike Matthews is a writer at iMore.com. He has used Apple products all the way back to the Apple II+. He appreciates no longer having to launch apps by loading them from a cassette tape recorder.

