How to free up and manage memory on your Mac
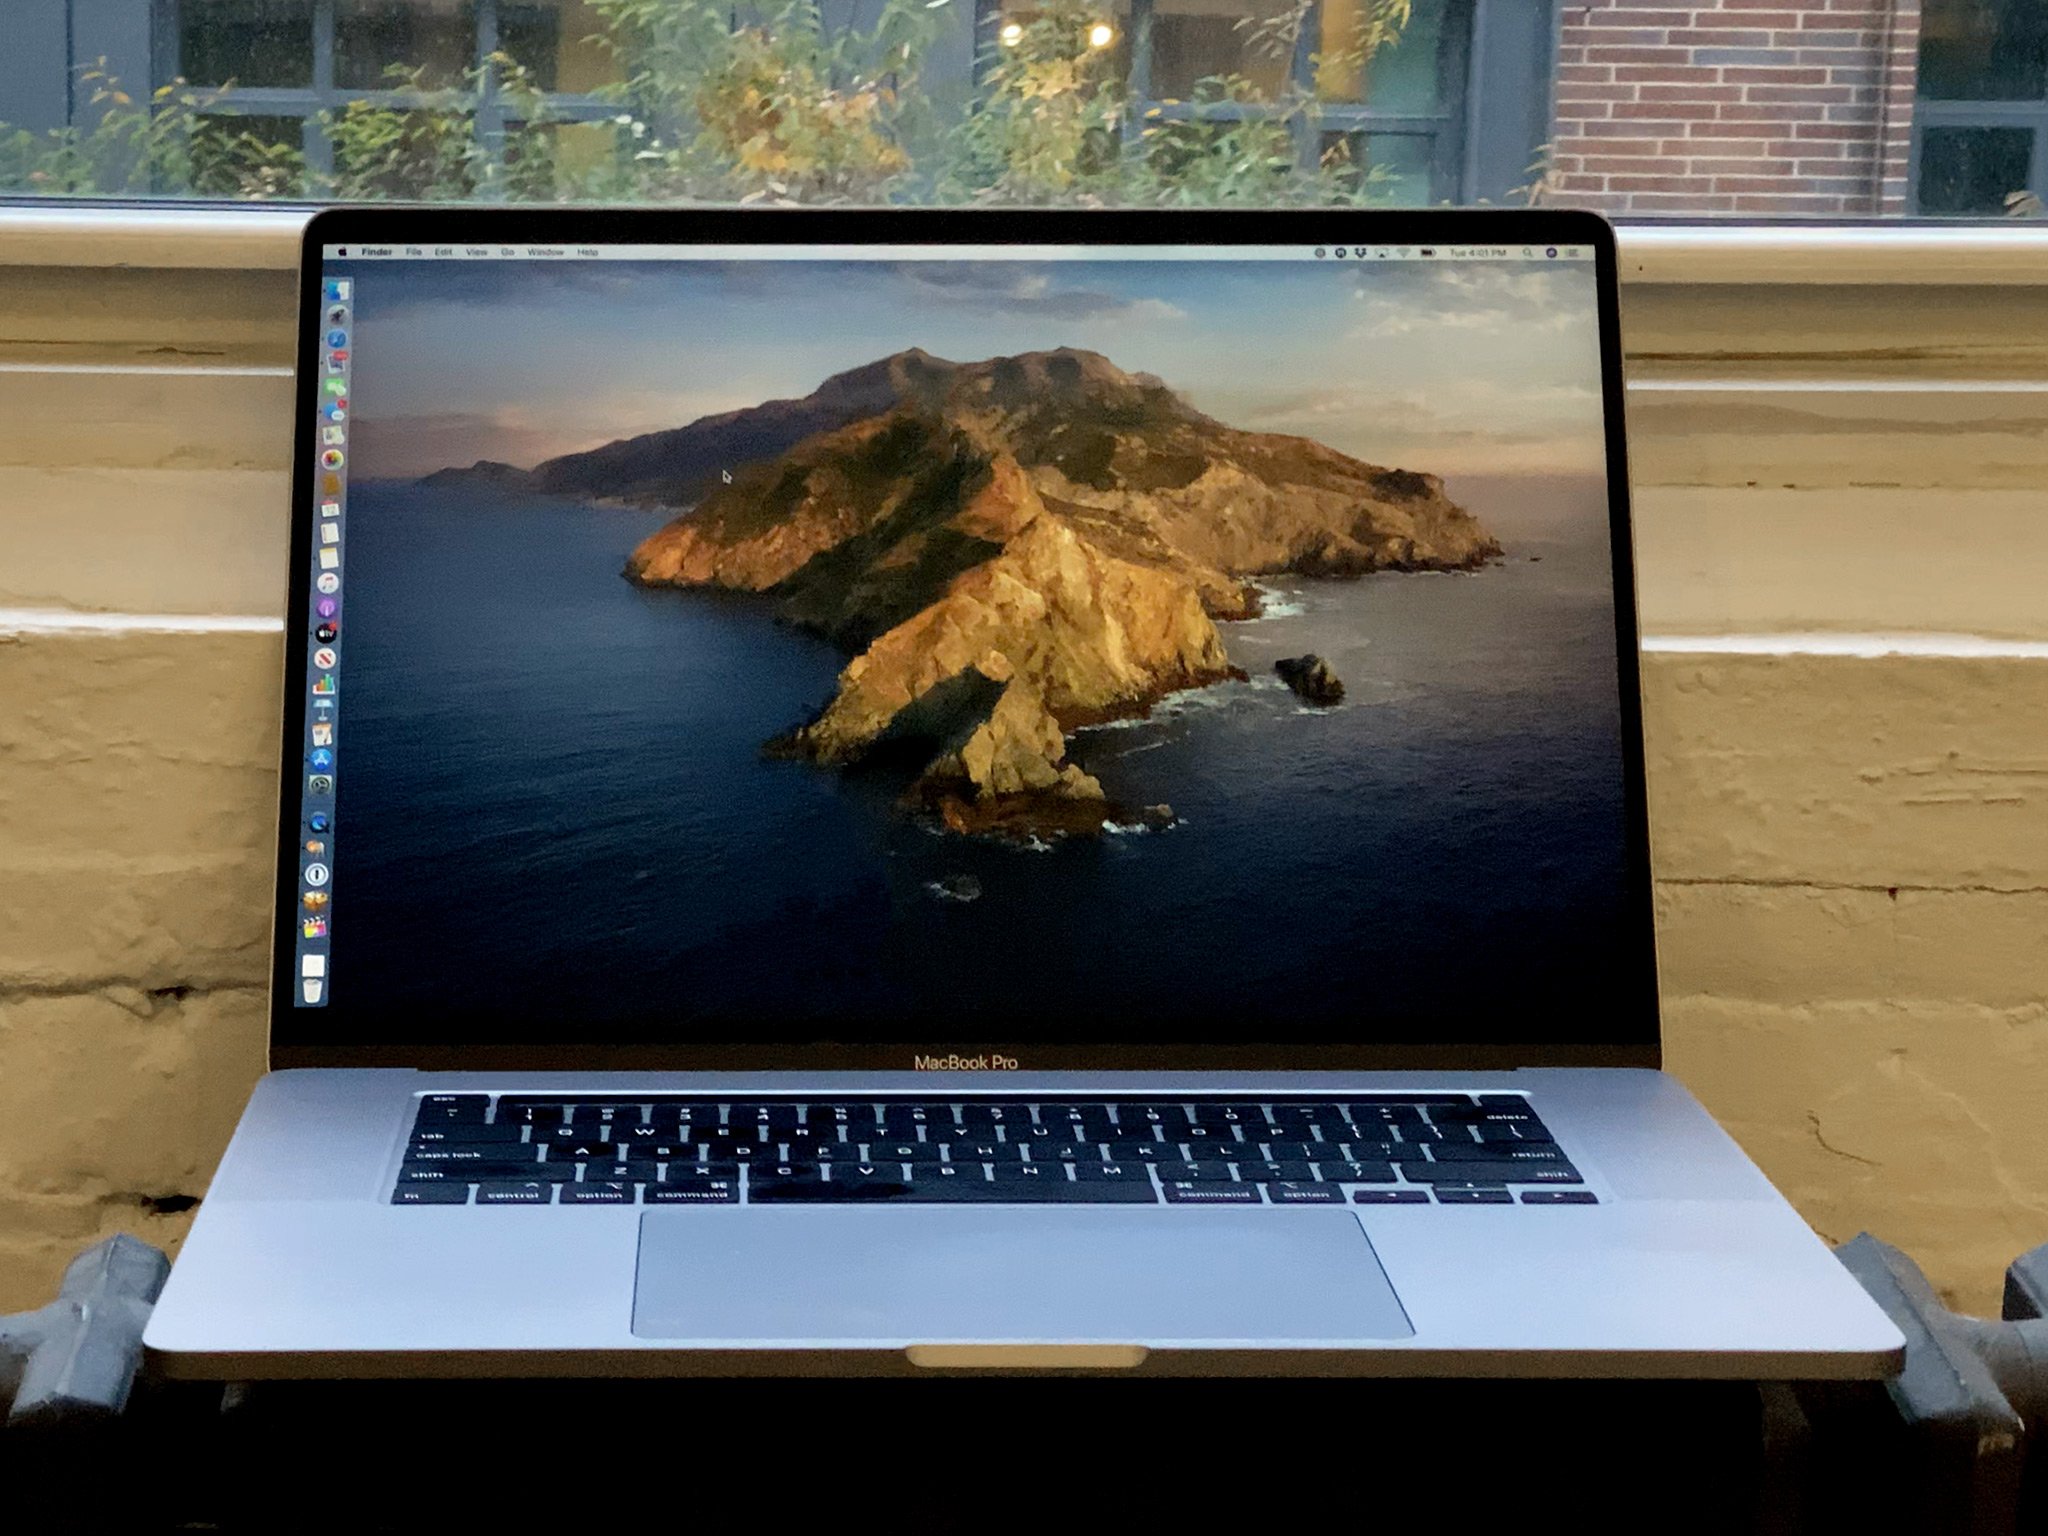
Is your Mac suddenly lagging? Is its performance slowing down? Then, you might need to clear the computer's memory cache. Here are some steps you can take to manage memory on your computer. You can follow these steps on all of the best Macs.
What is RAM?
RAM, which stands for random access memory, is one of the most important components in computers. It's designed to provide memory storage for current tasks and processes. When used properly, this memory speeds things up on the machine. Unfortunately, memory is often affected by poorly designed apps and web pages. In turn, this slows things down to unacceptable levels.
Years ago, it was easy to upgrade RAM on Apple devices. Unfortunately, those days are long over. Today, only the 27-inch iMac and Mac Pro allow for RAM upgrades after purchase. With this solution off the table for most users, it's important to maximize the size of the RAM on your machine at the time of purchase.
Regardless, you can take steps on your existing machine to manage memory by clearing up the cache and speed things up.
Find your RAM
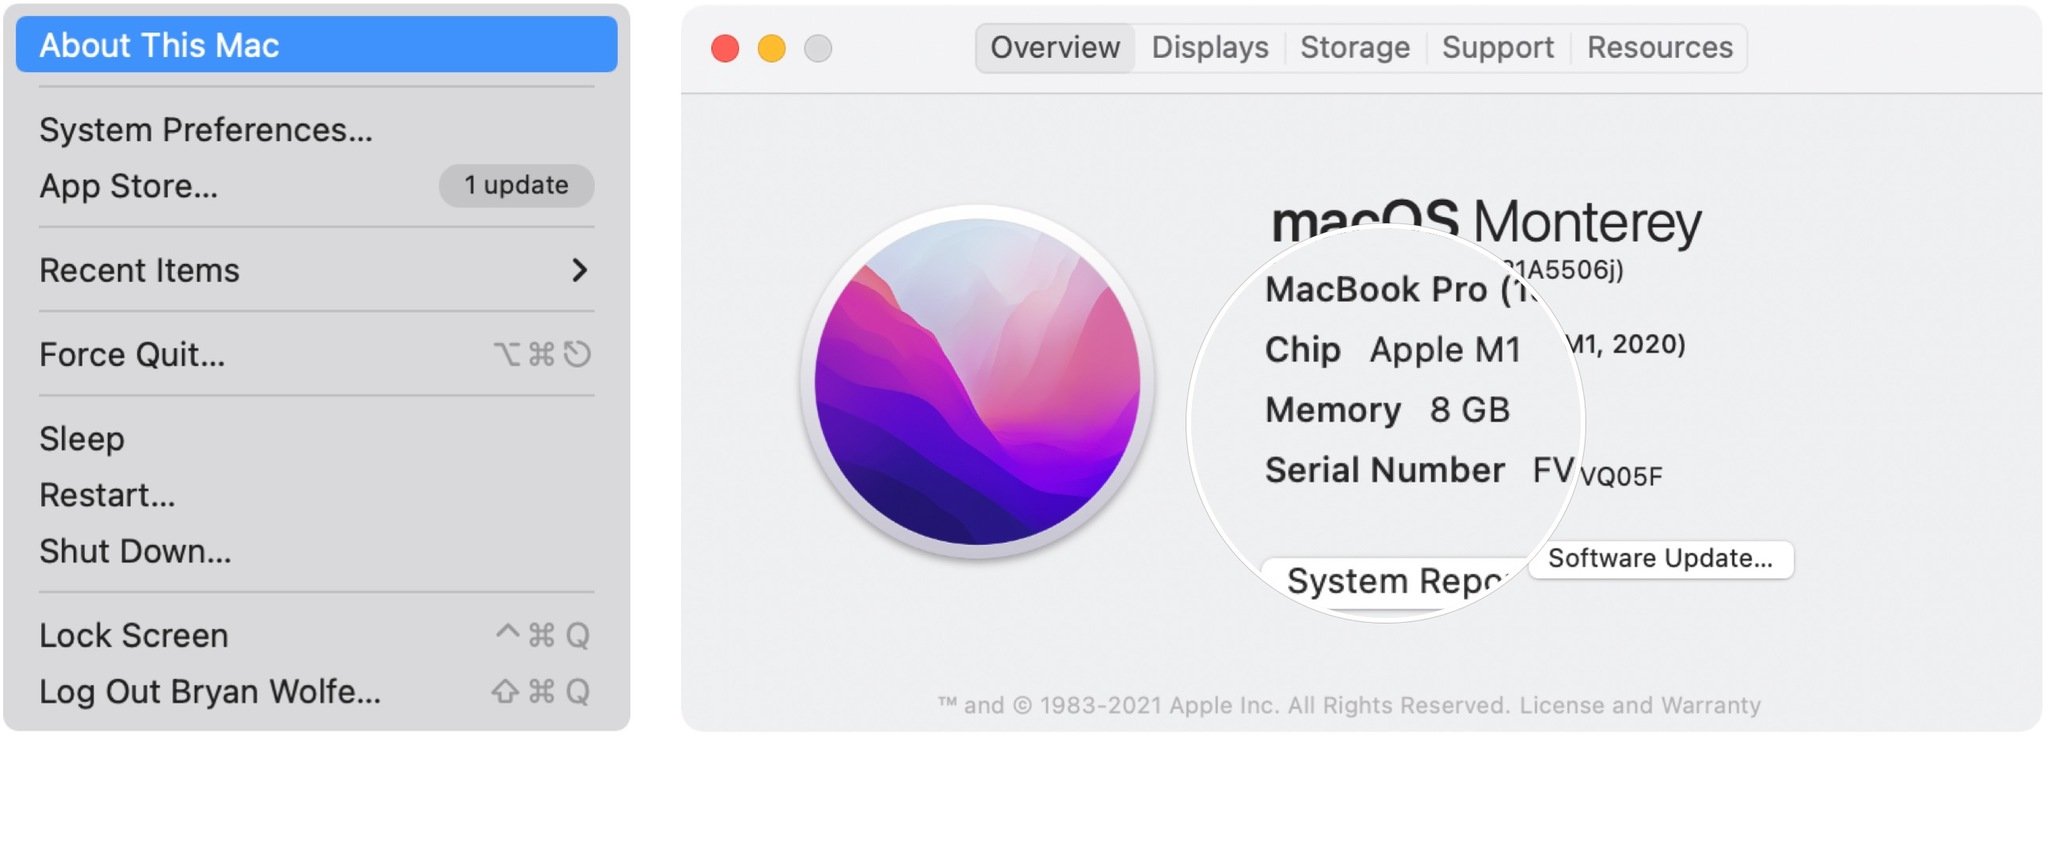
To find the amount of RAM on your Mac:
- Click on the Apple logo at the top left of the device.
- Choose About This Mac from the pull-down menu.
- Review the amount of memory on the overview tab.
Signs of trouble
When your Mac uses too much memory, you will know it almost immediately because the machine will begin to slow down unexpectedly. Among the signs there is a problem:
- Performance slows
- You'll see the spinning beach ball
- Apps become unresponsive or freeze
- Both apps and web pages fail to load or take a long time to do so
- You see a "Your system has run out of application memory" message
Steps to follow
There are certain steps you can take to improve memory performance on your Mac, including the following.
Master your iPhone in minutes
iMore offers spot-on advice and guidance from our team of experts, with decades of Apple device experience to lean on. Learn more with iMore!
Reboot your computer
As a first step, shut down all of the apps and reboot your computer. It's a simple step but is often the one that fixes memory issues.
Stay up-to-date
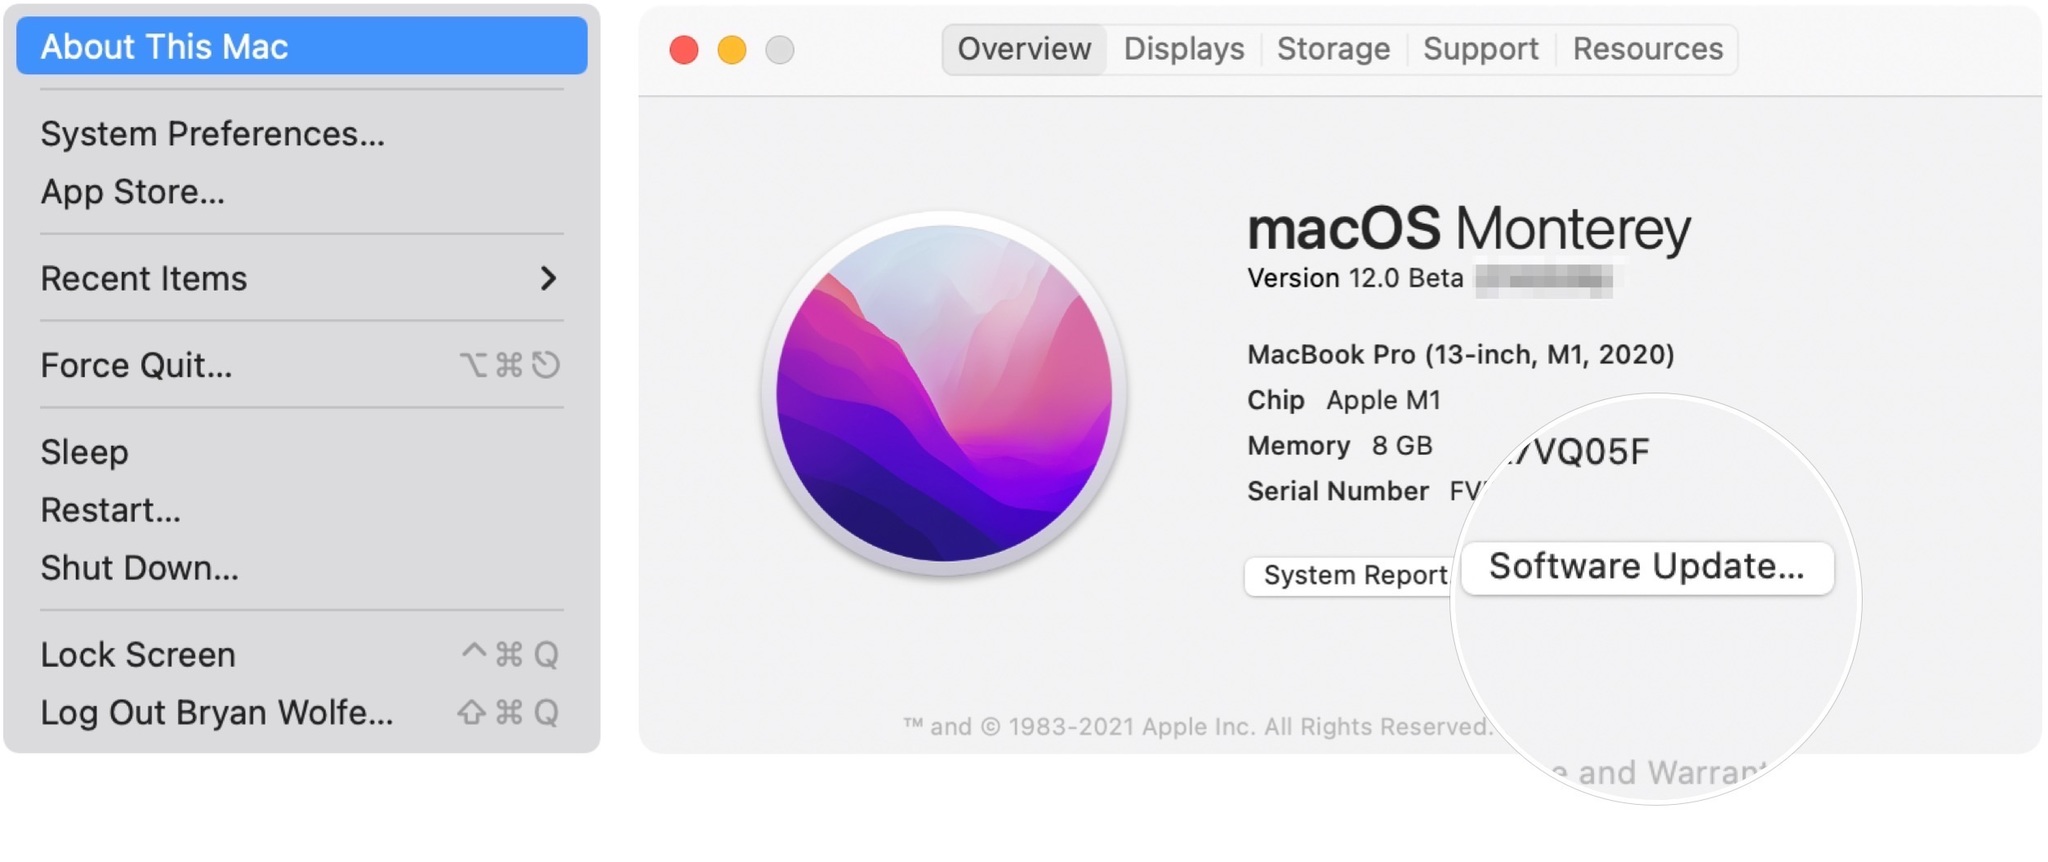
Install all Mac software updates and all current firmware updates on your Machine. To do so:
- Choose the Apple icon at the top left of the computer.
- Select About This Mac from the pull-down menu.
- Click Software Update.
- Follow the on-screen directions.
You should also check for app updates in the Mac App Store.
Check the Activity Monitor and shut down processes
It could be one pesky app or process that is causing memory issues. To find out, check the Activity Monitor. To do so:
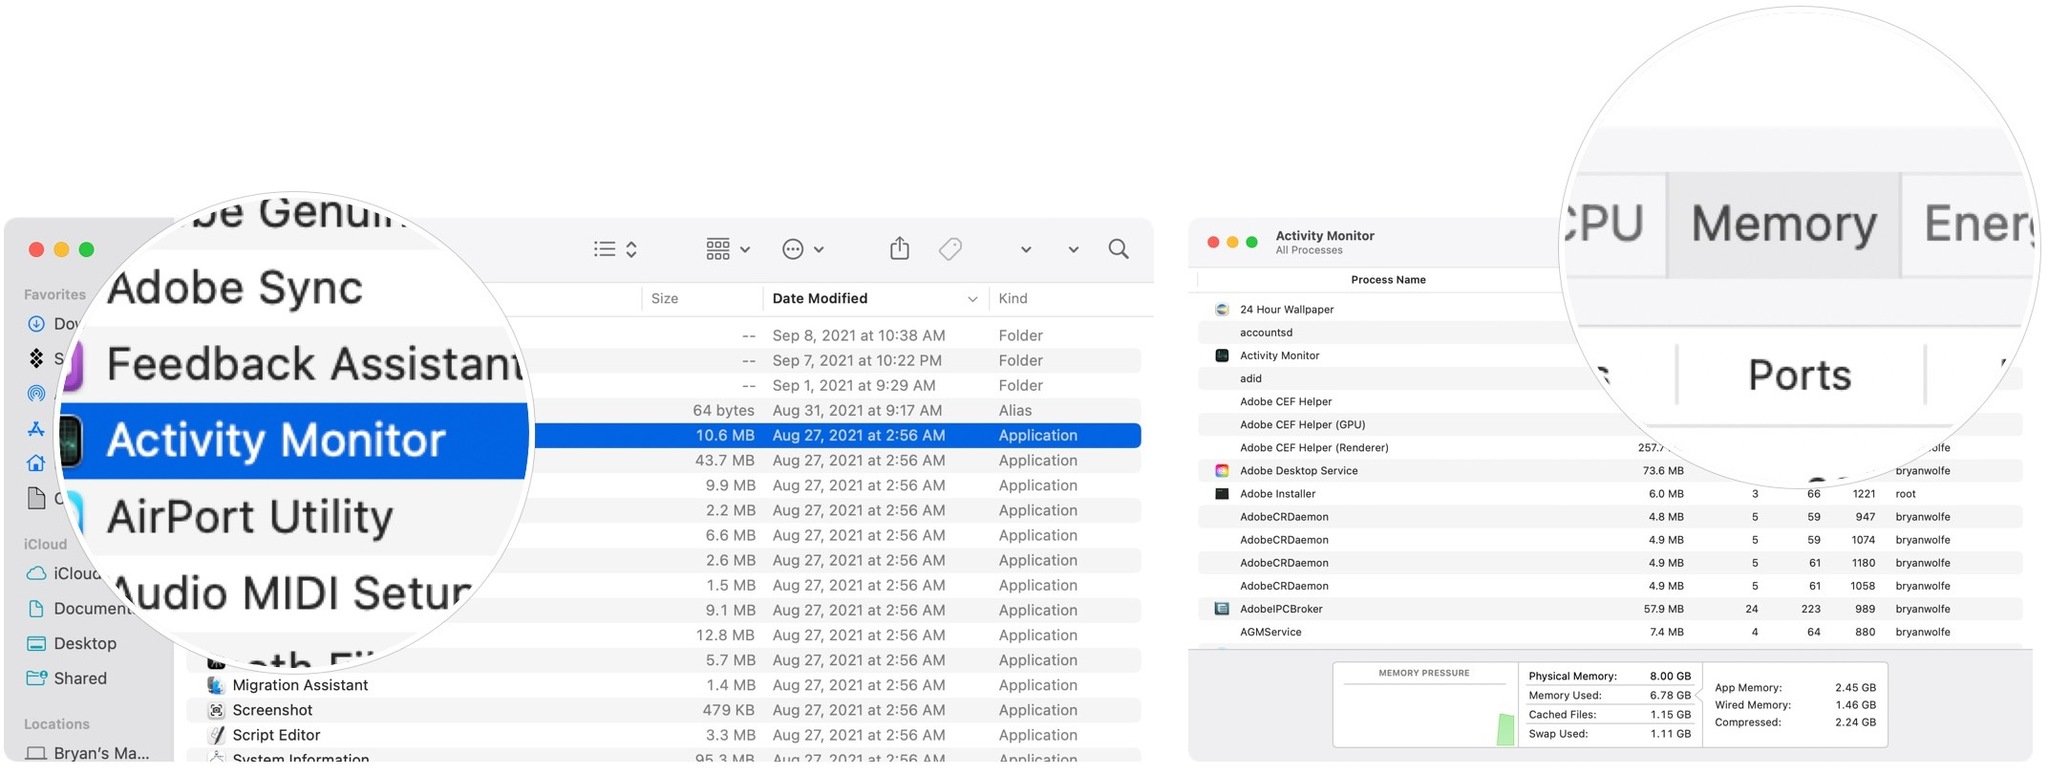
- Choose Finder on your Mac Dock.
- Select Go on the menu bar.
- Click Utilities from the pull-down menu.
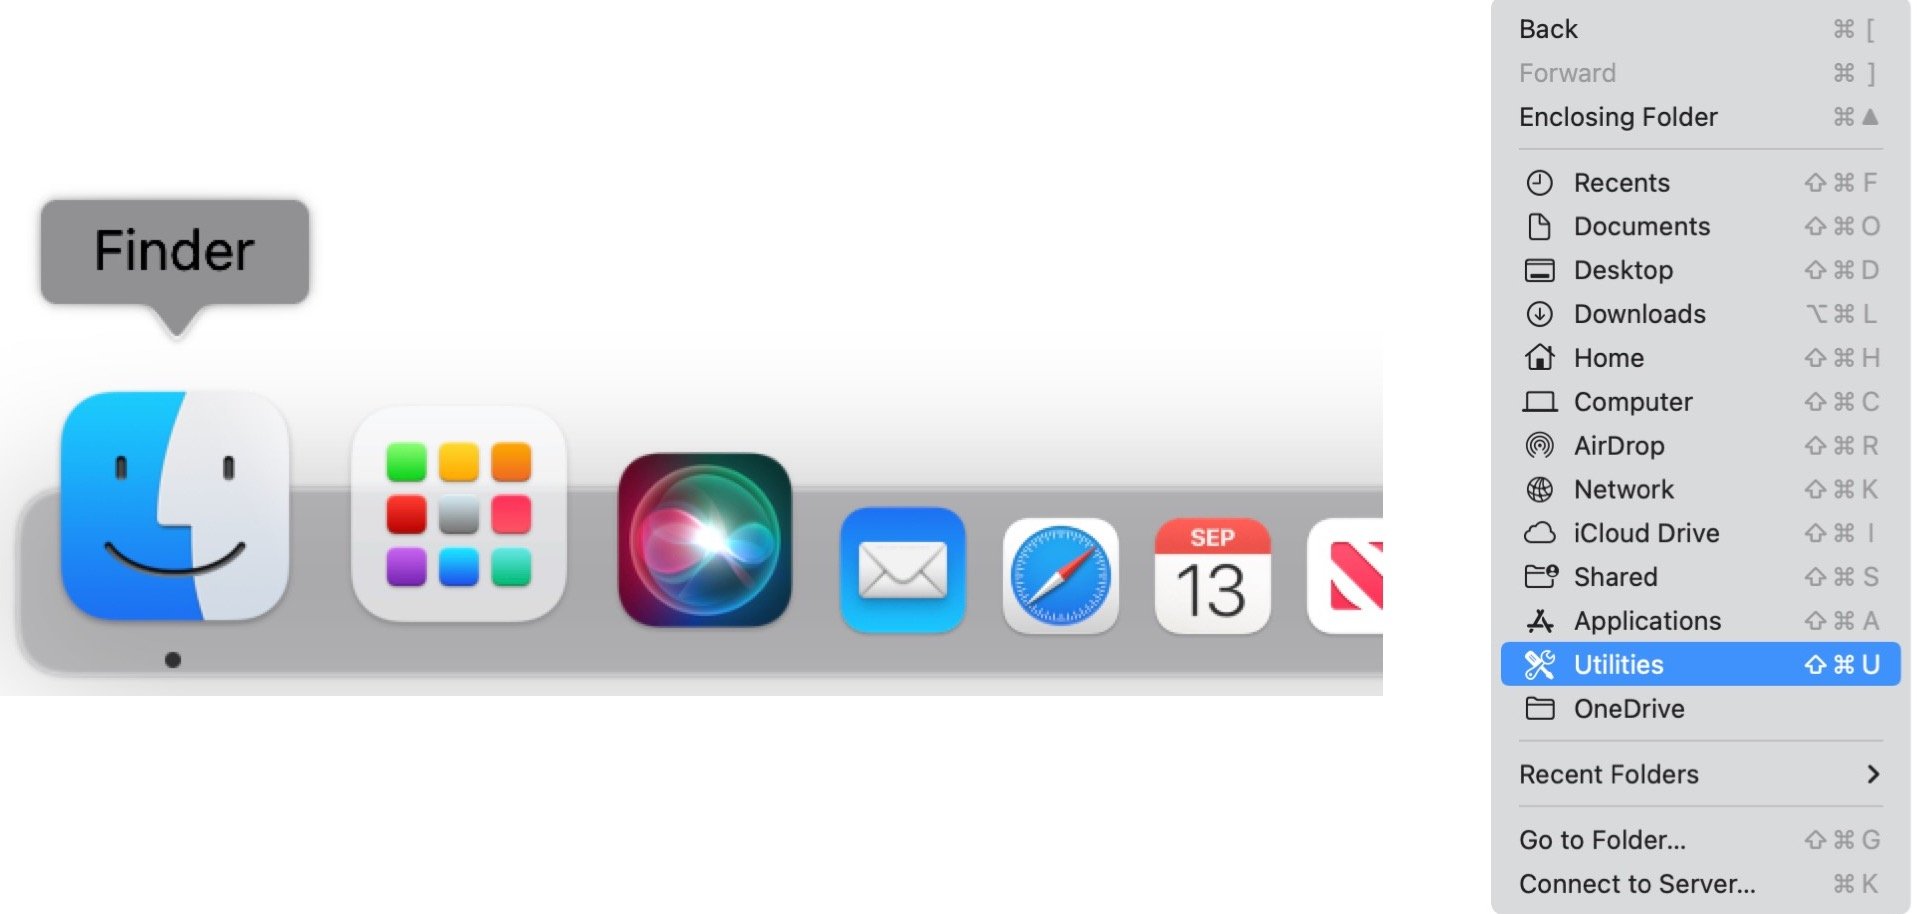
- Select Activity Monitor.
- Click the Memory tab at the top of the Activity Monitor.
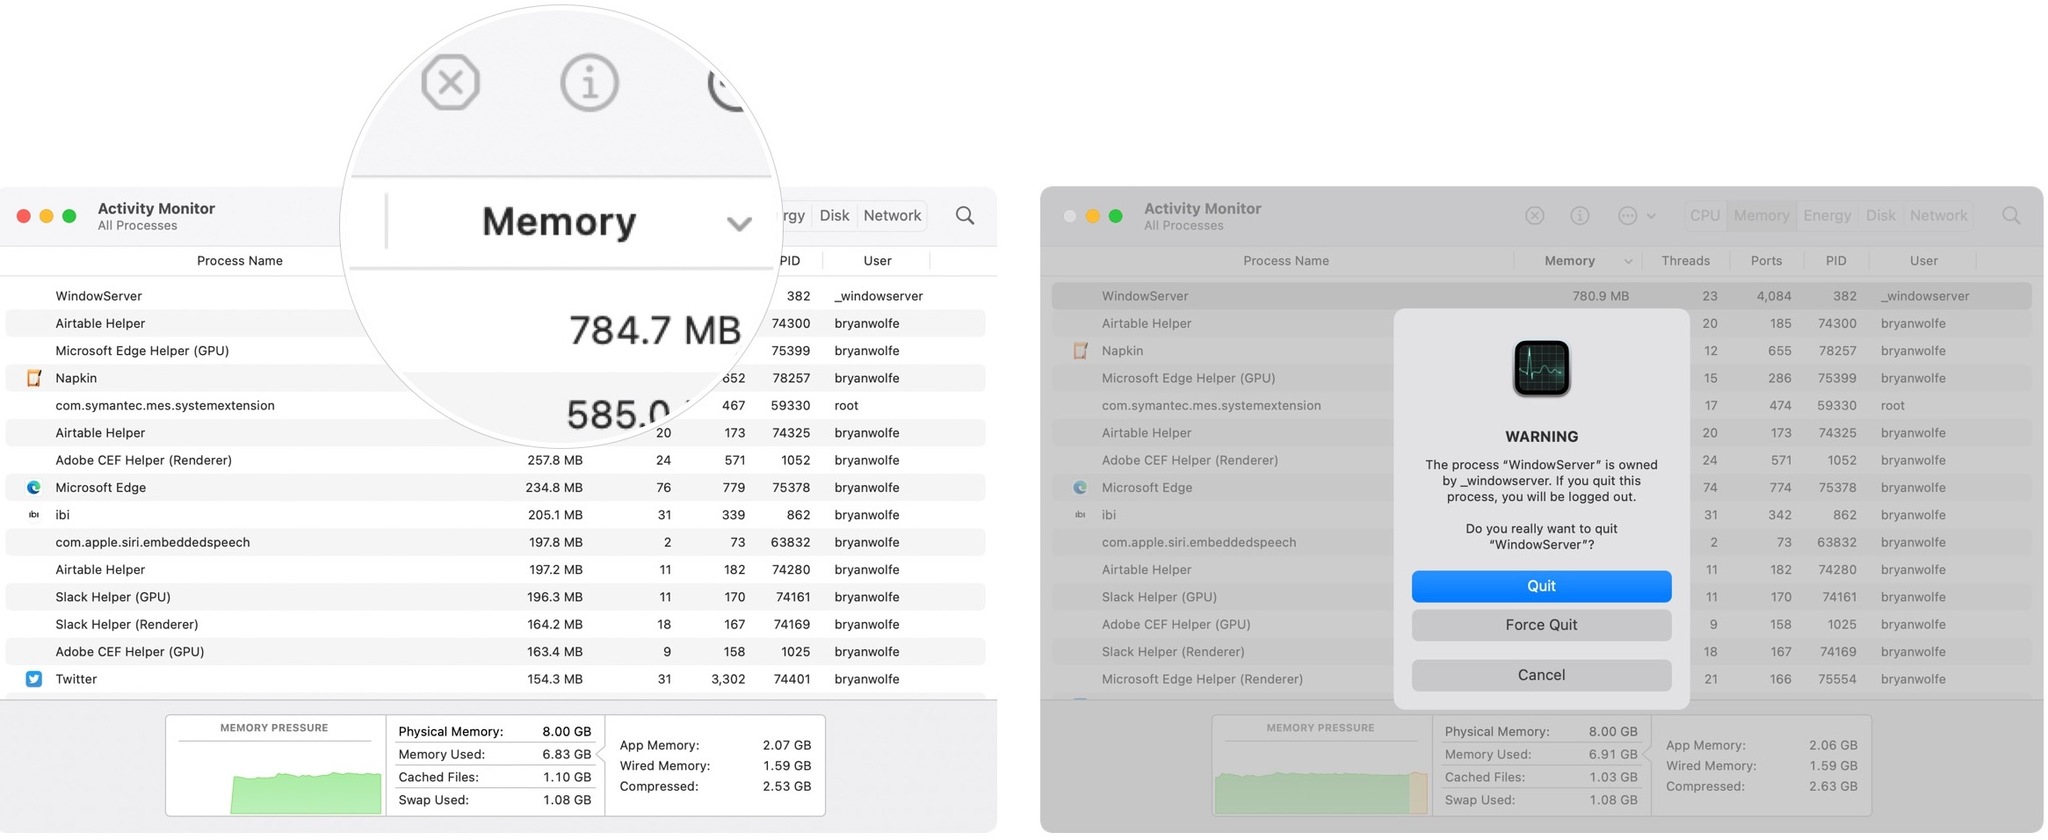
- Sort the table by Memory, so the processes using the most memory are at the top of the list.
- Highlight unneeded processes that are using a lot of memory. These could include open apps that you're not currently using. If you don't recognize a running process, it's best to leave it alone.
- Click the X icon at the top of the Activity Monitor to shut down the highlighted process.
- Choose Force Shut Down to confirm the shutdown.
- Repeat Steps 7 through Steps 9 as needed.
Check the CPU
Memory issues are sometimes connected to an overheated CPU that's caused by a pesky process. To see if this is the case:
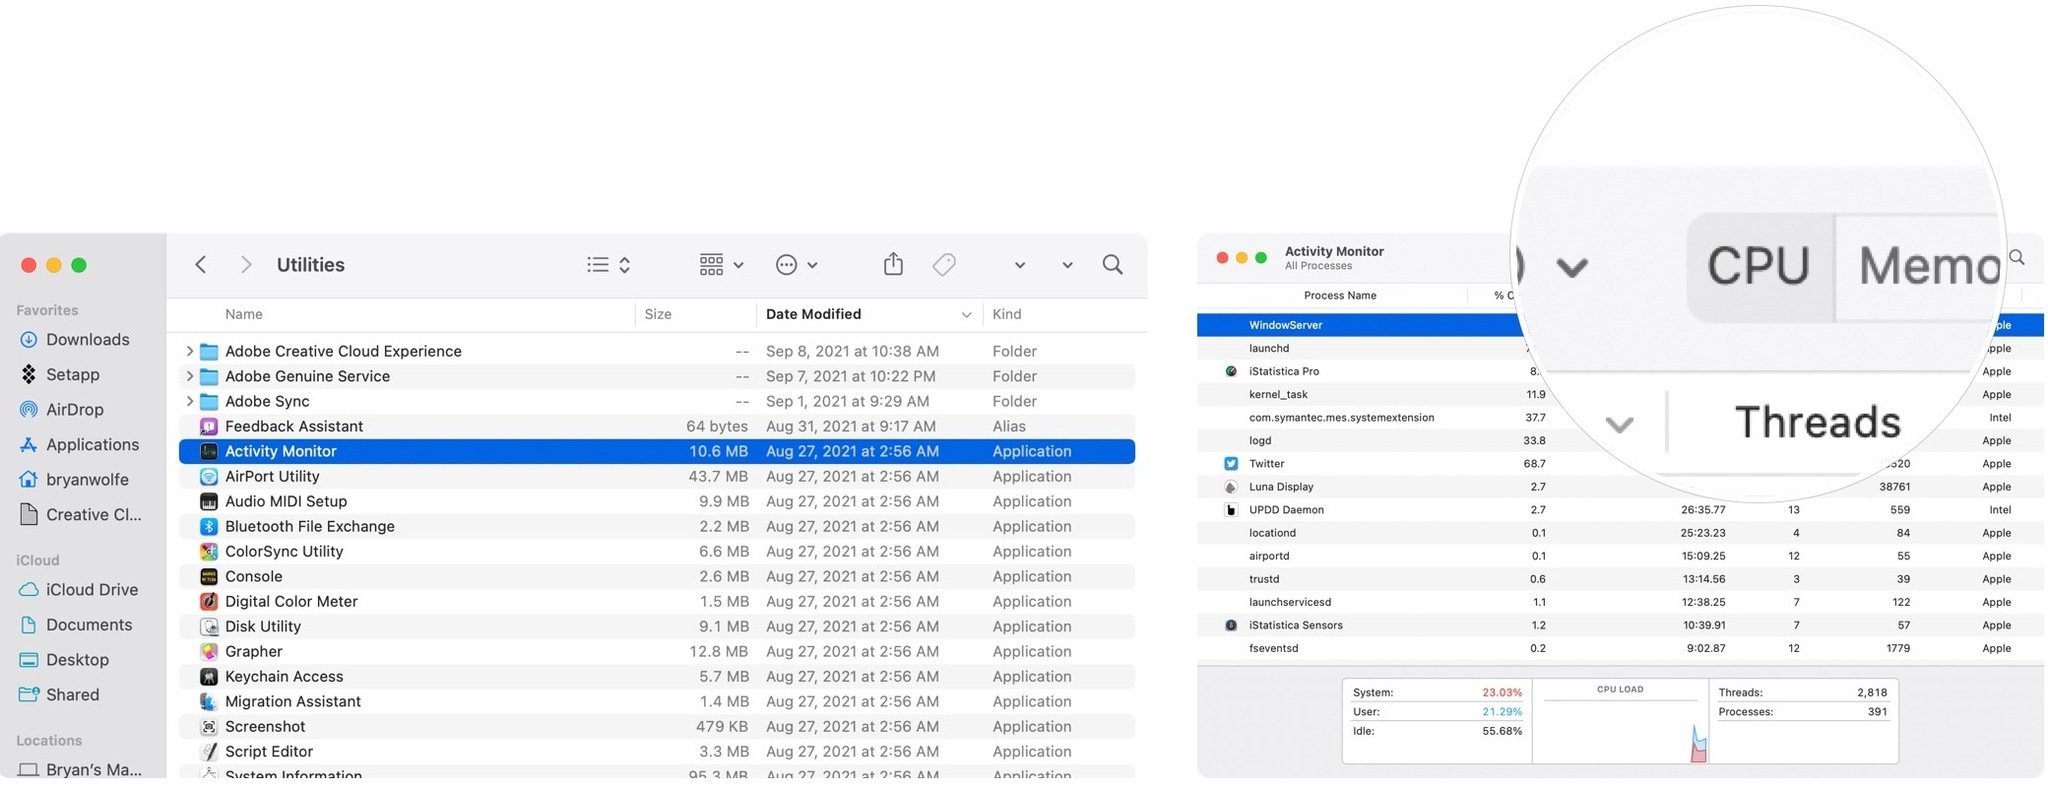
- Choose Finder on your Mac Dock.
- Select Go on the menu bar.
- Click Utilities from the pull-down menu.

- Select Activity Monitor.
- Click the CPU at the top of the Activity Monitor. (It's the default.)
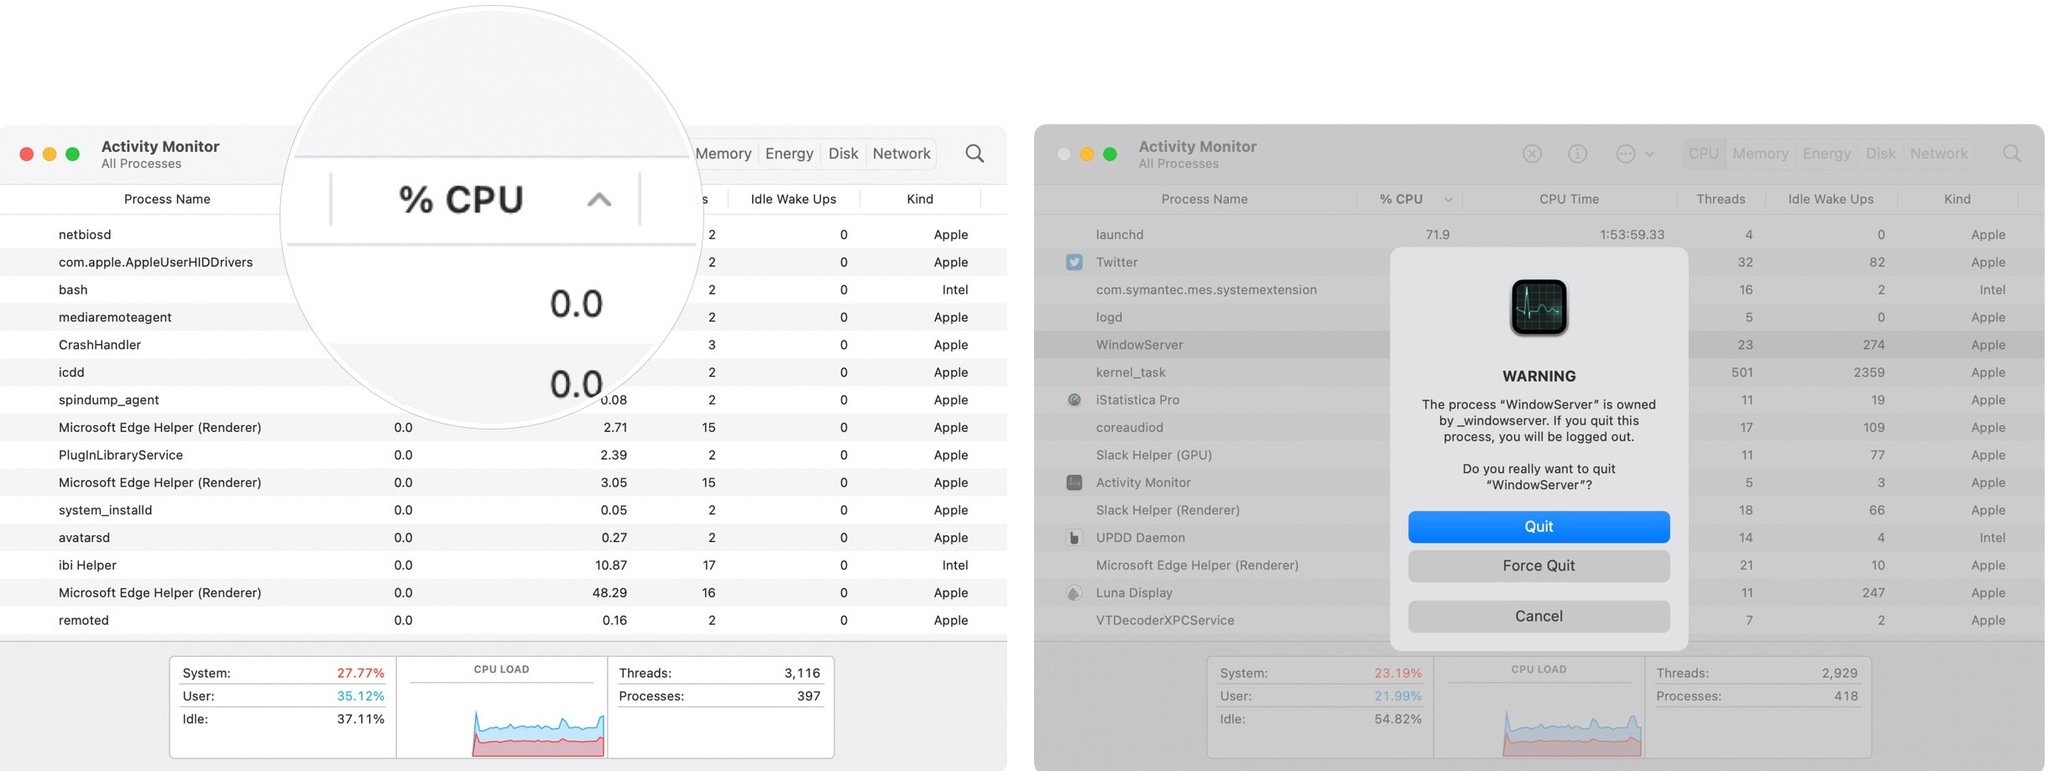
- Sort the table by %CPU so the processes using the most CPU are at the top of the list.
- Highlight unneeded processes that are using a lot of CPU. These could include open apps that you're not currently using. If you don't recognize a running process, it's best to leave it alone.
- Click the X icon at the top of the Activity Monitor to shut down the highlighted process.
- Choose Force Shut Down to confirm the shutdown.
- Repeat Steps 7 through Steps 9 as needed.
Remove startup apps
Another possible solution is to stop apps from automatically starting when rebooting the device. To do this:
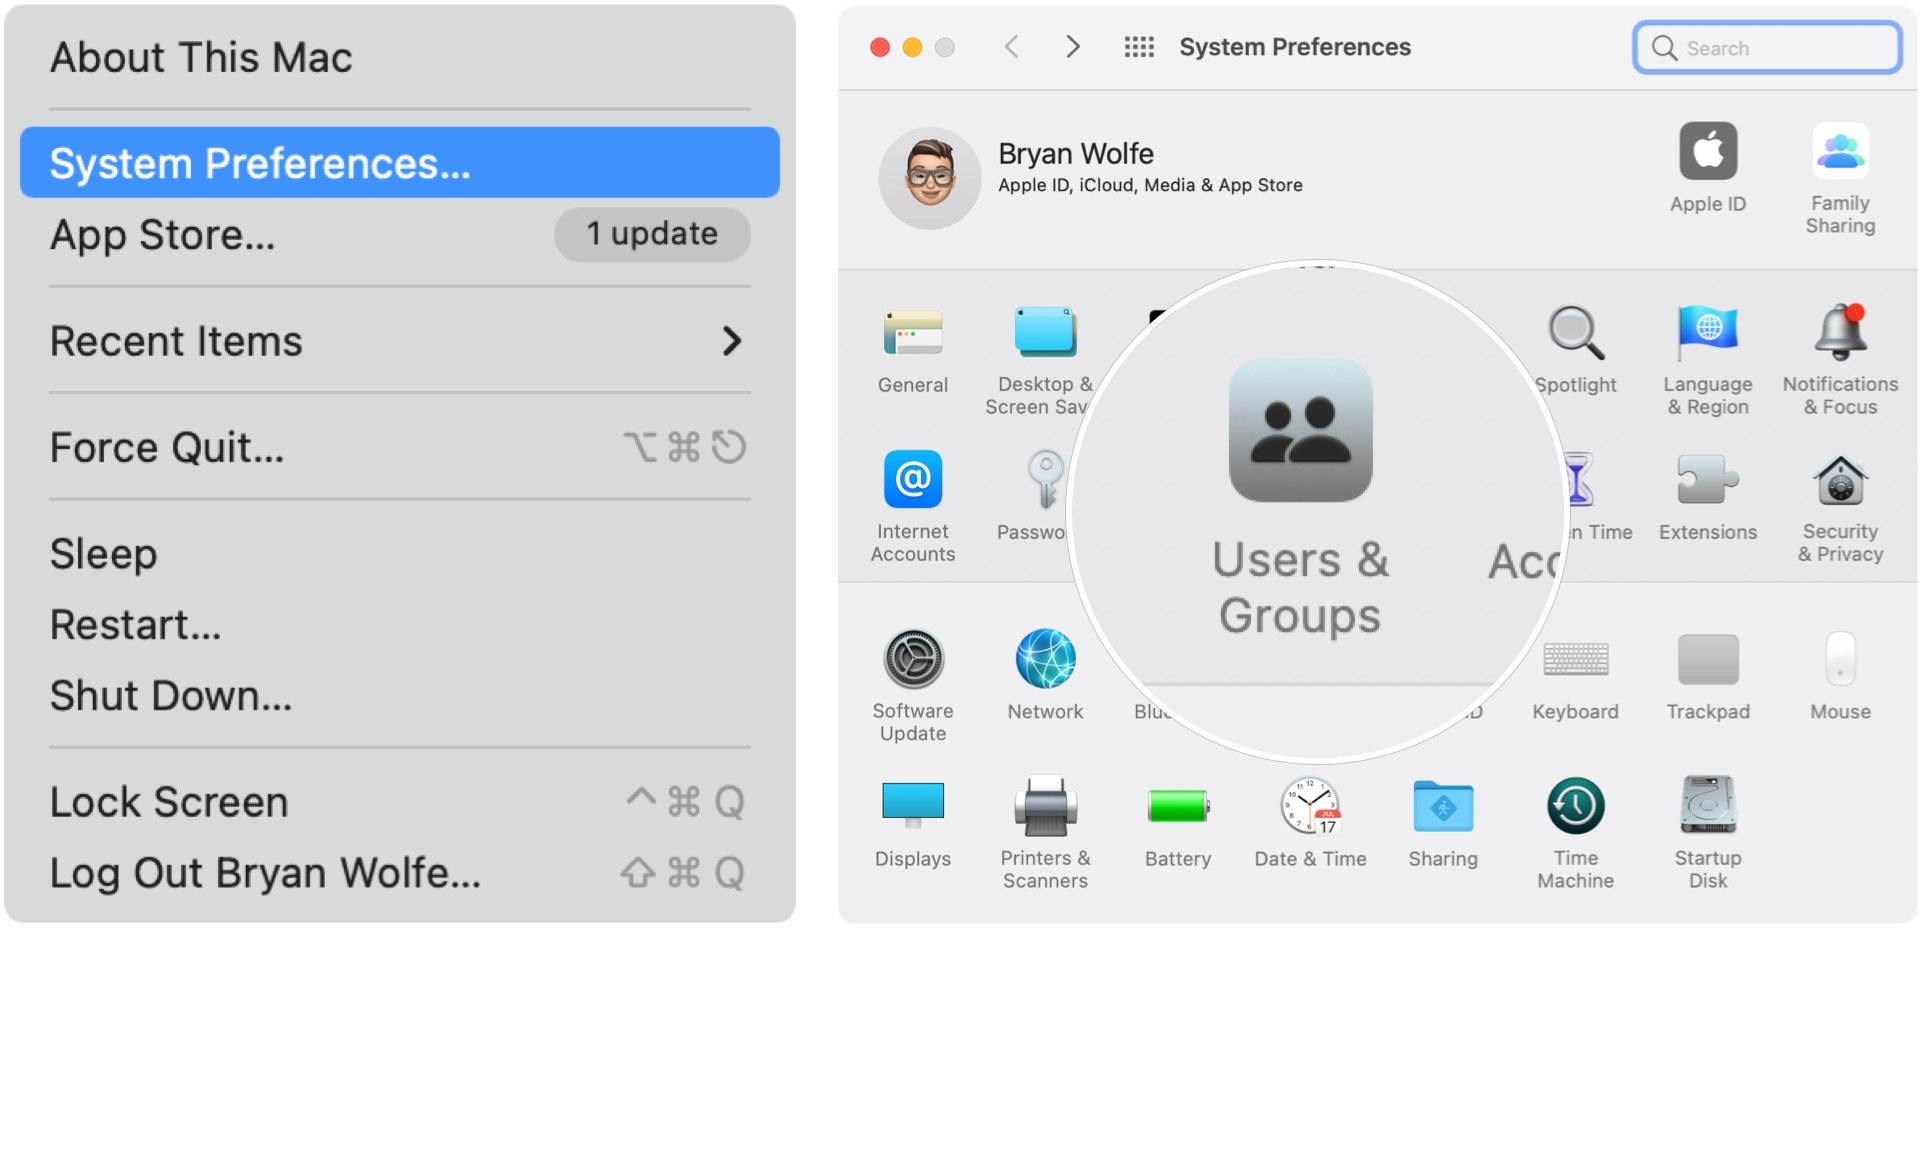
- Choose the Apple icon at the top left of the computer.
- Select System Preferences from the pull-down menu.
- Click Users & Groups.
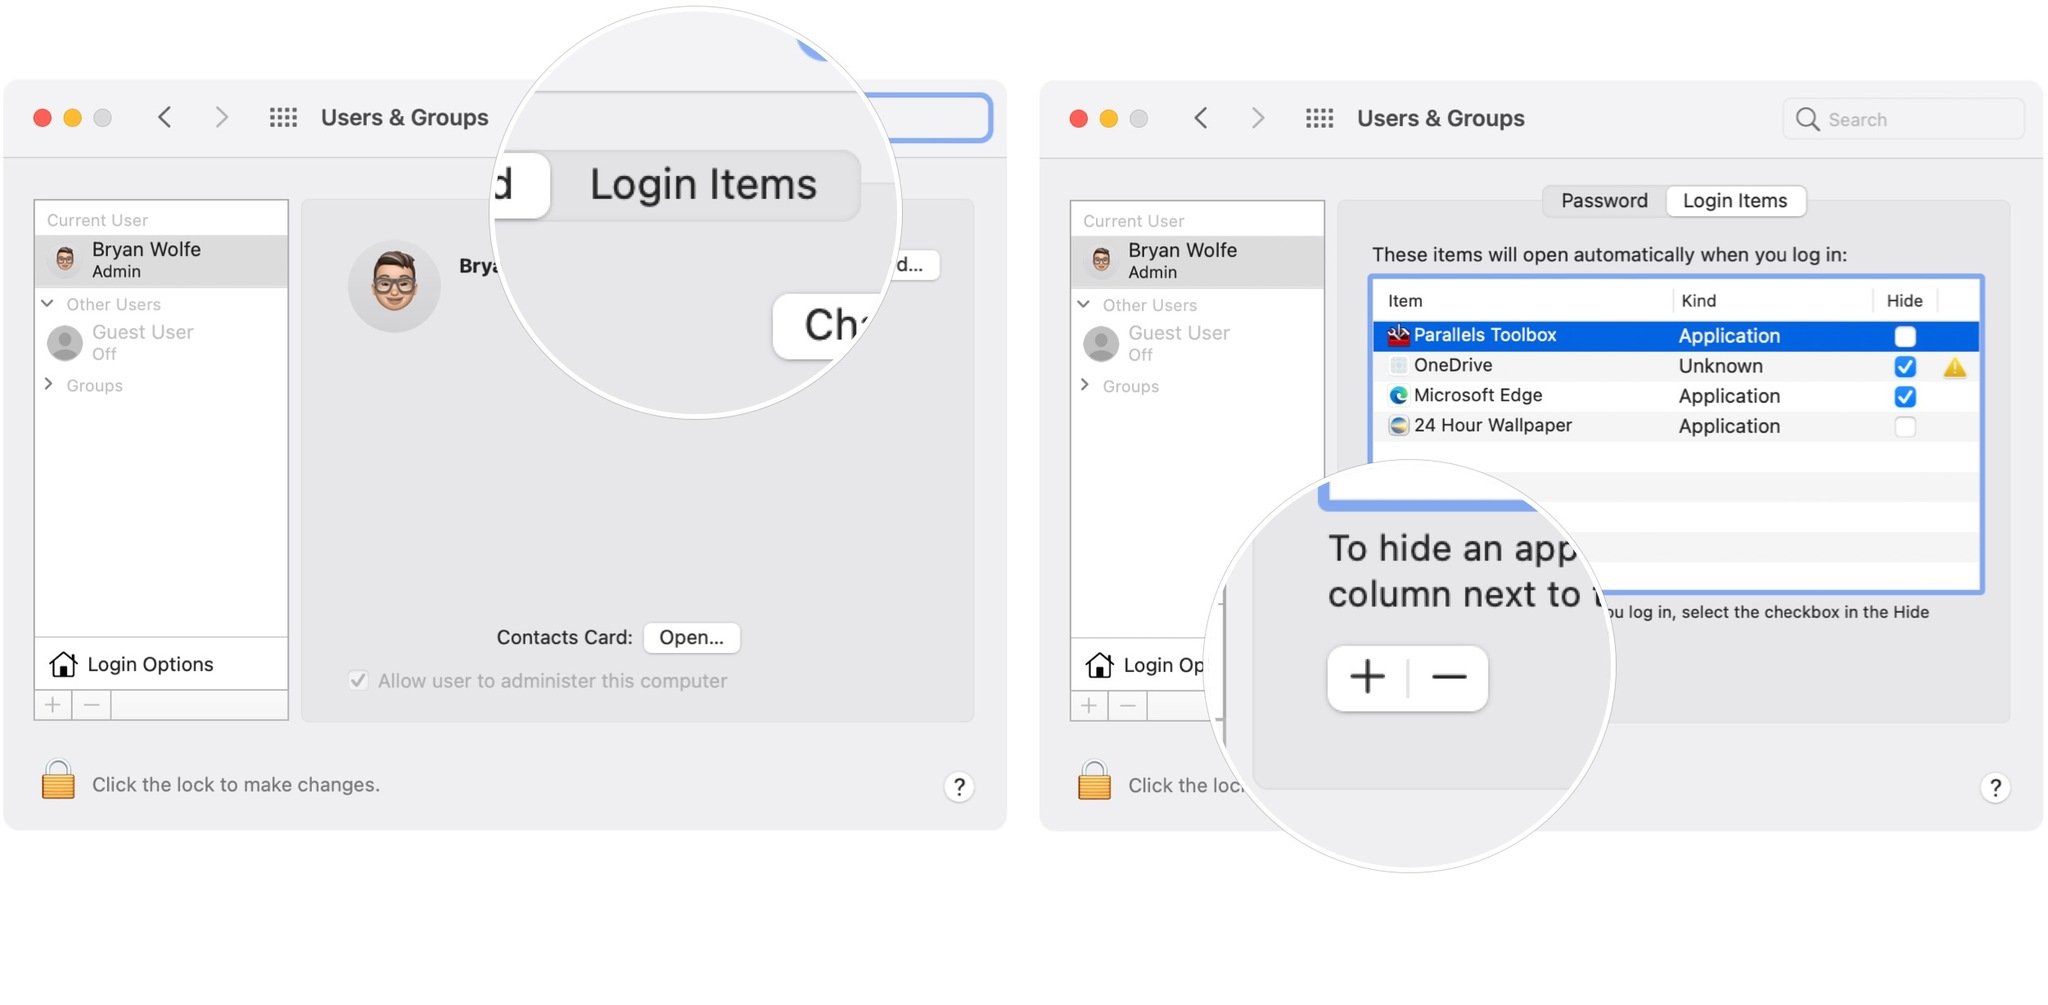
- Select the Current User at the left.
- Click the Login Items tab on the right.
- Highlight an app you don't want to startup automatically anymore. This does not remove the app from the computer.
- Choose the - below the list of apps.
- Repeat Steps 6 and 7 to remove other apps from starting up.
Thoughts?
Do you have any additional questions about how to manage memory on Mac or about macOS in general? Let us know in the comments below.

Bryan M. Wolfe has written about technology for over a decade on various websites, including TechRadar, AppAdvice, and many more. Before this, he worked in the technology field across different industries, including healthcare and education. He’s currently iMore’s lead on all things Mac and macOS, although he also loves covering iPhone, iPad, and Apple Watch. Bryan enjoys watching his favorite sports teams, traveling, and driving around his teenage daughter to her latest stage show, audition, or school event in his spare time. He also keeps busy walking his black and white cocker spaniel, Izzy, and trying new coffees and liquid grapes.
