How to get started with Things for iPhone, iPad, and Mac
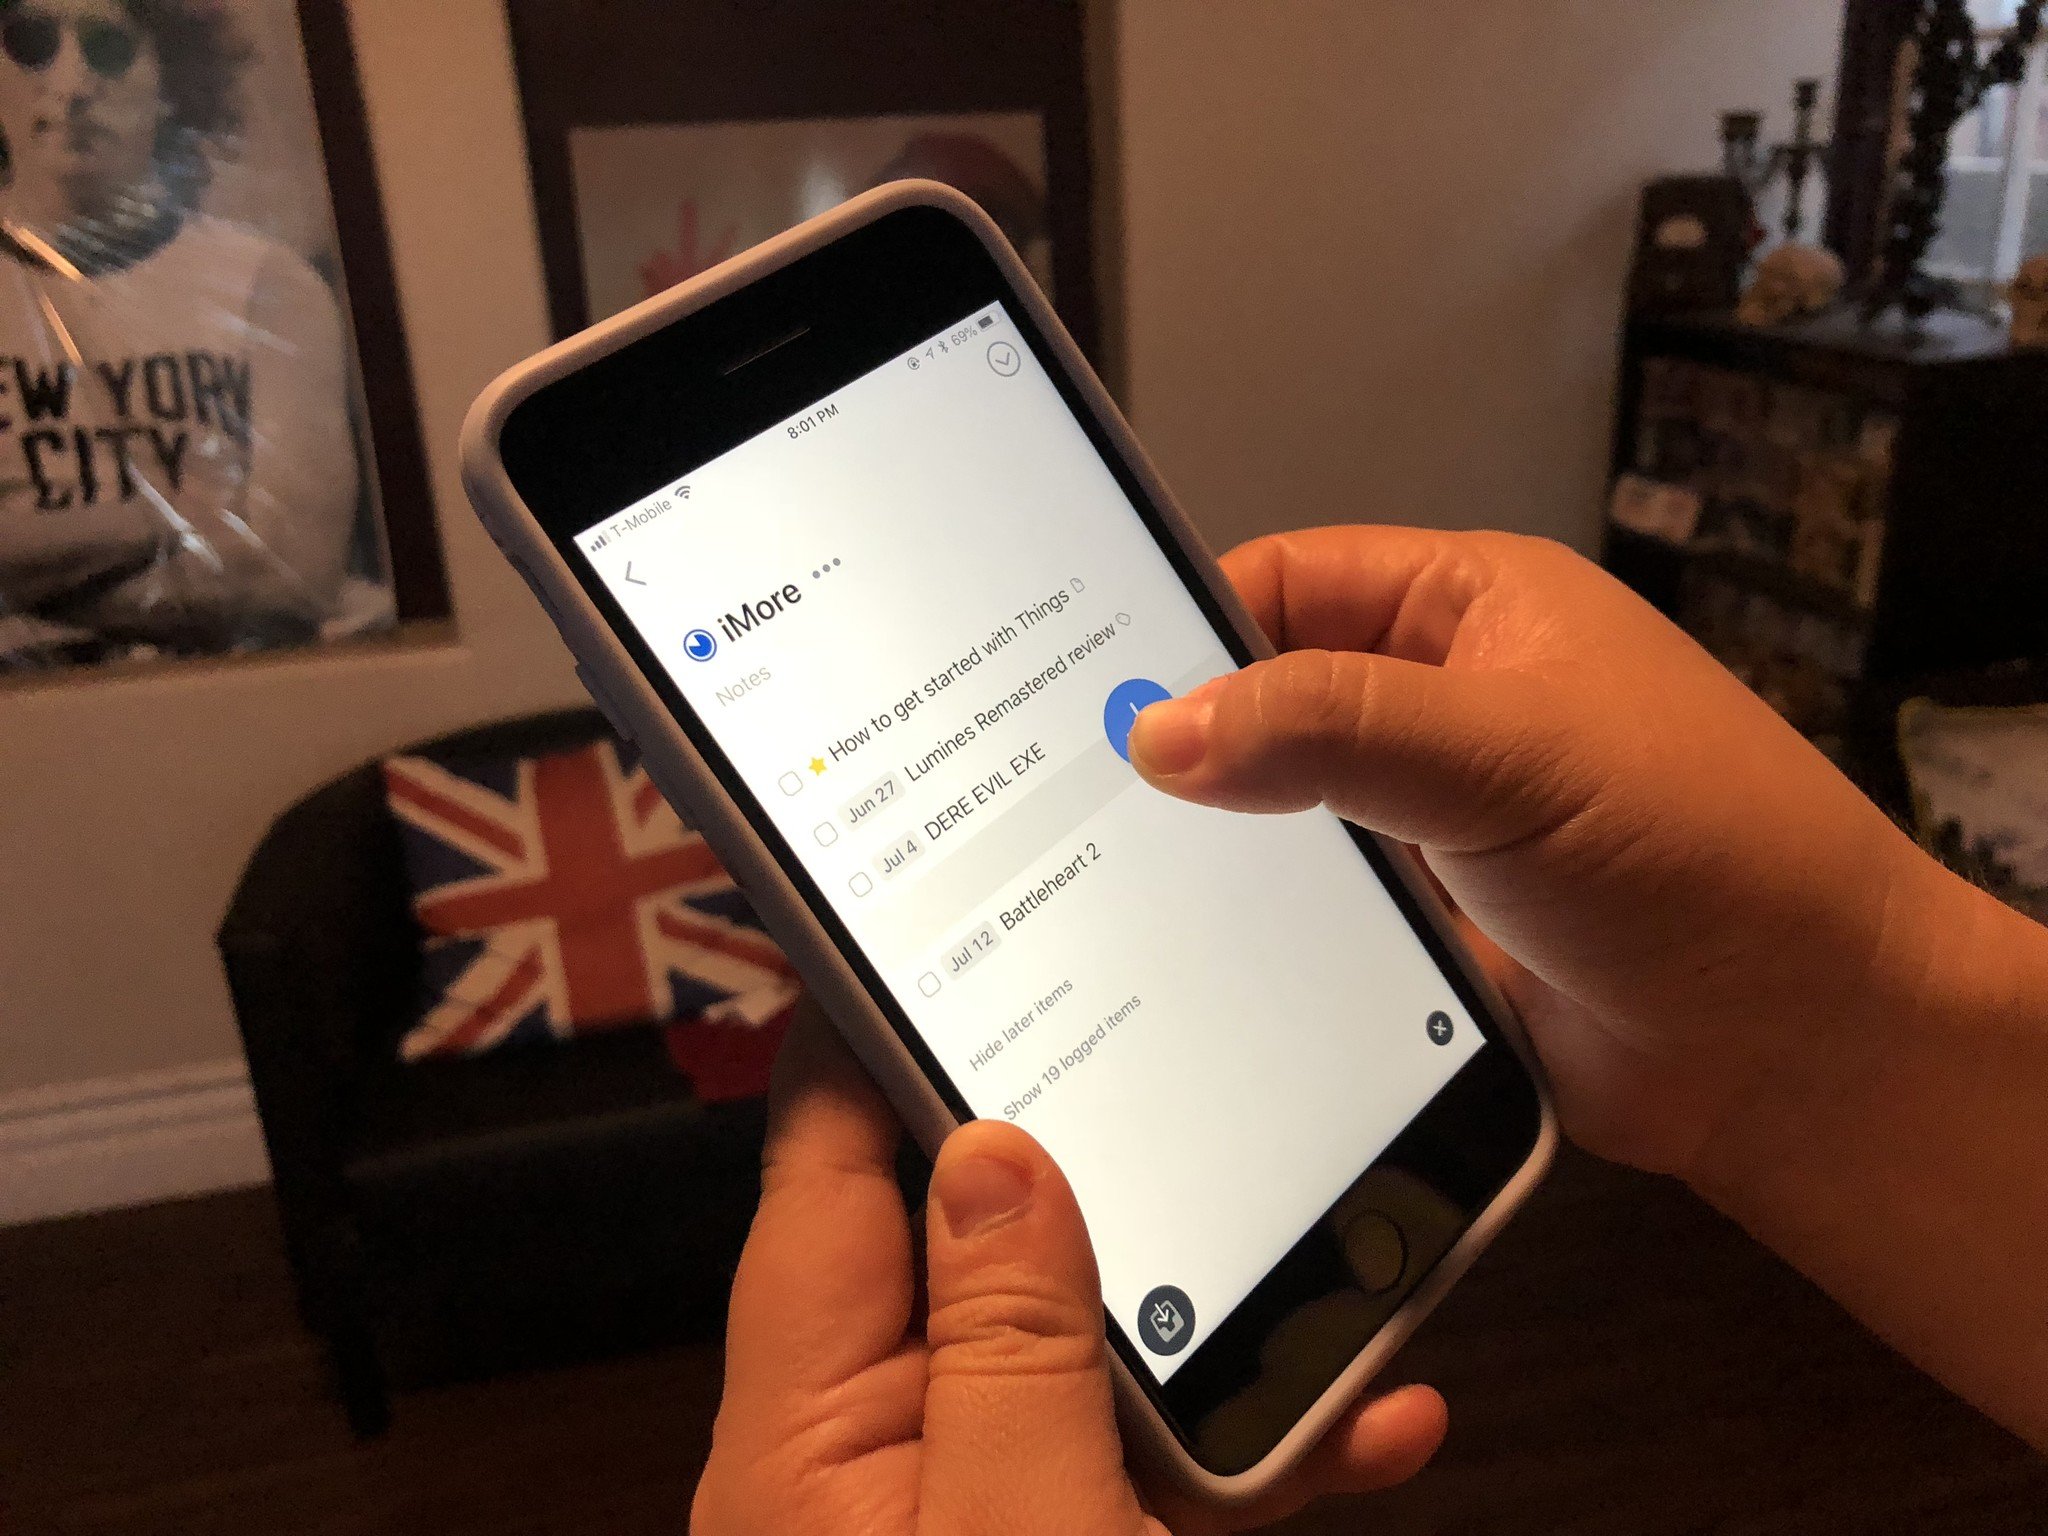
If you've ever dived into the world of task management apps, then you may be familiar with the powerful but complex beast called OmniFocus. In fact, I wrote a guide on how to get started with OmniFocus earlier.
However, as great as OmniFocus is, it may be just too much for some people, which is understandable. And when this is the case, there's another of my favorite task management apps on the other end of the spectrum — Things from Cultured Code.
- Things 3 for iPhone: $9.99 - Download Now
- Things 3 for iPad: $19.99 - Download Now
- Things 3 for Mac: $49.99 - Download Now
While Things used to be overly simple and not feature-rich, some fantastic updates have brought many new improvements. Even though Things is still a lot easier to use than OmniFocus, the latest iteration has brought some big changes that may take some getting used to.
Today I'm going to show you how to get started with Things to manage all of your tasks and projects, no matter how small or big they are.
Setting up Things
As with any app designed to help you with productivity, you need it to work with you, not the other way around. While OmniFocus had plenty of setup involved with getting it to work the way you need it to, Things is a lot simpler.
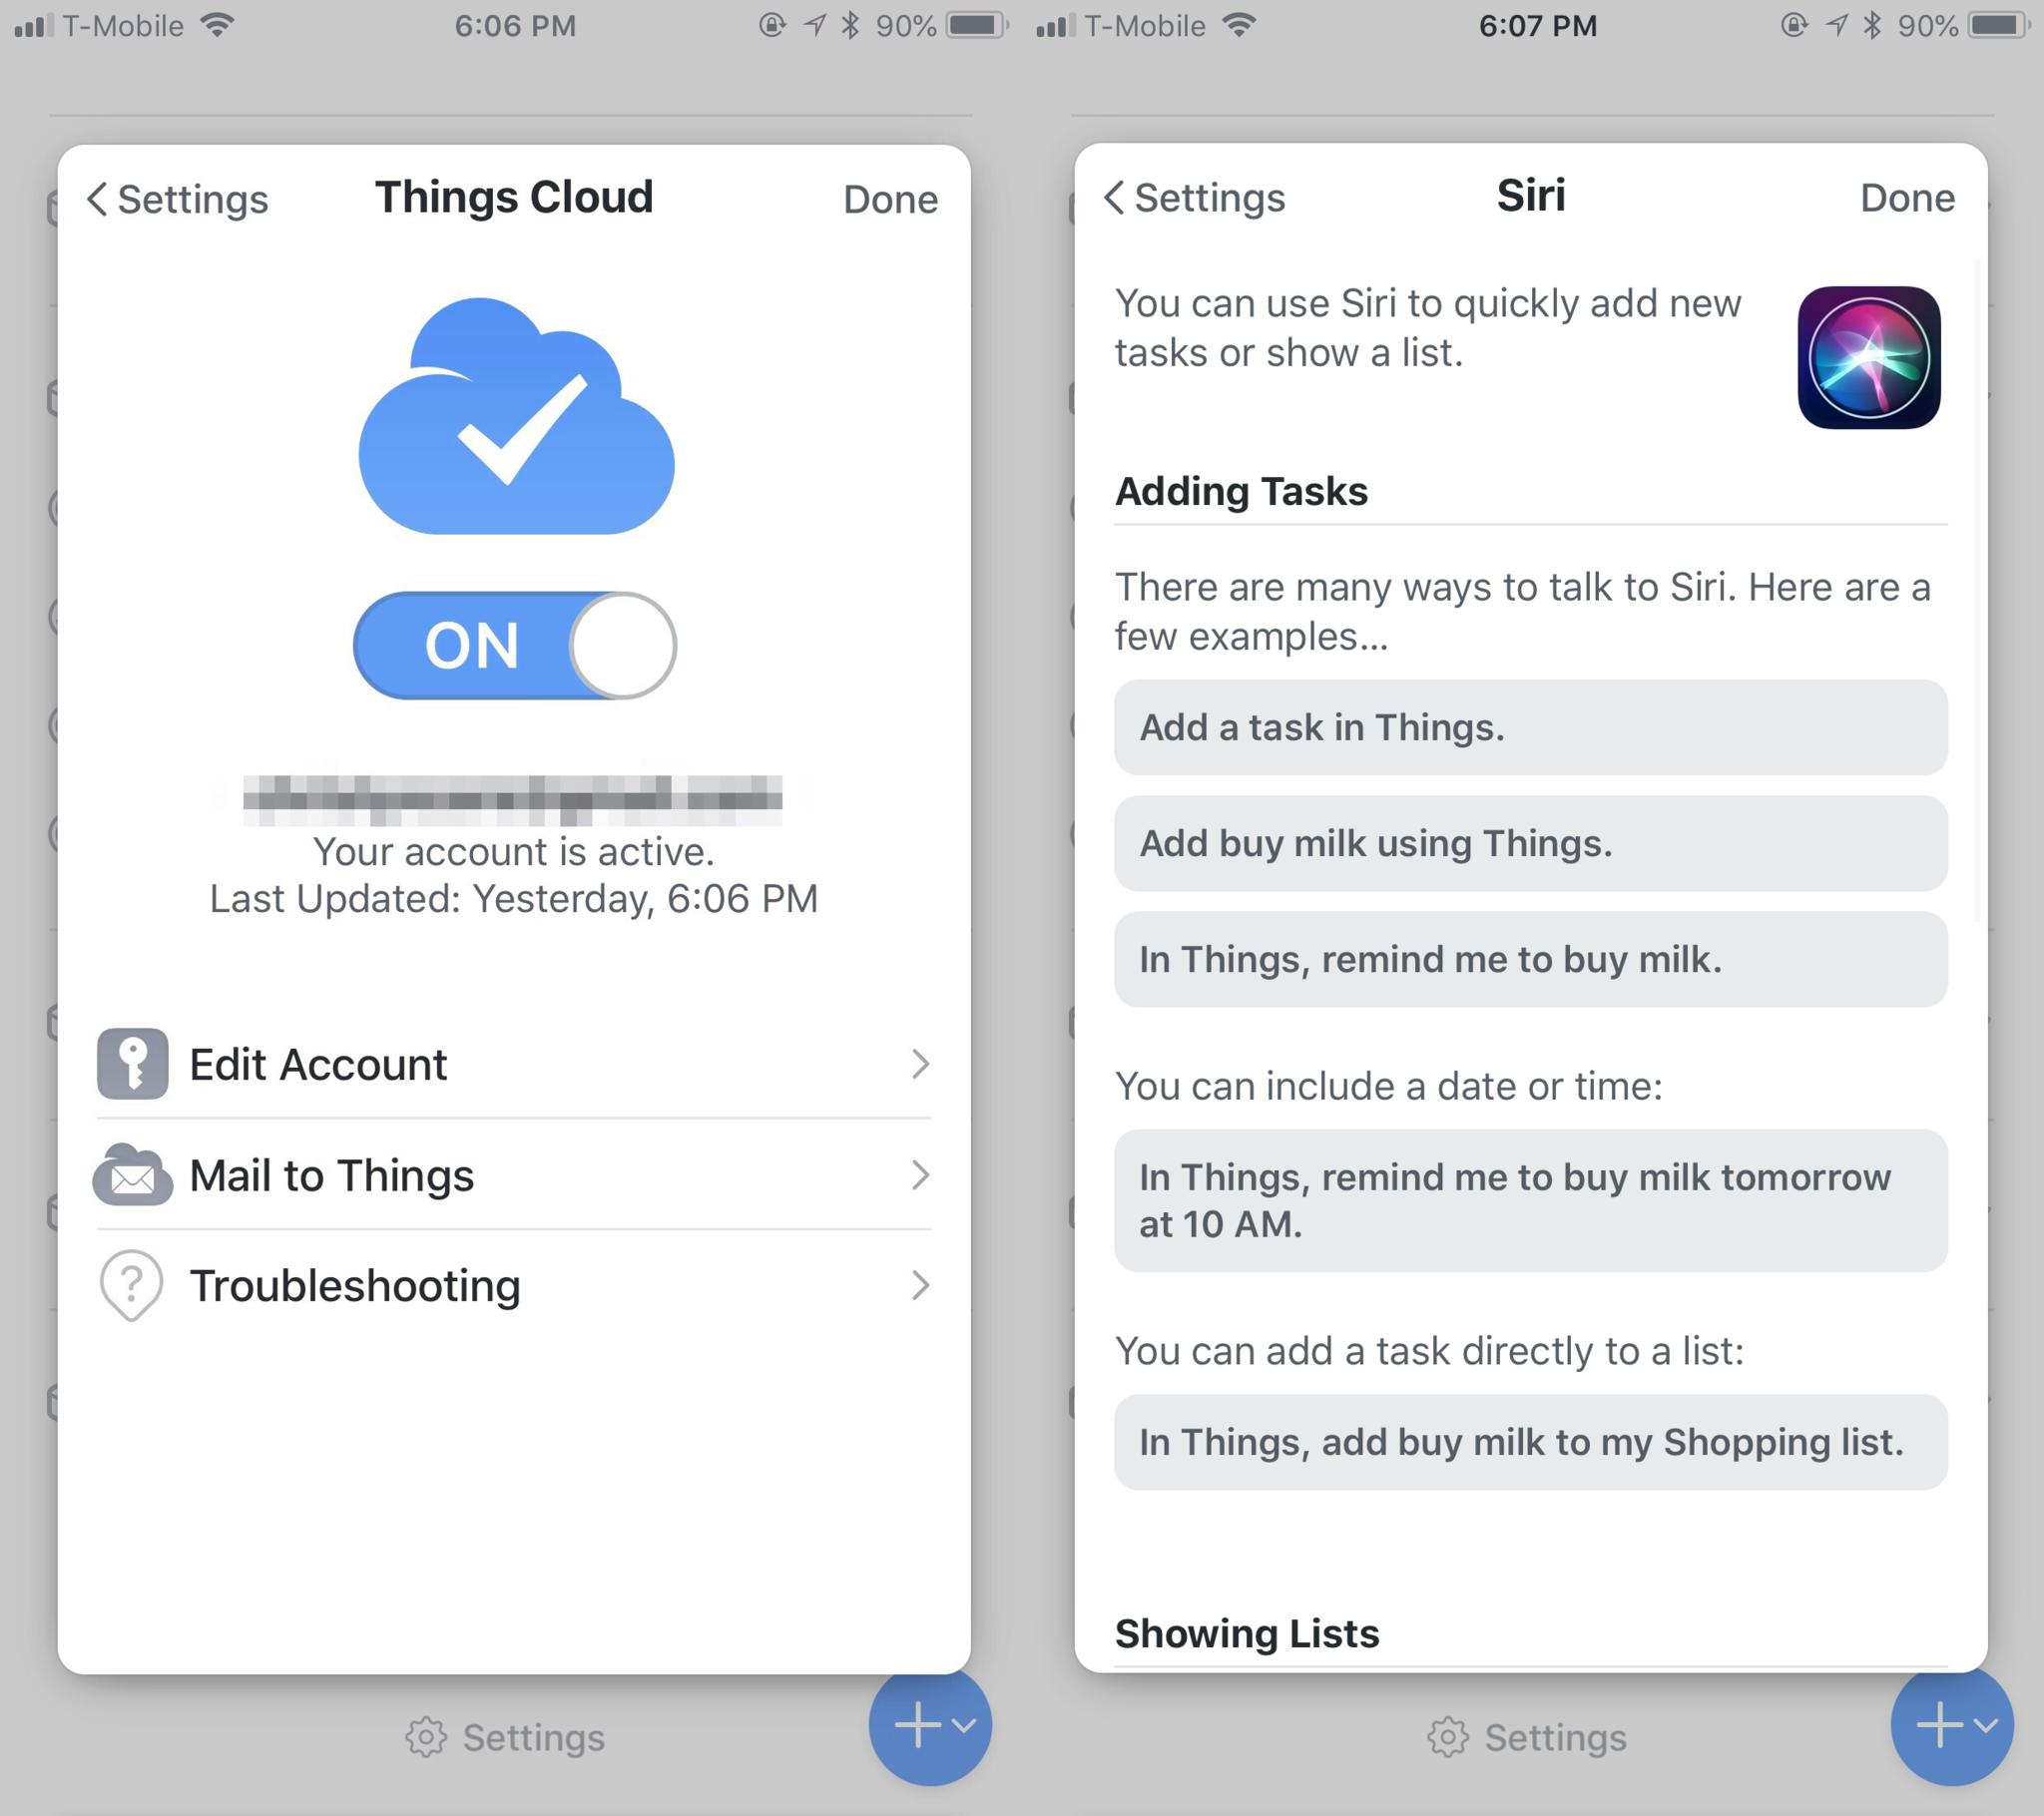
First, if you plan on using Things on all of your devices (iPhone, iPad, and Mac), then you should set up Things Cloud for syncing. Don't worry — accounts are free and super simple to set up!
When you're in Things on iOS, just access the Settings and select Things Cloud. Flip the switch on, and you'll get a prompt to log in to an existing account or create a new one if you don't already have one. Just enter an email and password, and you're good to go!
iMore offers spot-on advice and guidance from our team of experts, with decades of Apple device experience to lean on. Learn more with iMore!
Now whenever you use Things, just log in to that Things Cloud account and all of your to-dos and projects remain intact, no matter what device you're on. Plus it's fast, secure, and completely invisible. In fact, it's so invisible that I sometimes forget I even signed up!
Another thing that may be useful for your workflow is the Mail to Things feature. This is a randomly generated email address that is unique to each individual account. With Mail to Things, you're able to add to-dos to your inbox by sending emails to this address. You can get your distinctive email address in the Things Cloud section.
On iOS, Things integrates with Siri, so if you prefer to use Apple's virtual assistant to quickly get things into your apps, you're free to enable it. With Siri, you can say things like "In Things, remind me to buy milk tomorrow at 10 AM" and they get added without any other input.
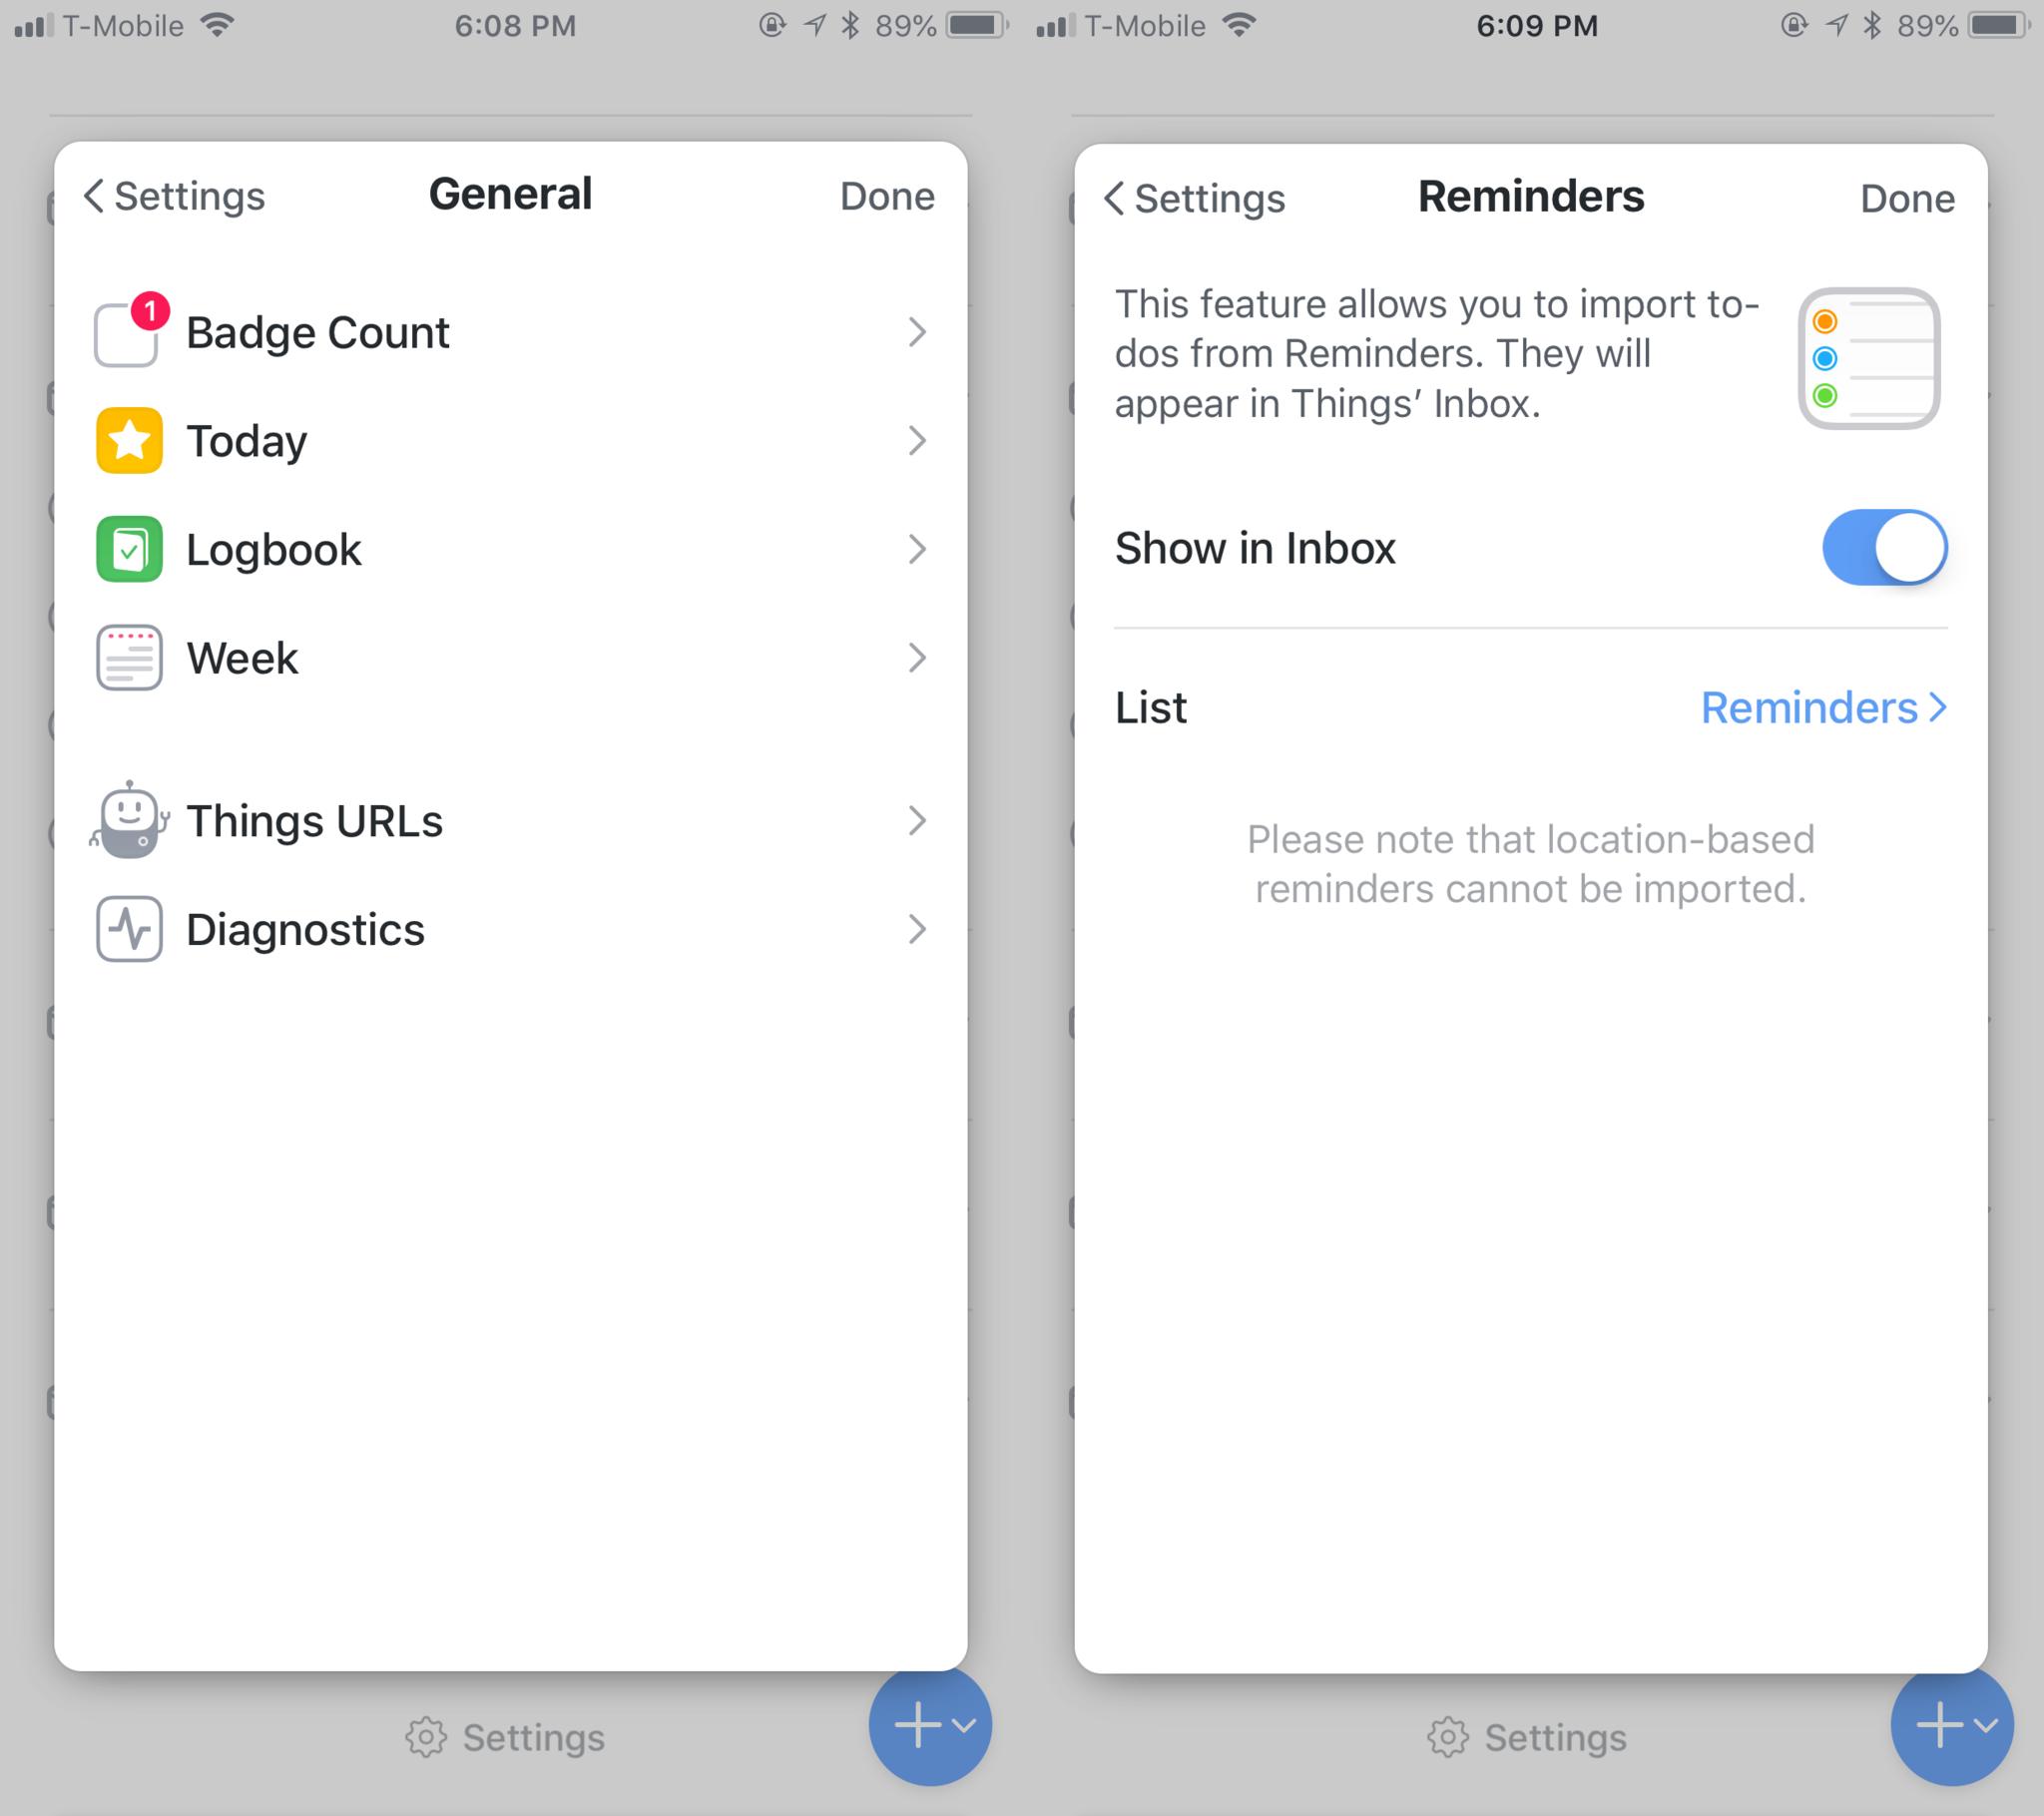
If you use Calendars or Reminders for your other simple tasks or schedule, then you'll be happy to know that Things can pull this data directly into the app as well. Calendar appointments appear in the Today and Upcoming sections of Things, so you'll always know what's in store in a single glance. Reminders get displayed in your inbox, as well as a separate list of your choosing.
Finally, there are a few miscellaneous settings that you can toggle in the General section in Things' settings to make it your own. This includes badge counts, how Today gets organized, when to move things to the Logbook, and the first day of the week.
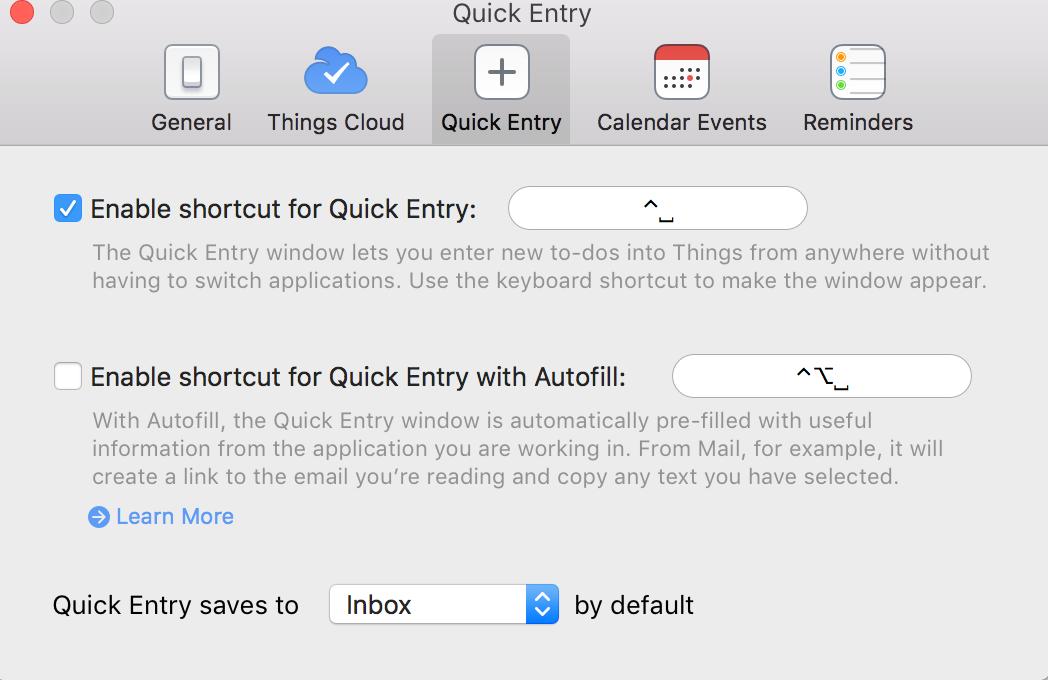
One more thing to note regarding the Mac version of Things: Quick Entry. Make sure you learn the keyboard shortcut to utilize this feature, since it allows you to create new tasks from anywhere without having to switch applications. The iPad version of Things also has new keyboard shortcuts (if you use a Bluetooth keyboard) to make life easier.
Focus on Areas and Projects
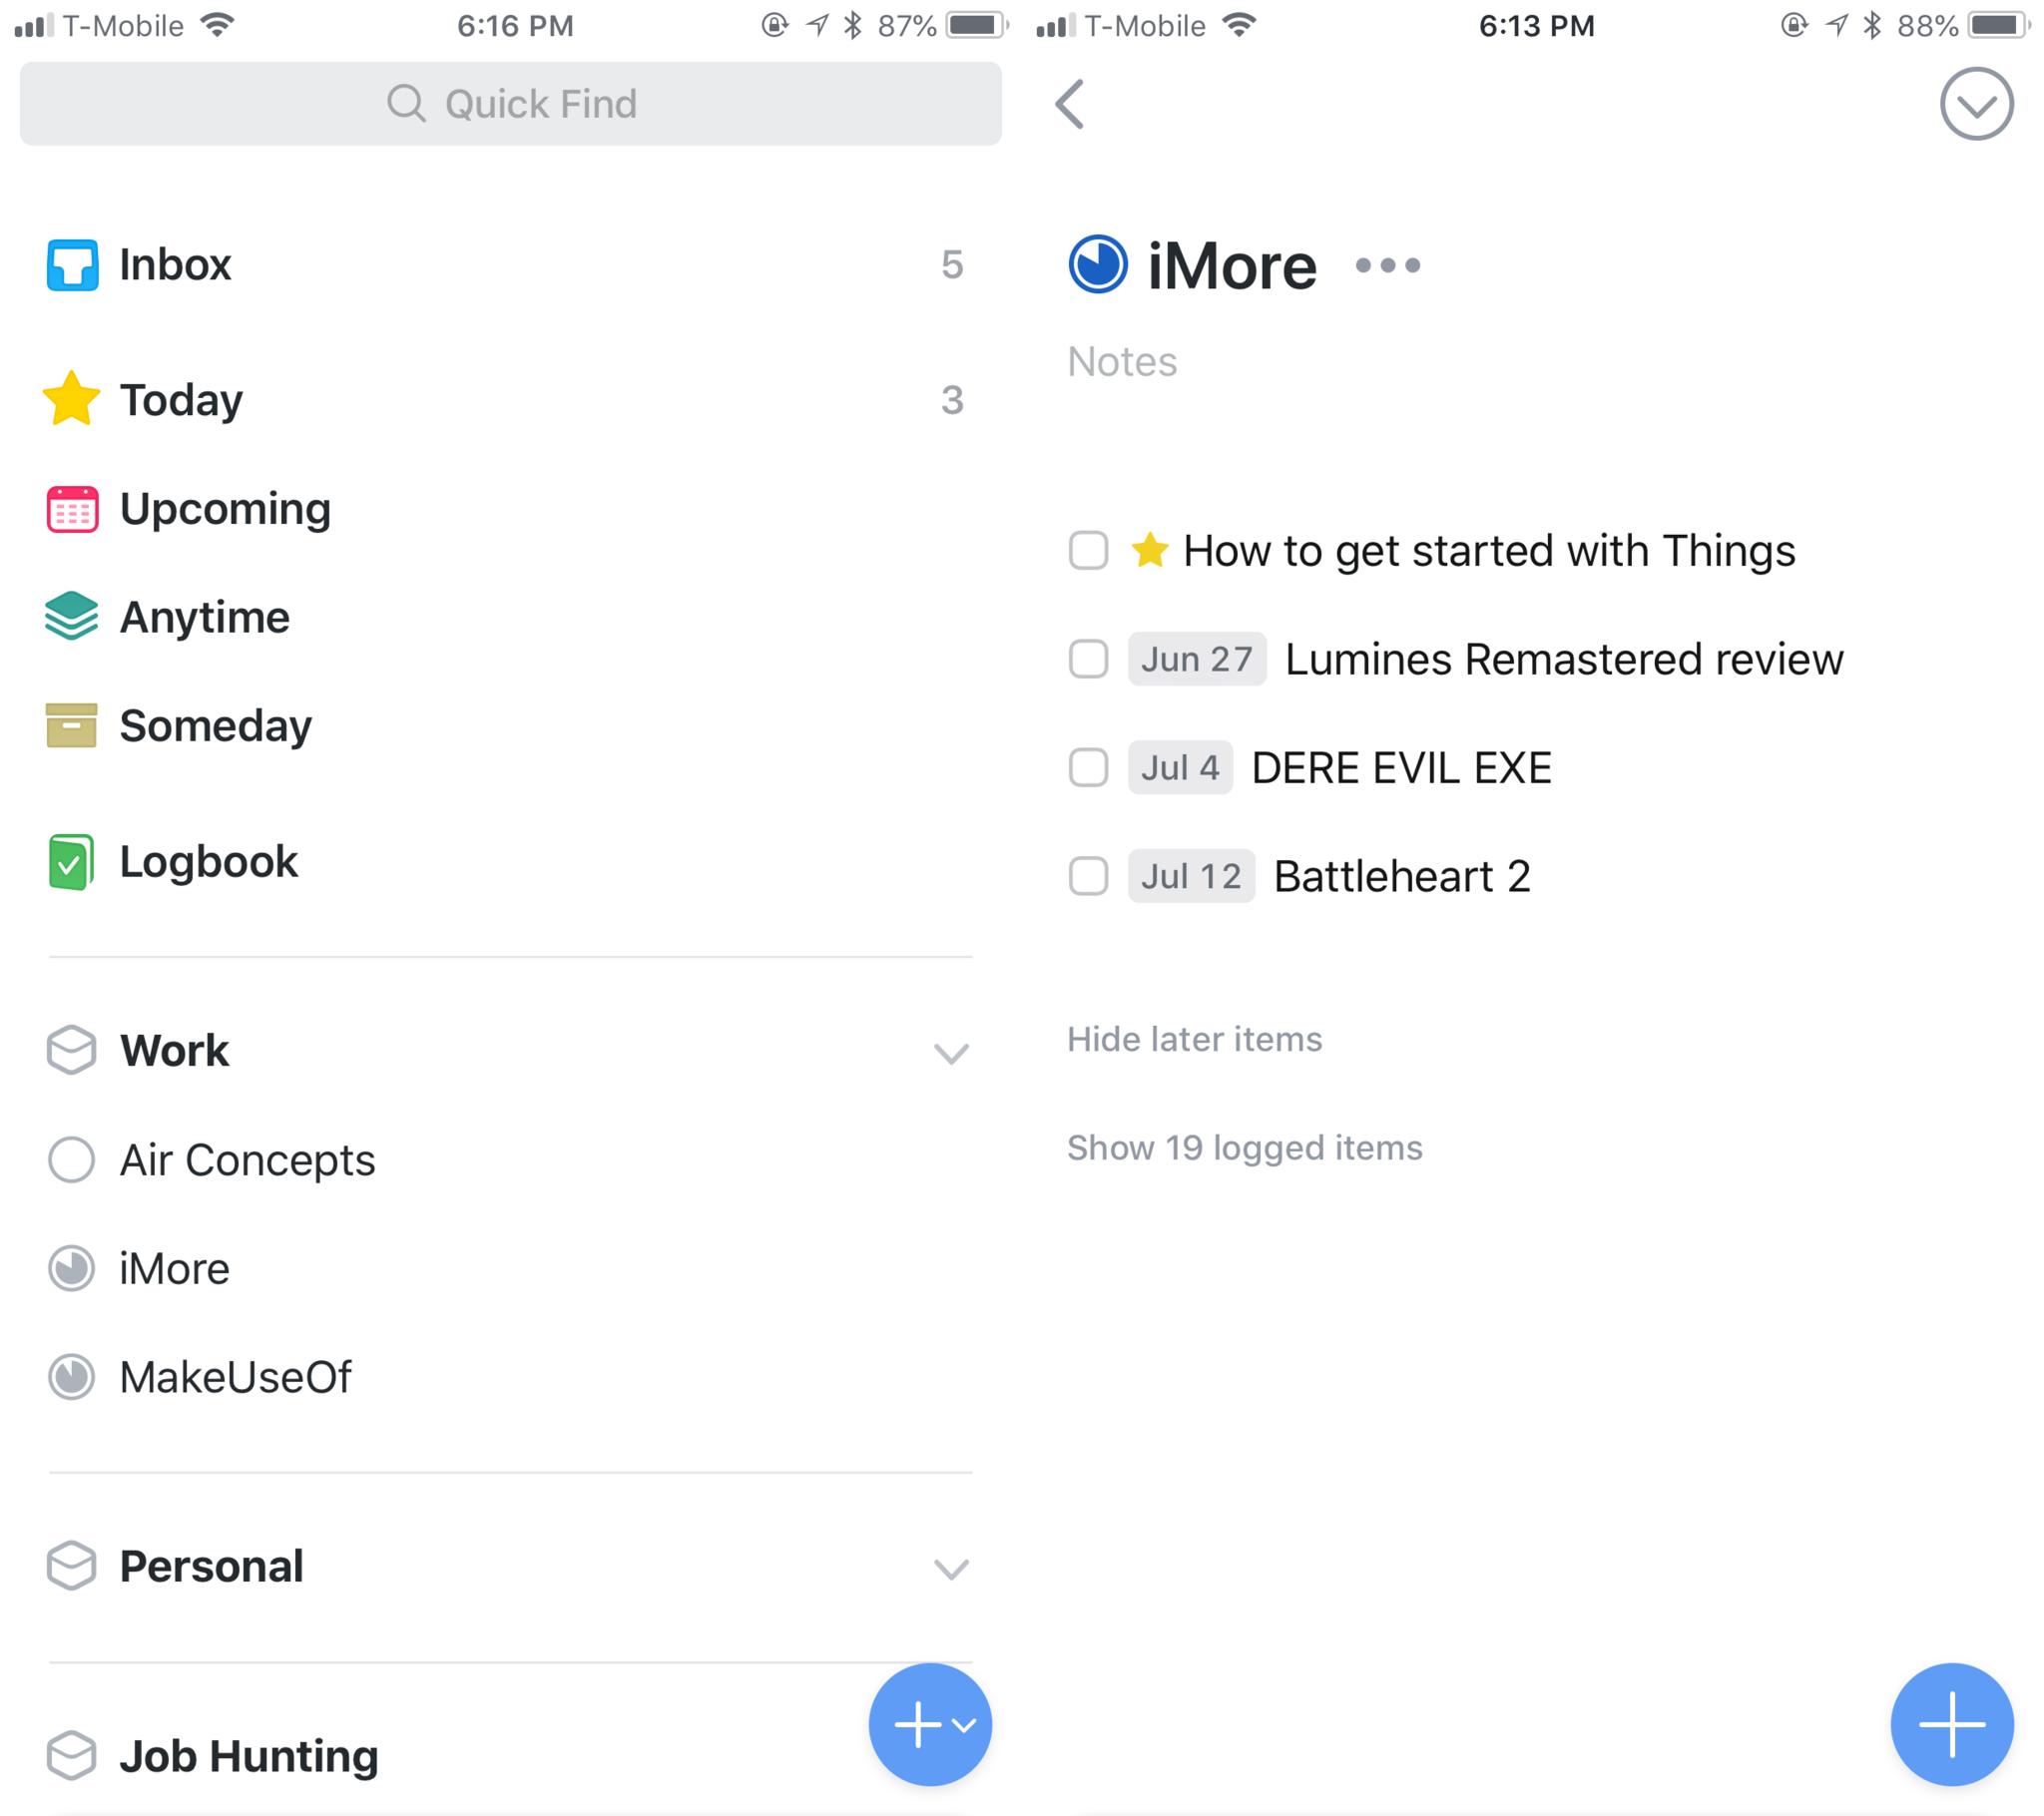
There are two ways to organize your tasks in Things: Areas and Projects. What's the difference though? Let's dive in.
Areas is the broader scope of the two, so you can think of these as the bigger umbrella that Projects will fall under. For example, you can create areas like Home, Work, Career, School, Health, Money, and etc. With Areas, it's more like grouping your projects into a an ongoing category.
For example, I have several Areas set up in my Things: Work, Personal, Errands, Job Hunting, Taxes, Payments, and Family. I think of Areas as generic categories where I may have several projects or lists that I need to work on, and go from there. Usually, there should be at least one or two "projects" of mine that end up in each, though sometimes I just dump task items in an area, rather than a project.
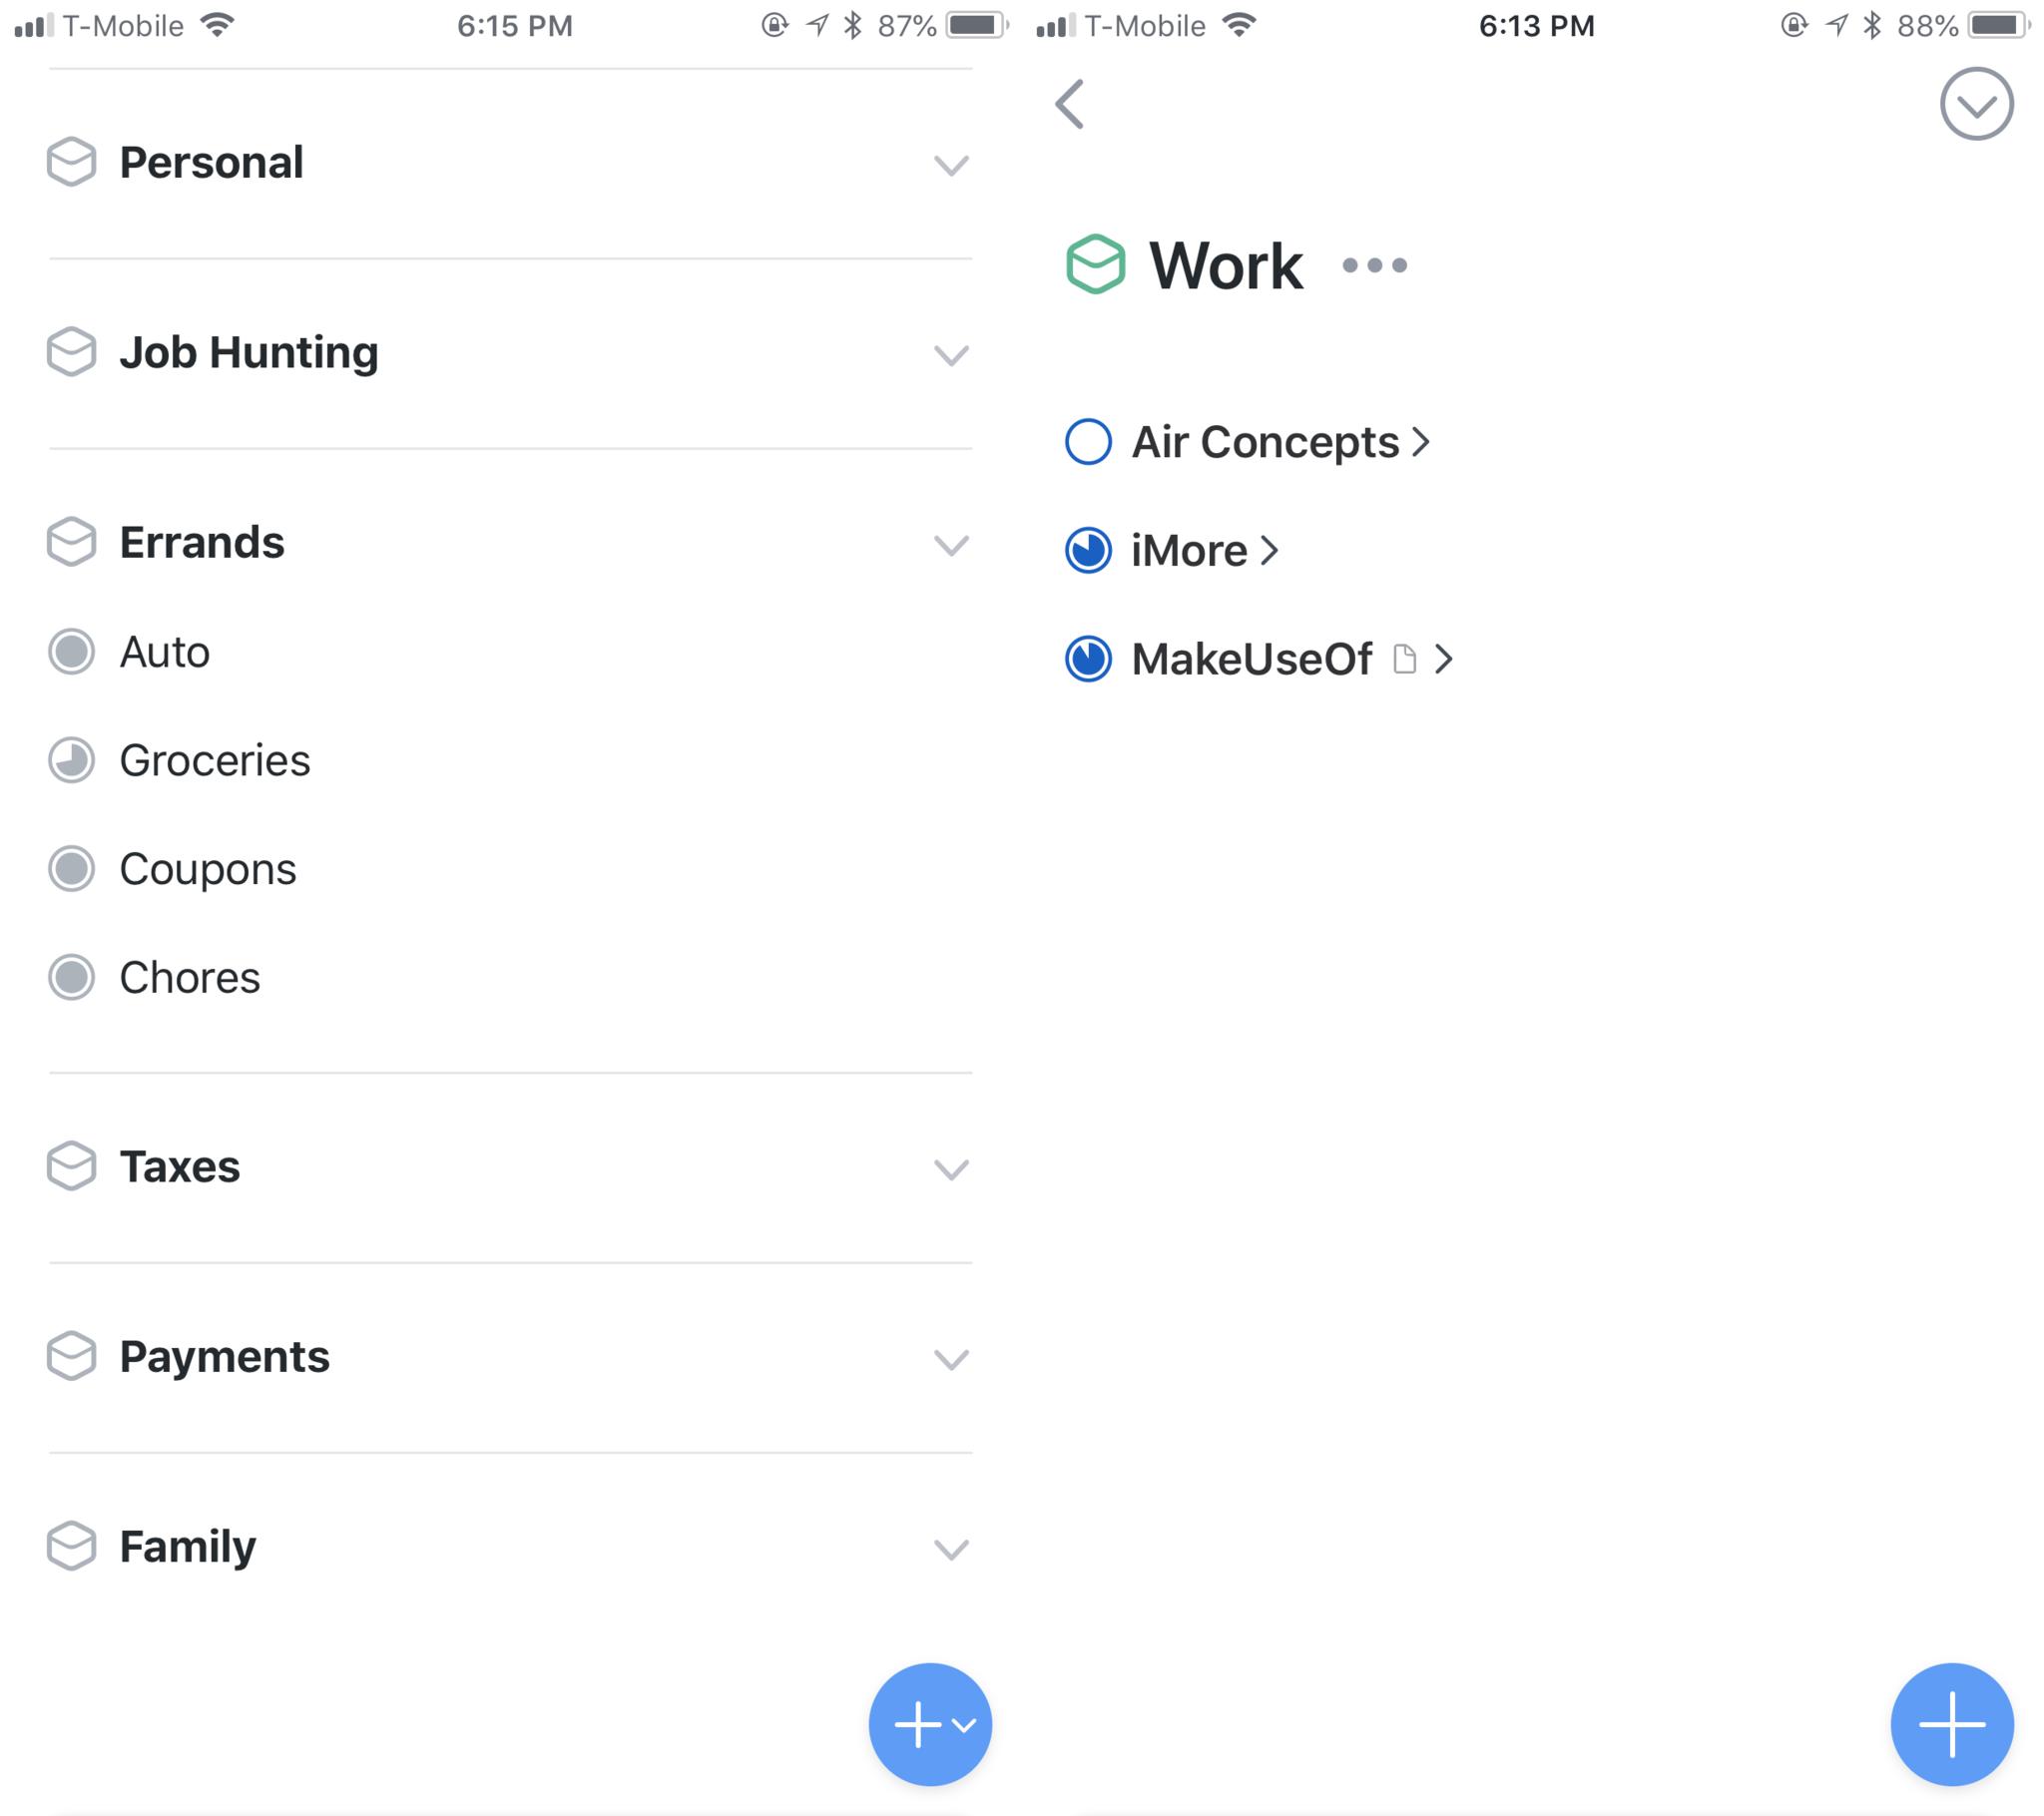
Projects are actually defined on the Things website as a task that takes multiple steps to complete. However, I personally see Projects as current jobs or other task groups where I always have something happening. Most of the time, my most important Projects are never empty or "complete," as they say.
A sample of my projects include iMore.com and MakeUseOf.com under my Work area. These projects are where I throw in all of my upcoming articles with deadlines, pitches, and tasks required in order to get paid. The system is pretty simple, but keeps everything organized so I don't get anything mixed up between jobs.
While your own workflow may differ from mine, I think Things' simplified approach with Areas and Projects is easy enough for anyone. It's straightforward, and when you go on to add a new item on the main screen, there's even descriptions under Project and Area so it's impossible to forget.
I'd recommend thinking about general Areas to add into Things first, and then start putting your Projects together under those broad categories. You can always go back and make any edits to Areas and Projects later too, or mark them as Complete and Cancelled when necessary.
Dealing with task items
Now that your Areas and Projects are all set up, it's time to start adding tasks and becoming productive. I mean, that's the entire point of Things, right?
In Things on iOS, there's the omnipresent and floating "+" button in the bottom corner. This button is always available on any screen, though the actions you're able to do with it may vary depending on where you are.
For example, on the main overview, it lets you create a new Area, Project, or Task for the Inbox. When you're in an Area or Project, tapping on the "Add" button lets you add a new task item directly in that area.
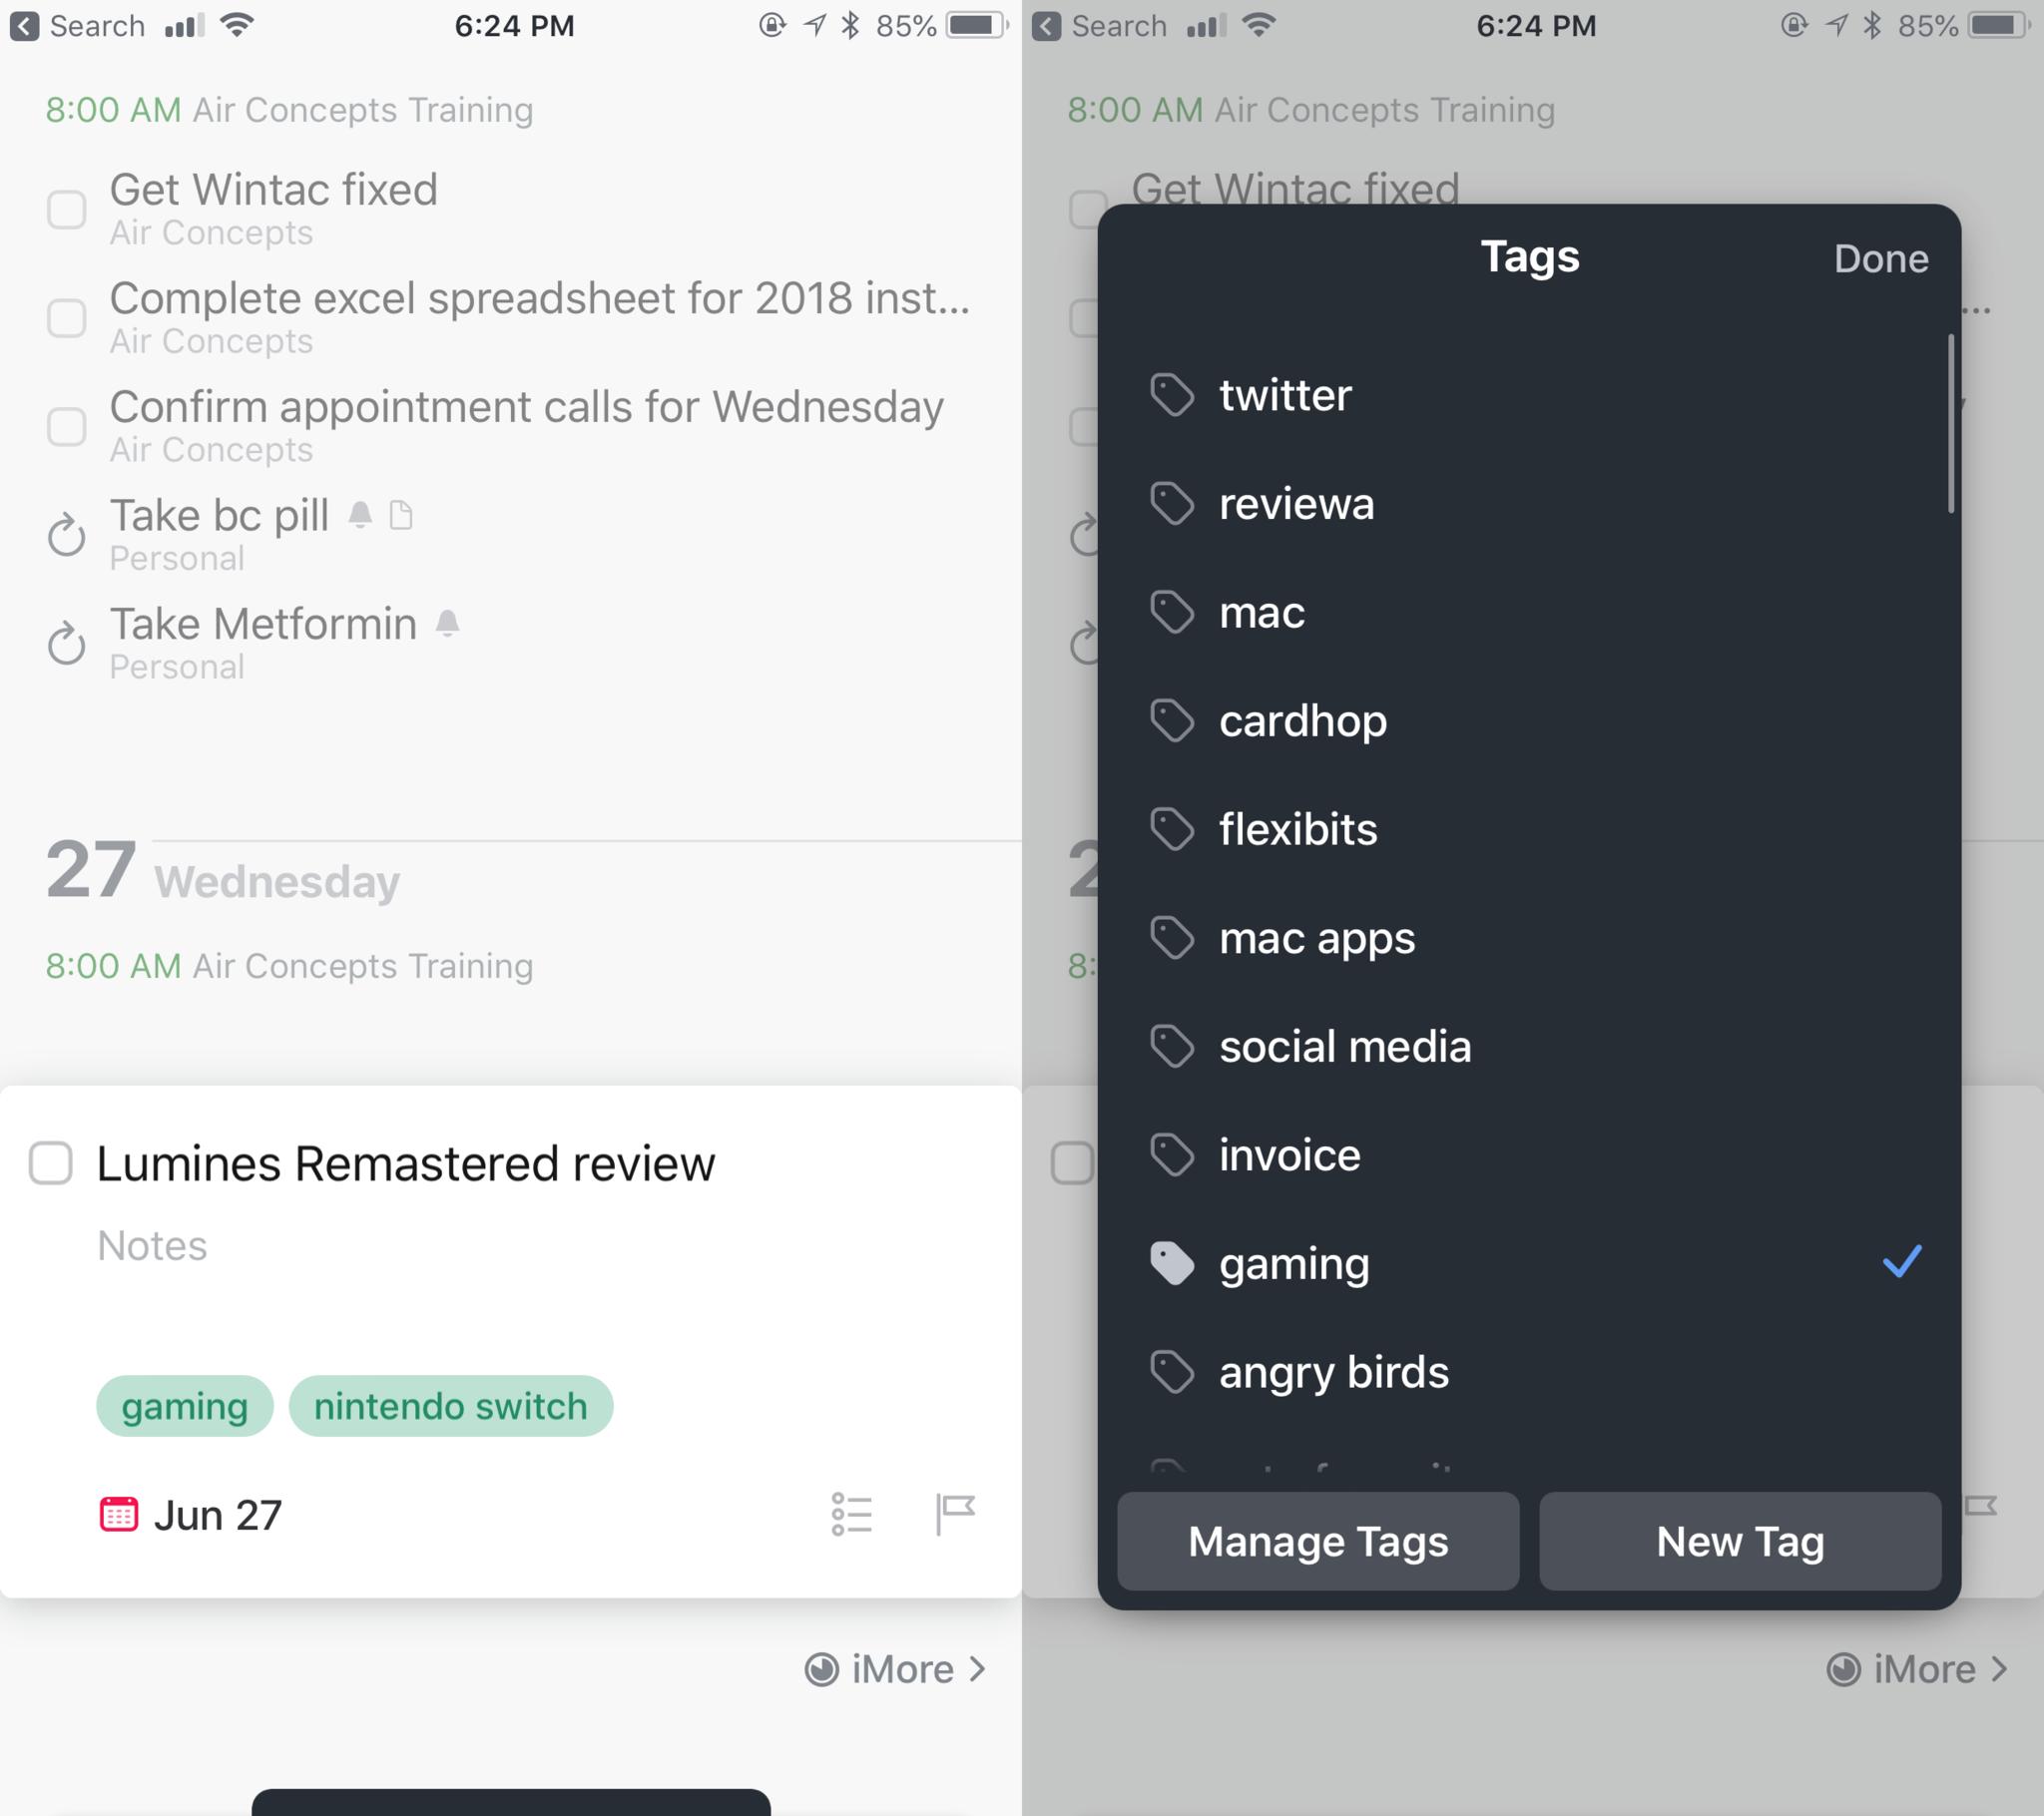
One neat thing with the iOS versions though, is the fact that you can drag and drop that button into a certain spot, such as when viewing an entire Area, or a Project with a few tasks already. This makes it easier for you to have your item where it needs to be, rather than having to move it around later.
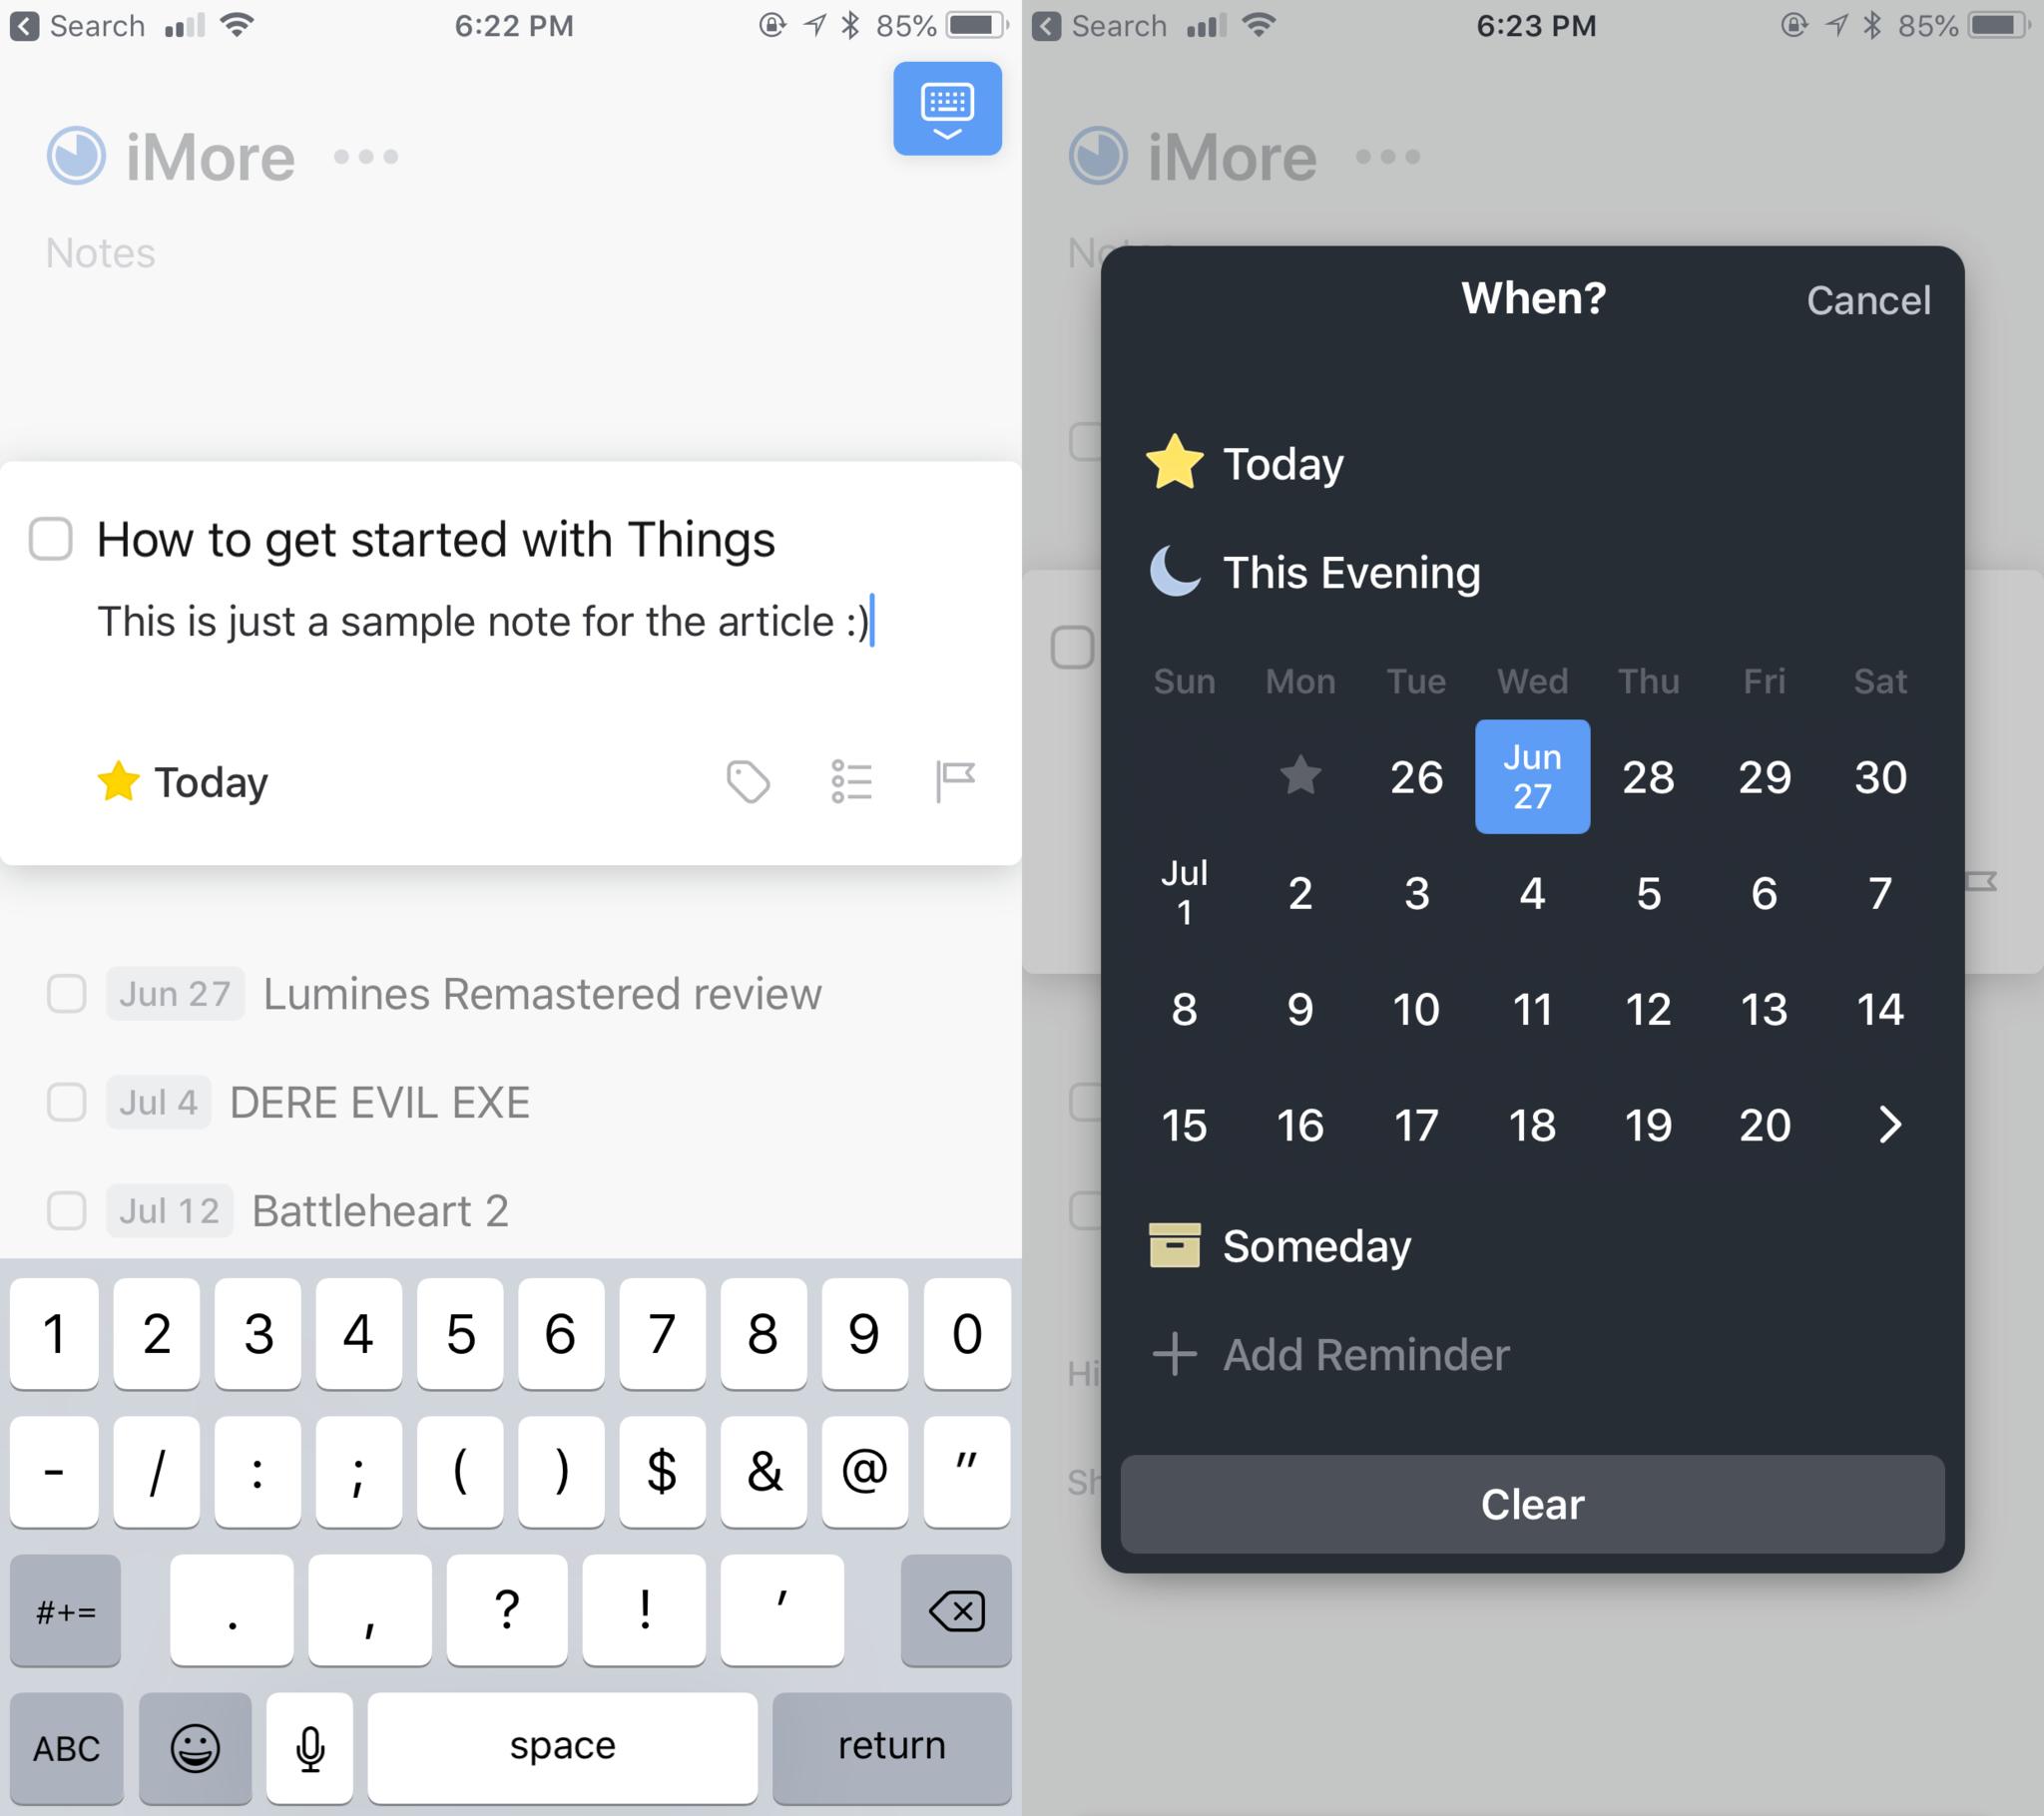
A task item in Things has a pretty simple format, and it's fairly straightforward. Just give it a name, and add in some notes if necessary. Once those two fields get filled in, you can choose the due date, add tags, create a checklist of subtasks or items, and even include a deadline.
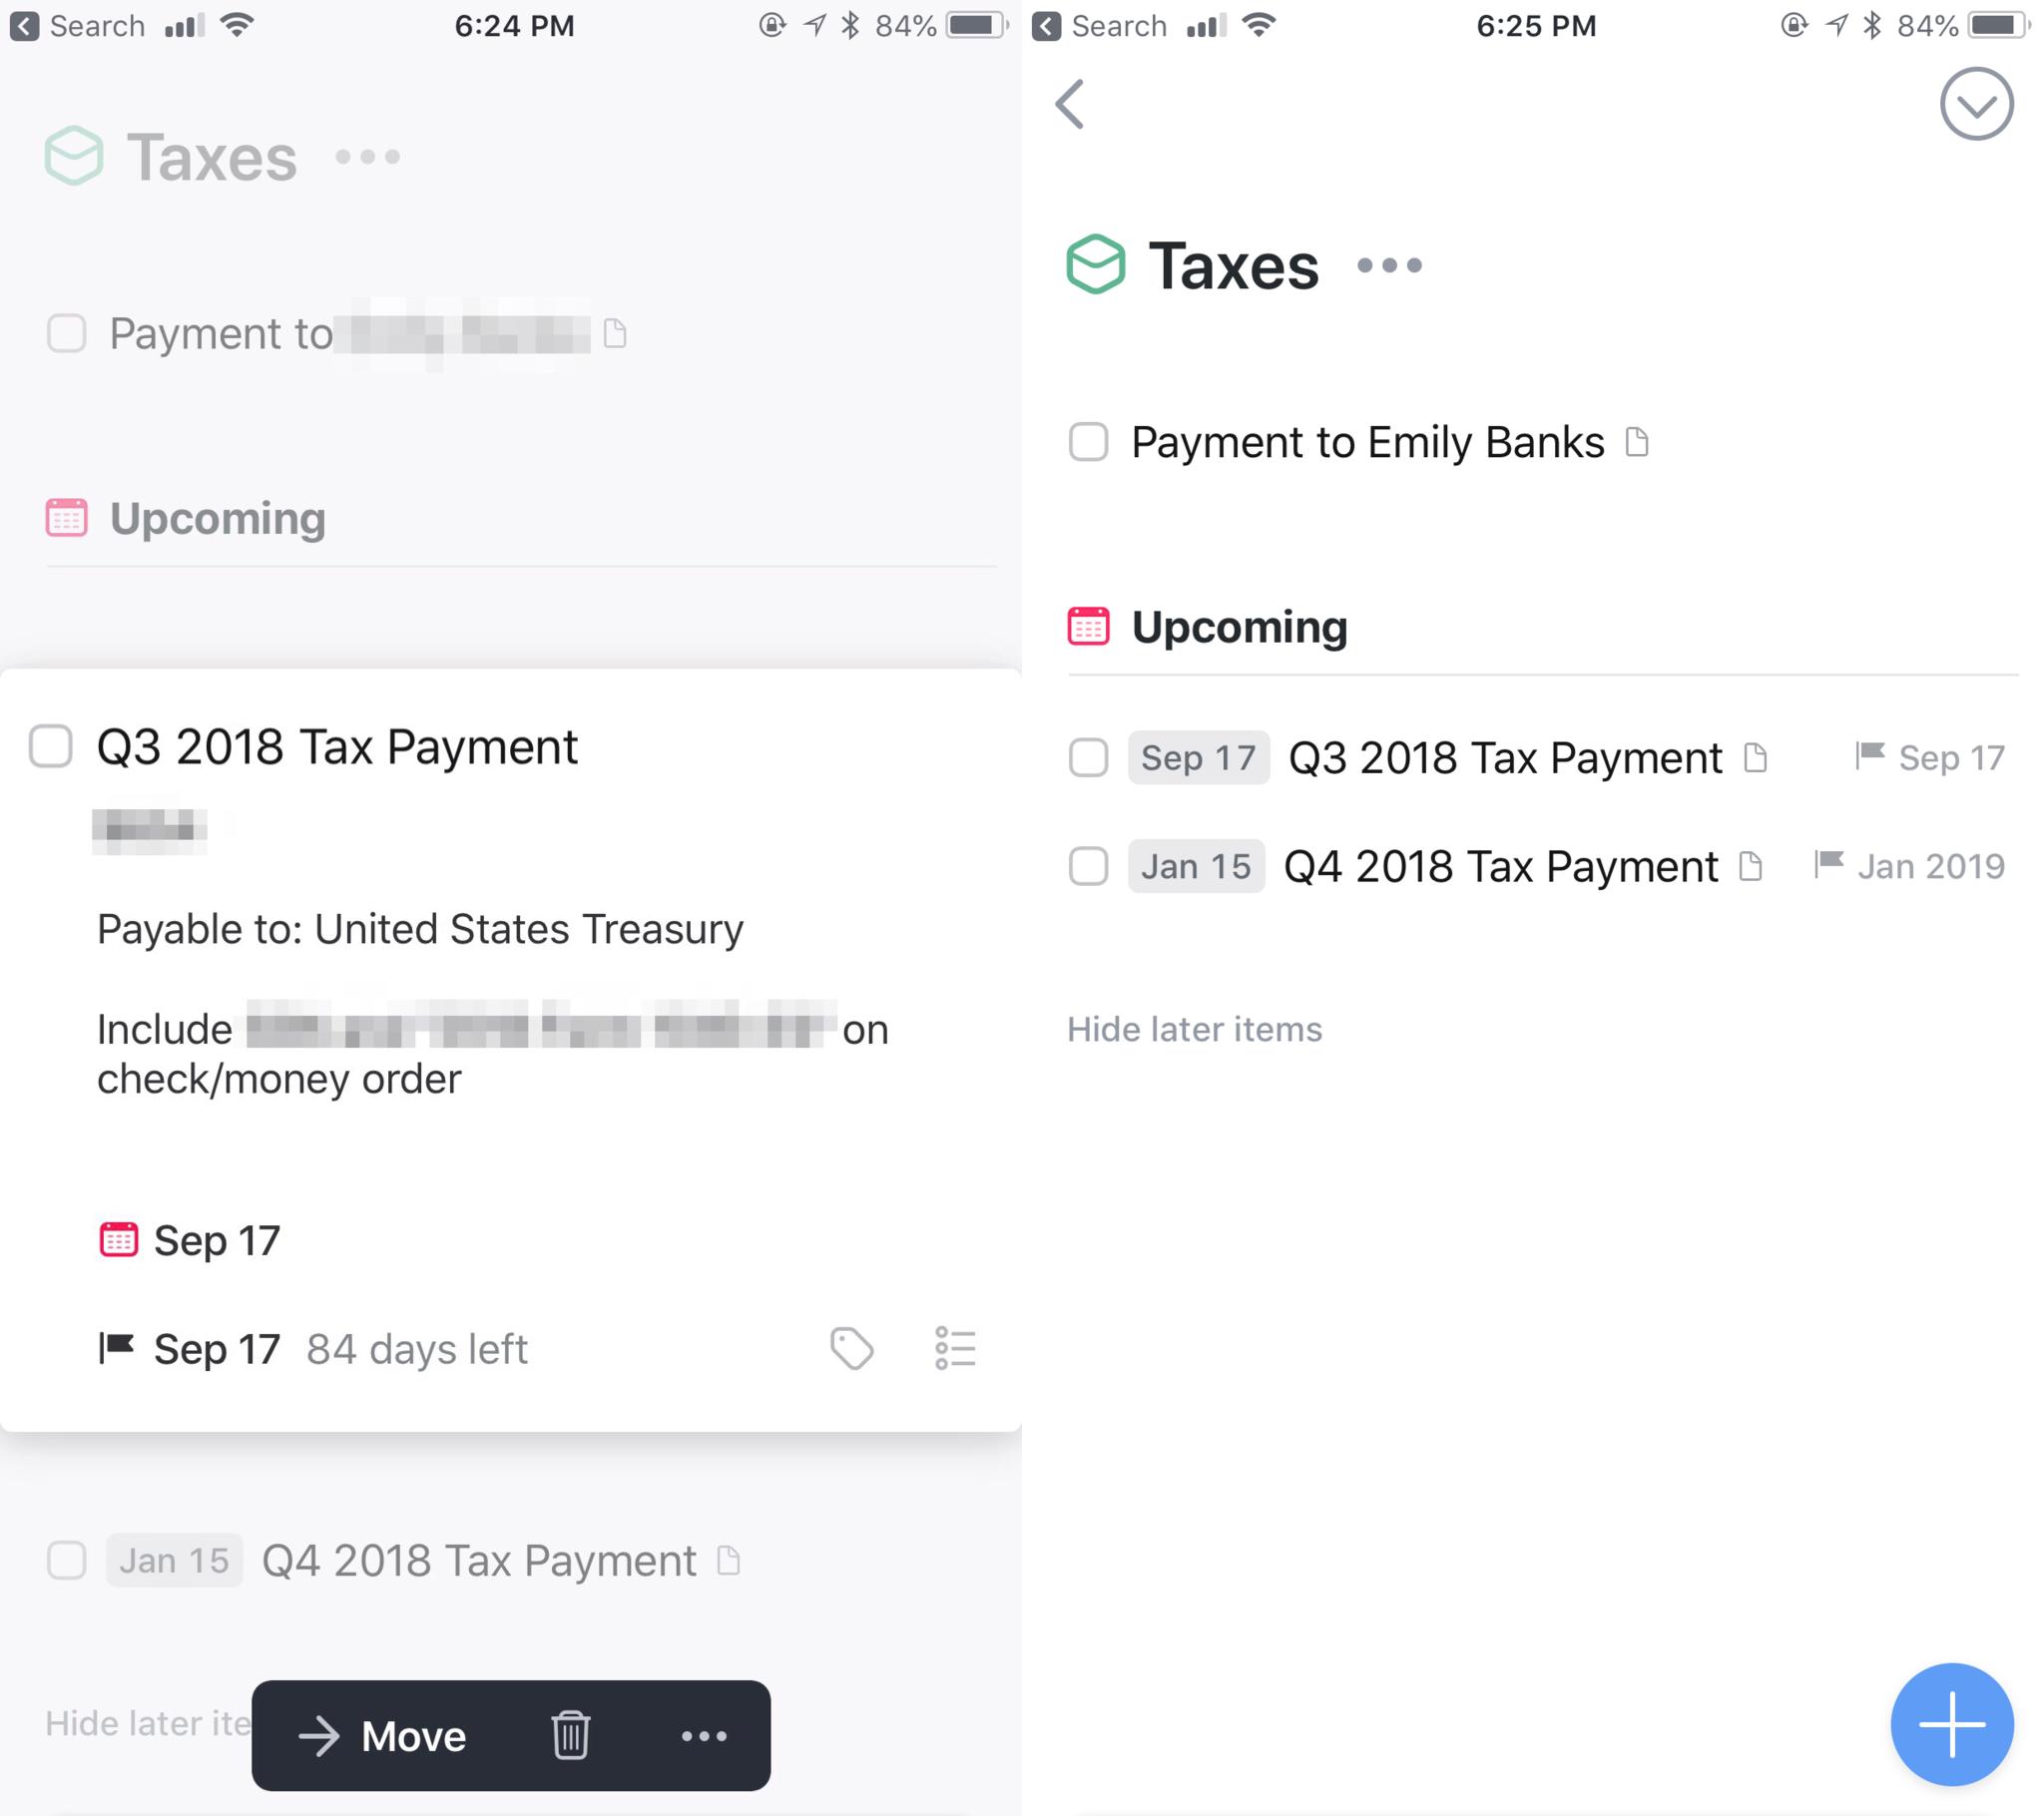
What's the difference between a due date and a deadline? While all of your tasks may have a due date, deadlines are high priority items that you absolutely cannot miss. That's why you should use deadlines sparingly, so that the sense of urgency isn't lost.
Things has the ability to also structure your days. As you decide on a due date, there are a few options: Today, This Evening, a specific date on the calendar, or Someday. The option for timed reminders is also available.
Selecting Today will make it so that the task shows up in your Today overview, which is a default section. The This Evening option also has it appear in Today, but you'll get reminded of the item around the evening, rather than earlier on in the day. If you choose a specific date, or even the Someday option, you can find these tasks in the Upcoming section of the overview.
With existing tasks, you can always tap on them to expand and view notes or make any edits. There are also swipe gestures that you can do to change the due dates, move it to a different Area or Project, make it a recurring task, duplicate, and more.
Unlike OmniFocus, Things has a much more streamlined and simplified approach to dealing with your tasks, which is evident with the task creation and editing options.
Utilize the Quick Find
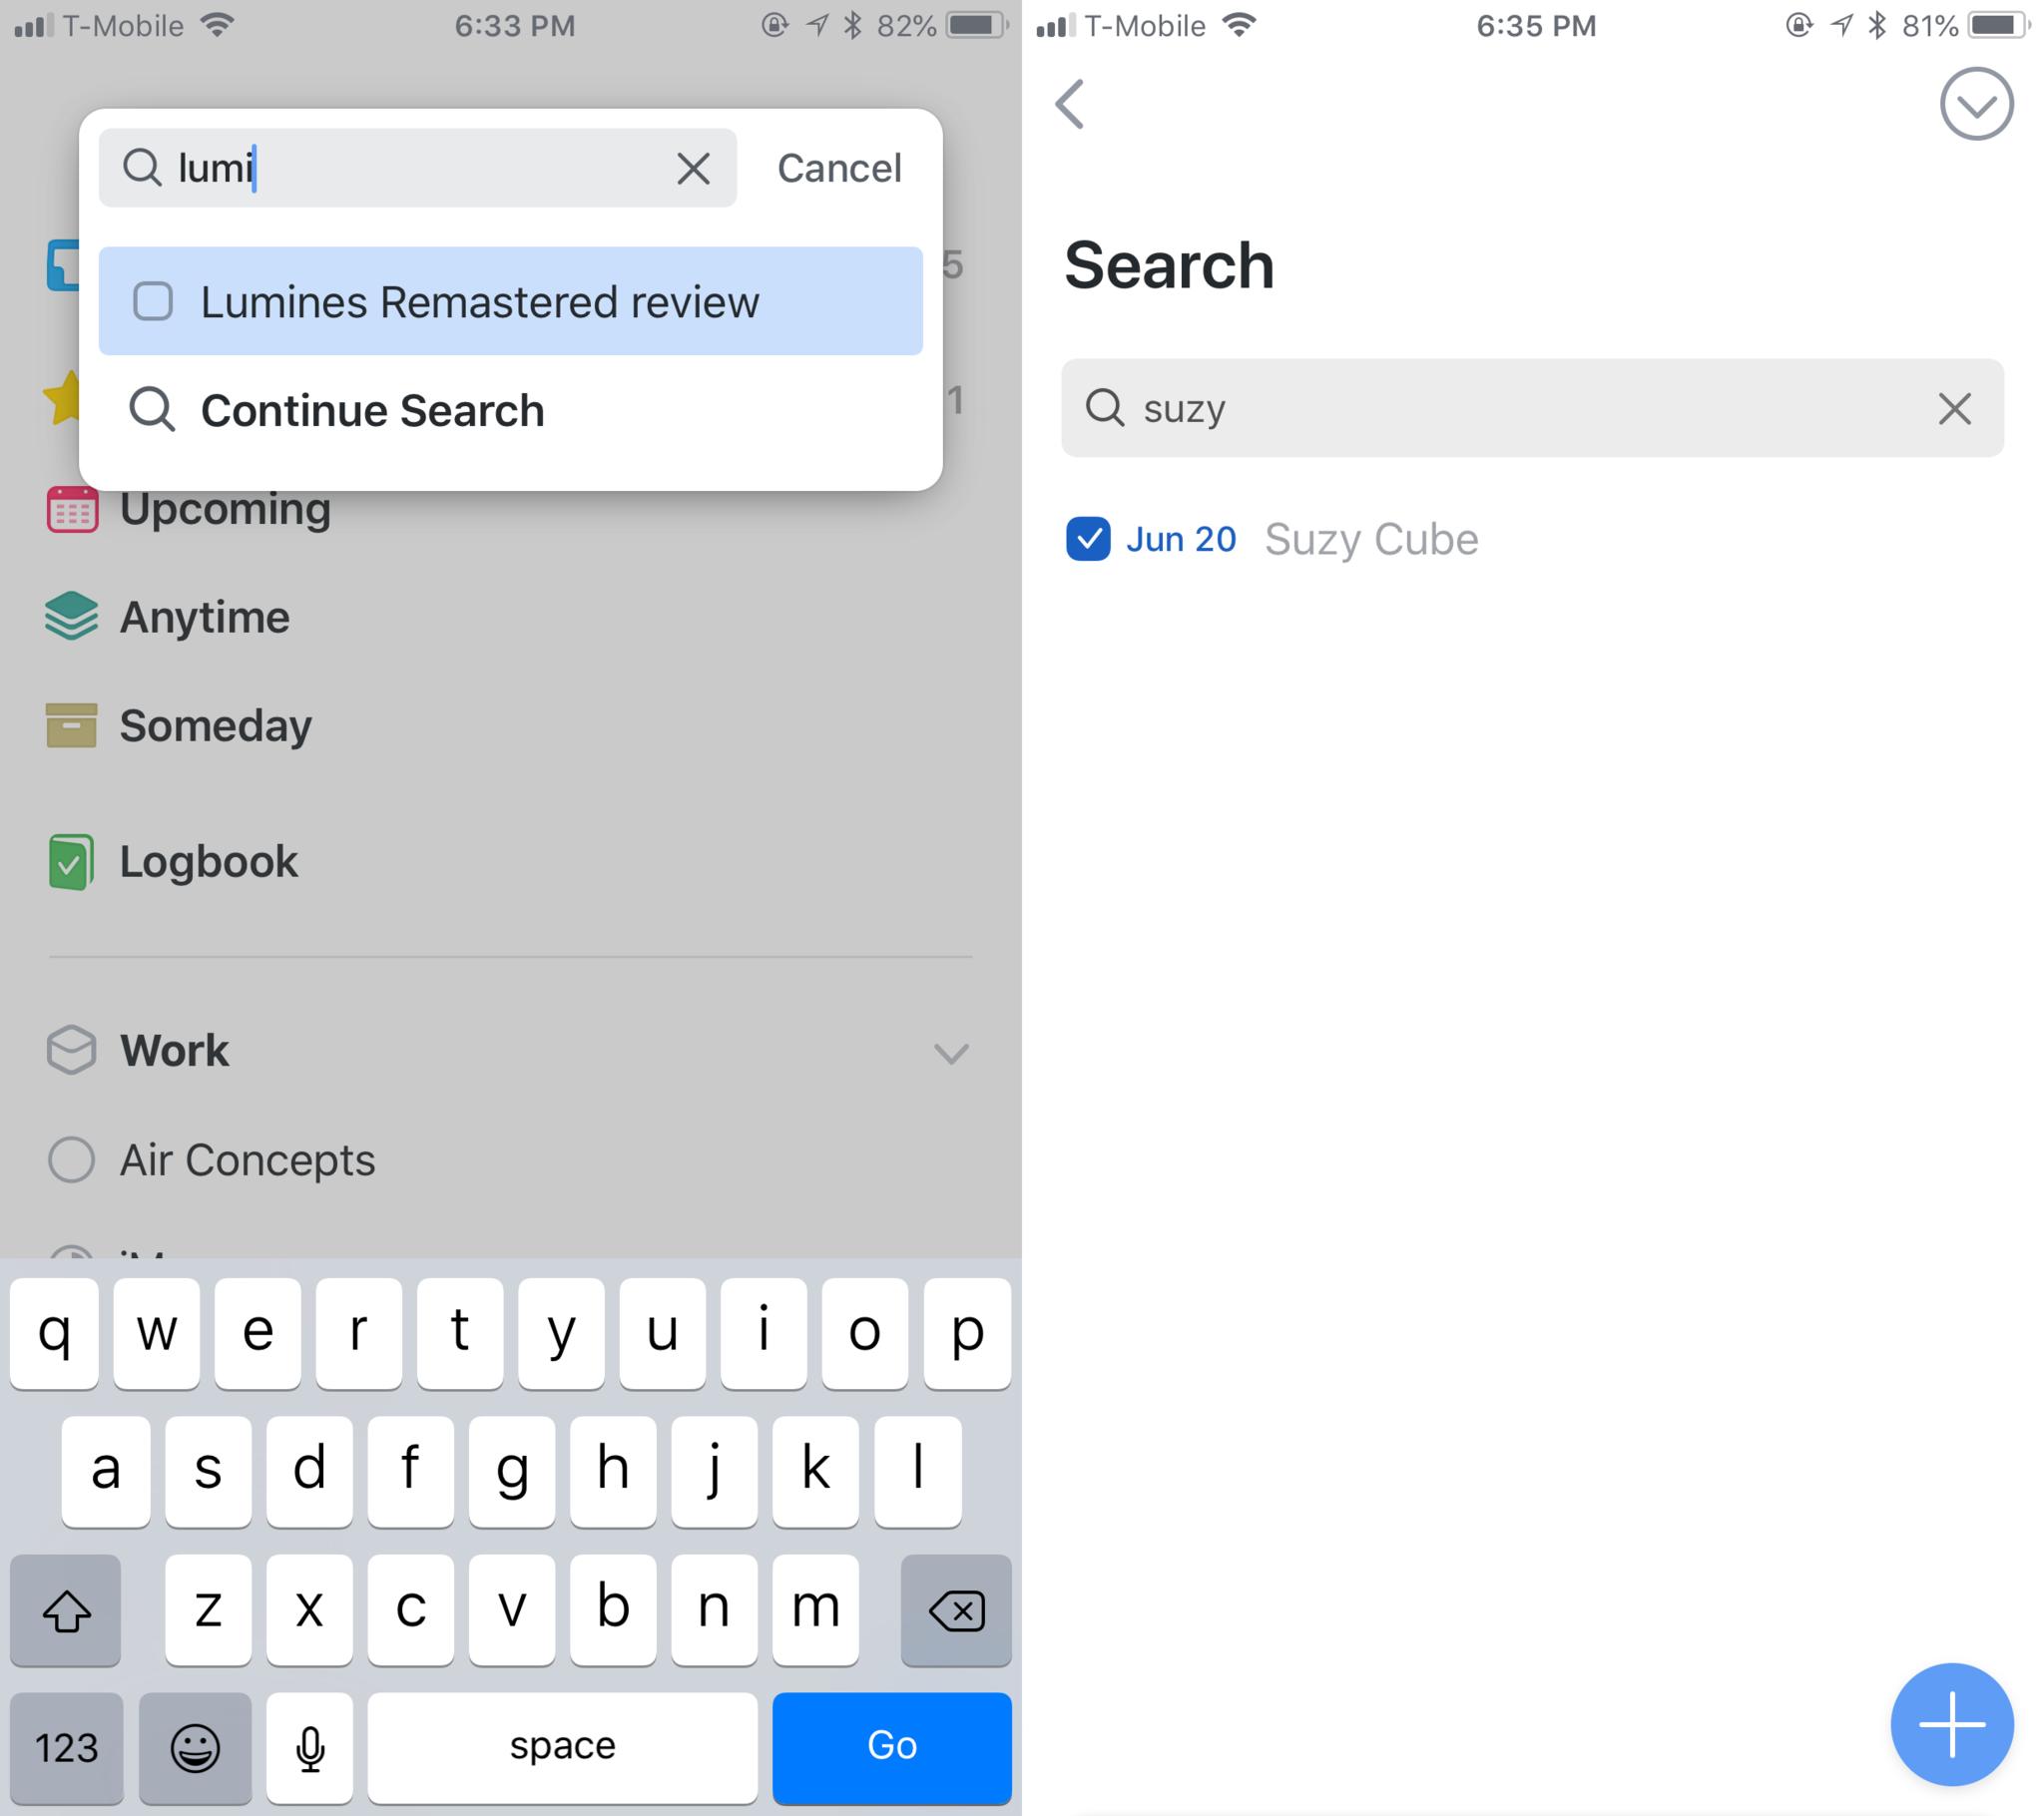
Once you start using Things to collect all of your daily and upcoming tasks, things can start to get a bit cluttered. While you could just go through all of your Areas and Projects to find that one specific task you're looking for, sometimes it's easier to use Quick Find instead.
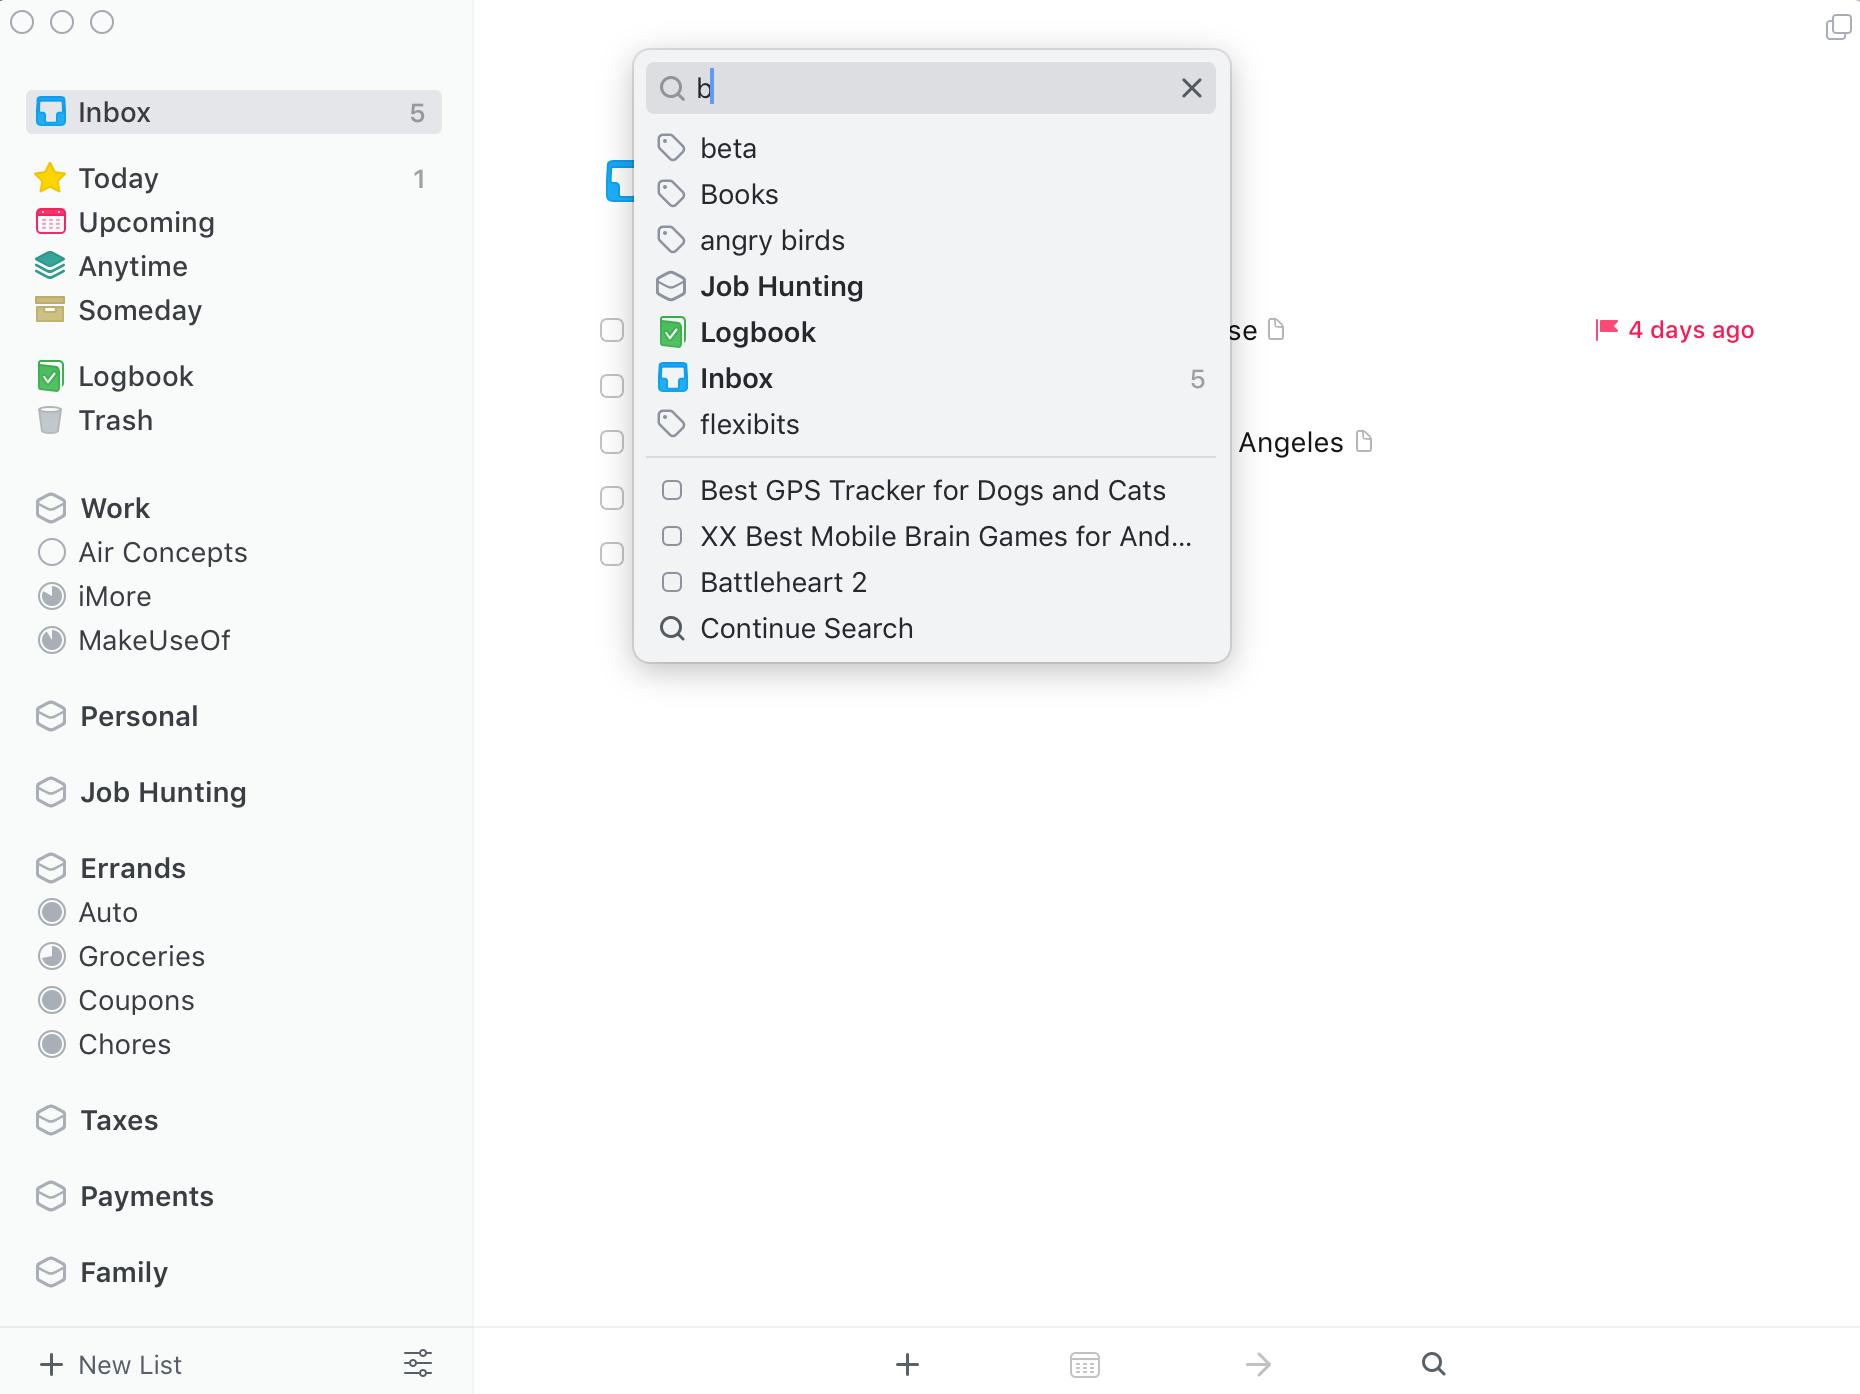
Quick Find is available on all versions of Things, but probably the fastest to get to on the Mac. With the Mac version, you just start typing anywhere in Things (as long as it's not an active text field you're in already) and Quick Find comes up. With the iOS versions, you'll need to pull the screen down a bit while you're in specific areas, but on the main overview, it's the search bar at the very top.
What I love about Things' Quick Find is the fact that it's incredibly fast with results, as they pop up instantaneously as you type. Quick Find lets you search through all of the text for tasks, including the notes. And while completed tasks don't appear right away, you can always select Continue Search to dive deeper and (hopefully) get the results you're looking for.
I don't often need to search for tasks, but when I do, I'm happy to have Things' lightning fast Quick Find available to use. It makes finding specific items a breeze.
Become more productive in a jiffy
Again, if OmniFocus was too overwhelming for you (even with my beginner's guide), then Things may be a better choice to consider for managing your tasks. Though it's much easier to understand, it does take some time to get used to before it fits into your own workflow. Honestly, I thought Things was way too simple many years ago, but the latest version has made it the perfect task management app for my needs.
This was only a beginning guide on getting started with Things. There are many more hidden and cool features that Things has, and we'll be covering them in the future here on iMore!

Christine Romero-Chan was formerly a Senior Editor for iMore. She has been writing about technology, specifically Apple, for over a decade at a variety of websites. She is currently part of the Digital Trends team, and has been using Apple’s smartphone since the original iPhone back in 2007. While her main speciality is the iPhone, she also covers Apple Watch, iPad, and Mac when needed.
When she isn’t writing about Apple, Christine can often be found at Disneyland in Anaheim, California, as she is a passholder and obsessed with all things Disney, especially Star Wars. Christine also enjoys coffee, food, photography, mechanical keyboards, and spending as much time with her new daughter as possible.
