How to make your YouTube videos 2:1 cinematic with Final Cut Pro X
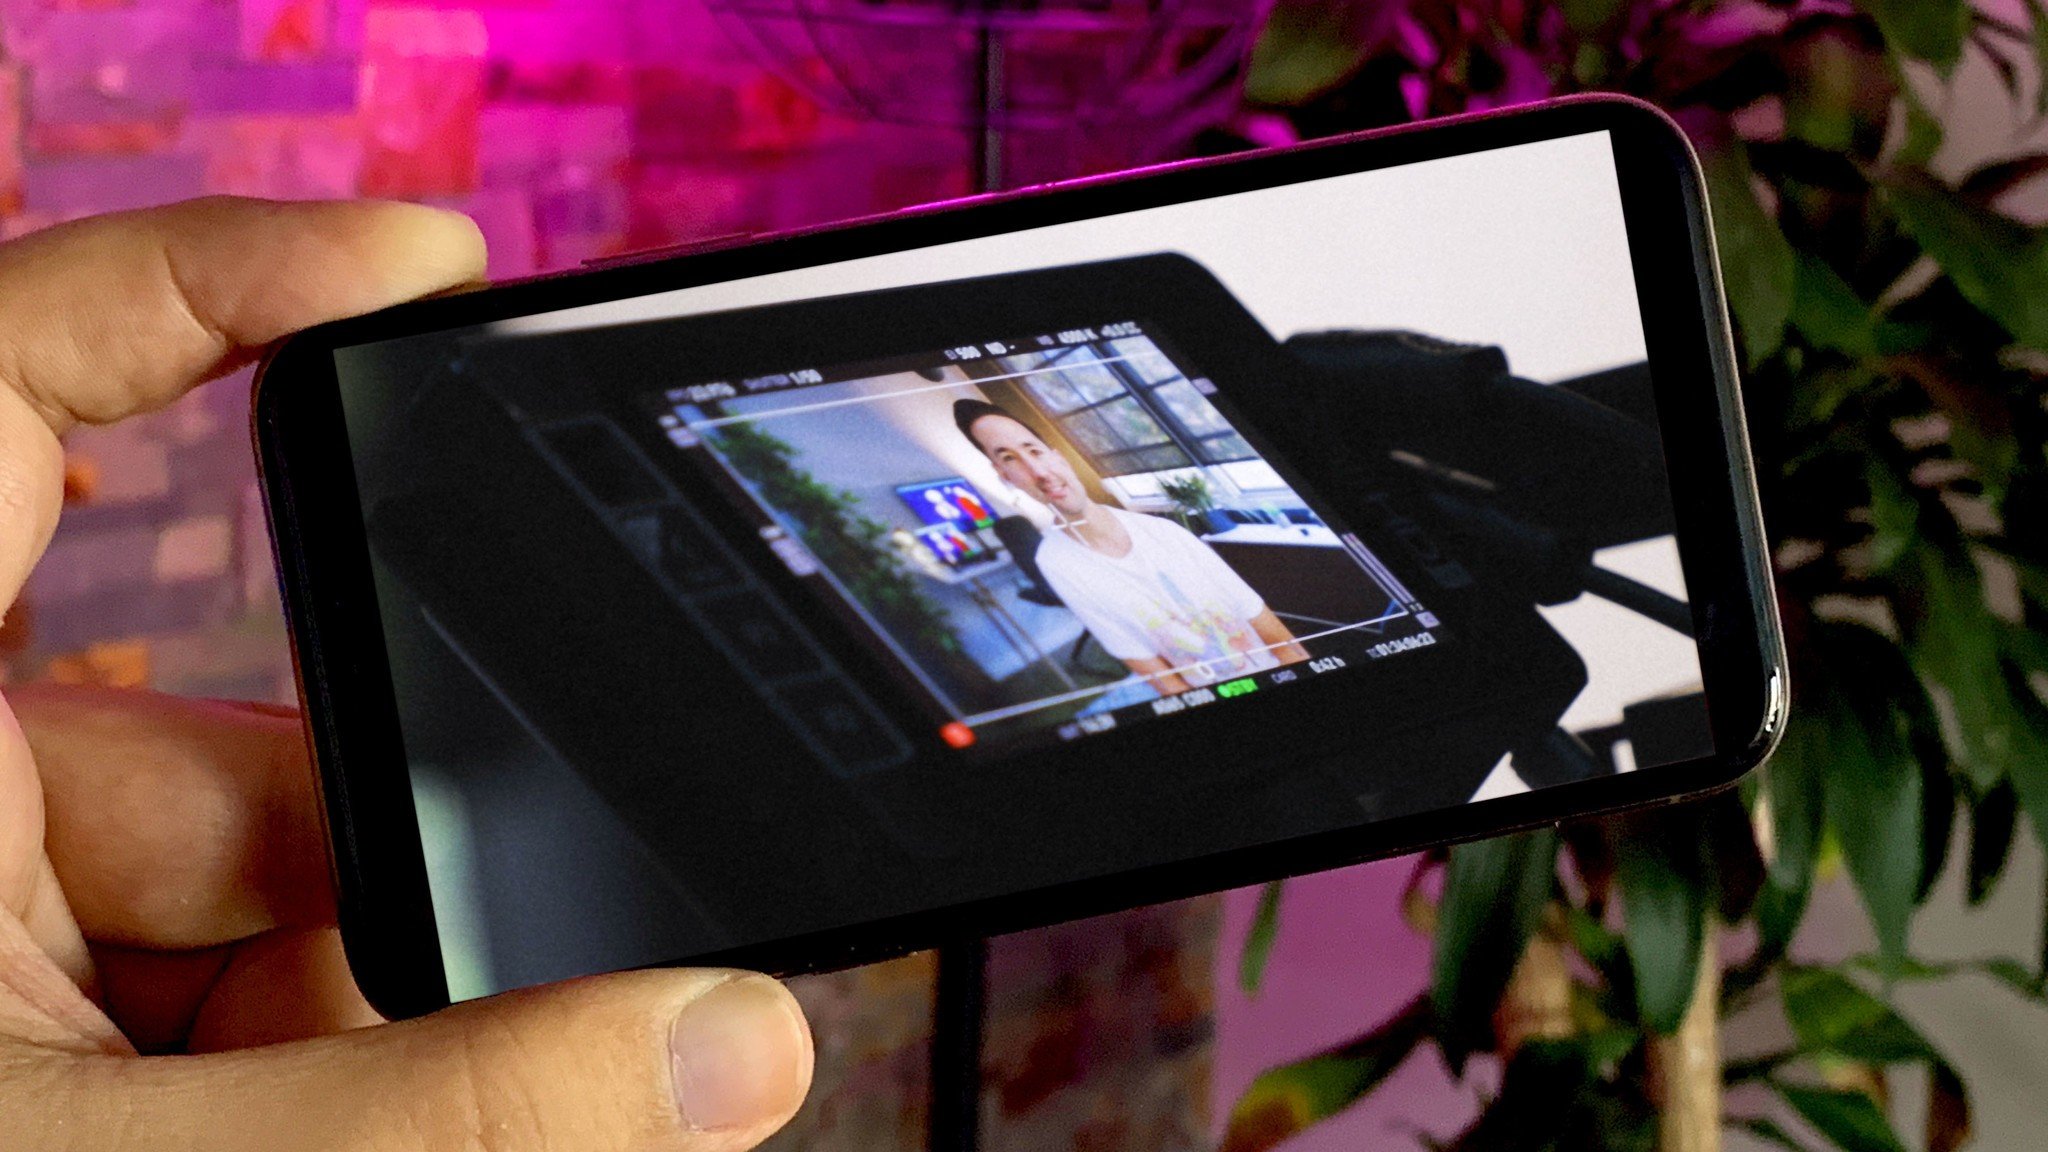
This is all Jonathan Morrison's fault. I'm sure you know who he is, but on the off-chance you don't, he makes some of the best-looking, and just plain best videos, on YouTube. Anyway, he switched to 2:1 video early. And, if memory serves, he helped get Marques Brownlee — MKBHD — to do the same. Watching how their stuff looked on iPhone X, XS, and XR, and other modern flagship phone displays, going edge-to-edge right along with the displays rather than stopping pillar-box short or getting clipped top and bottom — it just looked like the future. I made the switch around New Year I and here's how I did it.
Watch the video version. Seriously. It's much easier to follow than reading along!
2:1 All the Things
Film things first. 2:1 has a rich history but is also seeing a resurgence thanks to everything from YouTube to Netflix. We're still shooting in 16:9. We frame for 2:1 but the extra pixels means I can move things around in the edit to make sure everything is exactly where I want it to be. A little up, a little down, never a problem.
Once it's shot, I import it into Final Cut Pro X just like I've always done, just as you would with any footage.
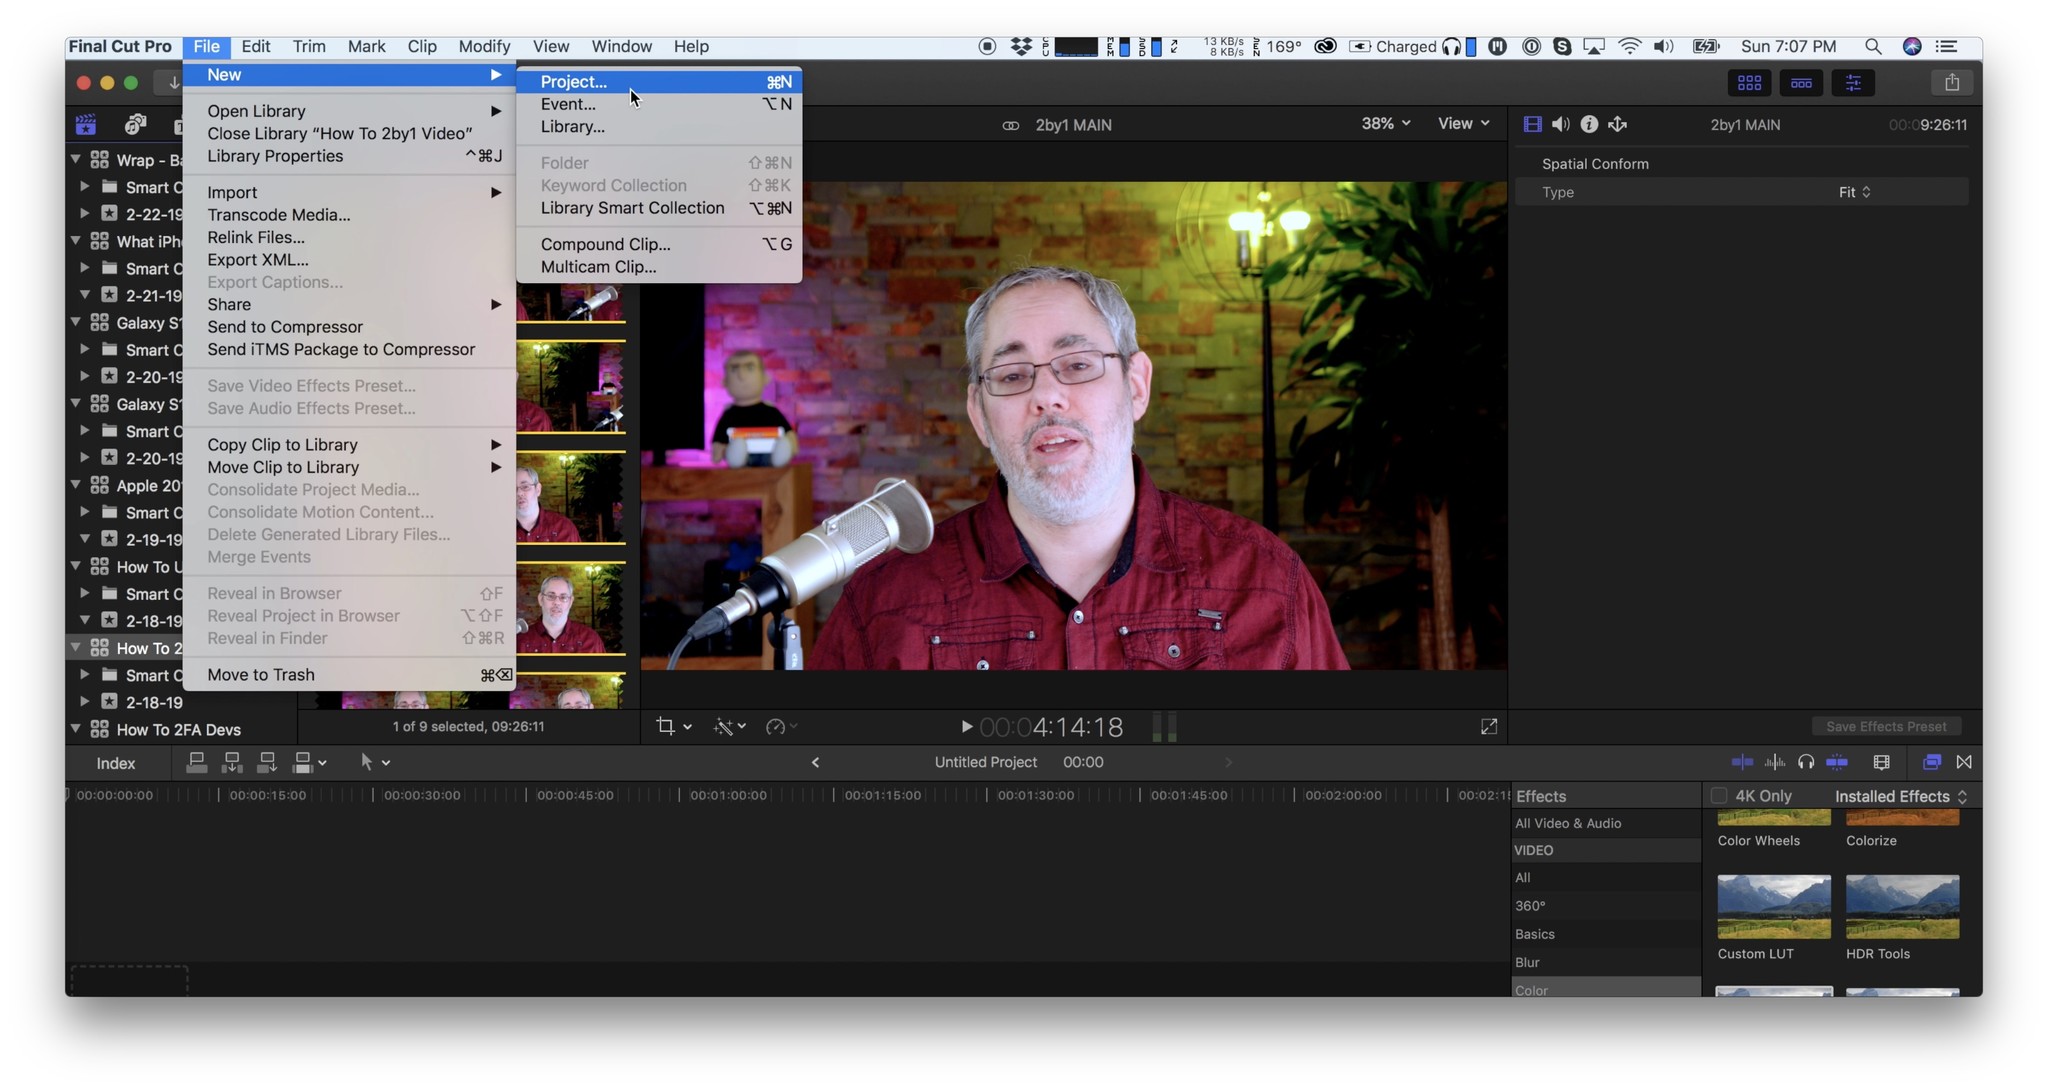
When you set up your project, though, instead of the default 16:9, you want to choose 2:1. I'm shooting and editing in 4K, so for me, that means switching from 3840 x 2160 to 4096 x 2048.
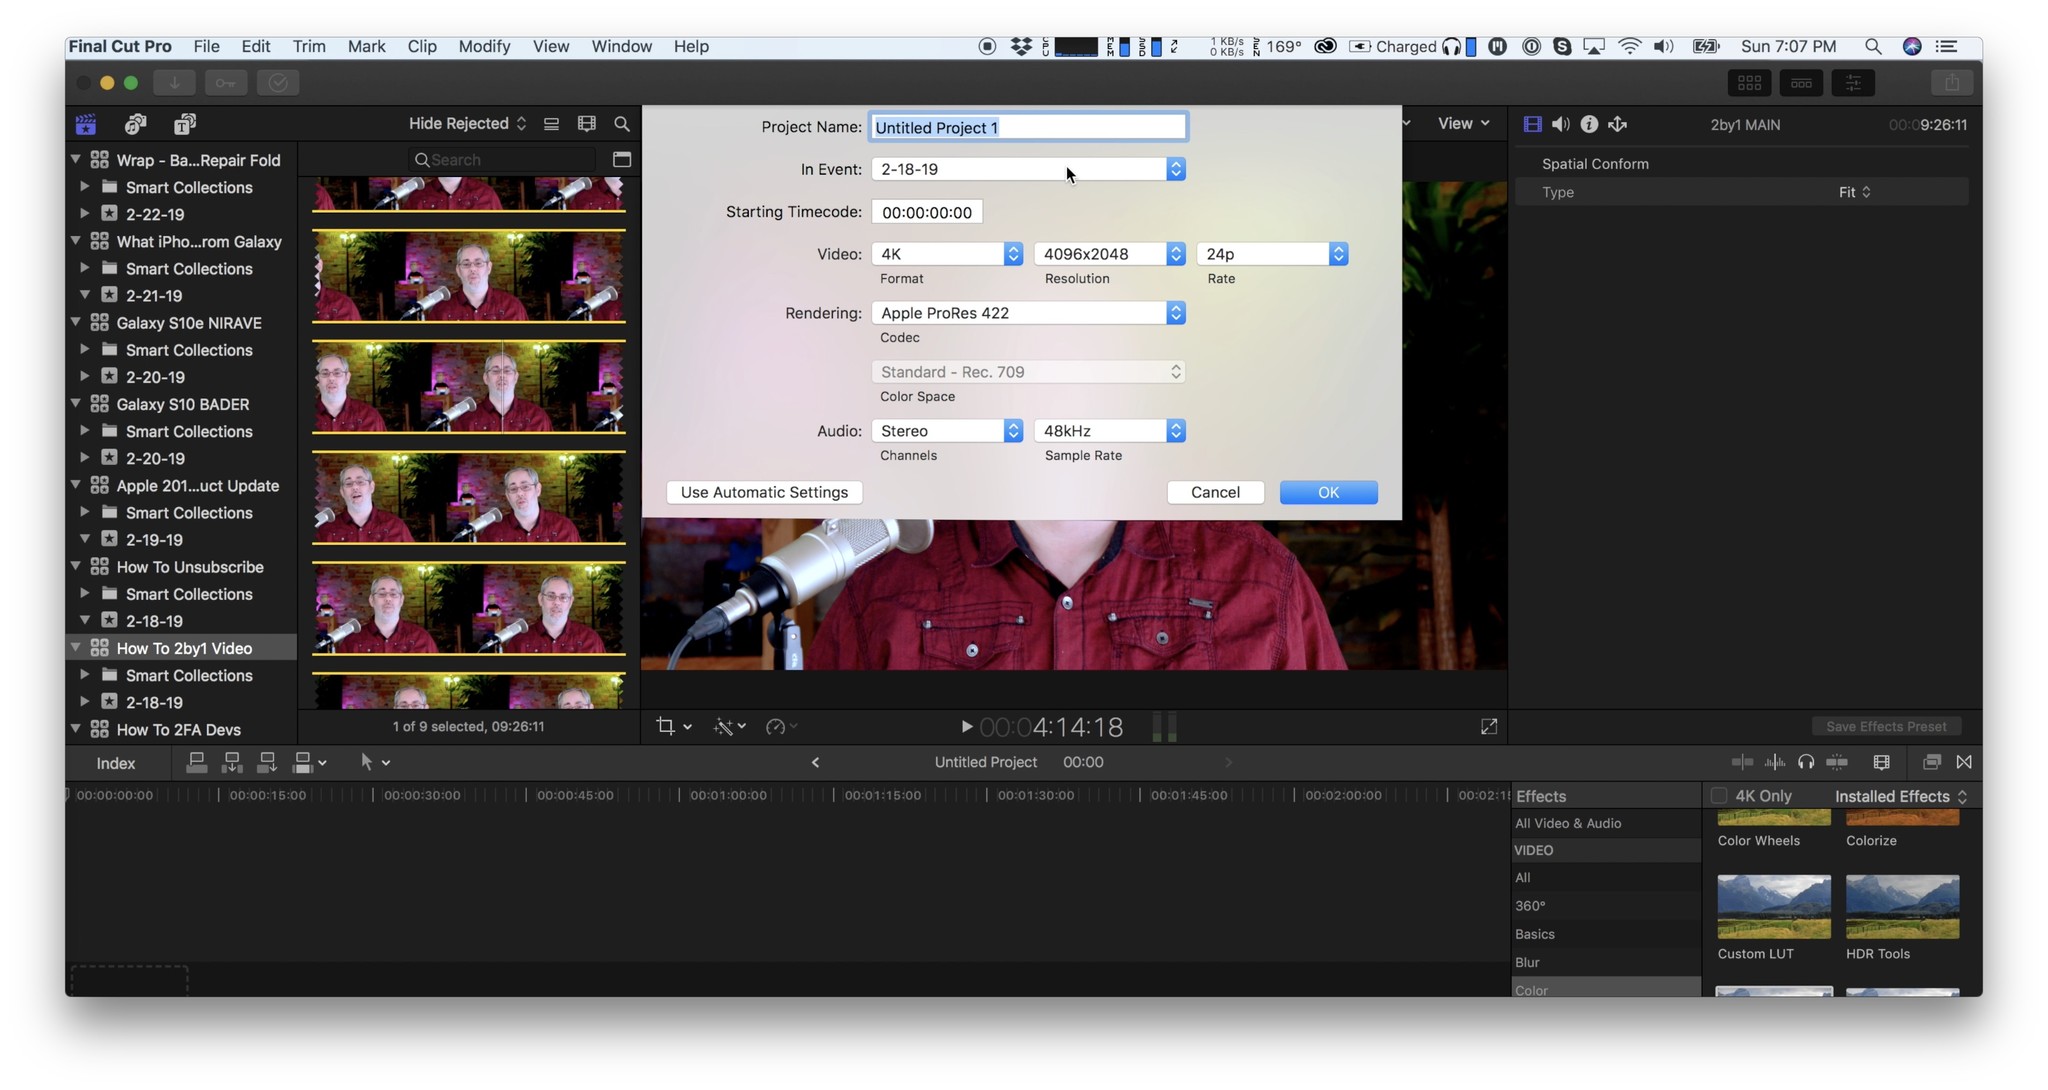
I used it because it's right there — and the nerd in me loves that it's literally 4K or 4 thousand pixels wide. If you want a different resolution, for example, if you want to stick with 3840 you can manually enter 1920, or if you're shooting in 1080p, you can enter 1920 x 960. If you're shooting in 8K or higher, well, then you're already at Gramaton Cleric level and I'll just keep on moving on.
Once you have your project set up, drag your clip or the first of your clips onto it to start laying down your video.
Master your iPhone in minutes
iMore offers spot-on advice and guidance from our team of experts, with decades of Apple device experience to lean on. Learn more with iMore!
Now, if you're shooting in 16:9 like me, you'll need to re-fit it first. Just go to the video inspector, look for Spatial Conform: type at the bottom, and change the drop-down from fit to fill. That'll instantly scale it up and knock out the pillar boxes.
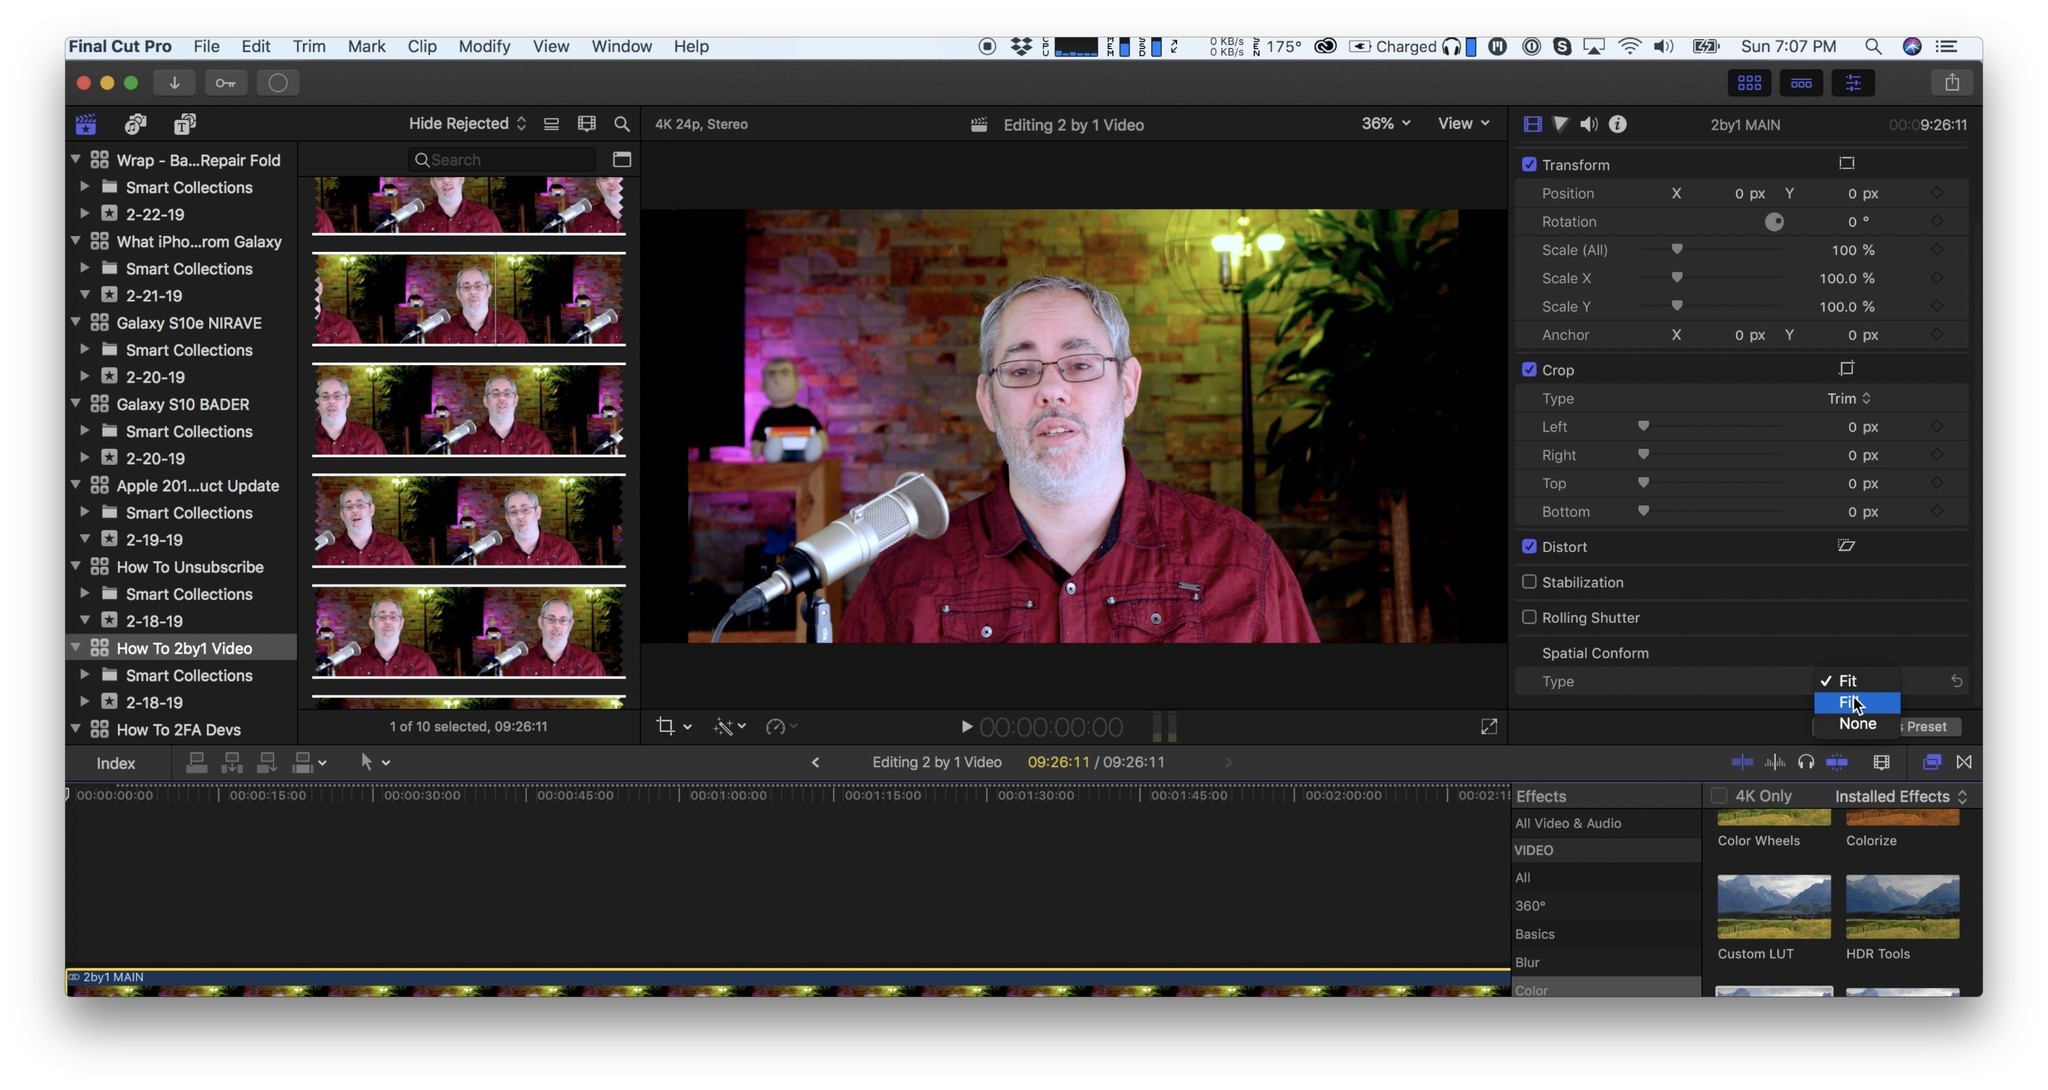
If you framed everything perfectly, that's it. If not, you can either use the video inspector and enter a different Y position to nudge it up. Or, you can use the transform tool to manually position it.
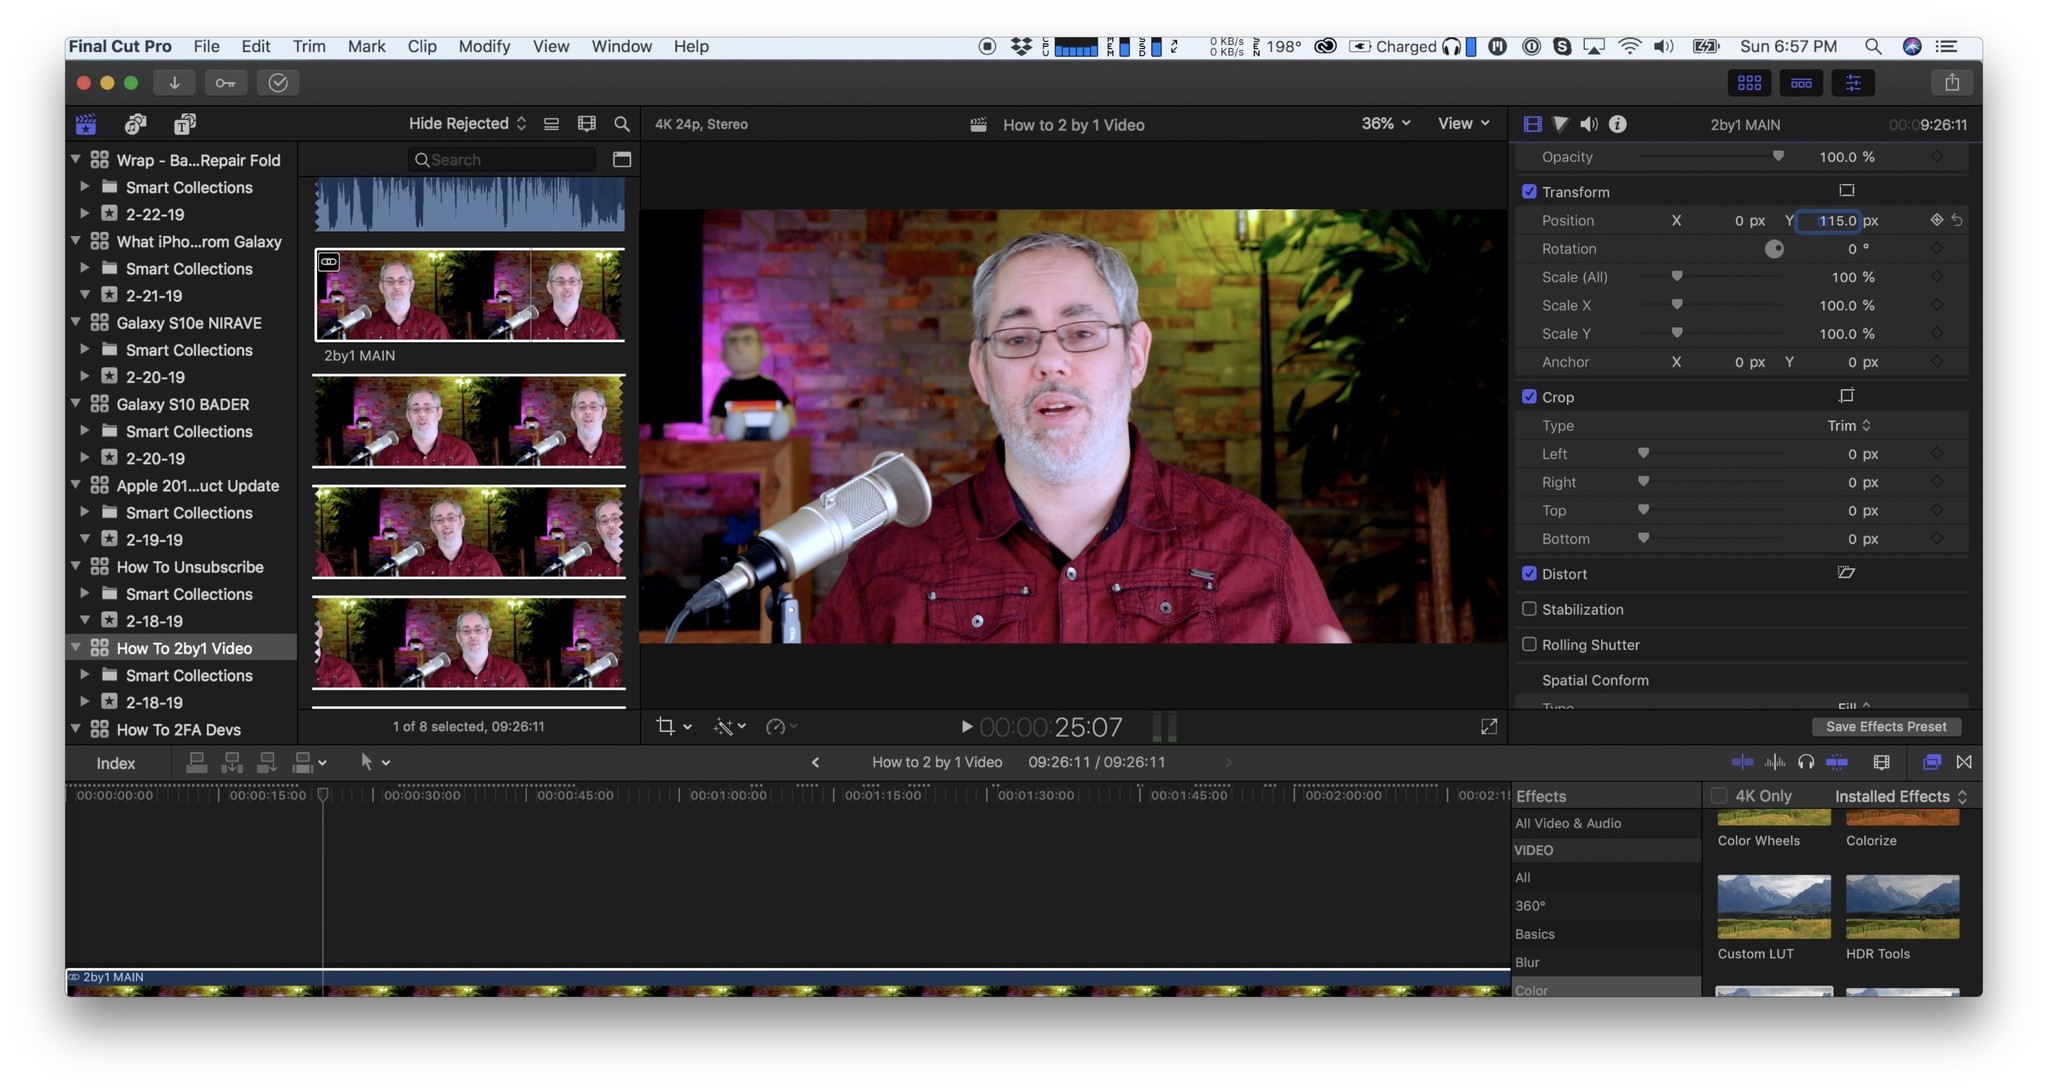
Since Final Cut don't snap, though, once you're happy, go back to the video inspector and make sure Y is set to 0.
If you've got multiple clips to assemble in the timeline, just copy the first clip, the one you've already got all set up, and then option paste it — that's option command V – onto all the other clips. That'll spare you having to fill and adjust all of them and keep everything consistent.
If some or all the clips are different, you can still do that and tweak as needed afterward, and it'll probably still save you some cycles.
Same thing for any b-roll you add. Basically, anything you add that's 16:9 or narrower that you don't want to pillar box and don't care if it's clipped on the top and/or bottom.
Then you can just go ahead and edit your video the way you've always edited your video, and you should be just fine.
With one exception.
Those Plugins Though
Not all third-party effect plugins are dynamic and that means not all of them will fill the 2:1 frame either. If they don't have any background or fill elements, it may not matter. If they do, those elements won't reach all the way to both sides.

I've only ever encountered this with titles and title-like effects, but it can still be a pain.
Sure, you can avoid using those clips or ping the creator or company who makes them and see if you can get them updated. But, if you don't mind getting your hands dirty, you can also open the effect in Motion, Apple's motion graphics editor, tweak them to 2:1, and save them back out. I'm still trying to figure out Motion, but if you're already a Pro, you can make any effect do pretty much anything you want to do, any time you want to.
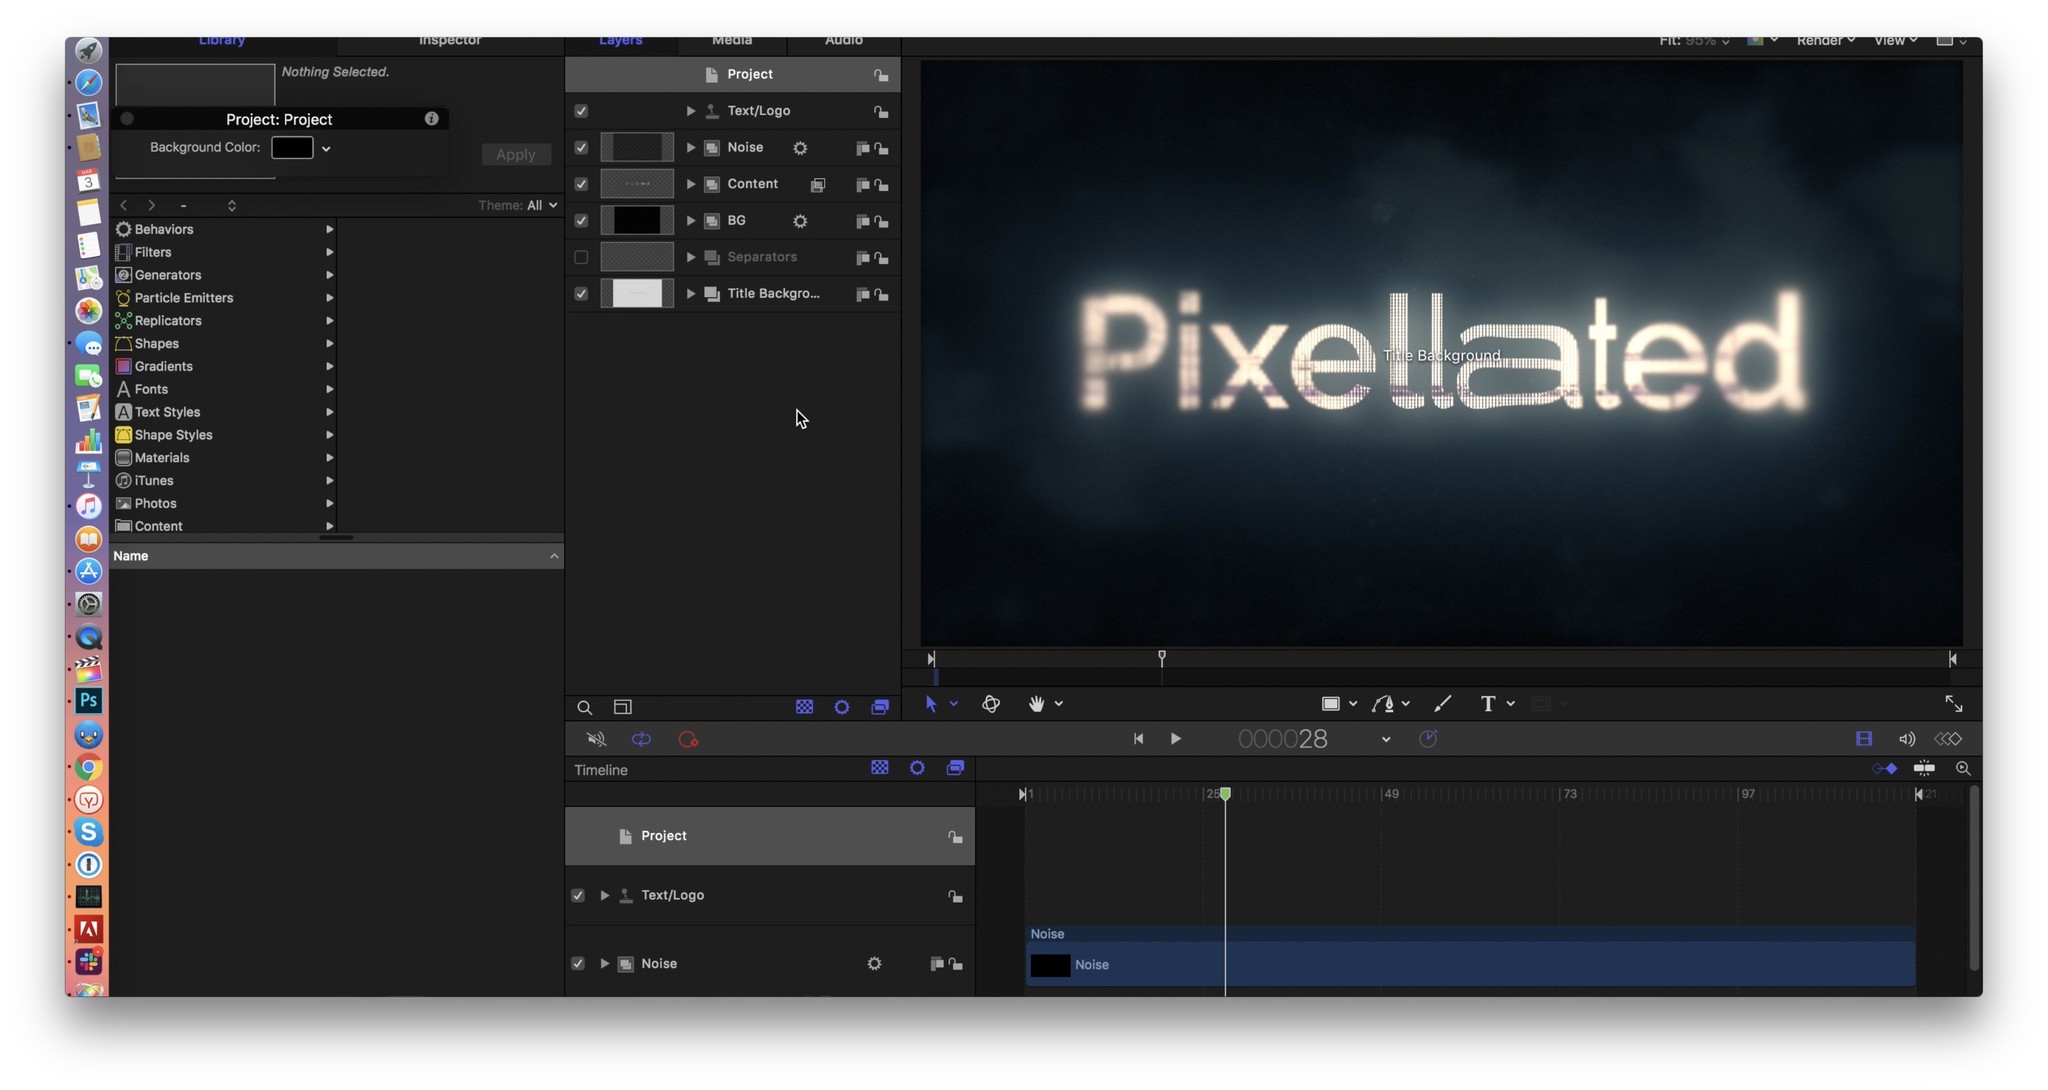
If you can't contact the creator or company and don't want to dive into motion, you can also drop in the effect, tune it the way you want it, and then turn it into a compound clip and scale the compound clip up by 112.47% or just 113% if you want to keep it quick.
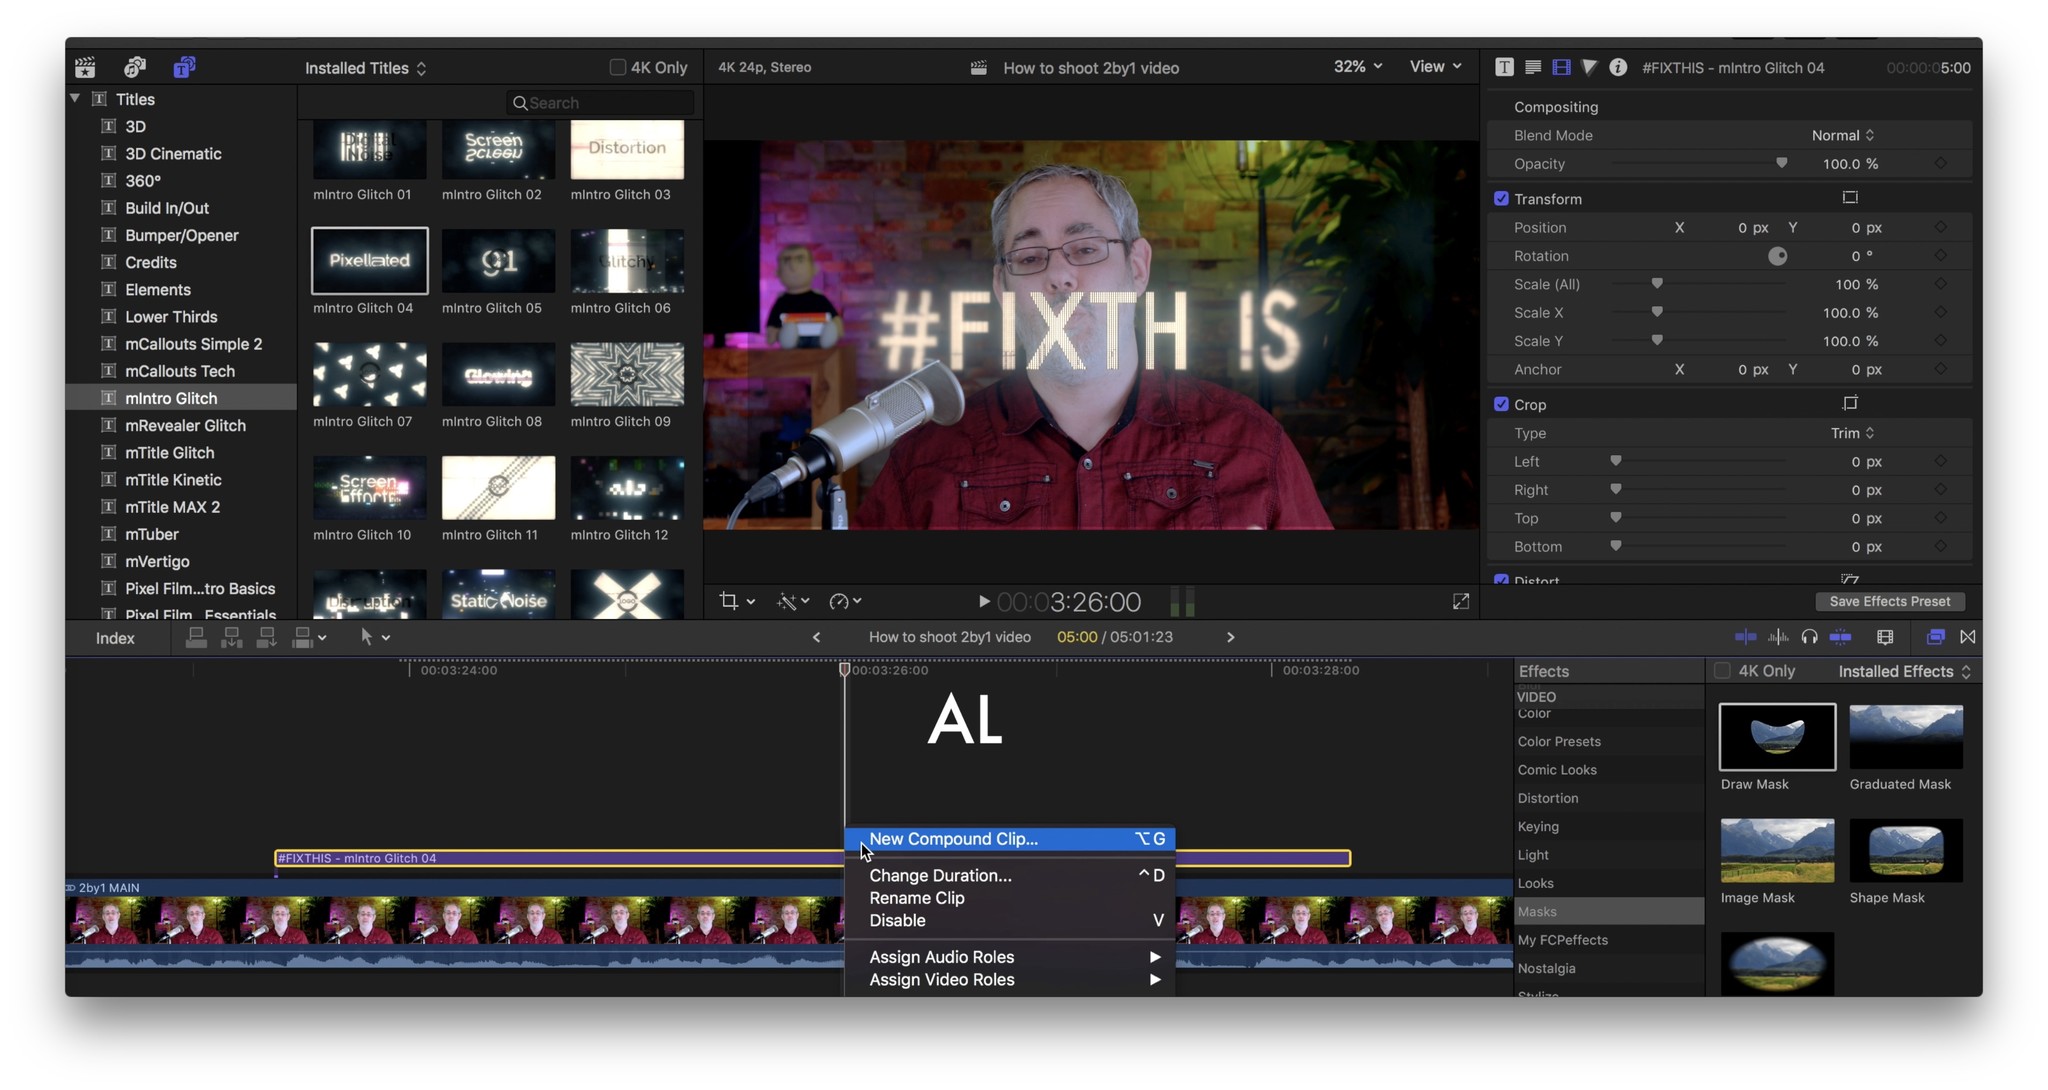
If you don't make the compound clip first, the scaling you apply to the effect will also apply to the clip underneath it, punching in and out as the effect starts and ends, which in most cases won't be what you want. So, yeah, it adds some complexity all its own, but it works.
Jonathan also suggests you use a monitor with guides to properly frame everything in-camera.
Upload and Enjoy
Rendering out the video the same as well. Just pick your target and start the export. Then upload it to YouTube and enjoy the fresh, clean, cinematic look.
And, yeah, I know not everyone loves 2:1 but I'm a true believer. It doesn't just look great on modern, flagship smartphones, it looks wider screen even when you're watching it on a 16:9 TV with the slightest of letterboxes. It looks like the movies.

Rene Ritchie is one of the most respected Apple analysts in the business, reaching a combined audience of over 40 million readers a month. His YouTube channel, Vector, has over 90 thousand subscribers and 14 million views and his podcasts, including Debug, have been downloaded over 20 million times. He also regularly co-hosts MacBreak Weekly for the TWiT network and co-hosted CES Live! and Talk Mobile. Based in Montreal, Rene is a former director of product marketing, web developer, and graphic designer. He's authored several books and appeared on numerous television and radio segments to discuss Apple and the technology industry. When not working, he likes to cook, grapple, and spend time with his friends and family.
