How to customize Health for iPhone
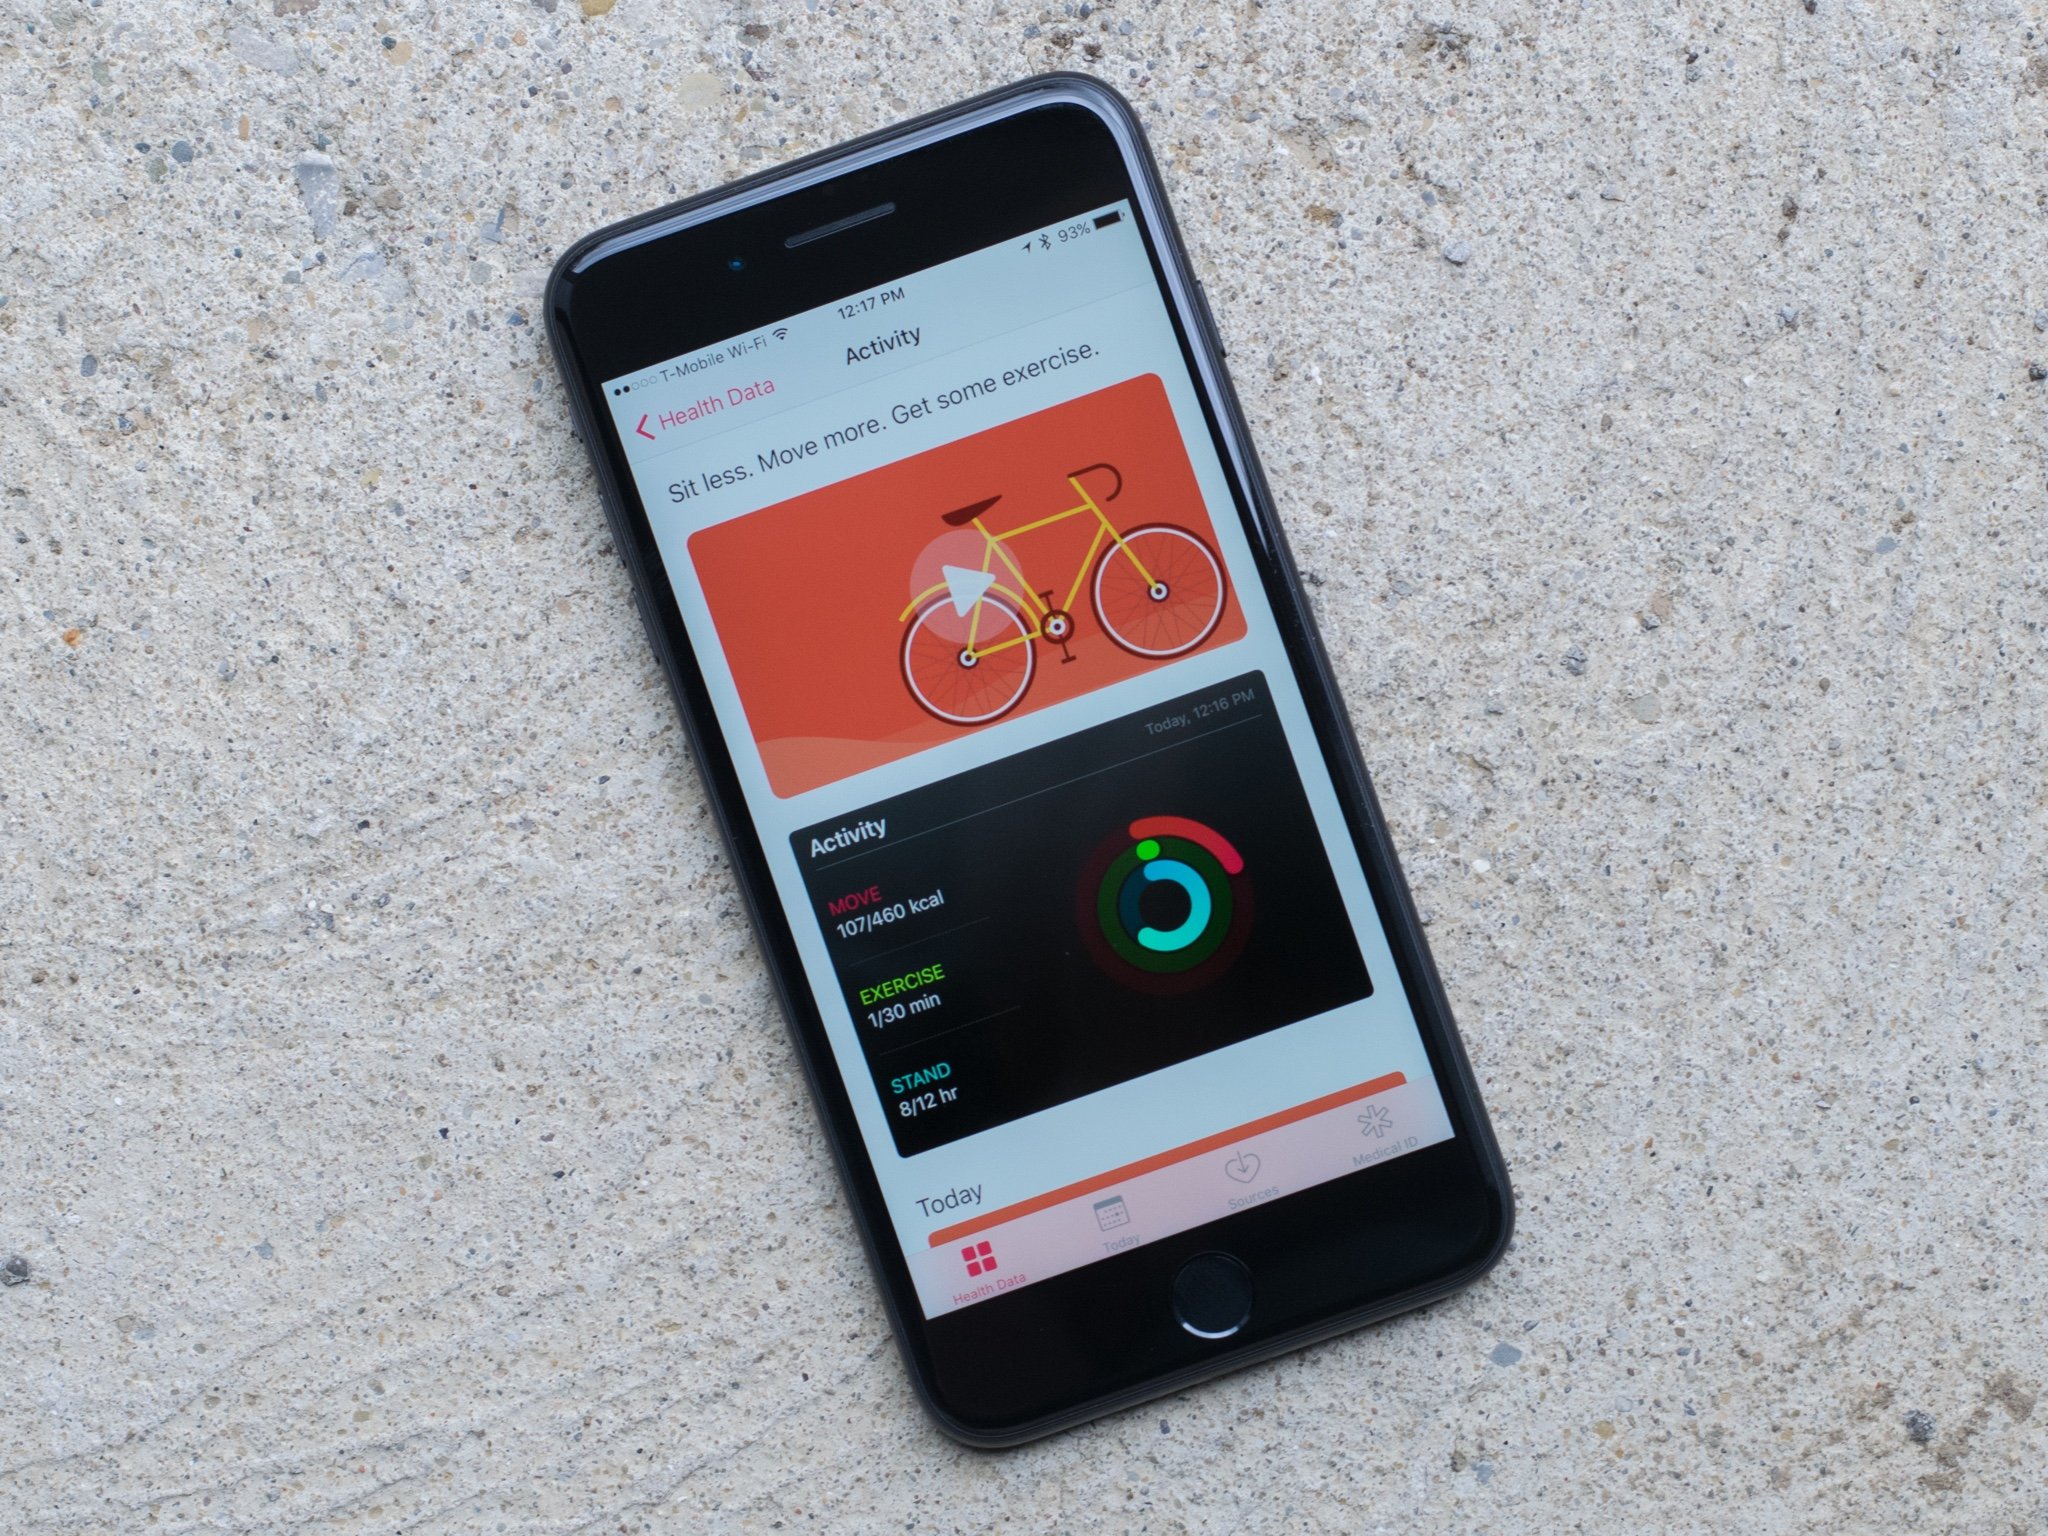
iOS 10's Health app is a great way to keep track of a variety of health stats, whether you're tracking activity or your sleep patterns. What's more, you can customize Health to fit your exact needs. Add calories from a meal, a quick cat nap, and much more. You can even create a medical identification card with all of your essential information in case of emergencies.
Follow this guide to find out how you can take control of Health in iOS 10.
- How to add or change health data
- How to change units
- How to delete health data
- How to manage data access permissions
- How to remove a data source
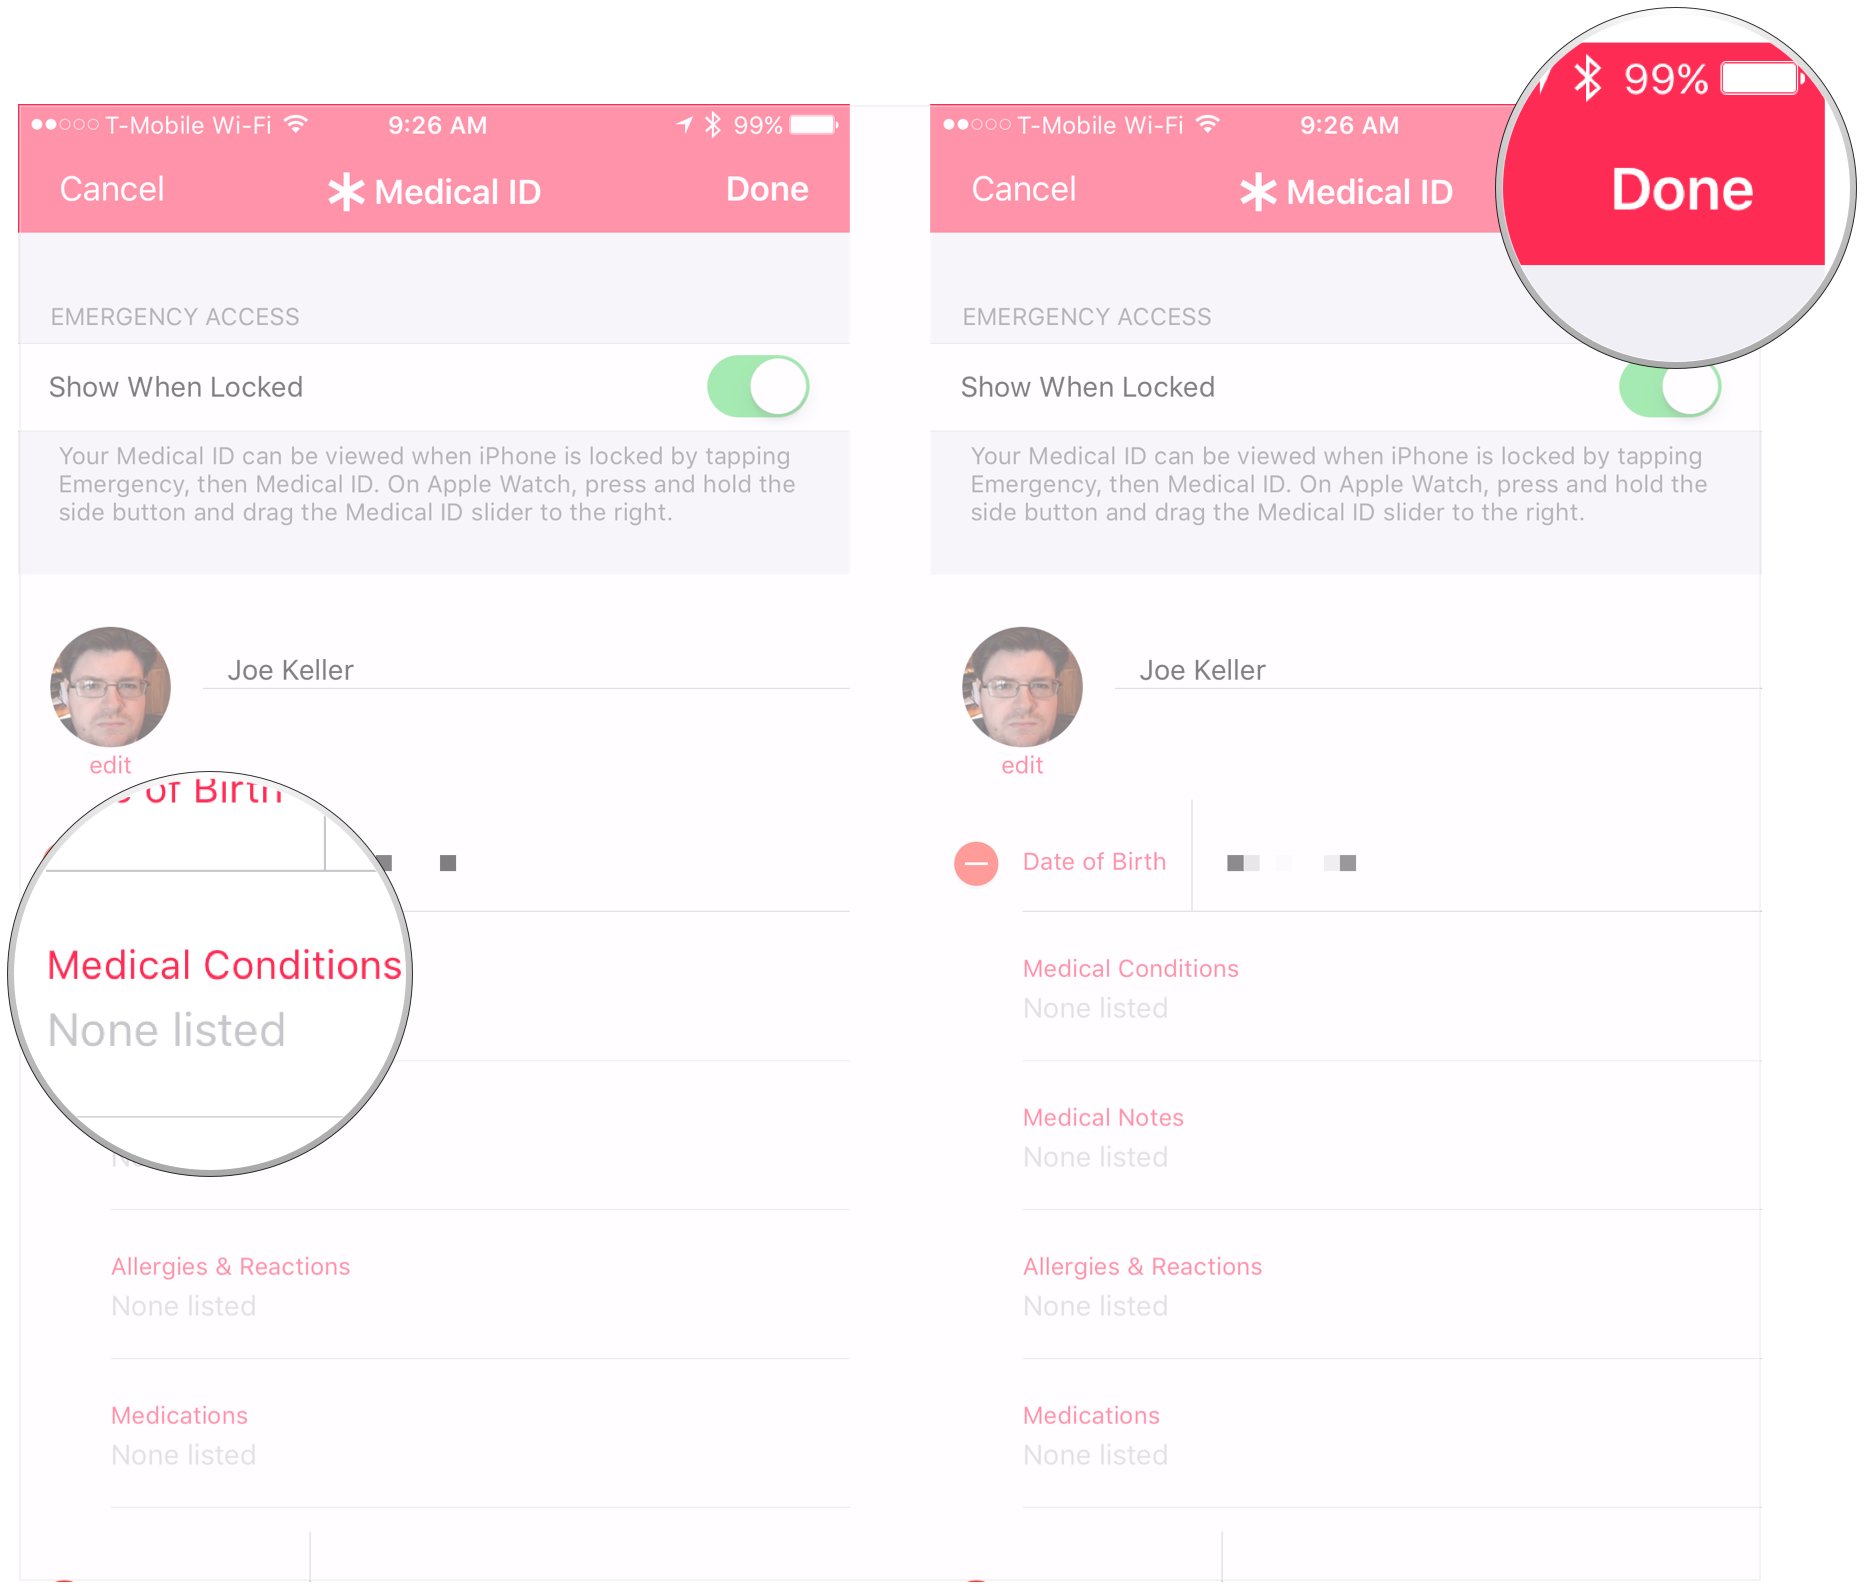
- How to create a Medical ID
- How to update your Medical ID
How to add or change health data
Some data, like your step count, is automatically tracked thanks to the on-board sensors in your iPhone; other information, like your heart rate, requires an external device (like an Apple Watch) to automatically log that data. There is a third option, however: You can manually add or change your health data from the Health app itself.
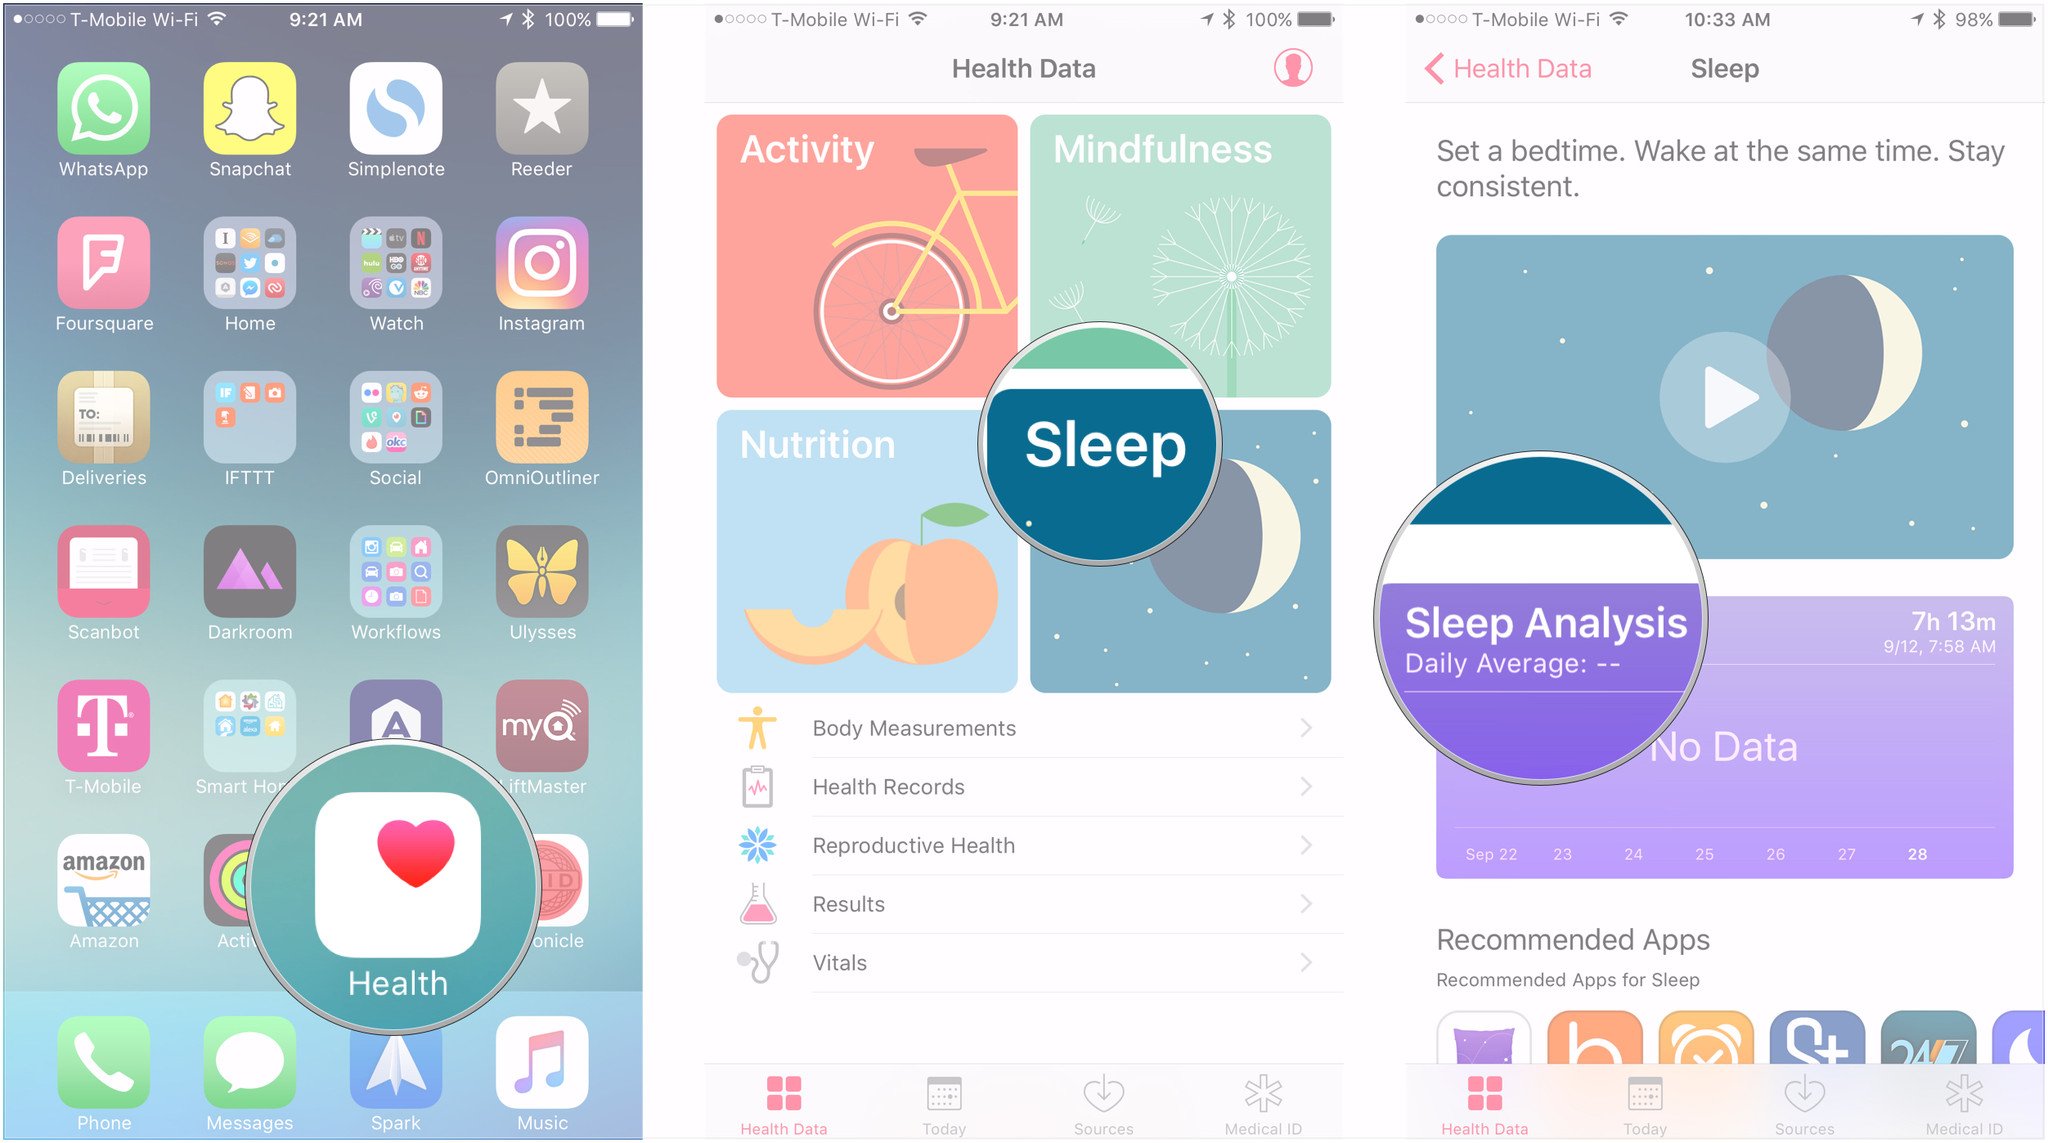
- Launch the Health app from your Home screen.
- Choose a category.
- Select the subject, such as Caffeine or Sleep Analysis, for which you wish to add data.
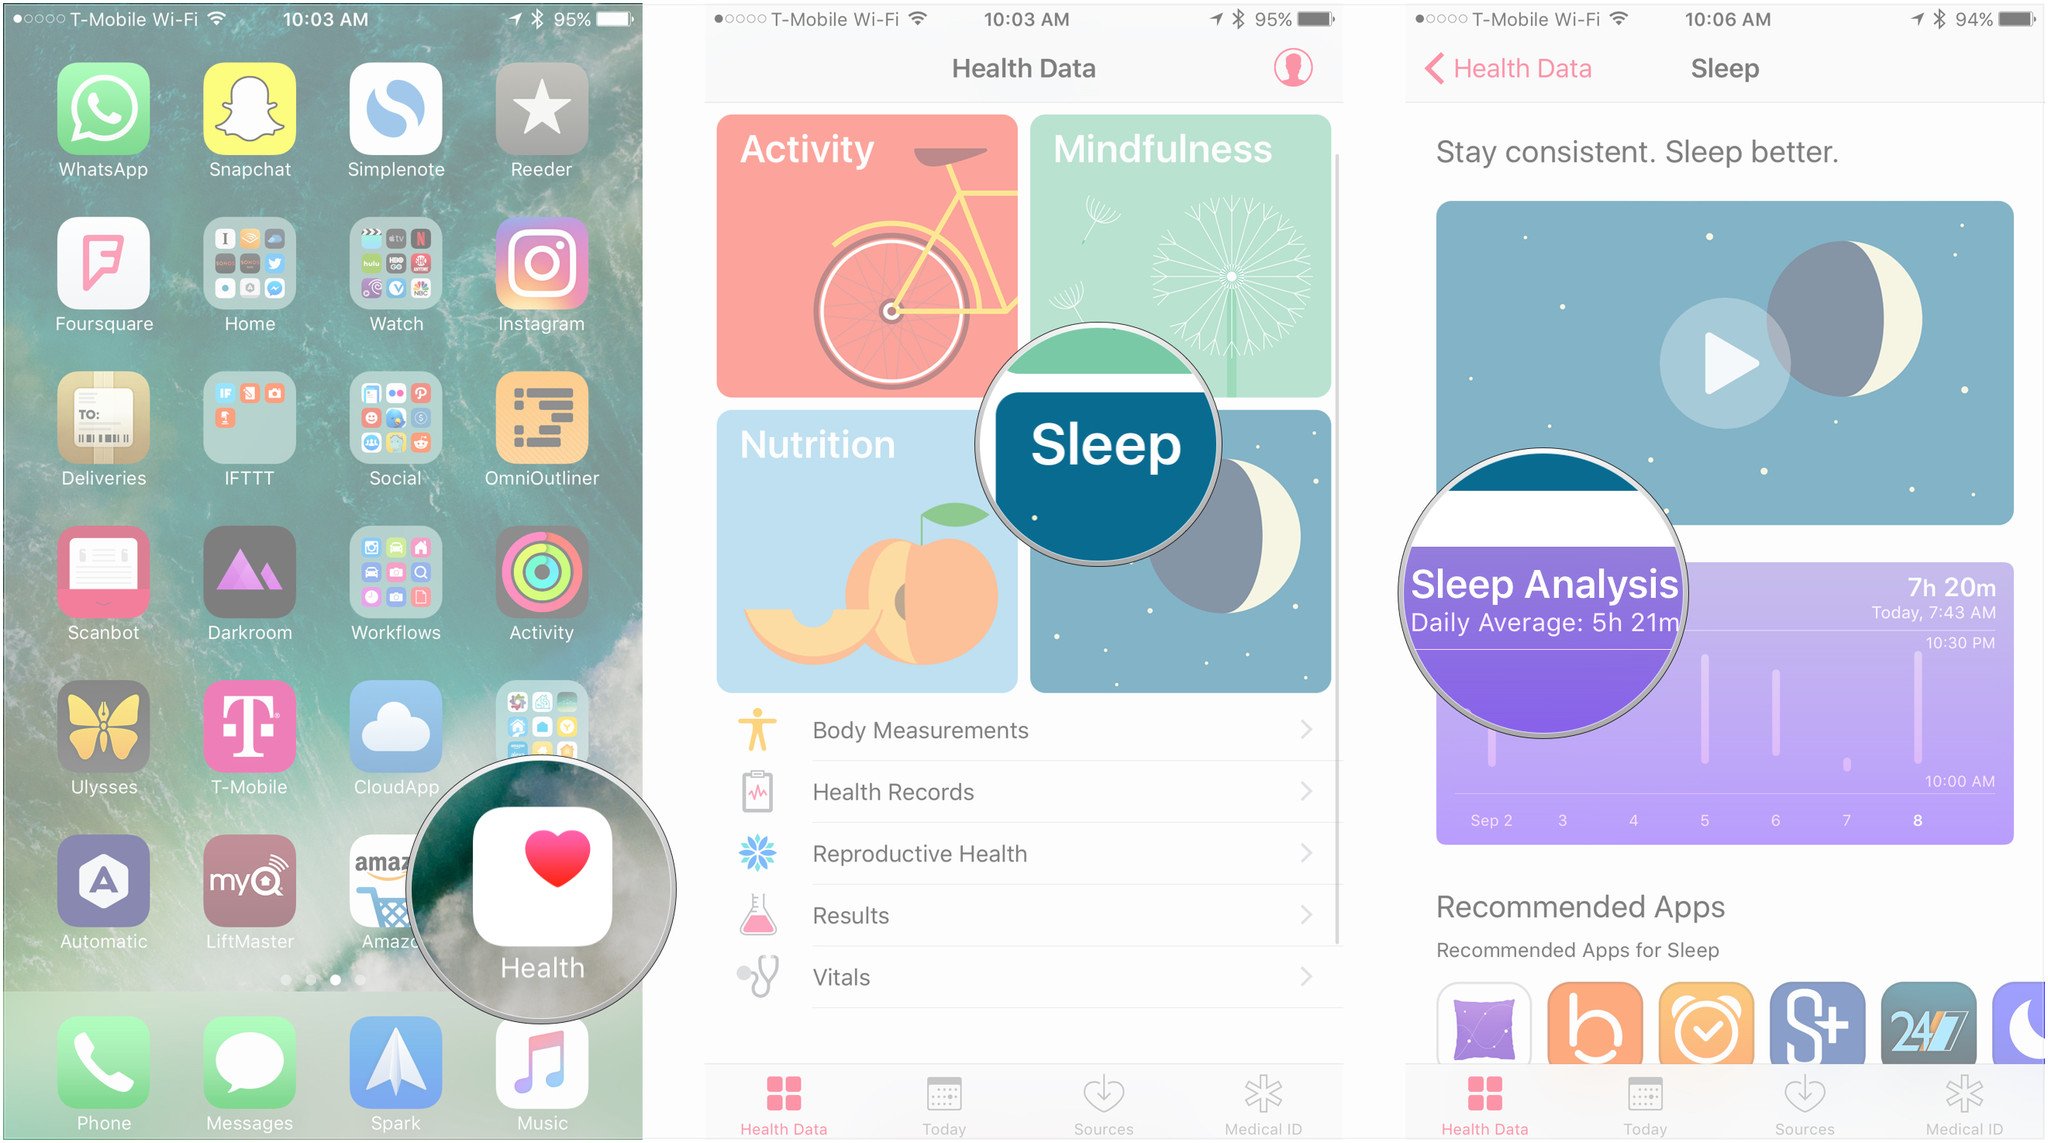
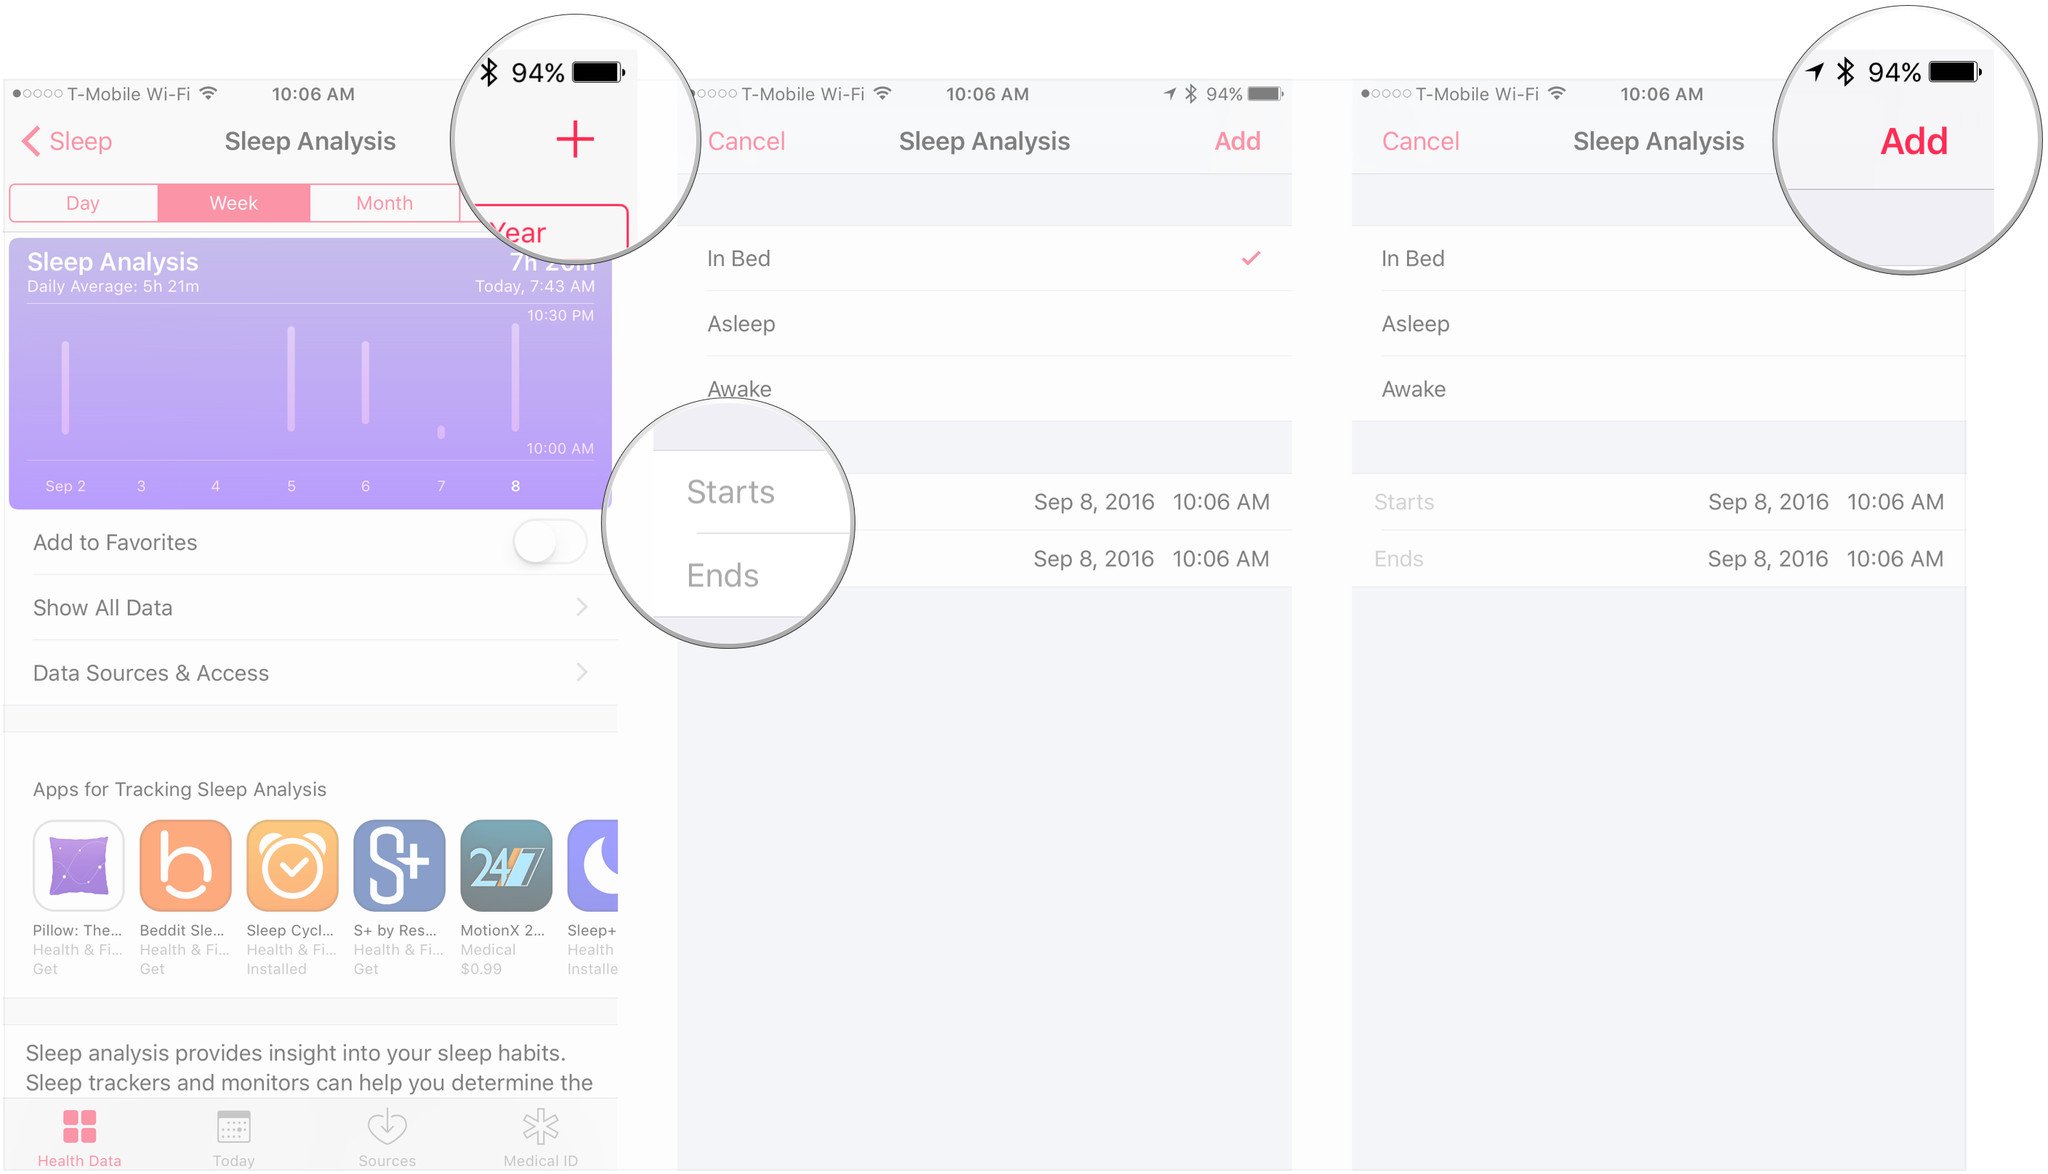
- Tap the '+' button in the top-right corner
- Choose the starting and ending times for the activity, and set any other relevant data, such as how many calories you burned or the amount of caffeine you ingested.
- Tap Add.
How to change display units
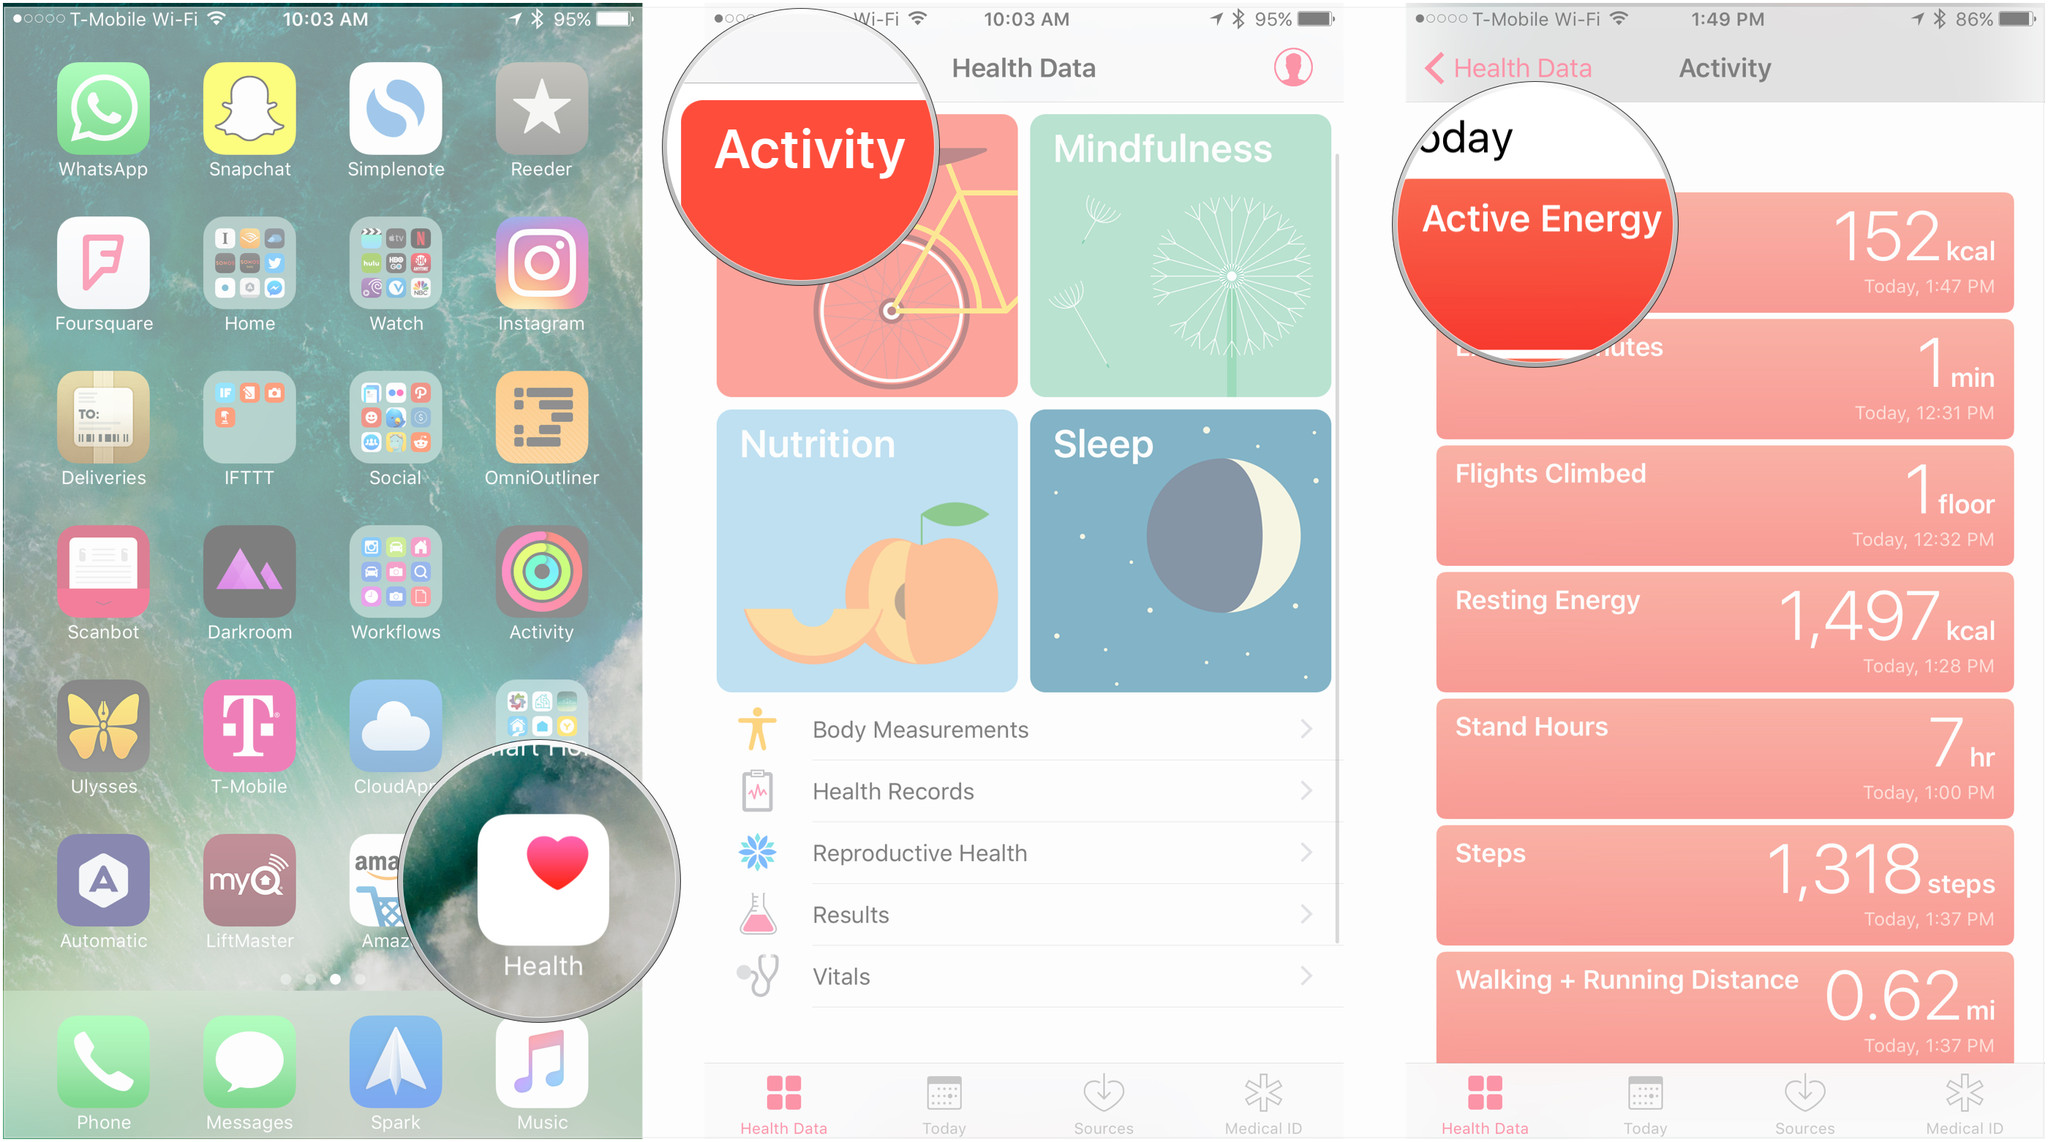
- Launch the Health app from your Home screen.
- Choose a category.
- Select the subject, such as Active Energy, whose display units you would like to change.
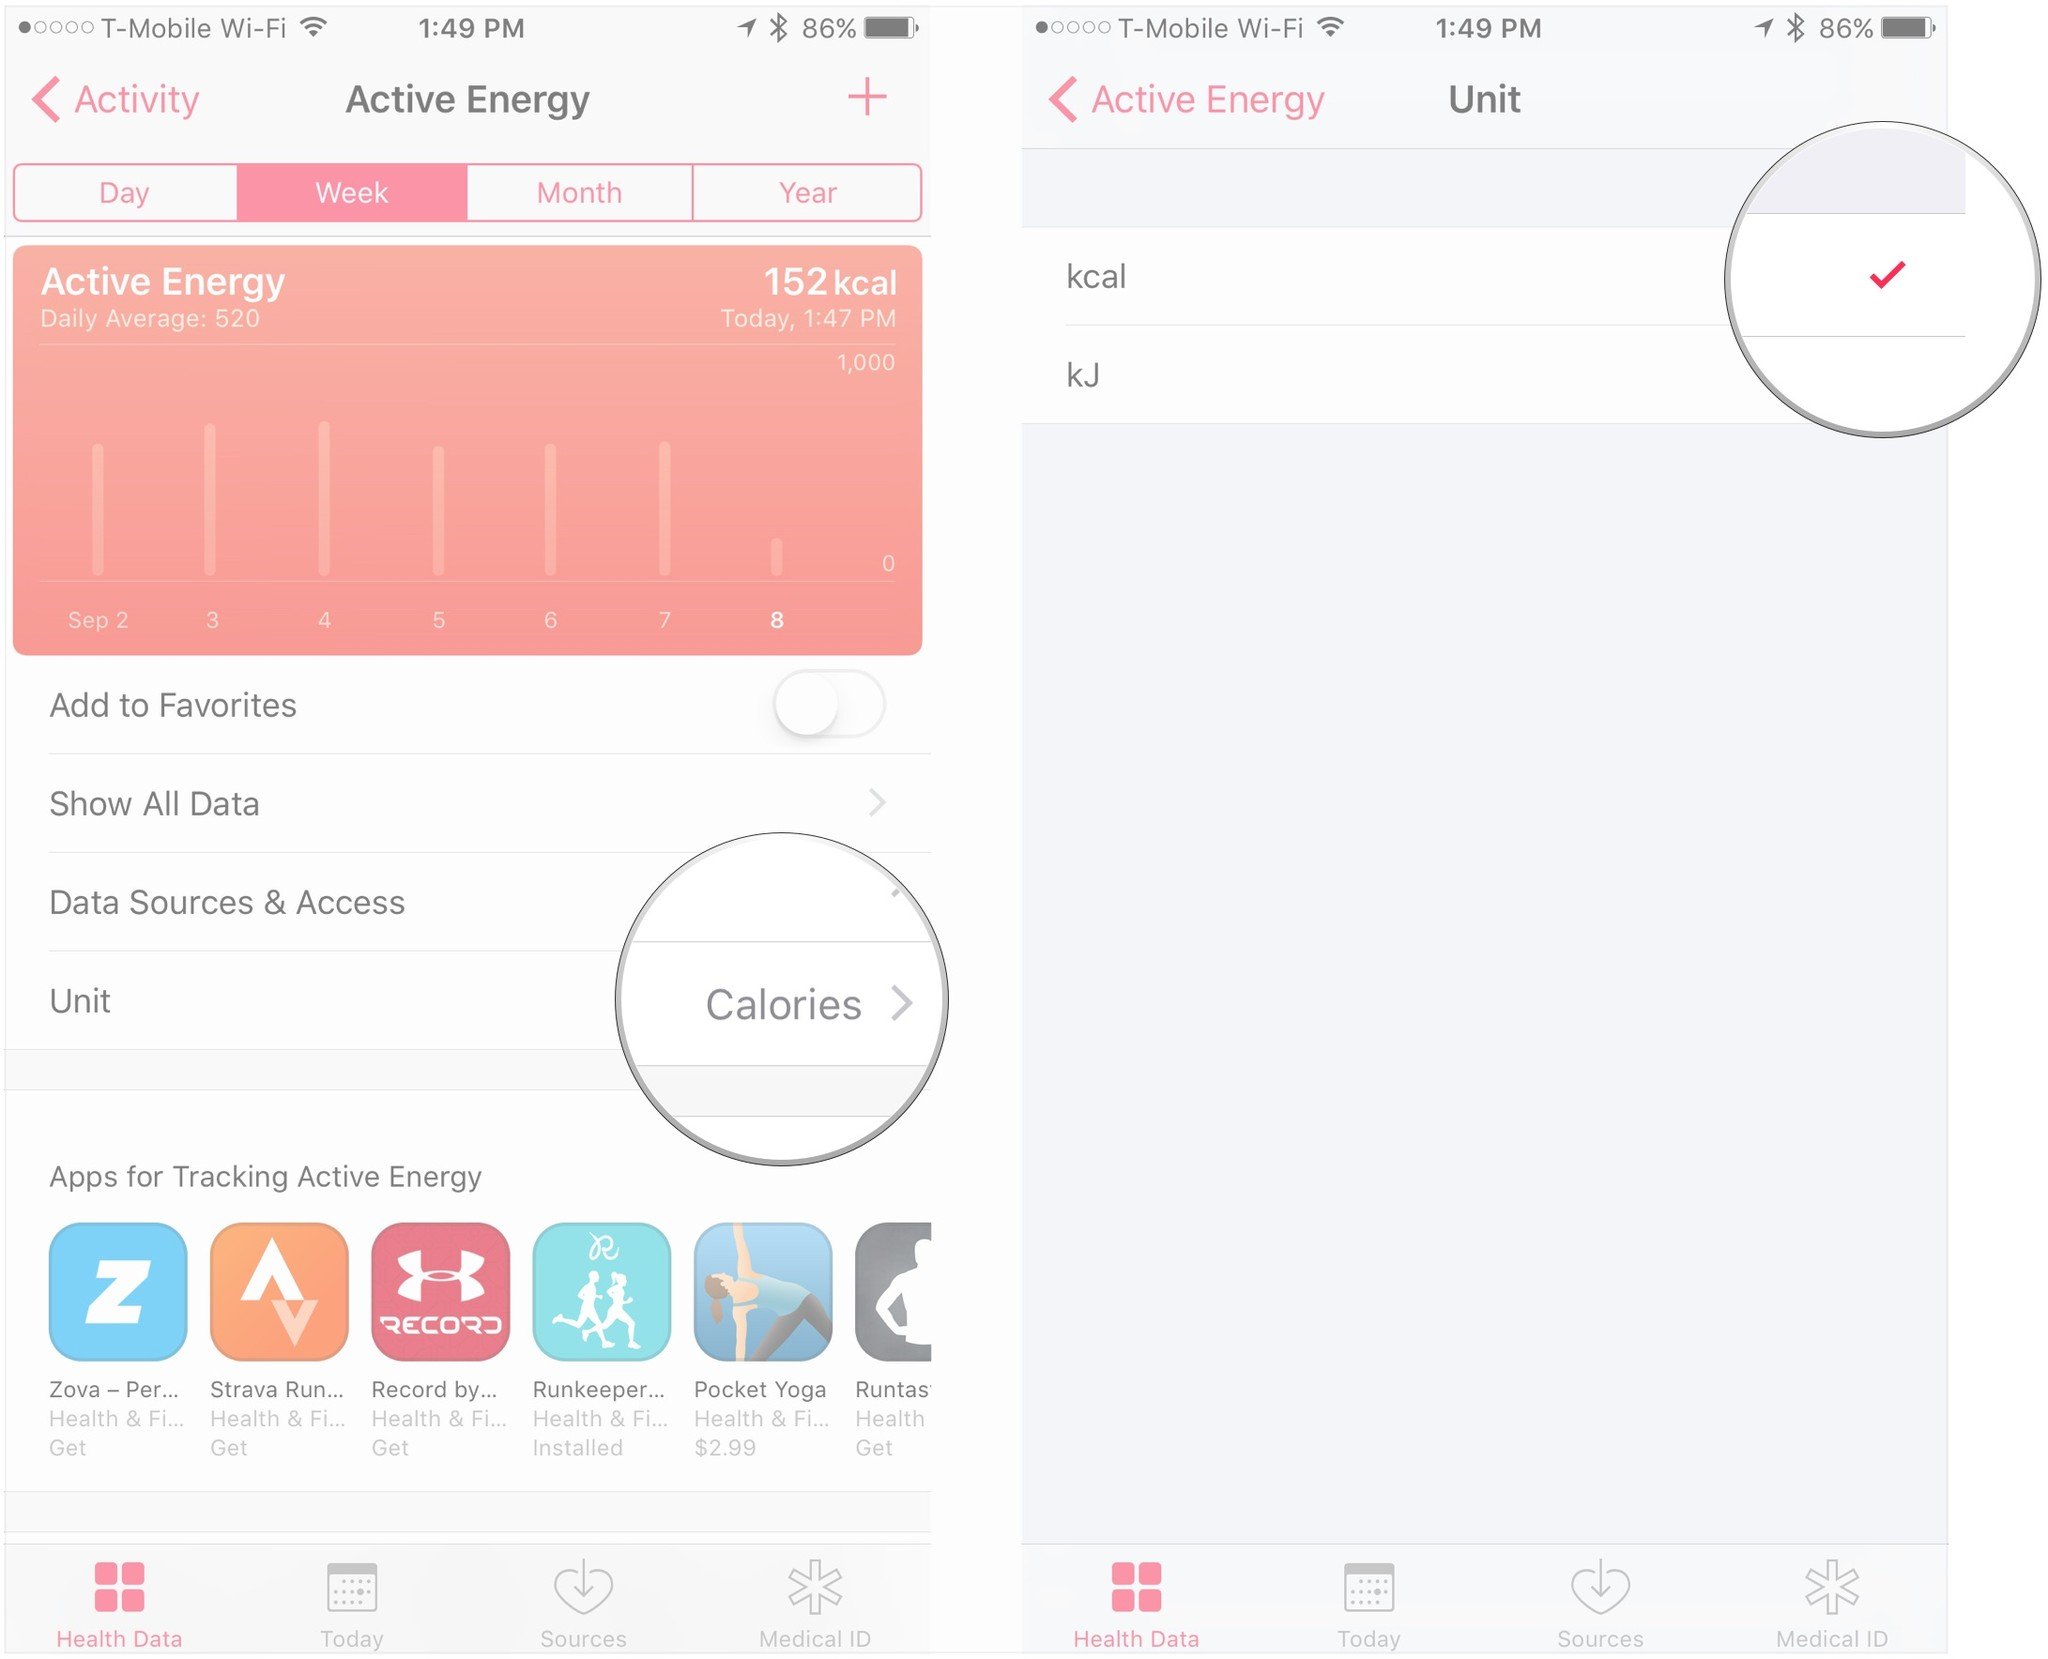
- Tap Unit.
- Choose from the available display options. In the case of Active Energy, for instance, select either kilocalories (kcal) or kilojoules (kJ).
How to delete data from the Health app
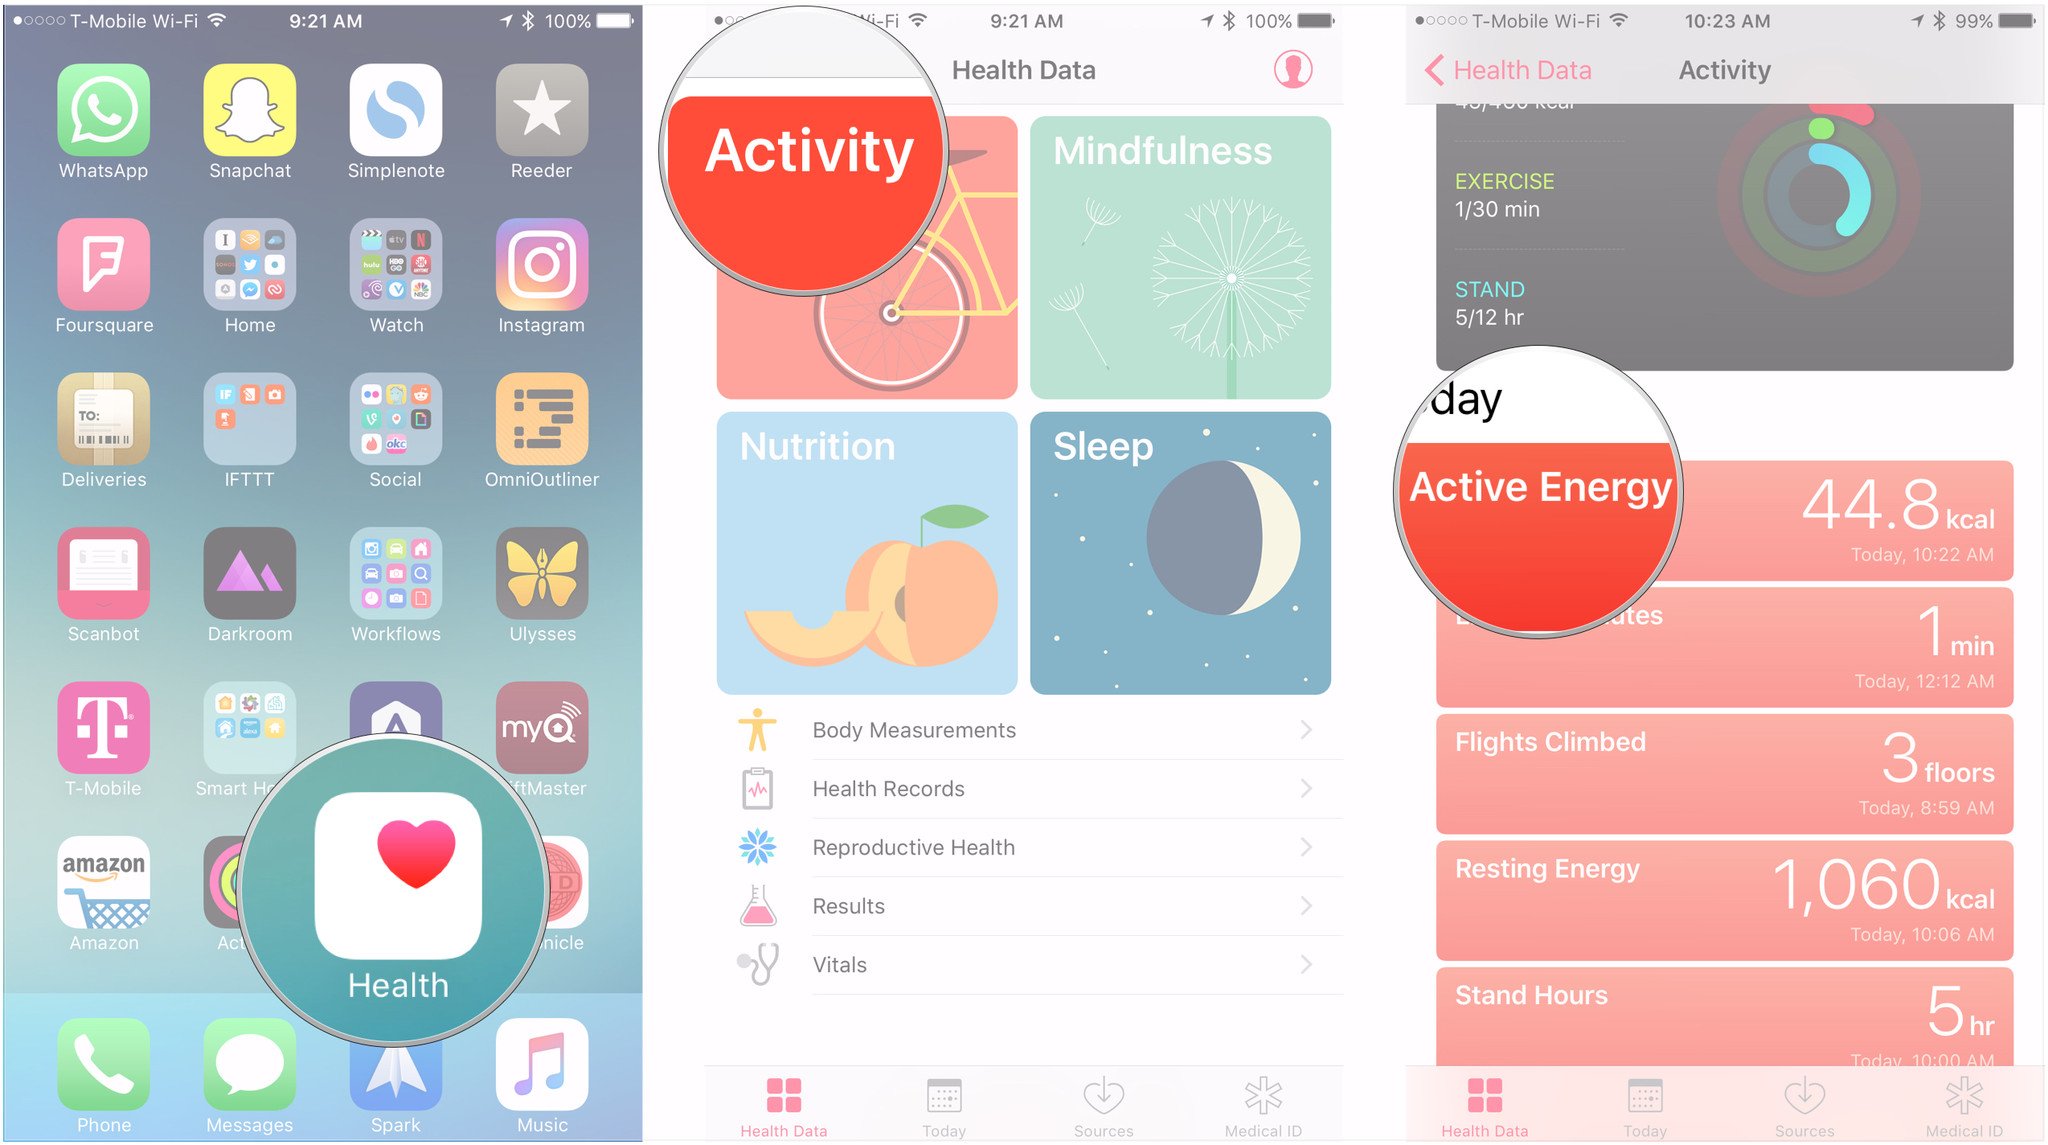
- Launch the Health app from your Home screen.
- Choose a category.
- Select the subject, such as Active Energy or Sleep Analysis, from which you wish to remove data.
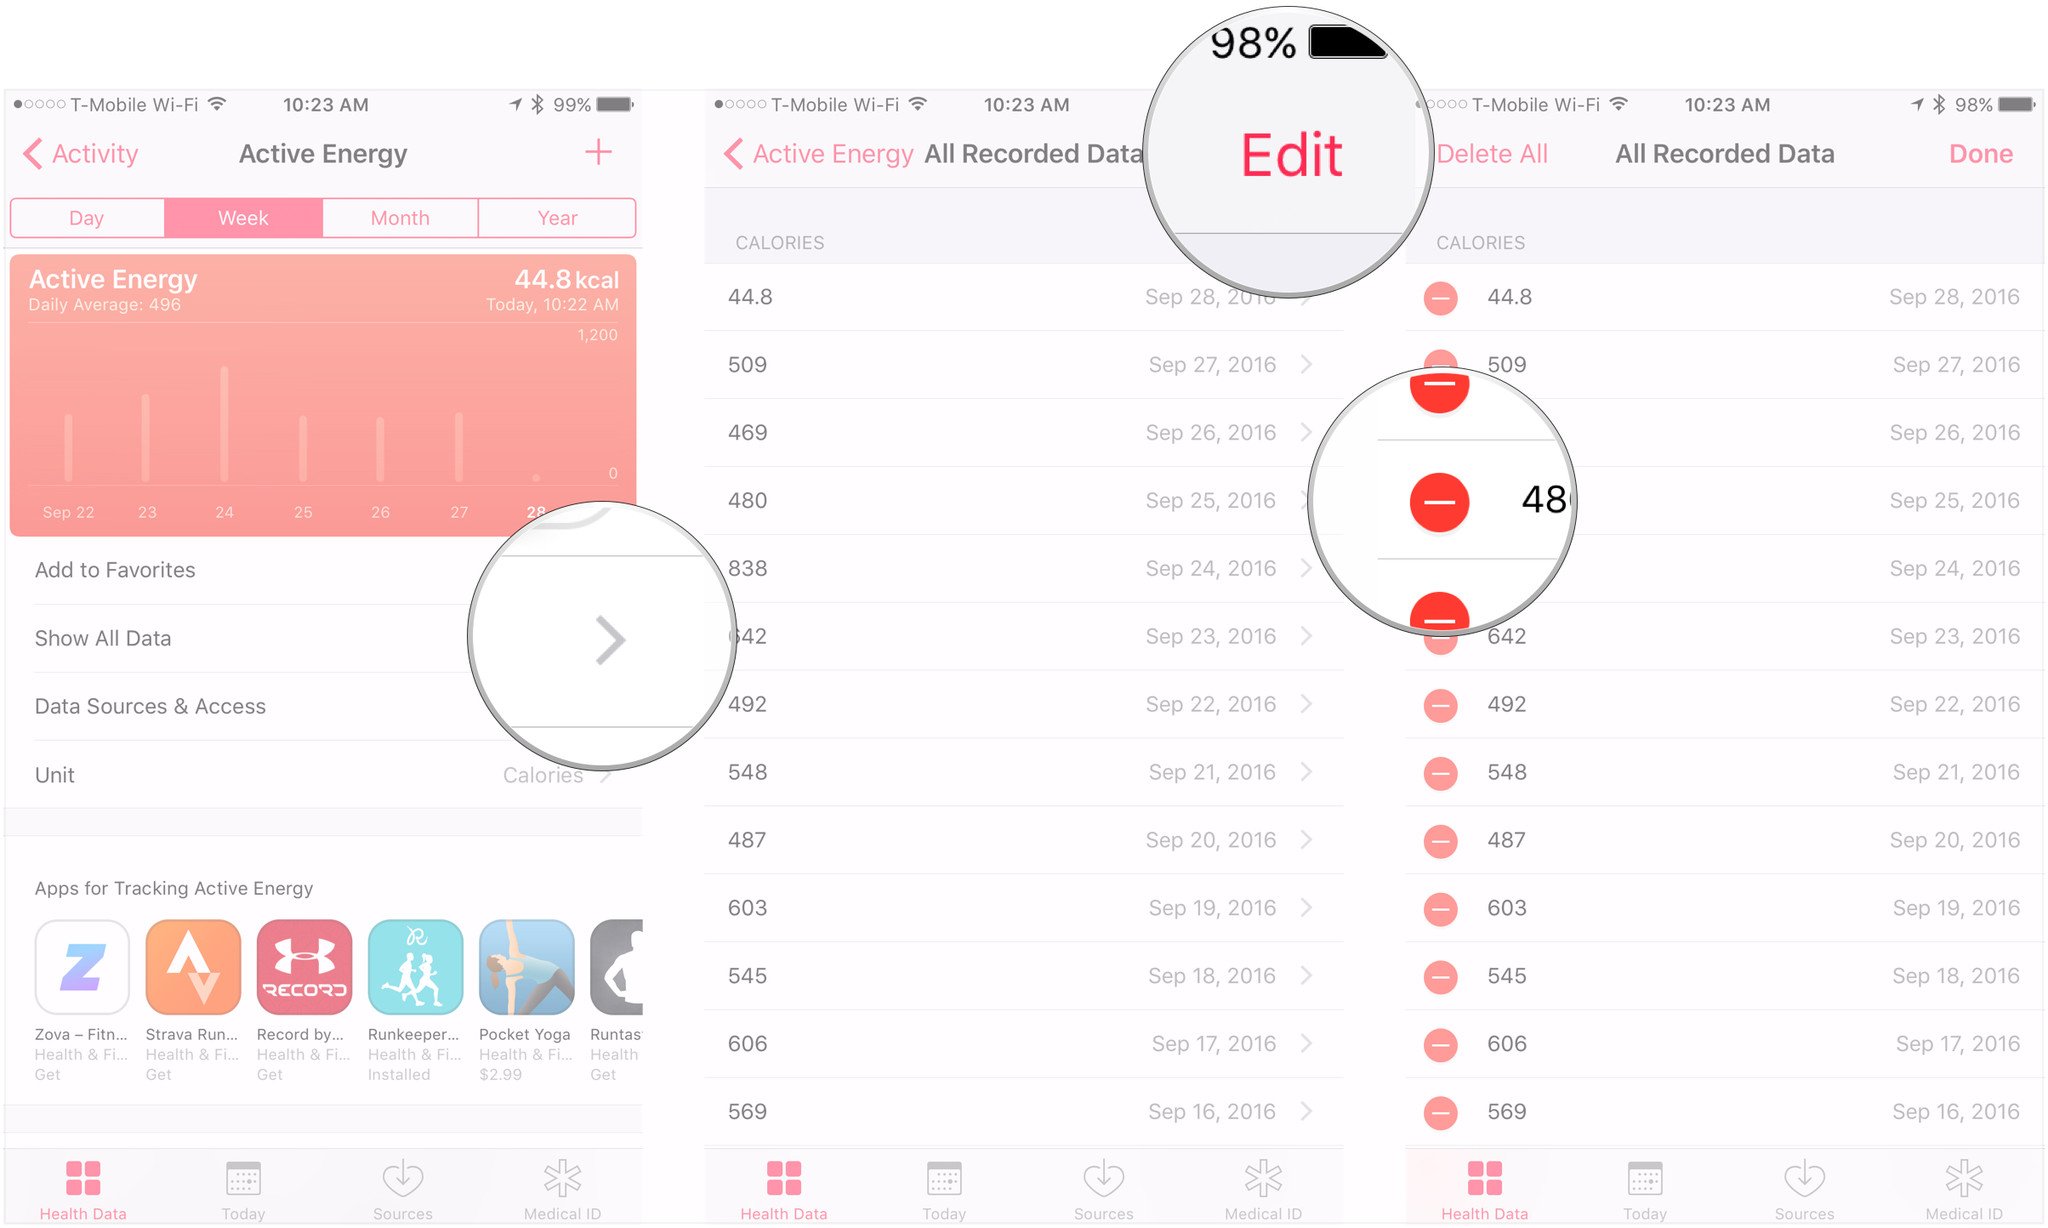
- Tap Show All Data.
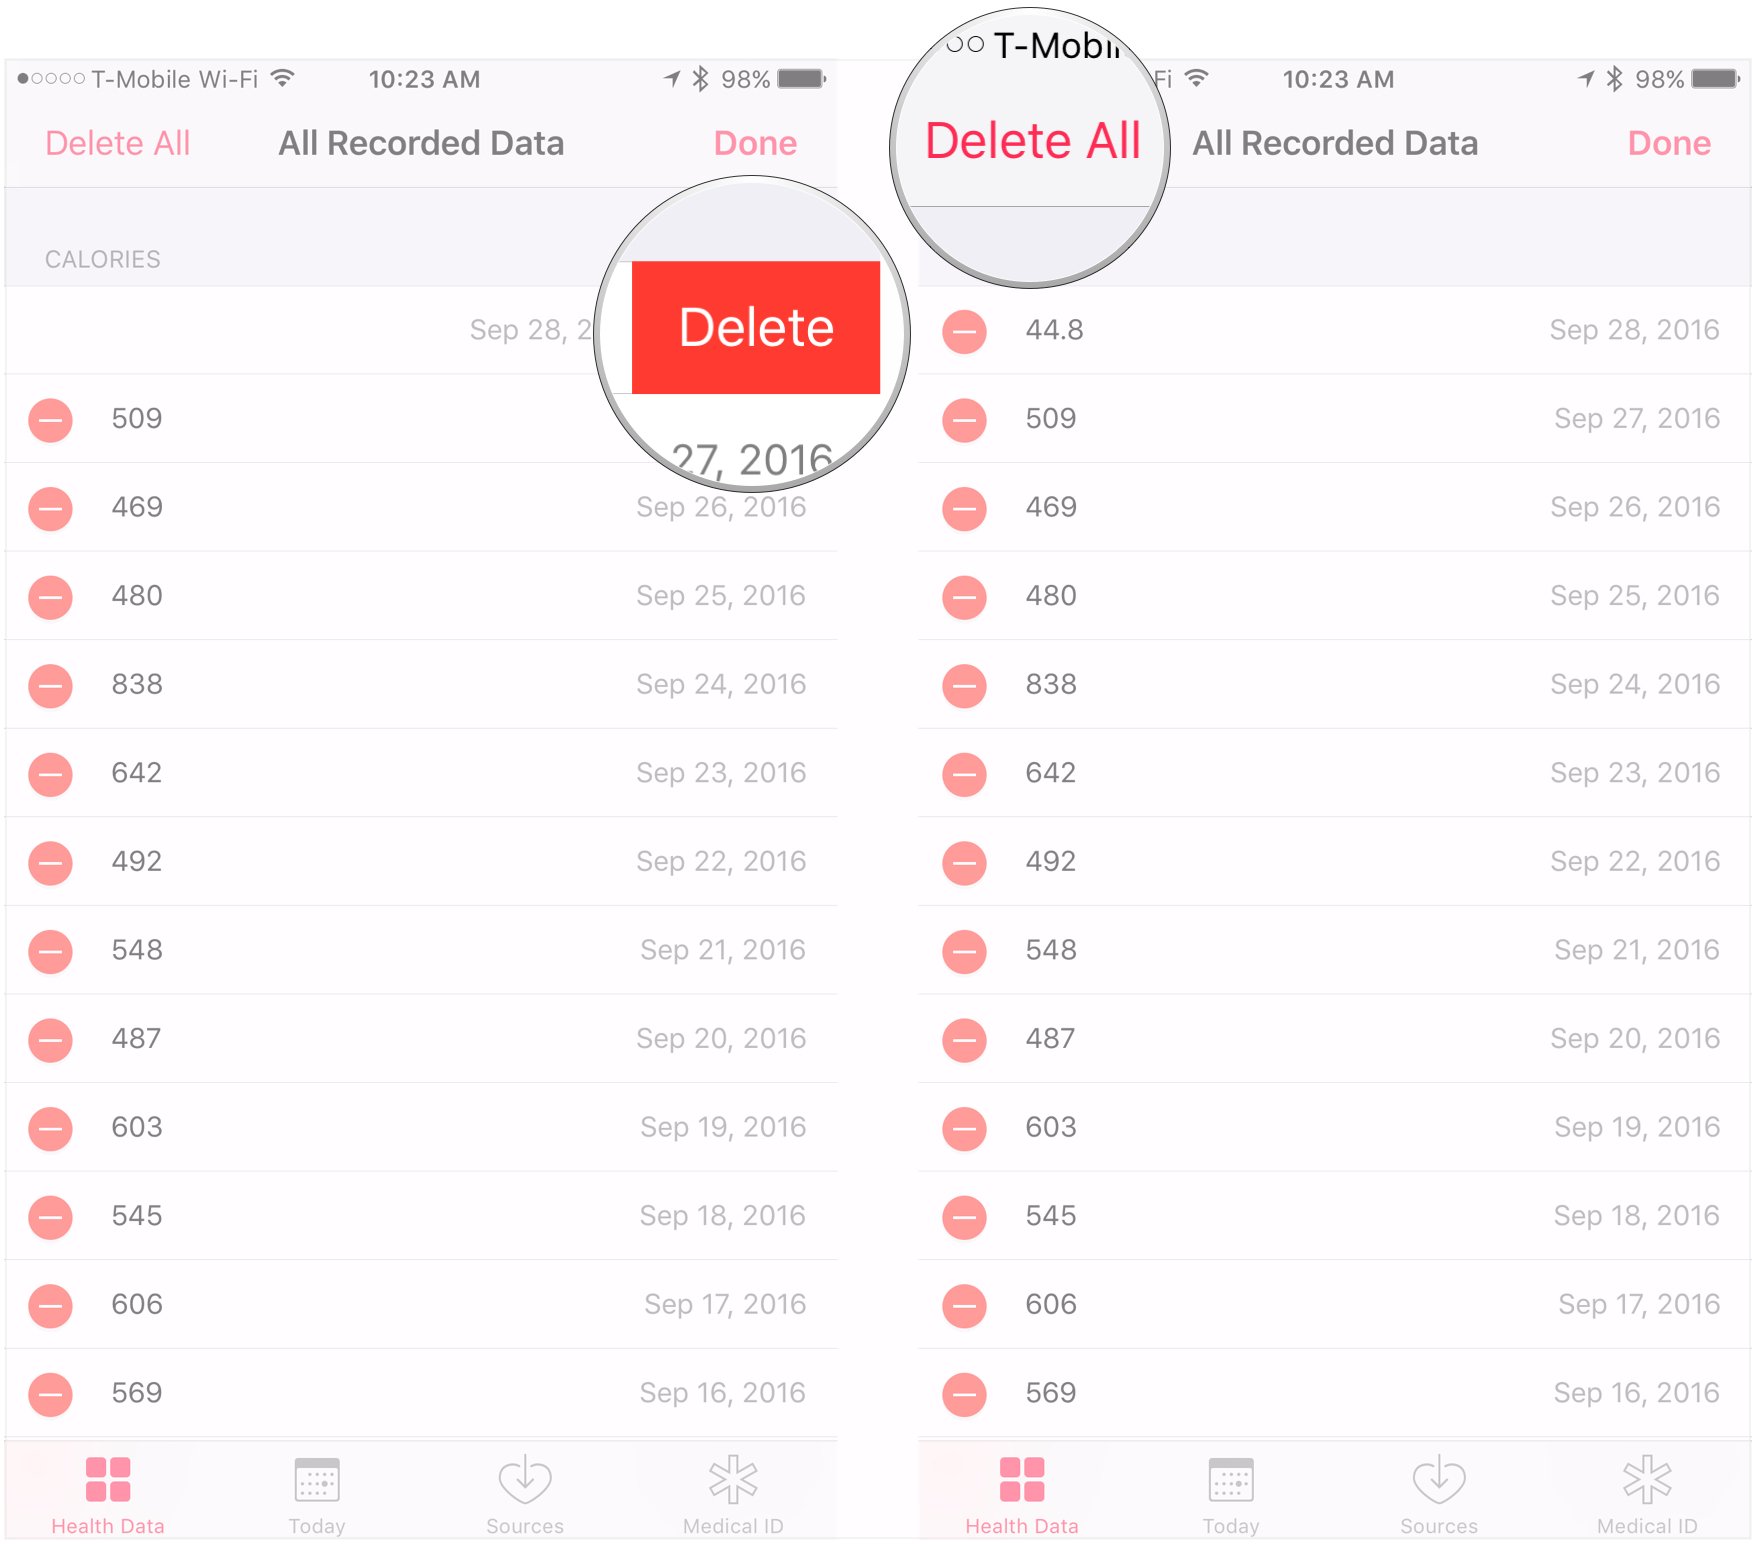
- Find the data that you want to remove and tap Edit.
- When deleting select pieces of data, tap the subtraction symbol in the red circle next to the data point or points you wish to remove.
- Tap Delete.
- If you wish to remove all of a subject's data, tap Delete All.
How to manage data access permissions
These permissions let the Health app know which apps can read and write data to this category.
- Launch the Health app from your Home screen.
- Choose a category.
- Select the subject, such as Active Energy or Sleep Analysis, where you want to temporarily disable data recording from an app.
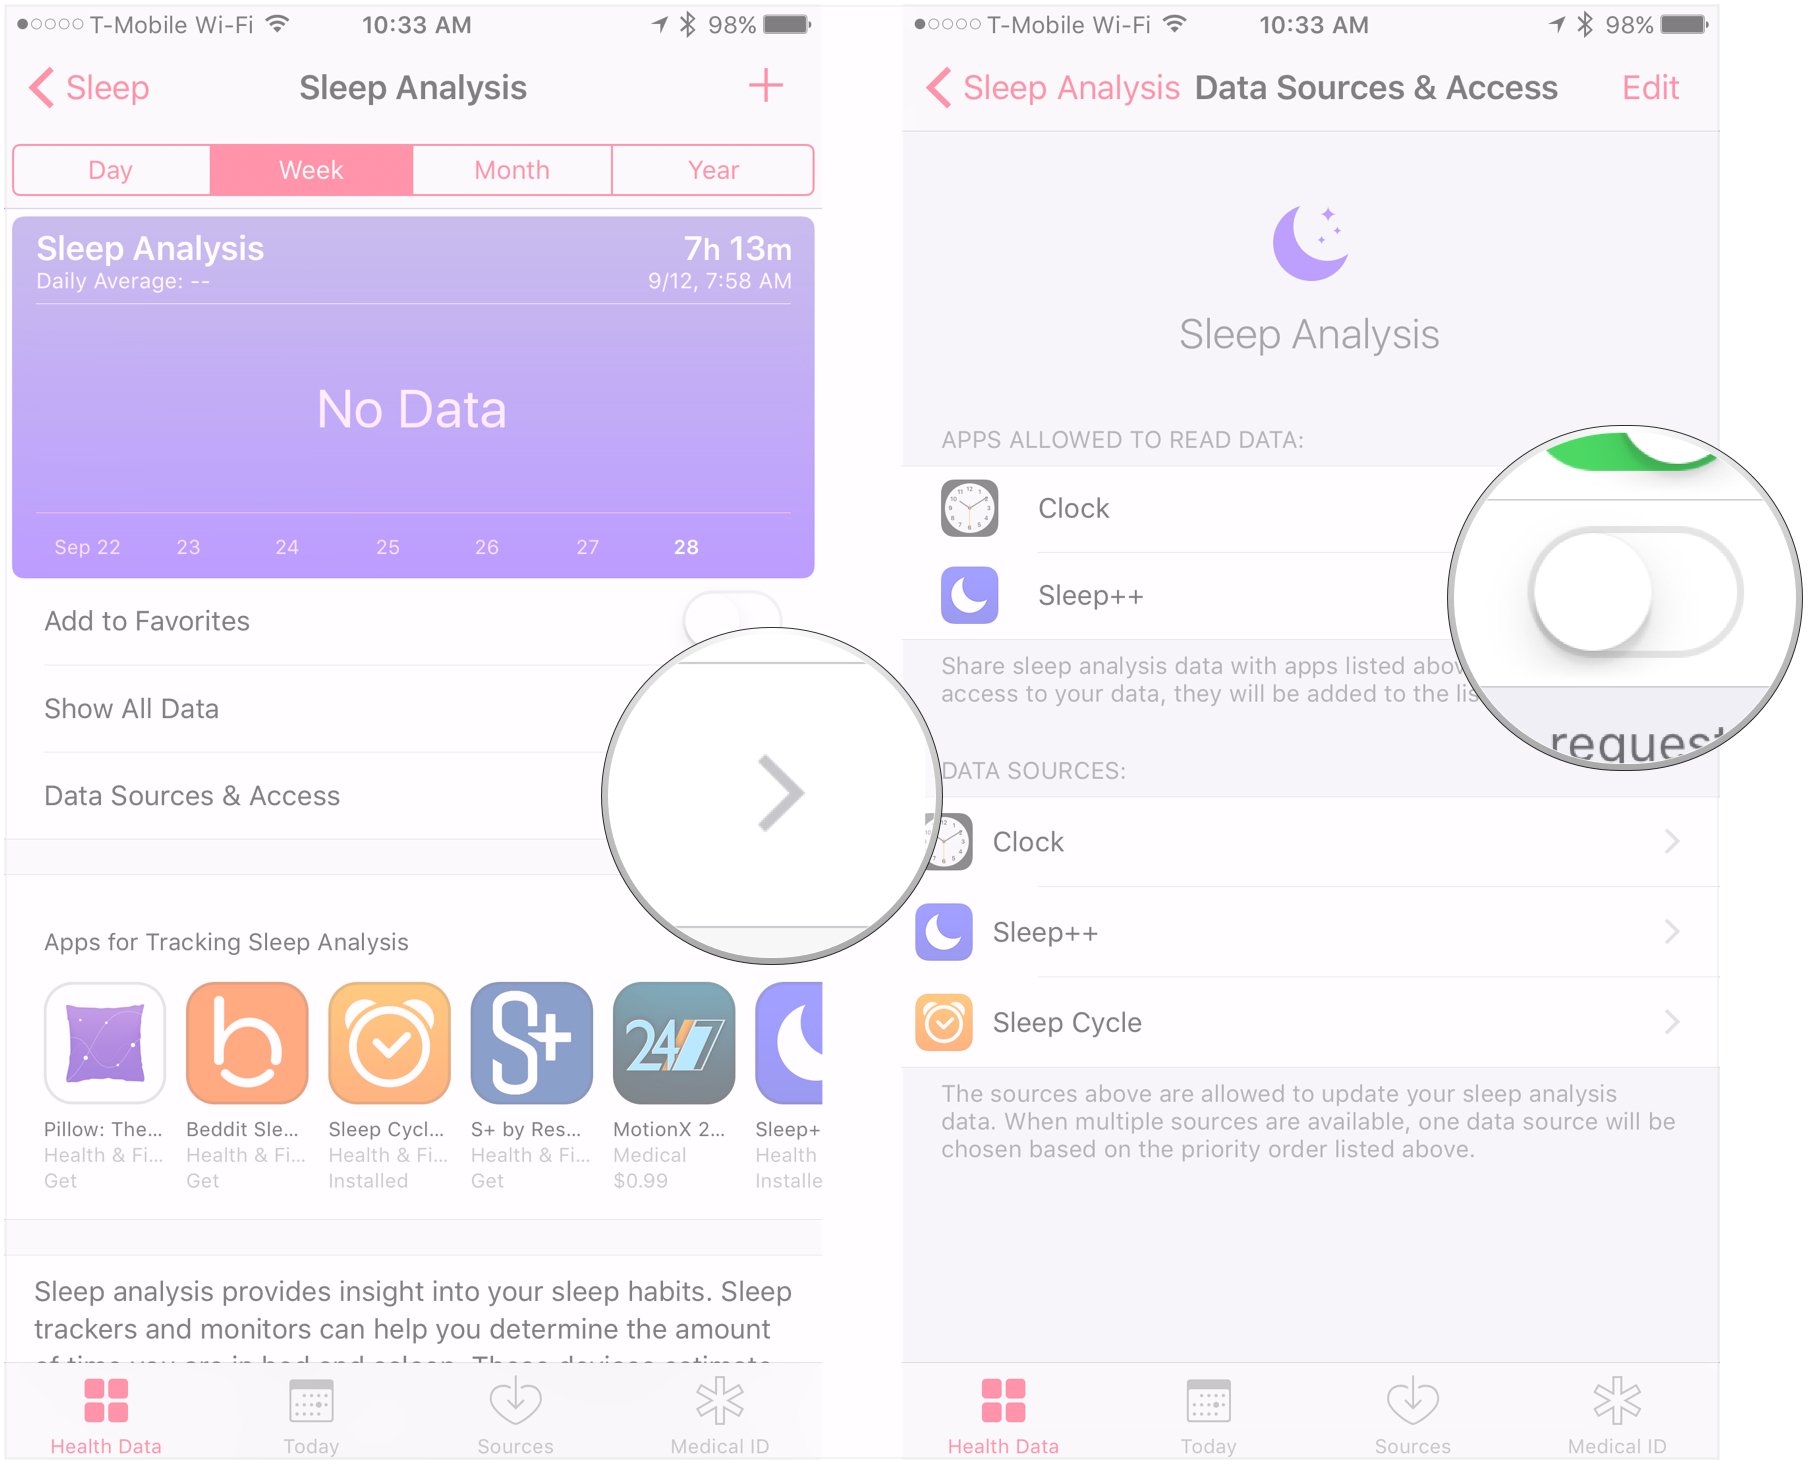
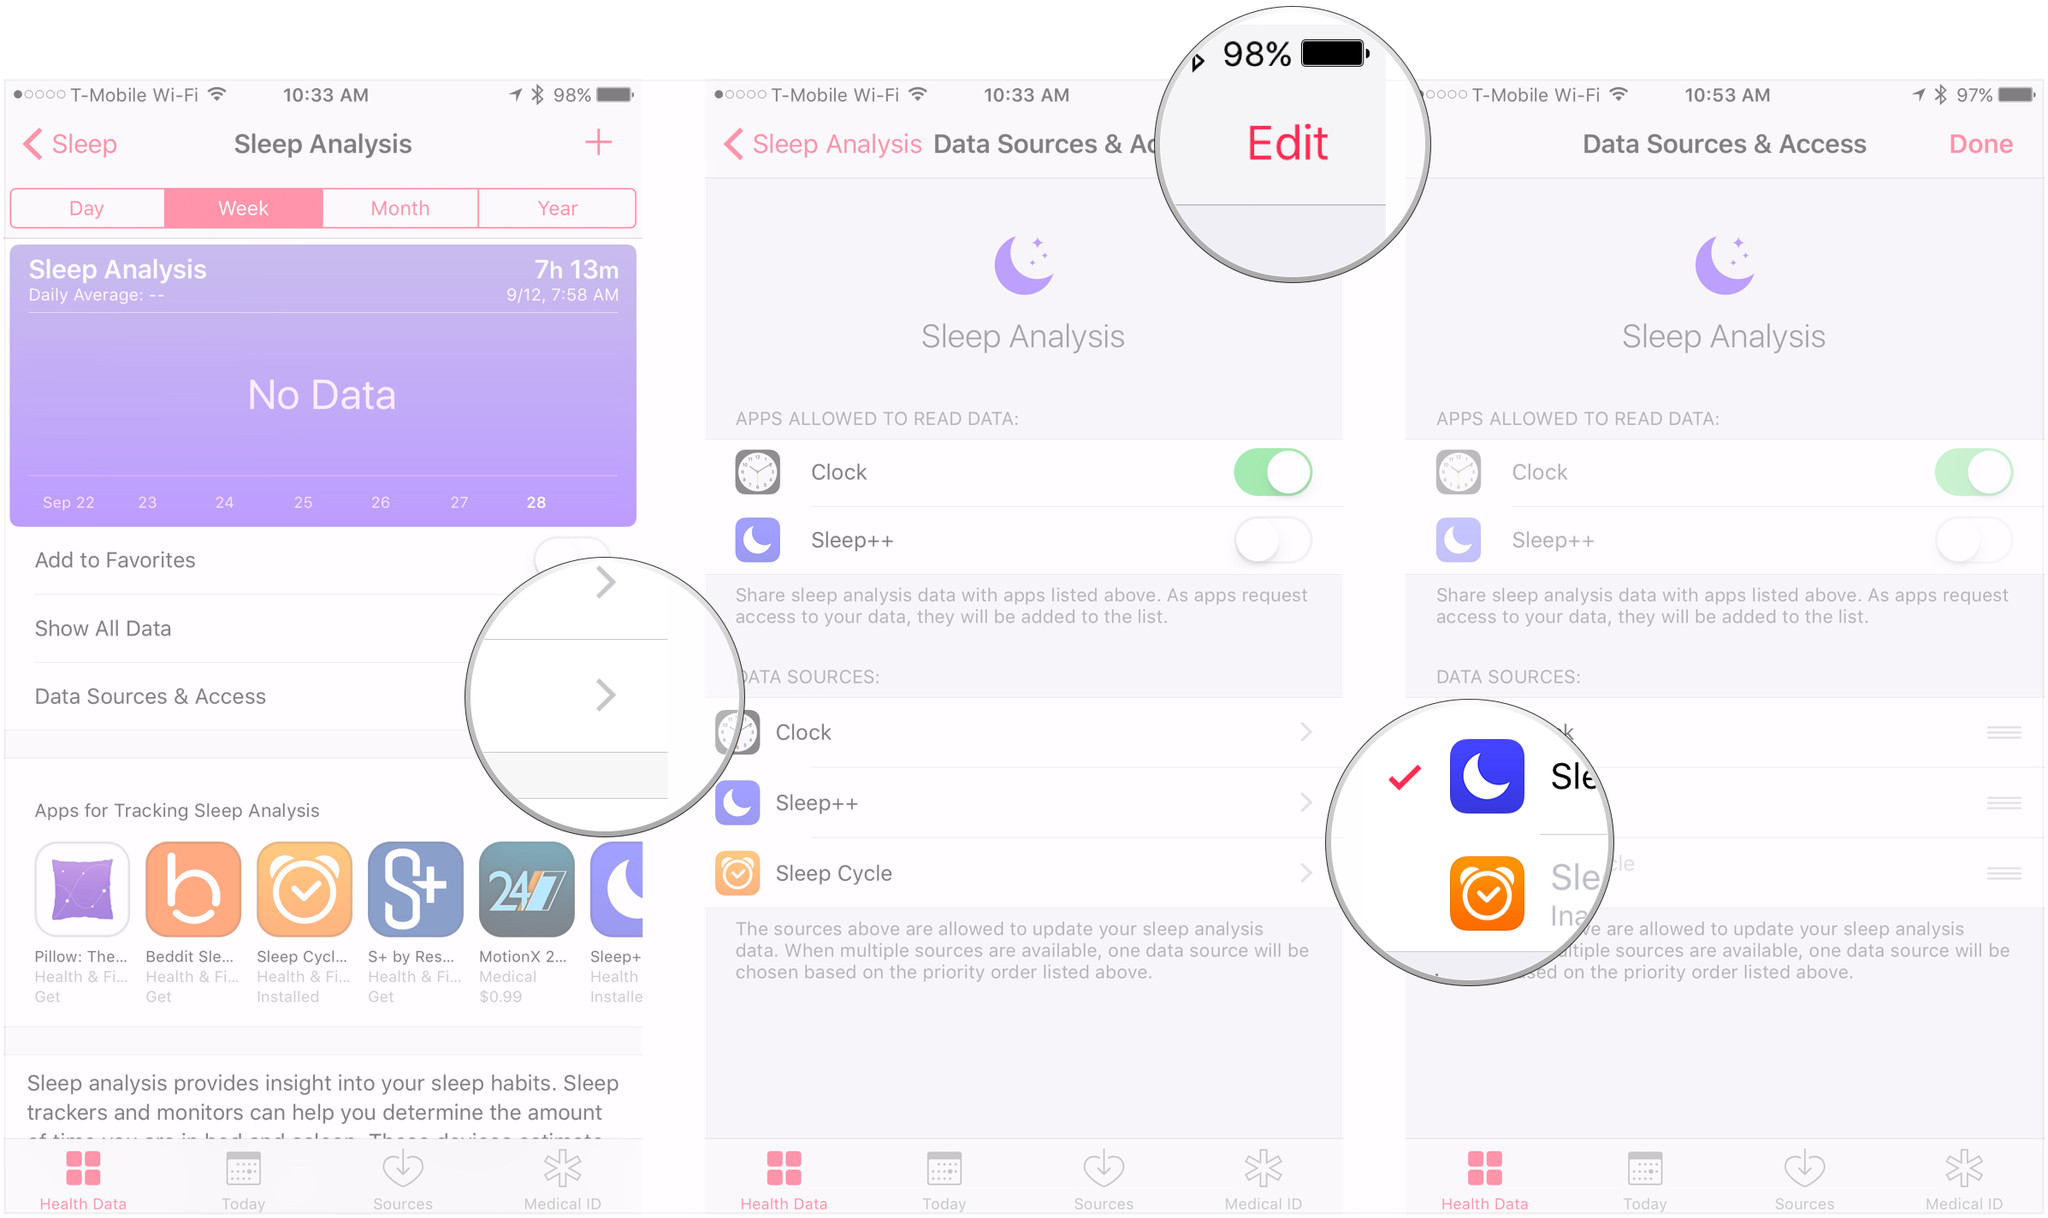
- Tap Data Sources & Access.
- Under Apps Allowed to Read Data, find the app for which you wish to revoke permissions, and flip its switch to the 'off' position.
How to remove a data source from your Health graph
If you don't want a data source to show up in your Health grab, you can disable it.
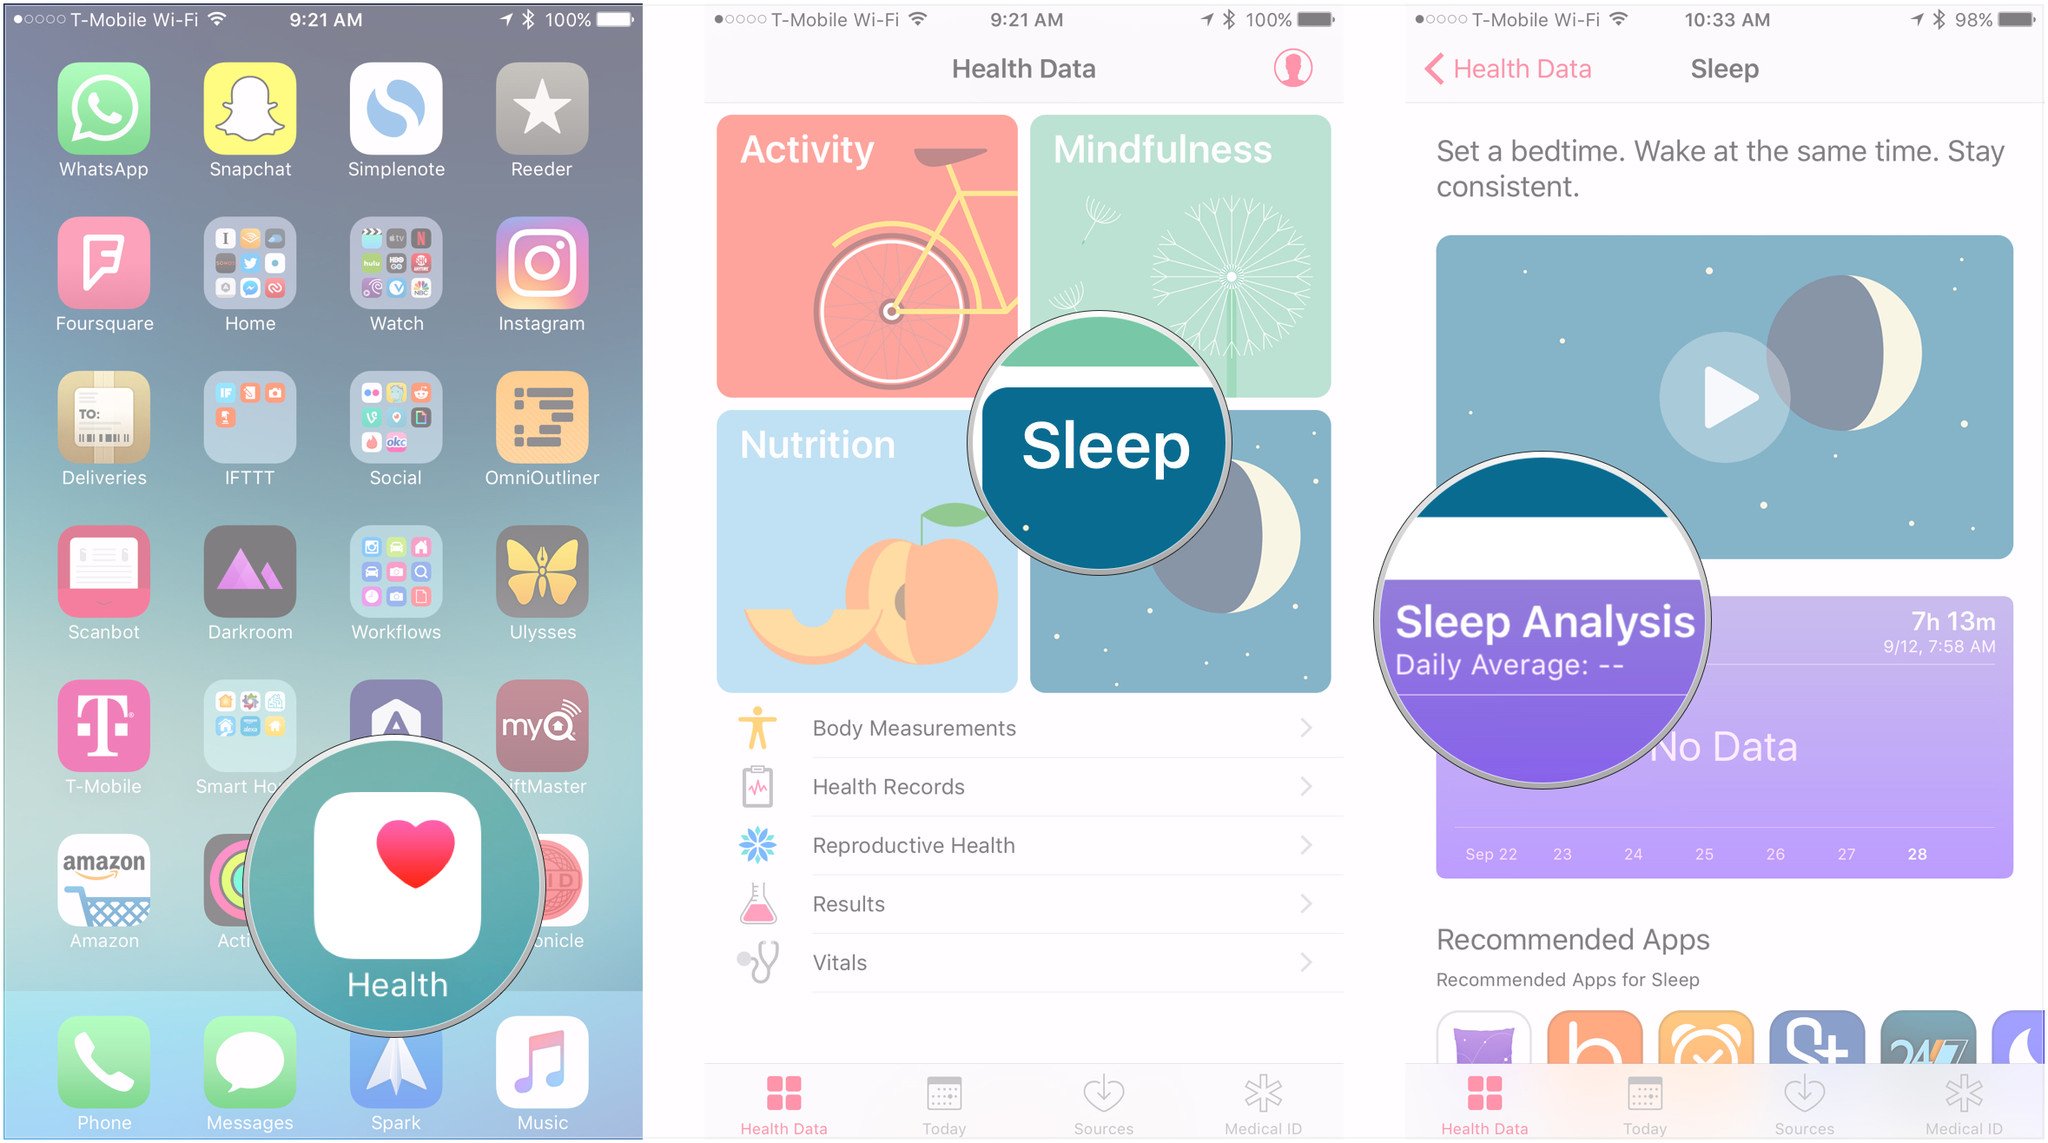
- Launch the Health app from your Home screen.
- Choose a category.
- Select the subject, such as Active Energy or Sleep Analysis, from which you wish to remove a data source.
- Tap Data Sources & Access.
- Tap Edit.
- Under Data Sources, find the data source you wish to remove and tap it. The check next to its name should disappear, and "Inactive" should appear under the source's name.
How to create your Medical ID
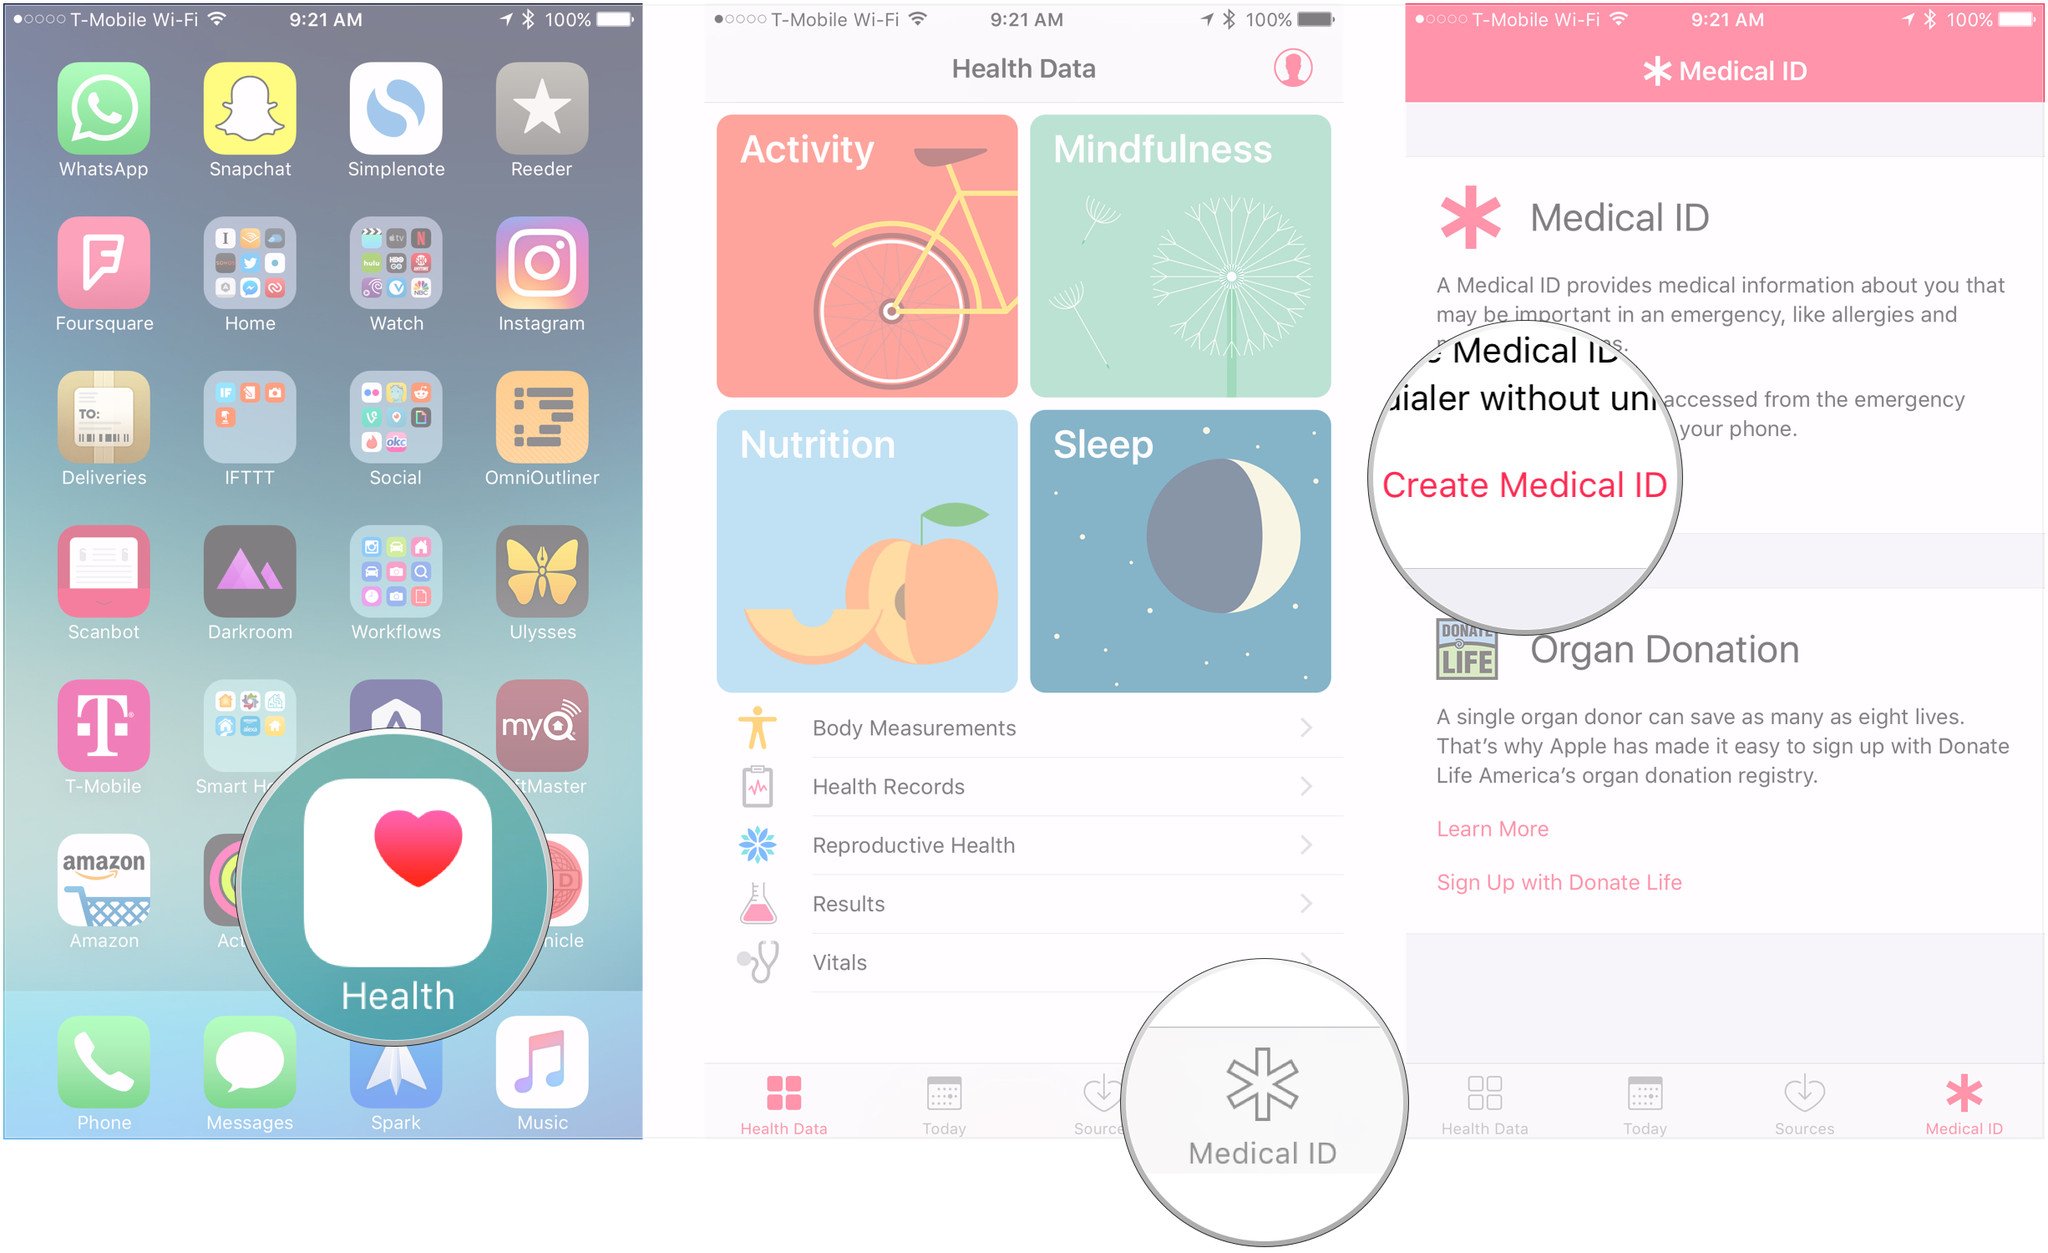
- Launch the Health app from your Home screen.
- Tap Medical ID.
- Tap Create Medical ID.
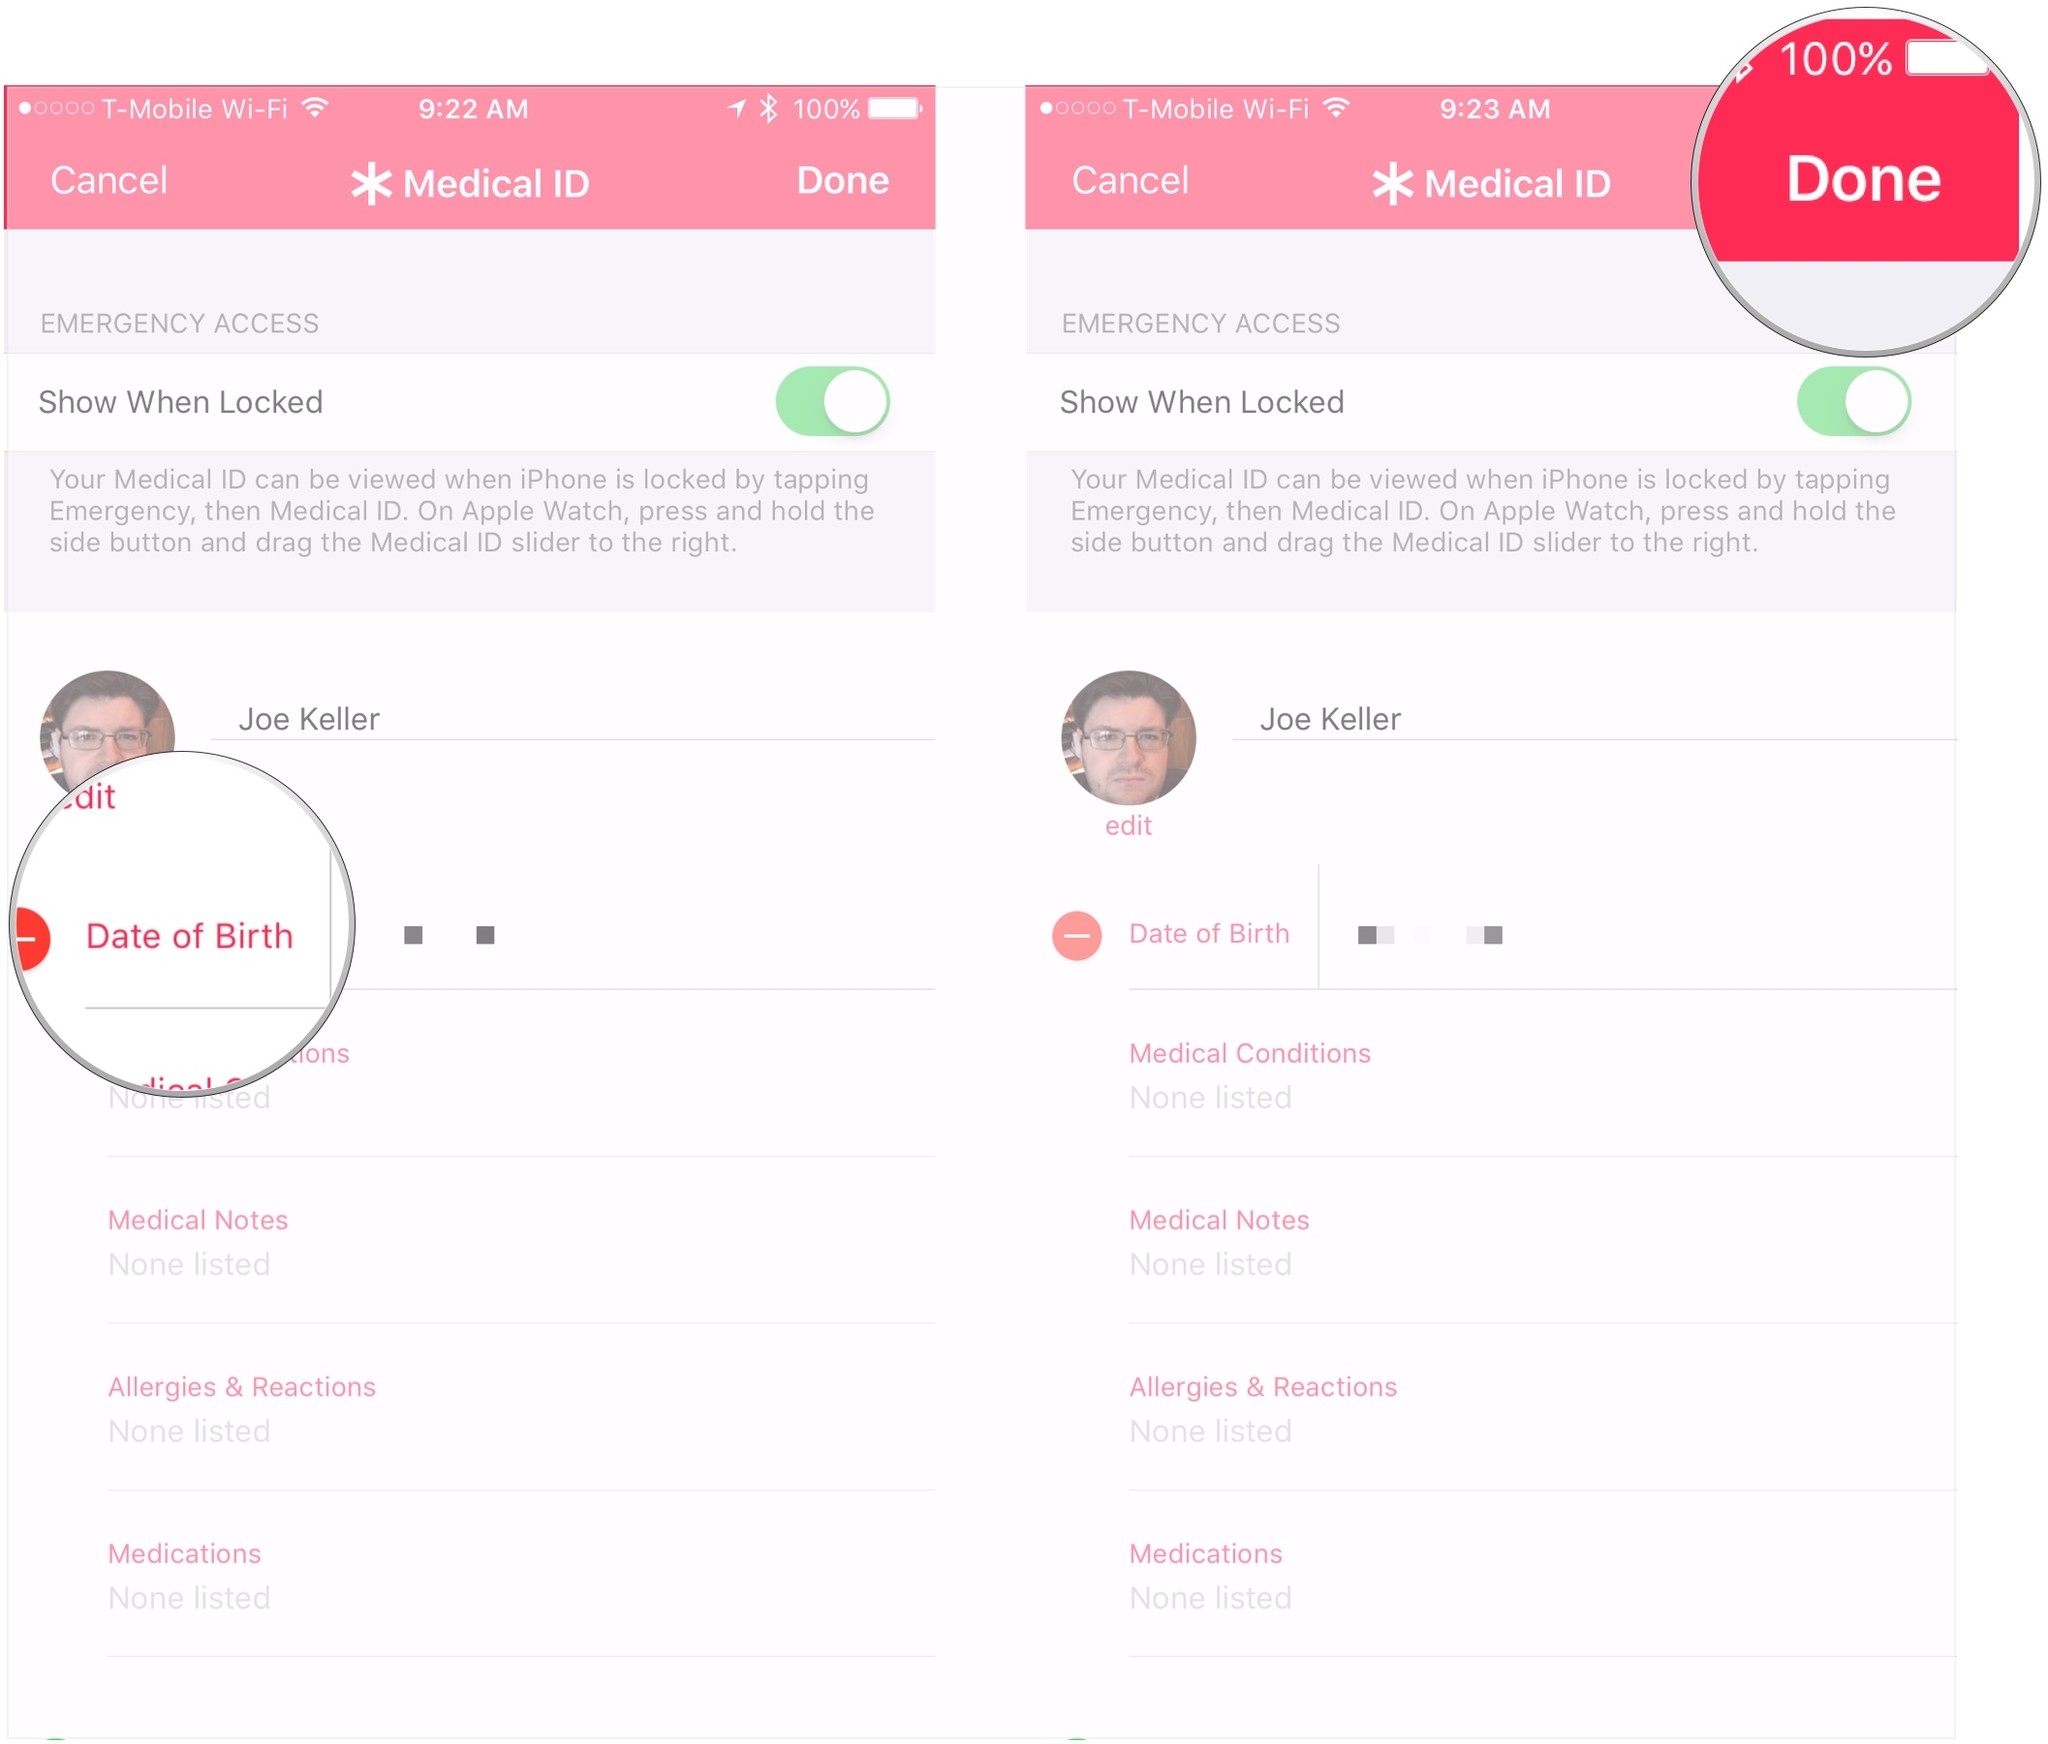
- Fill out each of the applicable sections with things like your age, height, weight, and blood type.
- Hit Done.
How to update your Medical ID
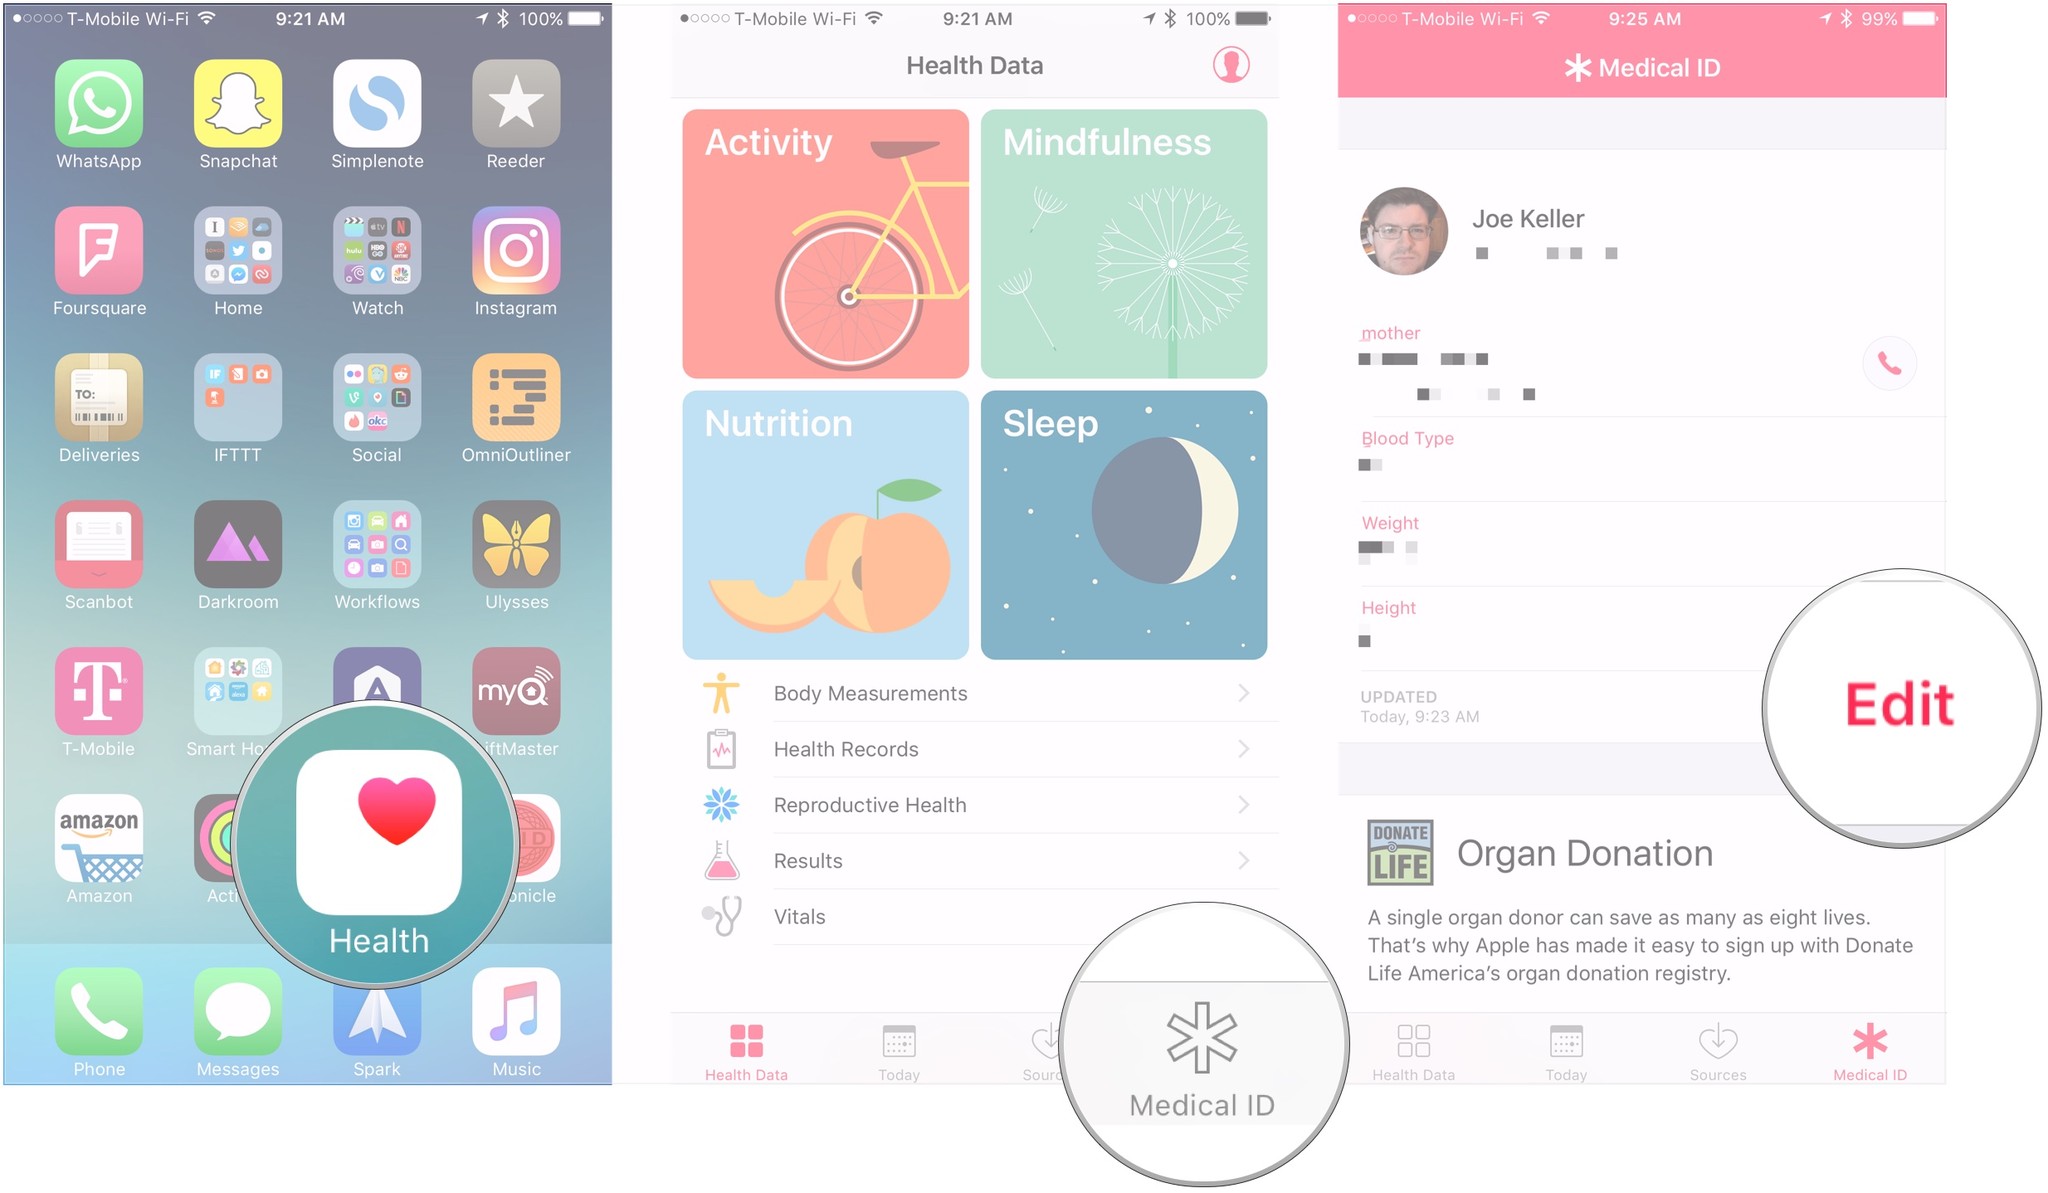
- Launch the Health app from your Home screen.
- Tap Medical ID.
- Hit Edit.
- Add or remove your new information, such as a medical condition or new emergency contact.
- Tap Done.
Questions?
Let us know in the comments.
Master your iPhone in minutes
iMore offers spot-on advice and guidance from our team of experts, with decades of Apple device experience to lean on. Learn more with iMore!
Joseph Keller is the former Editor in Chief of iMore. An Apple user for almost 20 years, he spends his time learning the ins and outs of iOS and macOS, always finding ways of getting the most out of his iPhone, iPad, Apple Watch, and Mac.
