How to manage your Medical ID on iPhone
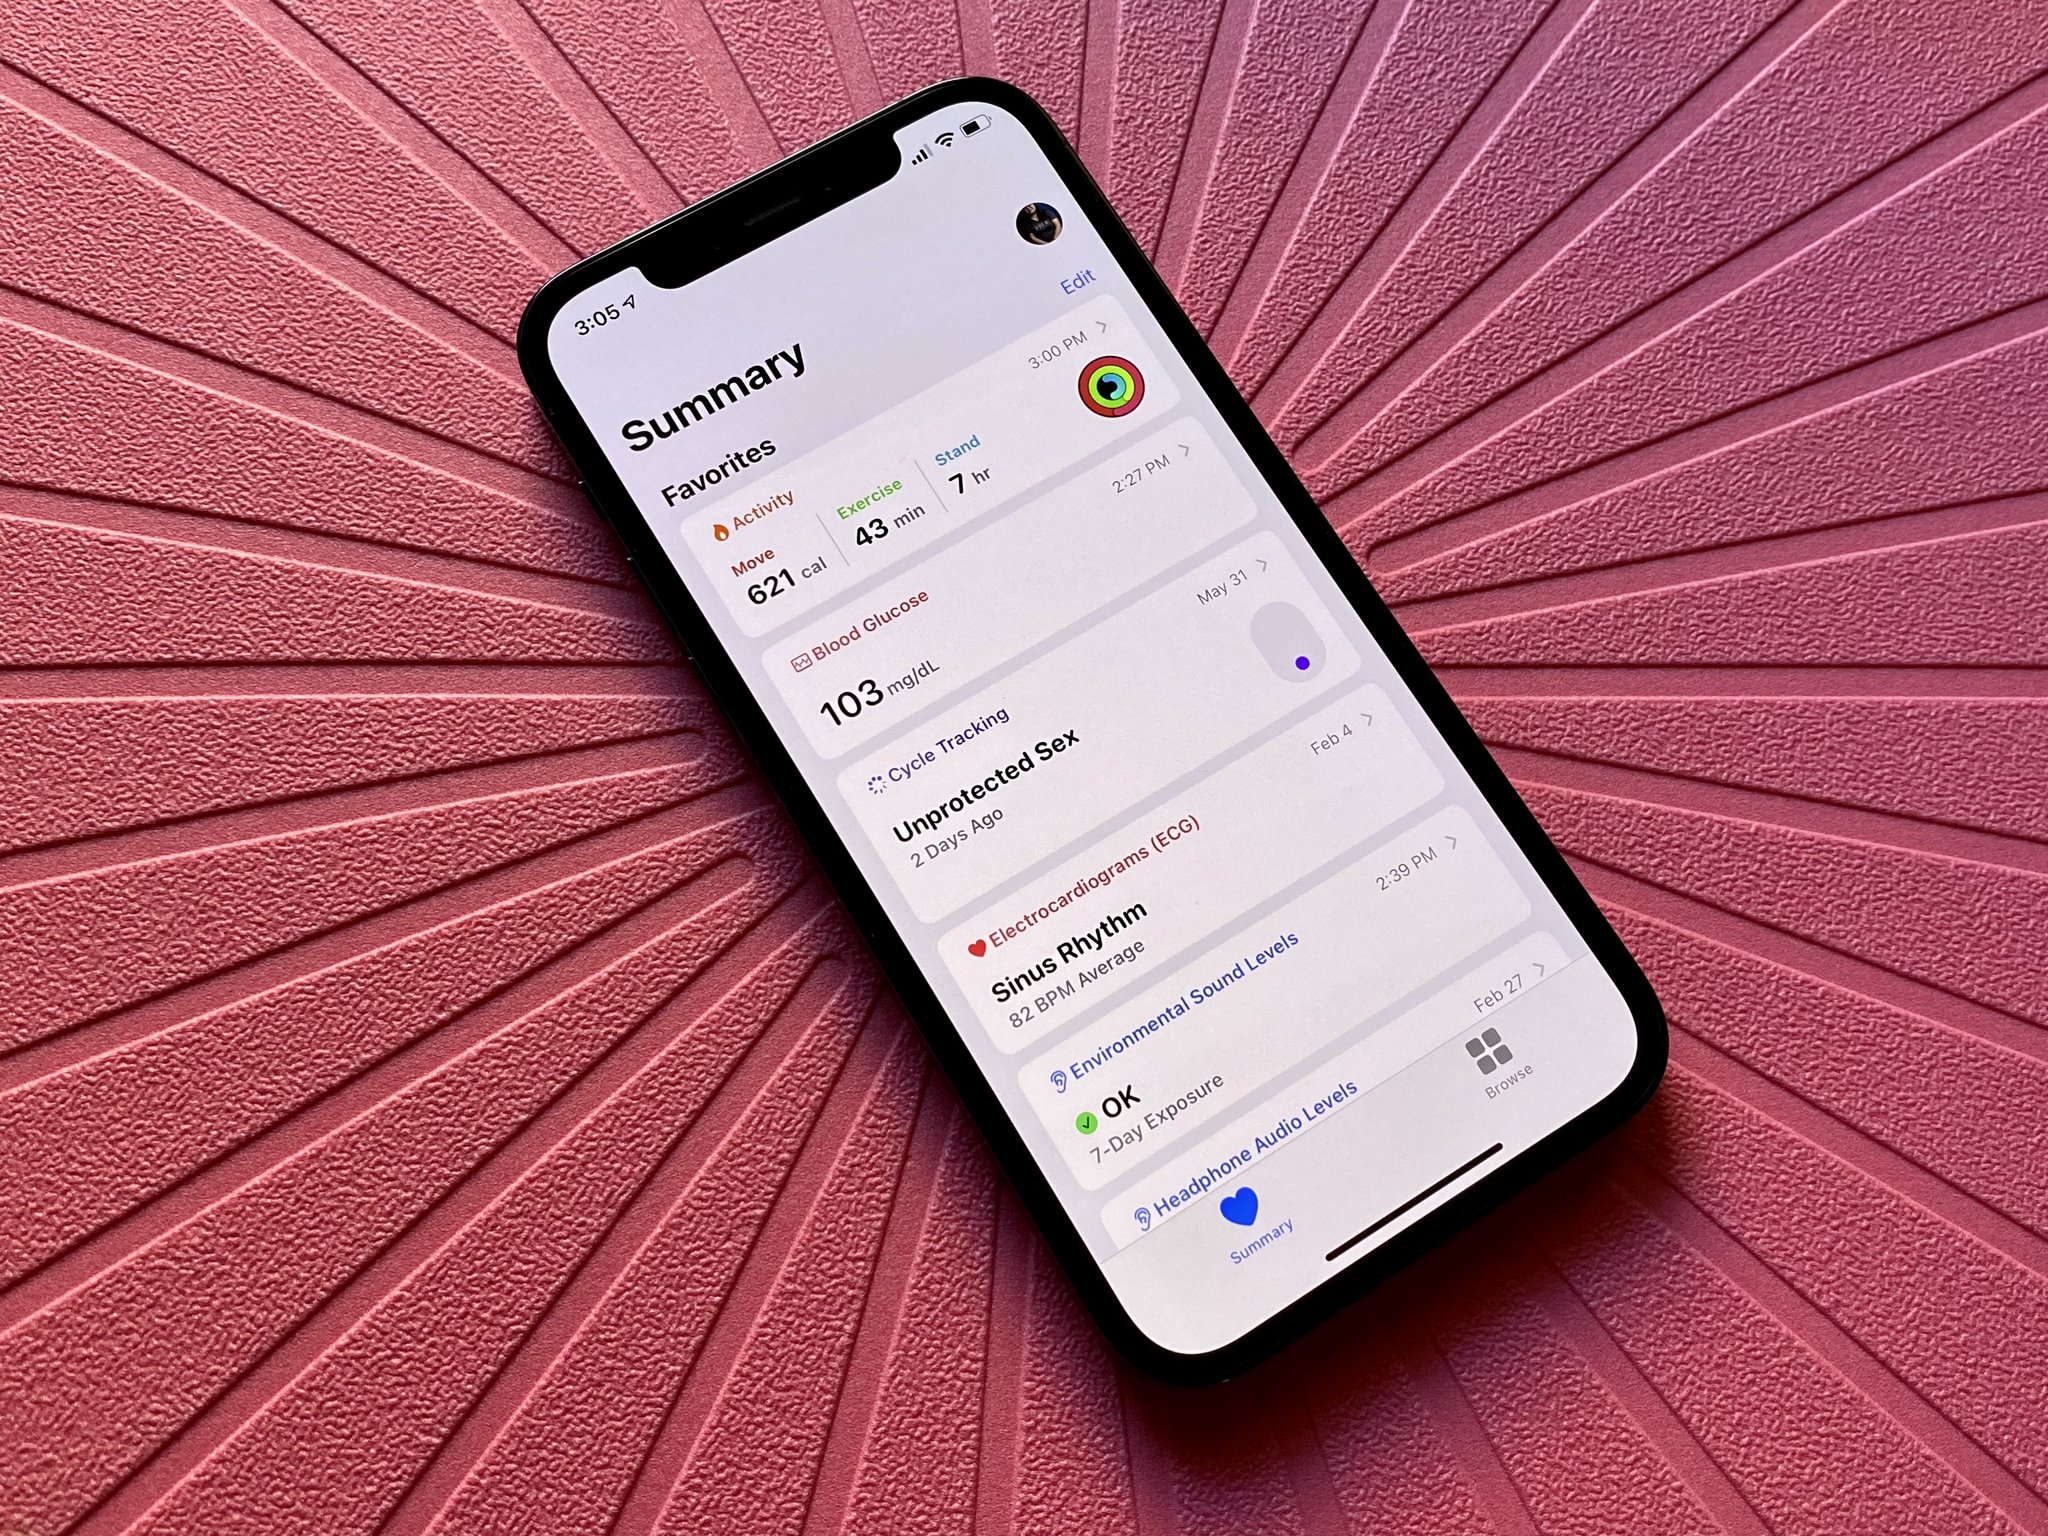
Back in 2014, Apple added a little feature to iOS called Medical ID. While it's a relatively small feature on your favorite iPhone, it can be one that ends up saving your life in case of an emergency. But if you don't set it up, well, that could be a fatal mistake.
Whether you're using the best iPhone or not, as long as you have iOS 8 or later, you have access to the Medical ID feature. Here's how to set up and manage your Medical ID and Health Details on iPhone.
How to set up your Medical ID
Your Medical ID can be accessed two ways: through the Health app or through the Settings app.
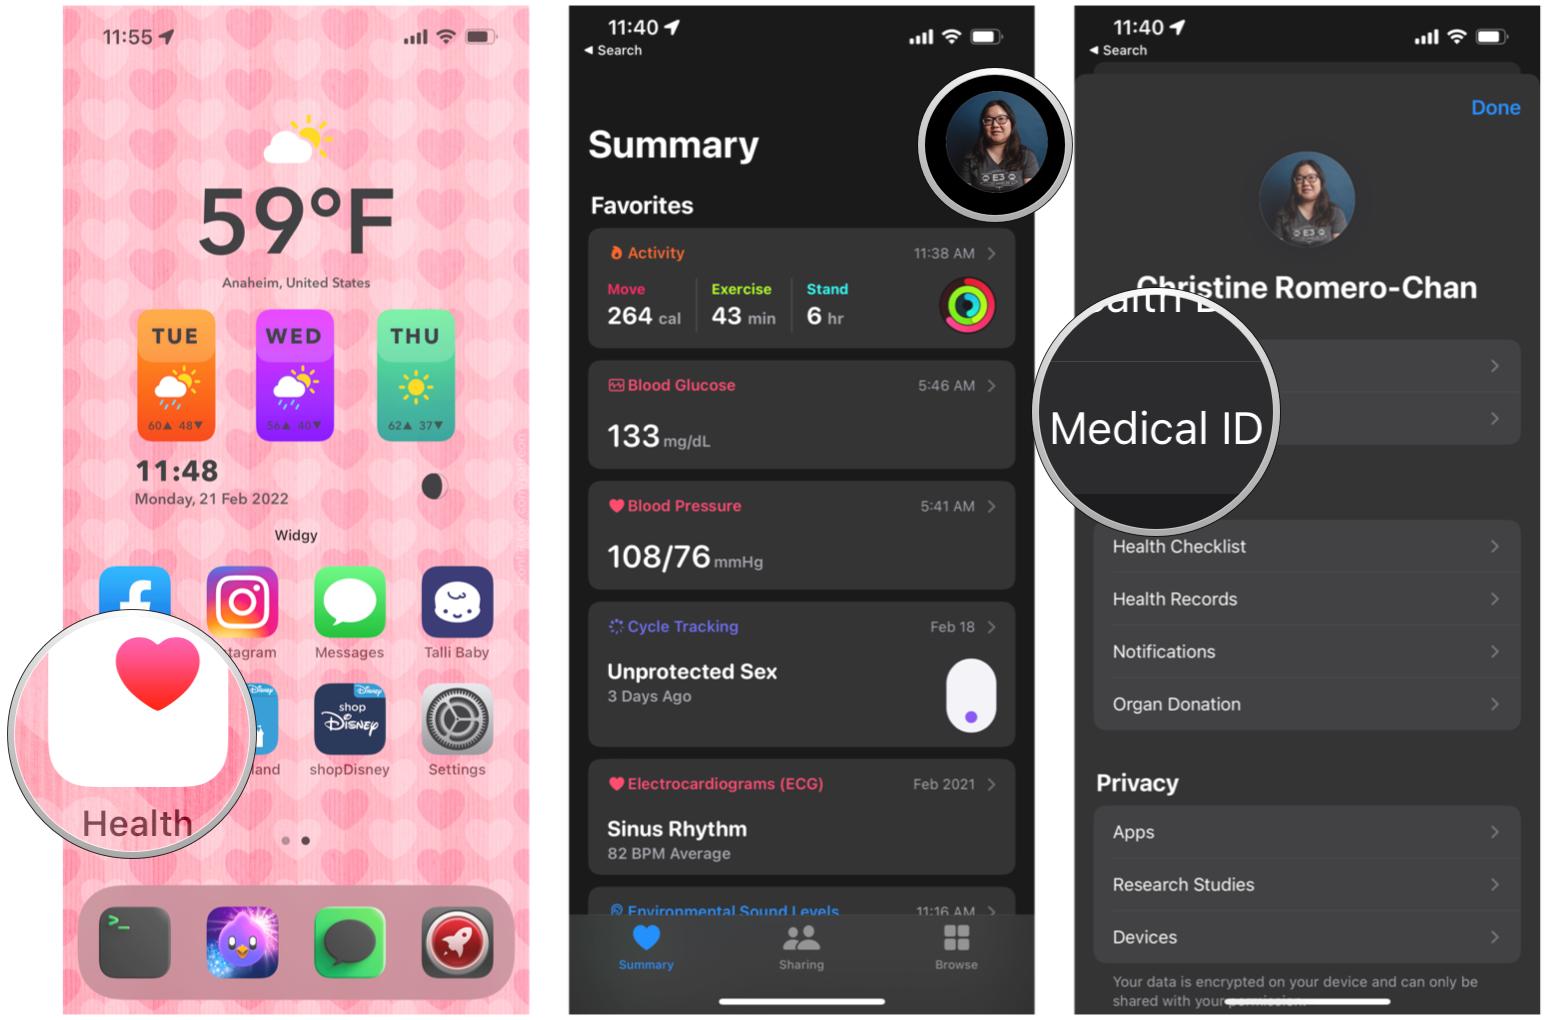
To access Medical ID in the Health app
- Launch the Health app on your iPhone.
- Tap your Apple ID avatar in the upper right corner.
- Tap Medical ID.
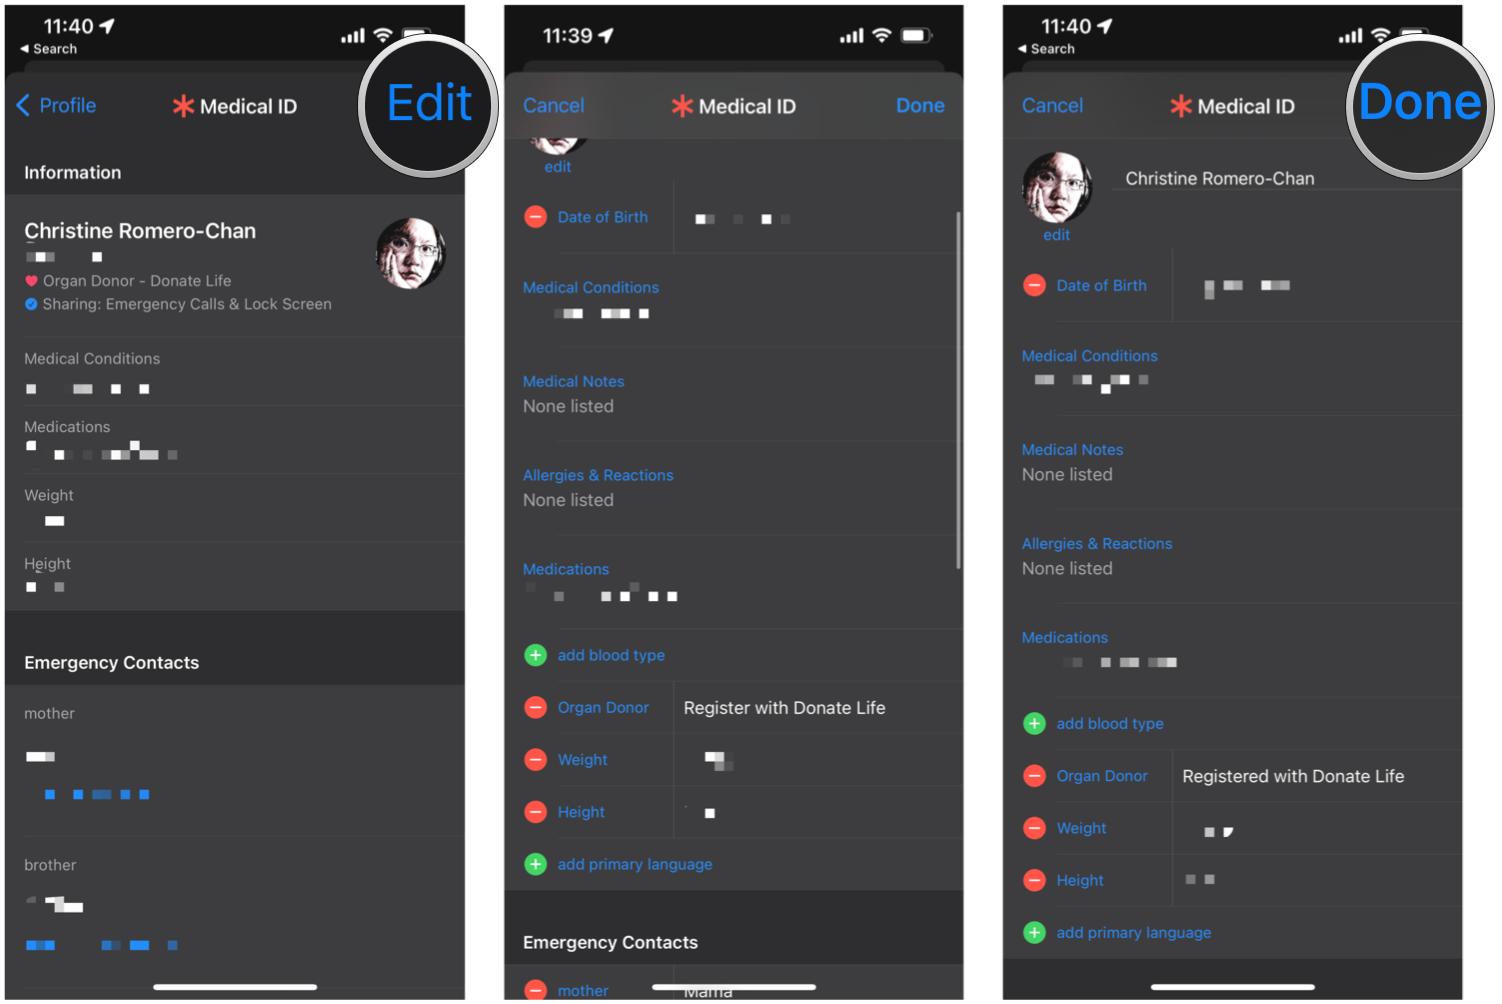
- Tap Edit.
- Fill out your personal health details as best you can.
- Tap Done to save.
To access Medical ID in the Settings app
- Launch Settings on your iPhone.
- Scroll down and tap on Health.
- Tap Medical ID.
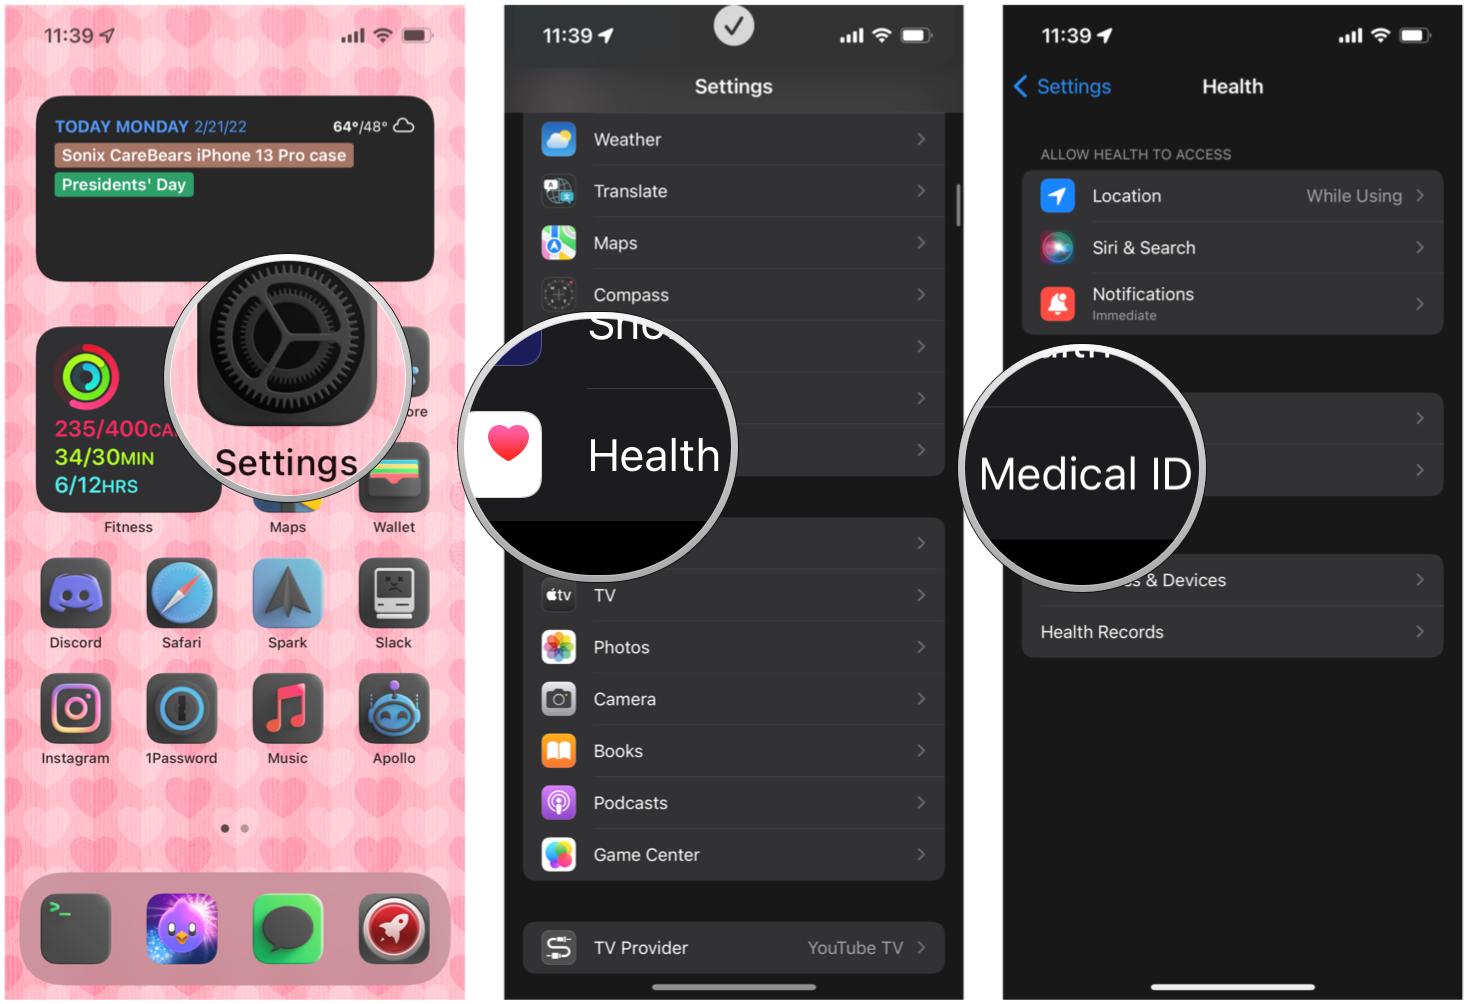
- Follow steps 4-6 above.
How to add Emergency Contacts on your Medical ID
In case something ever happens to you, you can trigger the Emergency SOS call. This lets you quickly call emergency services in your locale. If you take the time to set up Emergency Contacts as well on your Medical ID, then these people will get a message saying that you have called emergency services. This message will also include your current location, which would be vital.
- Follow the steps above to set up your Medical ID.
- Under Emergency Contacts, add the contact information of the people closest to you.
- Tap Done to save.
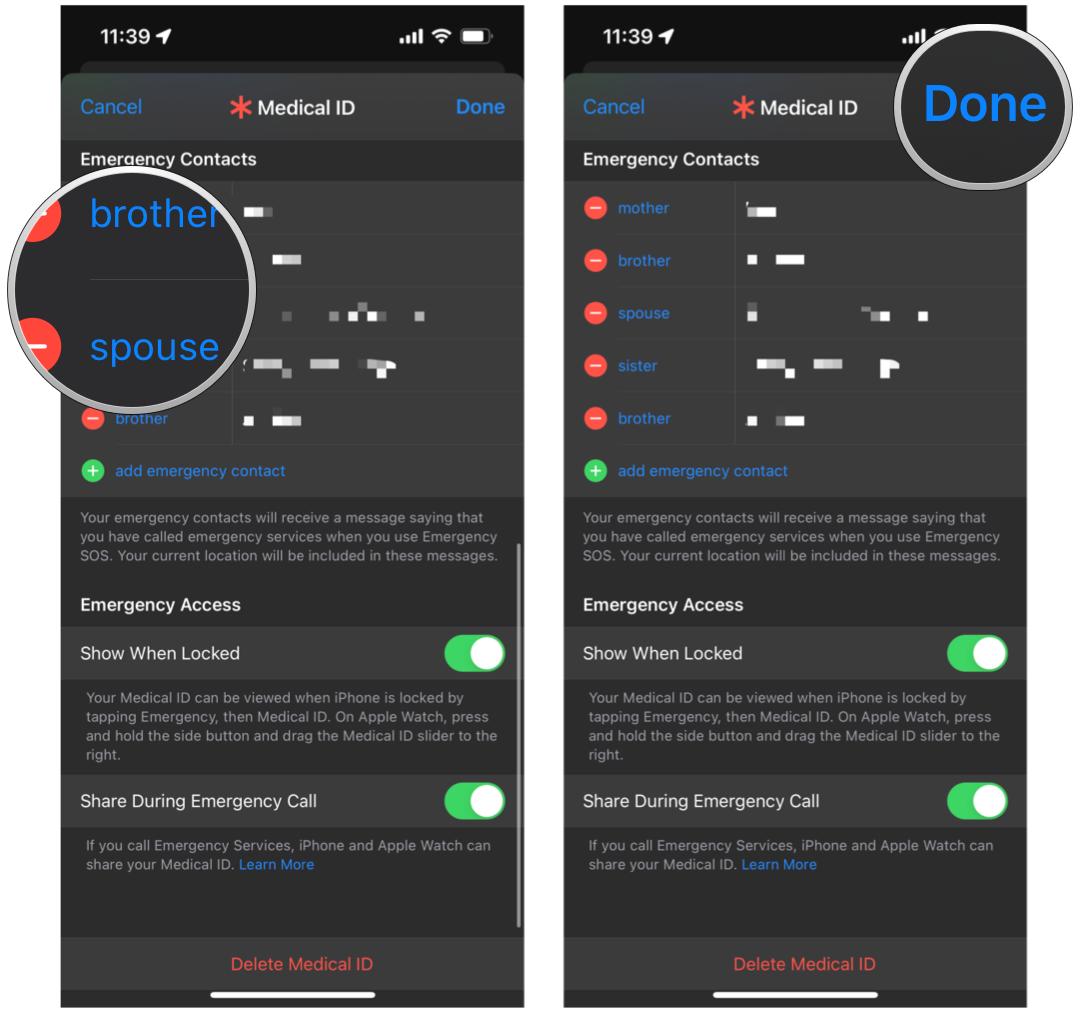
How to set up Emergency Access
Setting up your Medical ID is important because the information that you provide can show up on your Lock Screen in an actual emergency when paramedics and other medical professionals arrive to help you. The information can also be shared during an emergency call as well. These two settings can be what literally saves your life.
- Follow the steps above to set up your Medical ID.
- Scroll to the bottom until you see the Emergency Access section.
- Turn the toggles for Show When Locked and Share During Emergency Call to ON (green).
- Tap Done to save.
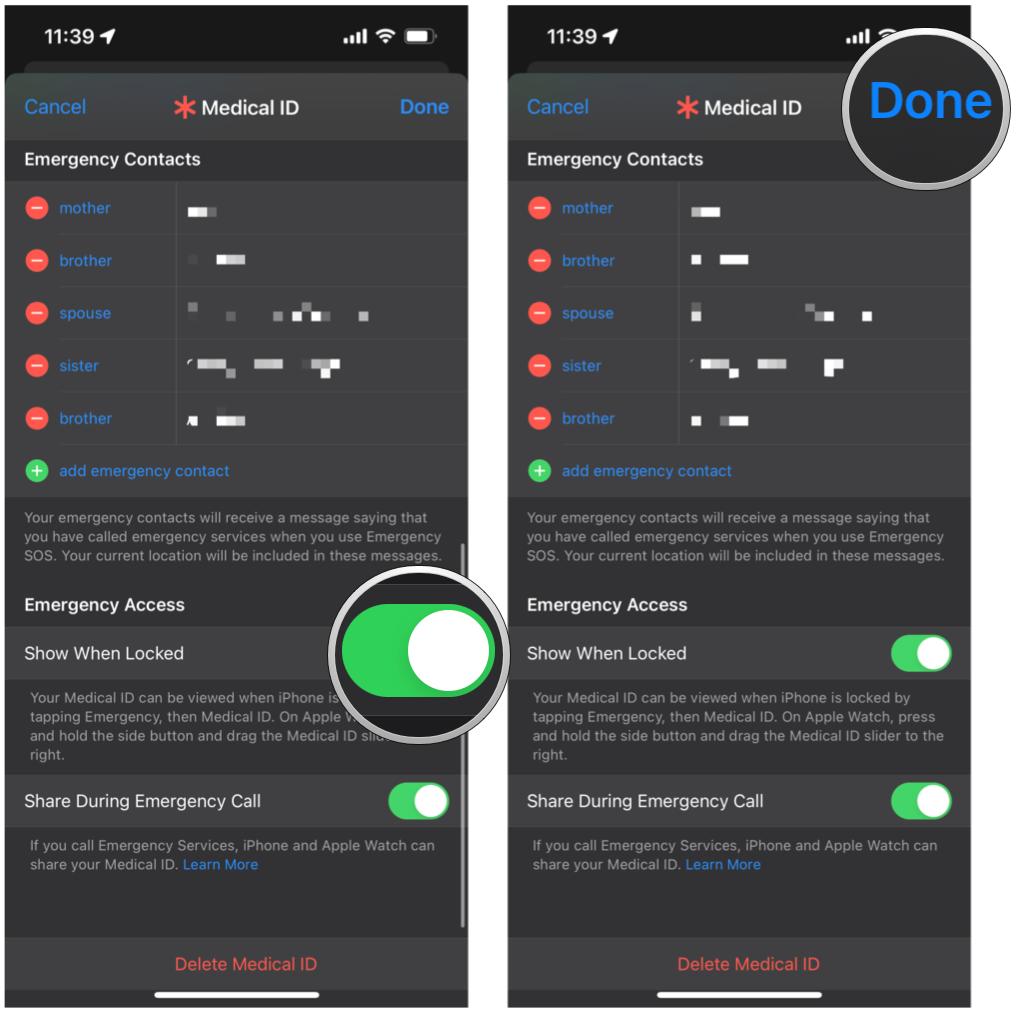
Once these two settings are enabled, your Medical ID information should appear on the Lock Screen when "Emergency" is tapped, and your information is shared on the call.
How to view someone else's Medical ID on iPhone
If you find someone who needs help, you can view their Medical ID on their iPhone. But if they have an Apple Watch, that may be a better option, as first responders usually are trained to look for medical bracelets or necklaces first.
Master your iPhone in minutes
iMore offers spot-on advice and guidance from our team of experts, with decades of Apple device experience to lean on. Learn more with iMore!
- On the Lock Screen, get to the passcode entry screen.
- Tap Emergency in the bottom left corner.
- Tap Medical ID.
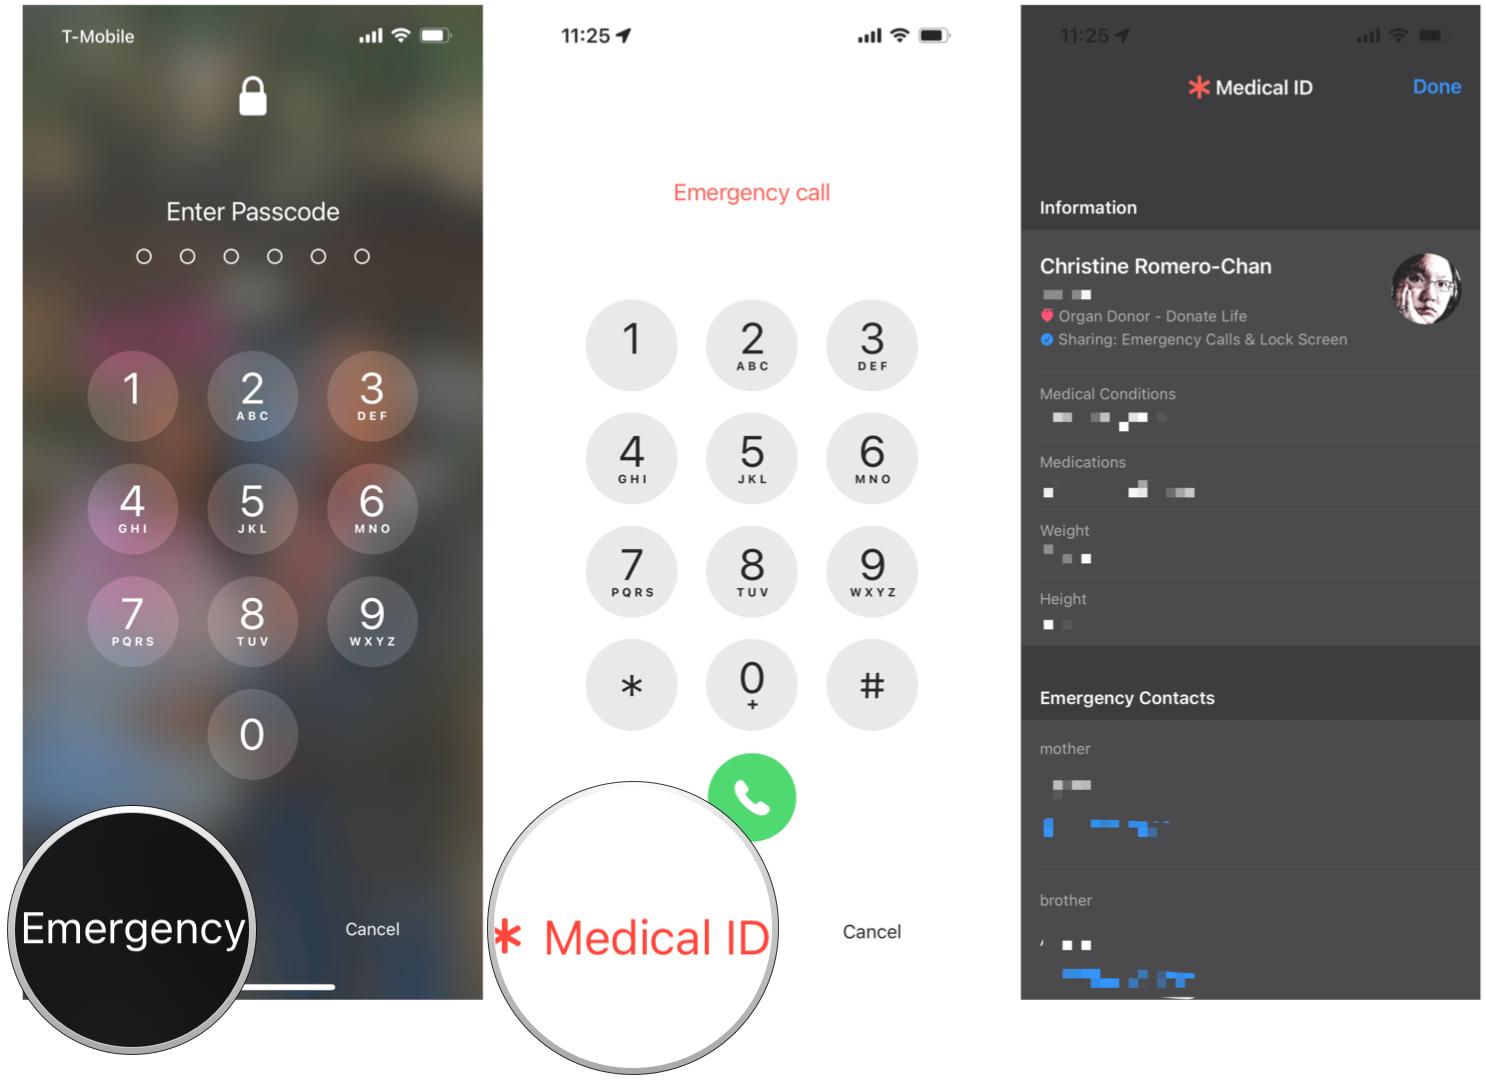
Other options include pressing and holding a volume button together with the side button until the power slider comes up, then tapping Medical ID. If the device still has a Home button, press it five times in a row to bring up that option.
On the best Apple Watch, all you need to do is press and hold the Side button, then slide your finger over the Medical ID option.
A literal life-saving feature
As you can see, getting your Medical ID set up on your current iPhone can literally save your life in an emergency. Of course, we don't want to find ourselves in such an emergency to begin with, but sometimes it just happens, and you'd best be prepared for it. And if you ever encounter someone who is in an emergency themselves, it's good to know how to help them out.
Christine Romero-Chan was formerly a Senior Editor for iMore. She has been writing about technology, specifically Apple, for over a decade at a variety of websites. She is currently part of the Digital Trends team, and has been using Apple’s smartphone since the original iPhone back in 2007. While her main speciality is the iPhone, she also covers Apple Watch, iPad, and Mac when needed. When she isn’t writing about Apple, Christine can often be found at Disneyland in Anaheim, California, as she is a passholder and obsessed with all things Disney, especially Star Wars. Christine also enjoys coffee, food, photography, mechanical keyboards, and spending as much time with her new daughter as possible.

