How to mark up photos in Messages on iPhone and iPad
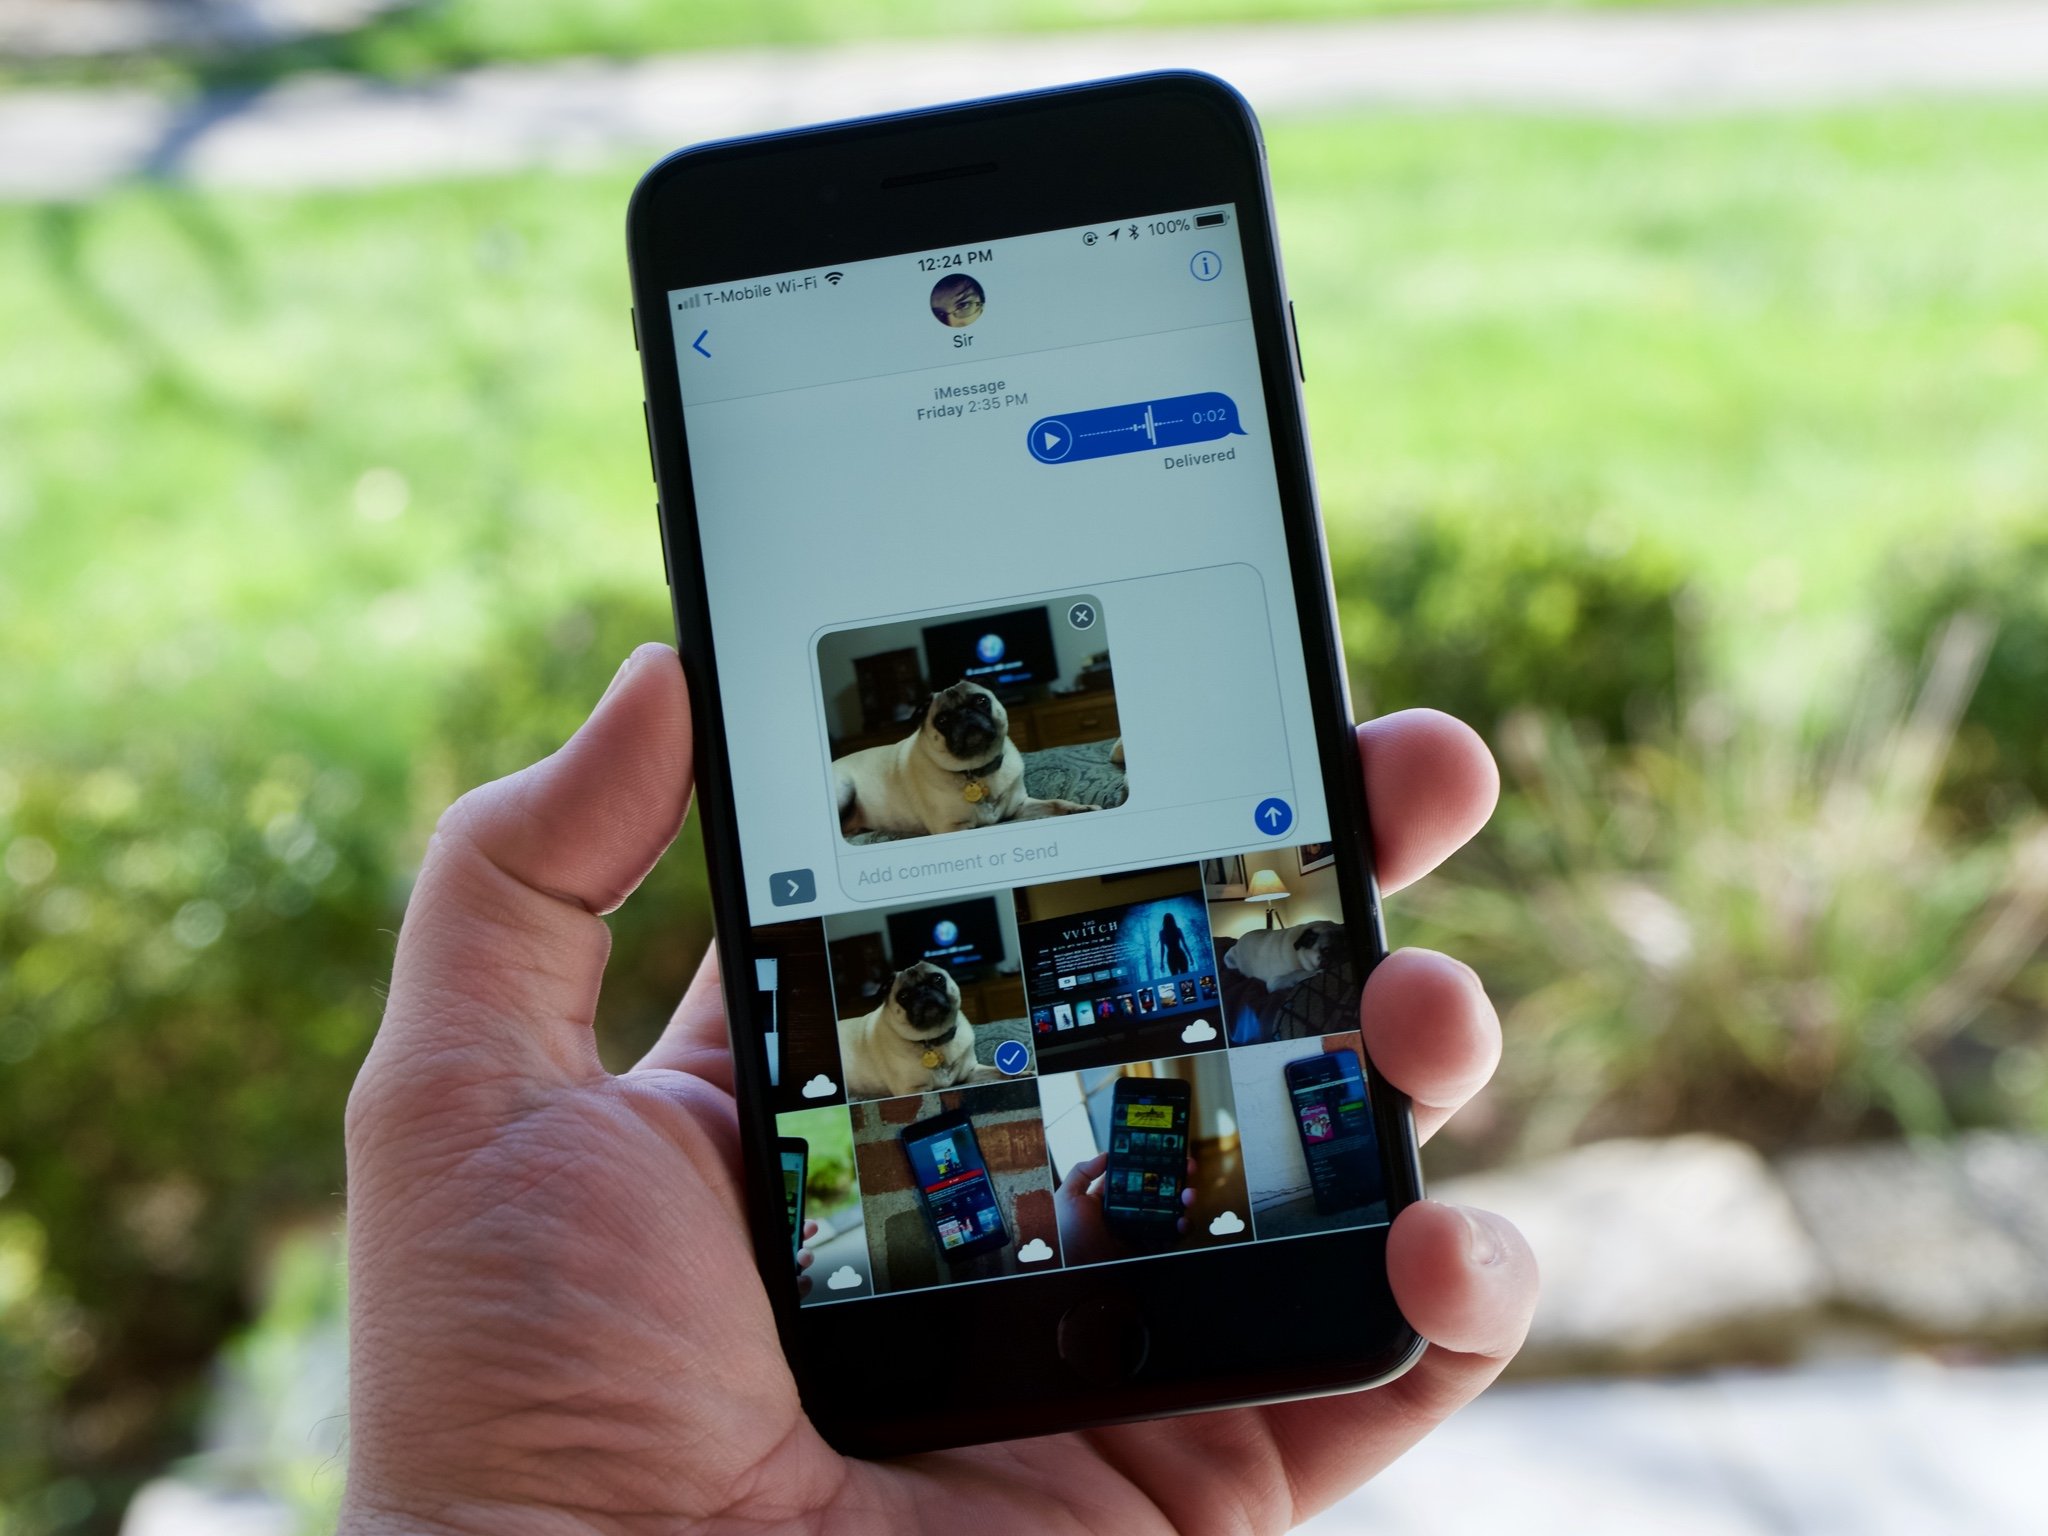
Messages is an easy way to share photos with friends and family, and the Markup editor lets you add some extra flair to your images. While you can use the Markup editor in the Photos app, you can also do so from within the Messages app.
When you open up the Markup editor in Messages, you'll have access to a number of tools for marking up your photos, starting with the pen, highlighter, pencil, eraser, and loop tools that let you draw and write all over your photo. But there are four other tools you should know about, as well, which you can get to by tapping the + in the bottom-right corner of the markup screen:
- Text - Add a text box to your image and write whatever you choose in it. You can also change the color of the text, as well as formatting like size, font, and alignment. Drag the points on the text box to change its size and how the text interacts with it, and drag it around the image to place it in the best spot.
- Signature - Add a signature to your image. Tapping on the signature tool will bring up a screen that lets you add a signature with your finger (or Apple Pencil on iPad Pro). Once entered, you can place the signature anywhere on the image, then send it off to whoever needs it.
- Magnifier - Call out a particular part of an image with the magnification tool which, as its name suggests, magnifies a portion of your image. Control the size of the magnification circle, as well as the strength of the magnification, as well as the color of the magnifier's border.
- Shapes - Add a shape to your image. Pick from the square, circle, chat bubble, and arrow, then control their size, color, and even overall shape. You can also decide between hollow and filled shapes.
Here's what you need to know about marking up photos inside Messages on iPhone and iPad.
- How to take and mark up a photo in Messages
- How to mark up an existing photo in Messages
- How to edit and mark up photos you've taken in Messages in iOS 12
How to take and mark up a photo in Messages in iOS 13
- Open Messages app on your iPhone or iPad.
- Tap on the conversation in which you'd like to send a marked up photo.
- Tap on the camera button in the bottom-left corner.
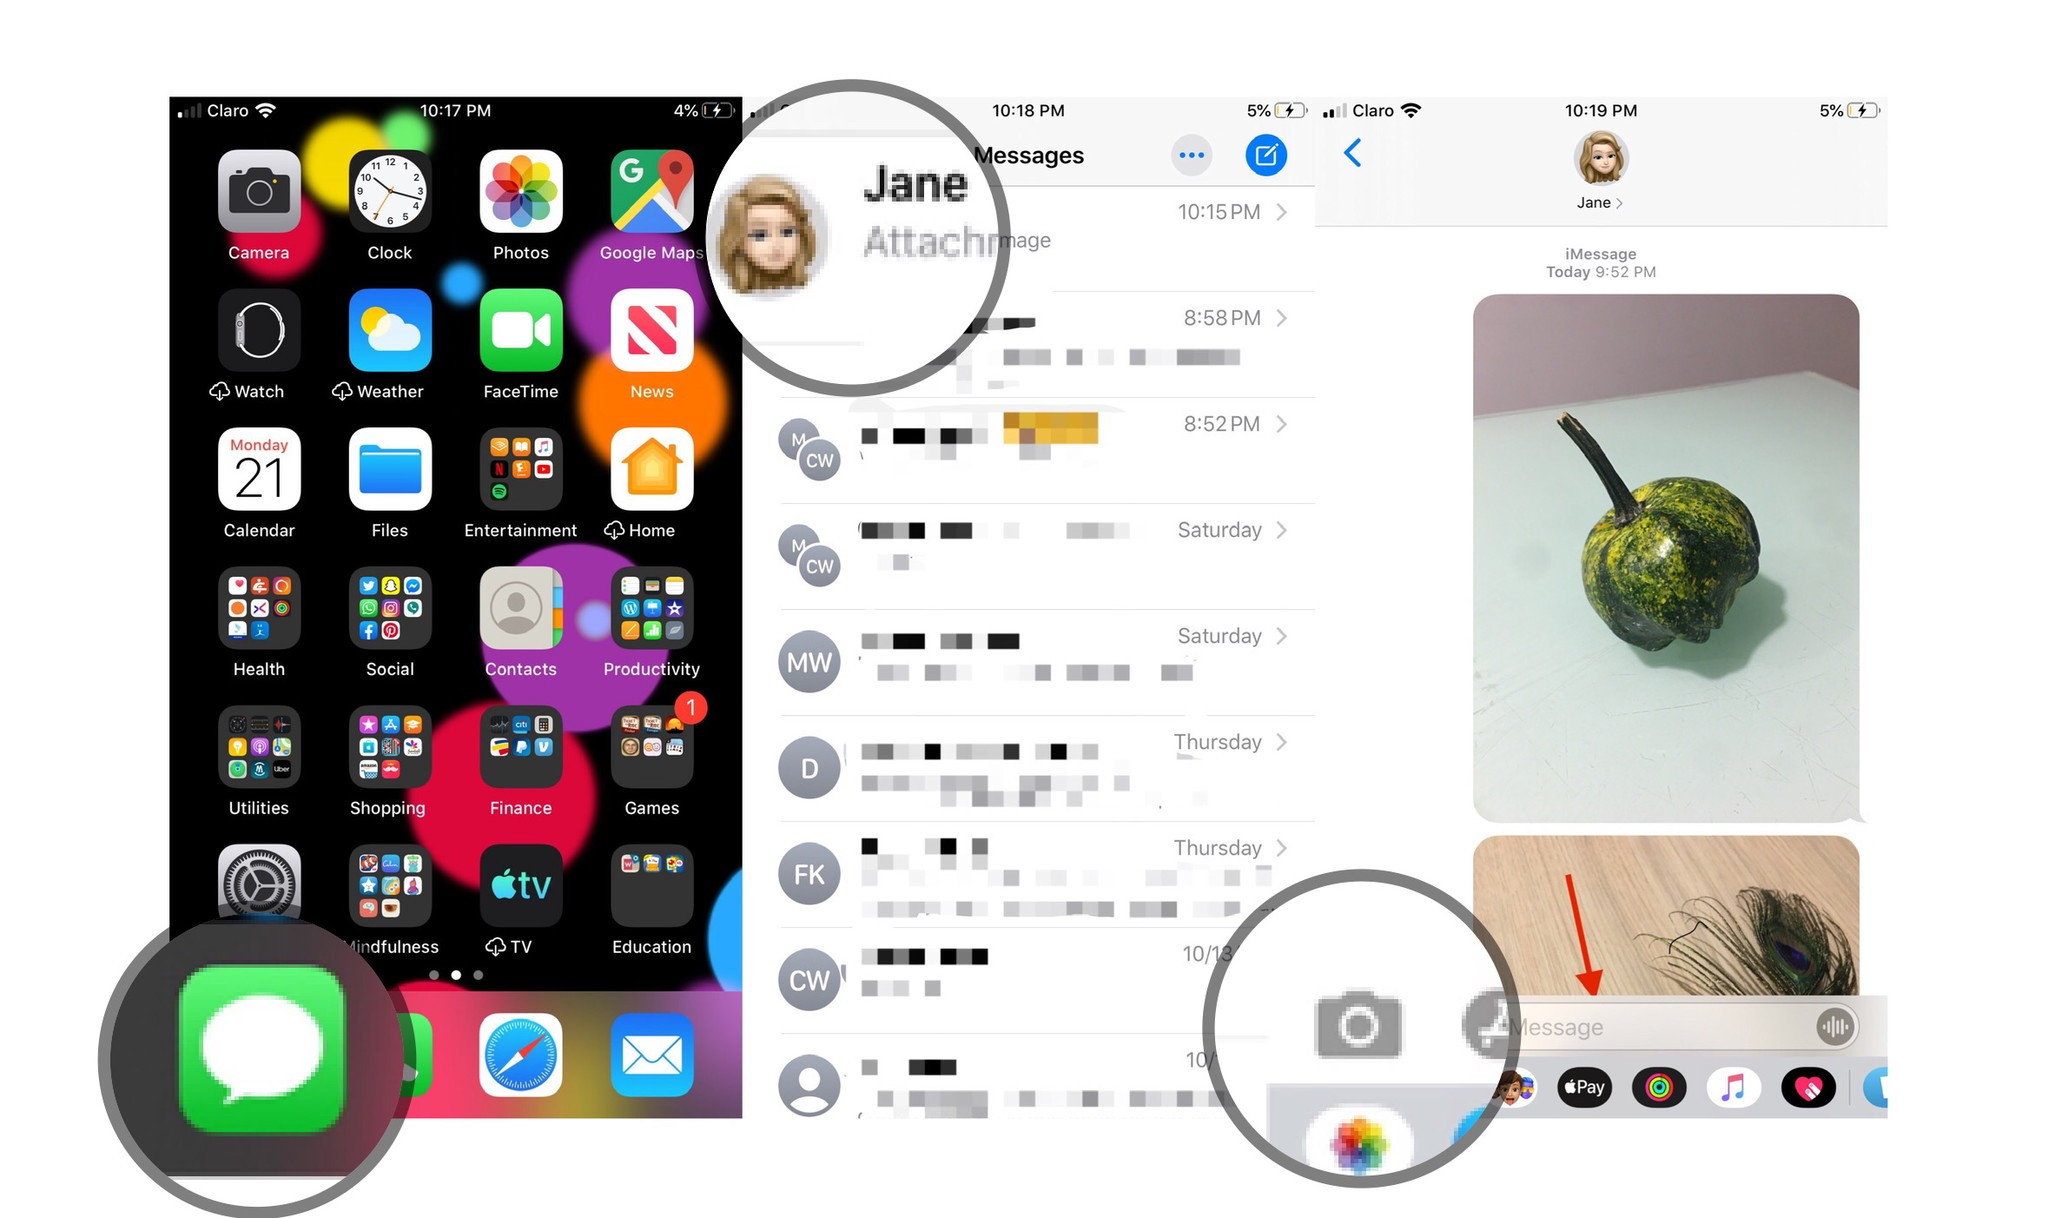
- Tap the capture button to take a photo.
- Tap Markup.
- Tap the + button in the bottom-right corner to access additional markup tools if you need them.

- Mark up your photo.
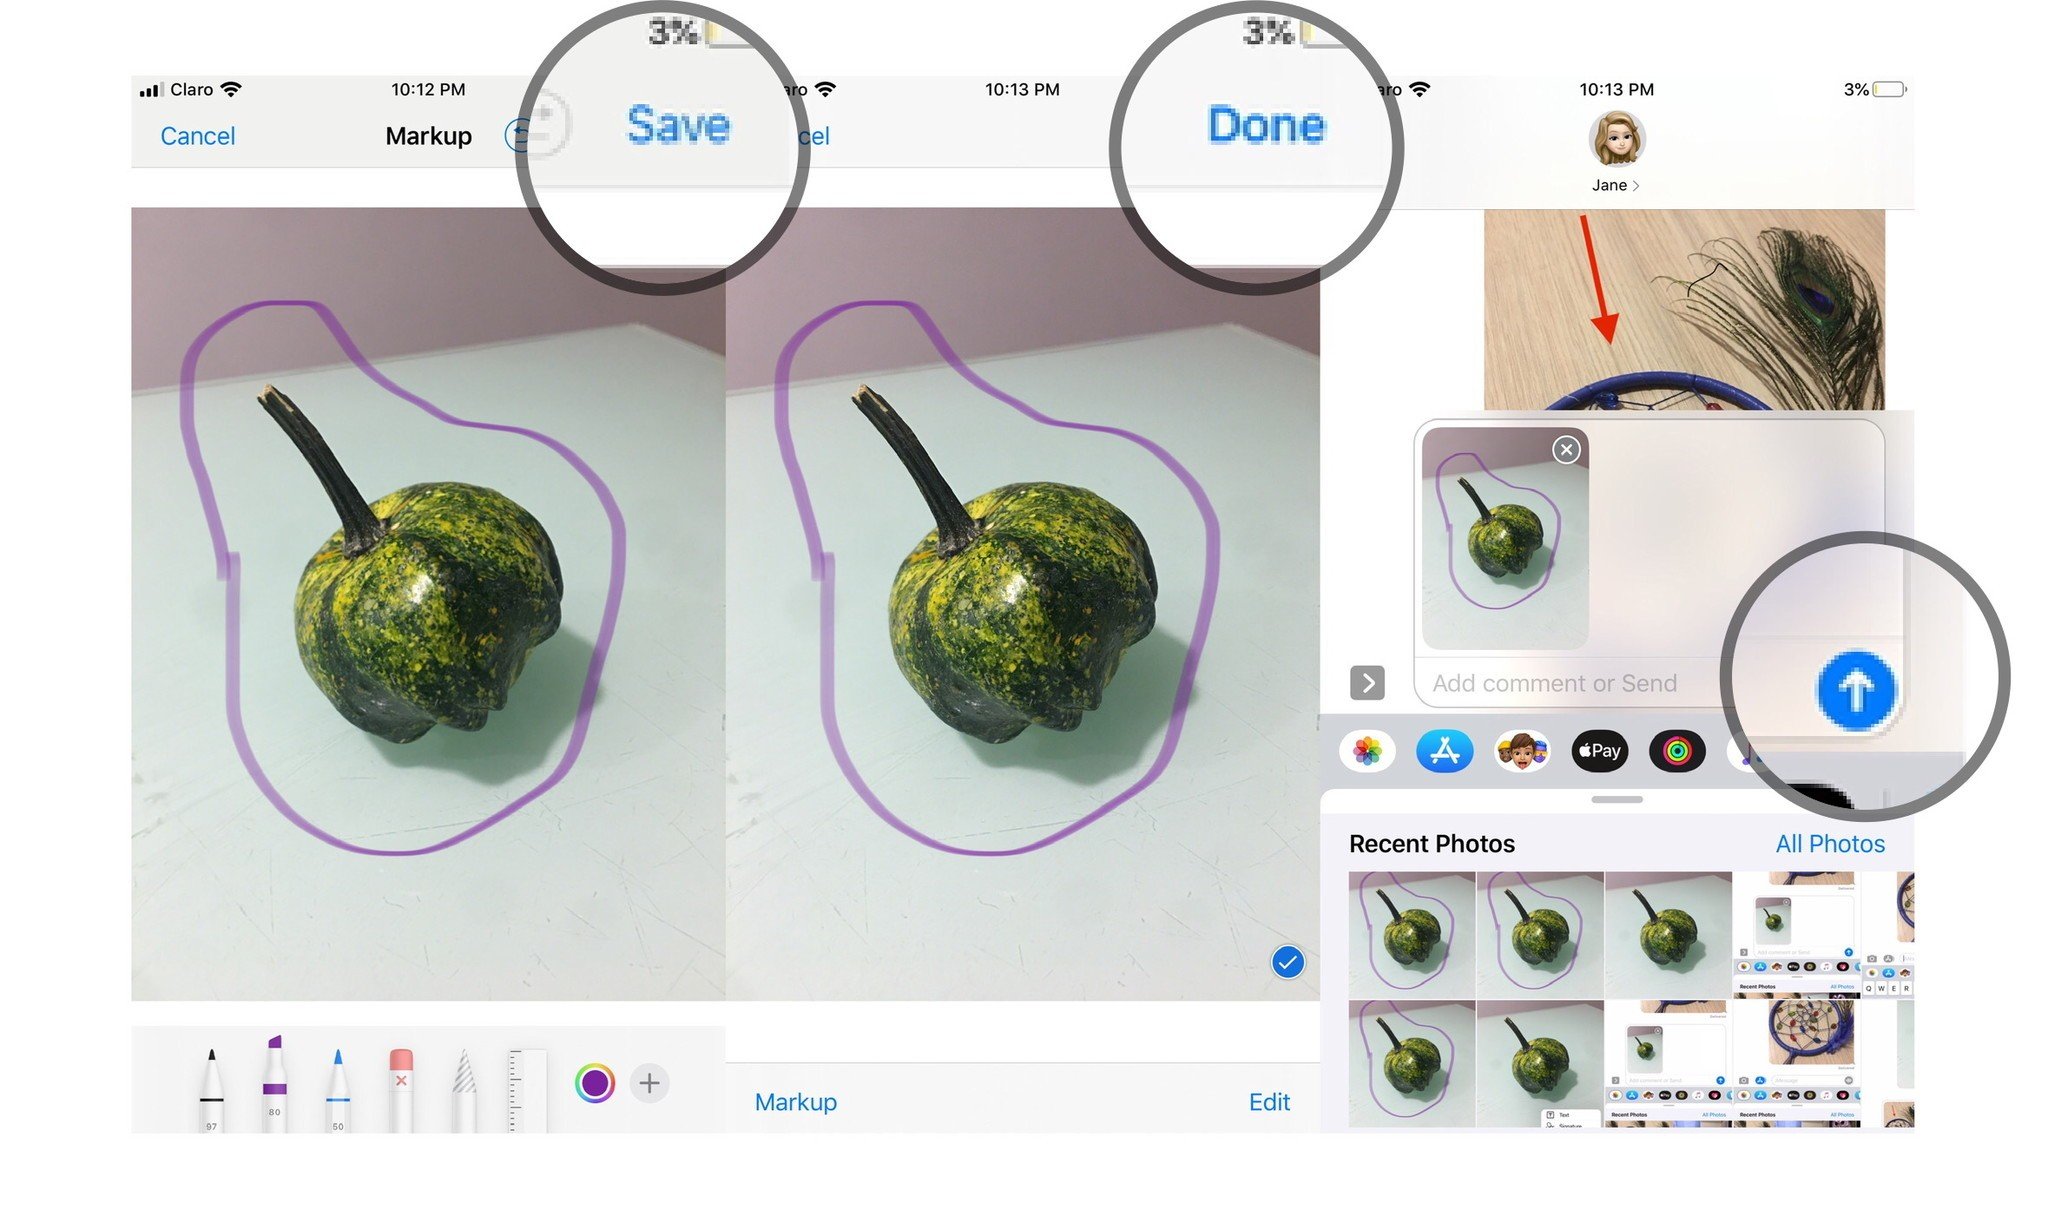
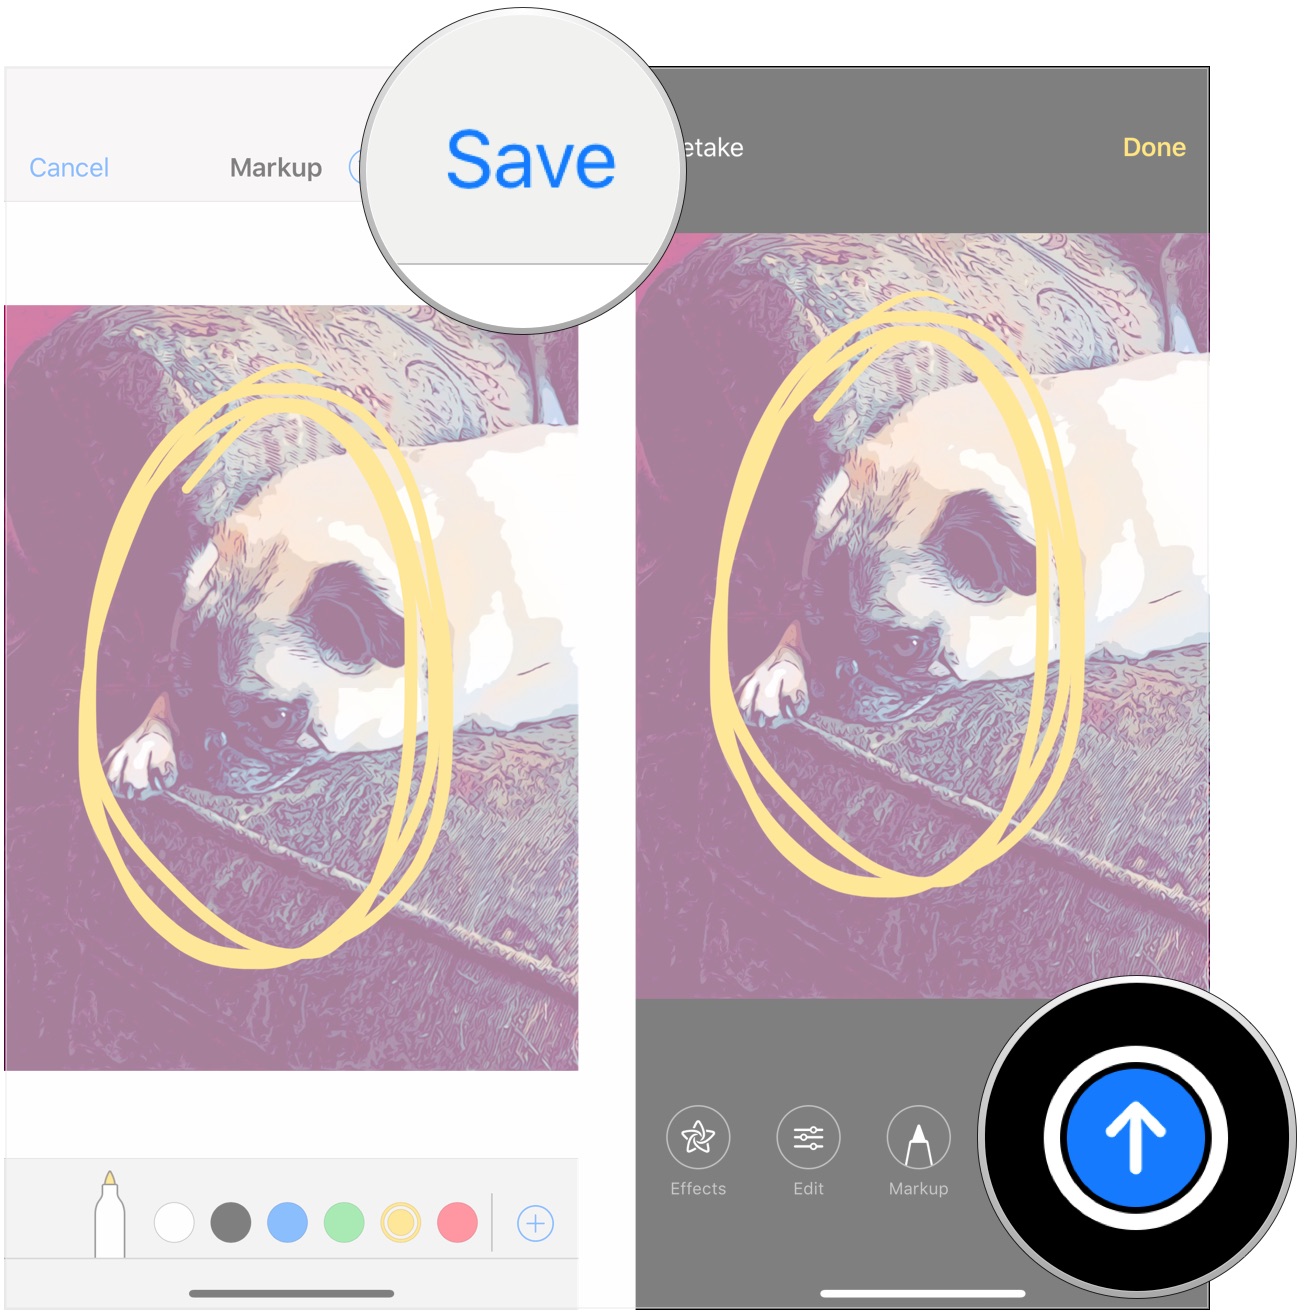
- Tap Save.
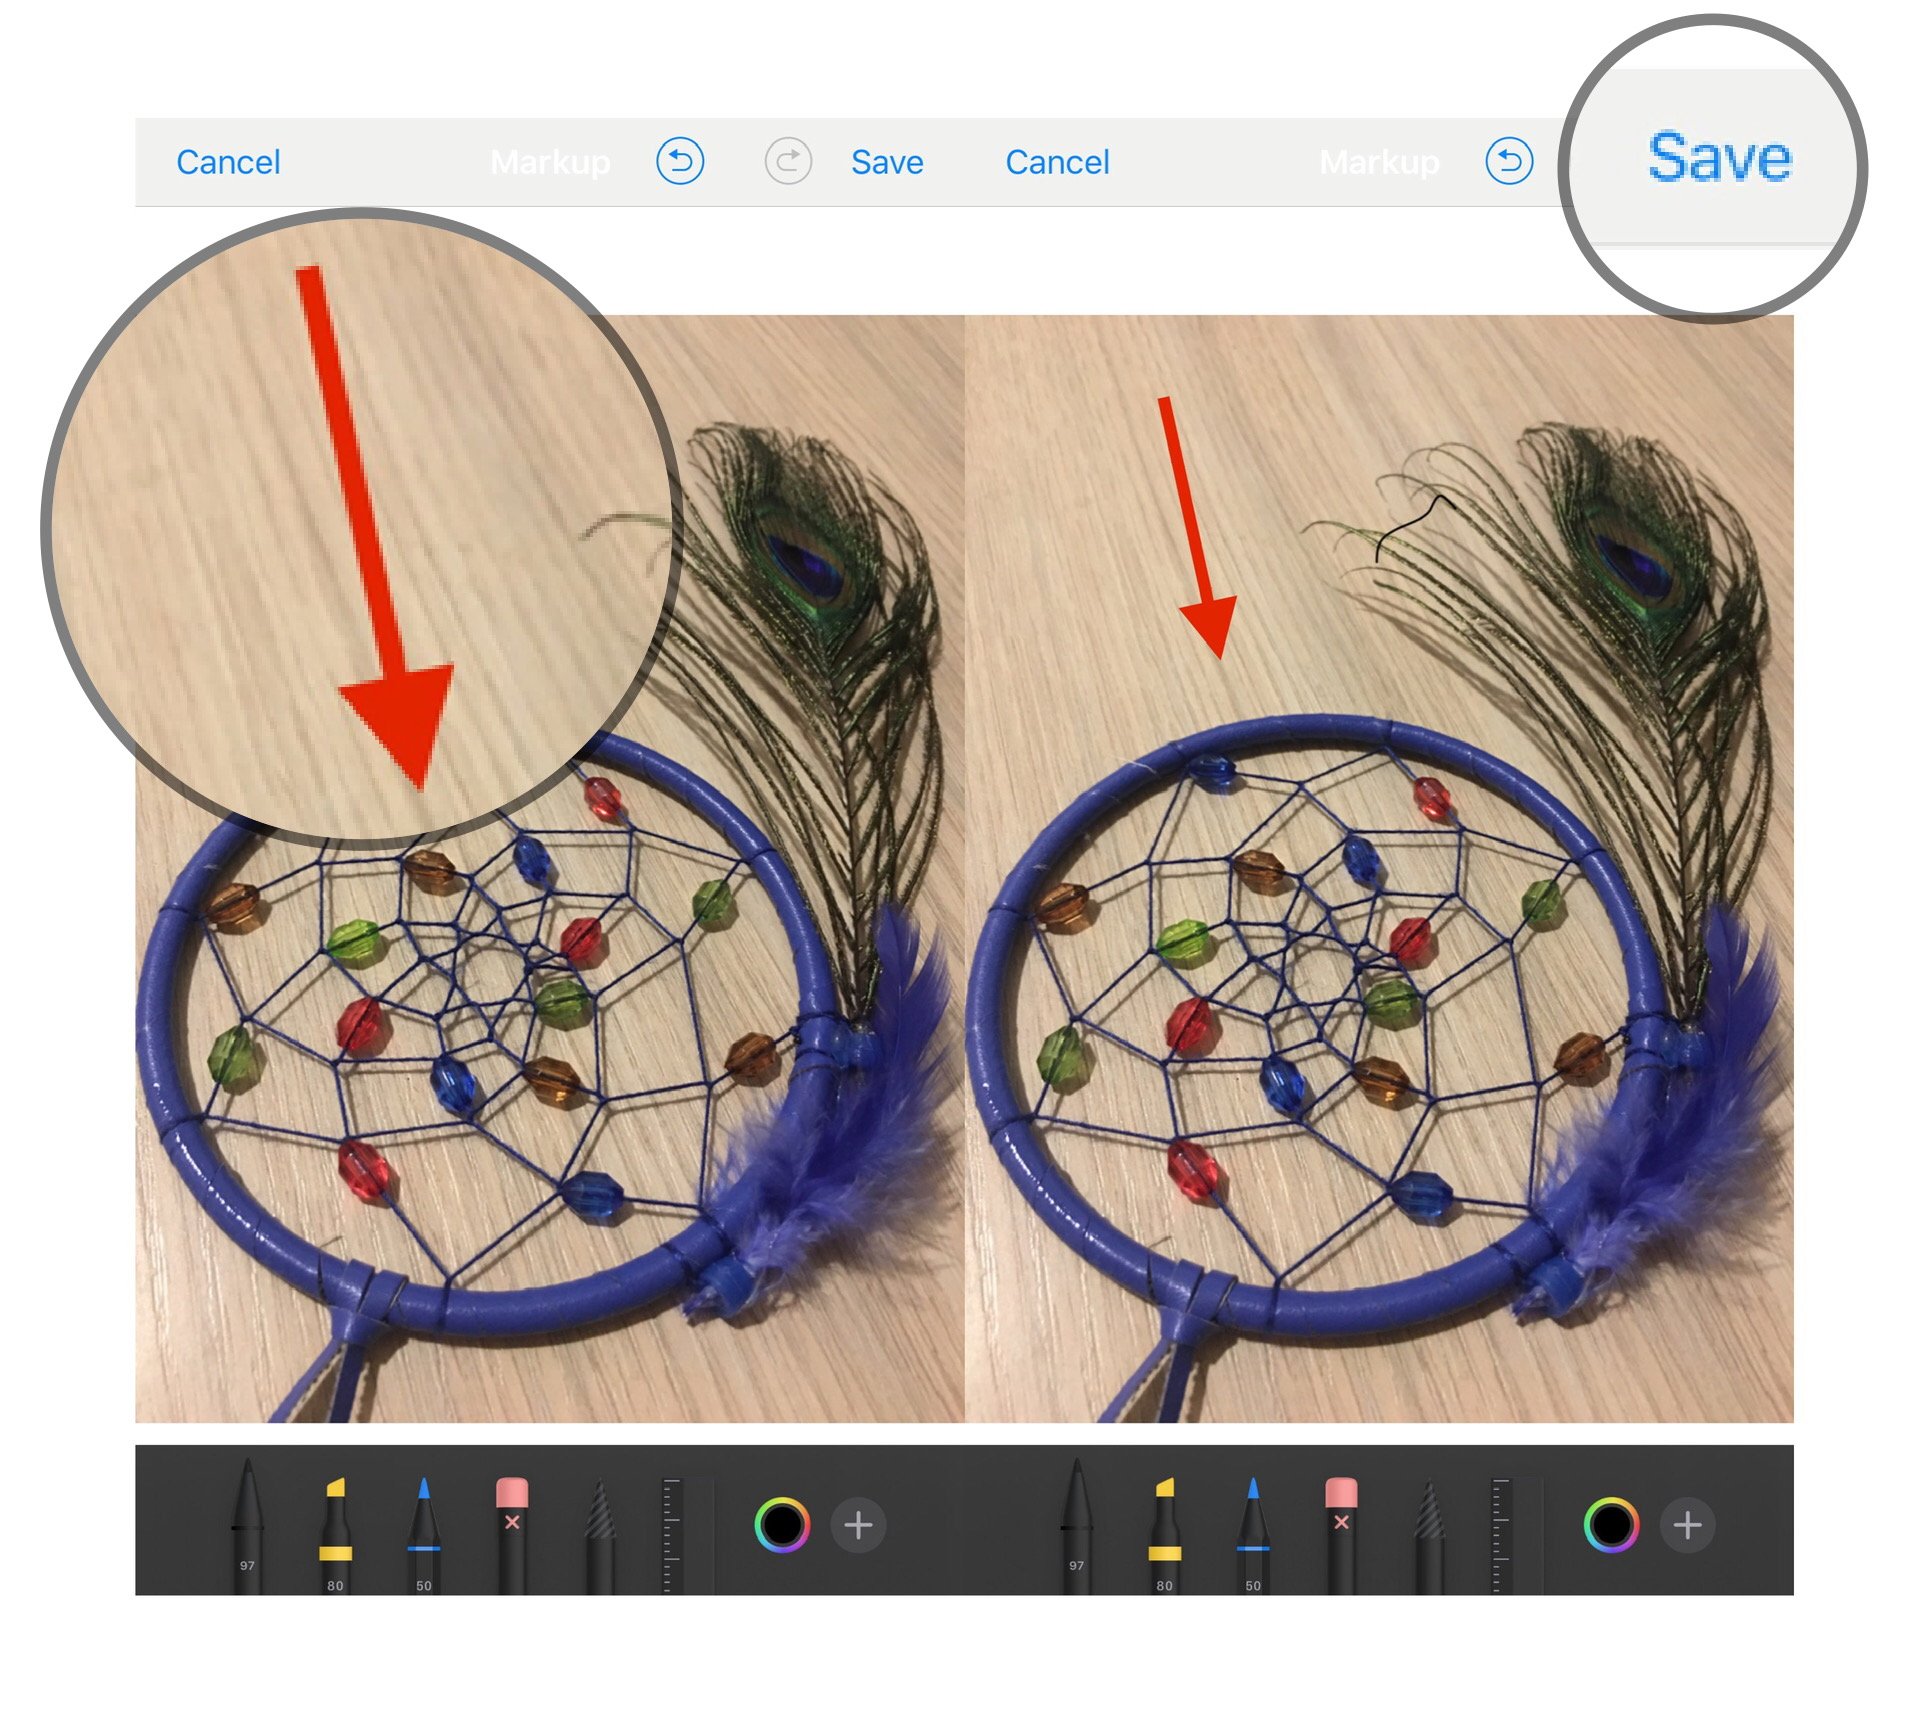
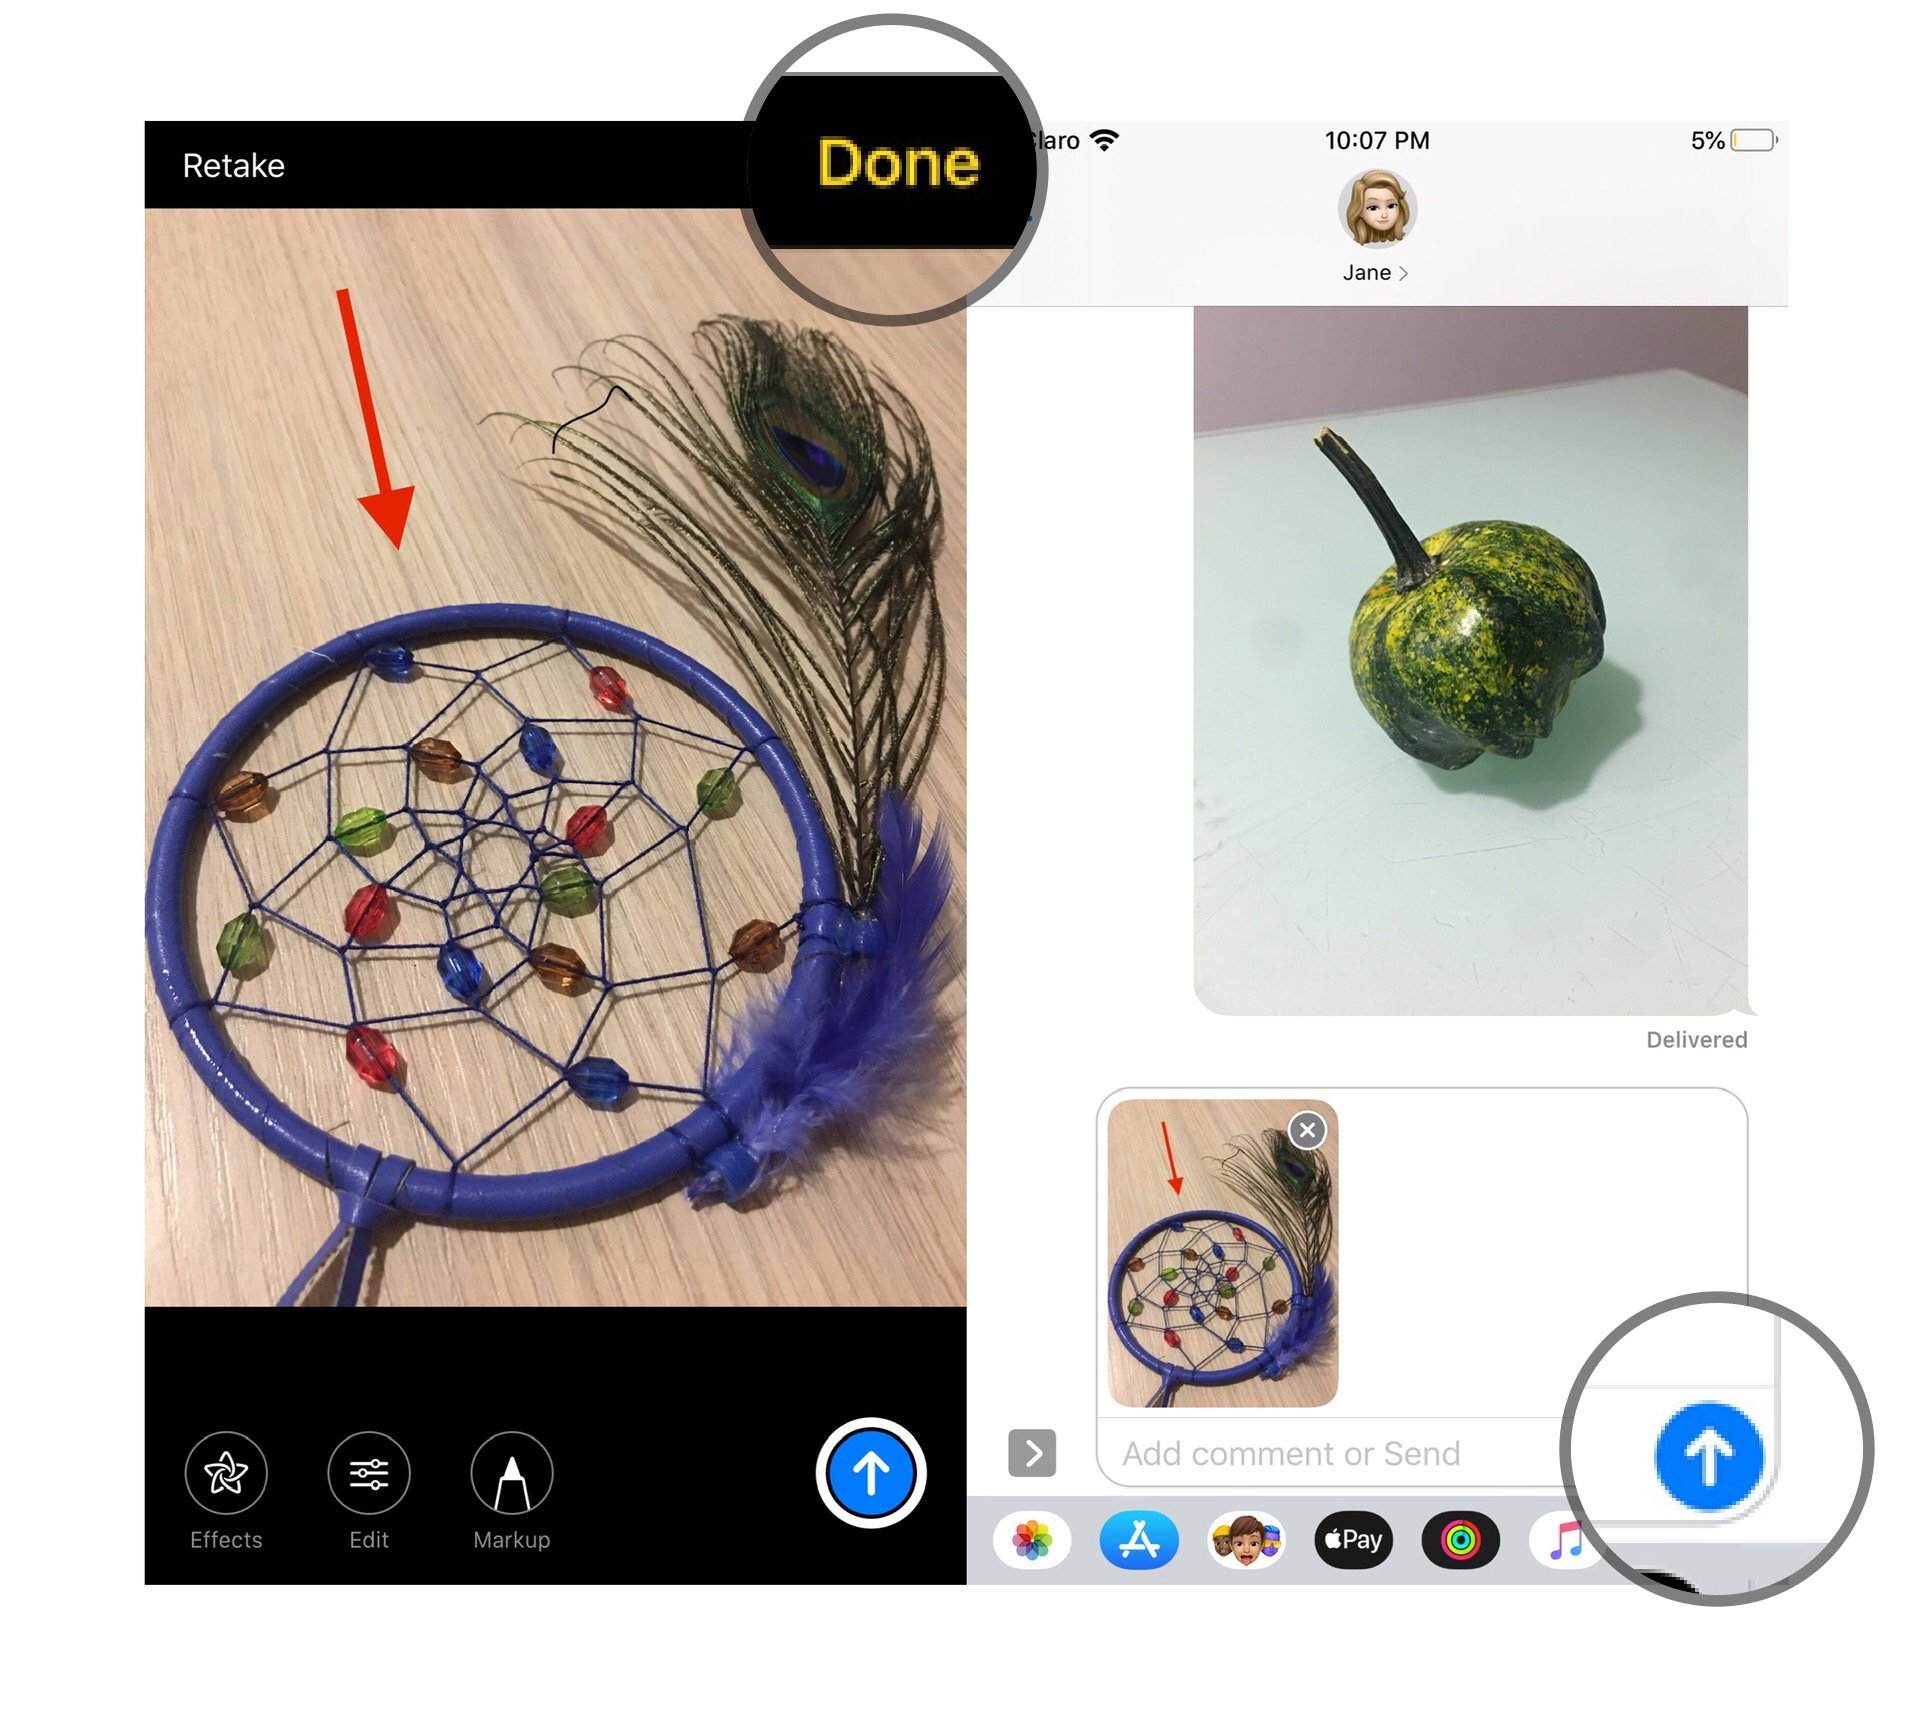
- Tap Done.
- Tap the Send button (looks like an arrow).
How to mark up an existing photo in Messages in iOS 13
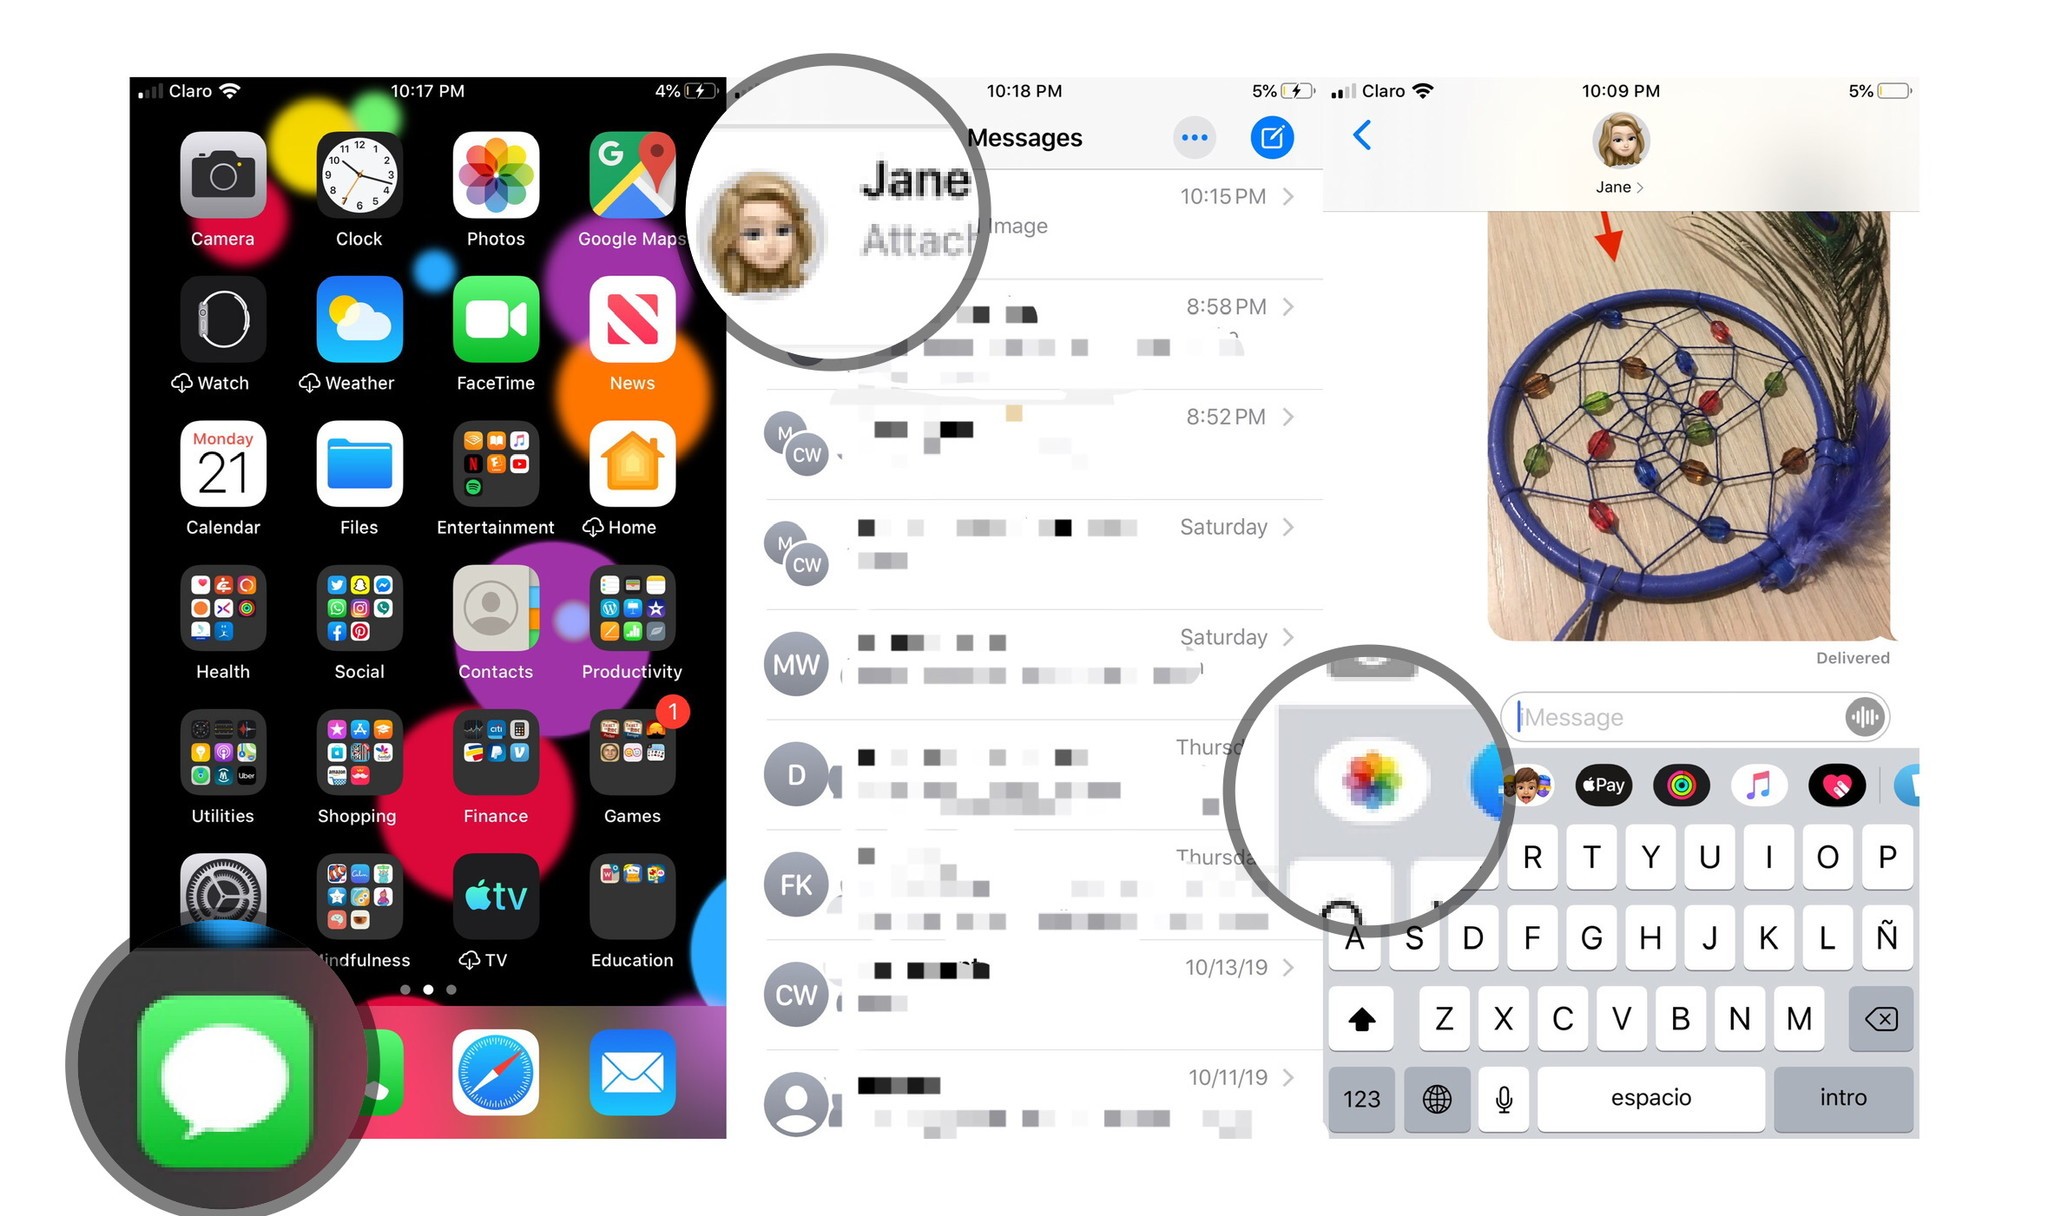
- Open Messages app on your iPhone or iPad.
- Tap on the conversation in which you'd like to send a marked up photo.
- Tap on the Photos button at the top of the keyboard panel.
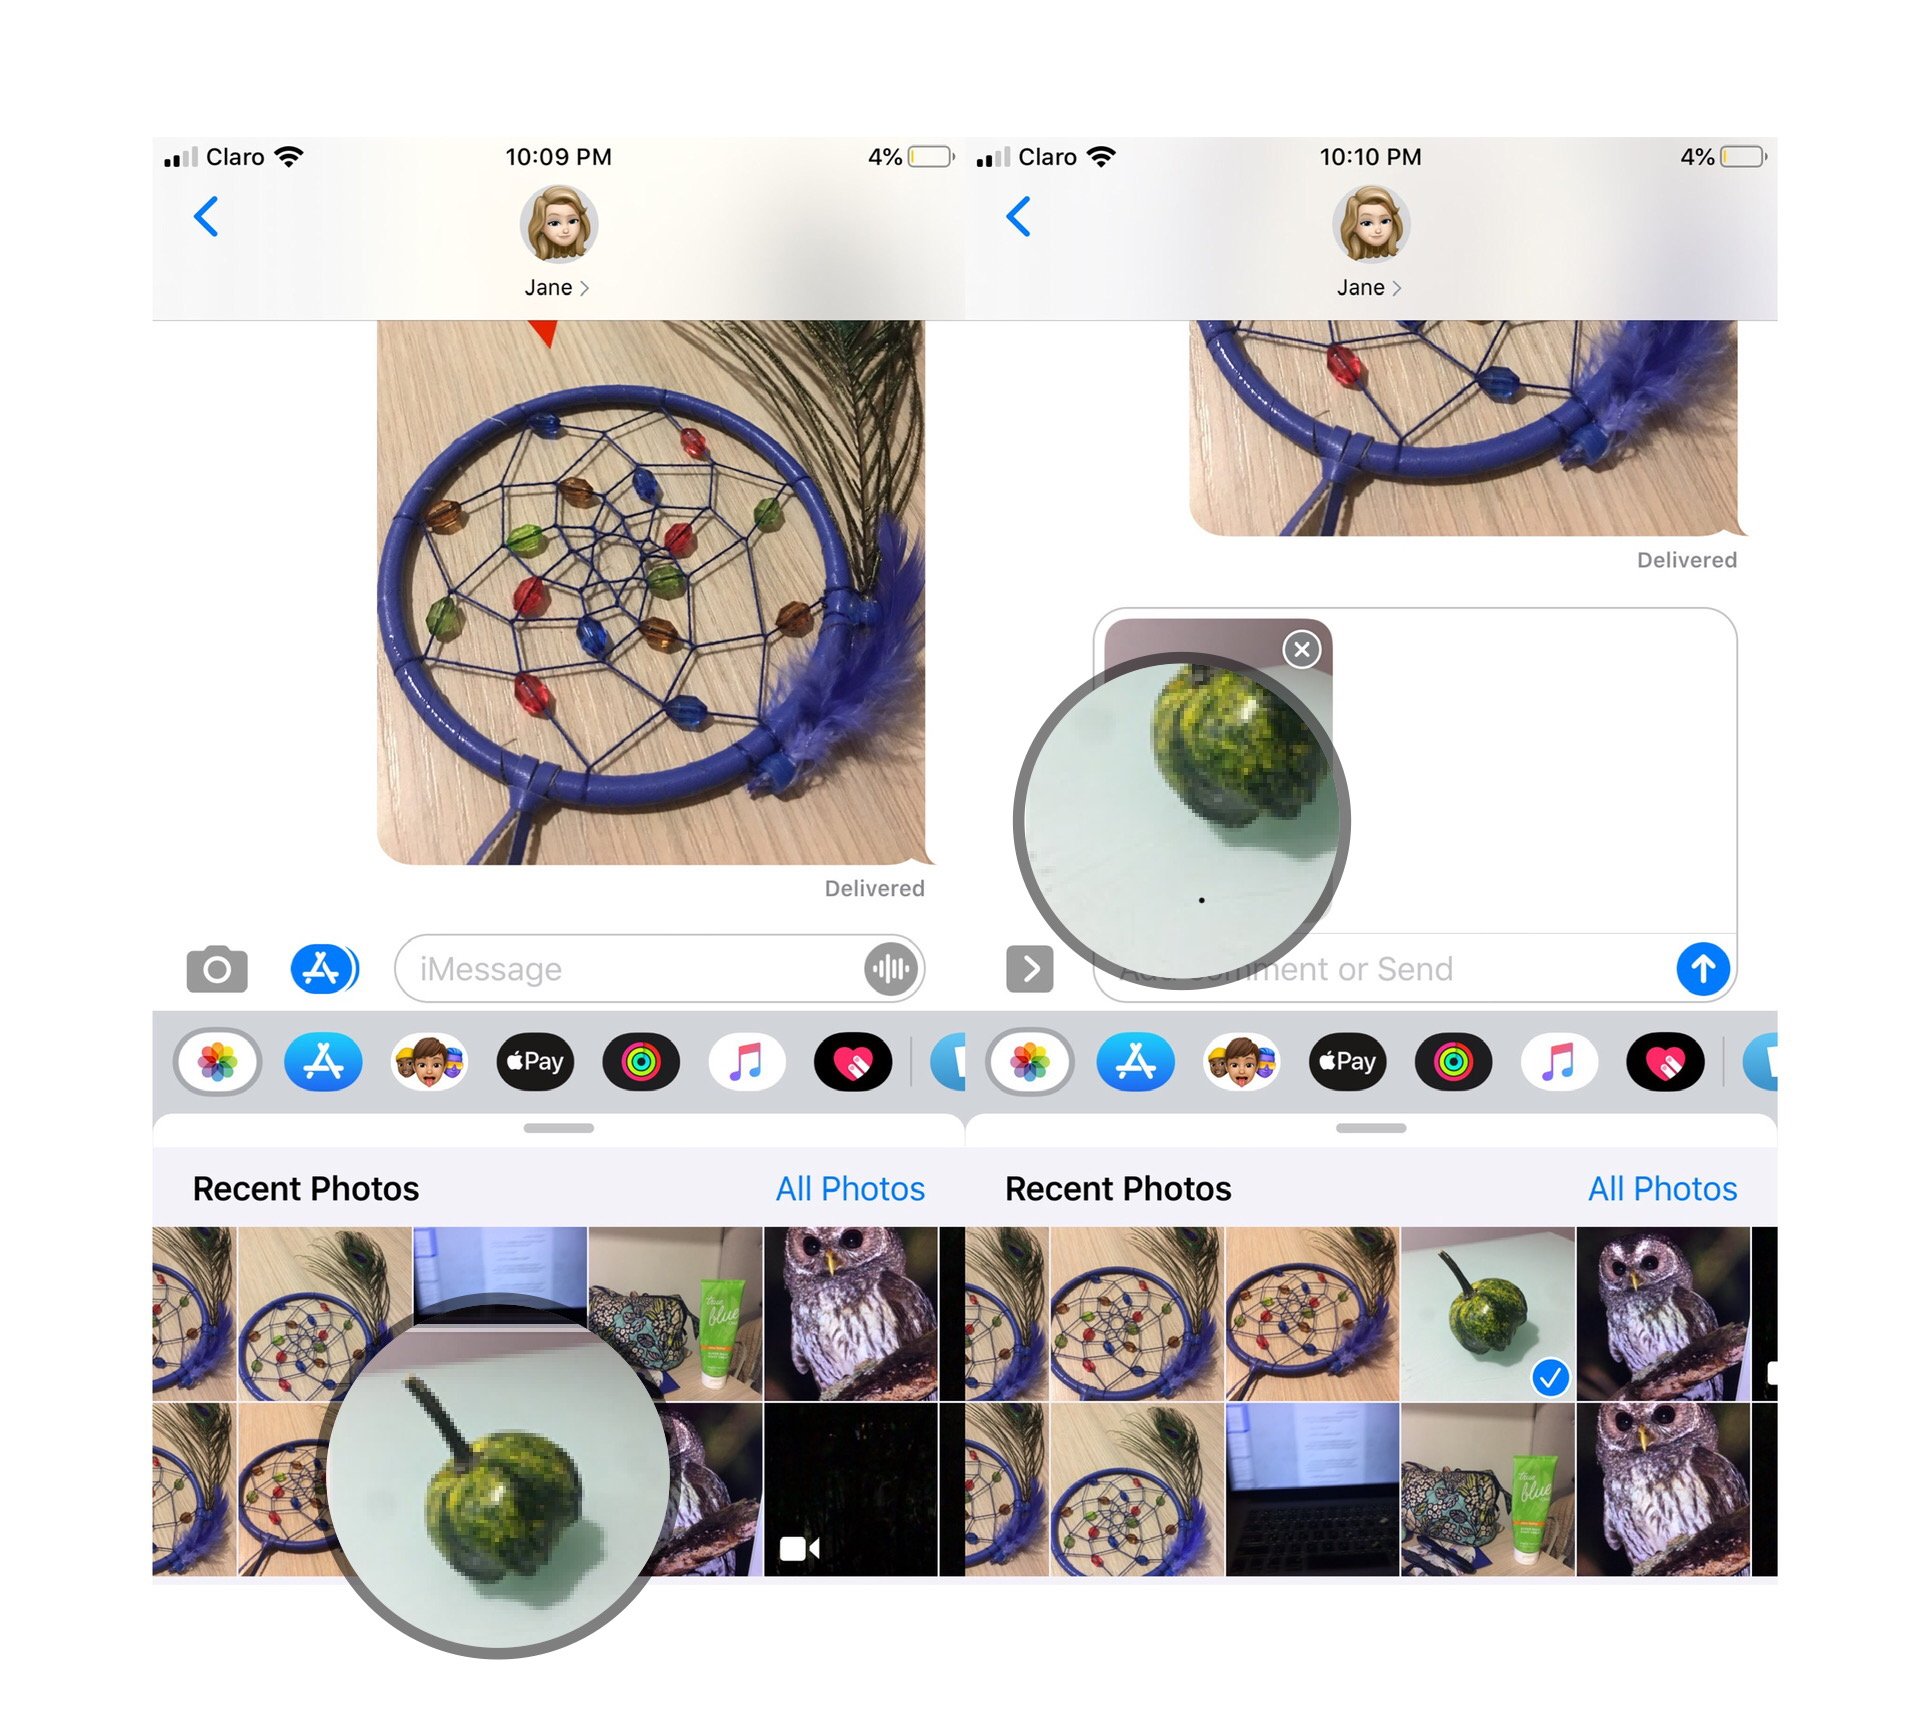
- Tap the image you'd like to send. The picture will automatically appear in the Compose box.
- Tap the photo in the compose box.
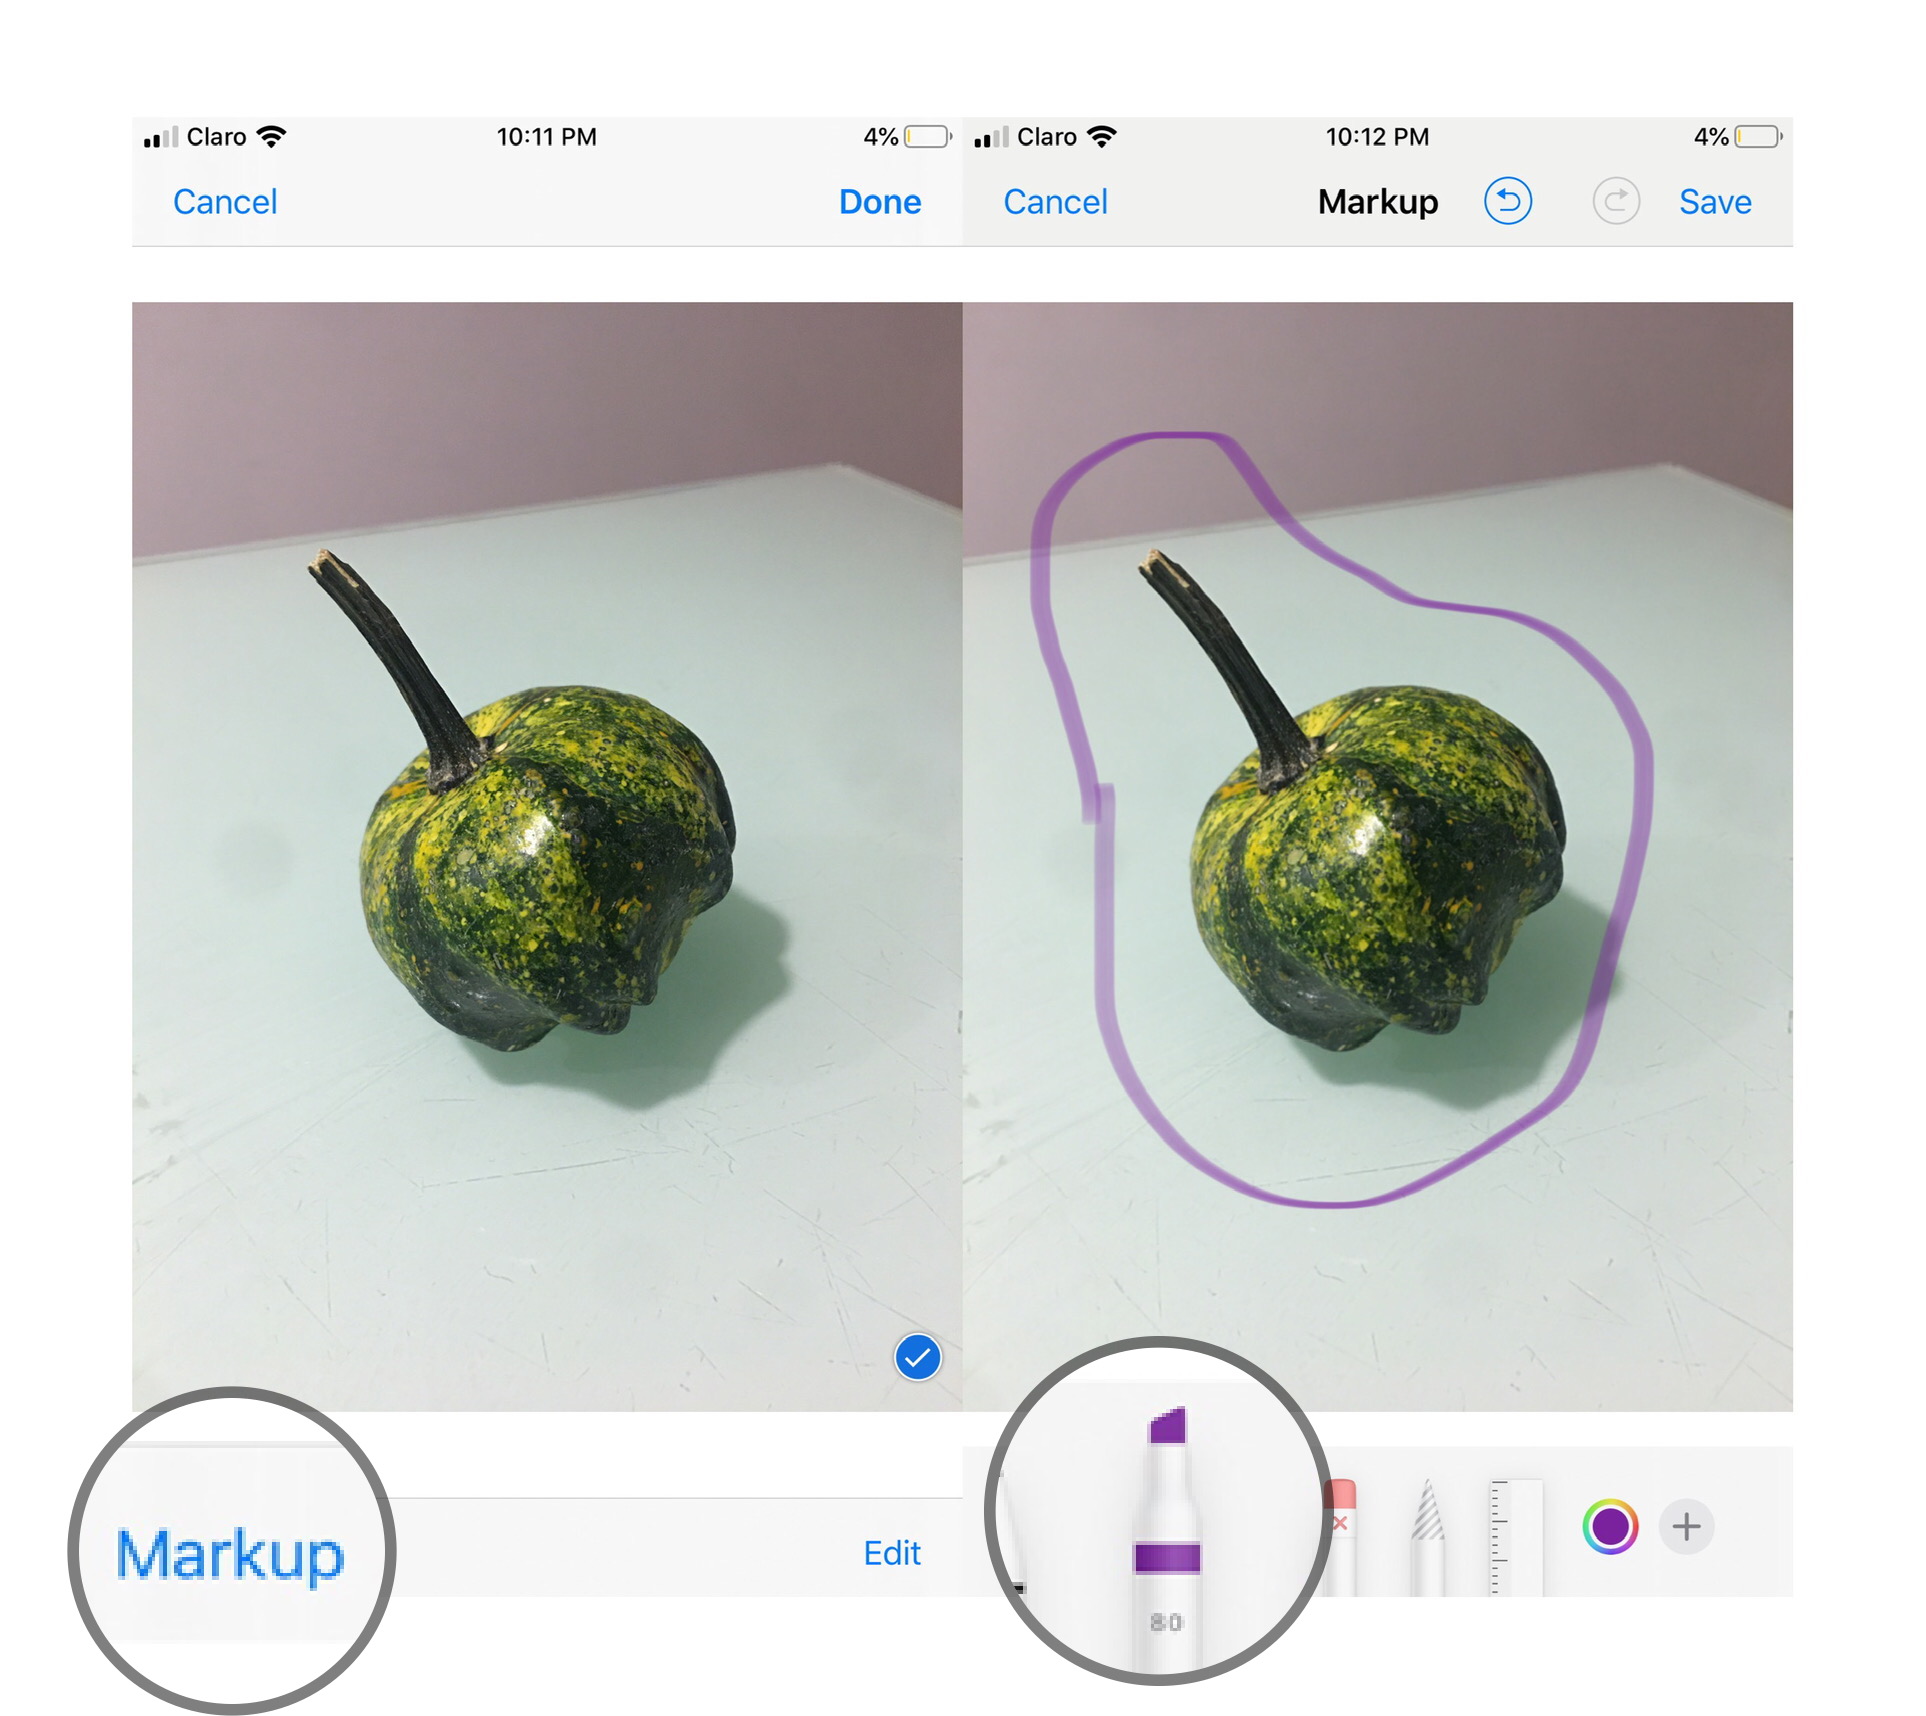
- Tap Markup.
- Mark up your photo.
- Tap Save.
- Tap Done.
- Tap the Send button (looks like an arrow).
How to edit and mark up photos you've taken in Messages in iOS 12
After taking a photo or video using the camera in Messages, right before you send it, you'll be given the option to add effects, edit, and mark up your content. Here's how you do it.
- Tap the Effects button.
- Tap on the button for the effect or you want to send with your photo or video. This can be anything from Animoji (and Memoji) to stickers from iMessage sticker apps.
- Tap on the effect or sticker that you want to send.
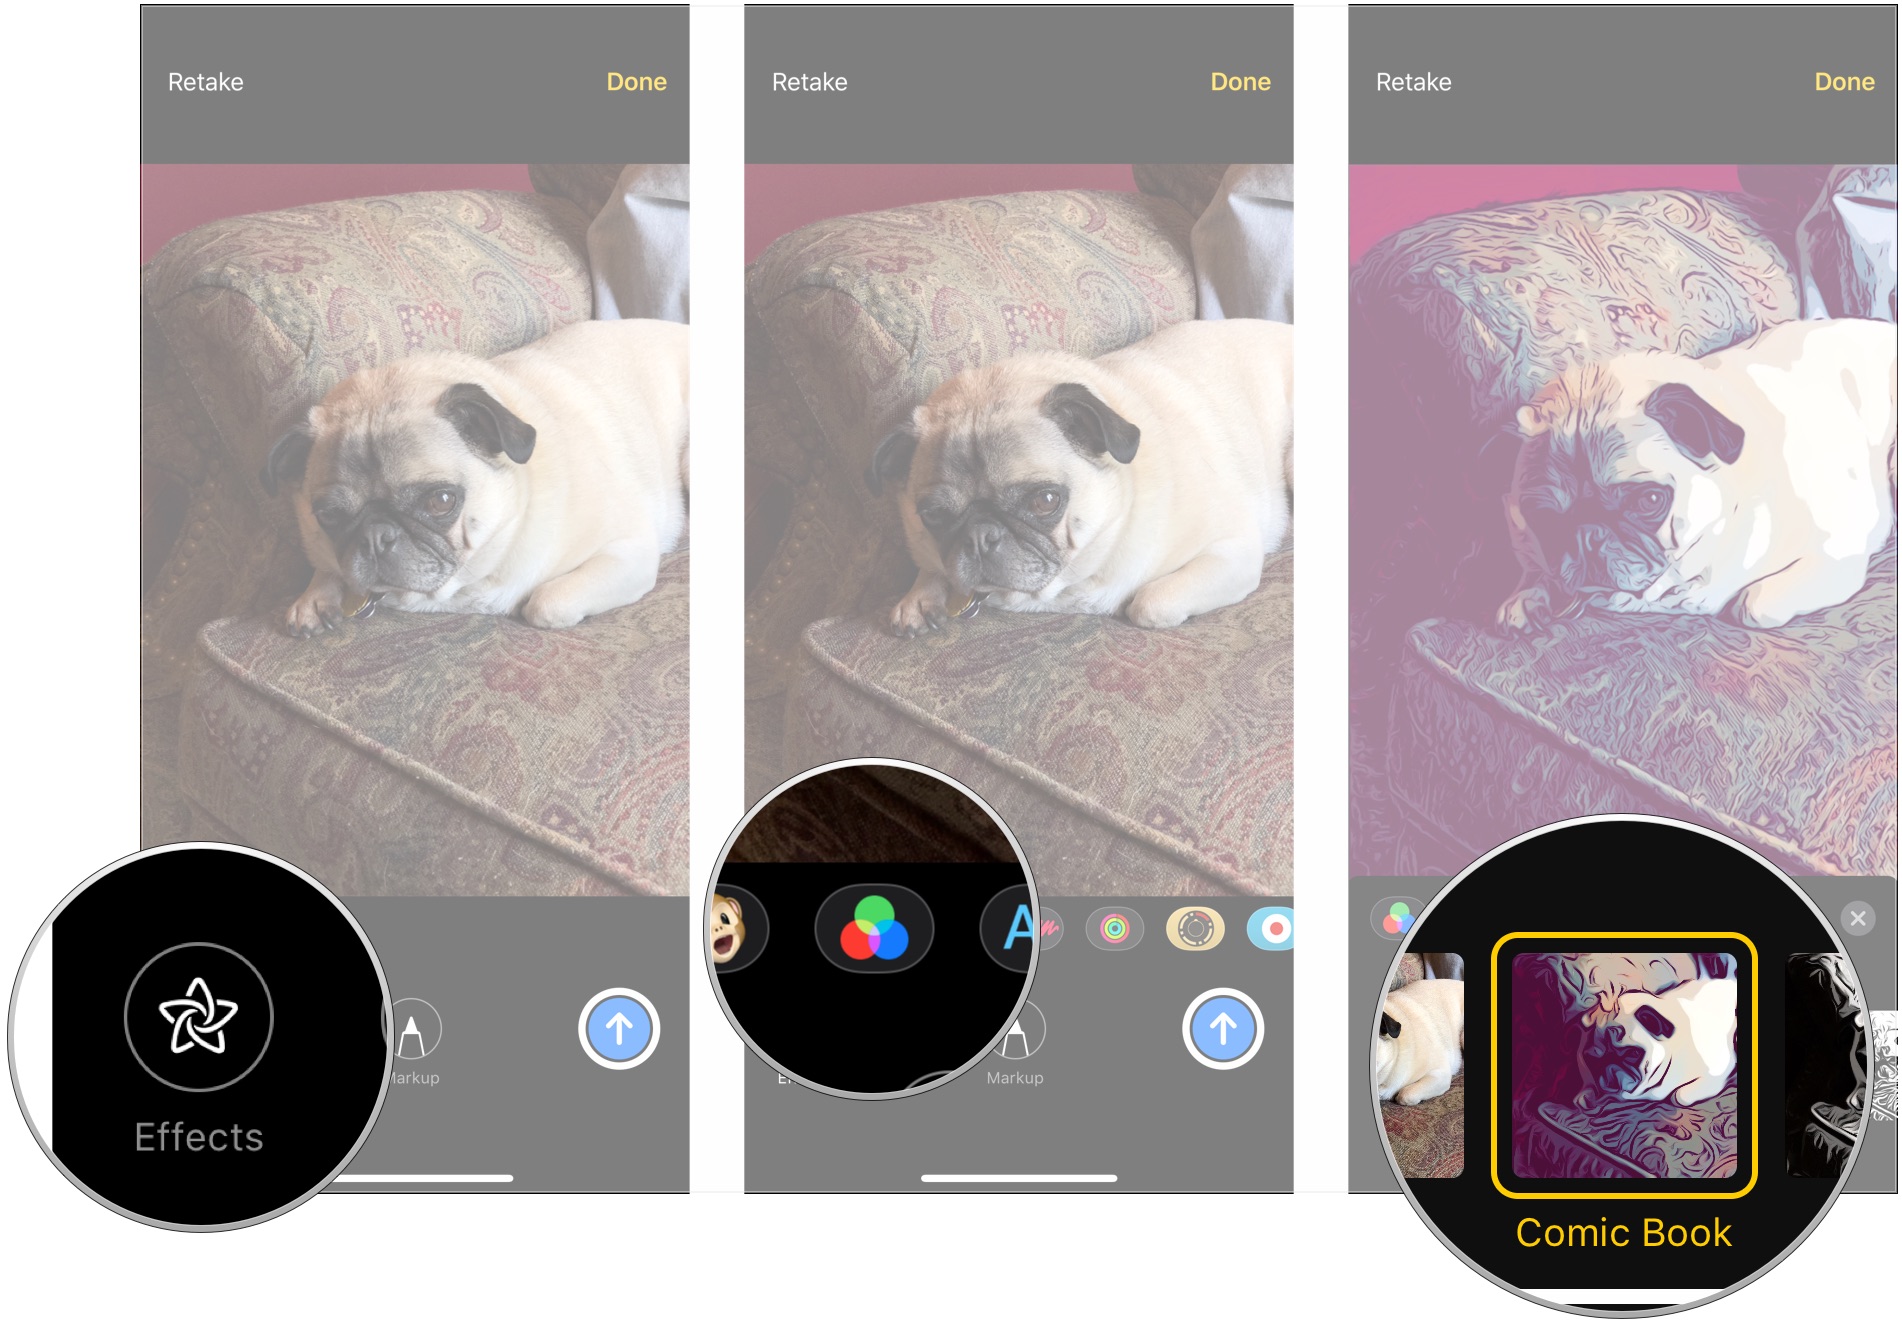
- Tap the X button at the top of the effect or sticker pane when you've added the effects and stickers that you wanted to.
- Tap Edit.
- Edit your photo or video as you see fit.
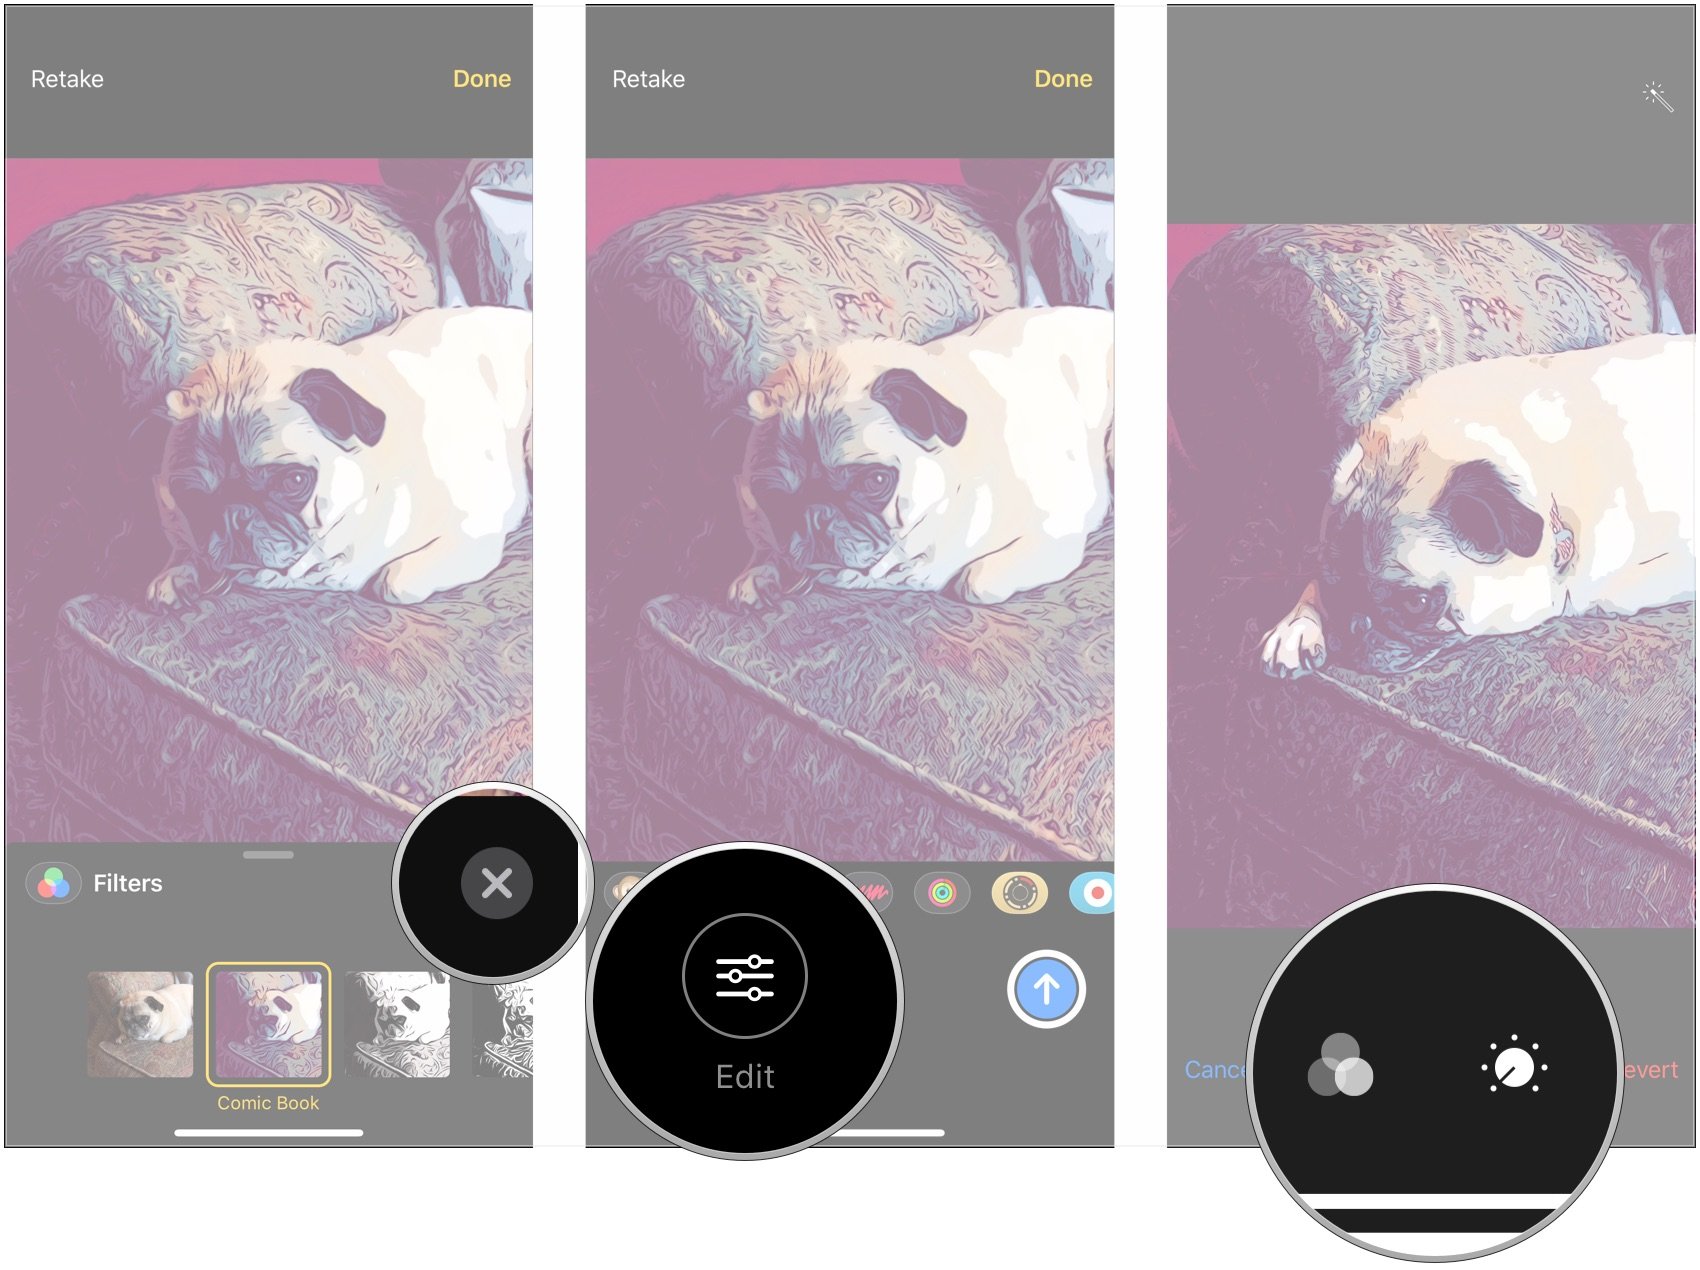
- Tap Done.
- Tap Markup (photos only).
- Mark up the photo as you need to.
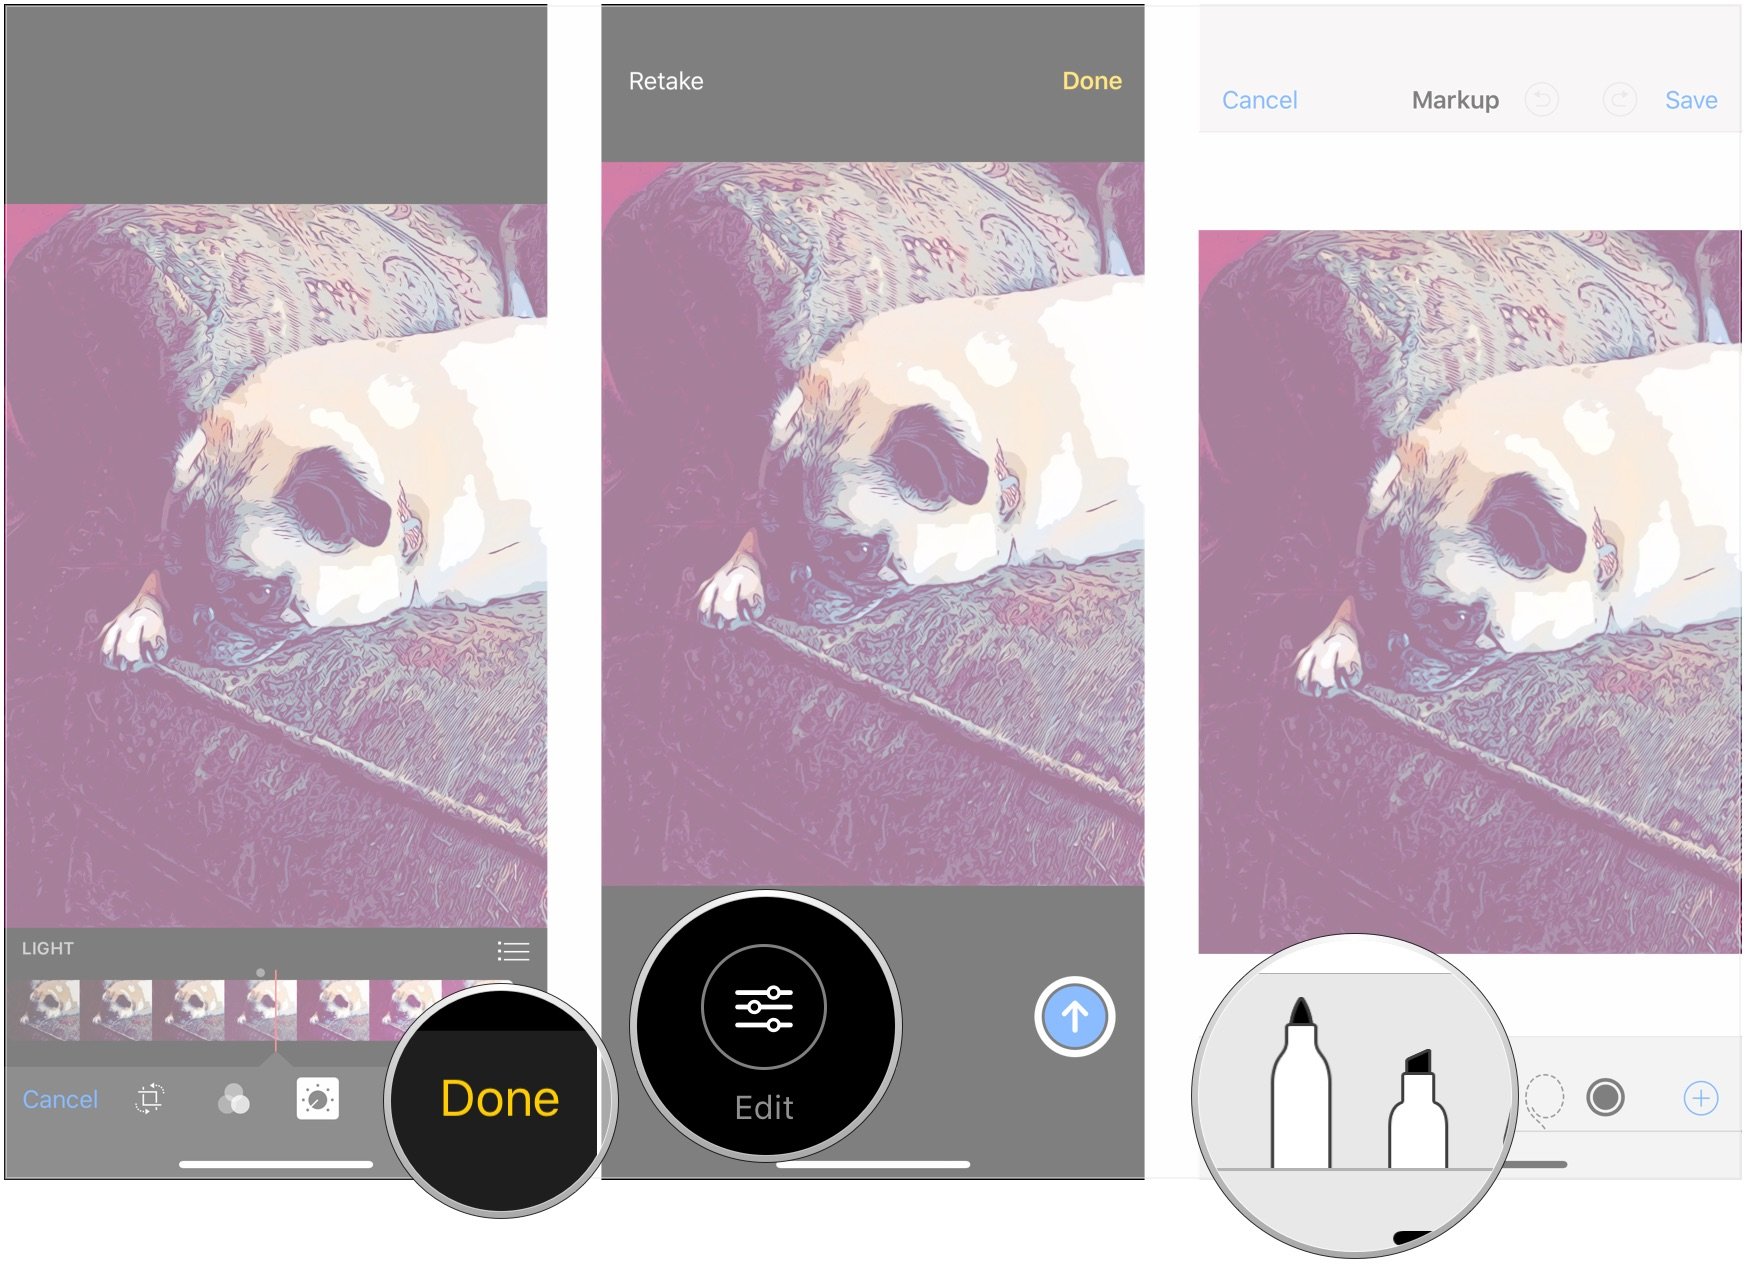
- Tap Save.
- Tap the Send button.
Questions?
Let us know in the comments if you have any questions about marking up photos in Messages.
Master your iPhone in minutes
iMore offers spot-on advice and guidance from our team of experts, with decades of Apple device experience to lean on. Learn more with iMore!
Joseph Keller is the former Editor in Chief of iMore. An Apple user for almost 20 years, he spends his time learning the ins and outs of iOS and macOS, always finding ways of getting the most out of his iPhone, iPad, Apple Watch, and Mac.
