At Apple's September 15 event, the Apple Watch Series 6 and Apple Watch SE were both announced alongside two new styles of band called the Solo Loop and the Braided Solo Loop. Adding these to Apple's current watch band lineup, there are now nine different styles not including the Hermès and Nike brands.
You may have heard some people complain about the Solo Loop or Solo Braided Loop not fitting even though they thought they printed the guide correctly. If you want to make doubly-sure that you have the correct size, you should use Apple's print out guide and use a ruler or tape measure and compare it to Apple's suggested size from the guide. Here's how.
How to measure your wrist using Apple's print out guide
This is the easiest way to ensure you're going to get the perfect fit for your Apple Watch. It's Apple's official guide and it doesn't require any extra tools other than access to a printer. If you want to make doubly-sure you correctly measure your wrist for Solo Loop bands, follow these instructions to use Apple's official guide and measure your wrist to compare it to what Apple's guide suggests.
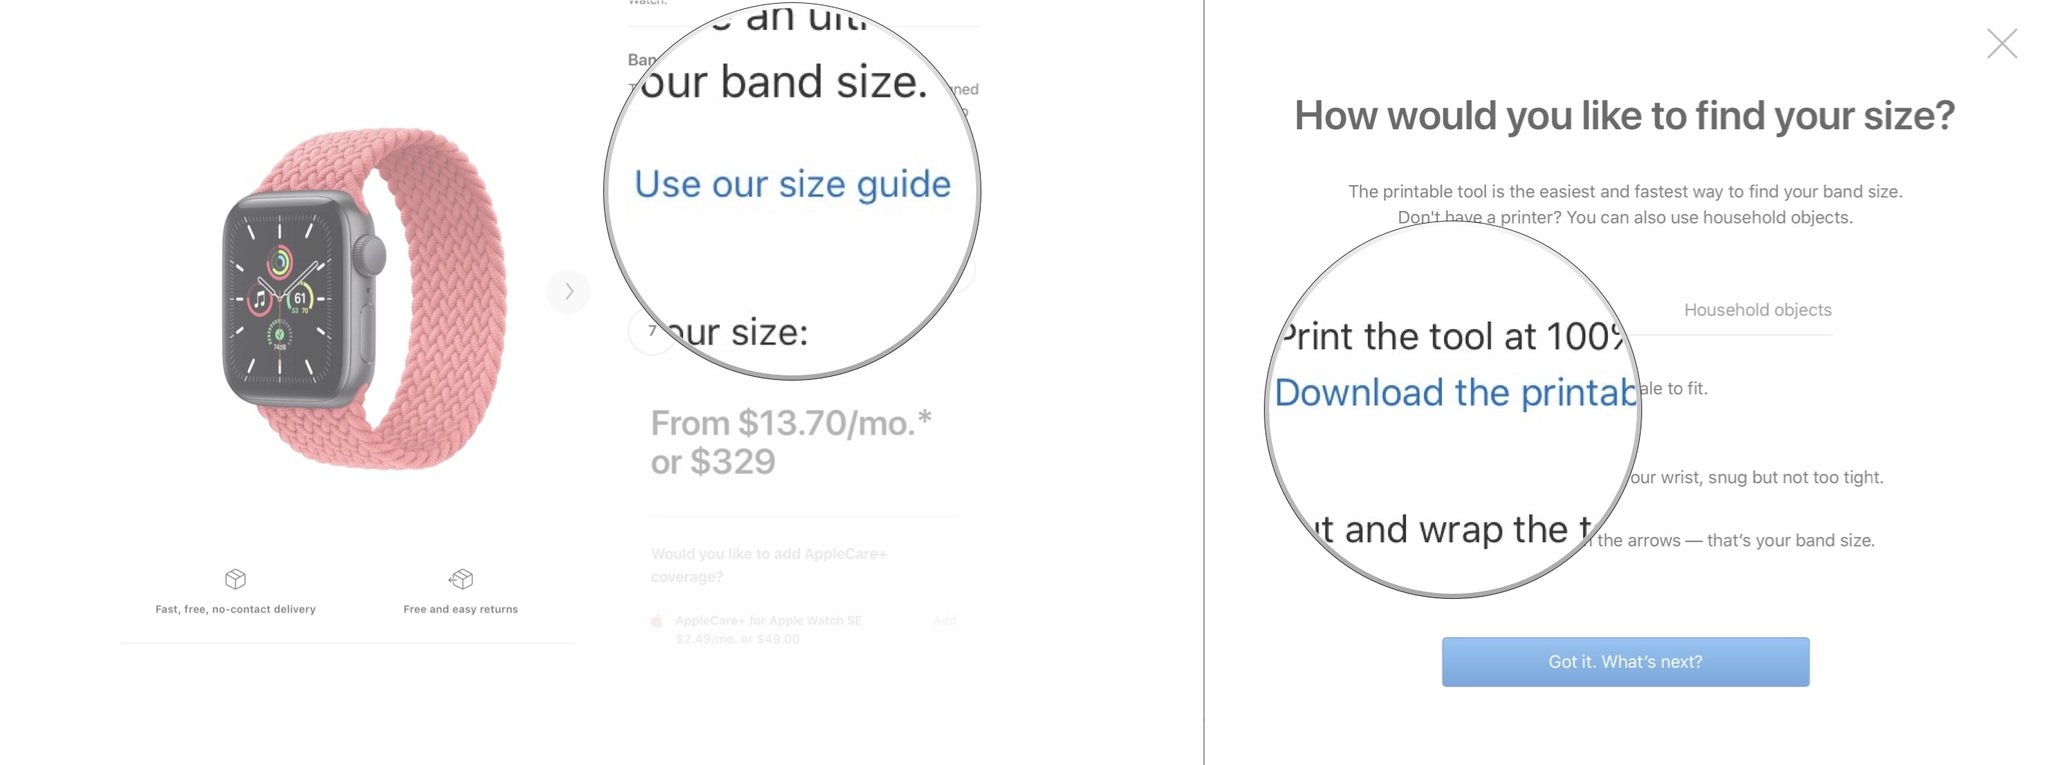
- Select either the Solo Loop or Braided Solo Loop as an option when purchasing your Apple Watch or a separate band.
- Tap or click on Use our size guide.
- Tap or click Download the printable tool.
- Make sure your printer is set to print at 100%. Do not fit to scale.
- Print the printable tool.
- Check to ensure that you printed the correct size by placing a standard credit card in the designated sizing spot on the guide.
- Cut out the sizing tool.
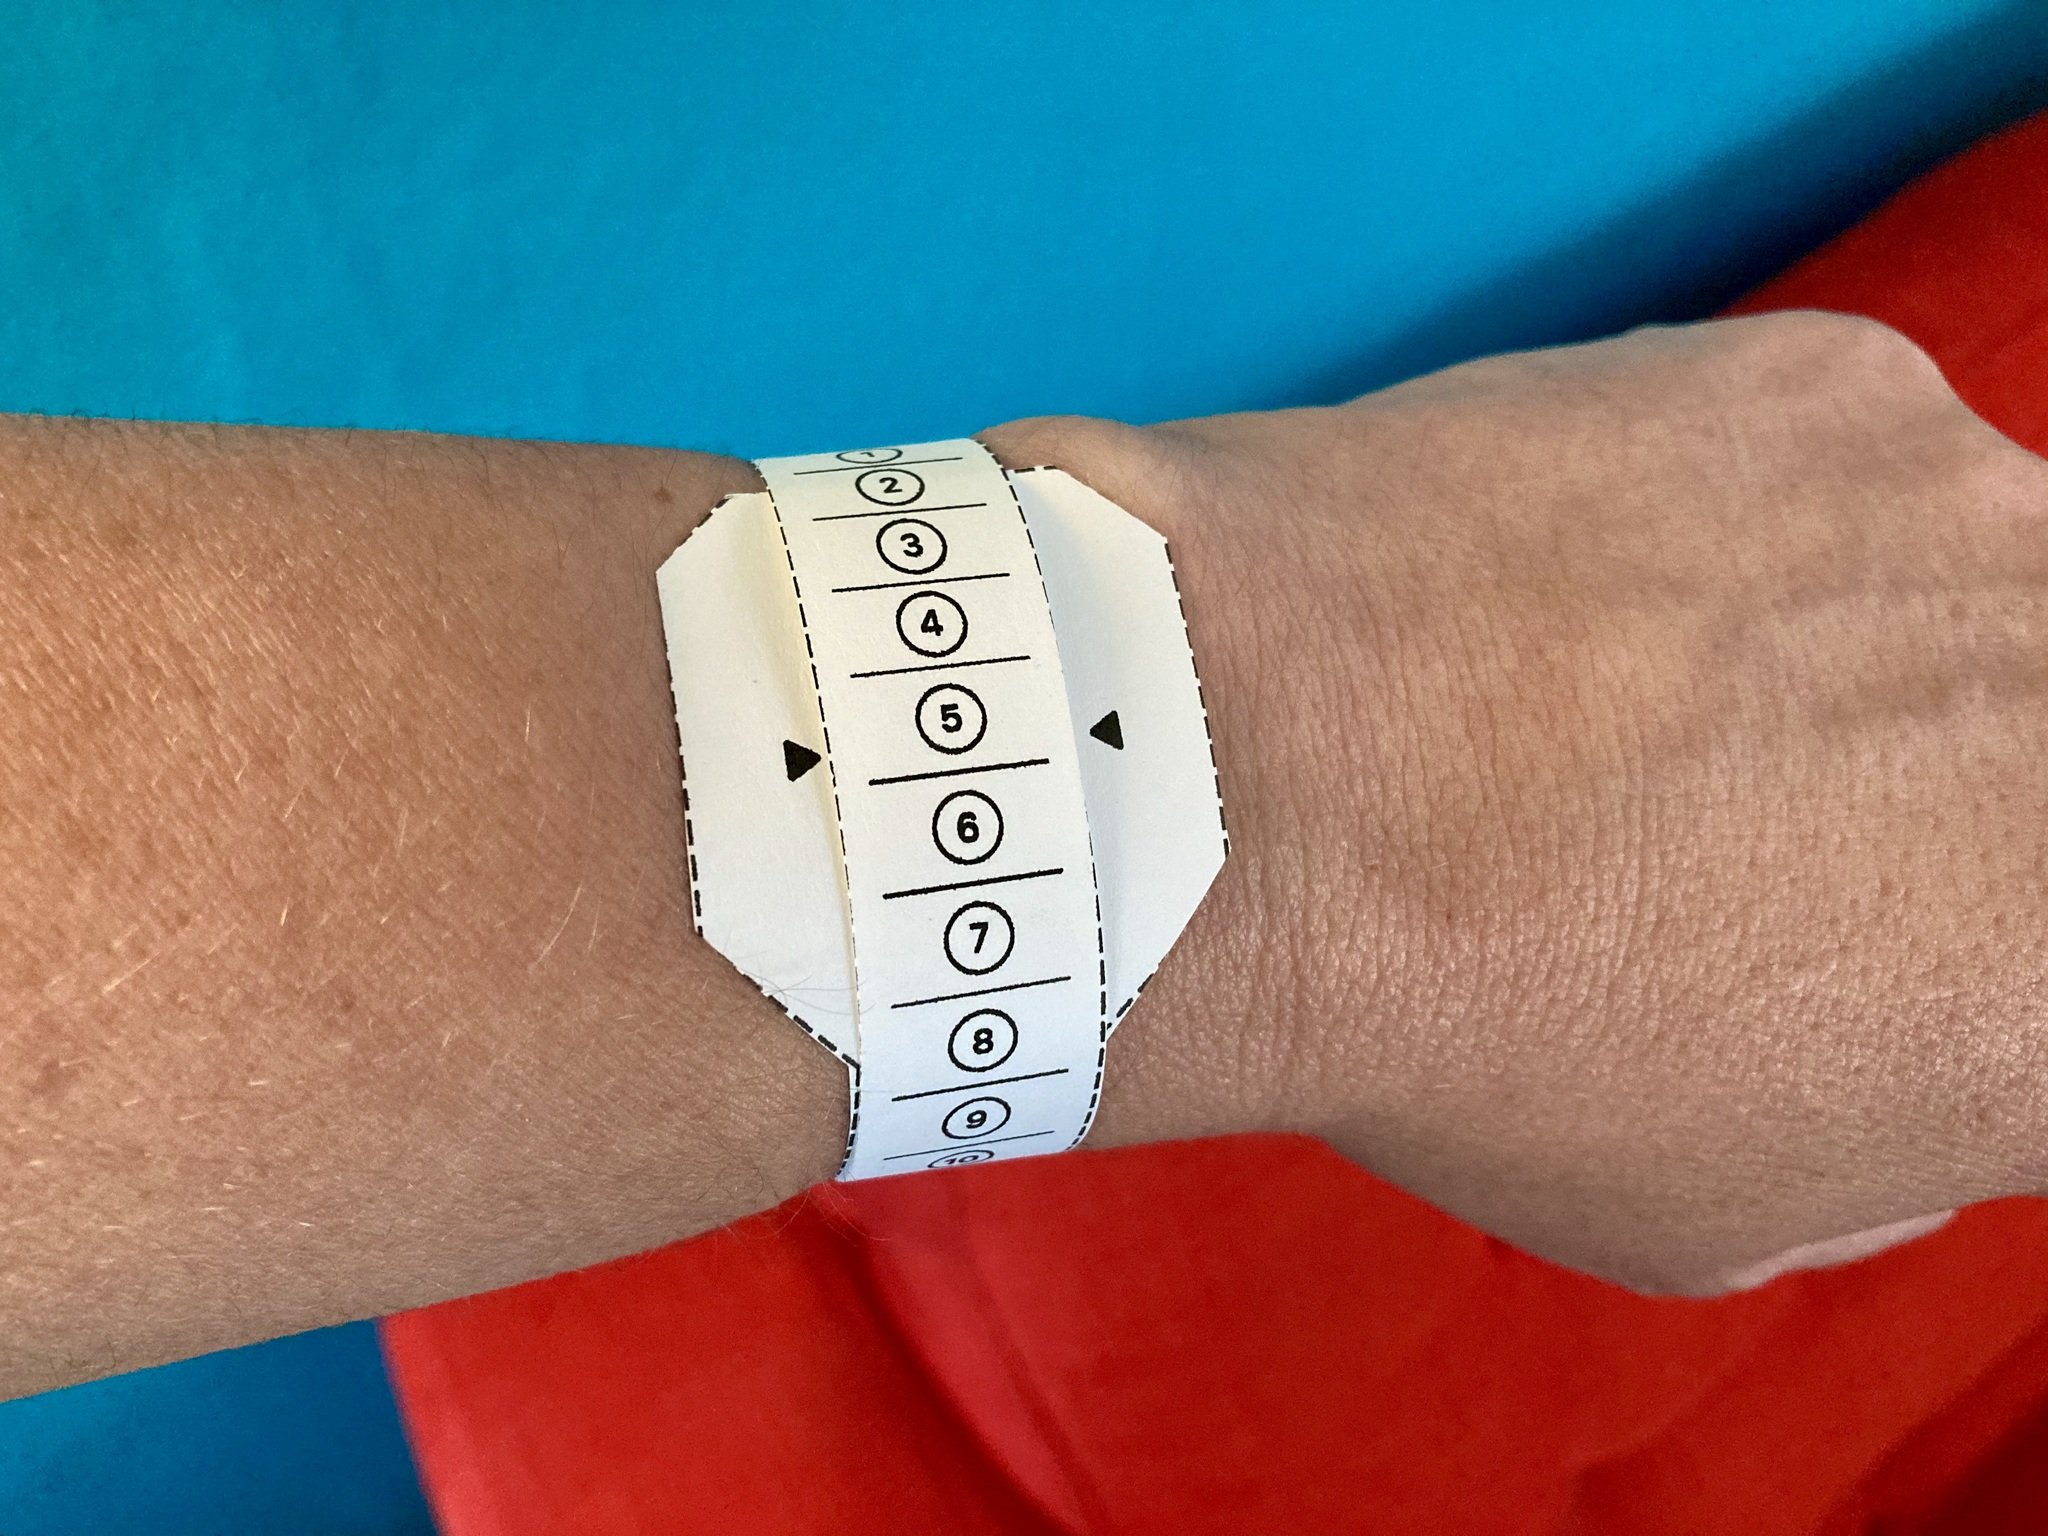
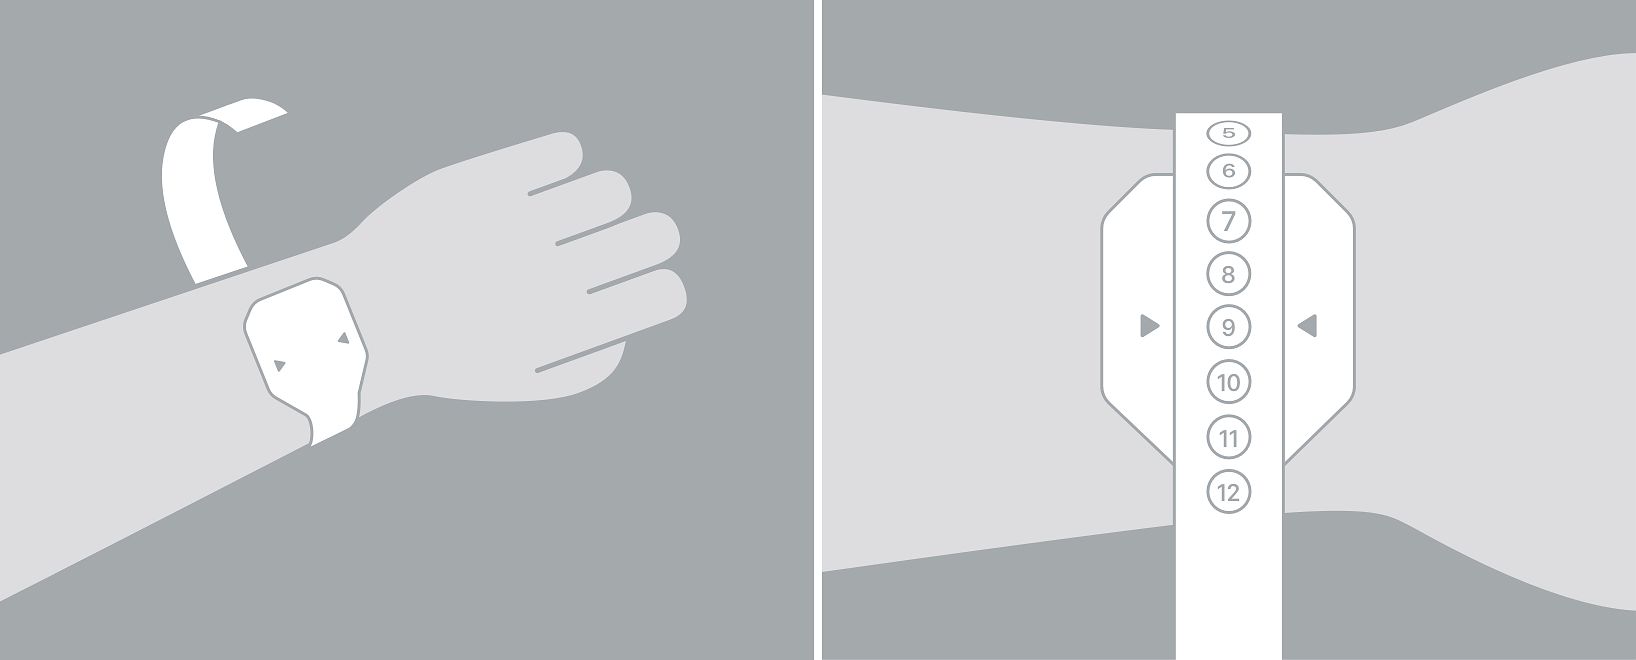
- Place the "case" side on your wrist.
- Wrap the measuring tool around your wrist. Don't pull it too tight. It should fit comfortably but not loose.
- Line up the arrows on the "case" with a number. This is the size band you should get.
If you don't have the ability to print out (and cut out) the printable tool, you can also measure your wrist using a tape measure or ruler, paper, and pen.
How to measure your wrist using a tape measure
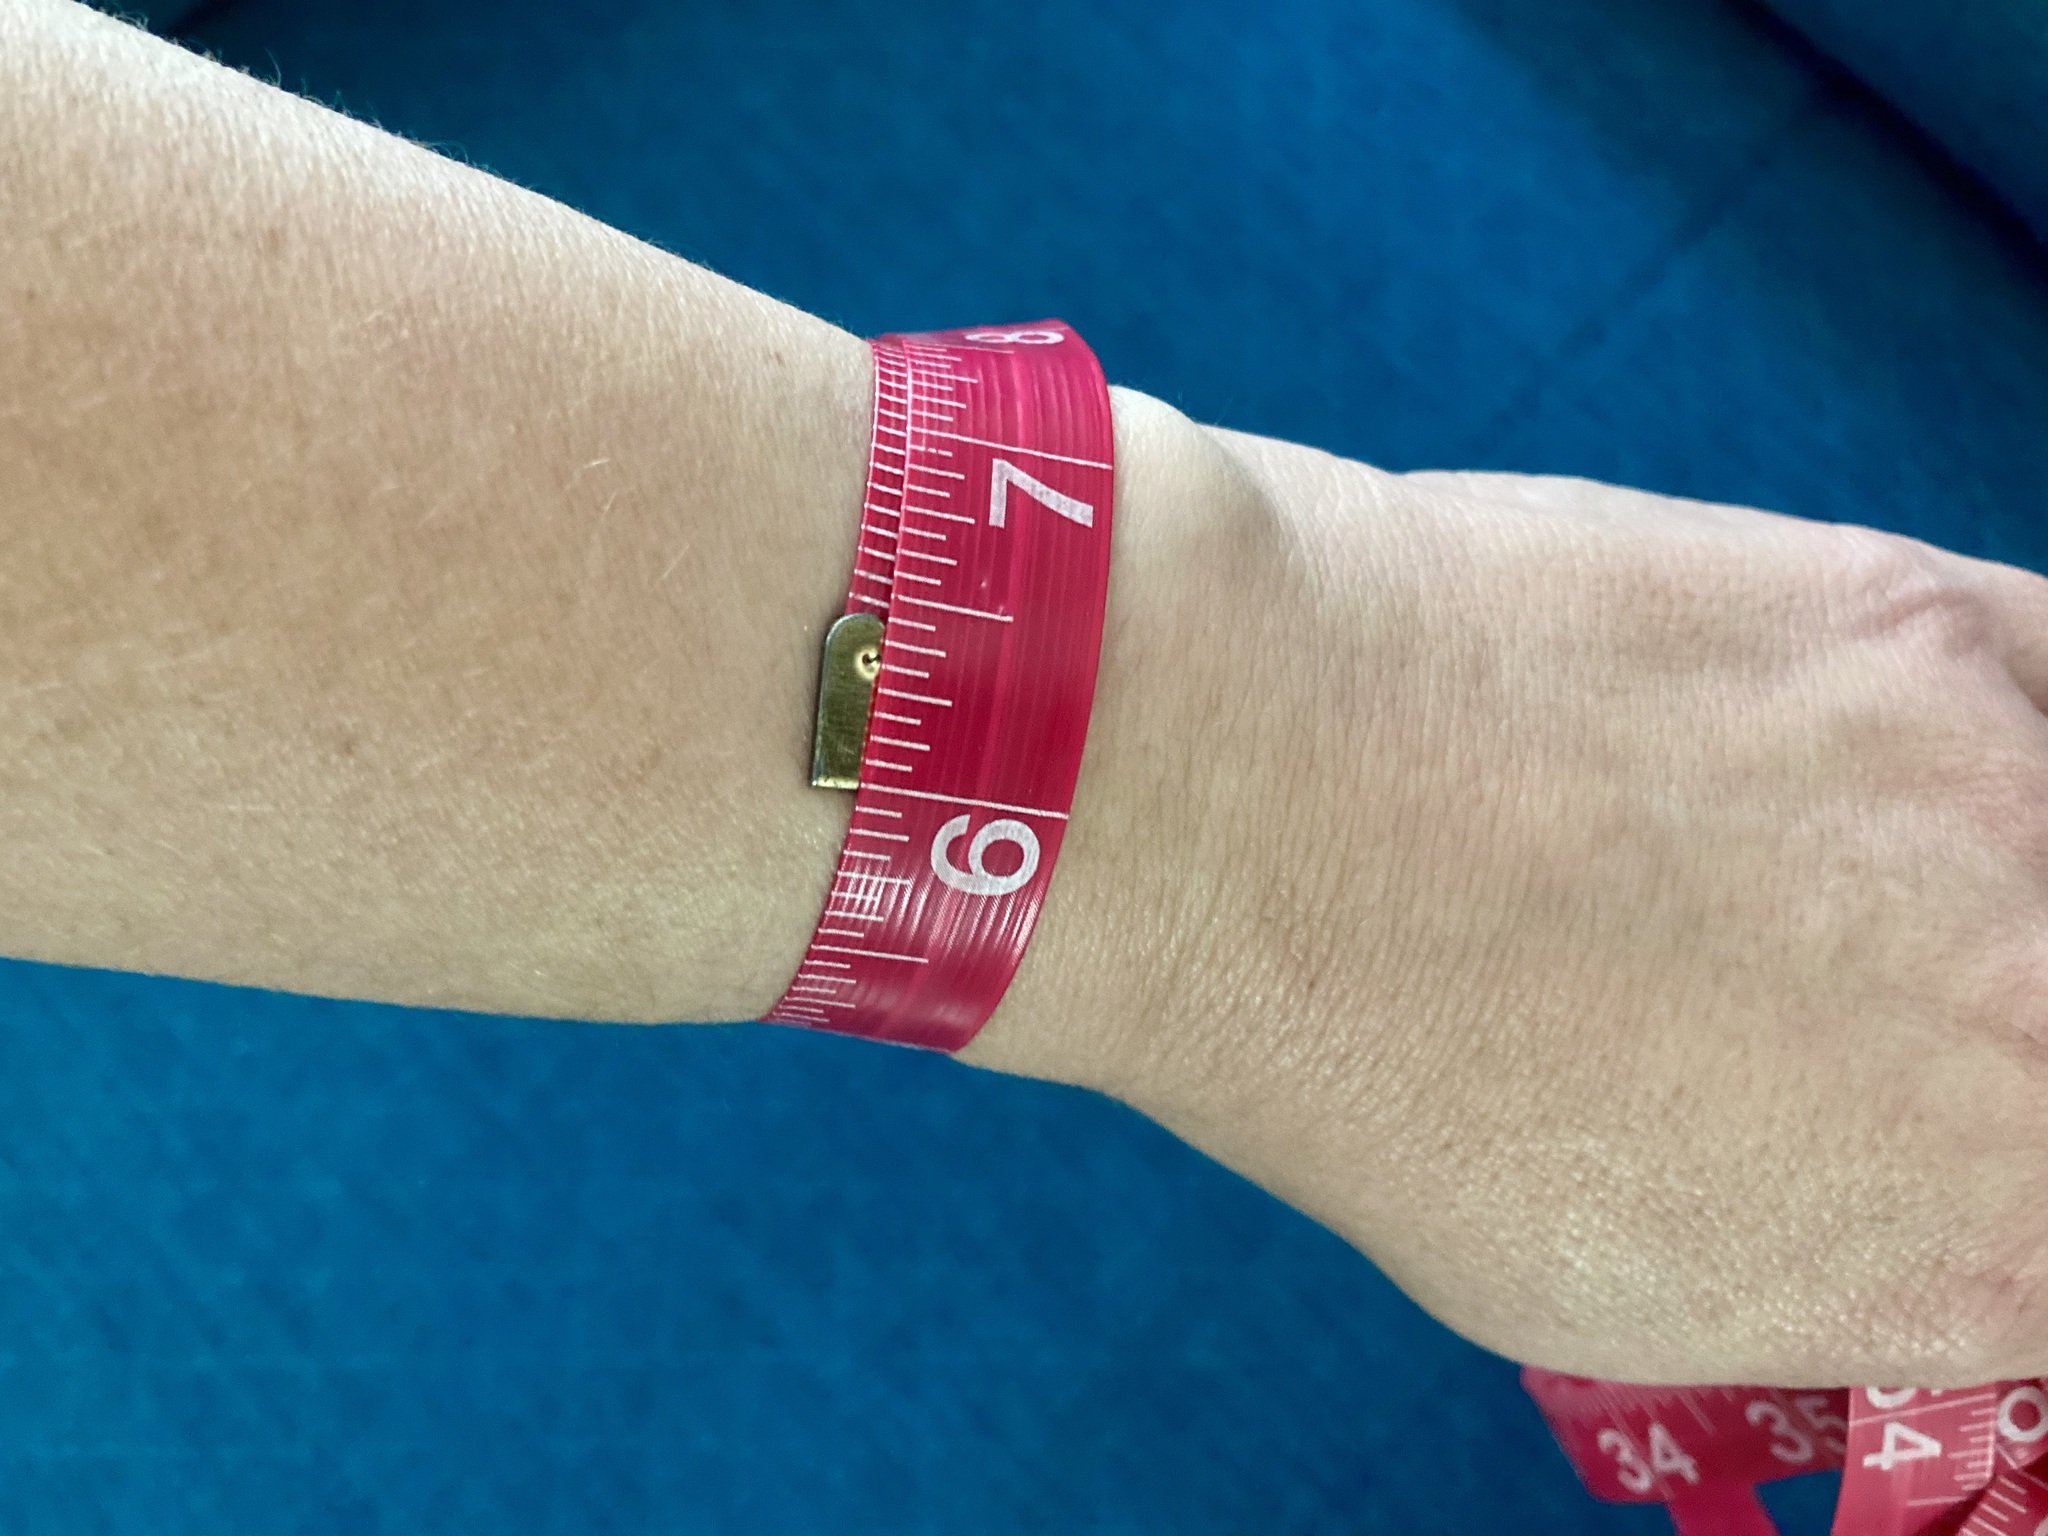
If you can't print the printable tool, you're not out of luck. You can measure your wrist with a tape measure (it's much better to use a soft tape measure, not a metal one).
If you want to make sure you correctly measure your wrist for Solo Loop bands, follow the instructions to use Apple's official guide and measure your wrist to compare it to what Apple's guide suggests.
- Wrap the tape measure around your wrist. Don't pull it too tight. It should fit comfortably but not loose.
- Note the measurement.
- Select either the Solo Loop or Braided Solo Loop as an option when purchasing your Apple Watch or a separate band.
- Tap or click on Use our size guide.
- Tap or click on the Household objects tab in the size guide window.
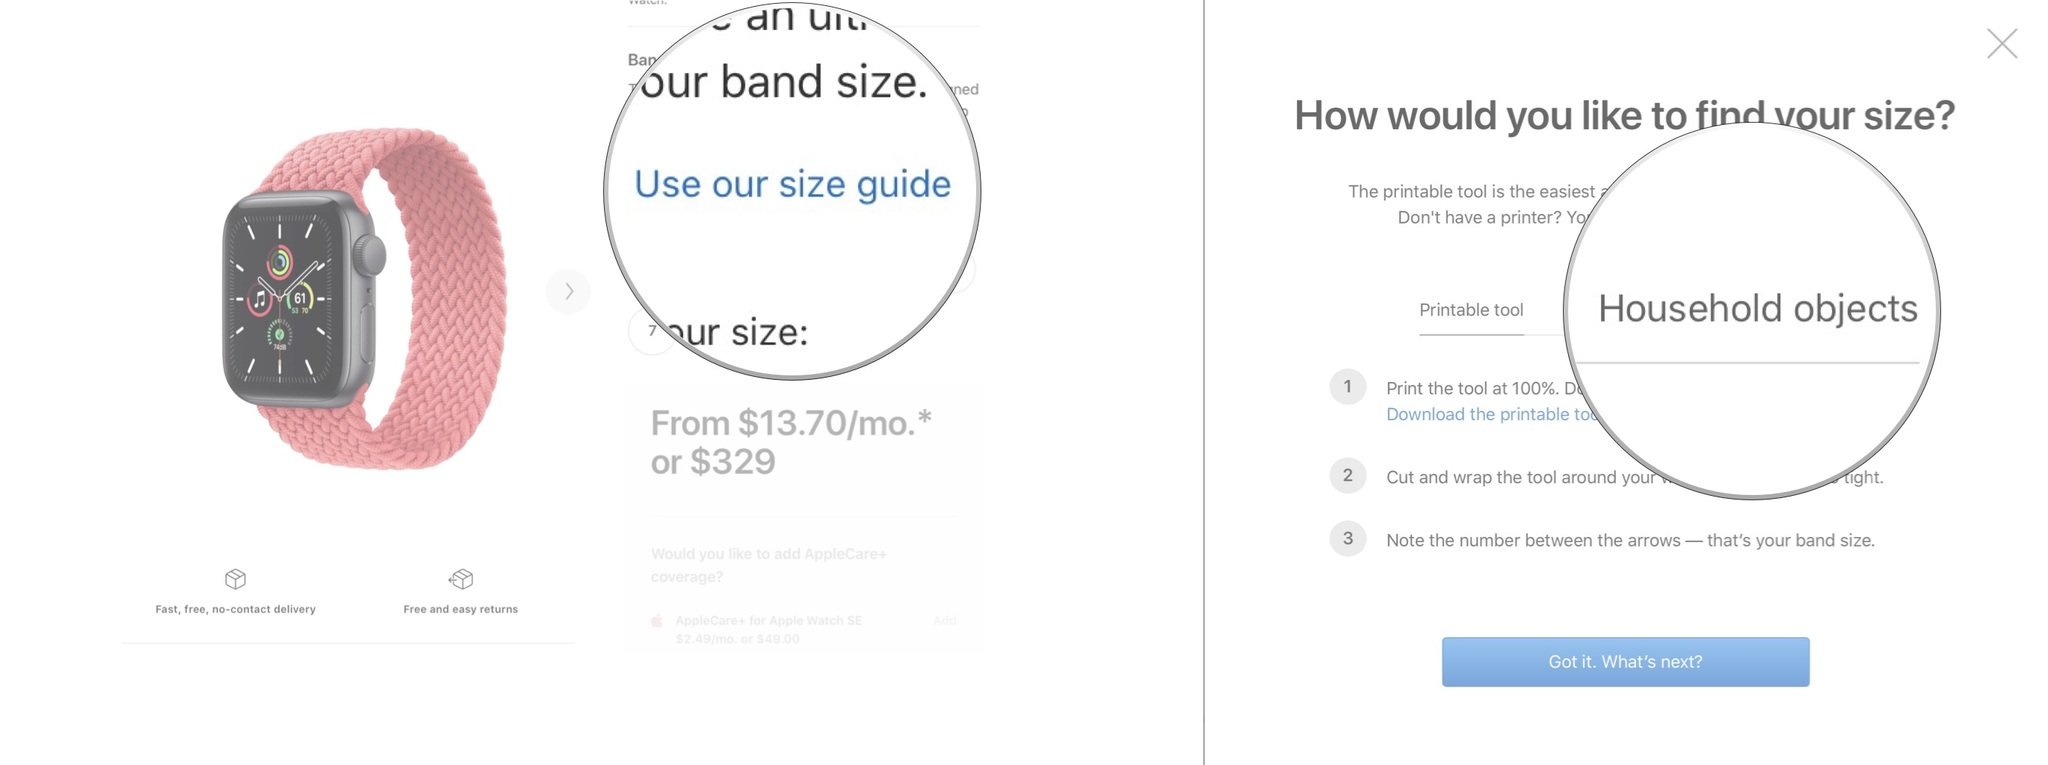
- Click or tap on Got it. What's next?
- Enter the measurement you noted, including the fraction of an inch.
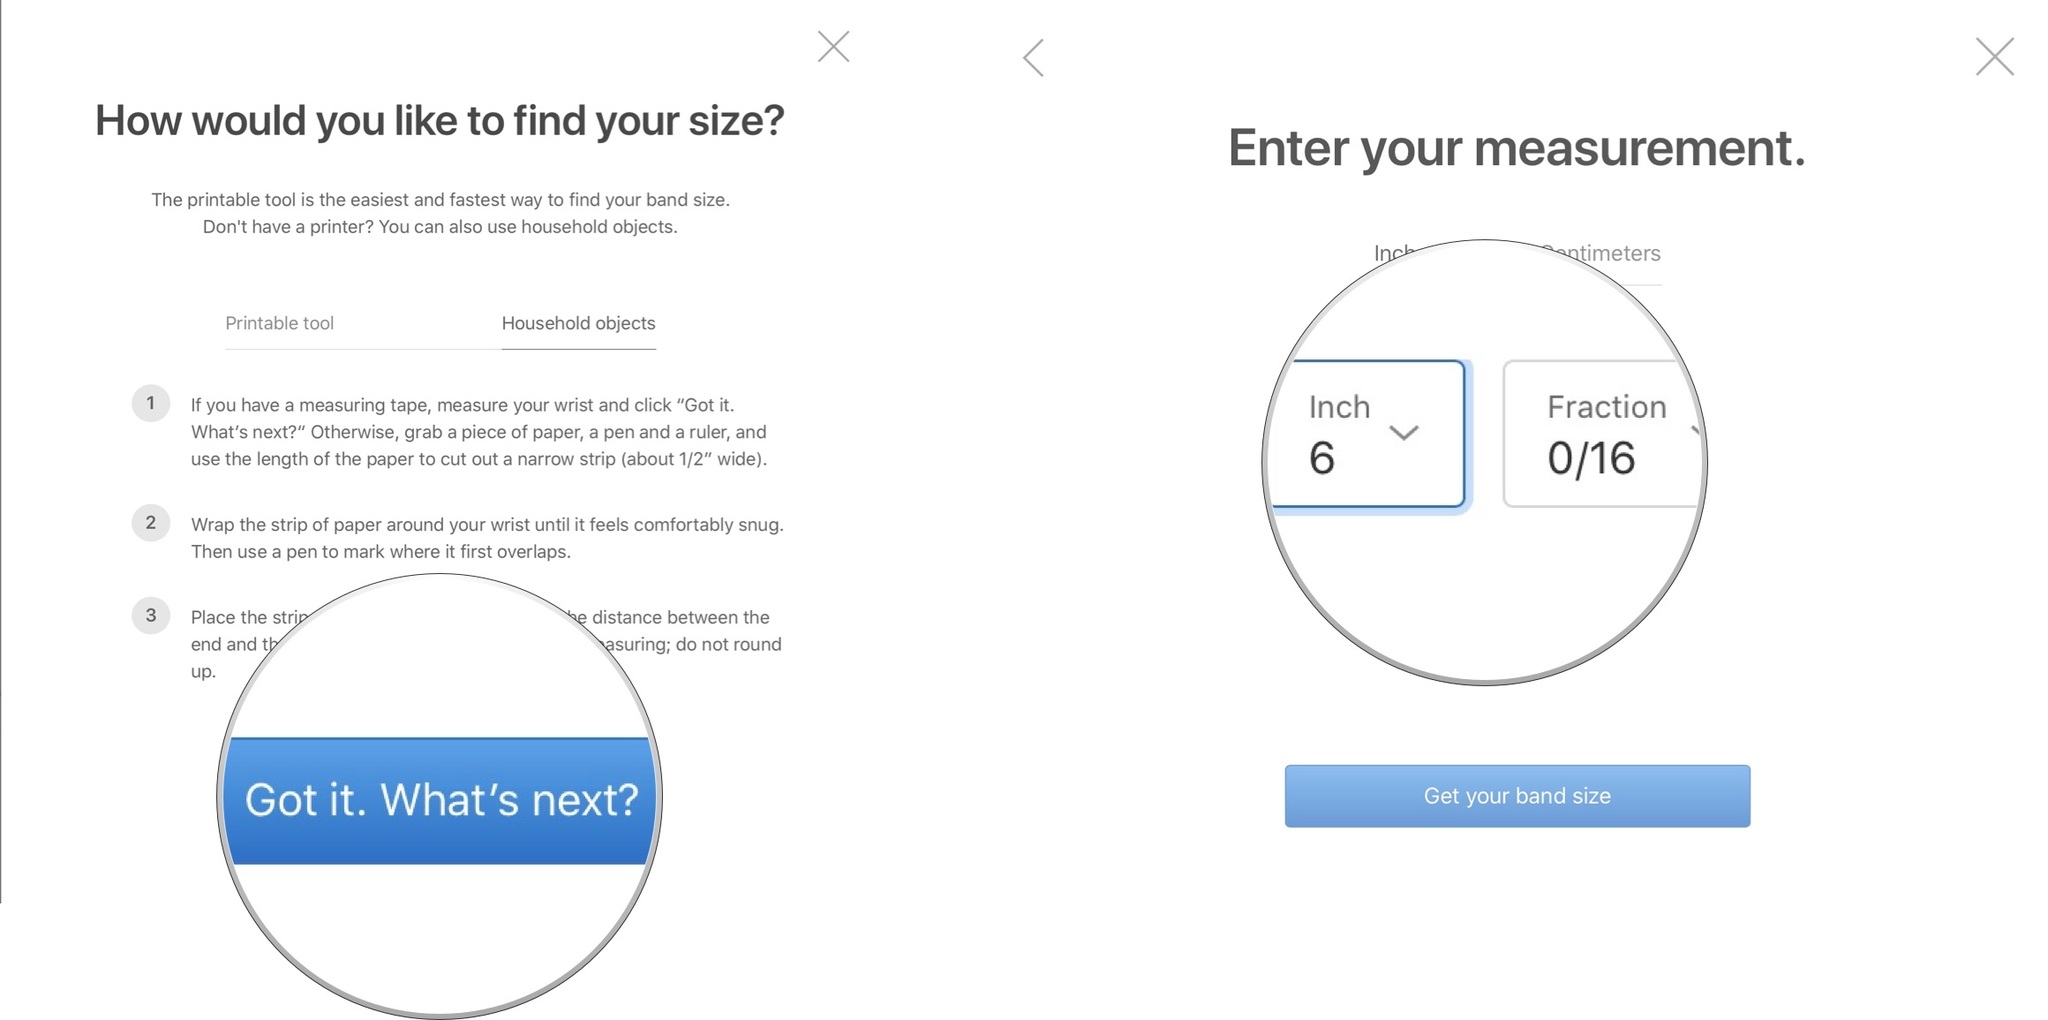
- Click or tap Get your band size.
- Click on Continue buying... once your band size appears.
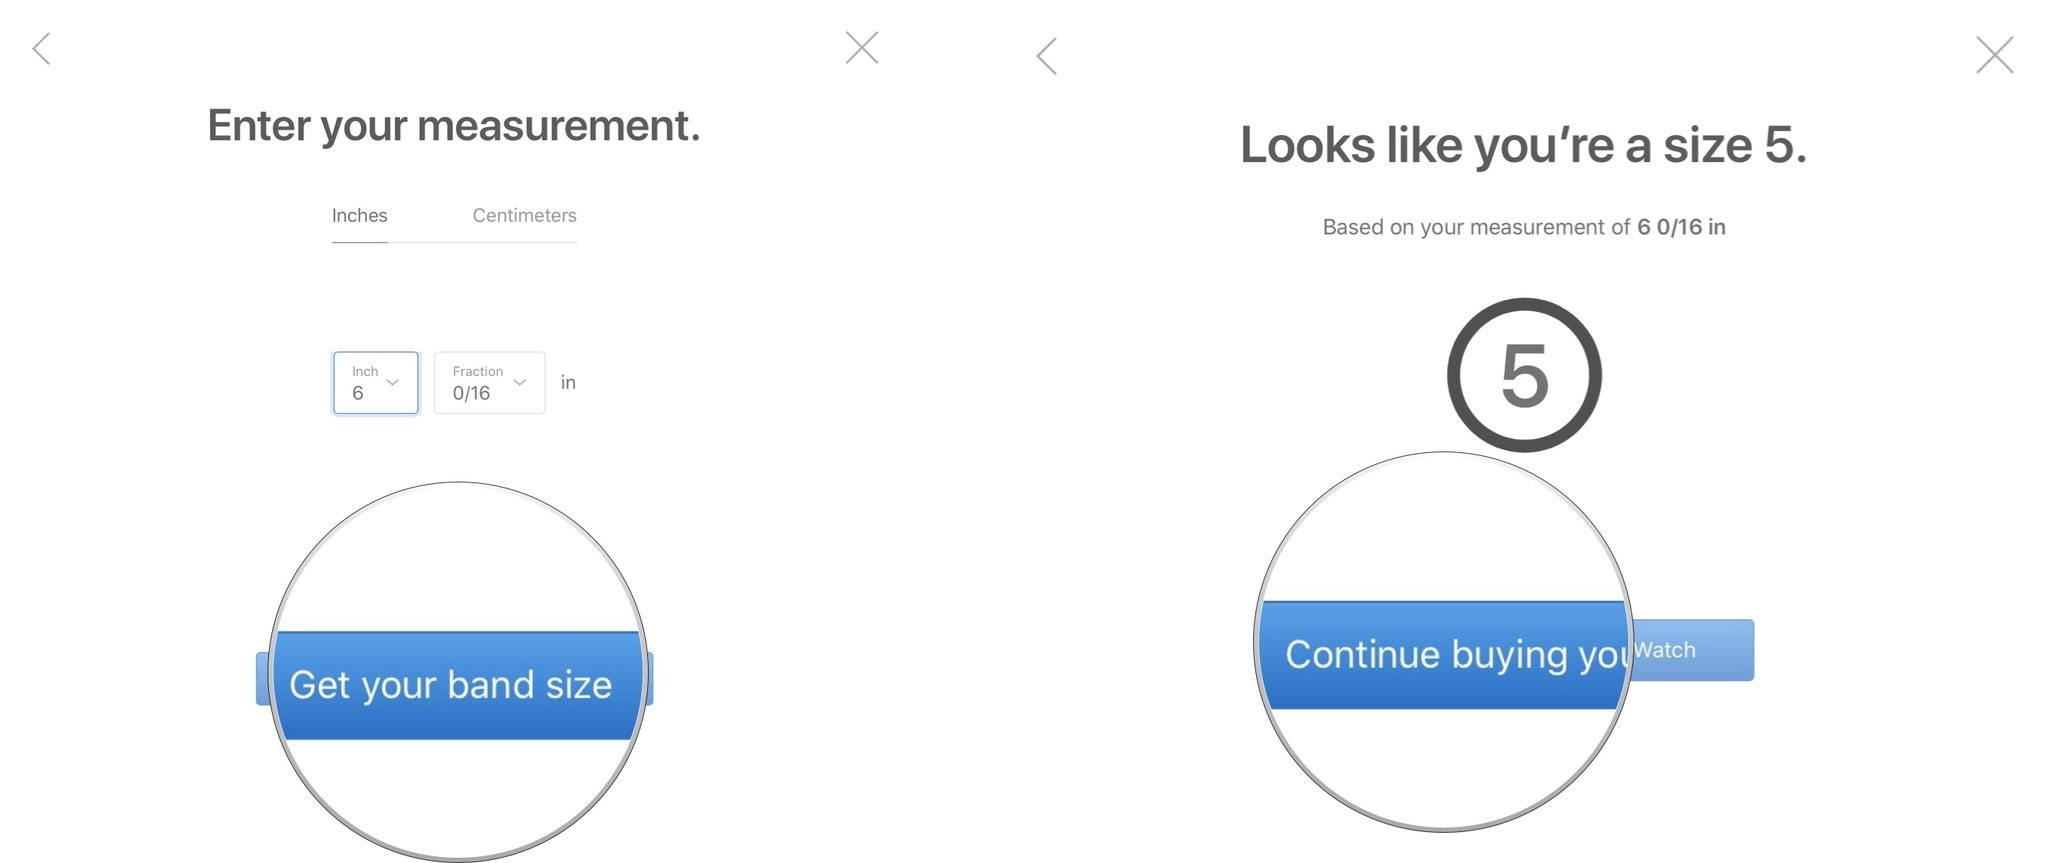
If you are cross-checking against Apple's official sizing guide the number you found on the guide should match the number Apple recommended when you measured your wrist. Now you know that you correctly measured your wrist for the Solo Loop.
Master your iPhone in minutes
iMore offers spot-on advice and guidance from our team of experts, with decades of Apple device experience to lean on. Learn more with iMore!
How to measure your wrist with a ruler, paper, and pen
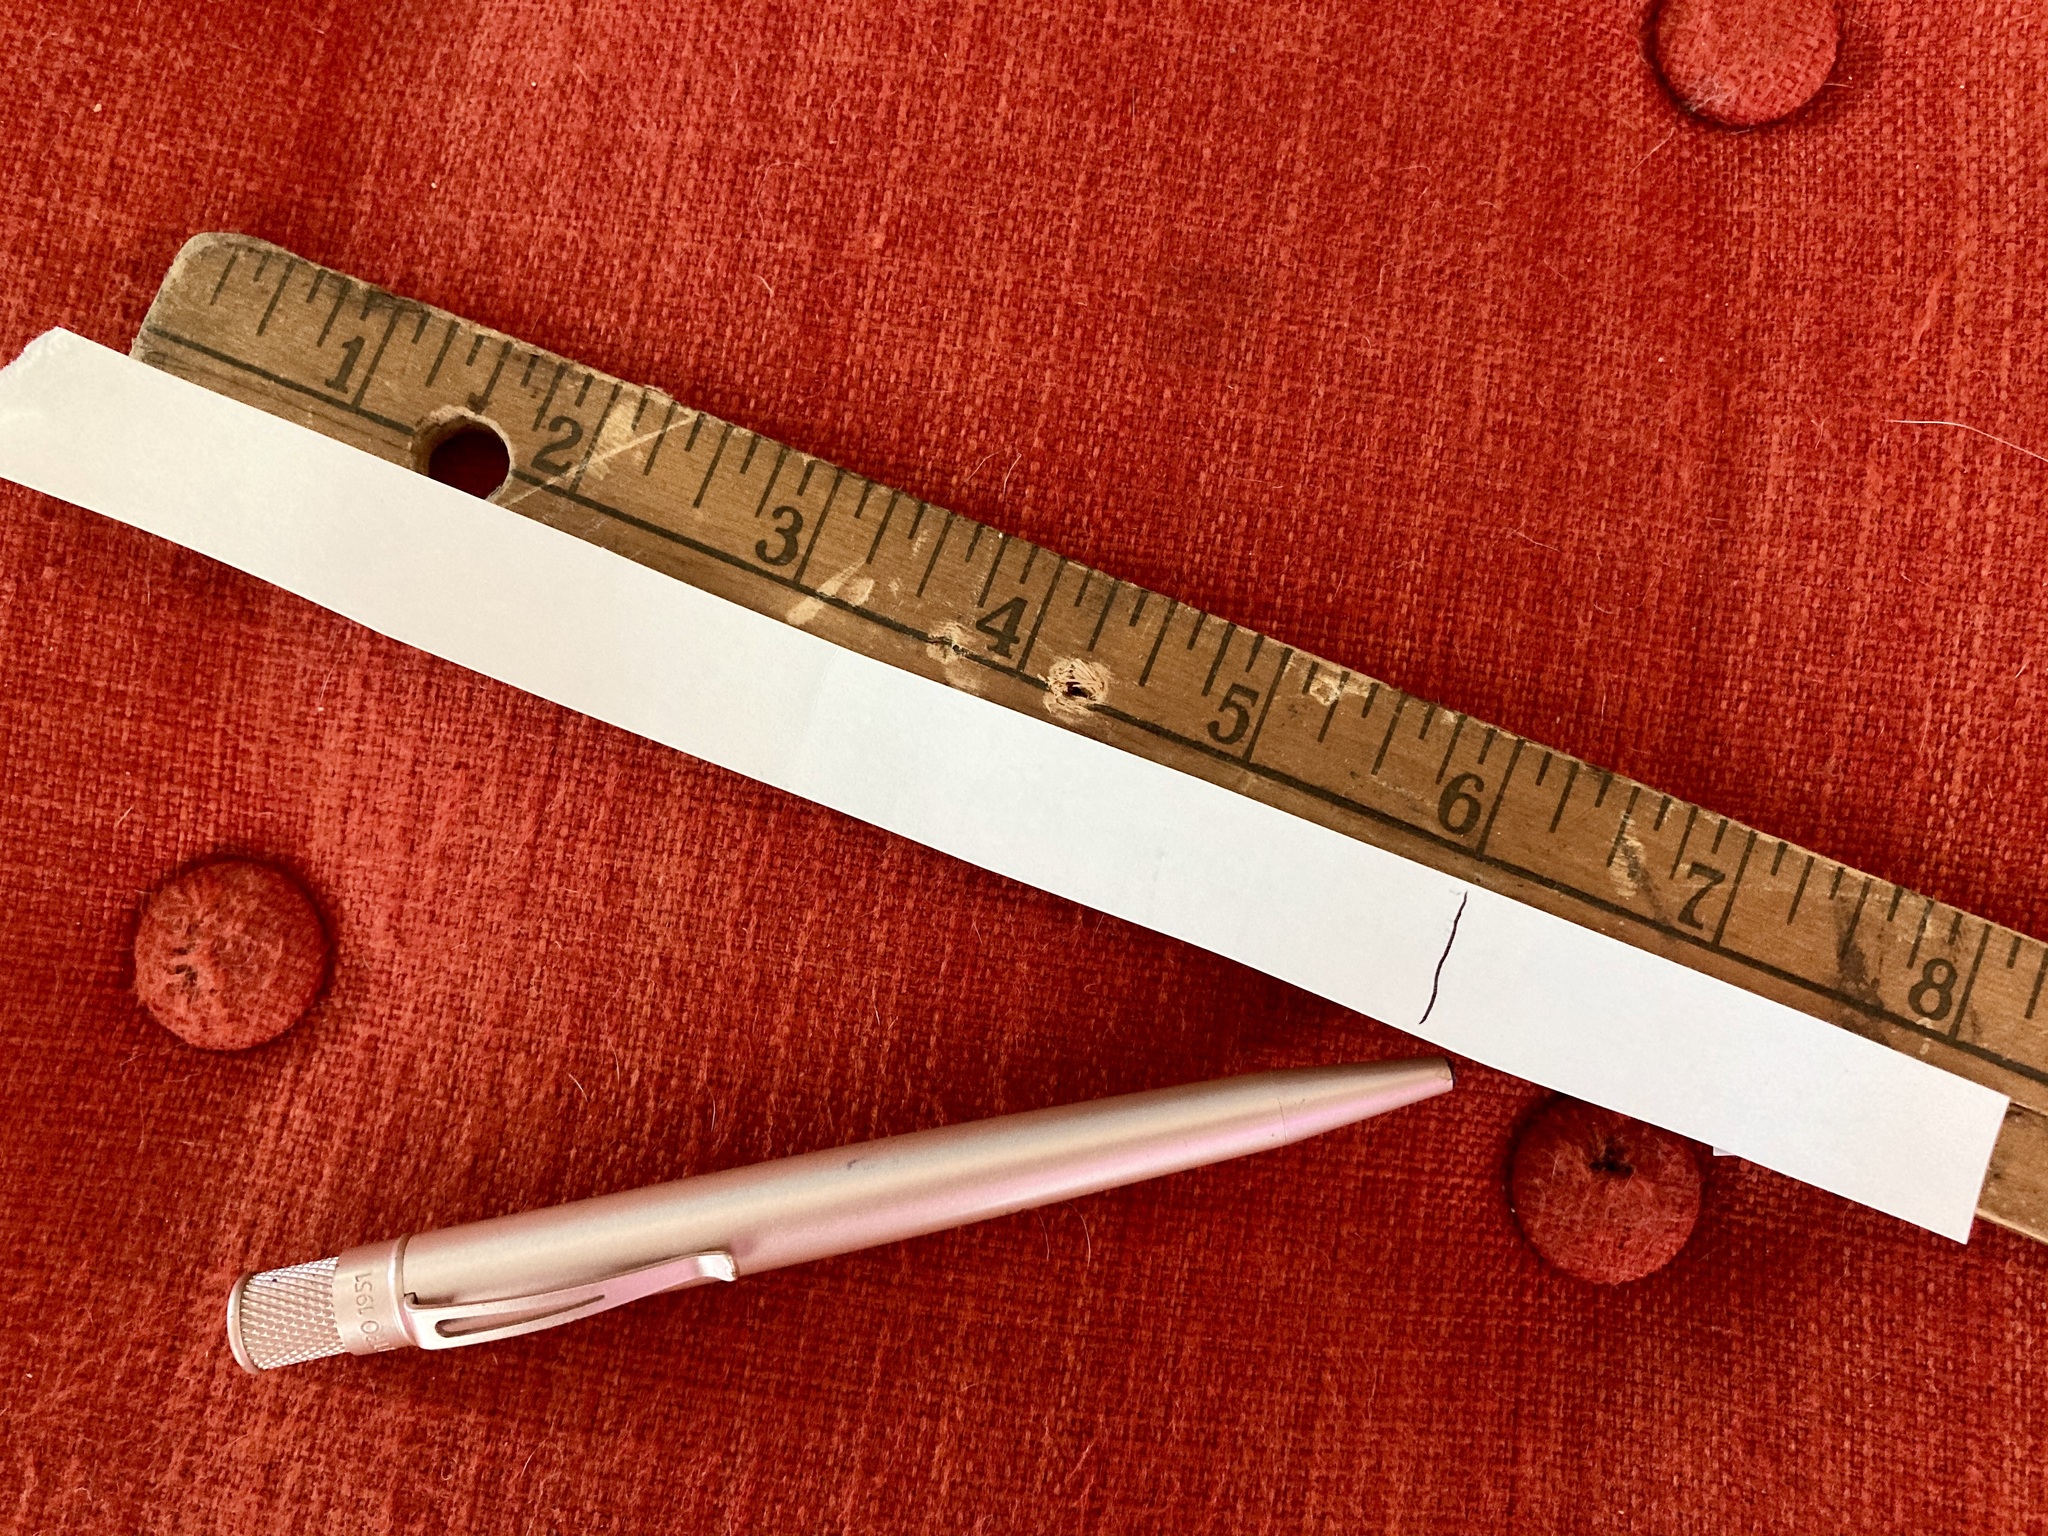
If you don't have a soft tape measure or you can't print out Apple's measuring tool, you still have a way to measure your wrist if you have a ruler, paper, and a pen or pencil lying around.
- Cut a straight strip of paper about one-half inch wide.
- Wrap the strip of paper around your wrist. Don't pull it too tight. It should fit comfortably but not loose.
- Mark the spot on the paper where the end of the strip overlaps the other side of the strip.
- Lay the strip of paper on a flat surface.
- Use the ruler to measure from the end of the strip to the spot you marked. Note the measurement.
- Select either the Solo Loop or Braided Solo Loop as an option when purchasing your Apple Watch or a separate band.
- Tap or click on Use our size guide.
- Tap or click on the Household objects tab in the size guide window.

- Click or tap on Got it. What's next?
- Enter the measurement you noted, including the fraction of an inch.

- Click or tap Get your band size.
- Click on Continue buying... once your band size appears.

If you are cross-checking against Apple's official sizing guide the number you found on the guide should match the number Apple recommended when you measured your wrist. Now you know that you correctly measured your wrist for the Solo Loop.
Sorry, this band doesn't fit your wrist size
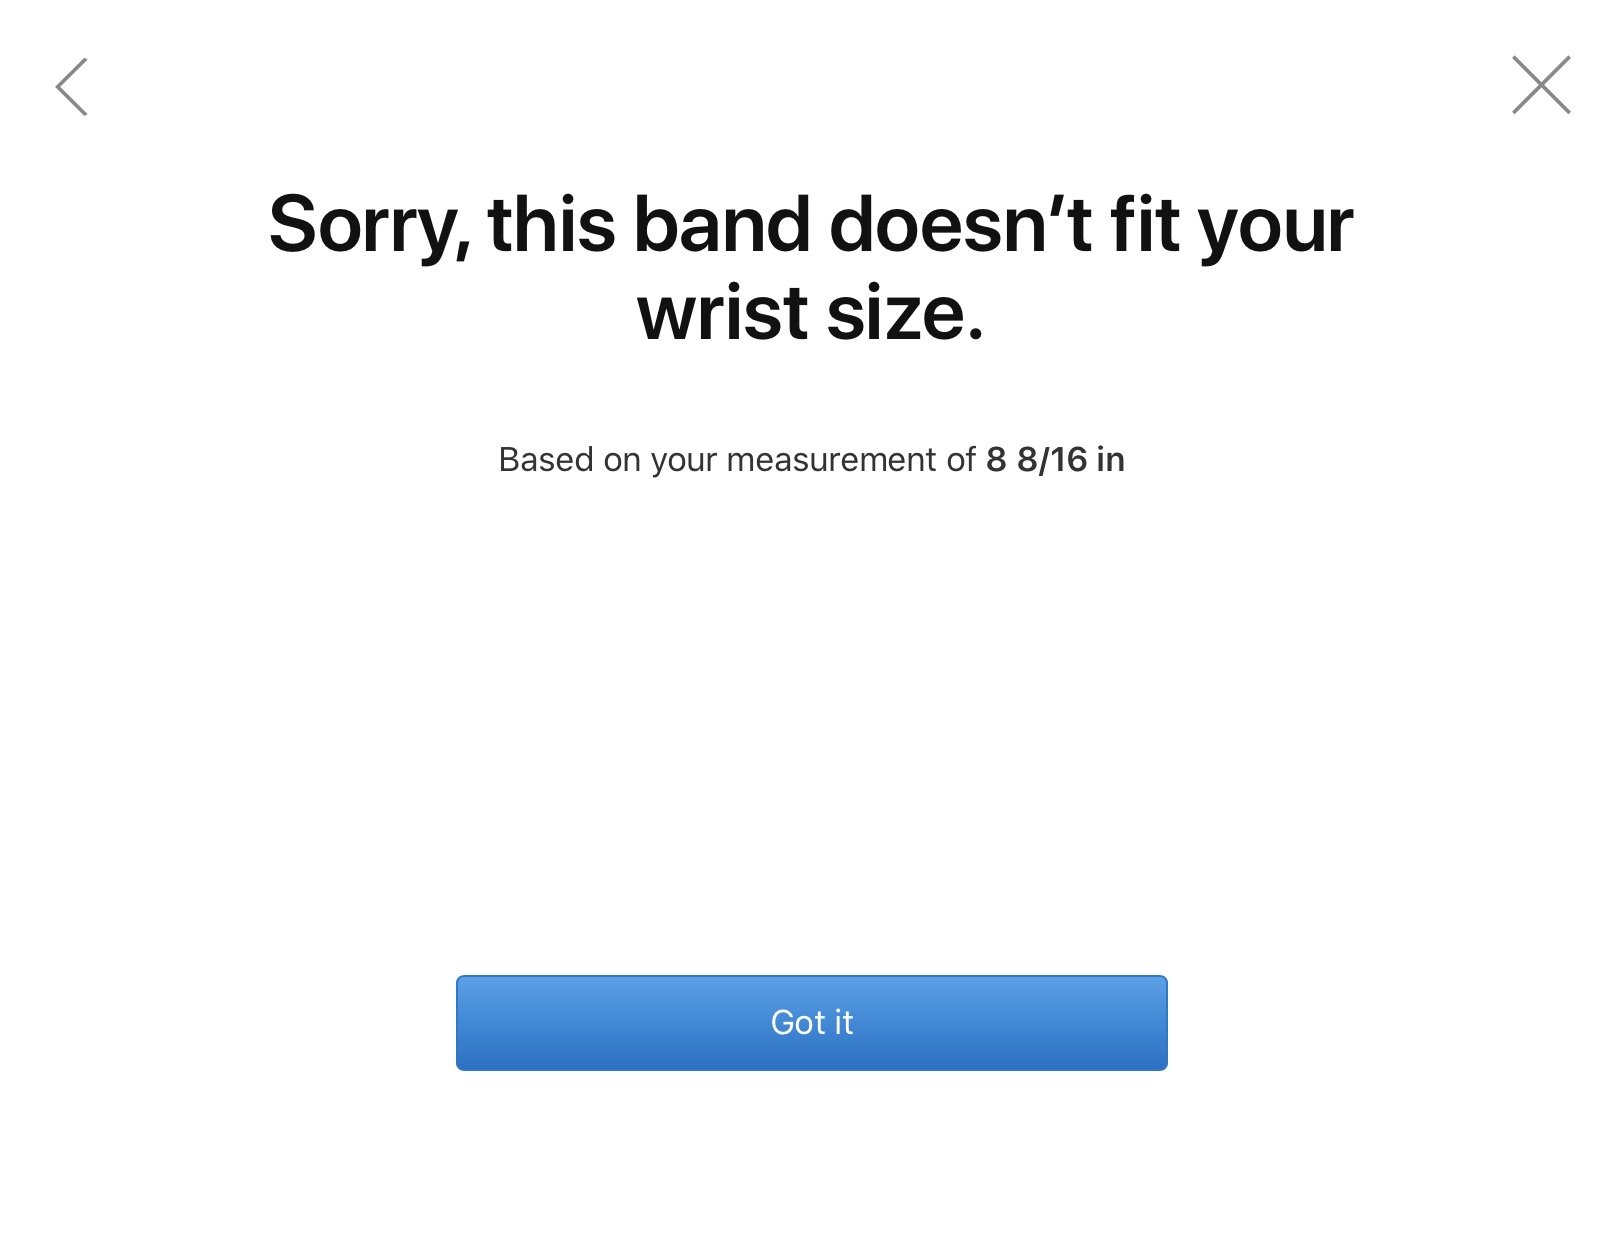
Though you can pick a band small enough to fit around a wrist as small as 5-inches in circumference and as large as 8-inches in circumference, if your wrist is extra-large or extra-small, you may not be able to select this band. Instead, I recommend one of Apple's Sport Loop styles.
I have a friend that has a large wrist and told me the standard Sport band fits, but is uncomfortably tight. The Sport Loop has more sizing versatility and fits him comfortably.
Some of the best Apple Watch Bands are not necessarily Apple brands and they come in a wide variety of styles and sizes.
Any questions?
Do you have any questions about how to measure your wrist for Apple's Solo Loop or Solo Braided Loop? Put them in the comments and I'll help you out.
Lory is a renaissance woman, writing news, reviews, and how-to guides for iMore. She also fancies herself a bit of a rock star in her town and spends too much time reading comic books. If she's not typing away at her keyboard, you can probably find her at Disneyland or watching Star Wars (or both).


