How to reclaim disk space from 'System' in macOS High Sierra
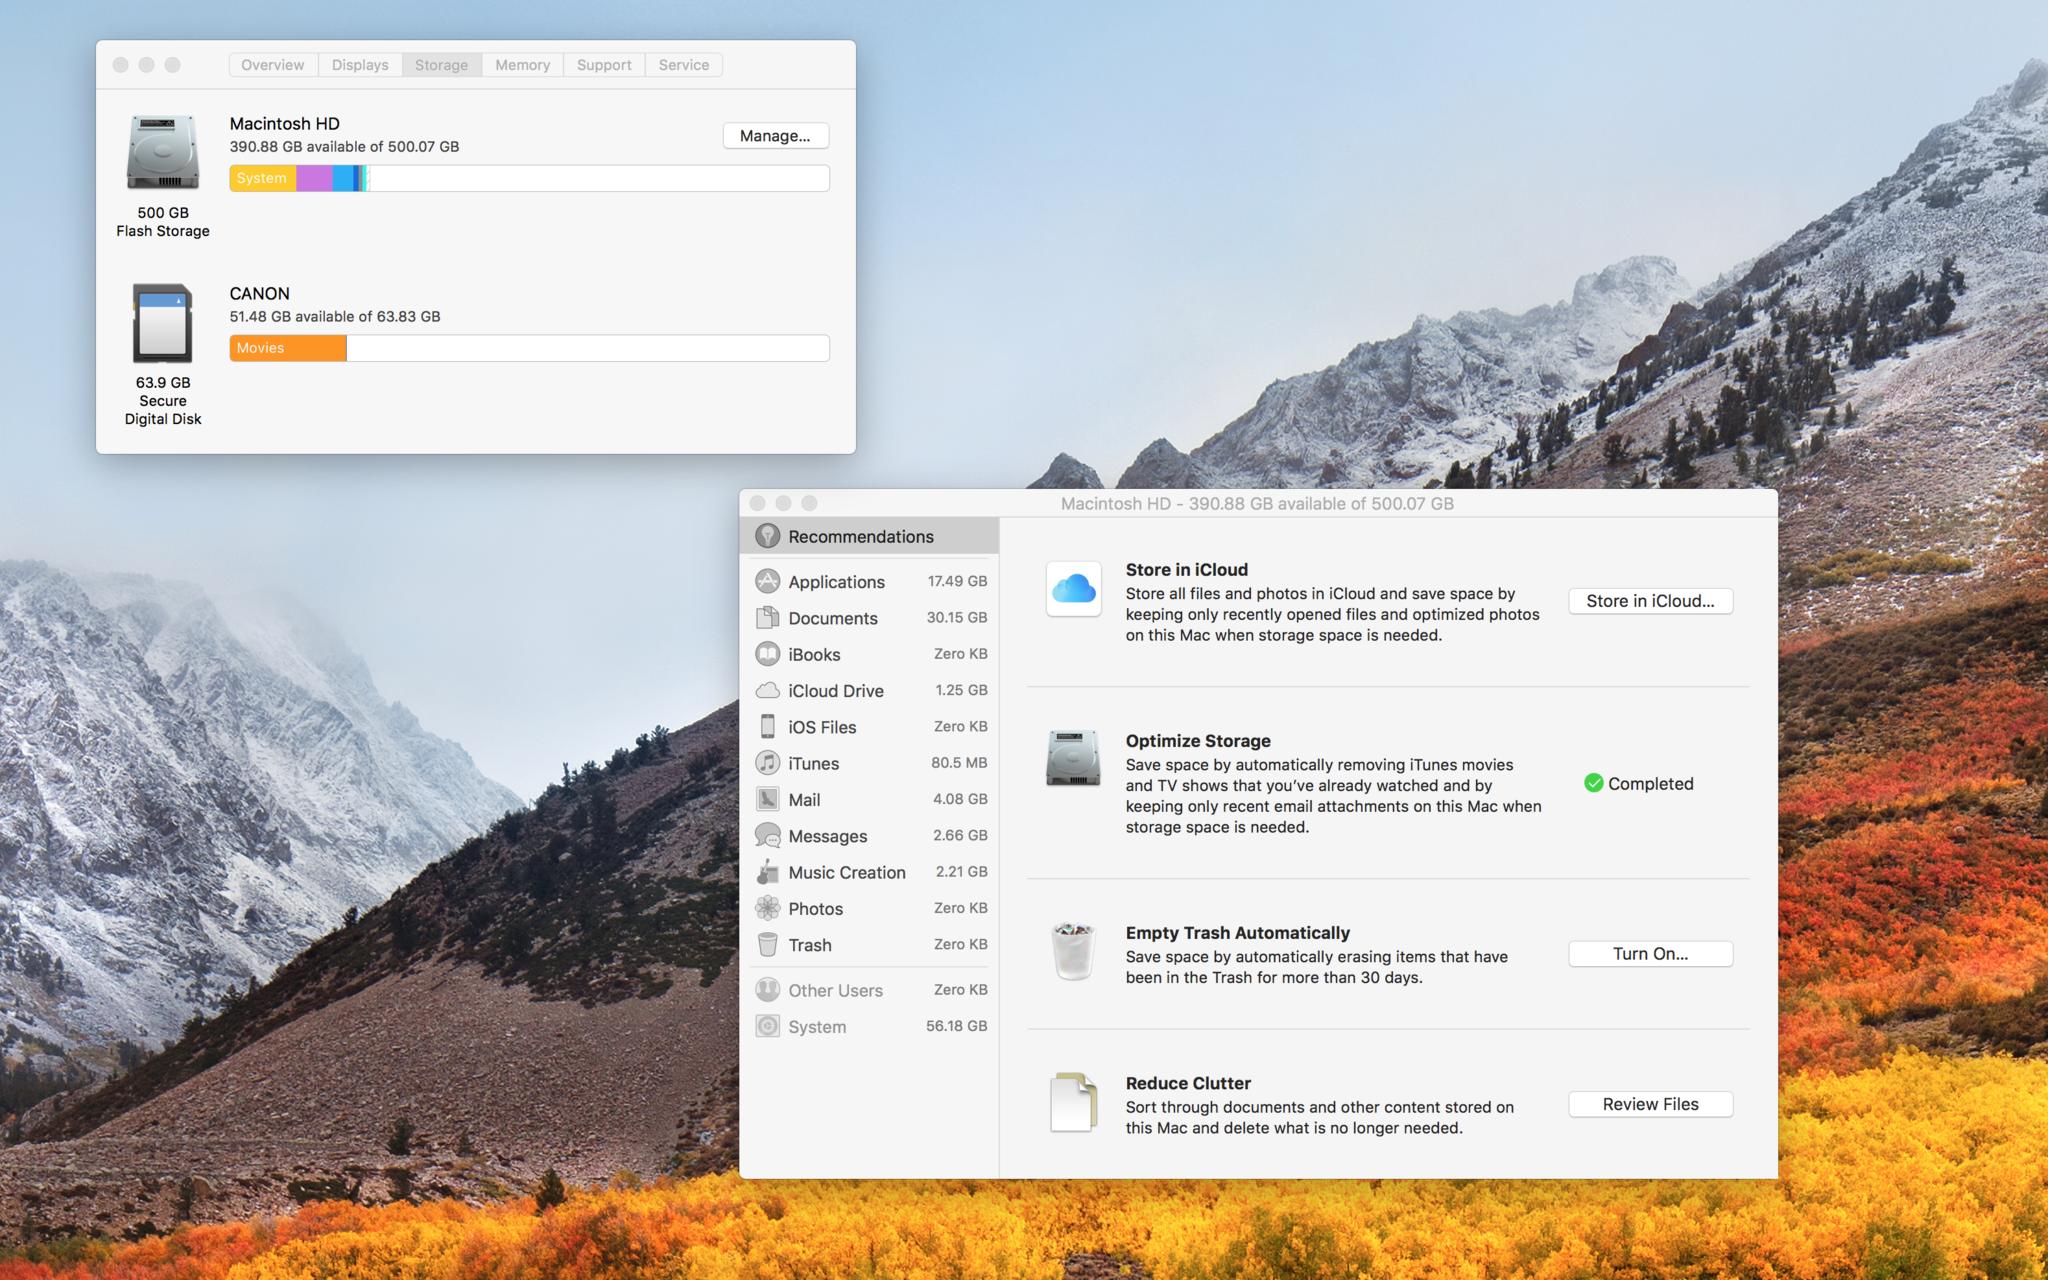
Having to play around with large video files can be a headache when my system has a blazingly fast SSD drive but is only 500GB in size. Going to the macOS storage analyzer can be a mixed bag of easy to understand actions to reduce disk usage to cryptic descriptions that are more daunting to deal with.
We have spoken about how to rid your computer from data noted in "other" which in short is space taken up by caches, plug-ins, and documents. But now we'll show you how to reclaim some of your disk space from your "System" disk usage.
- Time Machine and local backups
- How to determine if a lot of your disk space is being used by "System"
- Purging old snapshots
- Comments
Time Machine and local backups
If you run Time Machine for backups over Wi-Fi like I do, then macOS High Sierra will simultaneous use your remote backup disk and your local disk to save backups to. The reasoning behind this is that in the event the remote backup disk is not available or present, then you can recover files in spite of a missing remote backup disk and recover from the local disk.
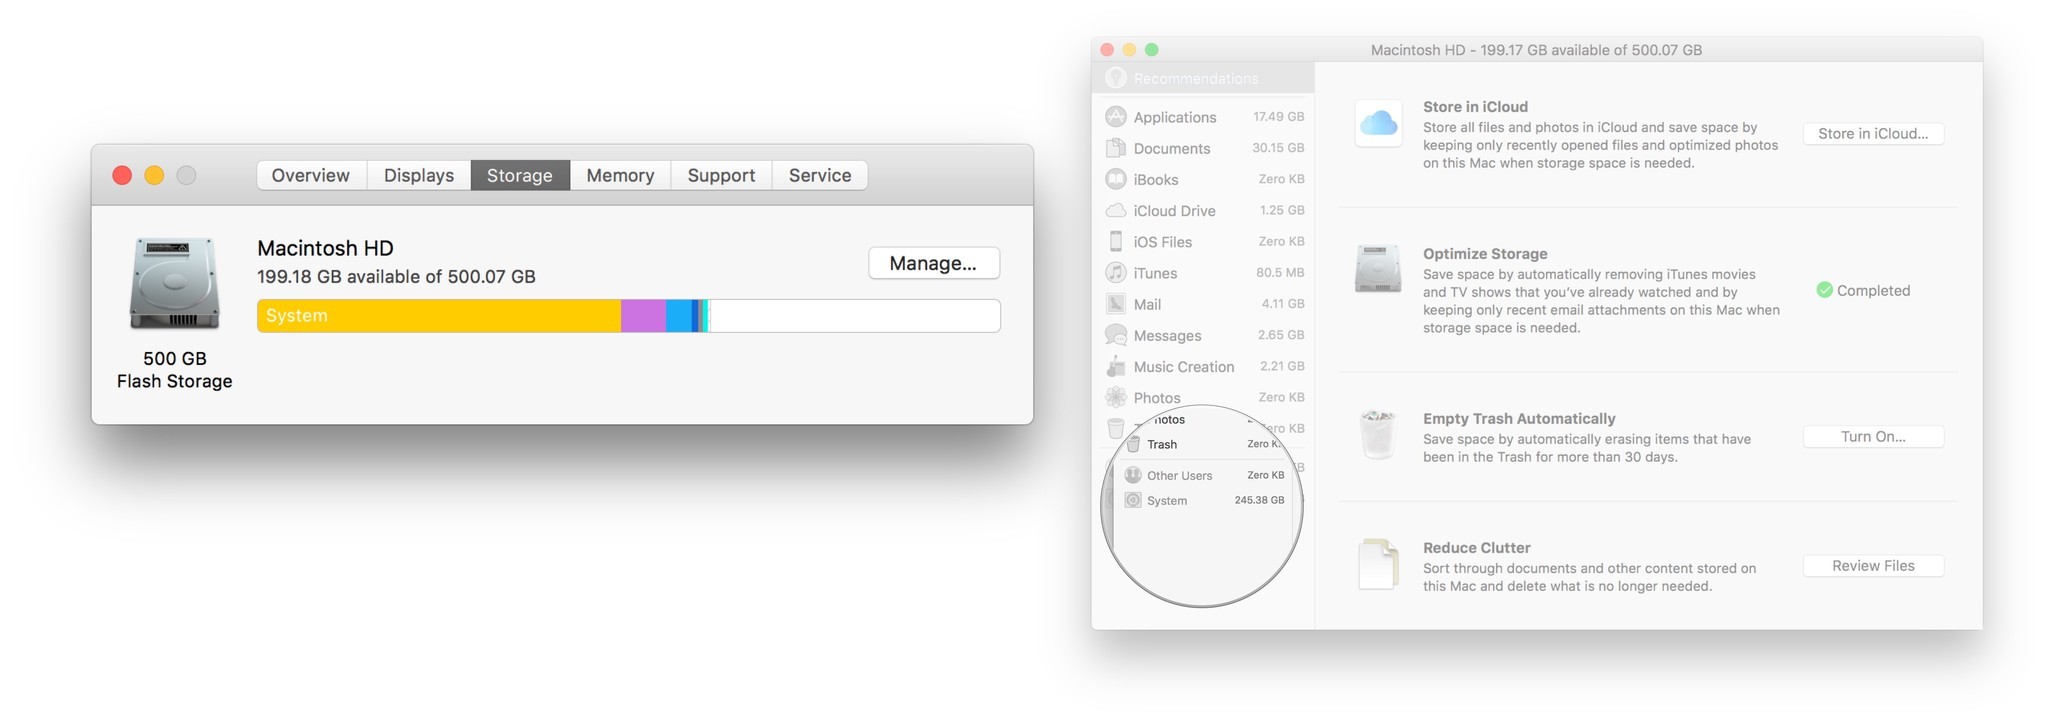
In fact, macOS High Sierra manages this disk usage seamlessly without user intervention. It also purges local backups if disk space starts to get too low. However, sometimes the purging doesn't happen to leave enough disk storage for my very large video files and I'll get a "not enough disk space" message. And instead of waiting for macOS to catch up with my disk space requirements, I can force the purging from the terminal.
Determining if you have a large amount of "System" disk usage
To see if this method will help you reclaim some disk space we need to check the macOS System Information.
- Click the from your desktop.
- Click About This Mac.
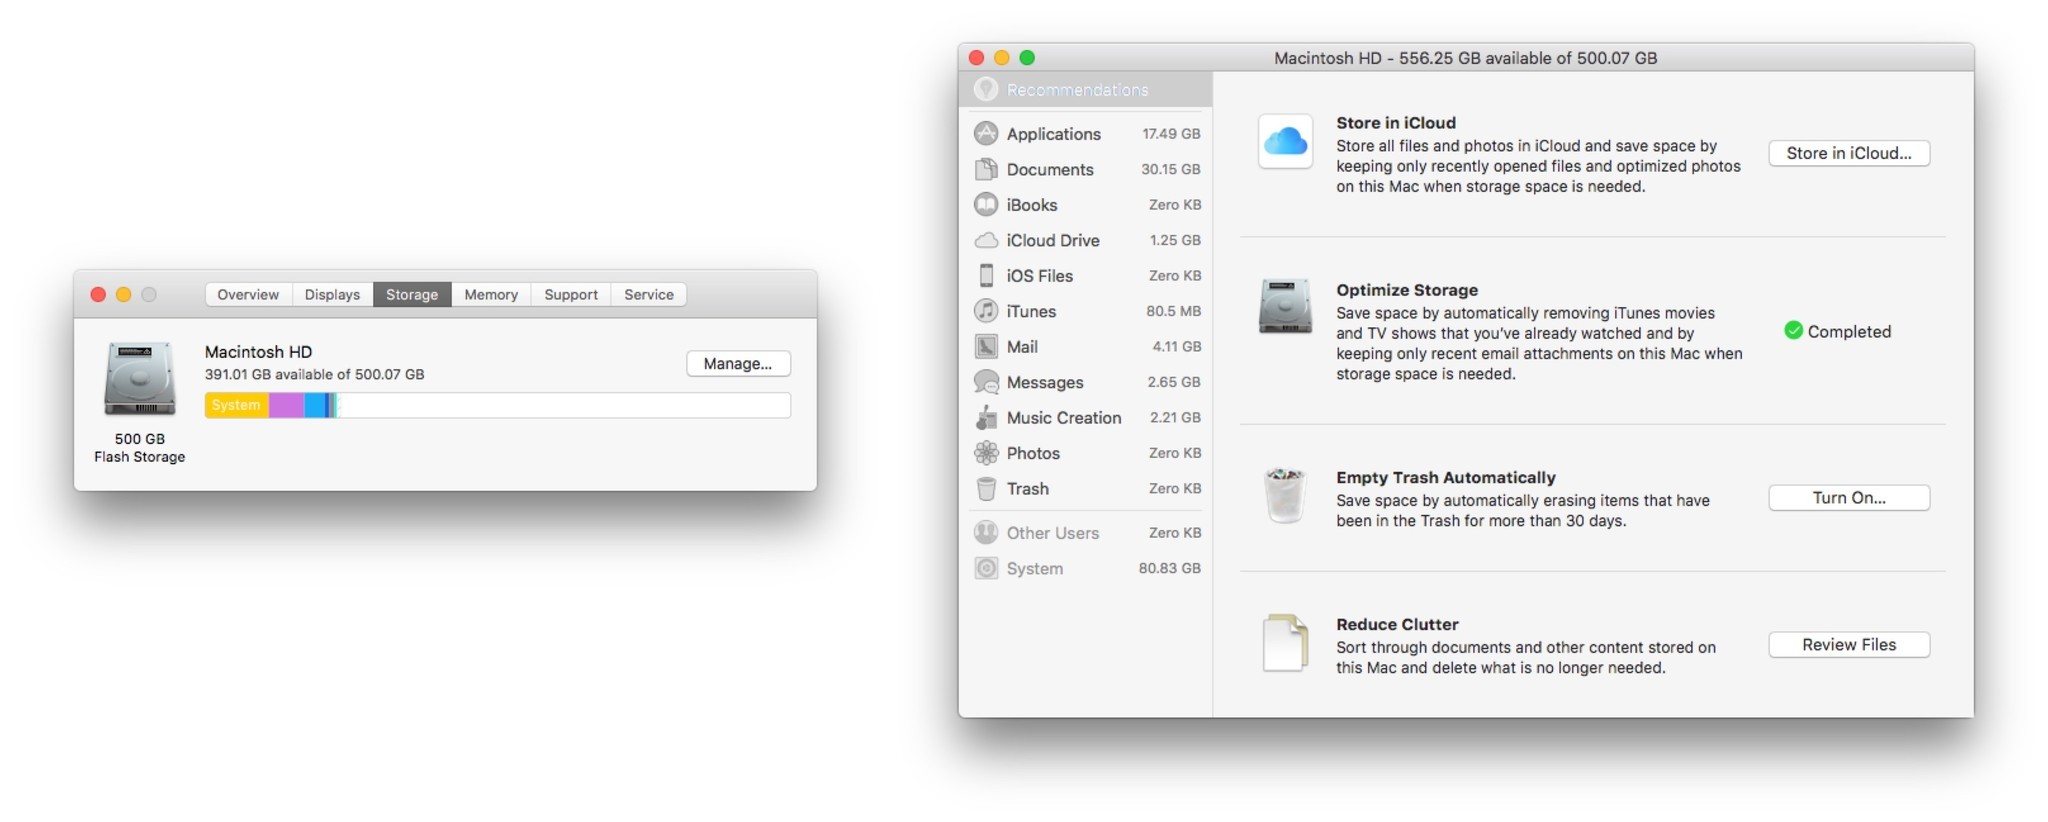
- Click the Storage tab. You'll be greeted with a color-coded categorization of what your disk is being used for.
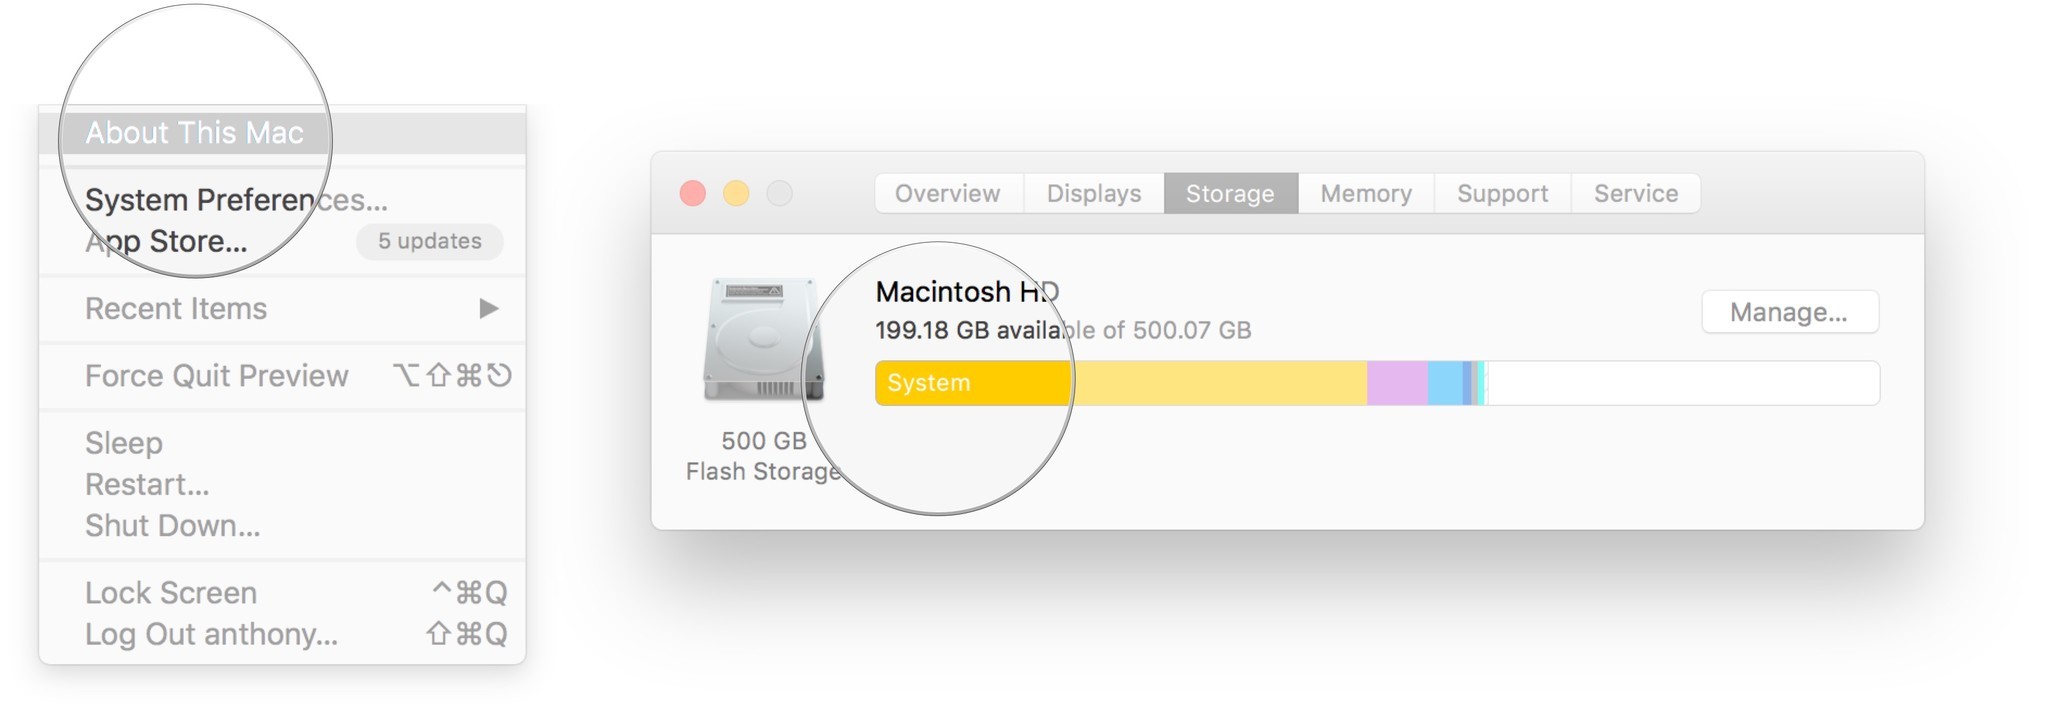
In my case, "System" (meaning the operating system) was clearly using the most space. Although I understand the reasoning behind why Time Machine is storing local backups, I didn't feel that I needed so much of my disk space devoted to these local backup snapshots.
If you have other categories that have very high disk usage you can click the manage button to get more details on what is using that disk space and possibly delete those things that you determine to no longer have use for.
Master your iPhone in minutes
iMore offers spot-on advice and guidance from our team of experts, with decades of Apple device experience to lean on. Learn more with iMore!
Purging local backups
Please note that although this doesn't affect your remote backup from Time Machine, this will get rid of the redundancy (at least until the next Time Machine backup) that a local backup disk will provide. If you need such redundancy or are worried about the recovery of your data then you would be best served to let macOS determine when to purge these files.
- Start Terminal from spotlight.
- At the terminal type tmutil listlocalsnapshotdates.
- Hit enter.
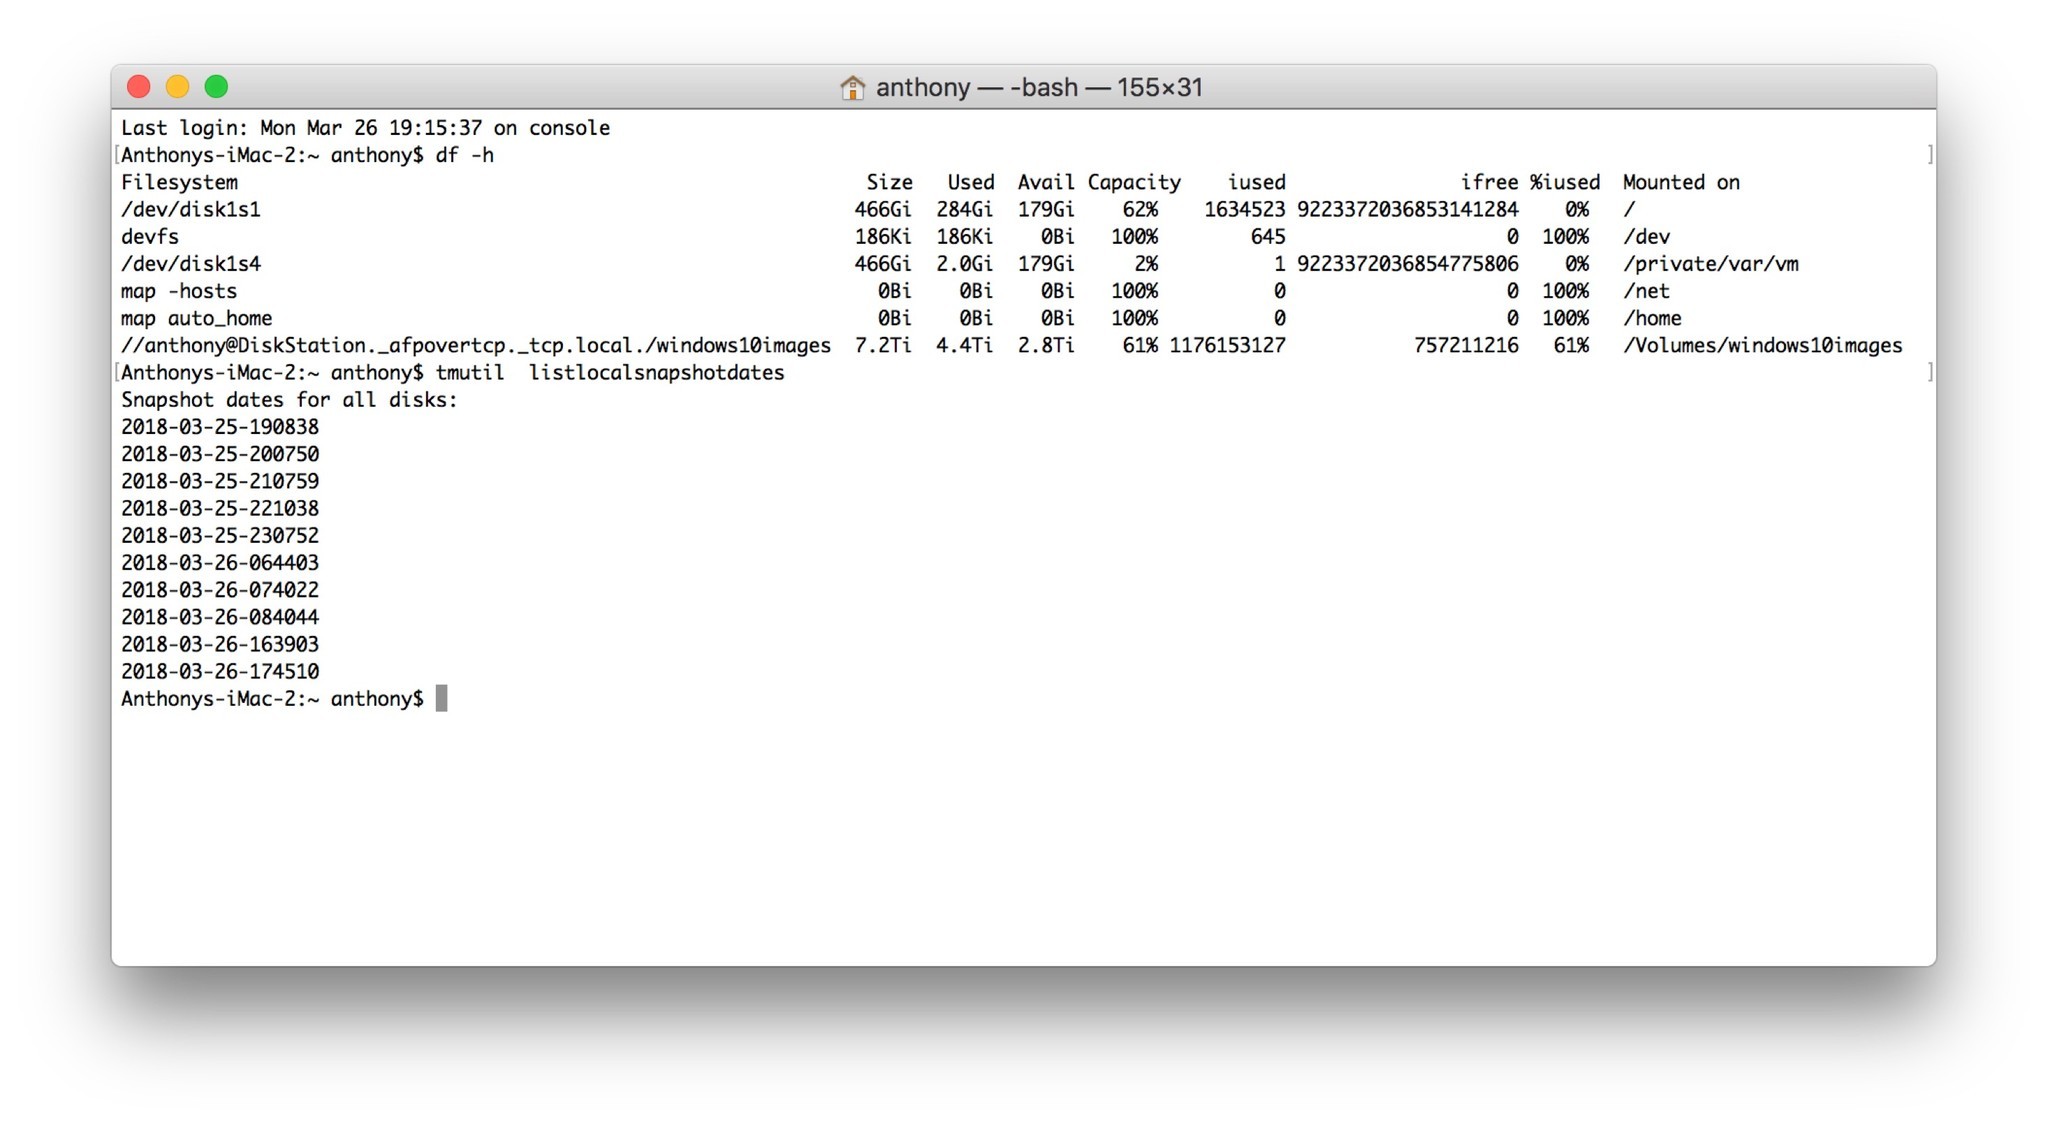
Here, you'll now see a list of all of the locally stored Time Machine backup snapshots stored on your disk.
Next you can remove the snapshots based on their date. I prefer to delete them one at at time. Once my "System" disk usage is at an acceptable level, I stop deleting but you can delete all of them if you want to reclaim all of the disk space.
- Back at the terminal, type tmutil deletelocalsnapshots [[ date ]] where [[ date ]] will be one of the dates from your backup. This will be in the form of xxx-yy-zz-abcdef. Try to start with the oldest snapshot.
- Hit enter.
- Repeat for as many snapshot dates as required.
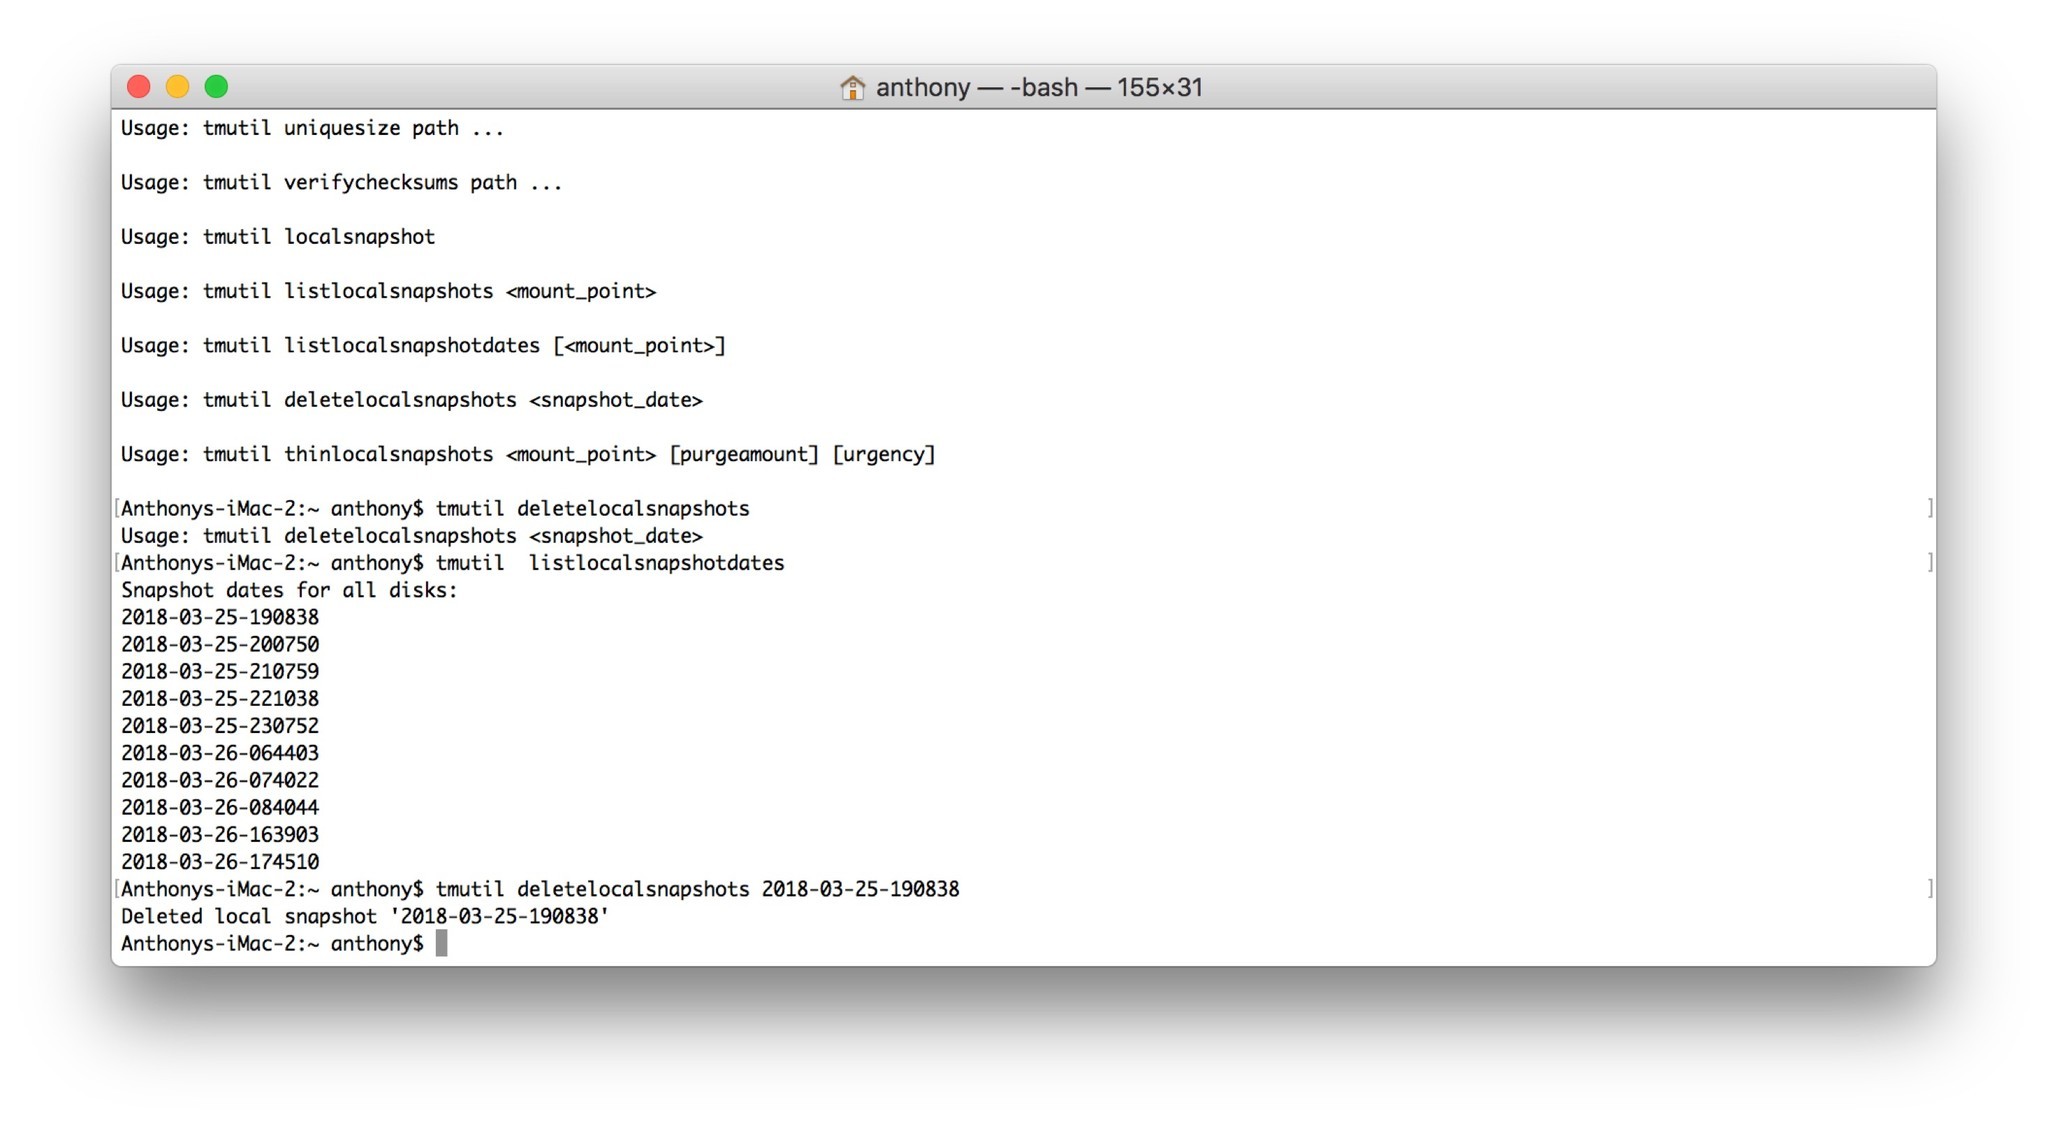
You can watch your System Information graphic free up disk space in real time to see if you've removed enough.
Comments
I want to stress that this should only likely be used if you absolutely immediately need to reclaim the disk space. Otherwise macOS does a pretty good job in managing the unused disk space for local backups and purging when it deems necessary.
Are you running out of disk space? What have you done about it? Let us know in the comments!

