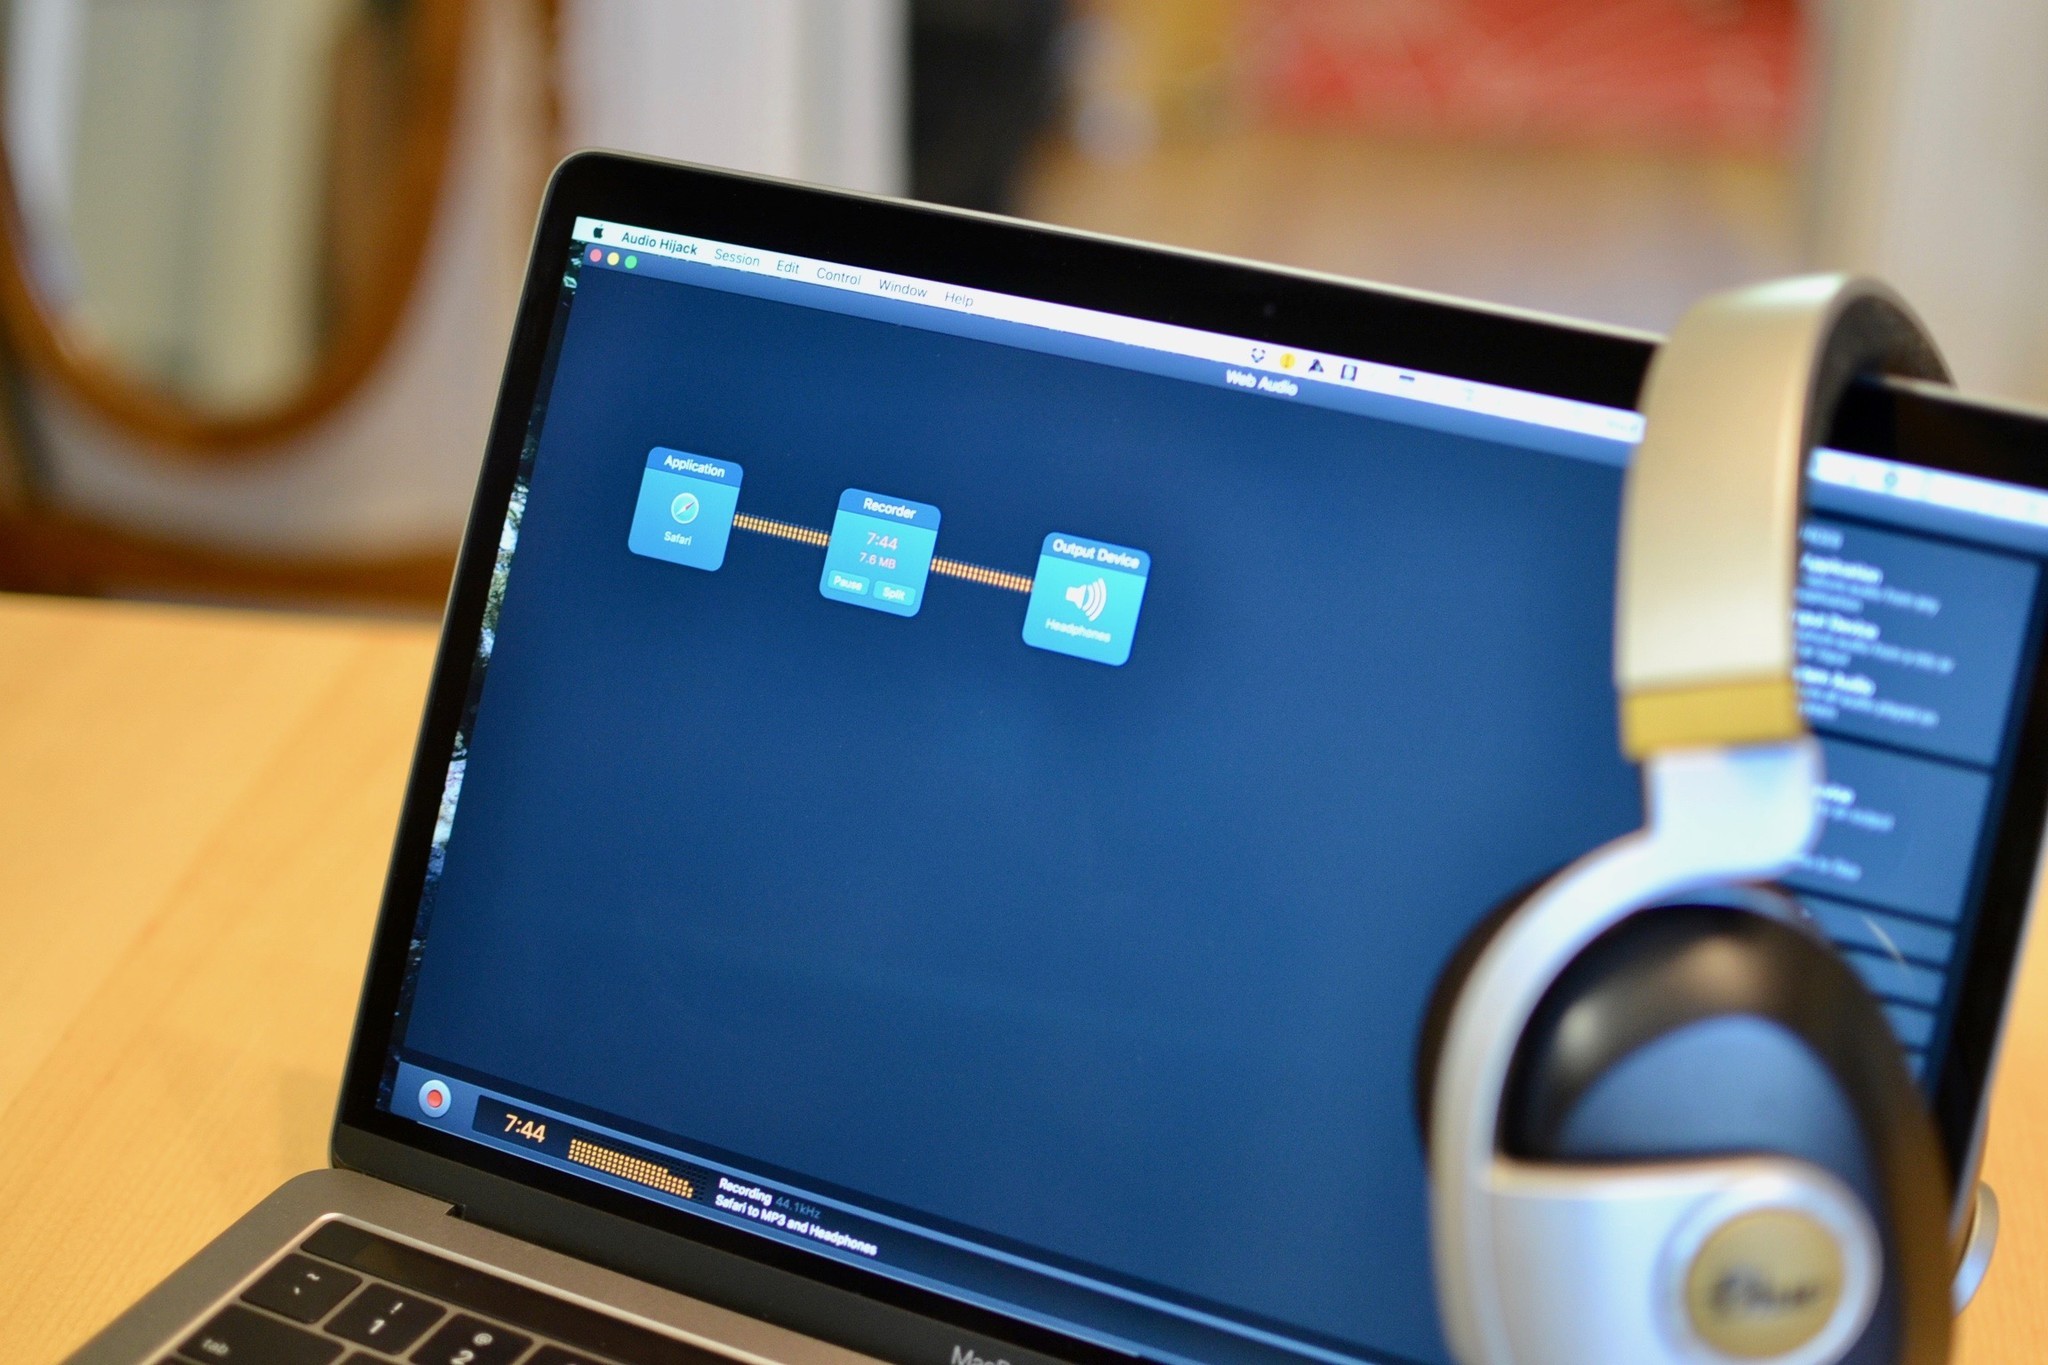
If you have any need to record an audio track on your Mac — from the web, from your microphone, from some streaming source, from a connected musical instrument — Audio Hijack is the perfect program for getting the best recording with the least amount of effort. Audio Hijack is a recording program that is designed to capture anything that plays from your Mac or a connected input device like a microphone or mixer. What makes it stand out in the crowd is just how easy it is to use.
What do you mean any audio?
I mean any audio. You can record audio streaming from websites or dedicated apps, from a DVD, from a record player that's connected to your Mac, VoIP calls, your personal podcast audio, and even all audio that is coming out of your Mac, system-wide. If sound comes from or goes into your Mac, you can record it. It's very easy to set up and use without needing any real instructions.
There are, however, additional features that make Audio Hijack a must-have addition to your Mac if you take a few minutes to learn about them. For example, you can schedule a recording. So, if a special announcement is going to air at a specific time, but you won't be around to listen to it, you can set up Audio Hijack to record a session, even if you're not around to press record.
You can also adjust audio settings with EQ and balance tools, pause and rewind live audio while it's recording, and a whole lot more.
Audio Hijack can create all major audio files it records, including MP3, AAC, AIFF, WAV, ALAC, and FLAC.
How do I use Audio Hijack to record audio from the web?
If you're ready to go, here's how to record audio from the web, edit tracks after your recording session is over, and export them to another application on your Mac or share with others.
- Step 1: Set up a new session
- Step 2: Post production
- Step 3: Exporting tracks
- Tips for recording audio from the Web
Step 1: Set up a new session
First, you'll need Audio Hijack 3. It costs $59 (or $25 if you're upgrading from an older version). You can also download a trial version if you'd like to test the waters before deciding to buy. But I'm pretty sure you'll want to own this program after you've tried it.
Master your iPhone in minutes
iMore offers spot-on advice and guidance from our team of experts, with decades of Apple device experience to lean on. Learn more with iMore!
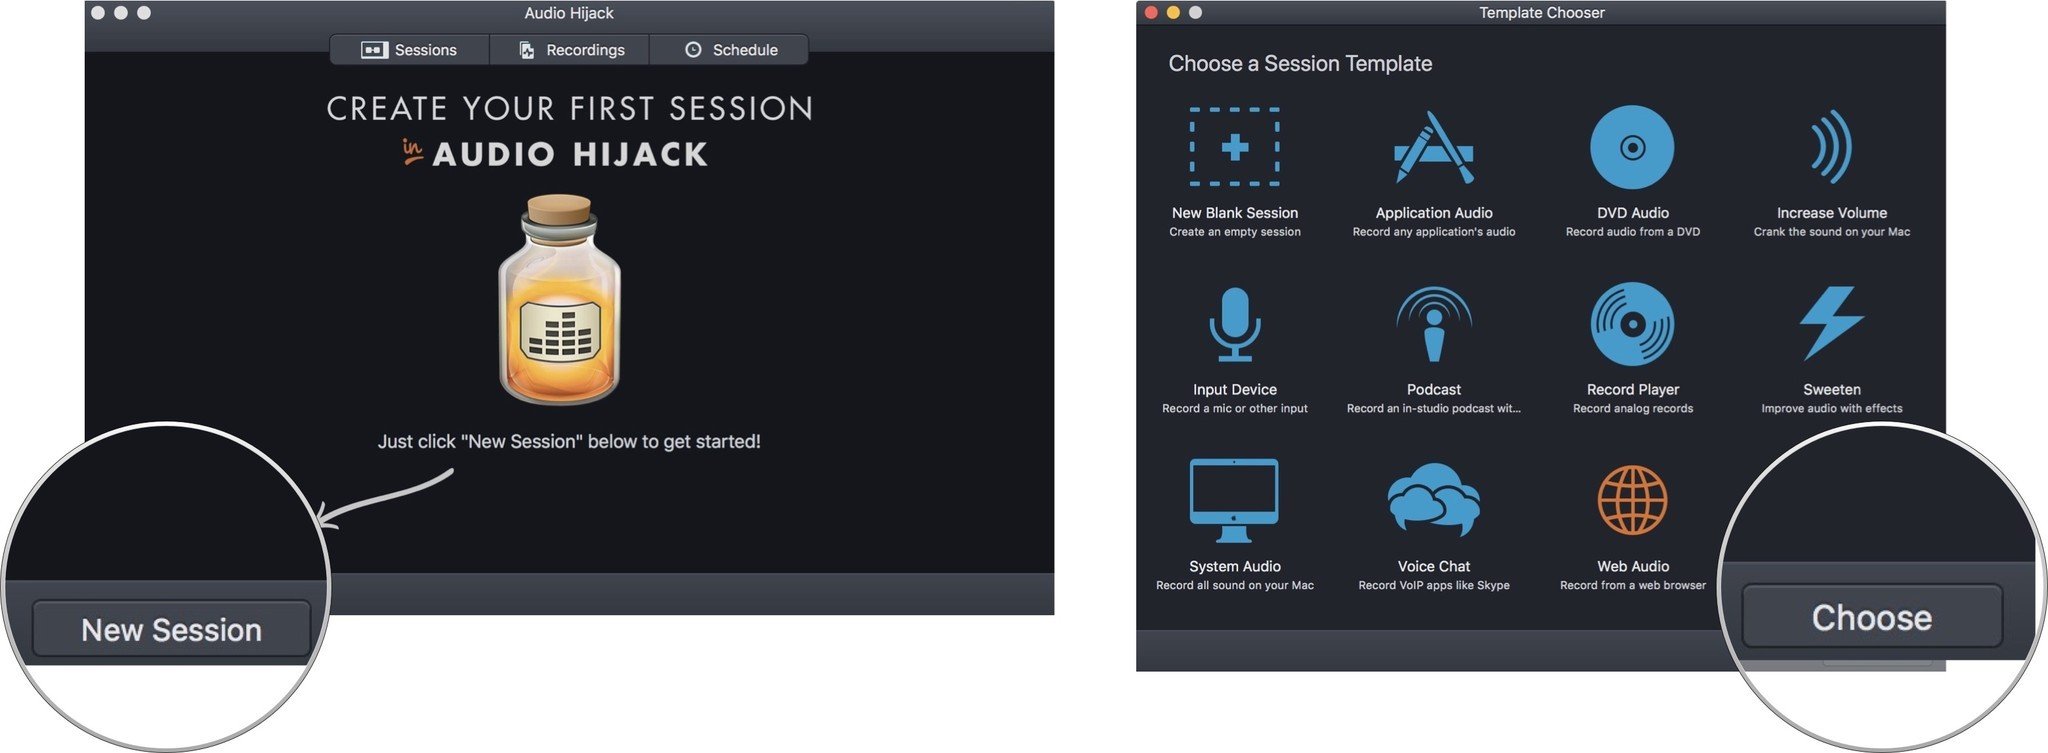
After downloading and opening the app, you'll be prompted to start your first session. Click New Session in the bottom left corner of the program window to get started.
Then, select the audio source you want to record. For this guide, I'm going to select Web Audio. Click Choose when you've selected the source for your recording session.
The recording template will set up automatically. For a web recording, the application, recording file type, and output device will display in the session window. You can manually change these options or add new tools to the recording before beginning the recording.
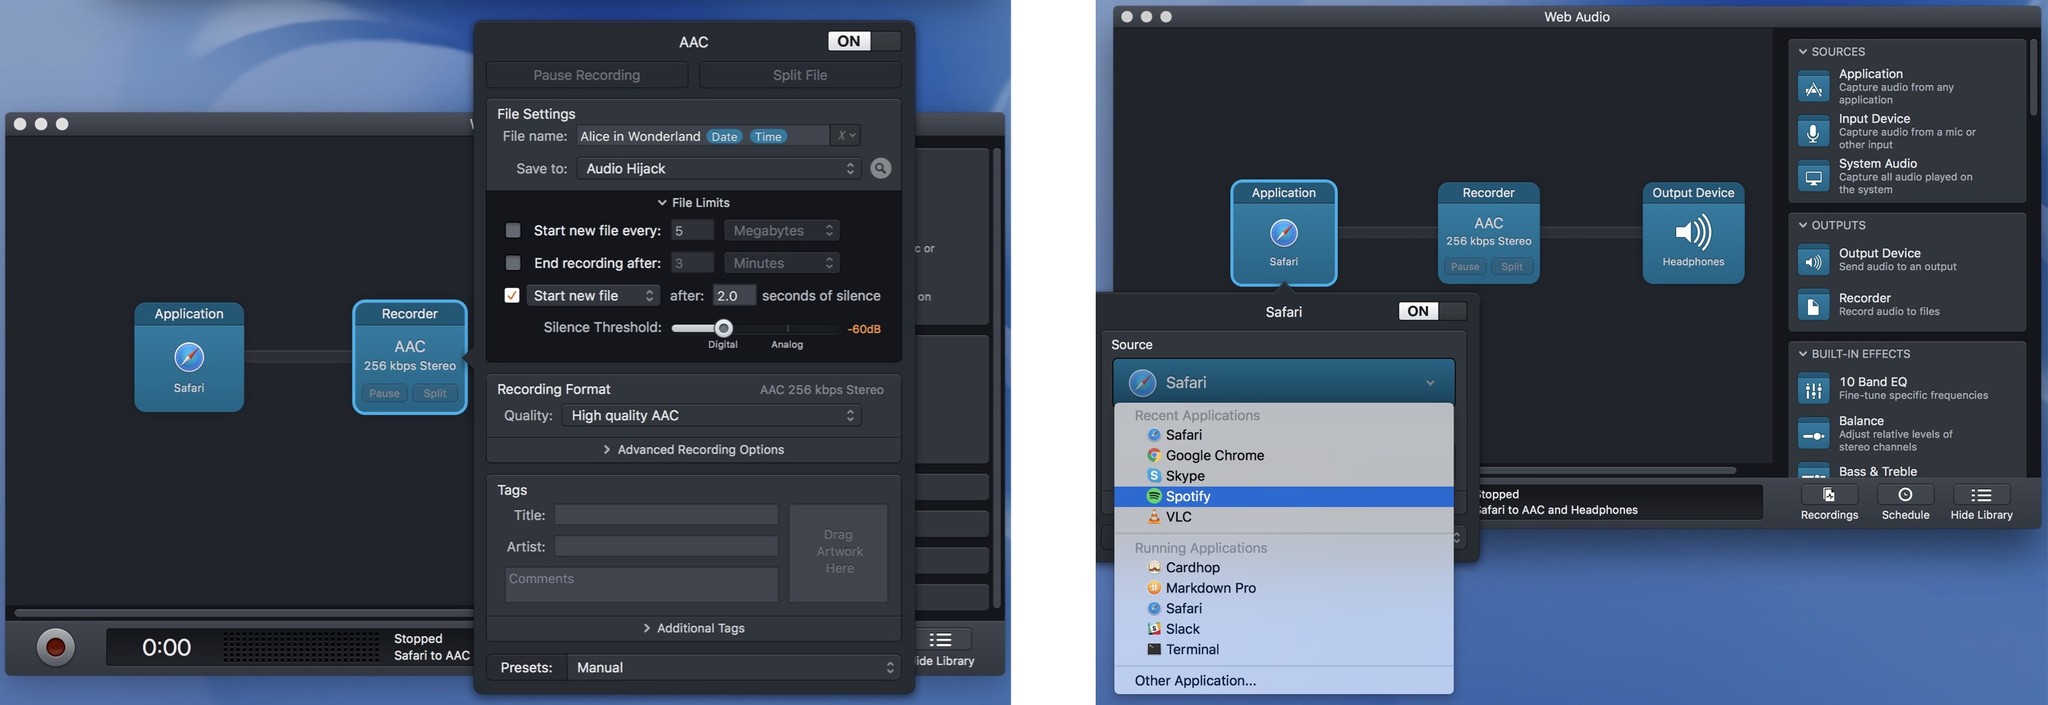
Click on one of the tools, the Recorder, for example, to make changes to the current options.
In the Recorder, you can change the file type and also add some useful tools, like creating a new file if there is more than a few seconds of silence. I love this feature for creating tracks for albums.
If you decide not to use the web to record audio, you can click on Application to select a different audio source, like Skype, VLC, or Spotify. You can even choose from any application on your Mac if you want to record audio from, say, Plex, GarageBand, or even Steam.
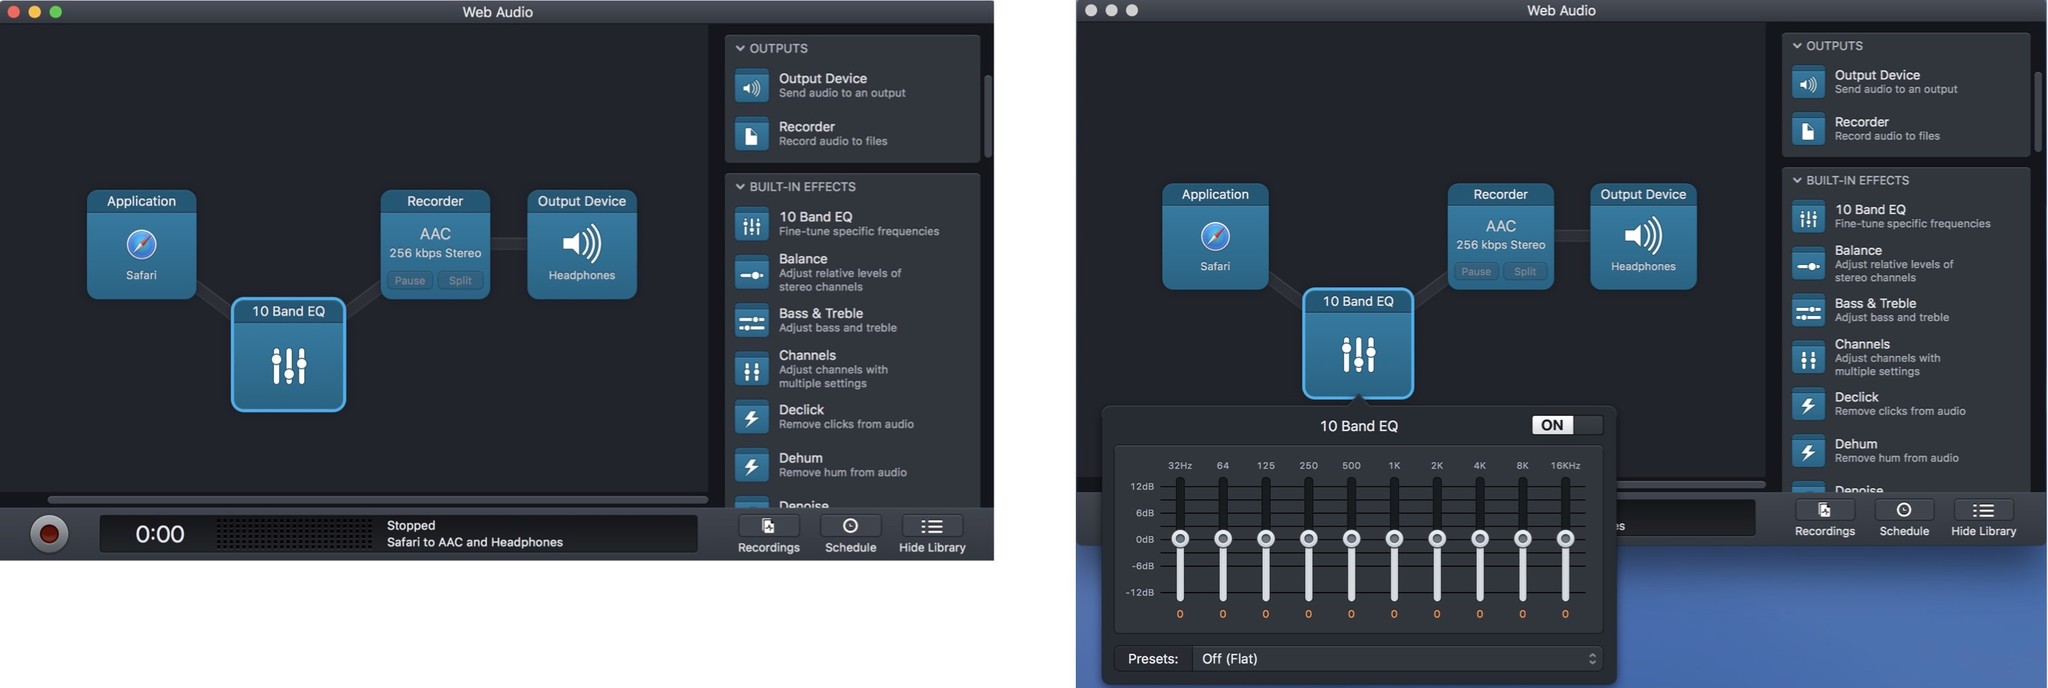
Depending on what you're trying to do, you can add built-in effects, like a 10-band EQ for fine-tuning your audio or a balance adjuster for making sure the audio gets picked up in both the left and right stereo channels. To add a tool, simply drag it from the menu on the right side into the session field.
To remove a tool, press Command+Delete on your keyboard.
You can also designate where the recorded tracks will end up. If you do nothing, they'll be listed under Recordings in the Audio Hijack window where you can then export them to your desired listening application in post-production
Once you've got your tools set up, it's time to record. Here's the easy part. Just press Record.
Step 2: Post production
After your recording session is done, you can do a little tweaking to get everything just right before exporting the tracks to whatever your preferred listening application is (iTunes, for example).
Select Recordings from your Audio Hijack window to find the tracks you just recorded. Here, you'll be able to edit and delete tracks before exporting them
If you set Audio Hijack to create new tracks for each audio stream in a playlist, there's a chance you'll have some unwanted extra tracks in there, depending on where you recorded from (advertisements, for example). You can delete any tracks that you don't want by selecting them and clicking on Delete Recording. You can playback any track in the Recordings tab to find out what they are.
You may not want to delete an entire track but might want to clip out unwanted audio from the beginning or the end. Select the track you want to edit and click Open in Editor from the list of options that appear. You can then select the program you want to edit the file in. You can use any audio track editor you like. I have used it with Audacity, but prefer Rogue Amoeba's $29 Fission 2 editing software simply because it works seamlessly with Audio Hijack.
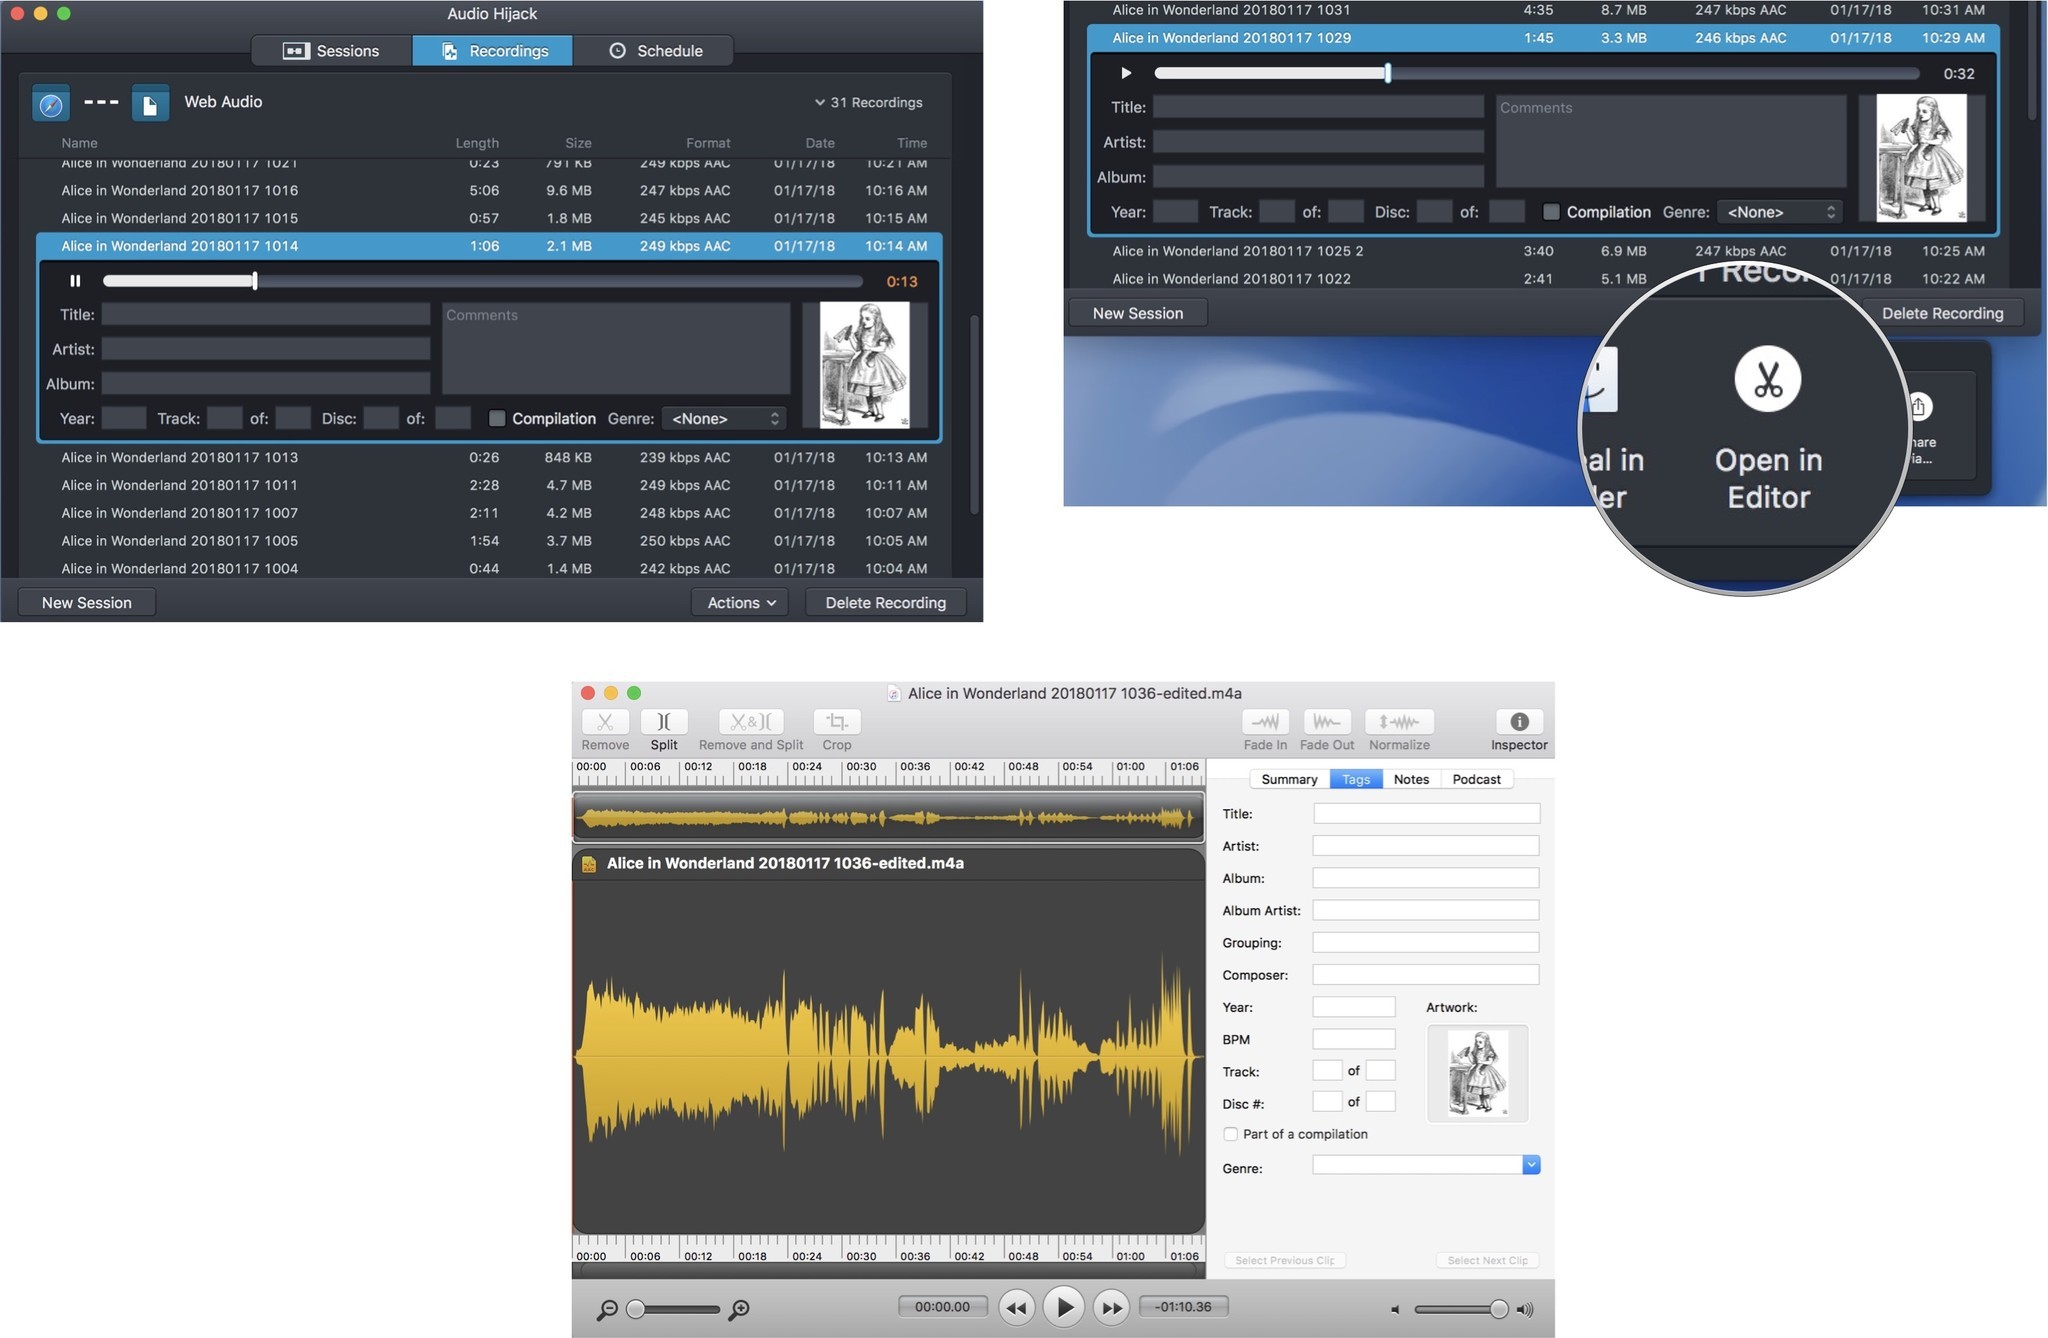
After all of your tracks sound the way you want, you can name them individually if each track has a specific name. You can also add information, like Artist, Album, year, track, and genre. Drop some artwork in to personalize your recording session.
Step 3: Exporting tracks
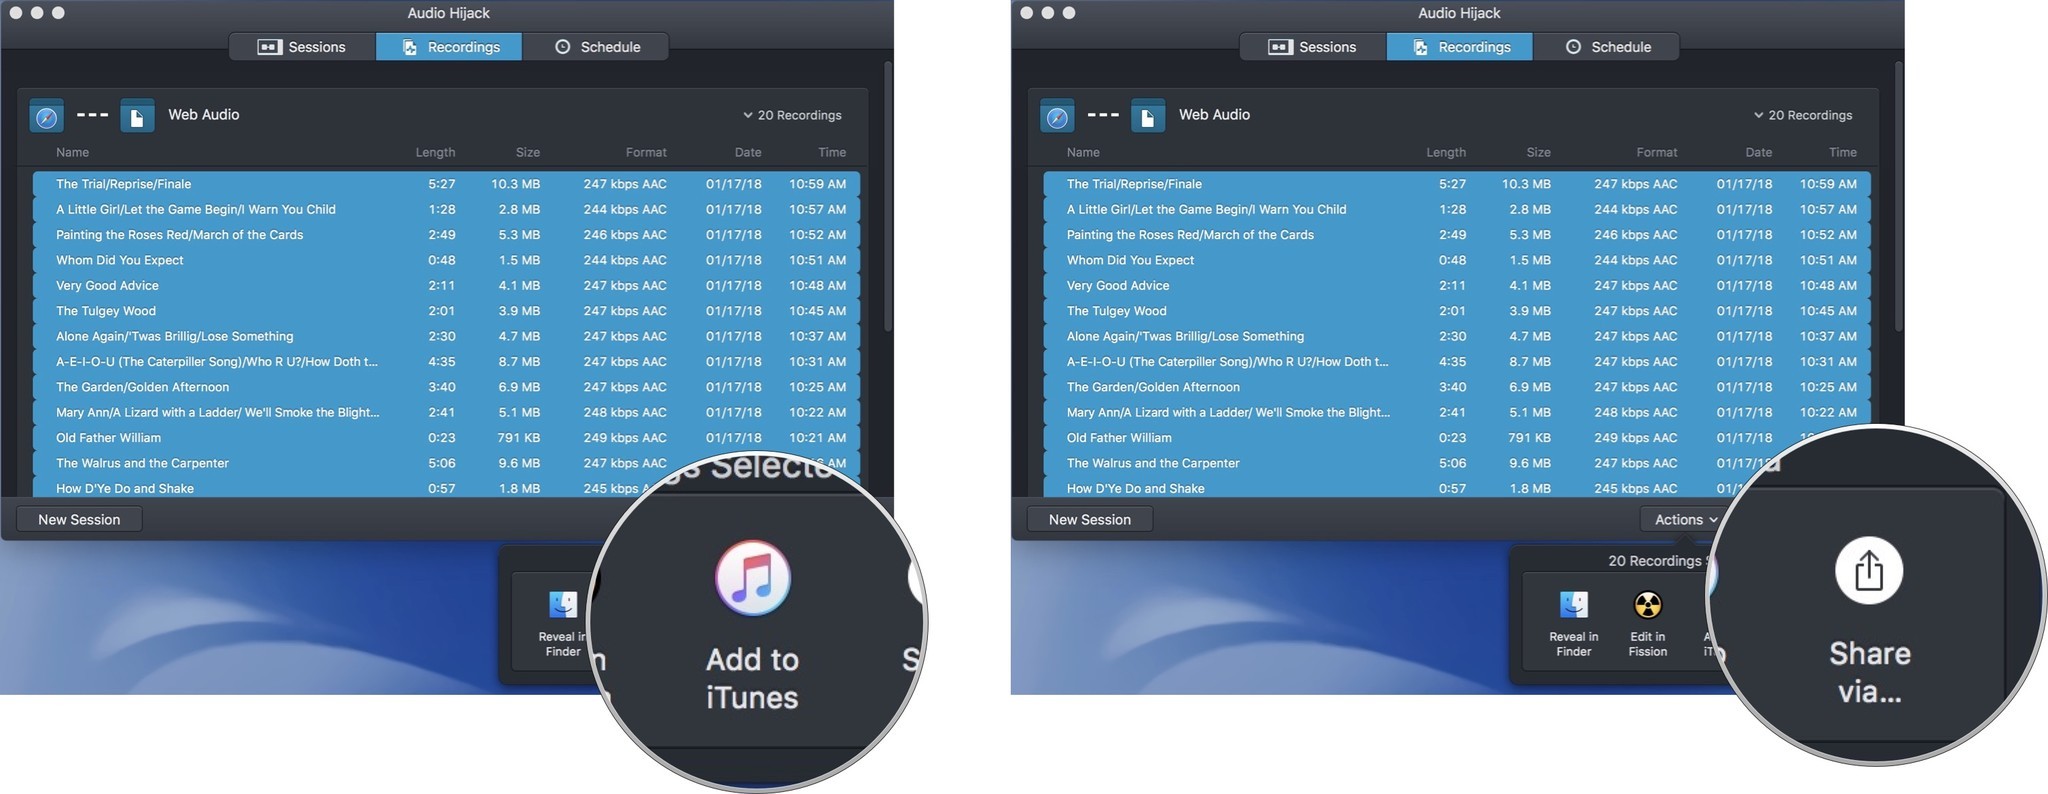
Now its time to export your session. If you just want to keep it on your Mac, you can add it to iTunes, or move it to your desired location from Finder. If you're going to share the recording outside of your Mac, you can send it through typical sharing options, like Messages, email, the Notes app, or Dropbox. Just select the tracks you want to export and click on the Actions button at the bottom right of the Recordings window. Then select with which method you want to send the files.
Tips for recording audio from the Web
If you're recording a playlist from the web, I've got a few tips to make it easier to get most of the work done during the recording process so you only have to do some minor post-production work.
- Download and install the Instant On plug-in (It comes with Audio Hijack but has to be installed separately). Once you have a recording session set up, you can simply click the Play button on whatever audio you're streaming and the recording session will start automatically.
- Set your silence threshold for recording a new track to one second. This is especially helpful if you're recording a playlist that has advertisements. It will create a separate track for those advertisements, which you can delete at any time (including while you're in the process of recording, if you want).
- Give the entire session an album name before you export it. This makes it easier to find tracks if you've sent them to an application like iTunes.
- If you're exporting multiple tracks, put a number in front of each track name so that they will end up listed in the order you want them in their new location.
Any questions?
Do you have any questions about how to use Audio Hijack to record audio from the web? Put them in the comments and I'll help you out.
Lory is a renaissance woman, writing news, reviews, and how-to guides for iMore. She also fancies herself a bit of a rock star in her town and spends too much time reading comic books. If she's not typing away at her keyboard, you can probably find her at Disneyland or watching Star Wars (or both).


