How to replace the rear iSight camera in an iPhone 5c
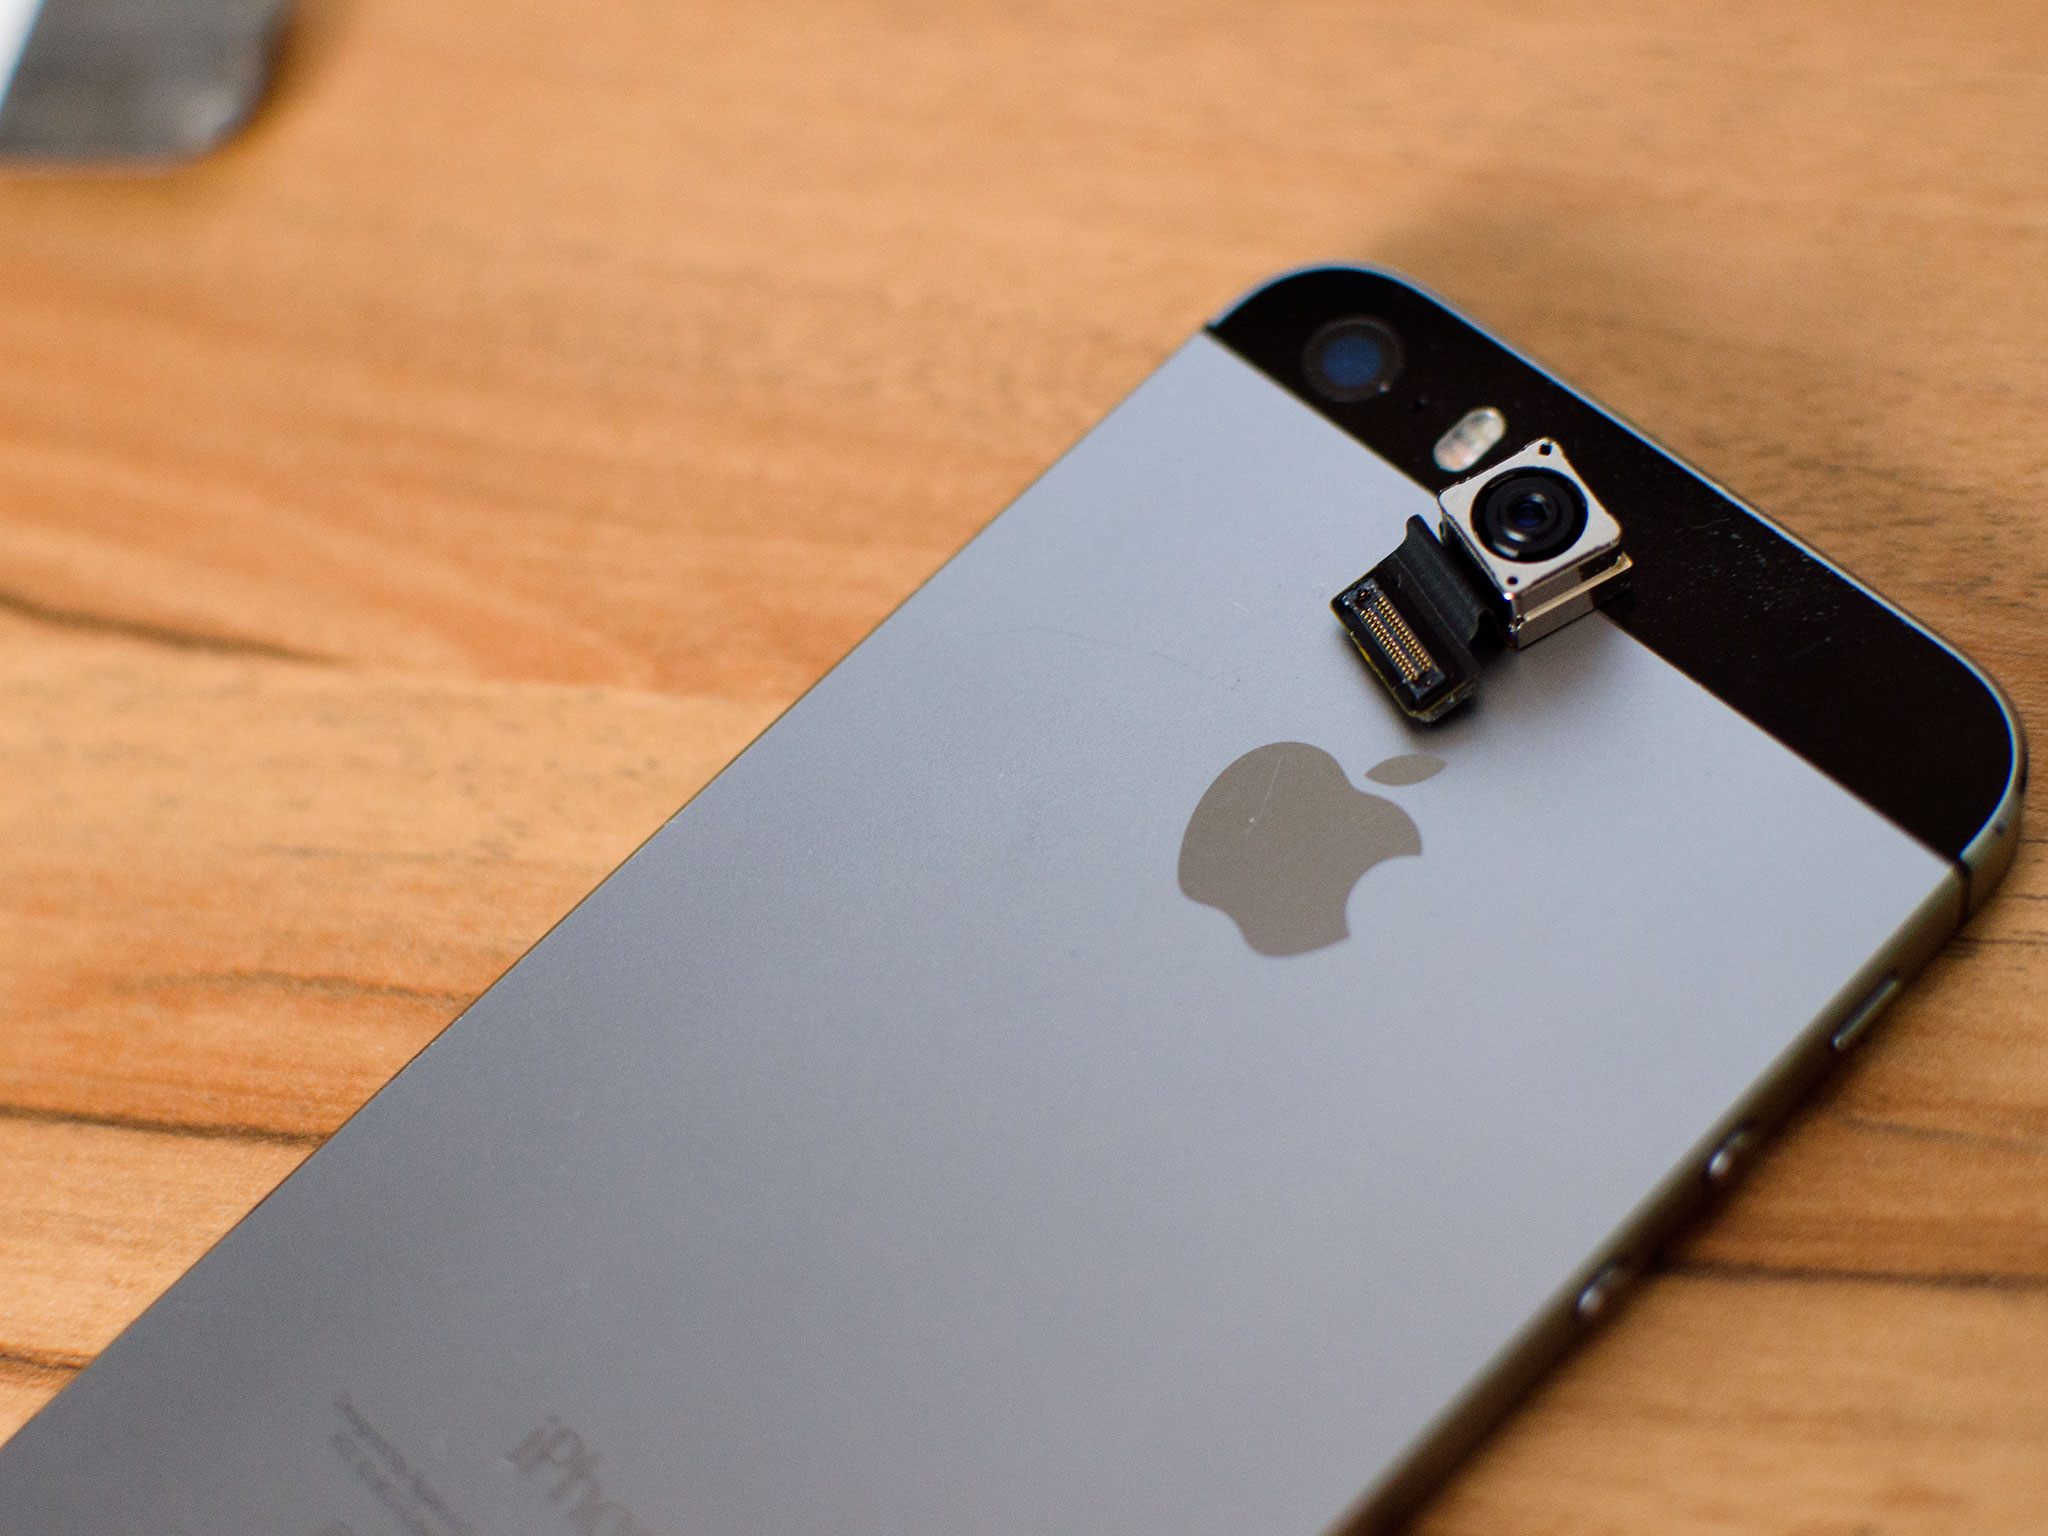
If you're having issues with the rear iSight camera in your iPhone 5s, a DIY repair is always an option, and in this particular case, it's not a terribly hard one either. Symptoms of a defective rear camera include purple spots on the lens that shows up in photos, lines through photos, issues with the Camera app freezing and never opening, and even blacked out photos appearing in the Photos app. Regardless what symptom you're experiencing, we can walk you through how to replace the camera in your iPhone 5s in less than 60 minutes, and for far less money than what a new iPhone would cost.
What you need to DIY replace an iPhone 5s rear camera
You'll need some tools and parts in order to repair your iPhone 5s. iMore recommends using only quality and genuine parts from a reputable supplier like iFixYouri. They have quality parts, tools, and much more for all your repair needs.
- Replacement iPhone 5s rear camera
- Suction cup
- 5-point security screwdriver
- Standard #000 Phillips screwdriver
- Spudger tool
- Razor blade
- iSesamo Opening tool (not necessary but awesome for prying up cables and getting under adhesive)
1. Power off your iPhone 5s
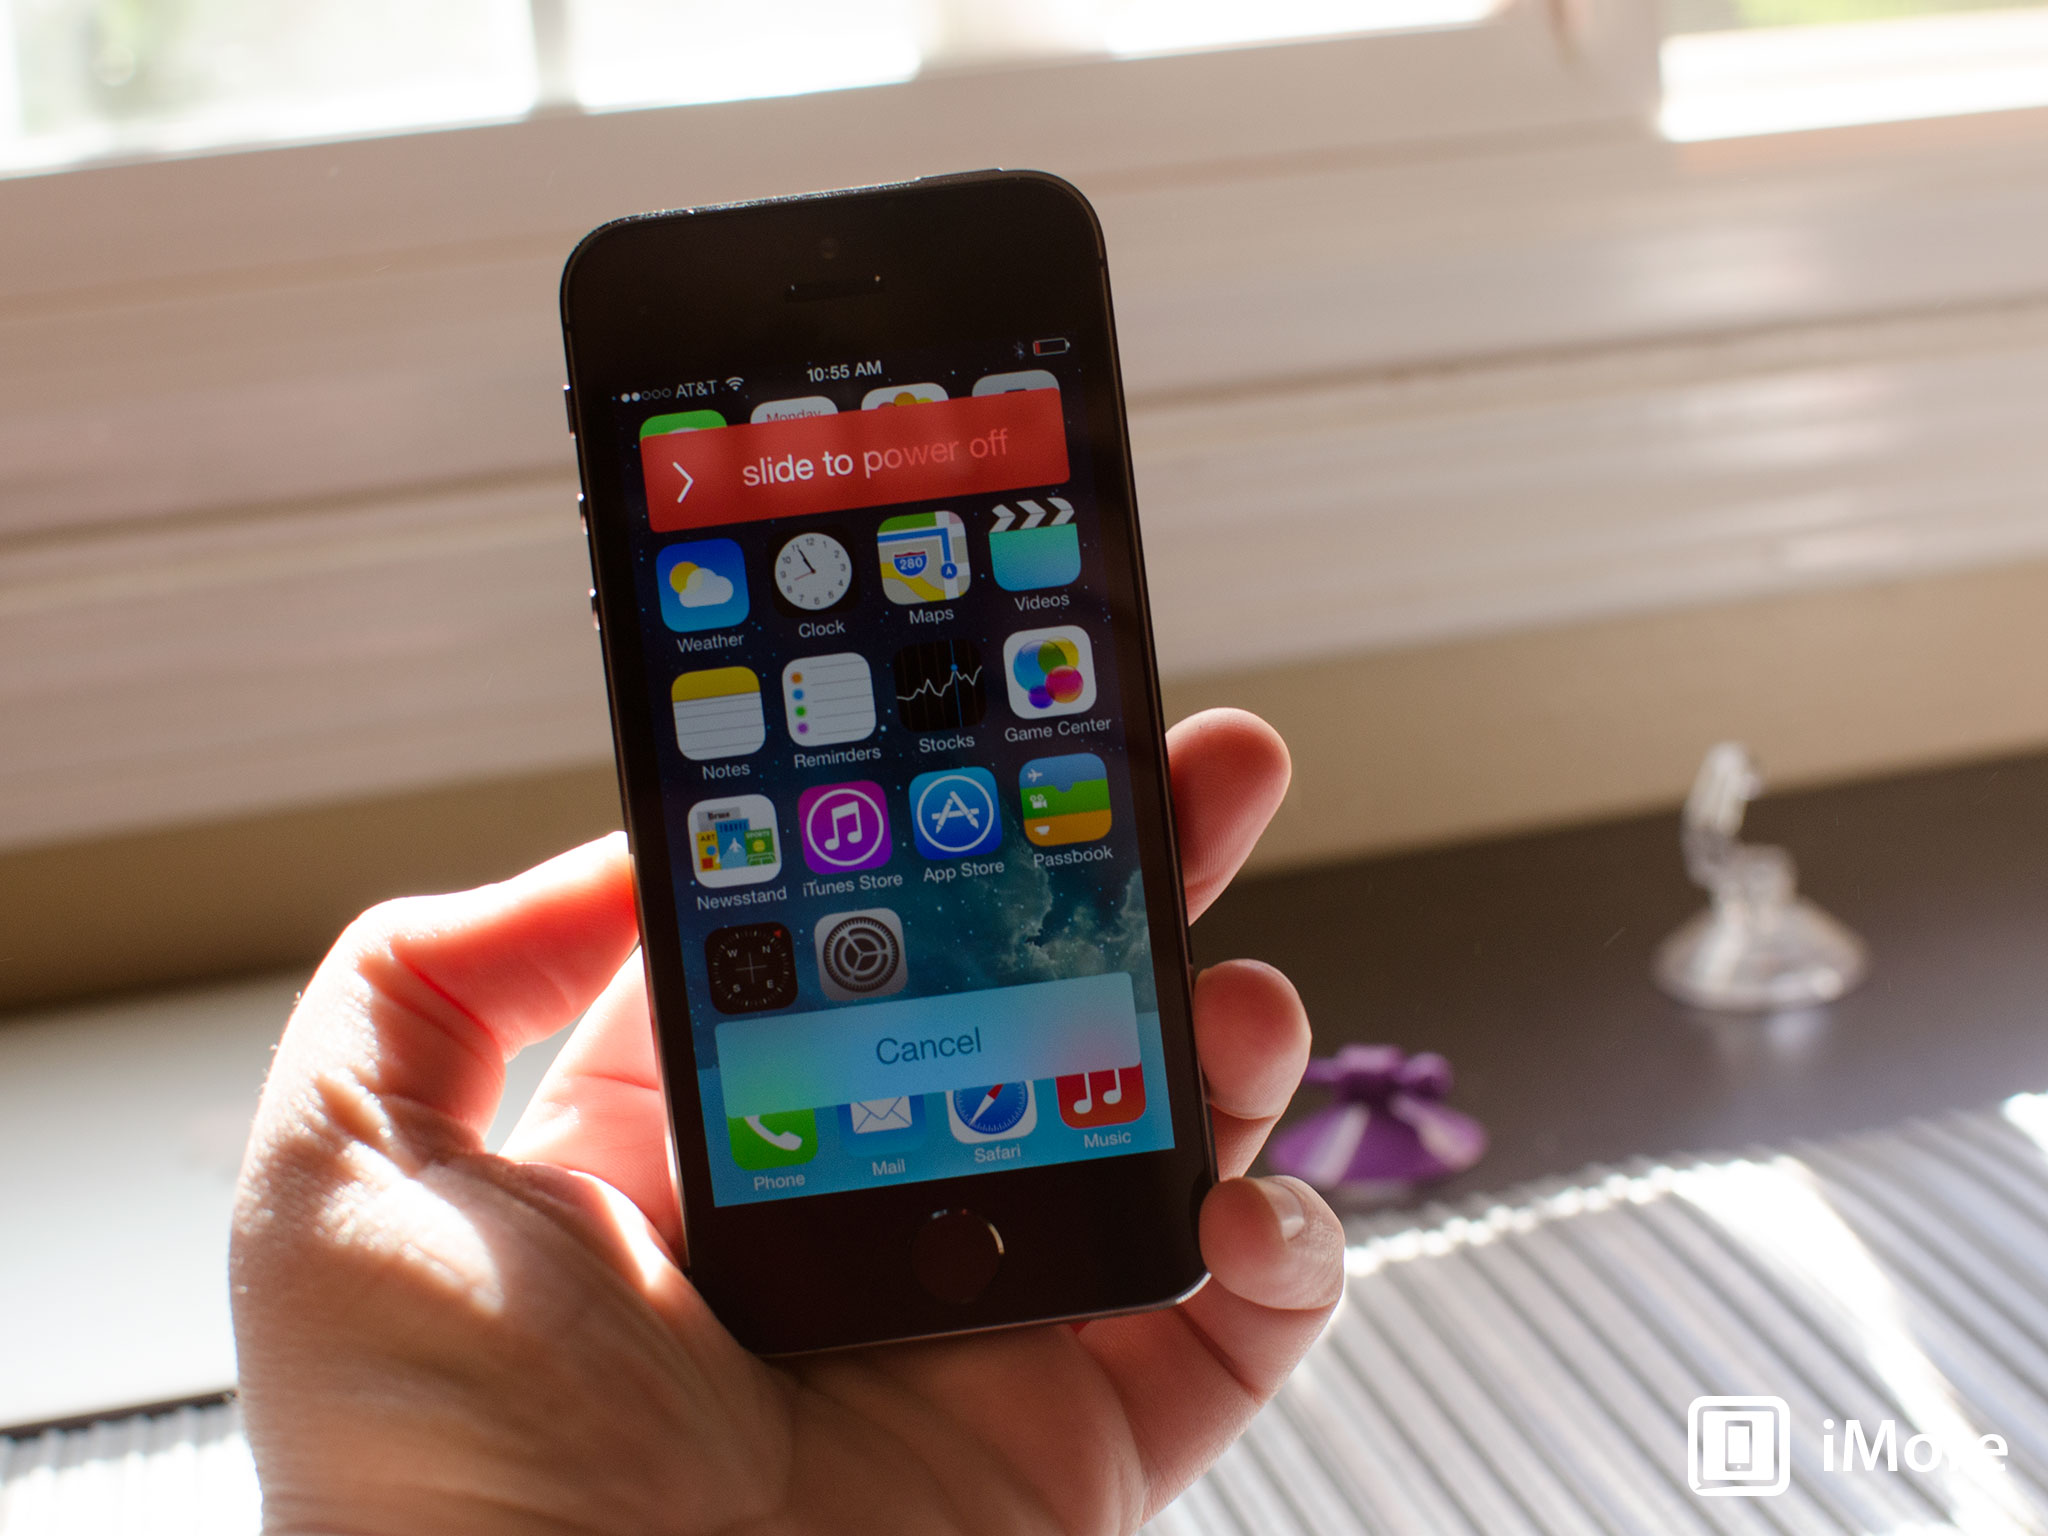
Before performing any repair on any device, always remember to power it off. Simply hold down on the Power button until you see Slide to Power off. One you're sure your iPhone 5s is turned off, proceed to the next section.
2. Remove the two security screws on both sides of the dock connector
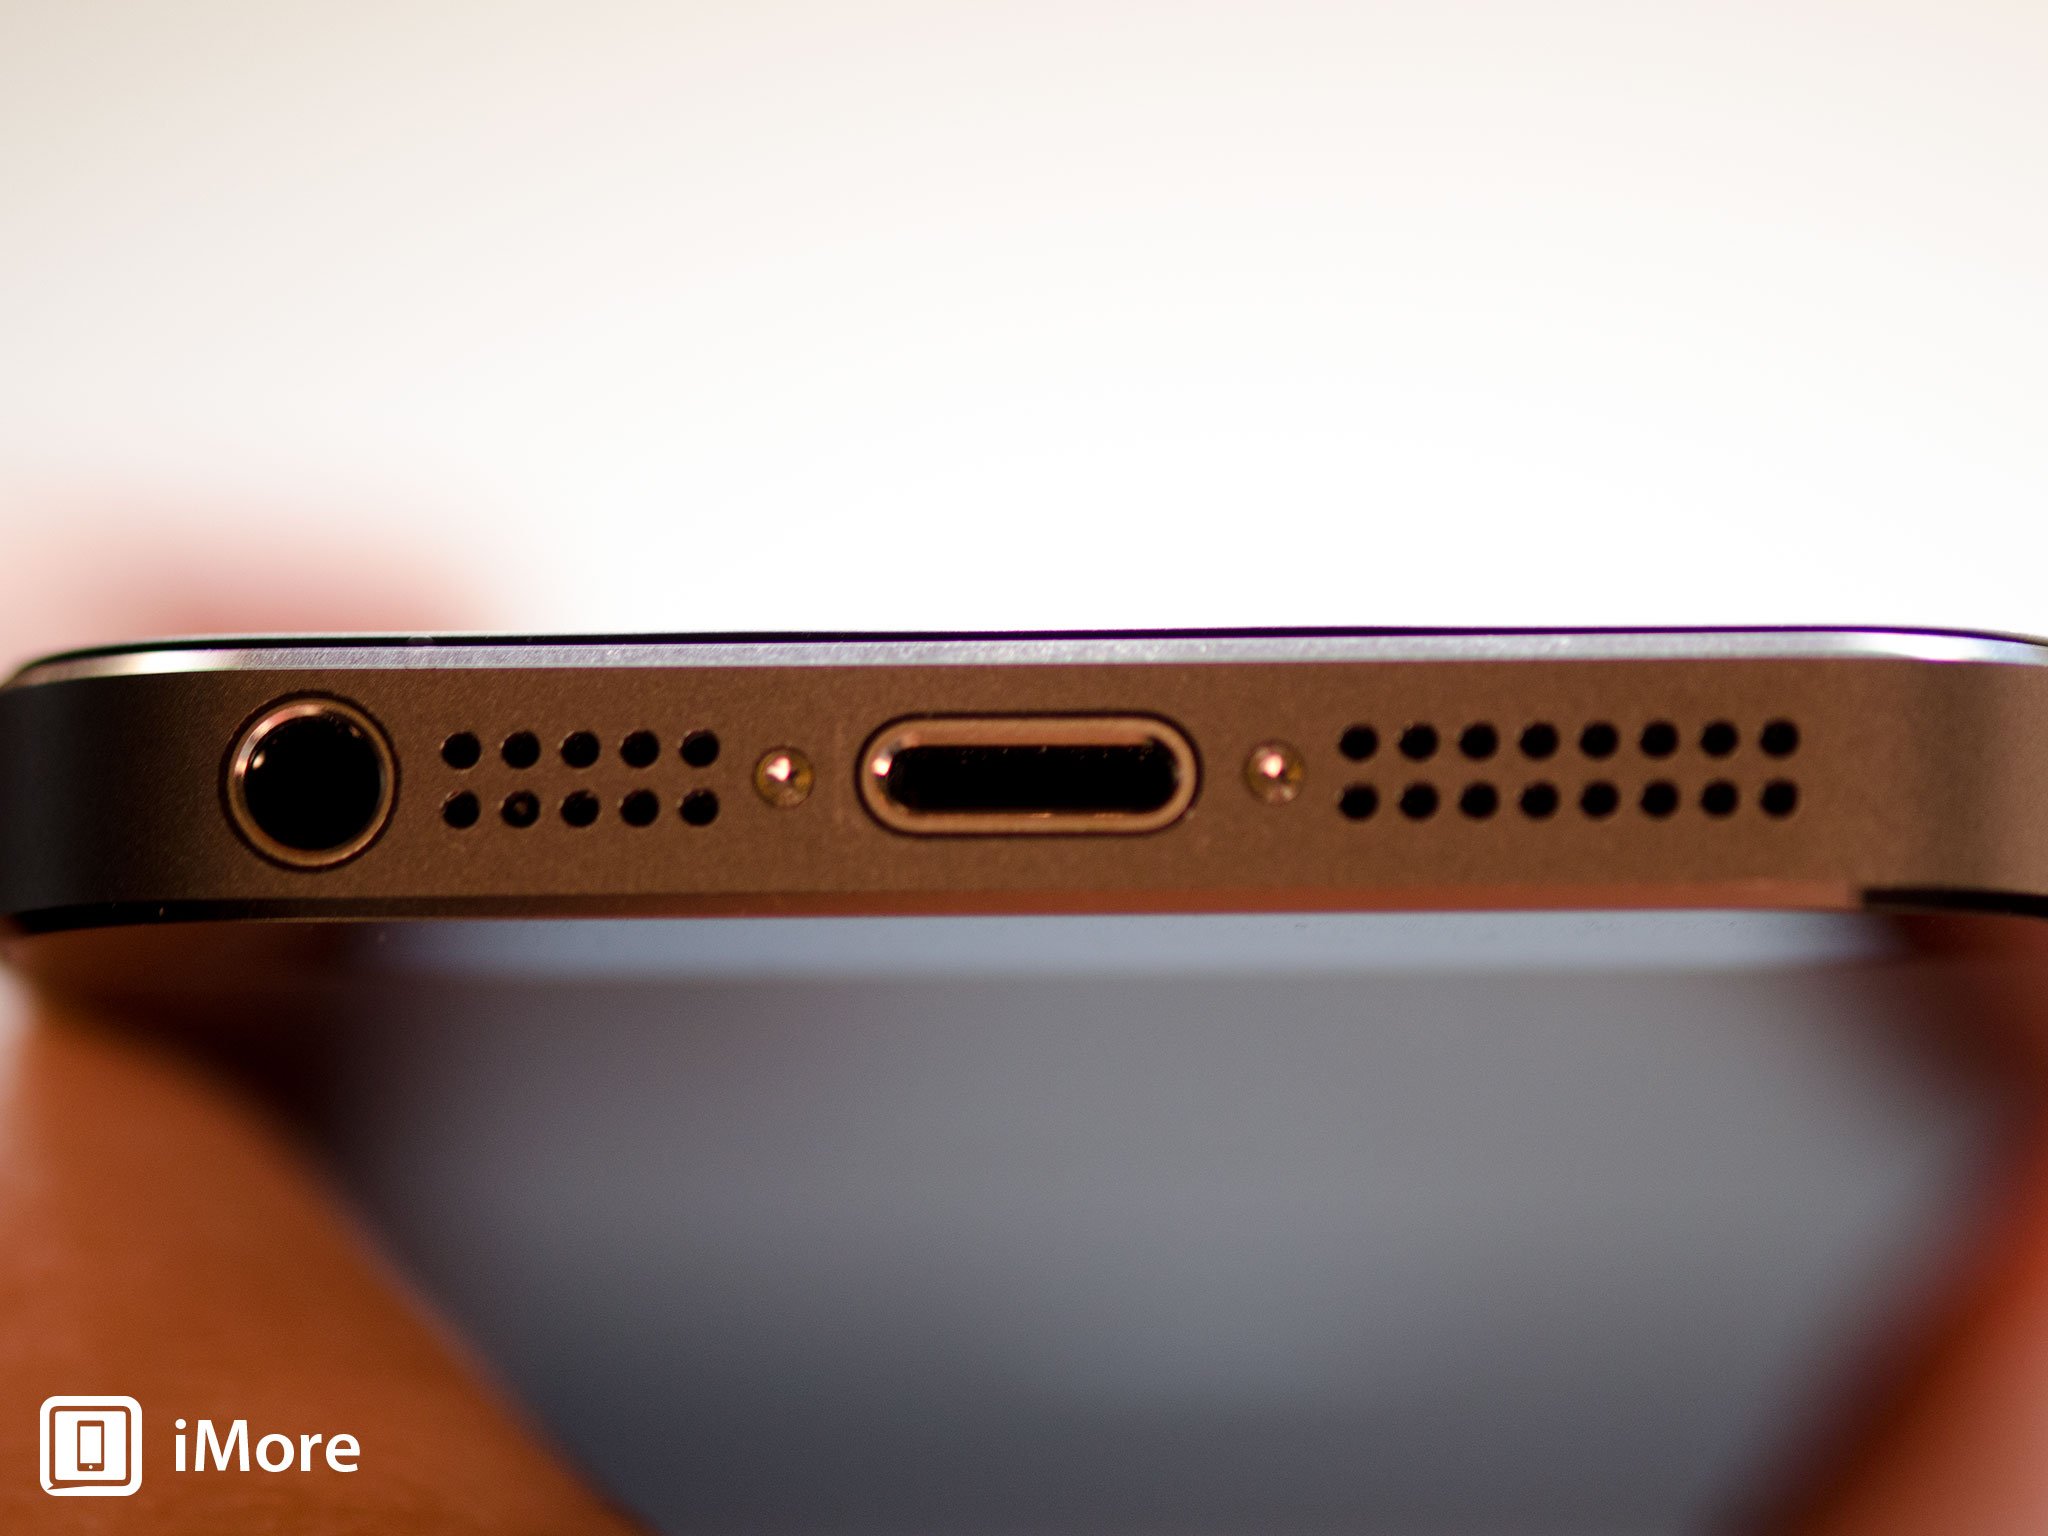
There are two security screws that secure the screen to the frame and they sit on each side of the dock connector. Use your 5-point security screwdriver to remove them. They are both the same size so it's okay if you mix them up.
3. Remove the display assembly
- Place your suction cup slightly above the Home button assembly and secure it to the screen.
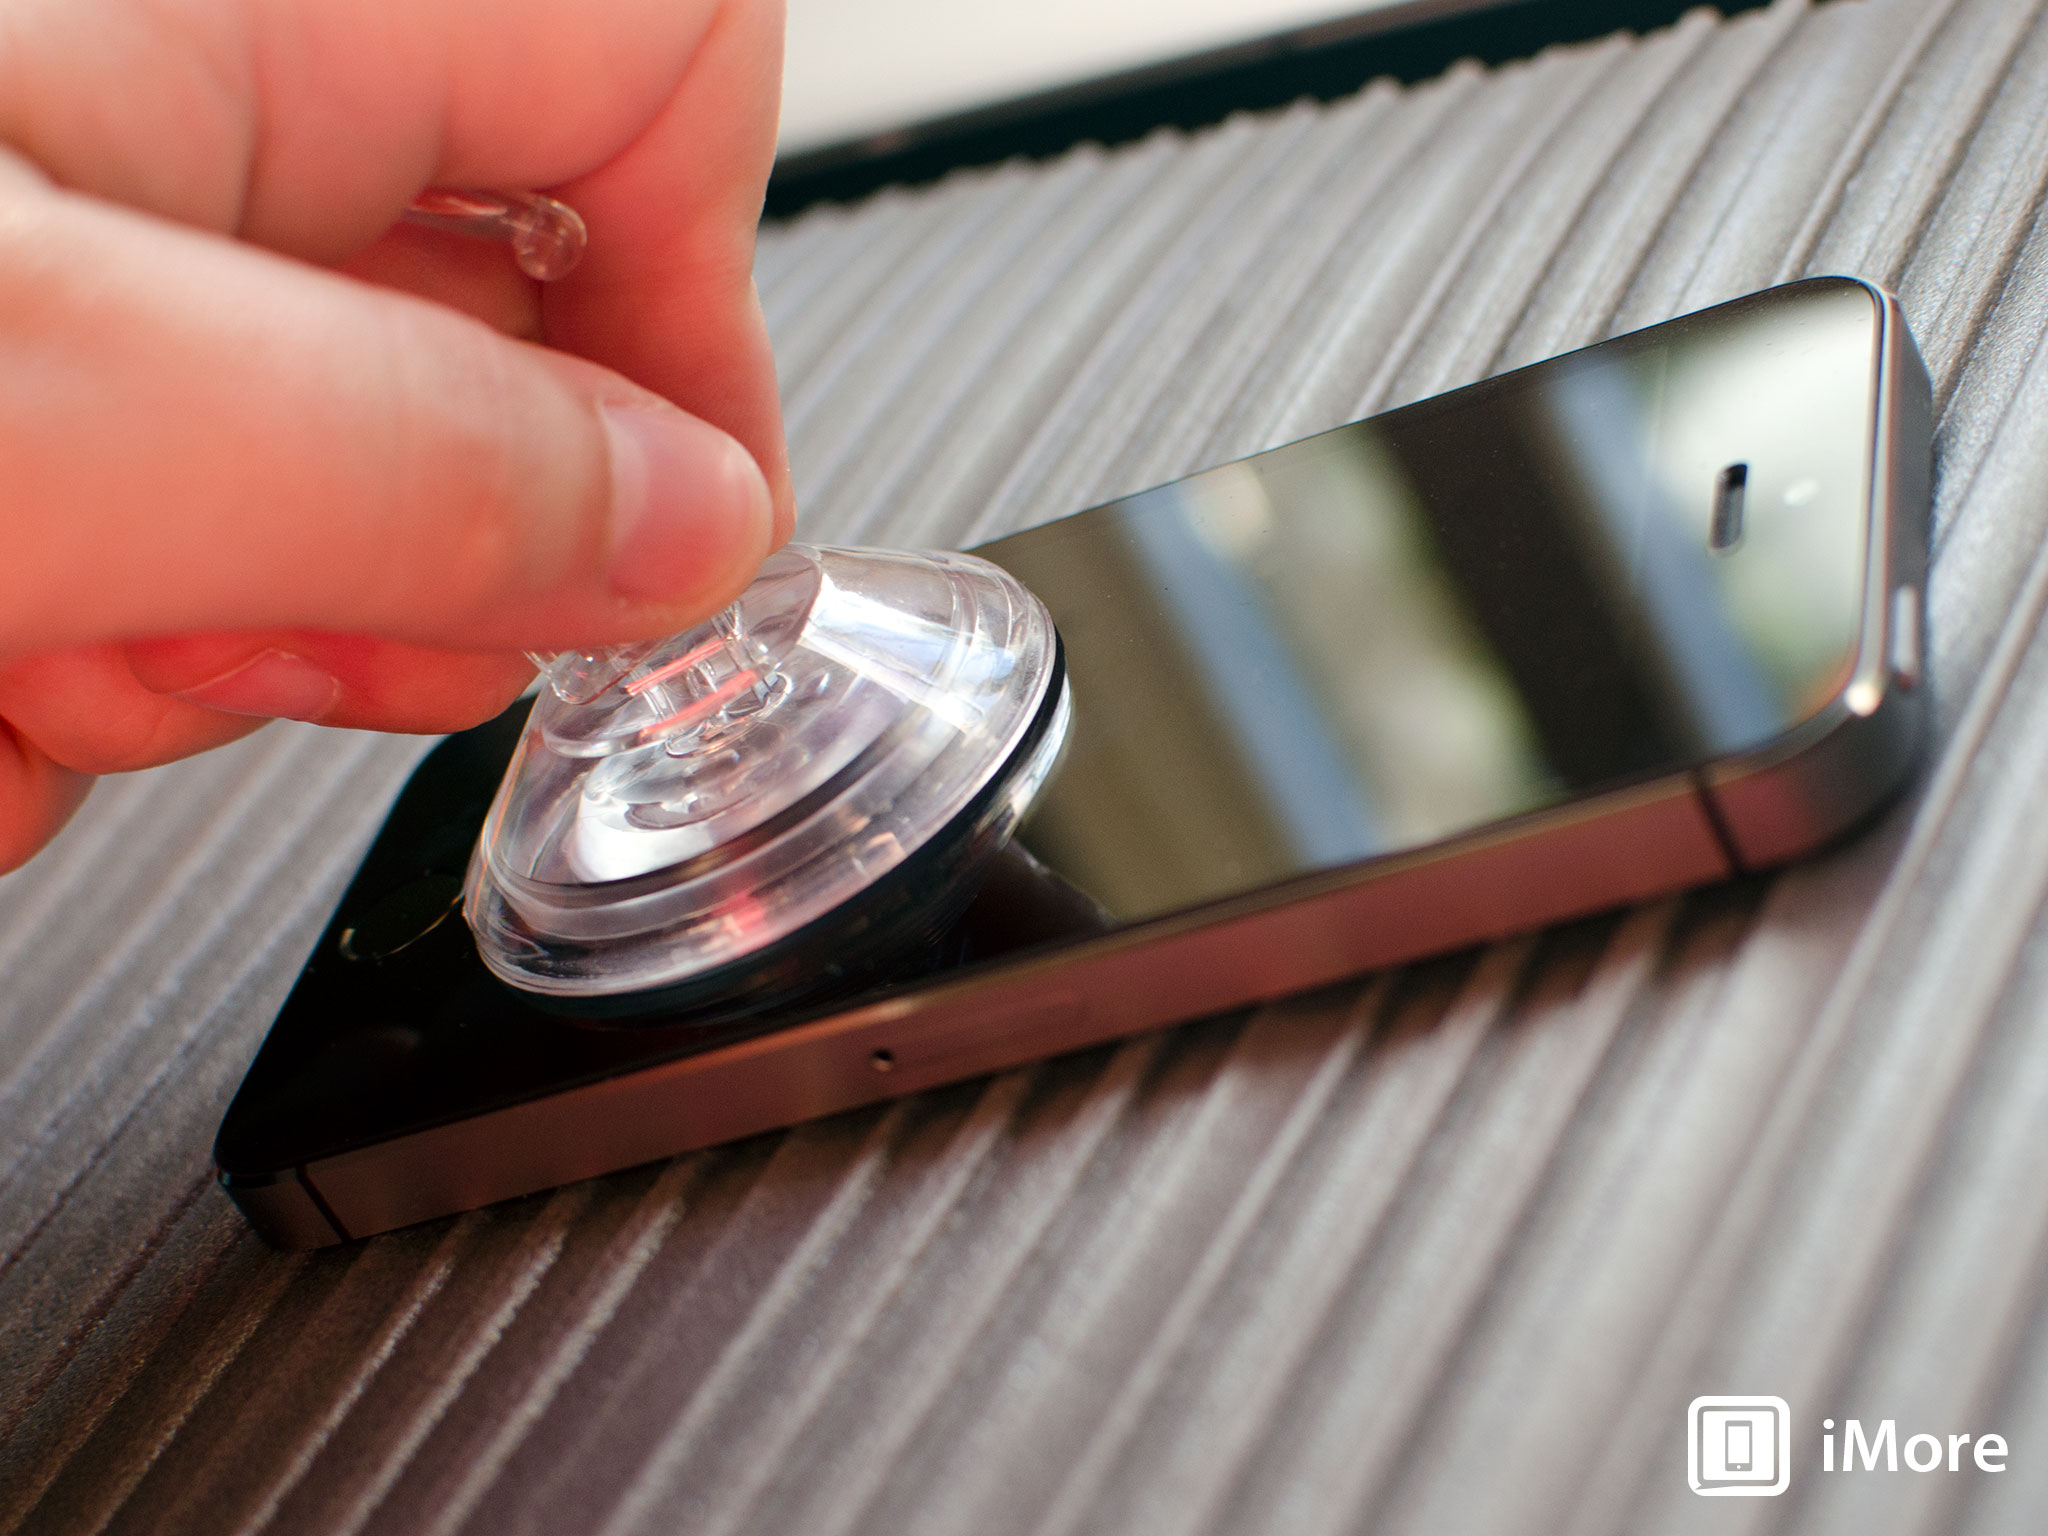
- Holding the iPhone in place with one hand, gently pull upwards on the suction cup until you free the bottom of the screen but do NOT pull up all the way at this point as a cable running to the Touch ID sensor is still connected. You only want to separate the screen about an inch at this point.
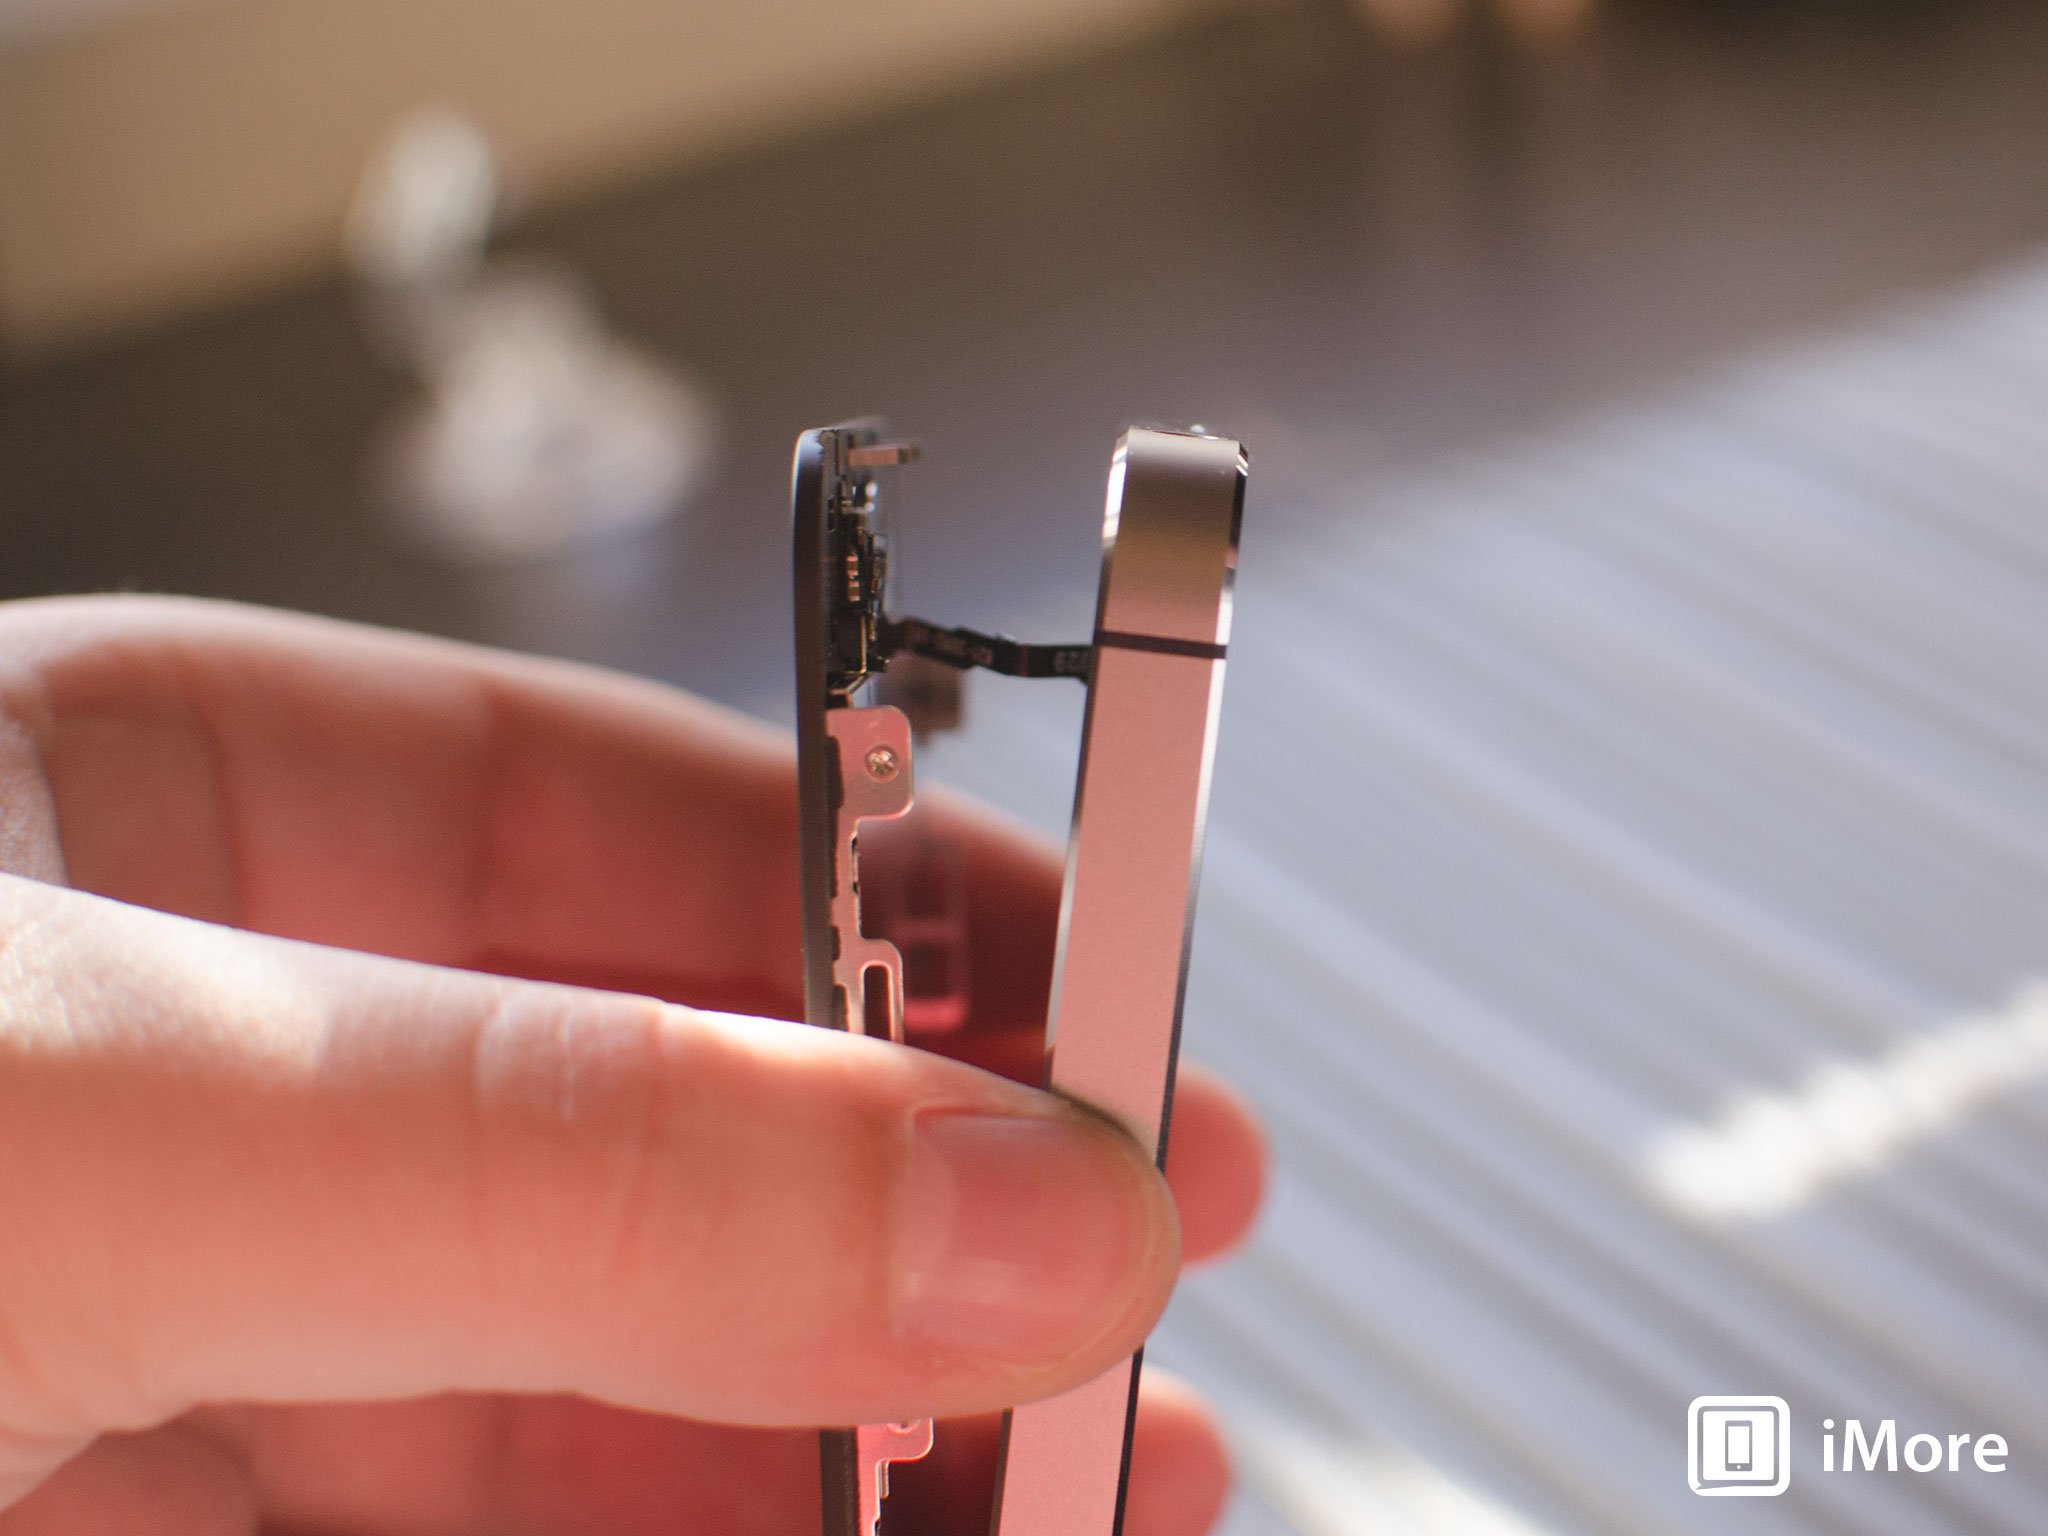
- Now that you have a clear view of the cables, use the pointed edge of your spudger tool in order to carefully remove the metal shield covering the Touch ID cable.
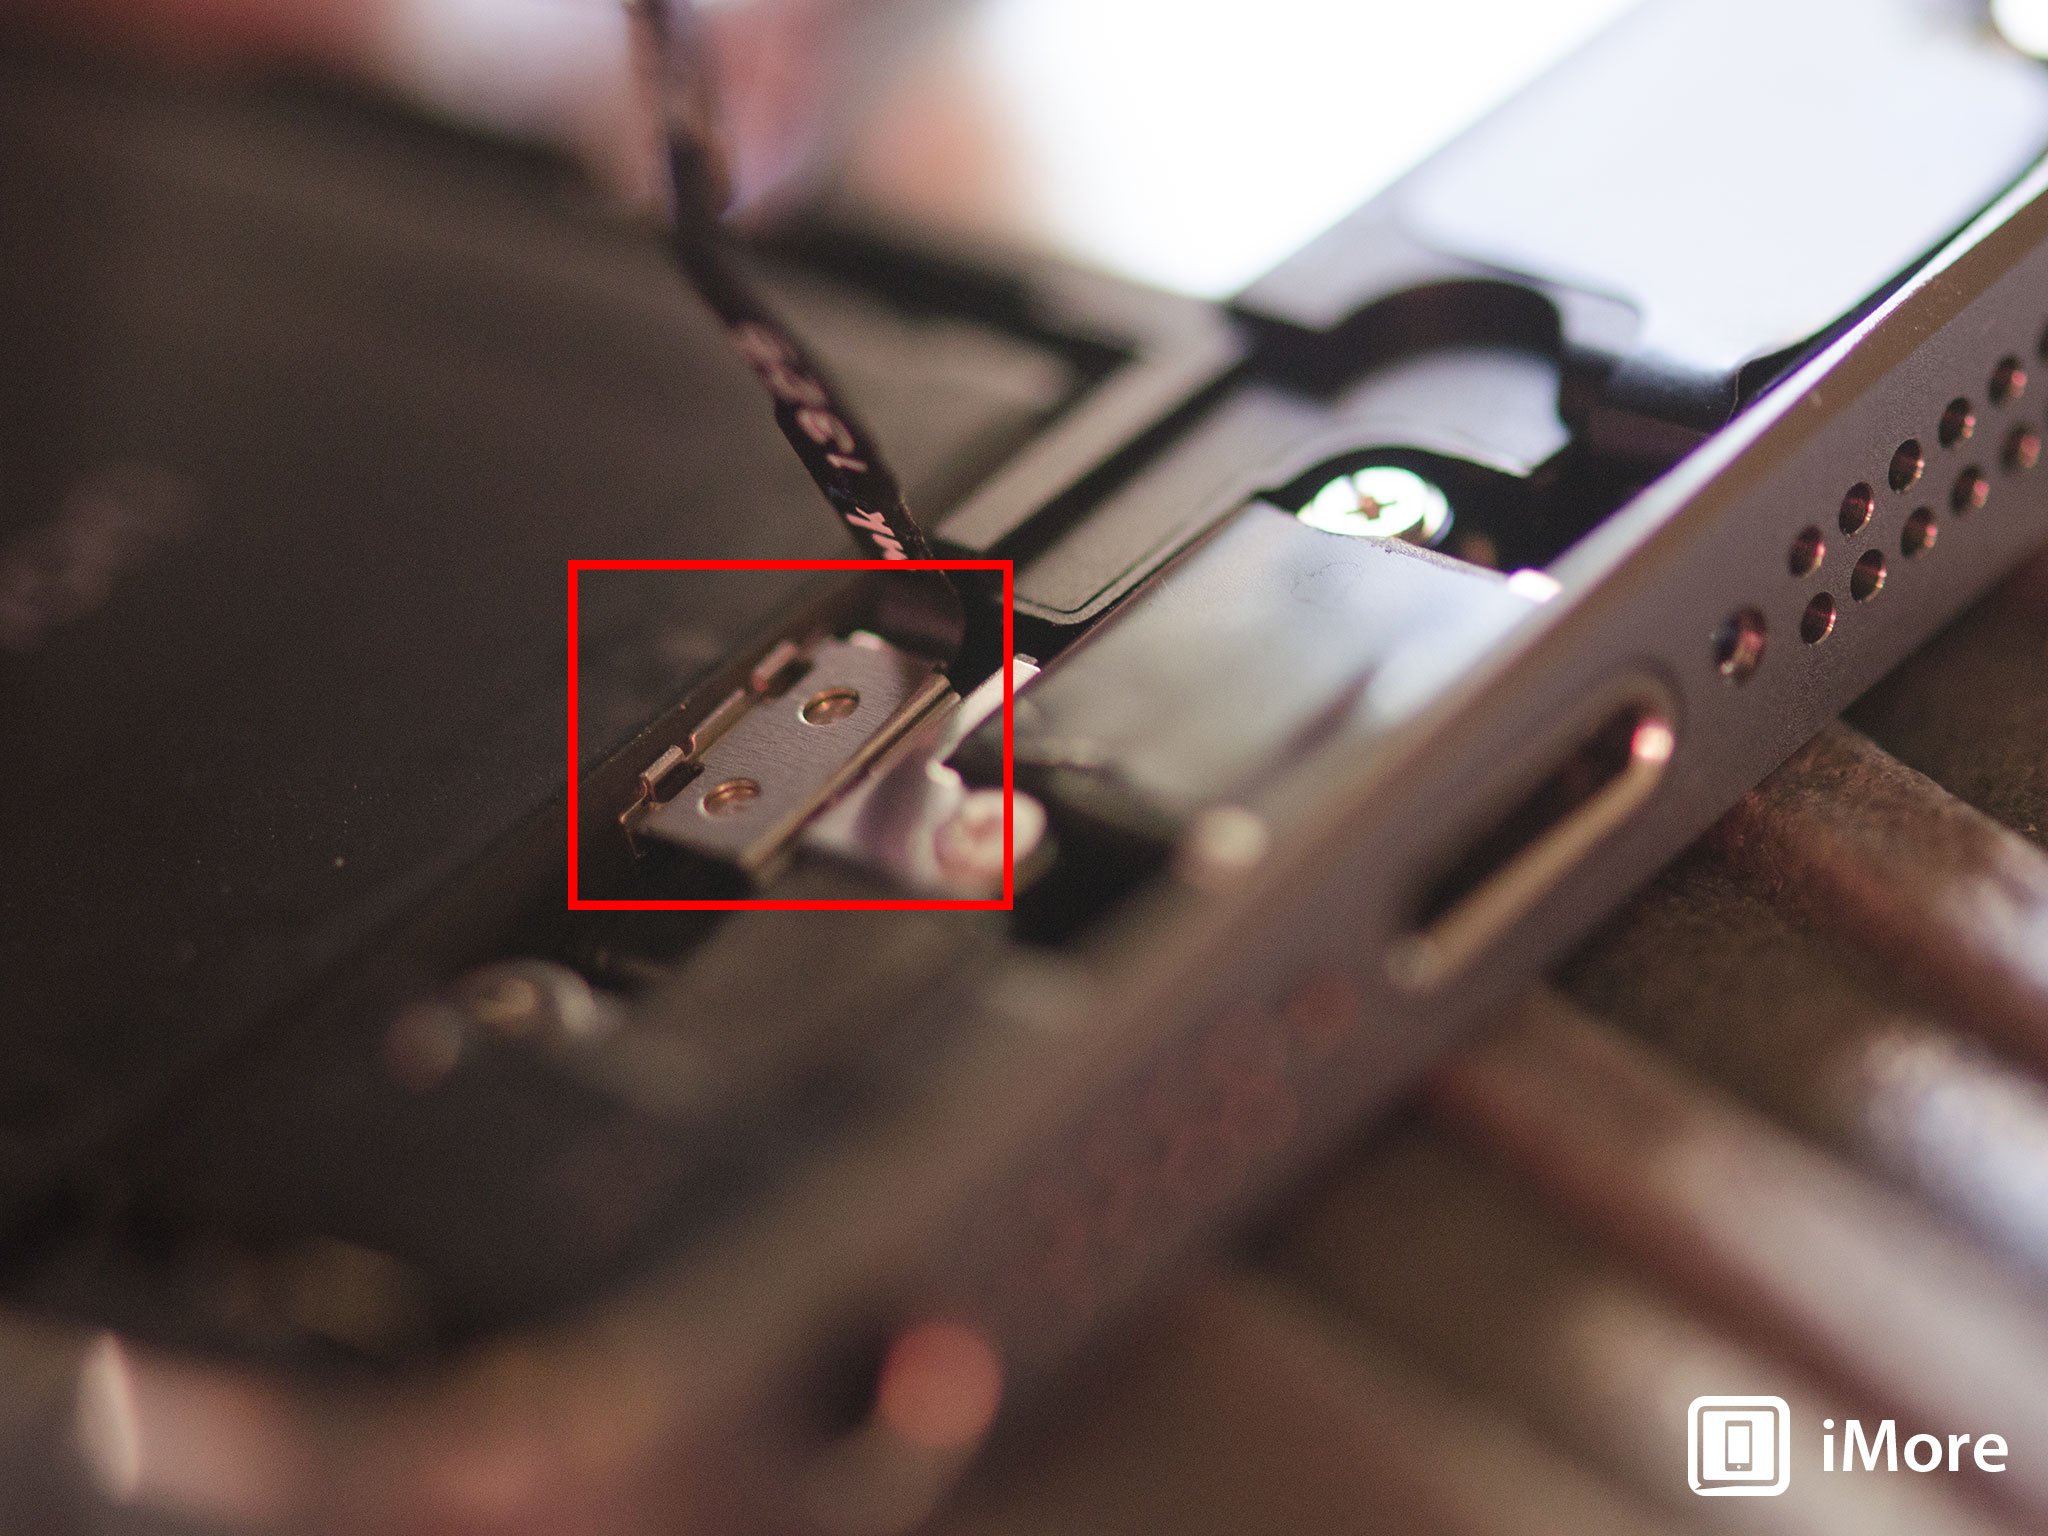
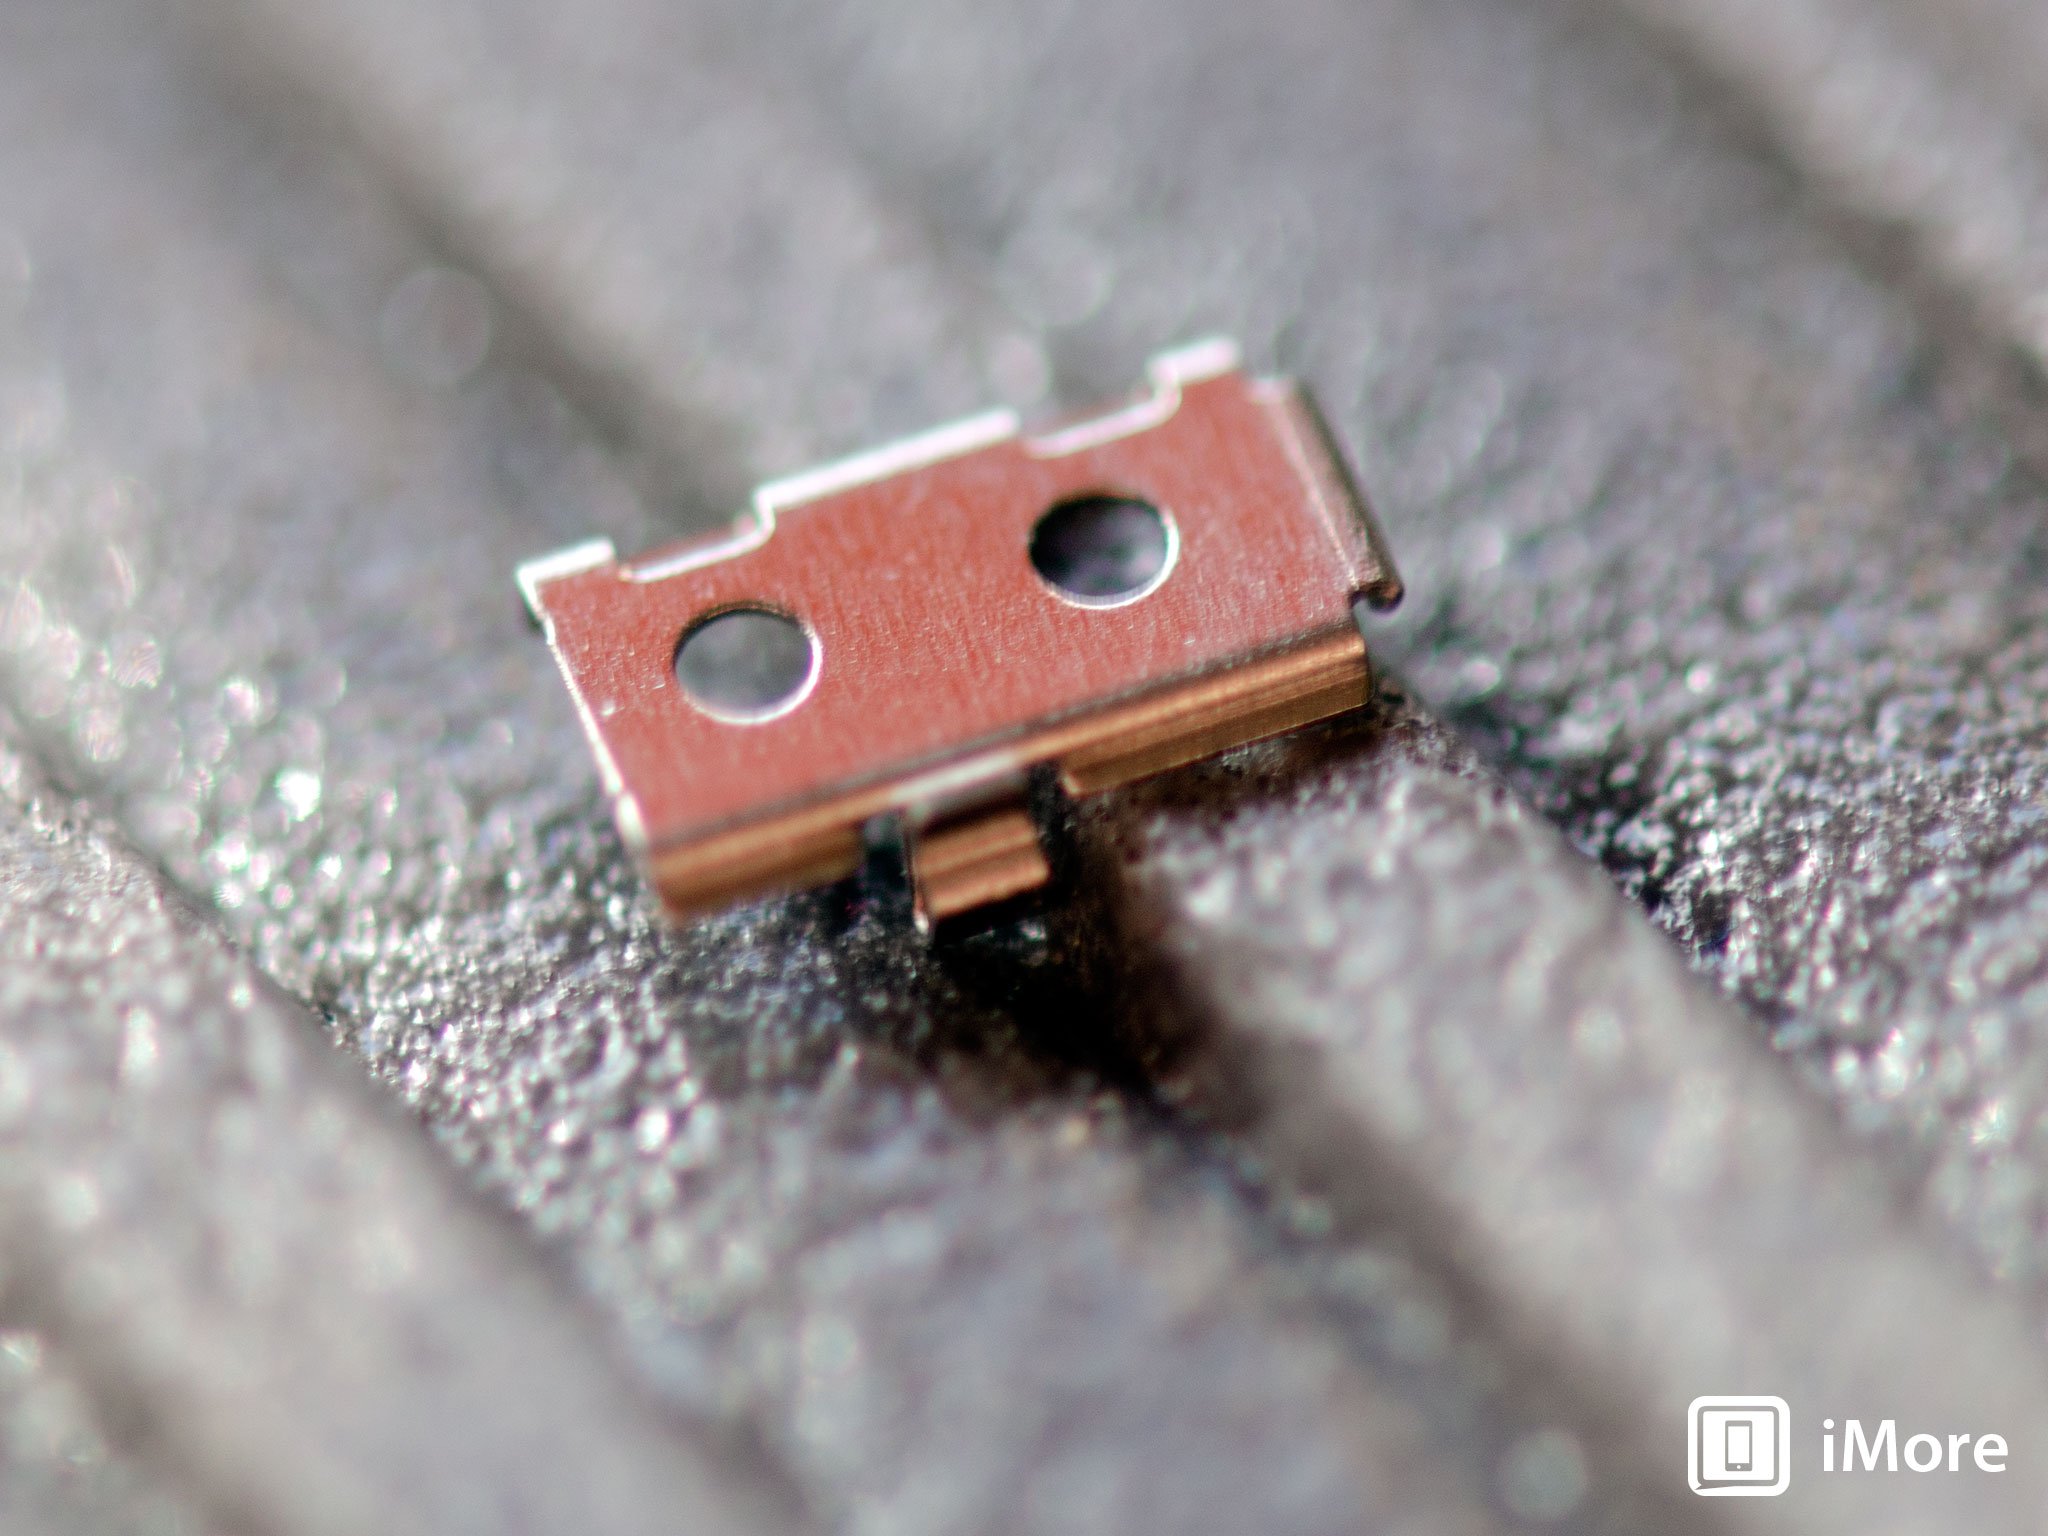
- Make sure you don't lose the metal guard that covers the Touch ID connector.
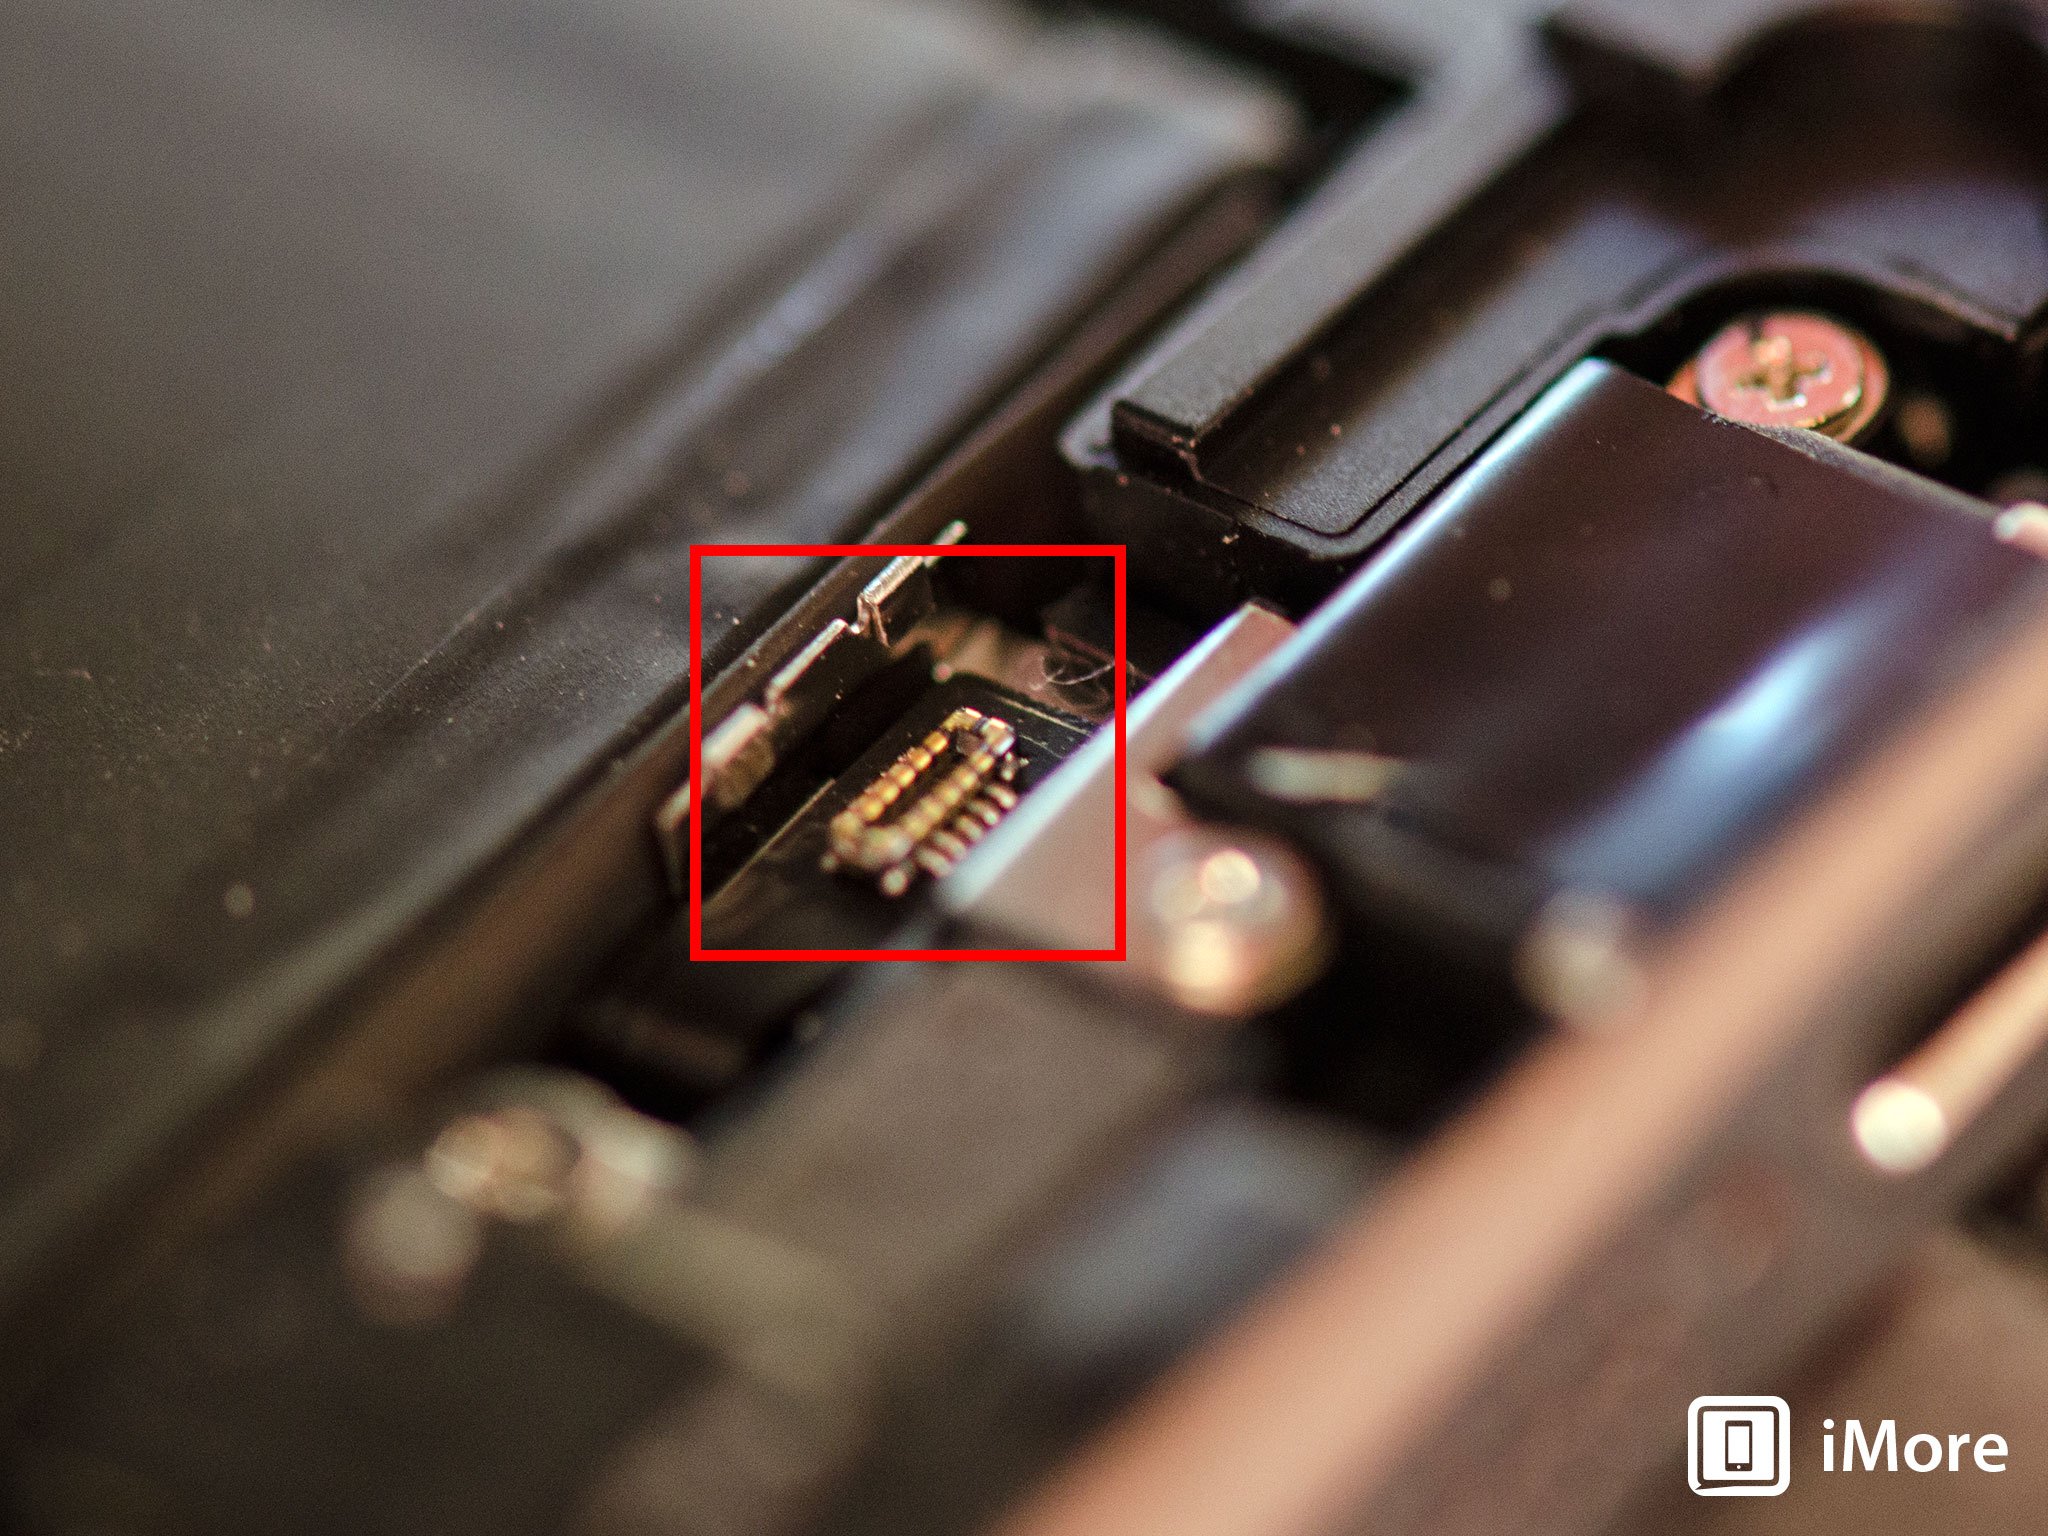
- Again, use the pointed edge of your spudger tool in order to disconnect Touch ID.
- You can now safely swing the display up more in order to see where it is connected to the board.
- Remove the four screws holding down the shield that covers the display cables. To do this, use your #000 screwdriver.
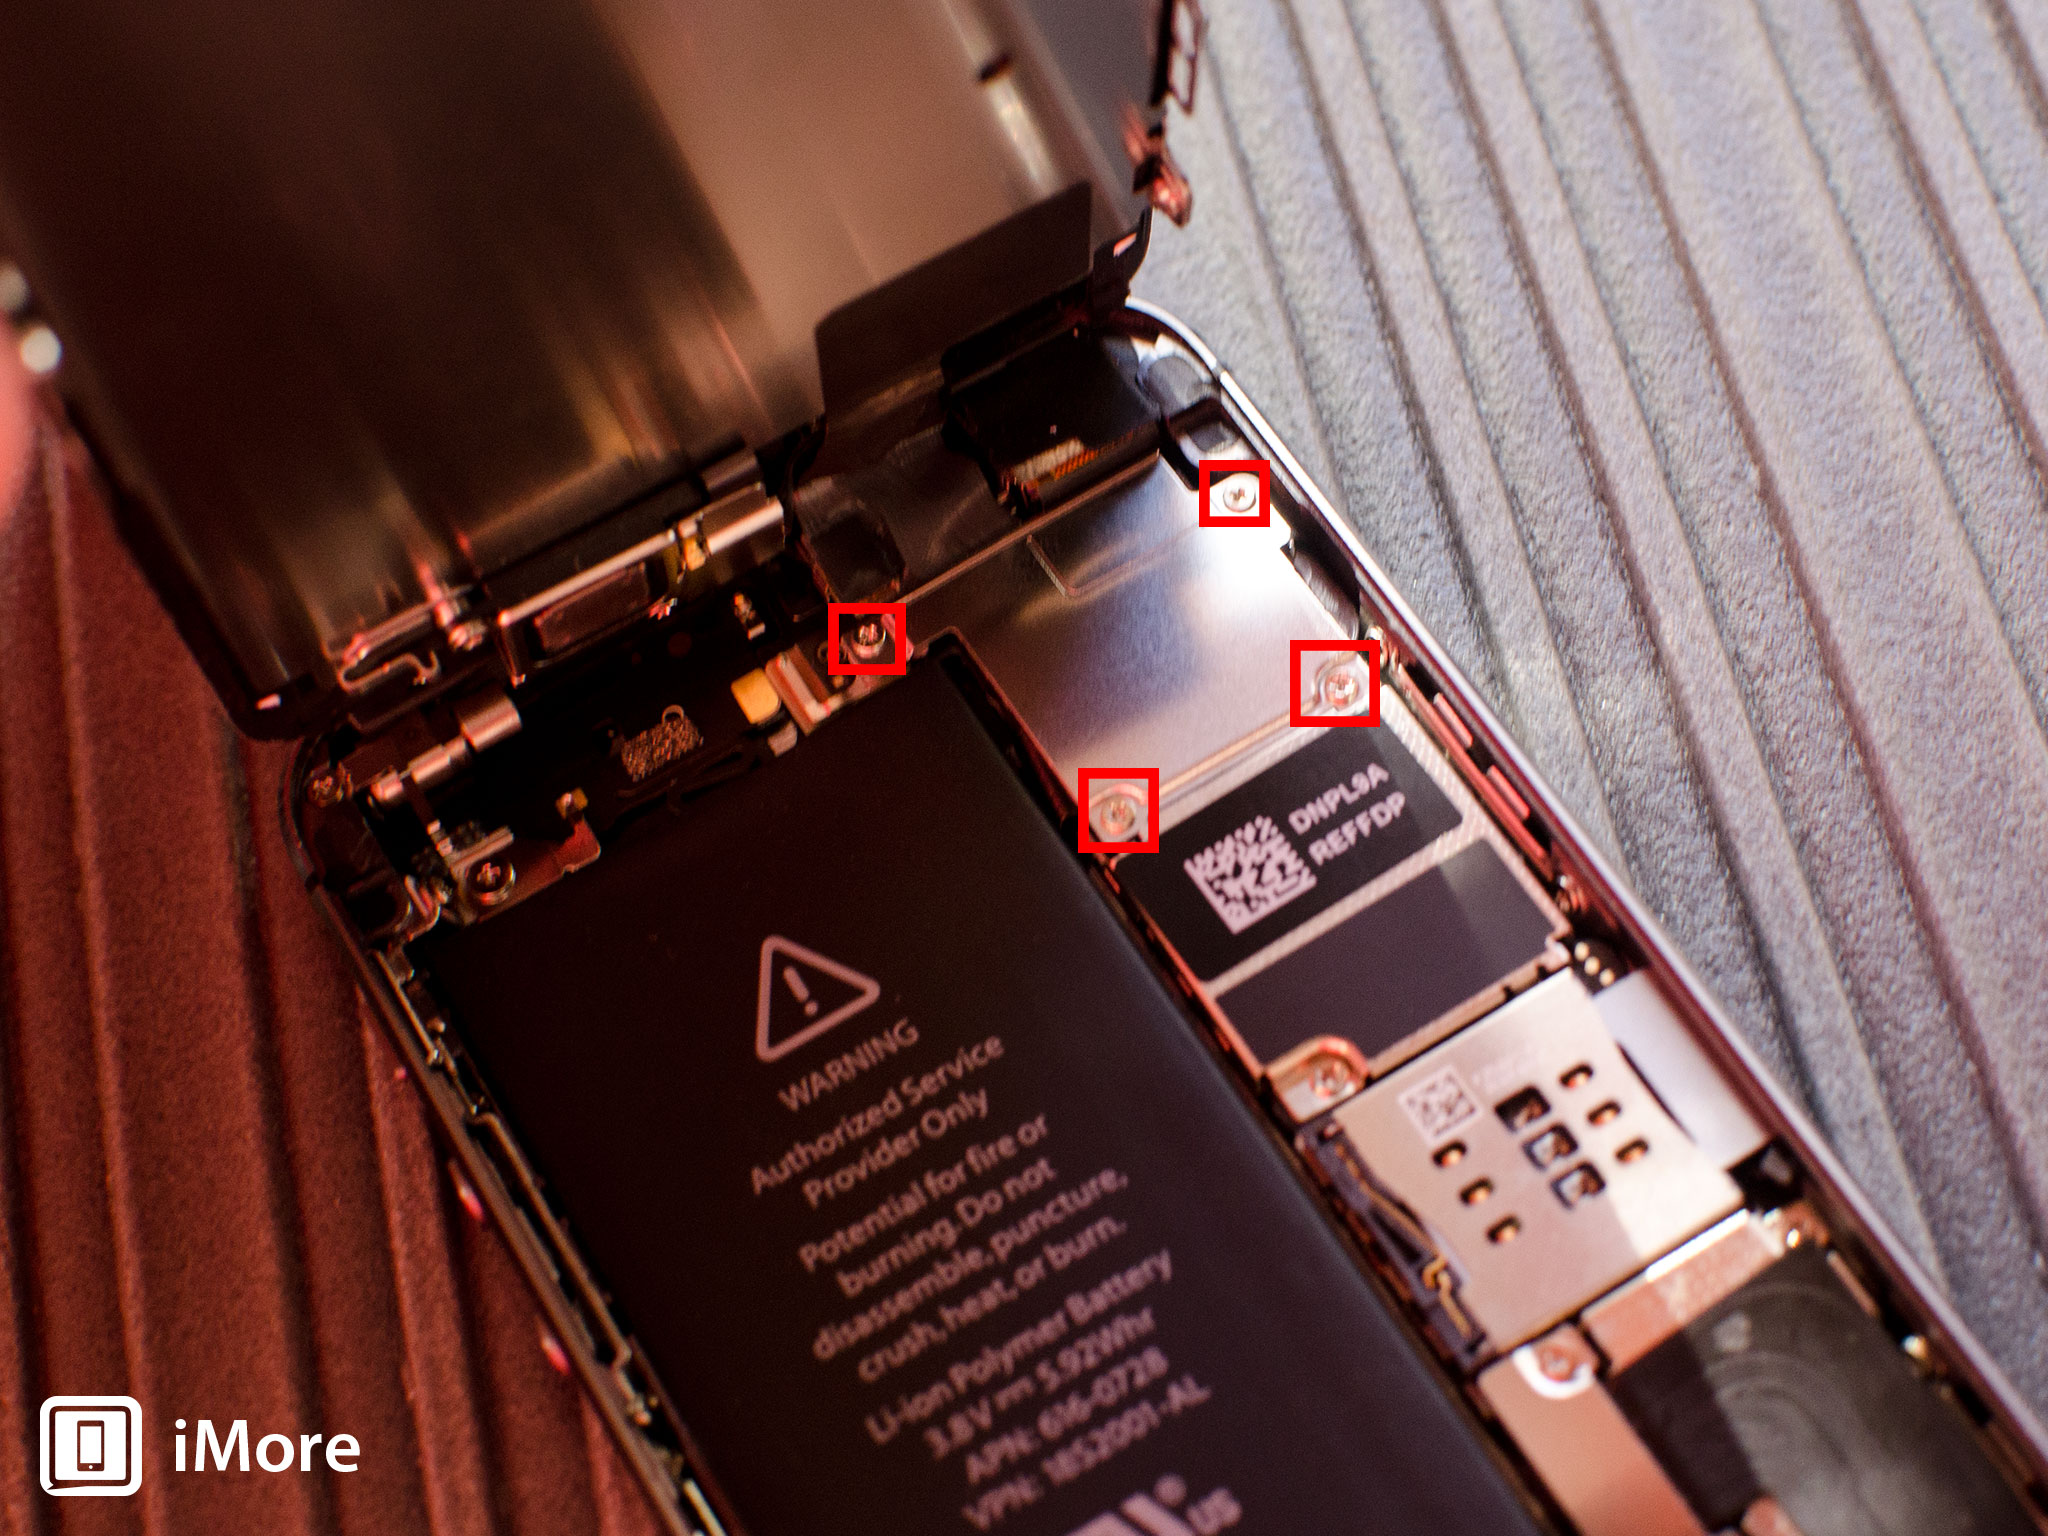
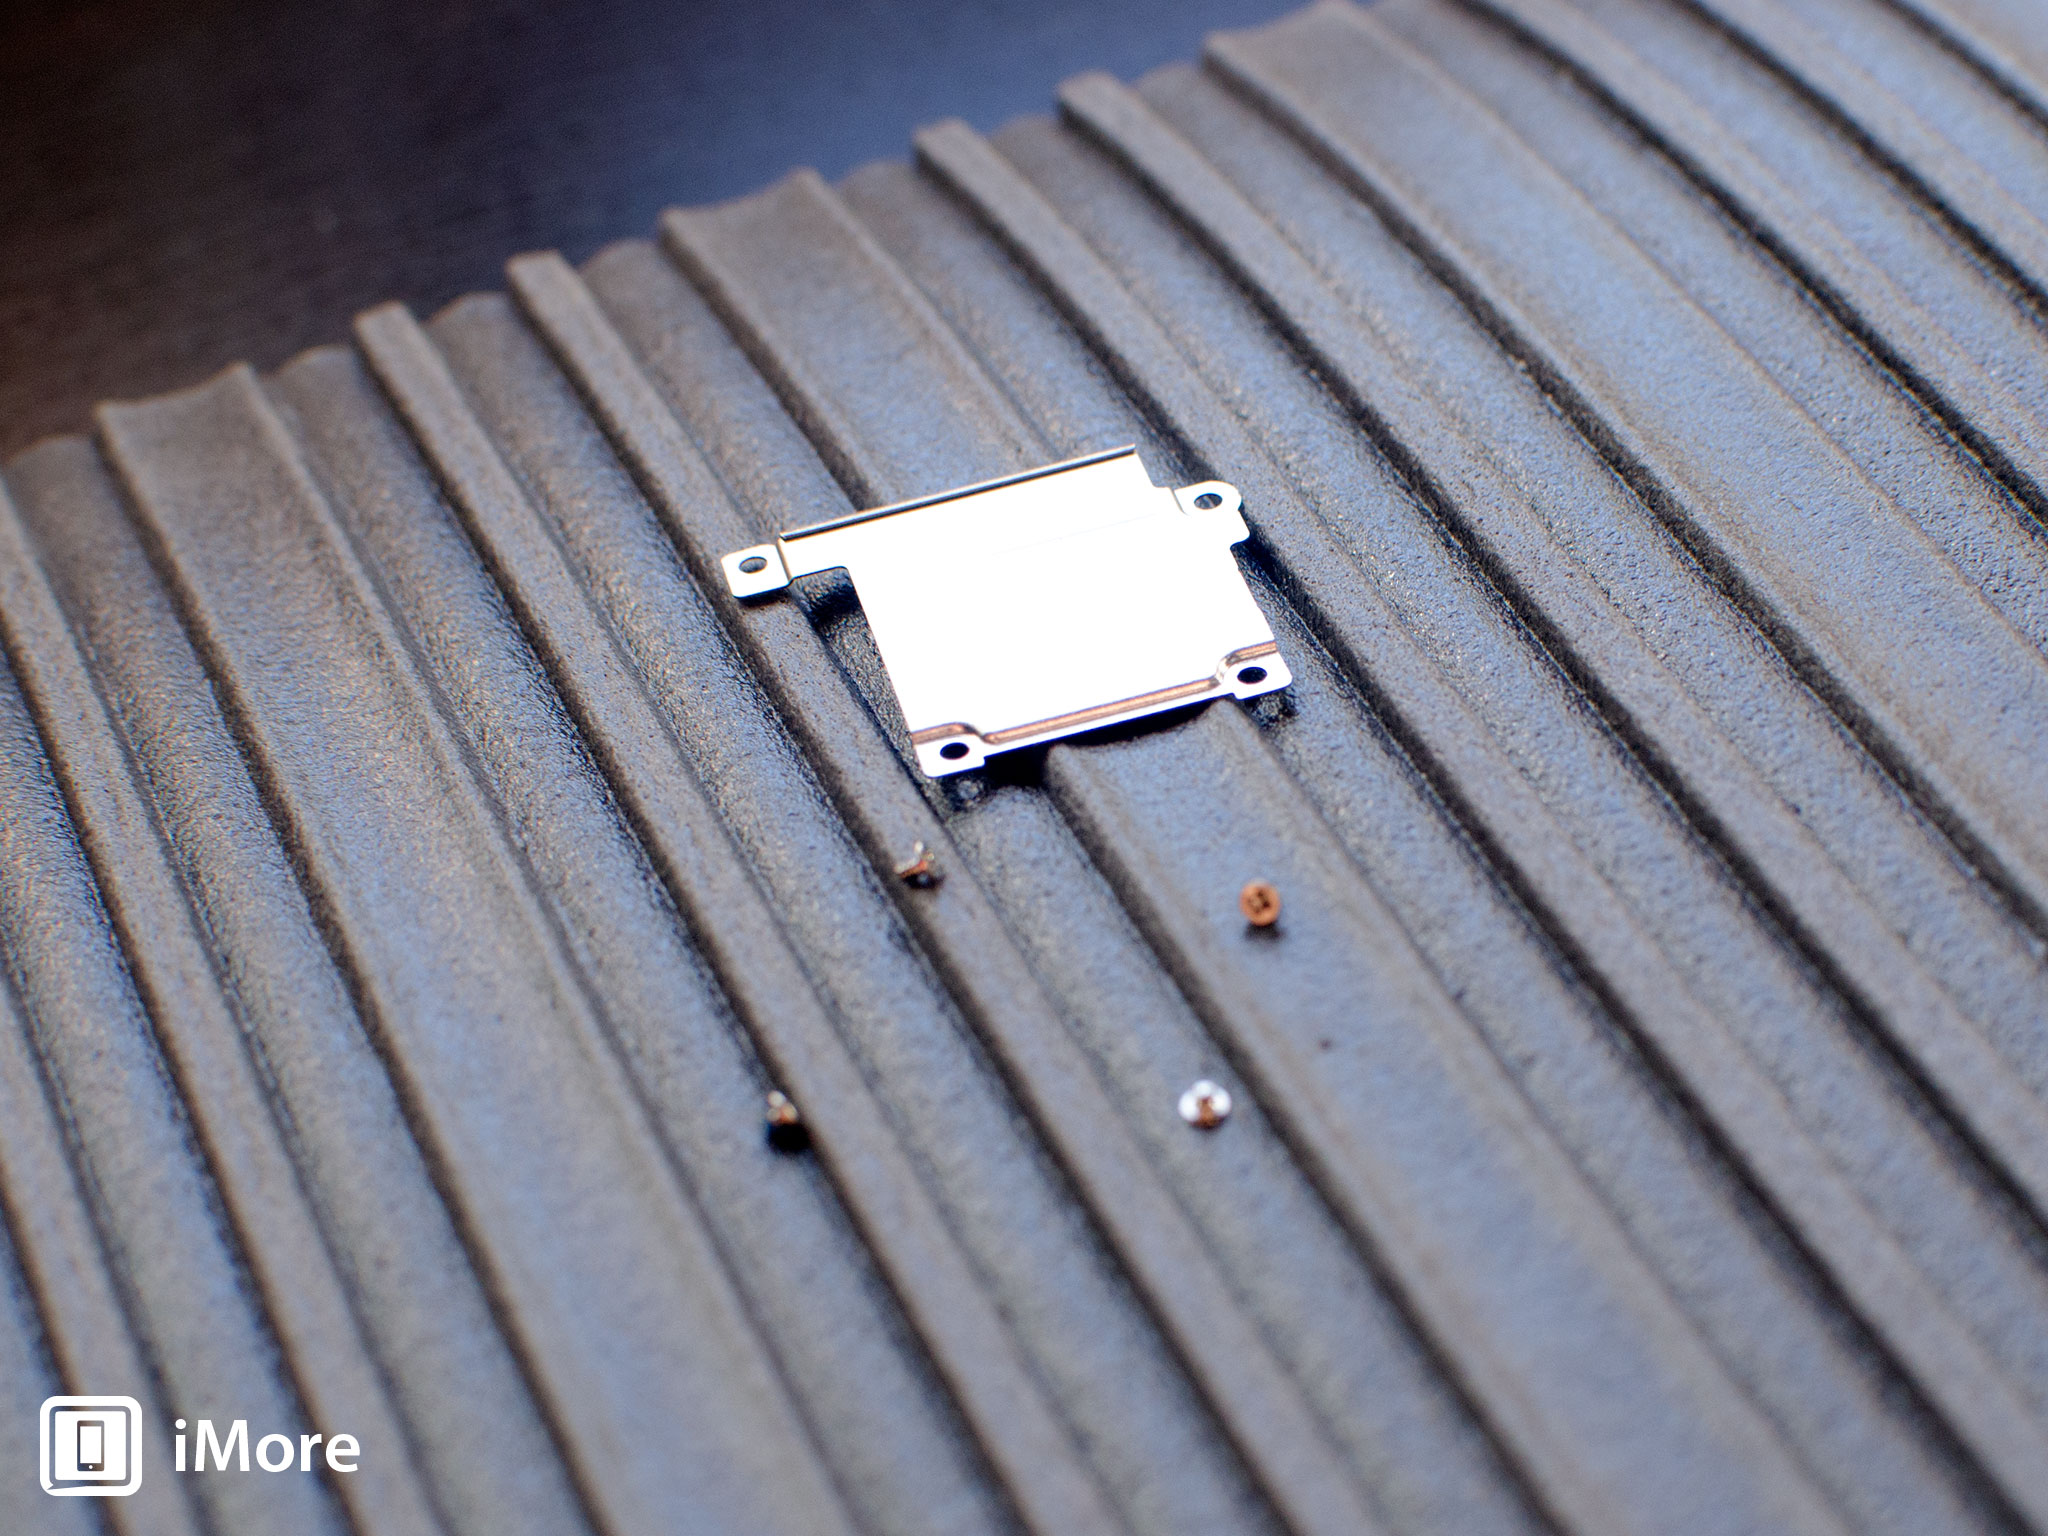
- Once all four screws are removed, carefully remove the shield and set it aside.
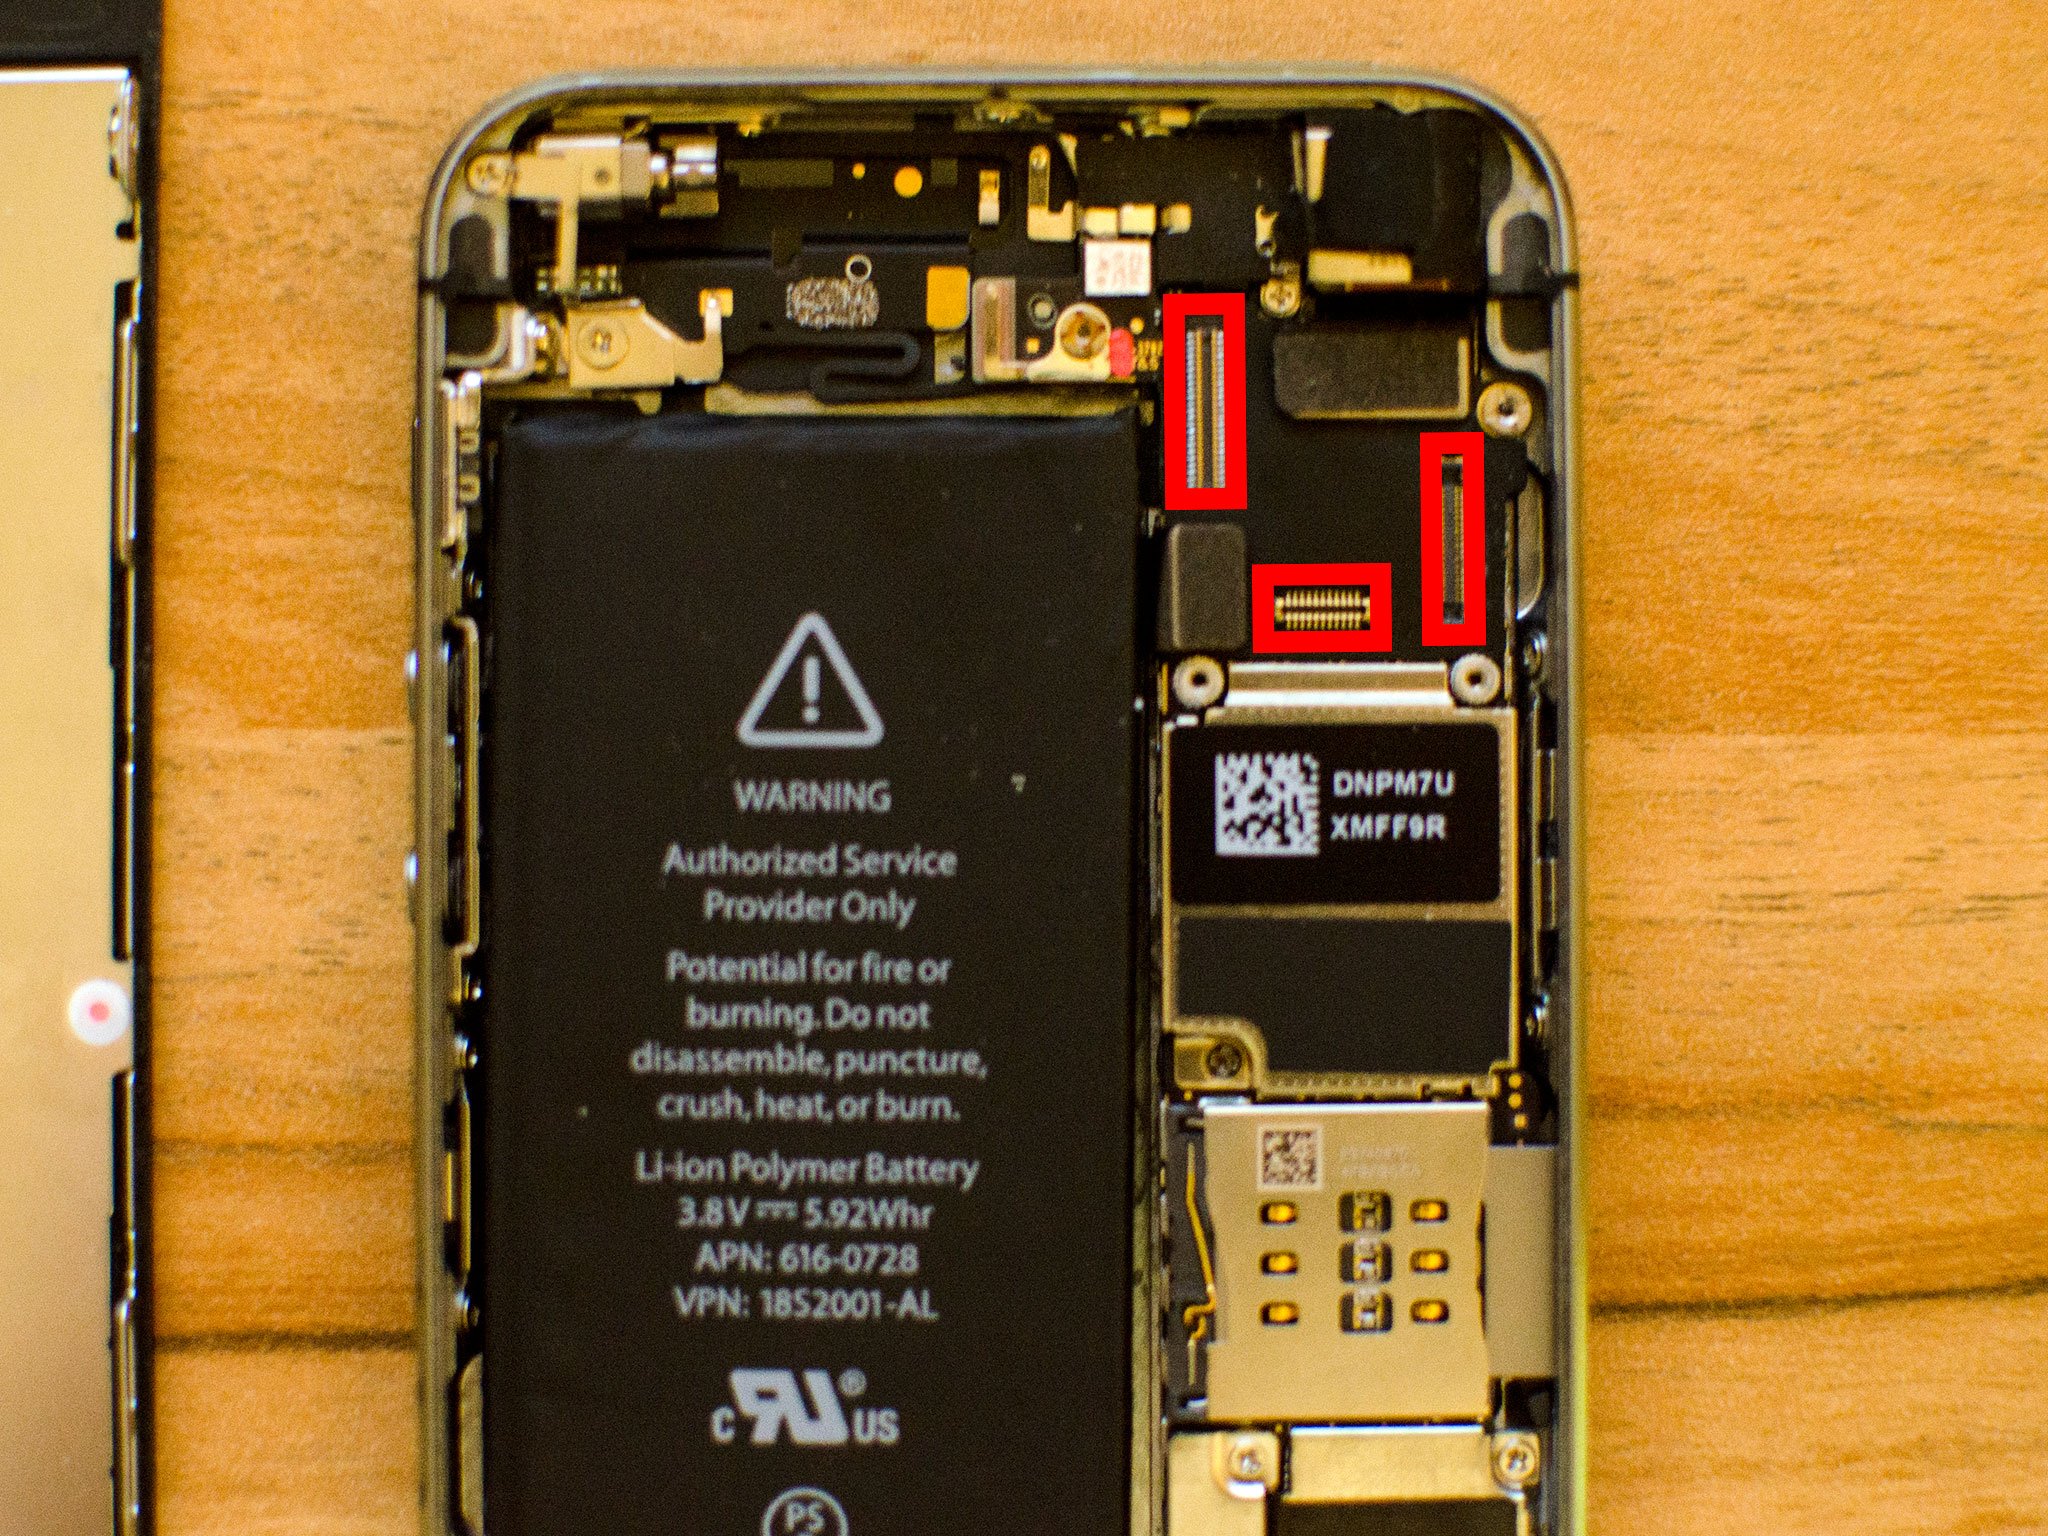
- Now use your spudger tool in order to remove the three cables shown in the image below. You'll need to remove the two off to the far right in order to reveal the third and final cable, which sits below them.
- The display assembly should now be free from the body of the phone. Go ahead and set the display assembly aside.
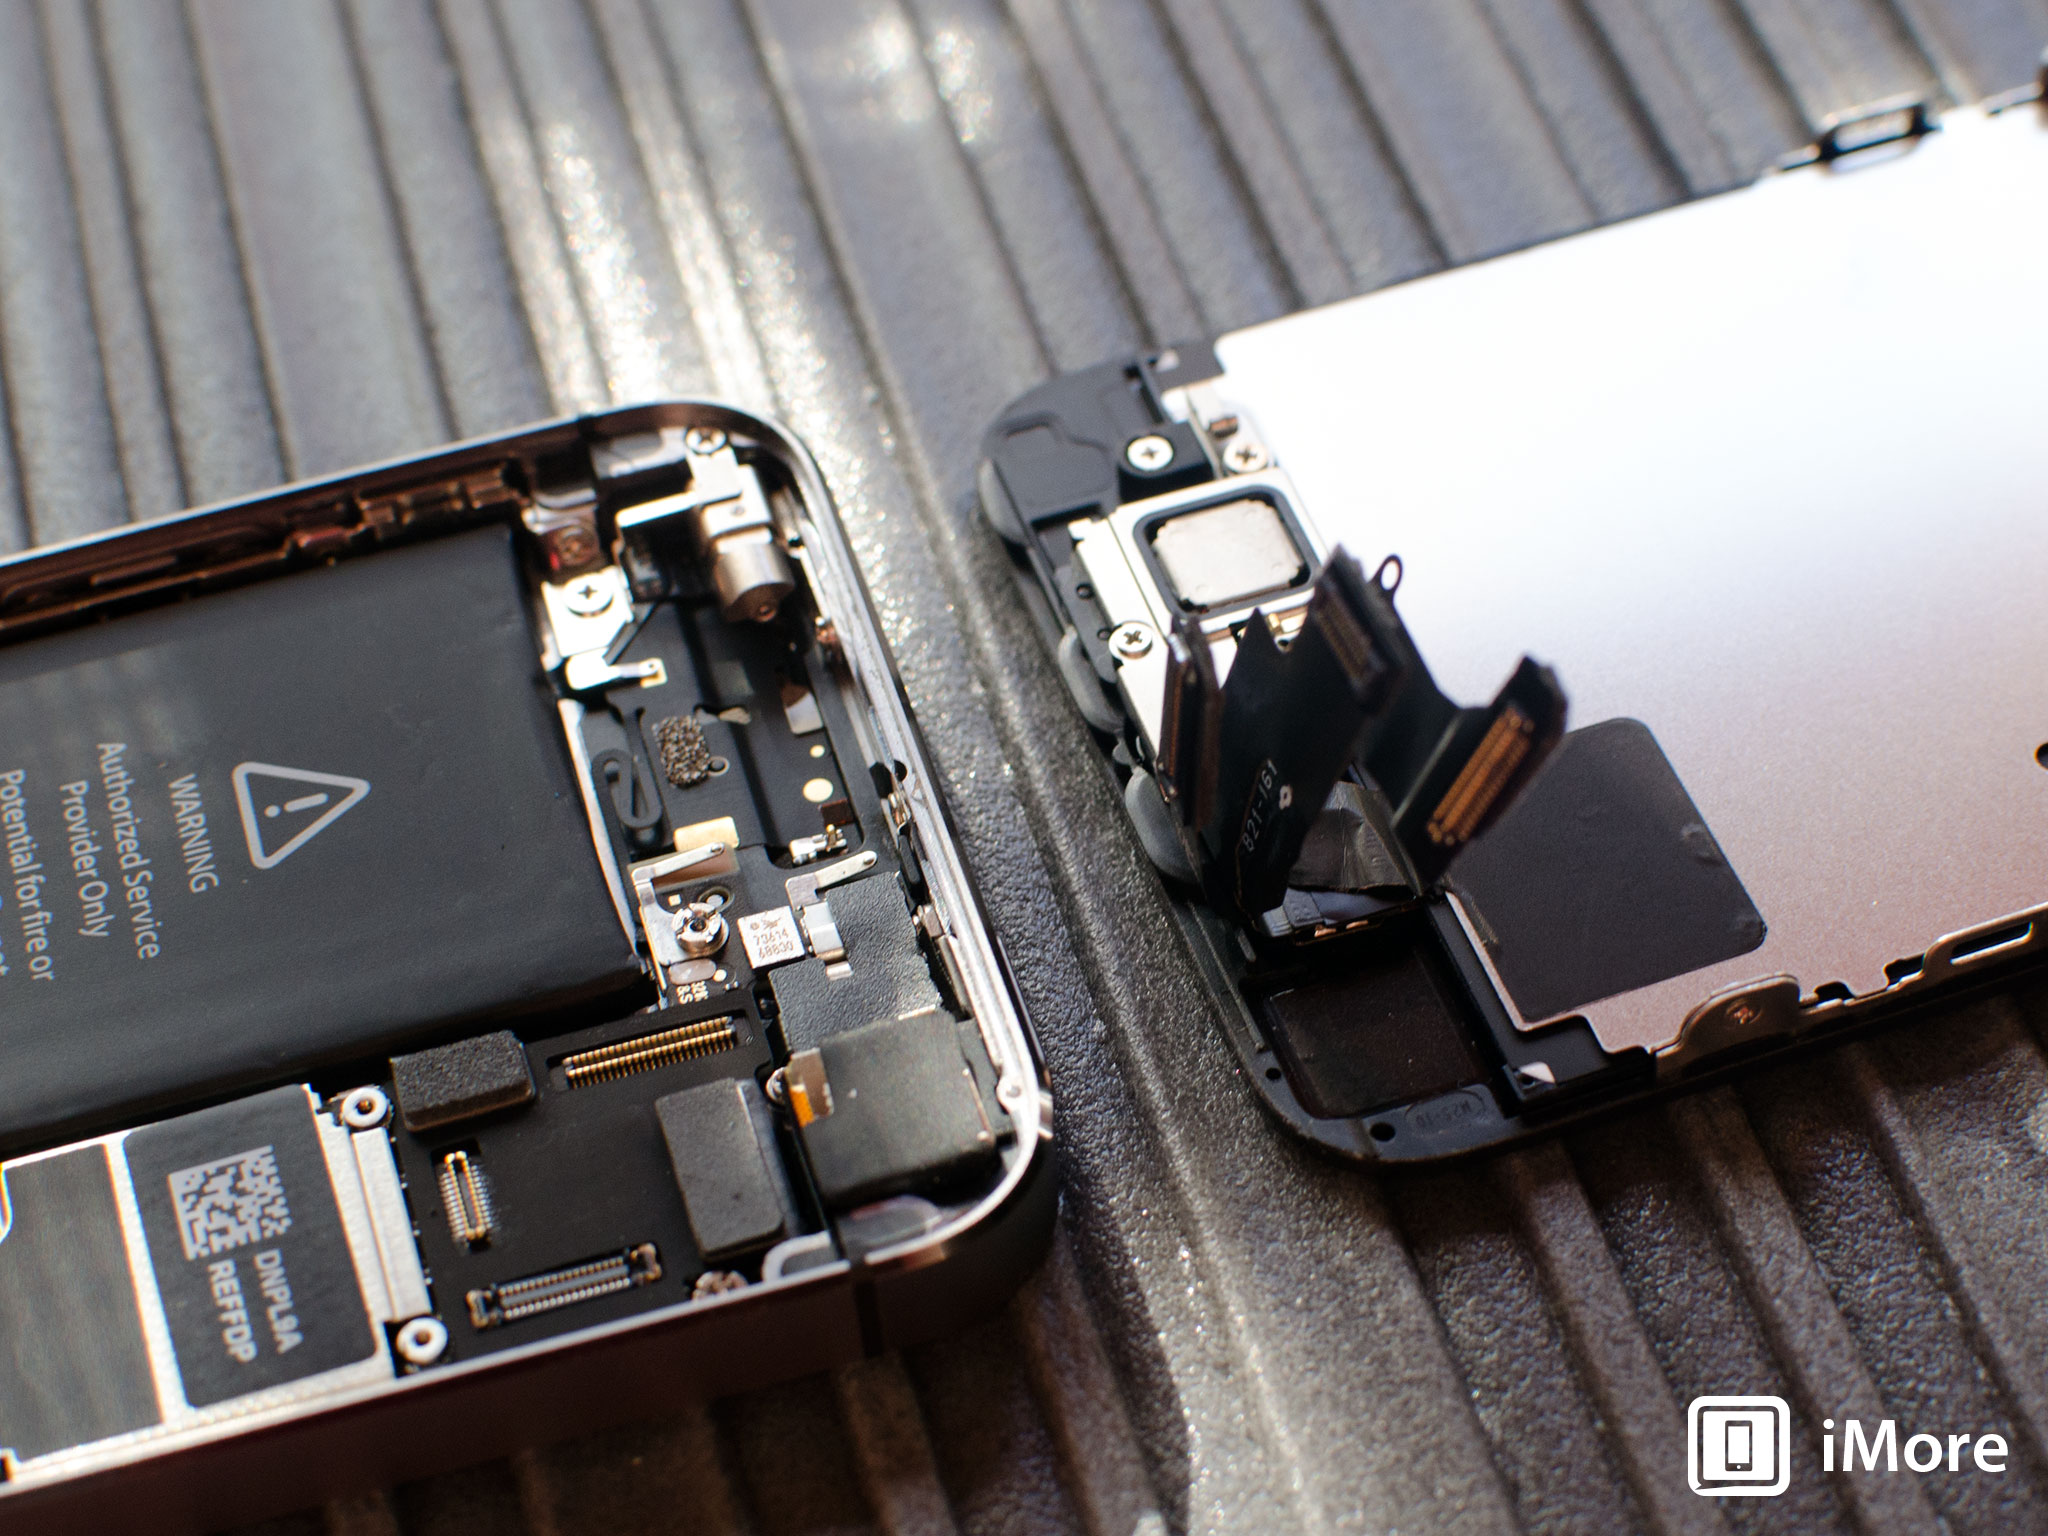
Note: We used the suction cup method here but note that if you can't get a firm grip with a suction cup, you can use a razor blade or the iSesamo opening tool. Carefully work your way around the bottom of the phone between the frame and display assembly with a razor blade or the iSesamo Opening Tool until you can gently pry up using the flat end of your spudger tool. We recommend using plastic razor blades if you can find them since they won't cause damage to the finish of the iPhone's frame.
4. Disconnect the battery
- Remove the two screws holding down the battery cable using your #000 Phillips screwdriver.
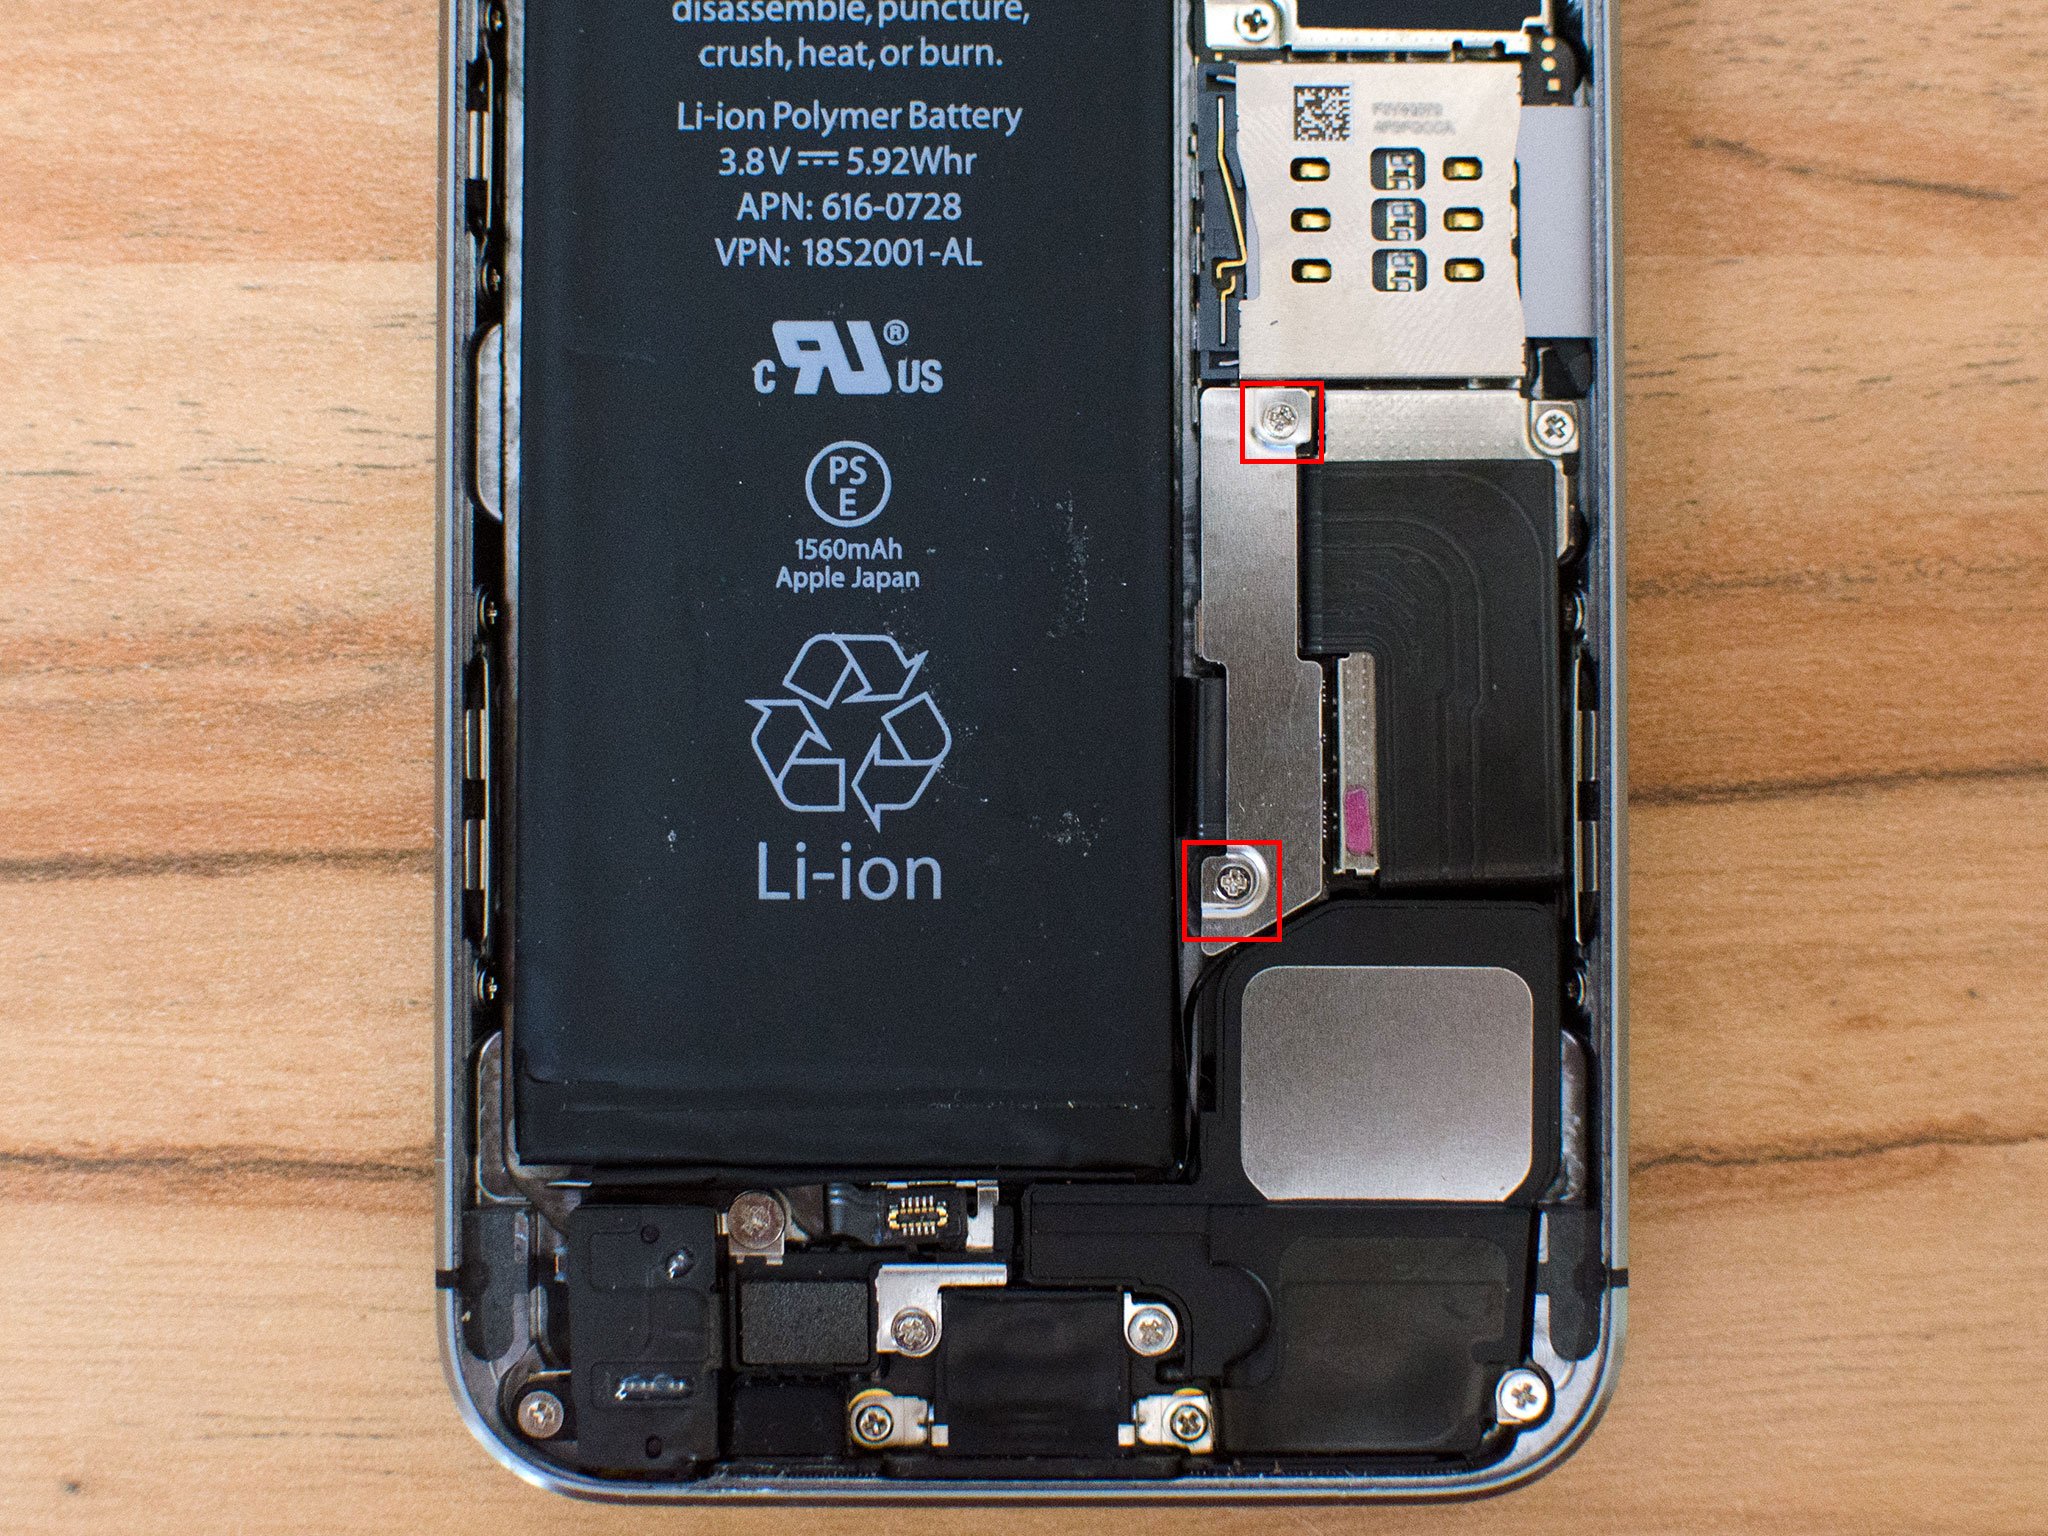
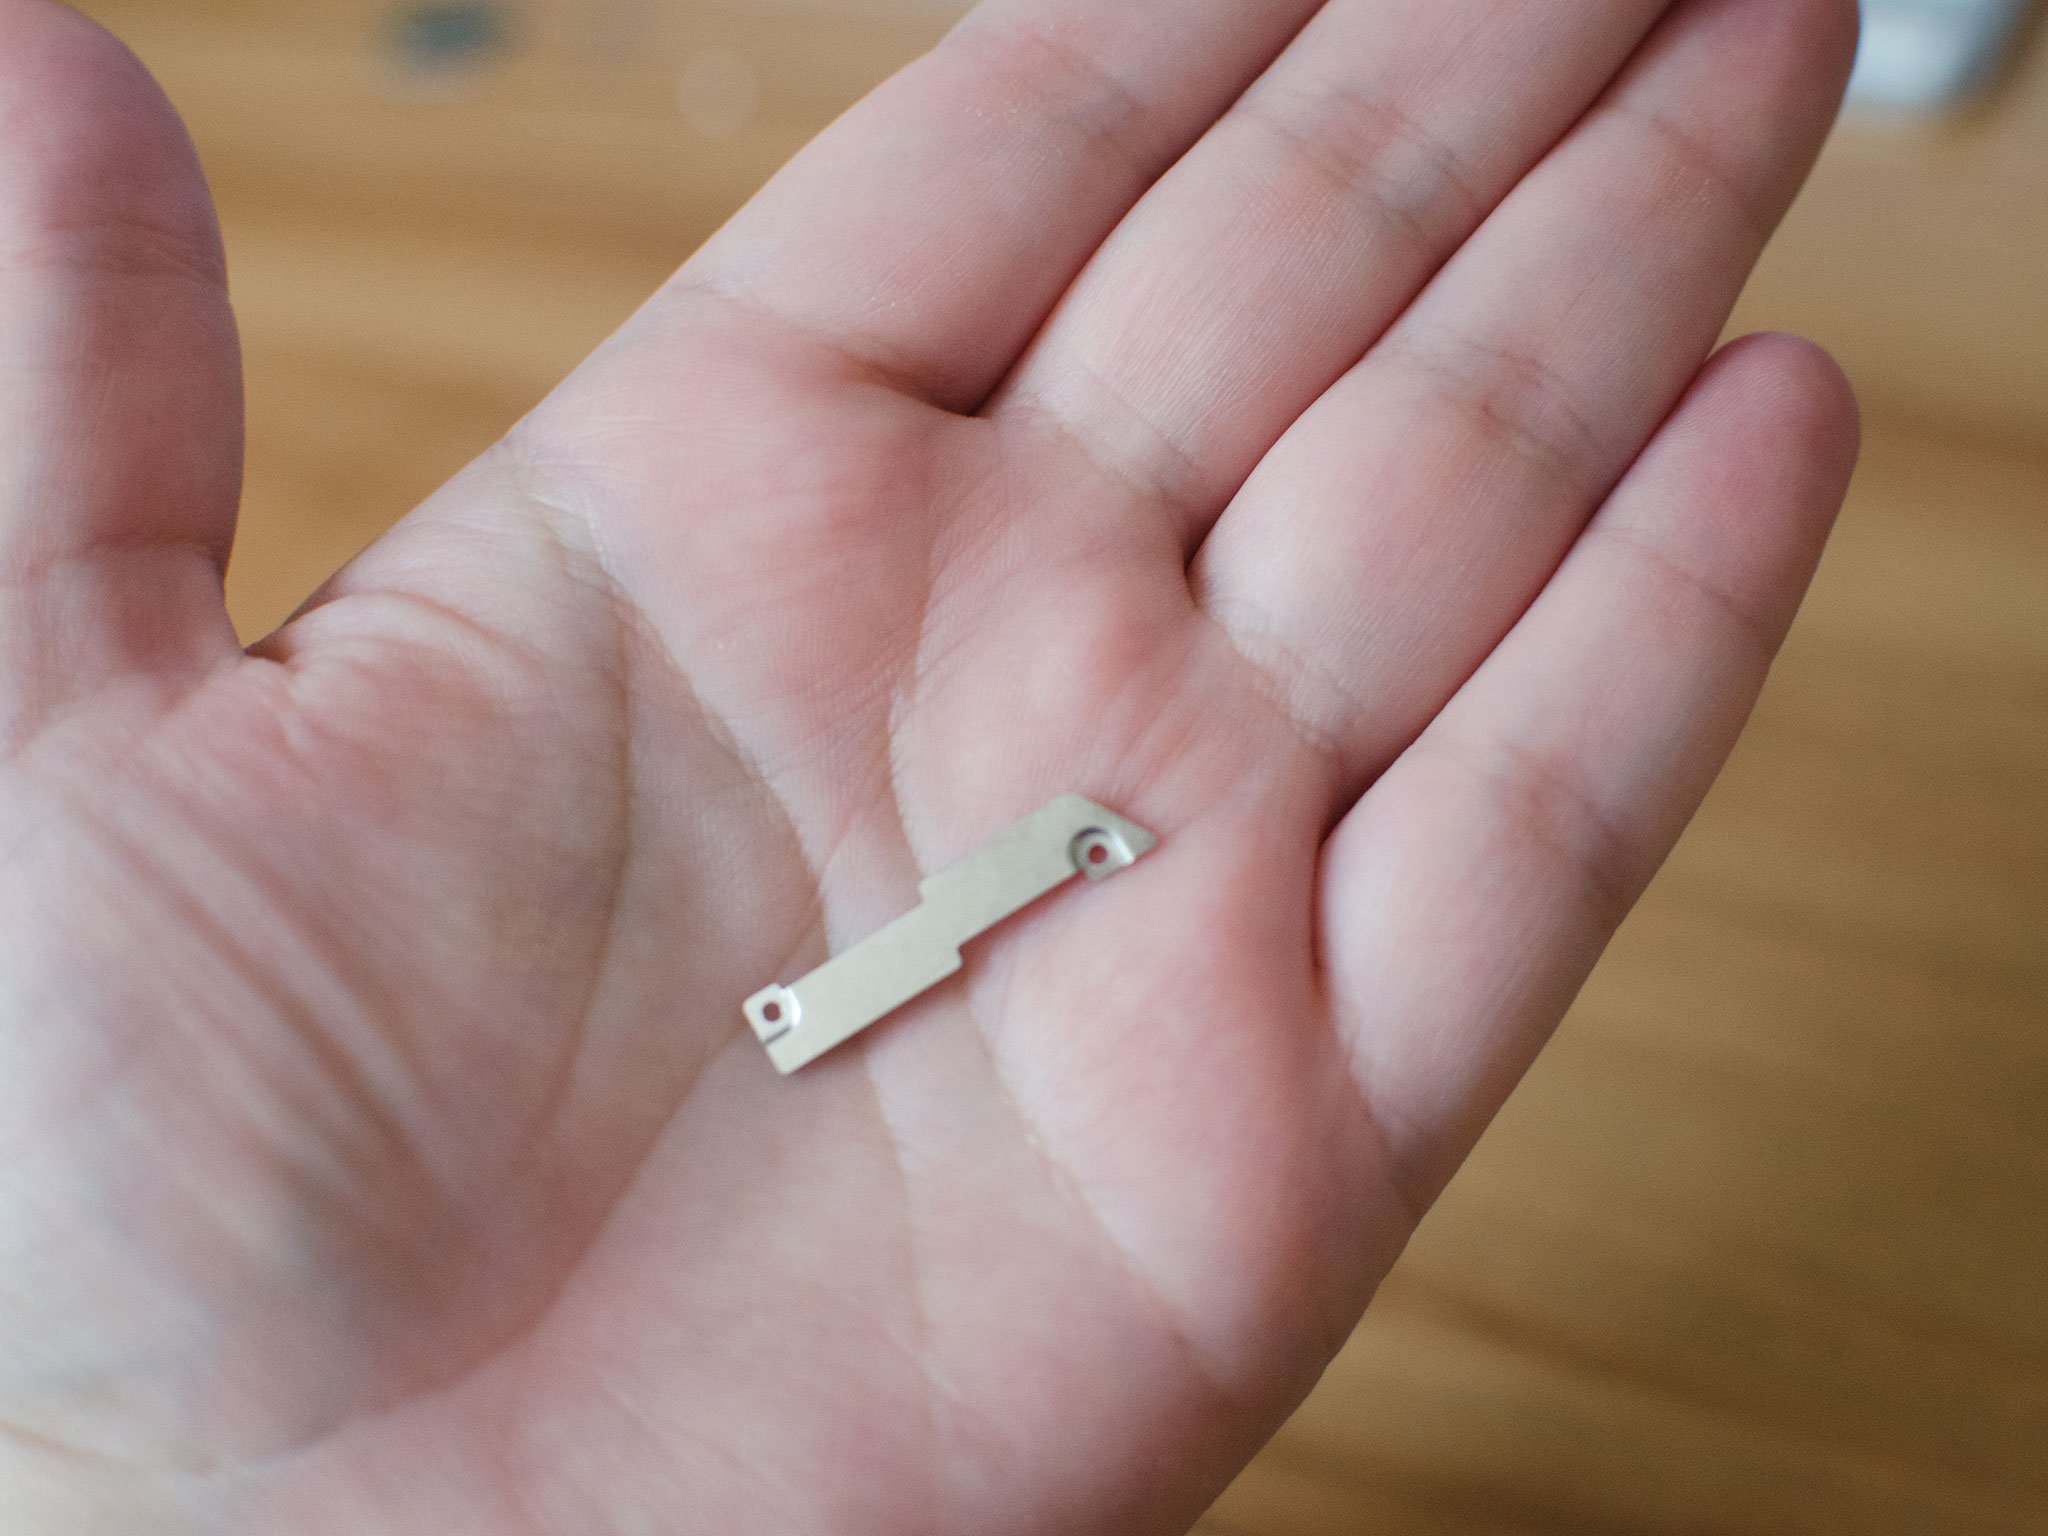
- Gently lift the battery shield out of your iPhone 5s and carefully set it aside.
- Use your spudger tool to carefully pry up the battery cable.
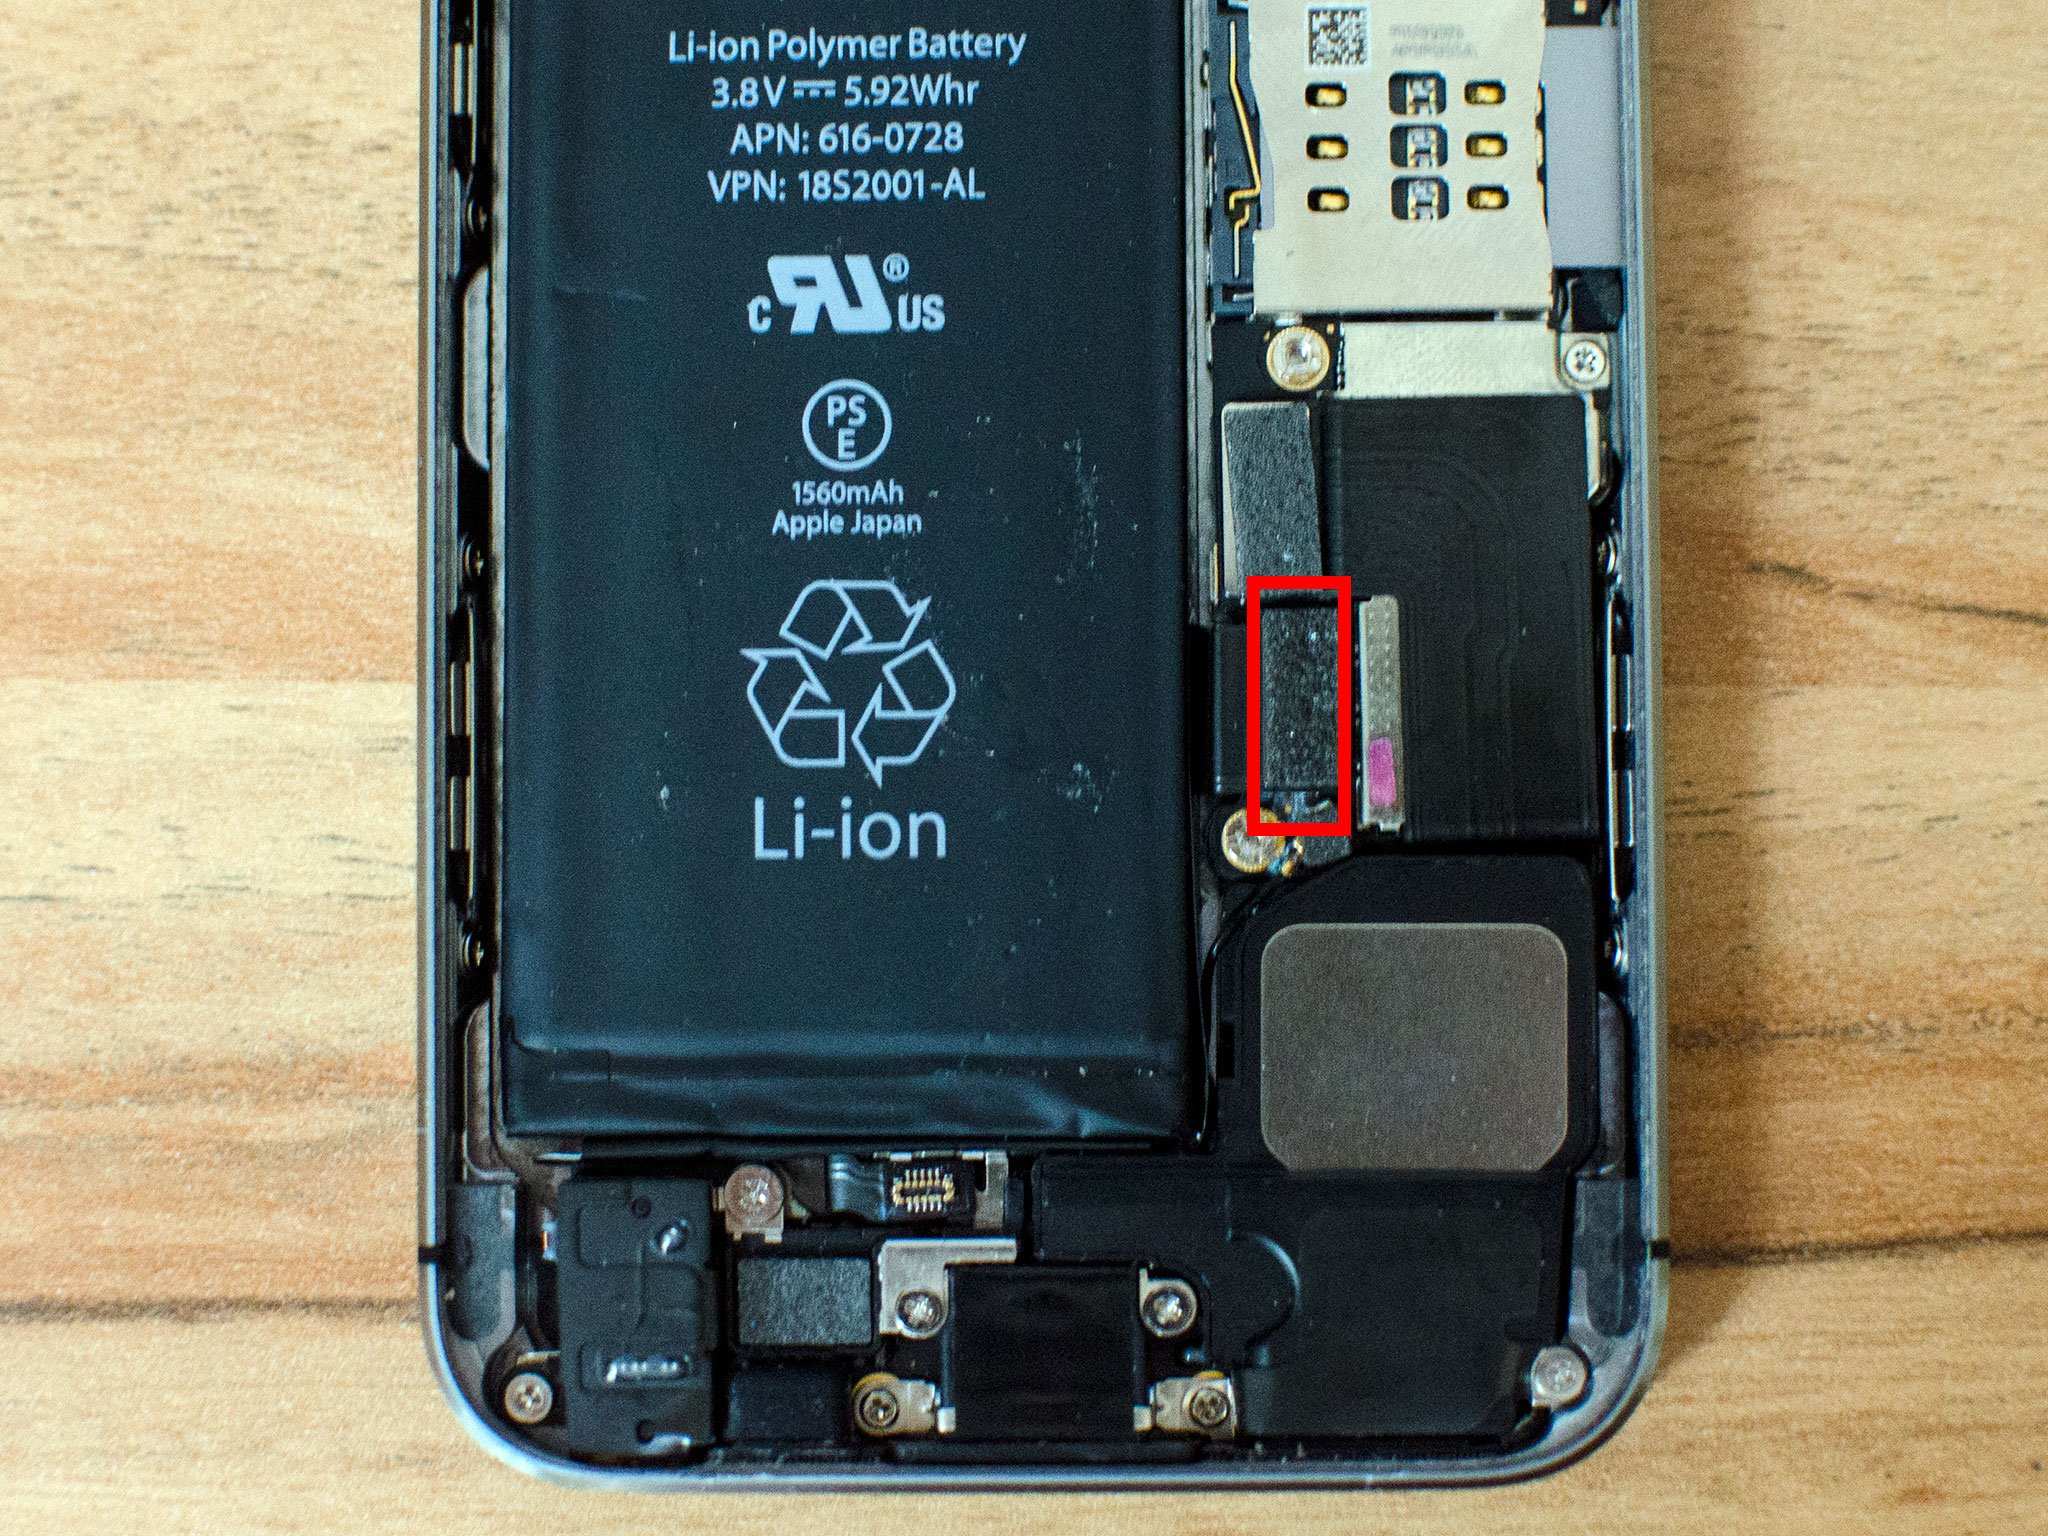
This is as far as you need to go. It isn't necessary to completely remove the battery, but it's always a good idea to disconnect it before replacing any components to prevent any shorts from happening if the Power button accidentally gets pushed during the course of a repair.
5. Replace the rear iSight camera
- Use a pair of tweezers to flip the rubber shield covering the rear camera to the right — do not try to remove it completely as it's connected. You'll only need to move it aside.
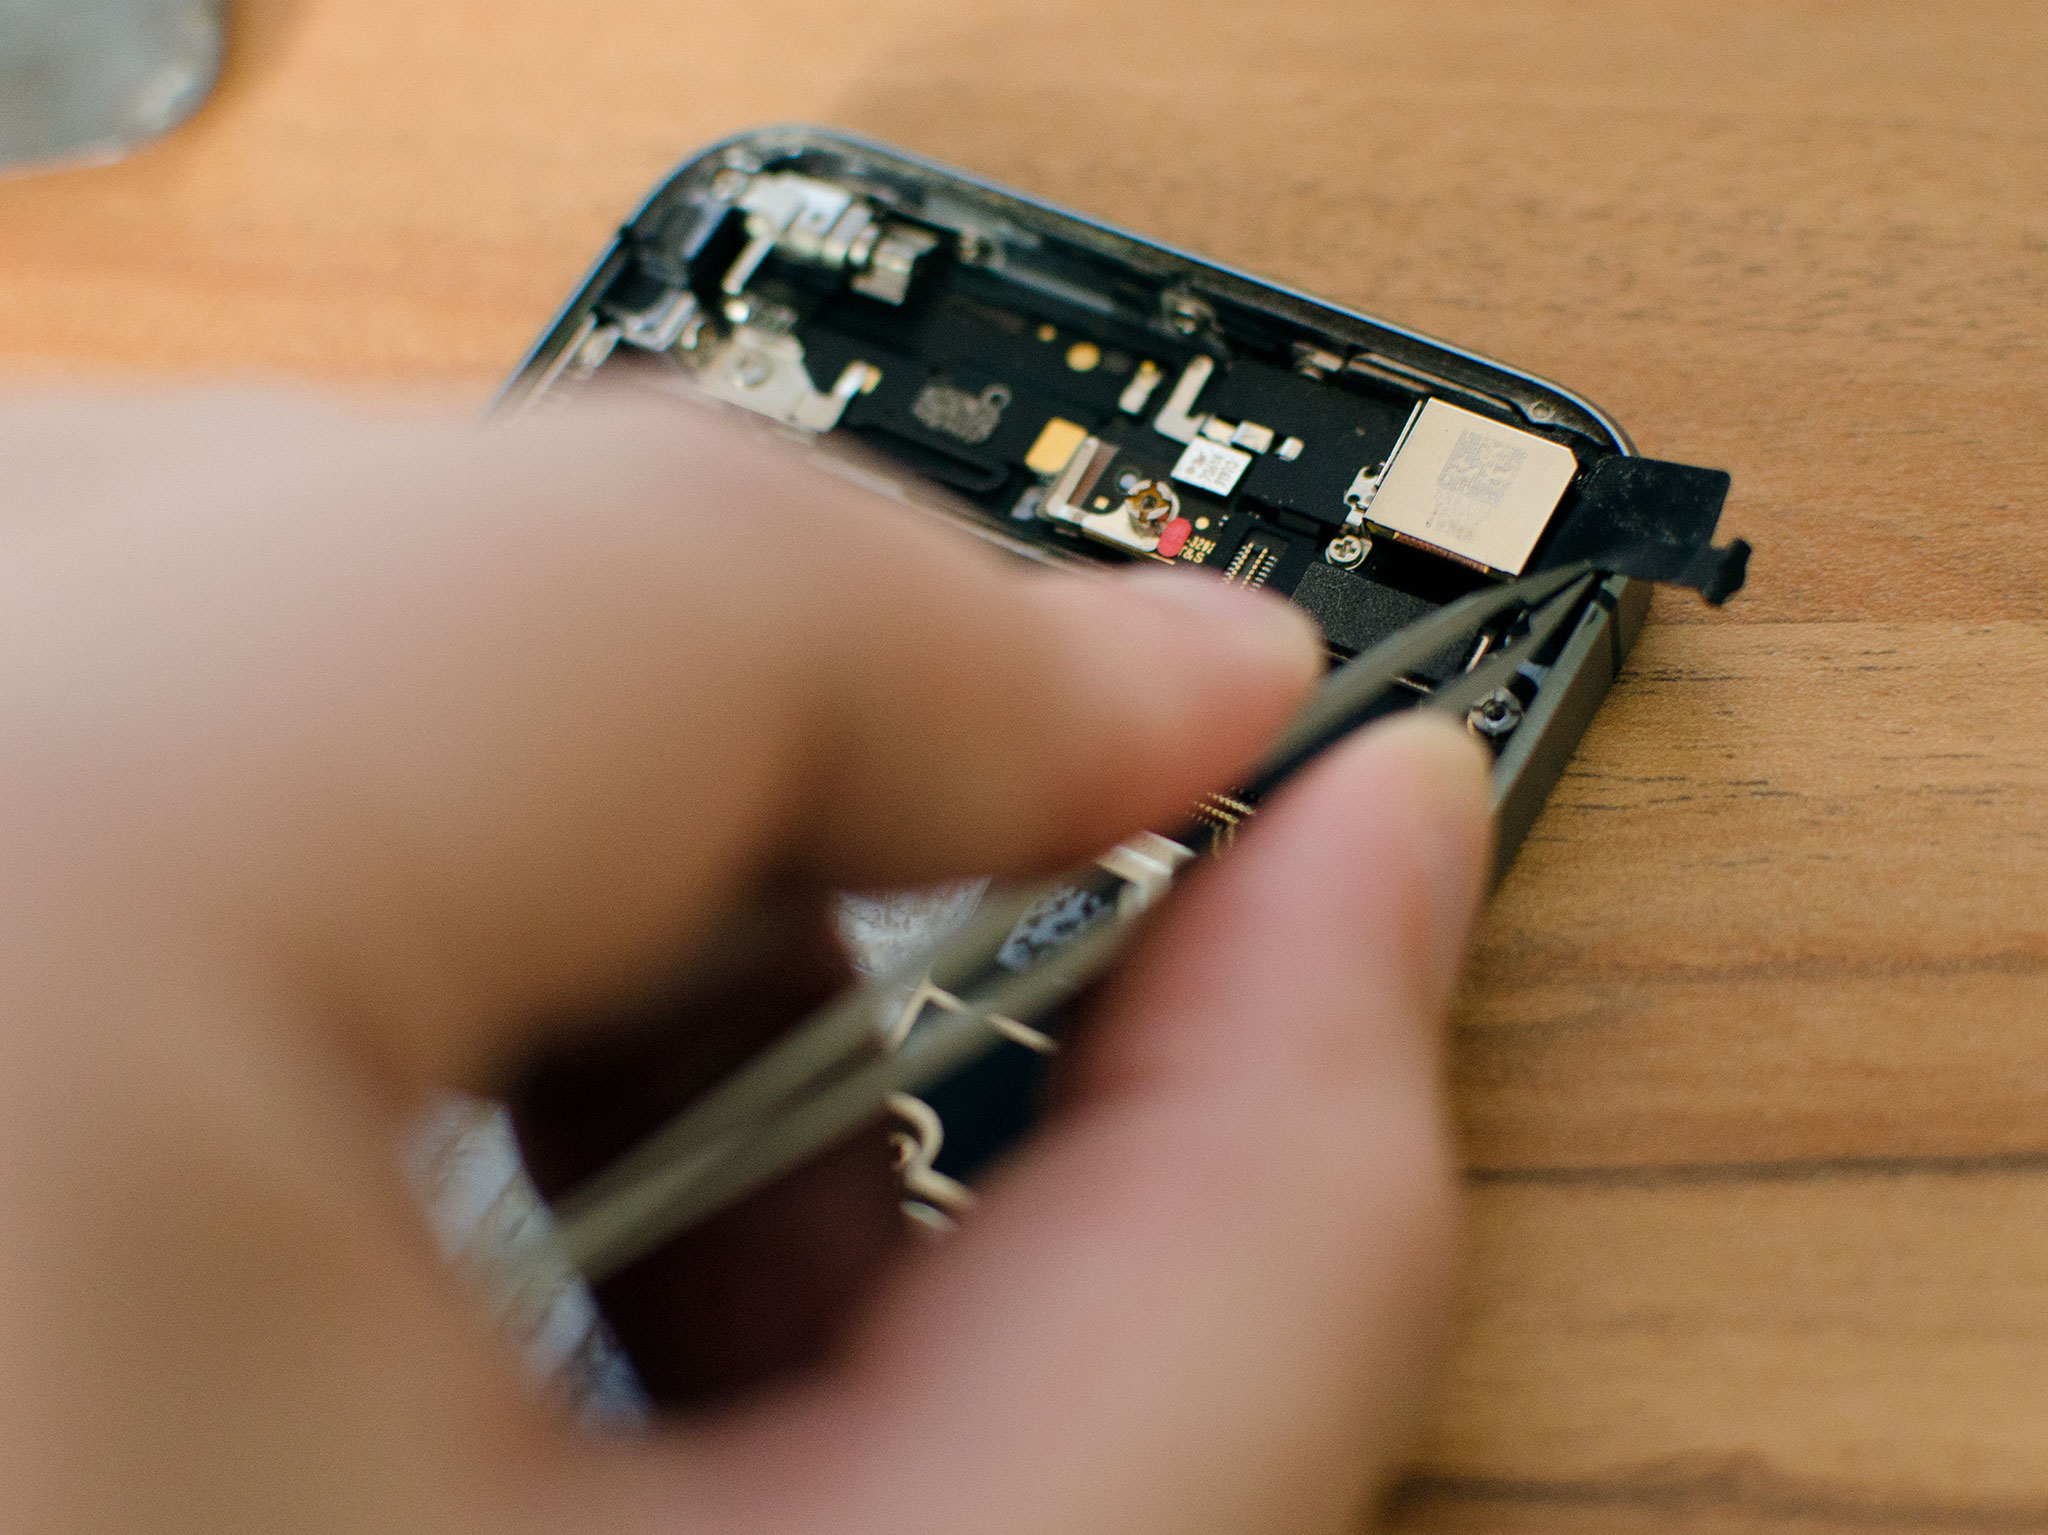
- Use your spudger tool to disconnect the rear racing camera from the logic board as shown in the image below.
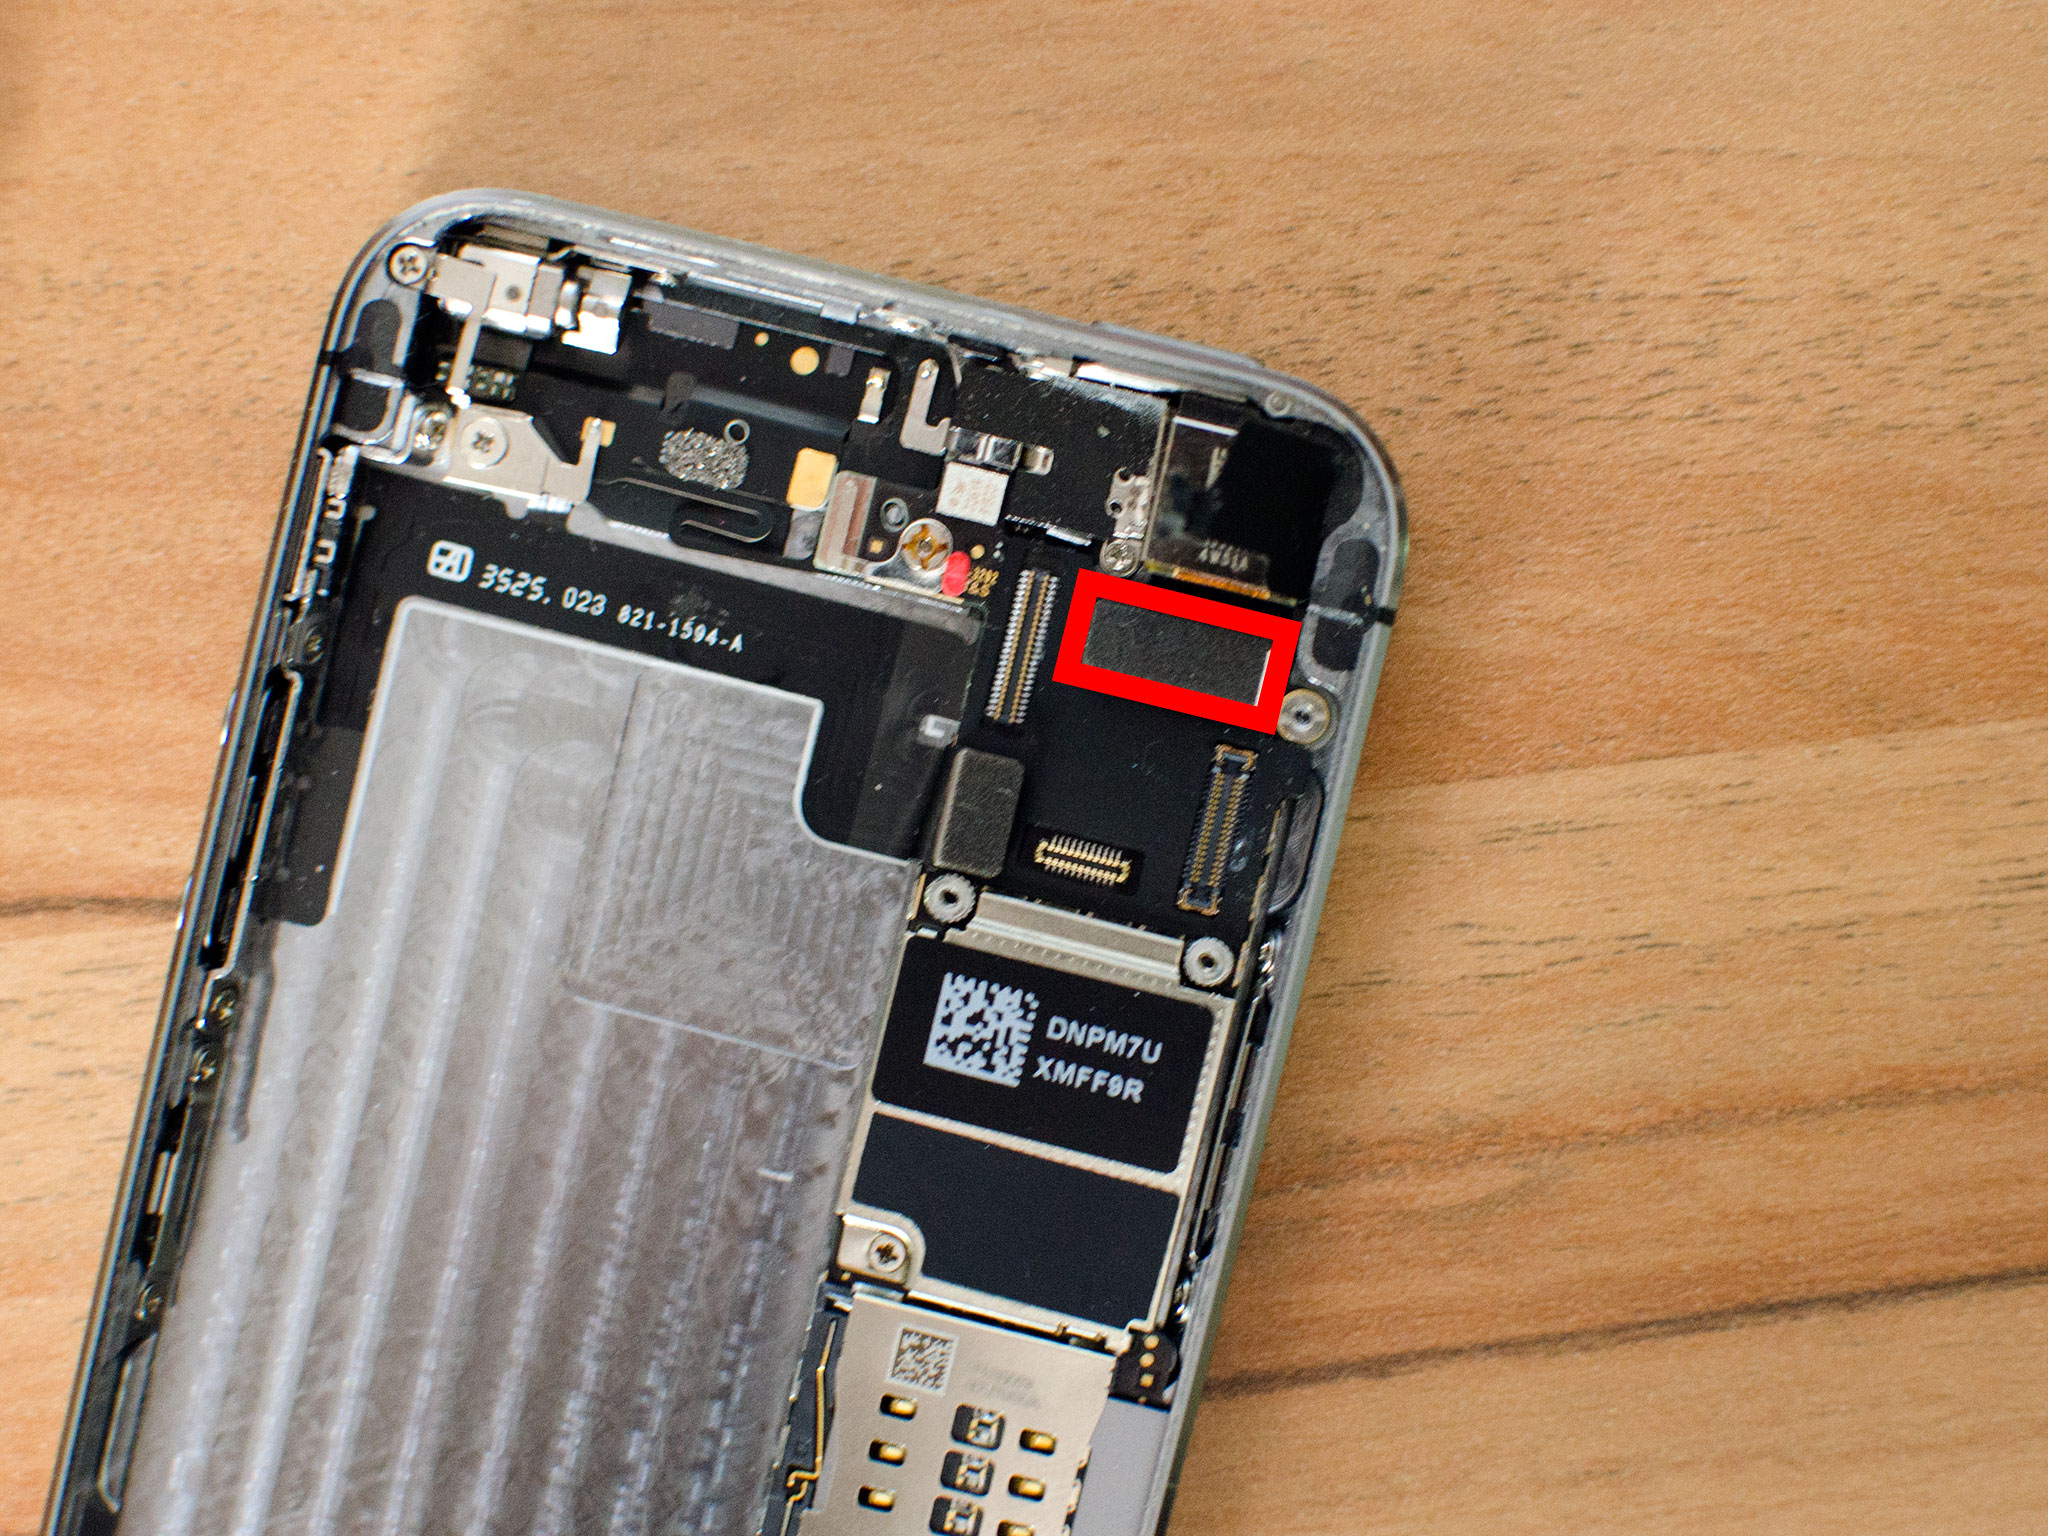
- Use your tweezers to remove the defective iSight camera from your iPhone 5s.
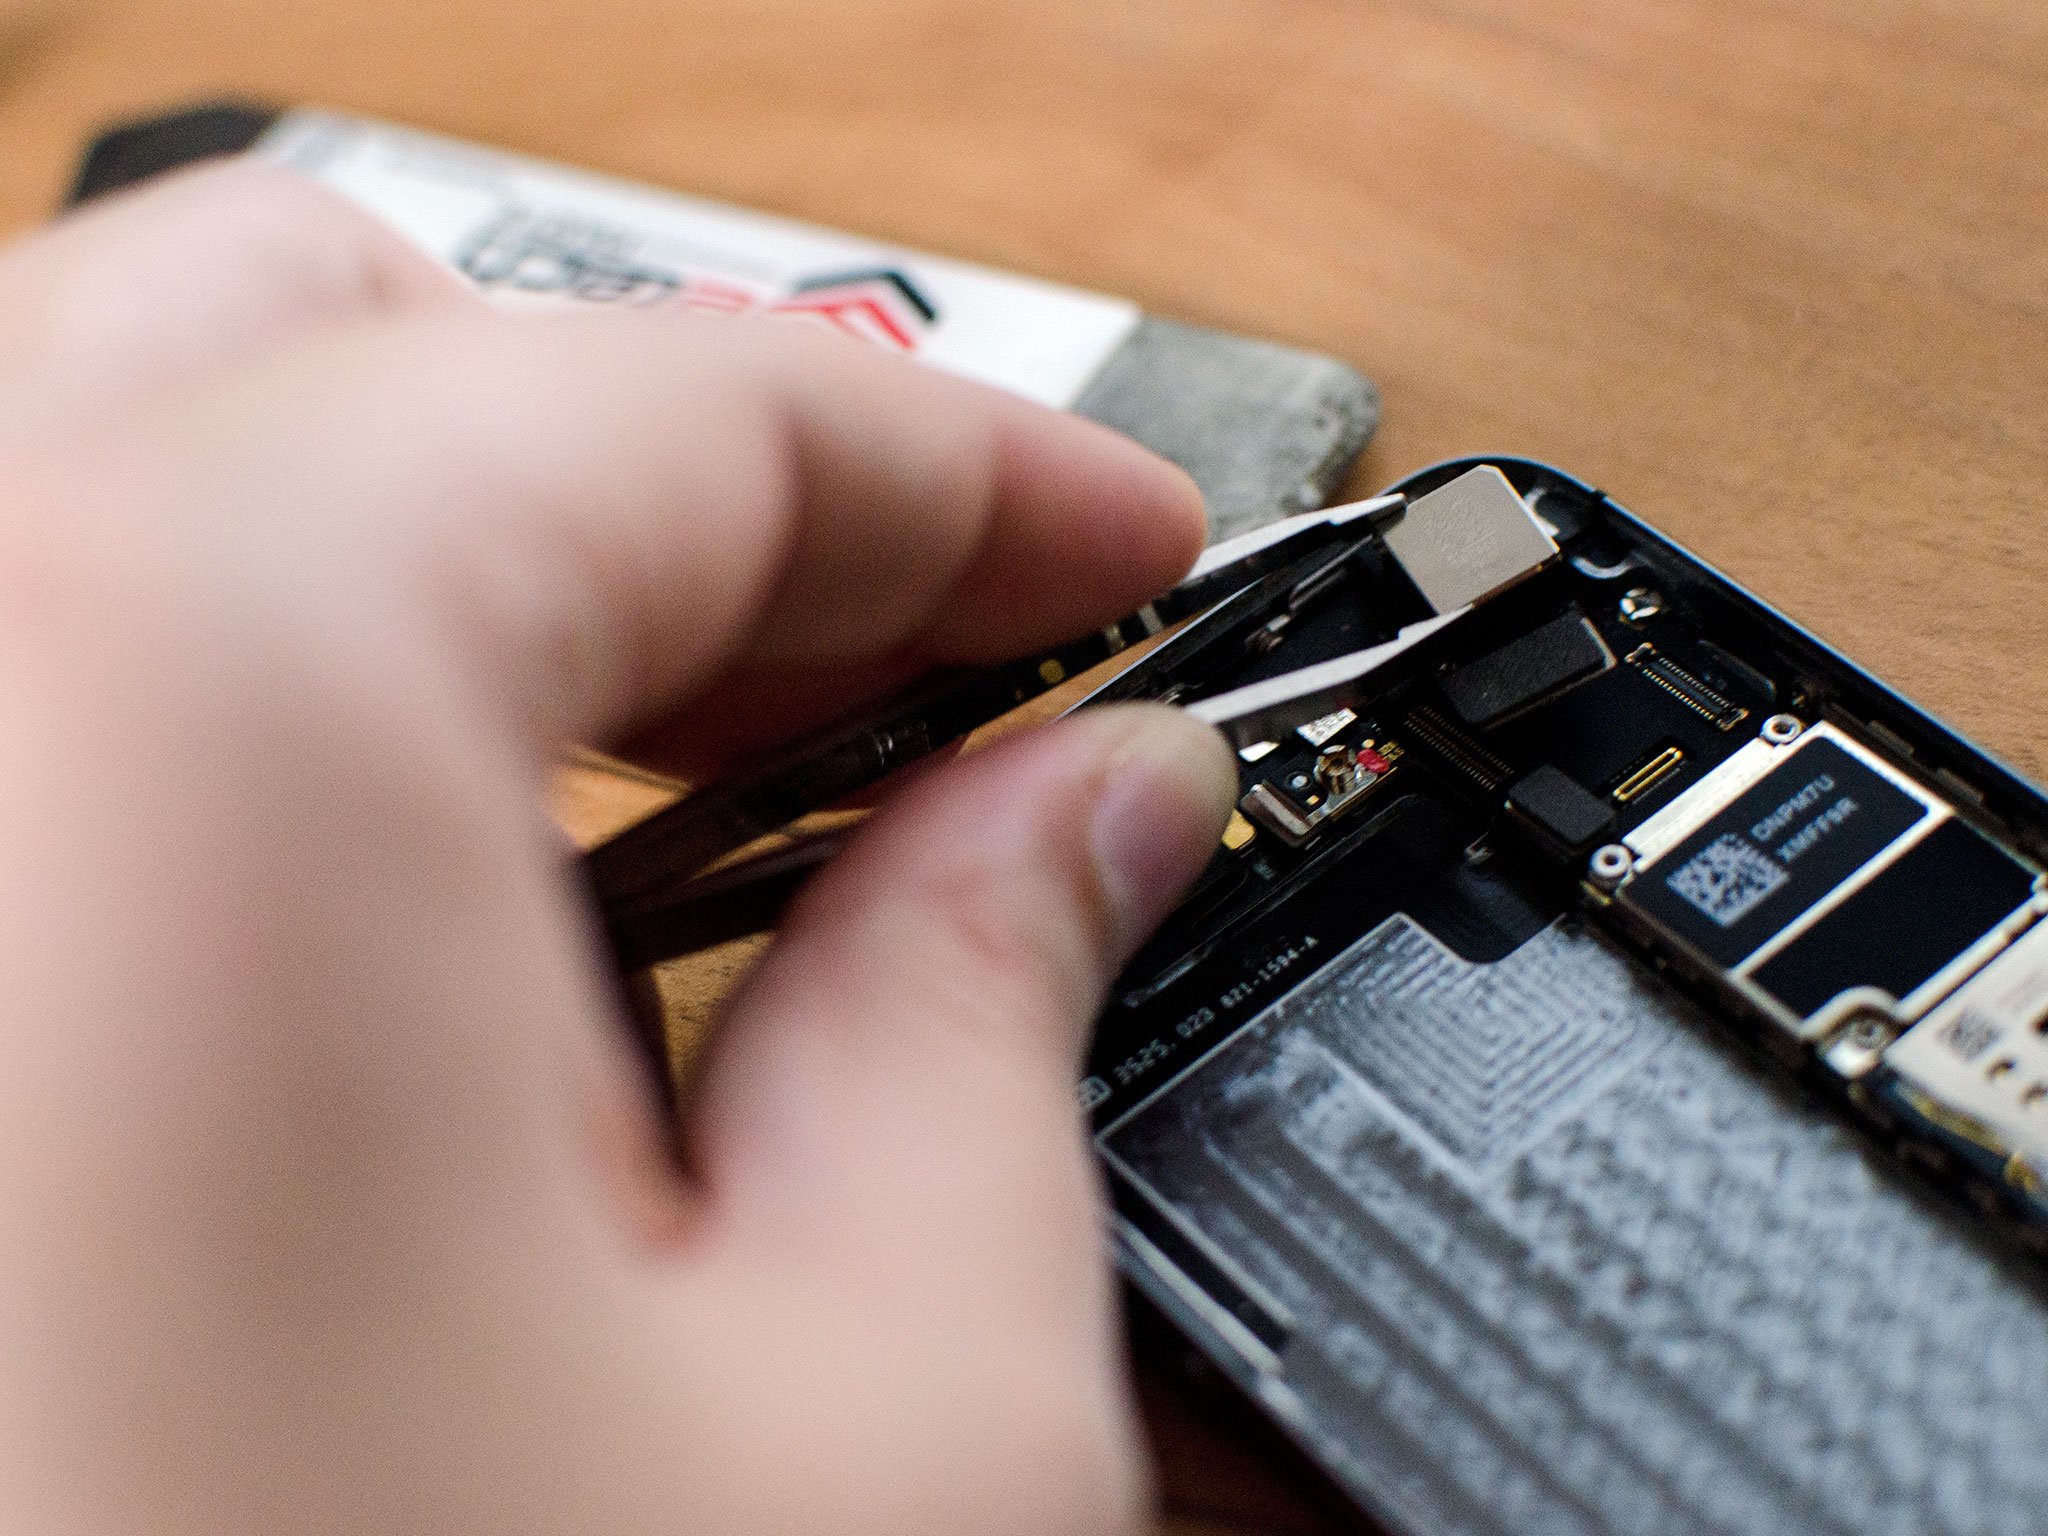
- Take notice of the small rubber spacer that sits above the camera assembly. If it became dislodged, be sure to reposition it correctly before installing the new camera.
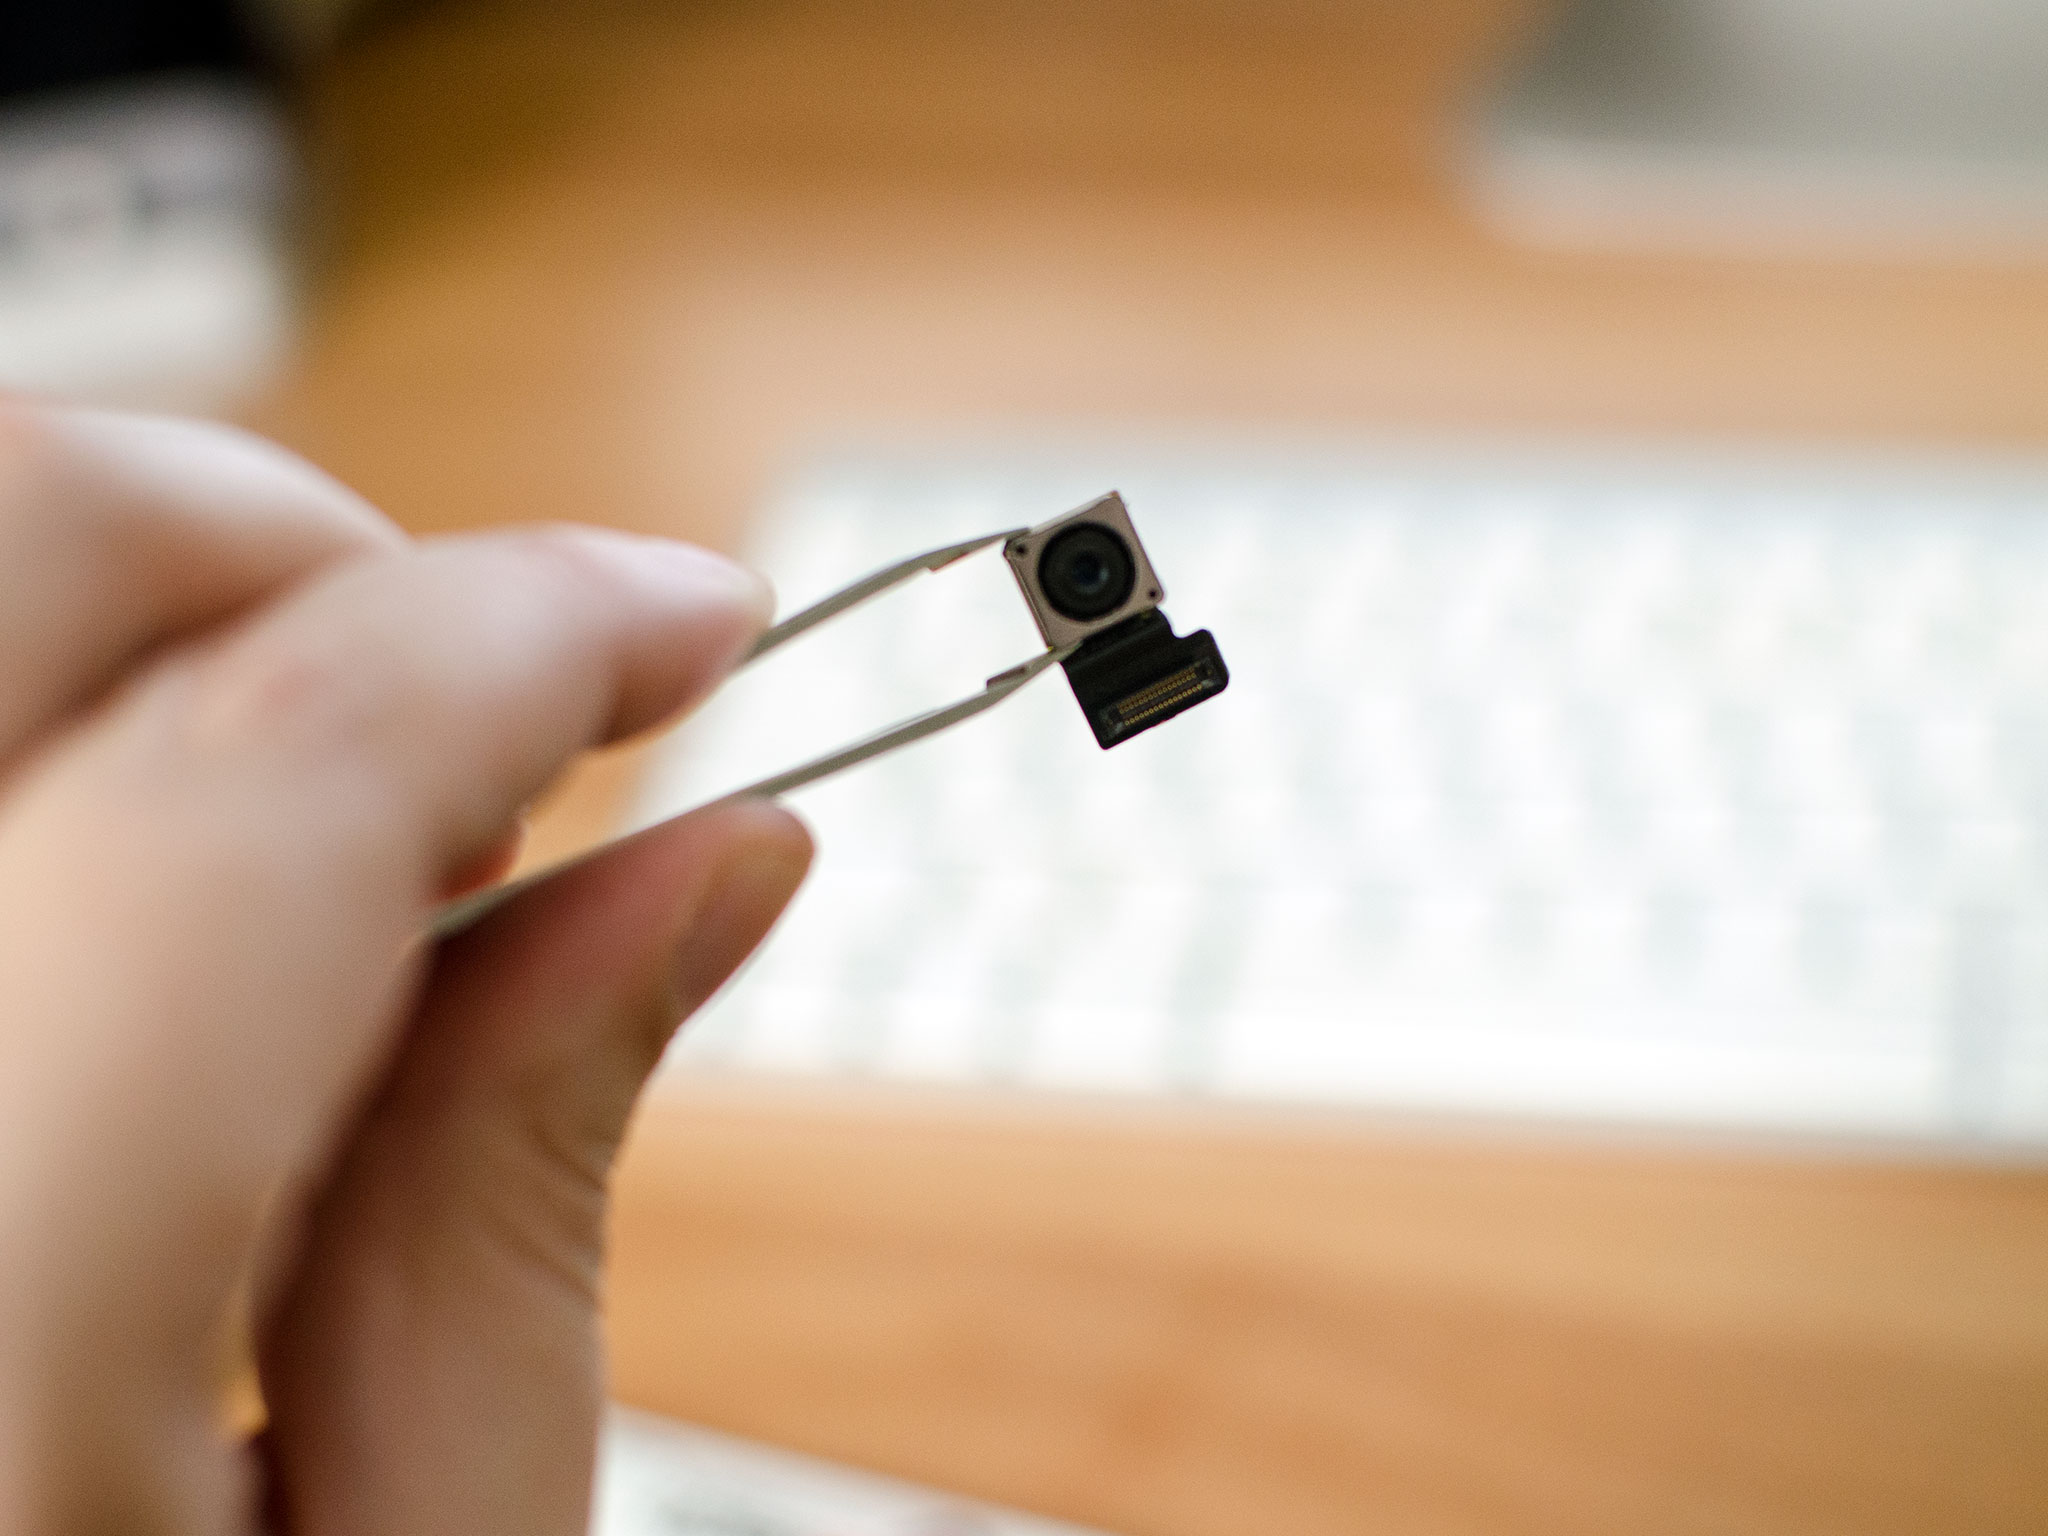
- Replace the rear iSight camera with the new one and re-connect it.
6. Reconnect the battery
- Reconnect the battery cable to the logic board.

- Replace the battery shield and the two screws you removed earlier.

7. Replace the display assembly
- Reconnect the three cables shown in the image below, starting with the cable to the far left, which sits underneath the other two.

- Replace the display shield using the four screws and your #000 Phillips screwdriver.

- Re-connect the Touch ID cable to the logic board. The easiest tool to help you do this is the pointed end of the spudger tool.

- Replace the Touch ID shield that sits over the cable.

- Carefully line up the top of the display into the top of the frame.
- Snap down the display until it clicks into place.
If the display doesn't want to go back down, do NOT force it. Instead, be sure that the top is lined up correctly and that you aren't snagging any cables. There should be no resistance when snapping it back into place. If there is, you aren't lining it up correctly.
Master your iPhone in minutes
iMore offers spot-on advice and guidance from our team of experts, with decades of Apple device experience to lean on. Learn more with iMore!
8. Replace the dock connector screws

Use your 5-point security screwdriver to replace the two dock connector screws that sit on either side of the dock.
9. Test the new iSight Camera
After you've finished assembling your iPhone 5s, it's safe to turn it on. In order to test the new camera, I recommend you perform the following steps:
- Toggle between the front and rear facing cameras to make sure both are working and switching properly.
- Tap the screen is several different areas to ensure focus is working.
- Take different kinds of photos to ensure all modes function properly — for example, take some burst photos as well as some regular ones.
- Take a few videos in different modes.
- Take a photo of a piece of white paper and of a dark surface to verify there are no dead spots on the new camera.
If all of the above checked out okay, you're good to go!
○ Fix a broken iPhone 7 or 7 Plus
○ Fix a broken iPhone 6s or 6s Plus
○ Fix a broken iPhone SE
○ Fix a broken iPhone 6 or 6 Plus
○ Fix a broken iPhone 5c
○ Fix a broken iPhone 5s
○ Fix a broken iPhone 5
○ Fix a broken iPhone 4s
○ Fix a broken iPhone 4 (GSM)
○ Fix a broken iPhone 4 (CDMA)
○ Fix a broken iPhone 3GS or 3G
iMore senior editor from 2011 to 2015.
