How to set up Timed Access Control on your Apple AirPort router
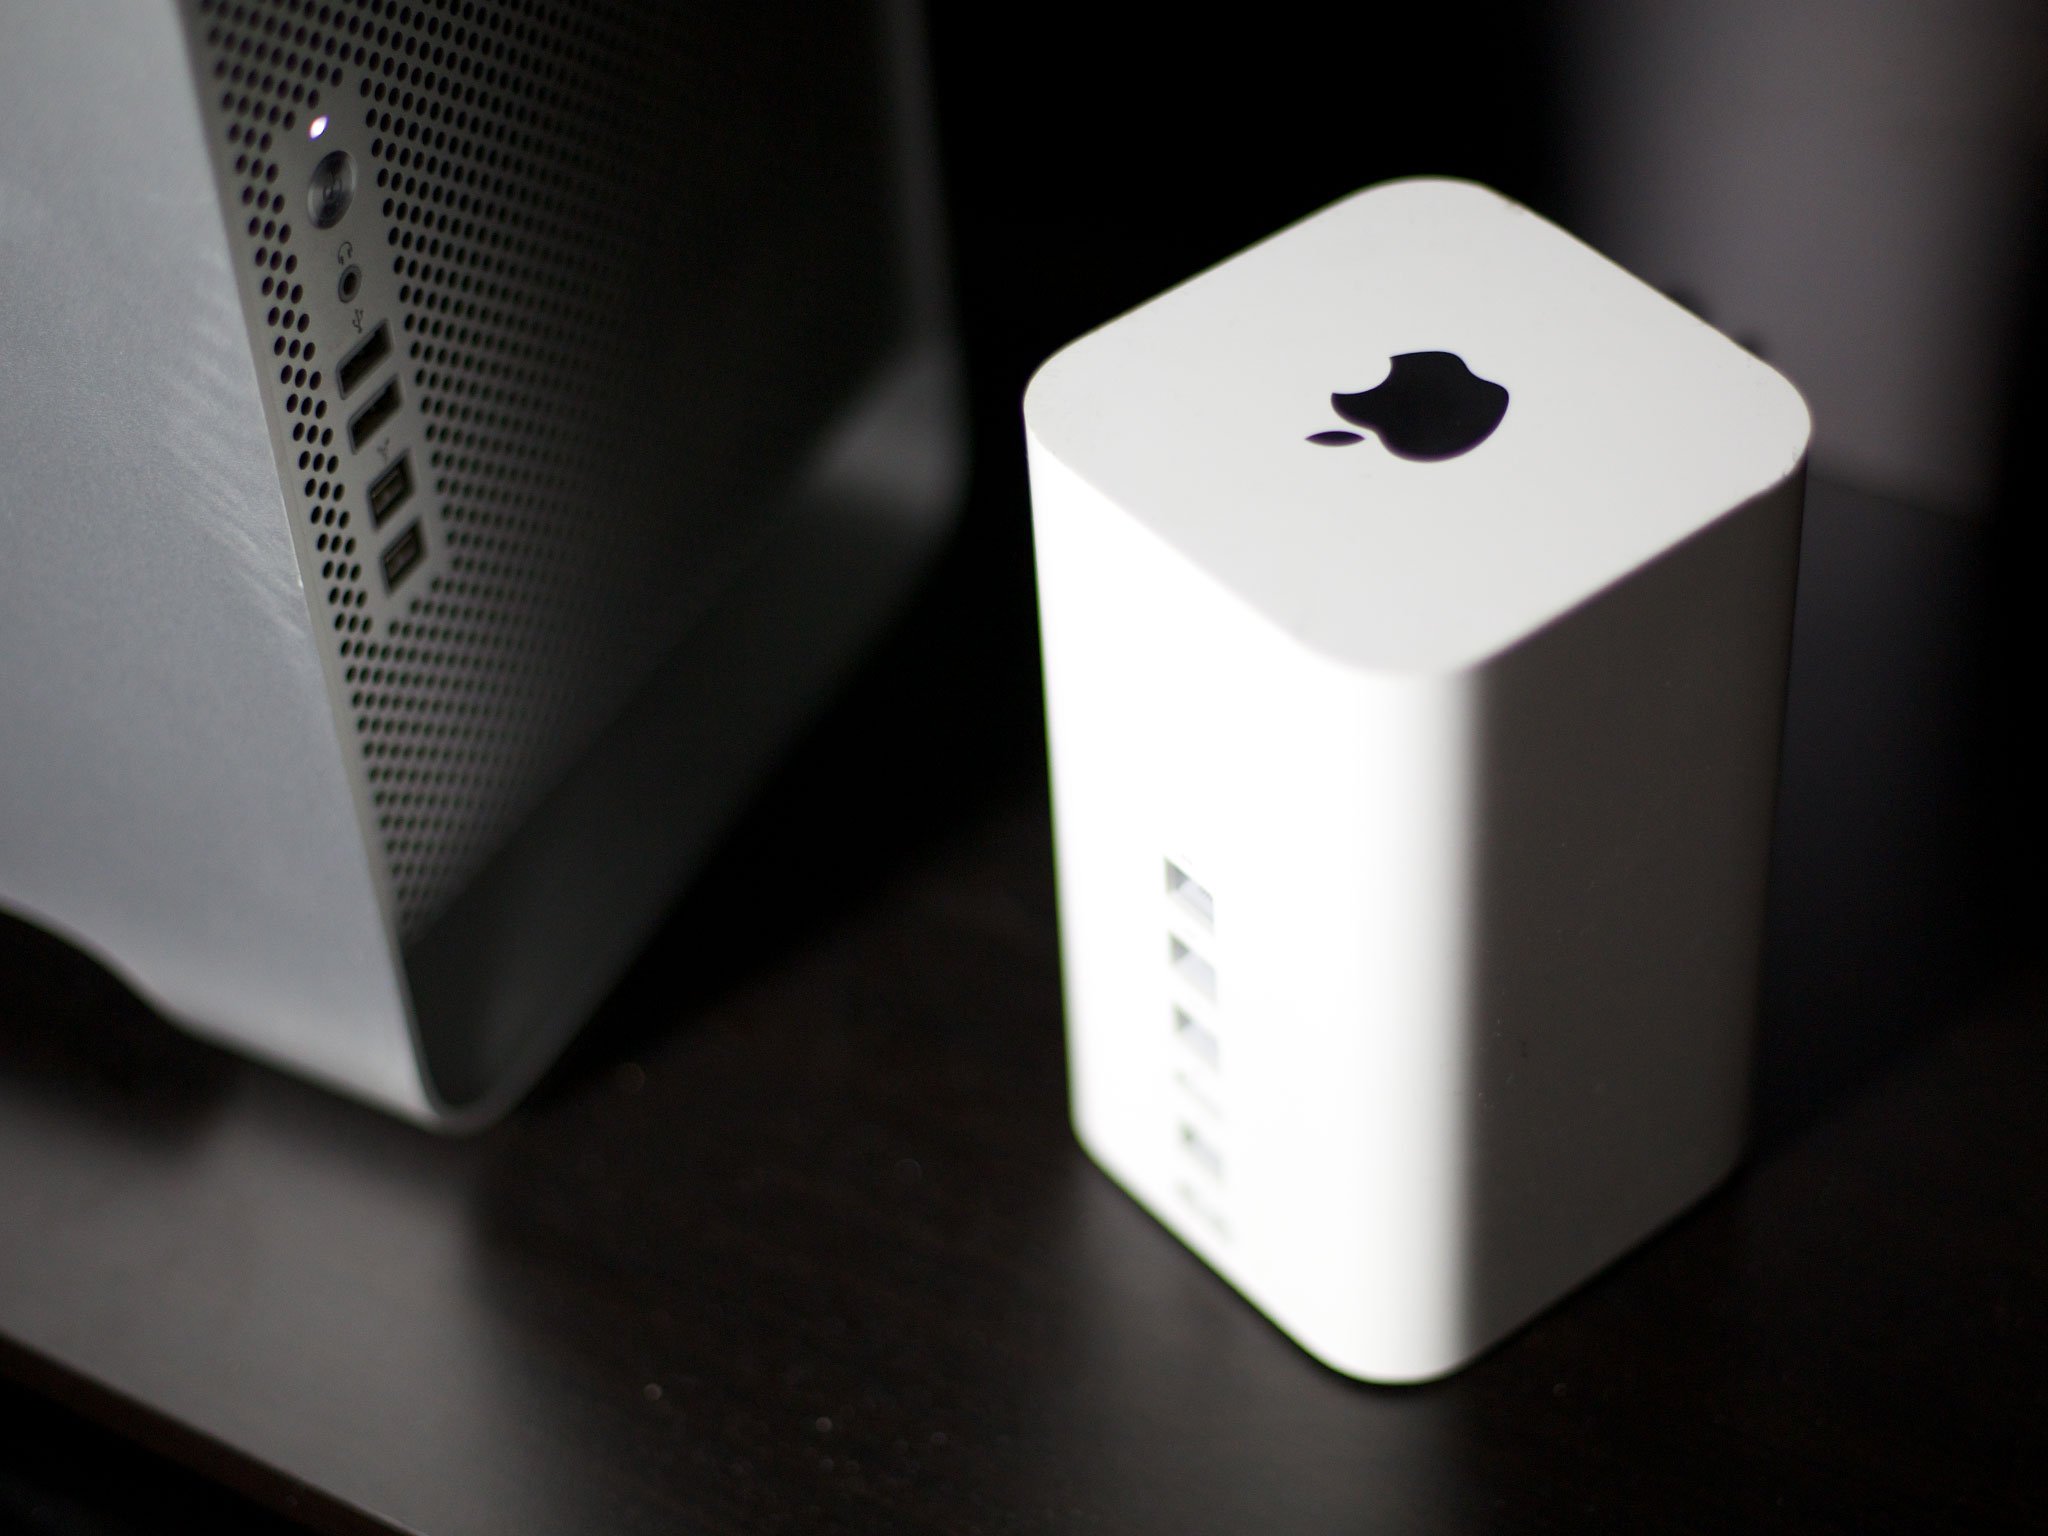
Are your children getting messages at 3 a.m.? Playing Pokémon Go when they should be doing homework? Are you finding it impossible to get off the internet at night and get the sleep you need? Well, Timed Access Control is here to help!
If you're a concerned parent who wants to limit your children's access to the internet, or you simply what to take control of when and how the internet can be accessed in your home, Apple's AirPort Extreme and AirPort Express routers and the Timed Access Control feature were designed to do just that.
How to find the MAC addresses for the devices you want to control
Before you begin, you'll need the MAC address of any device you want to add to Timed Access Control. The MAC address is the unique identifier of that device's network card.
How to find the MAC address of a Mac
You can find a MacBook or desktop Mac's MAC address is the system's network settings.
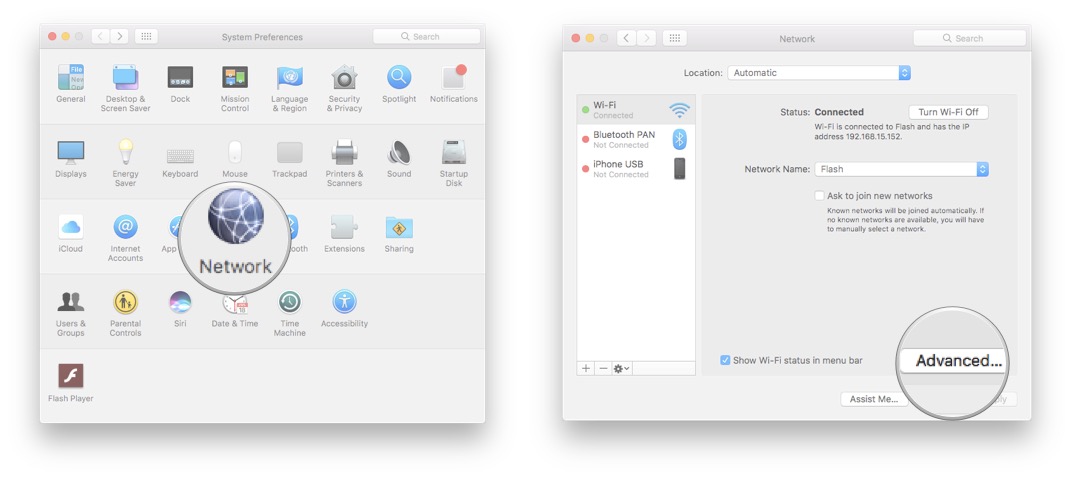
- Launch System Preferences
- Click Network.
- Click the Advanced button, bottom right.
- Click on the Hardware tab and find your MAC address. It'll be in the form of xx:yy:zz:aa:bb:cc and can be a mix of numbers and letters. For example, 58:55:ca:f7:ba:2d. That's the MAC address.
- Highlight the address and copy it (type CMD-C).
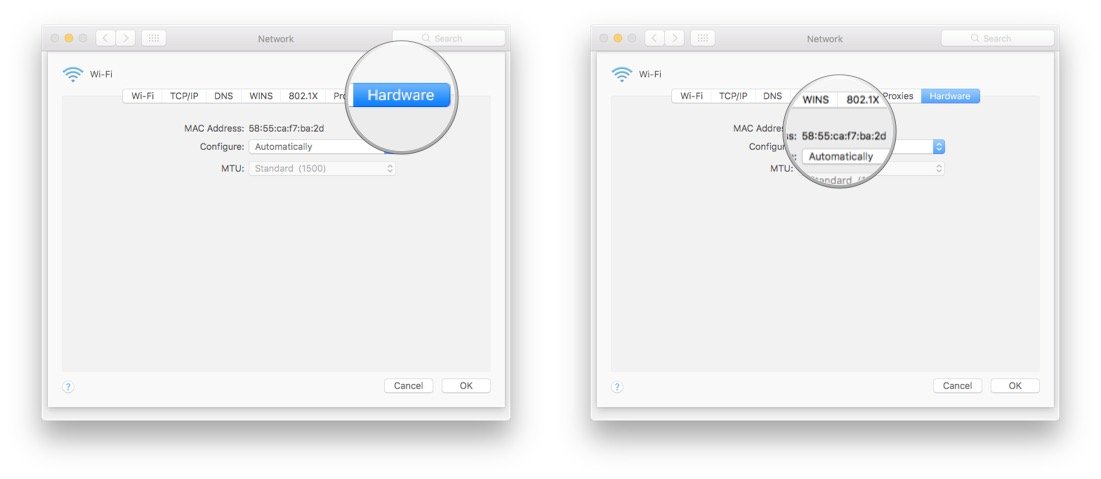
Paste the address into Notes or, if the device is on a different Apple ID, send it to yourself through Messages or Mail. Include a reminder of which device the address belongs too, if you're adding more than one.
How to find the MAC address of an iPhone or iPad
You can find the MAC address for iPhones and iPads in Settings.
- Launch Settings from the Home screen.
- Tap on General.
- Tap on About.
- Touch and hold on Wi-Fi address.
- Tap on Copy.
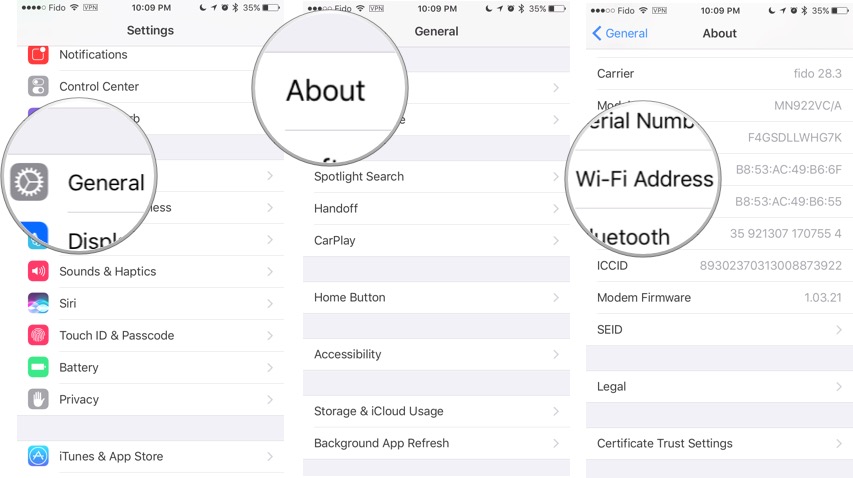
Paste the address into Notes or, if the device is on a different Apple ID, send it to yourself through Messages or Mail. Include a reminder of which device the address belongs too, if you're adding more than one.
Master your iPhone in minutes
iMore offers spot-on advice and guidance from our team of experts, with decades of Apple device experience to lean on. Learn more with iMore!
How to set up Time Access Control on the Mac
- Launch the Airport Utility app on your Mac.
- Select your AirPort. (If you have more than one, select the AirPort that's internet-facing.)
- Click Edit.
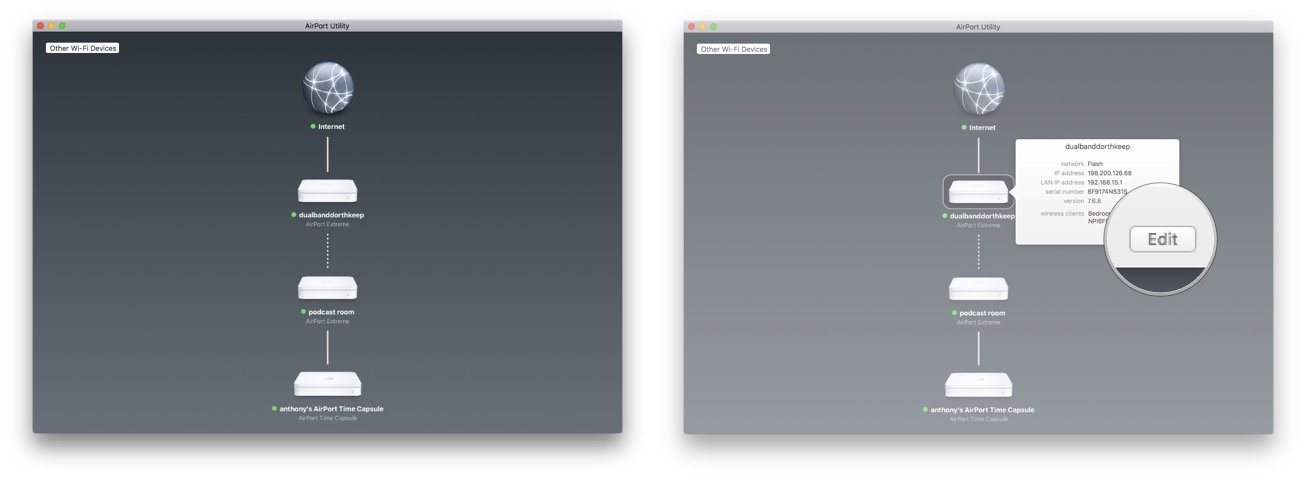
- Enter your Password, if prompted.
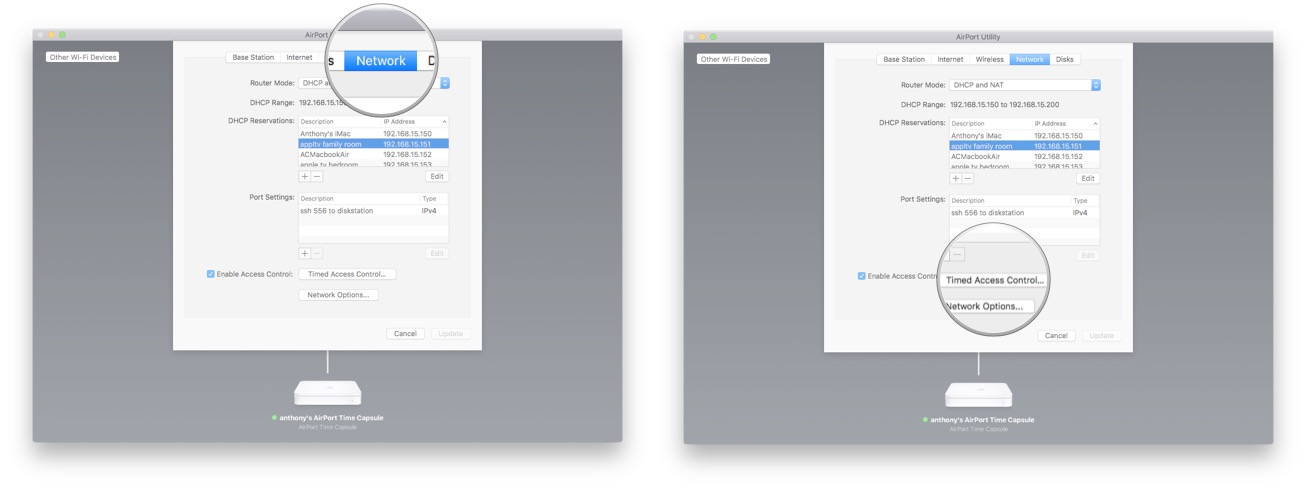
- Select the Network tab at the top of the application screen.
- Check the Enable Access Control box.
- Click the Timed Access Control button.
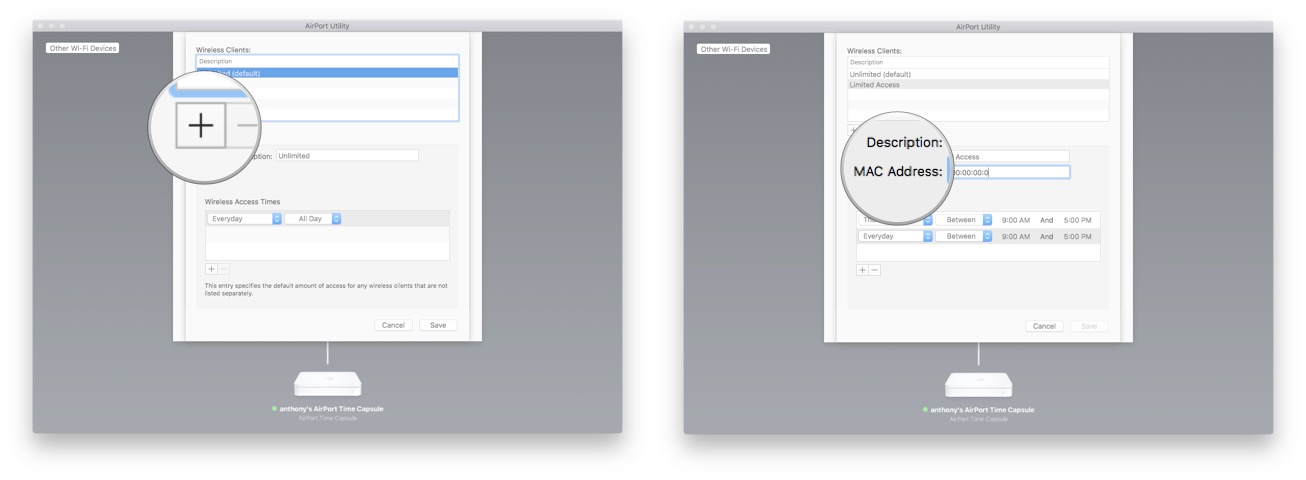
- Click the Add button (looks like +) under Wireless Clients.
- Add a description, for example, "Joey's Laptop Access".
- Paste in the corresponding MAC address, for example, Joey's MAC address for Joey's Laptop Access.
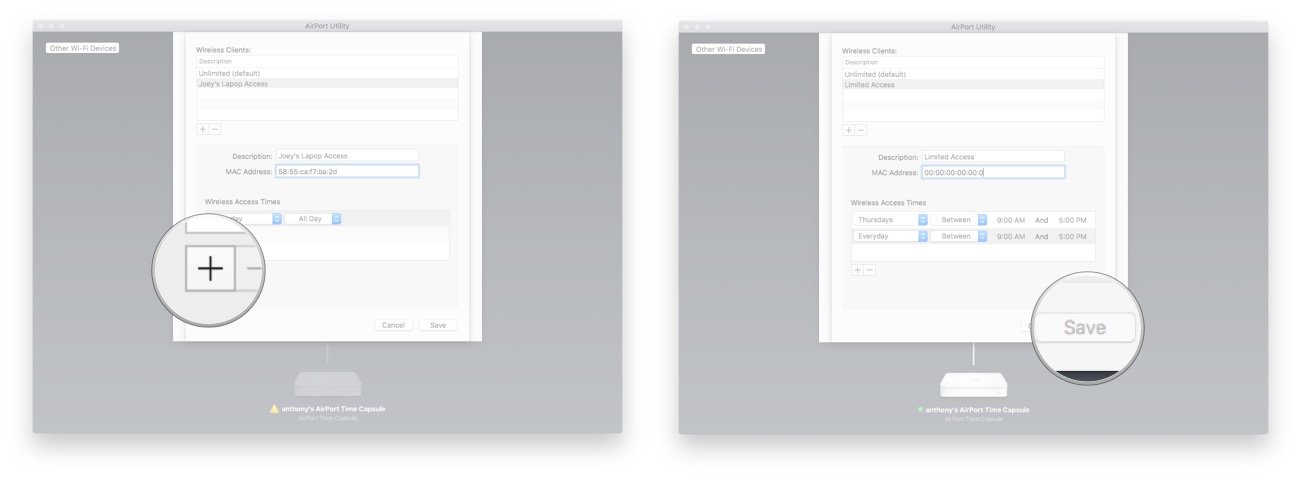
- Select the timed access you want for that device by clicking the + symbol. You can choose, certain days, weekdays, or weekends, and between a variety of hours.
- Click Save and continue to exit the various dialog boxes until you are prompted to restart your Airport base station.
- Click Restart.
How to set up Timed Access Control on iPhone or iPad
Before you begin, make sure you've downloaded AirPort Utility from the App Store.
- Launch AirPort Utility from your Home screen.
- Select your AirPort. (If you have more than one, select the AirPort that's internet-facing.)
- Tap Edit.
- Enter your Password, if prompted.
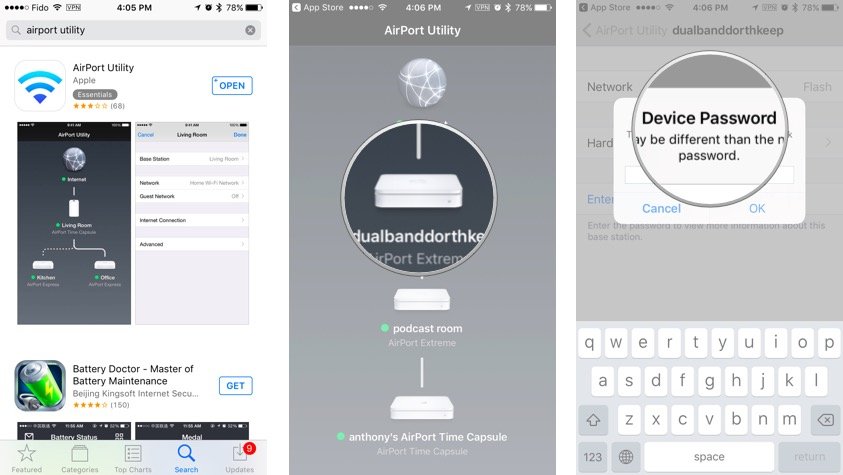
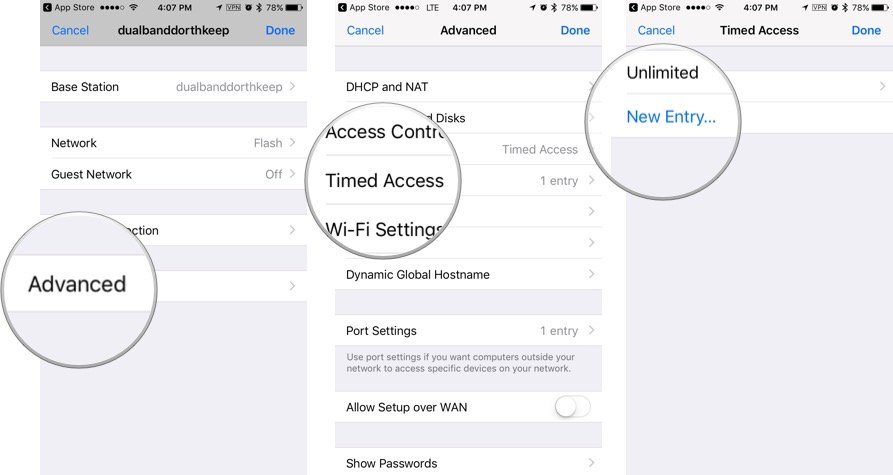
- Tap on Advanced.
- Tap on Timed Access.
- Tap on New Entry.
- Add a description, for example, "Joey's Laptop Access".
- Paste in the corresponding MAC address, for example, Joey's MAC address for Joey's Laptop Access.
- Tap on Access Restrictions
- Select the timed access you want for that device. You can choose, certain days, weekdays, or weekends, and between a variety of hours.
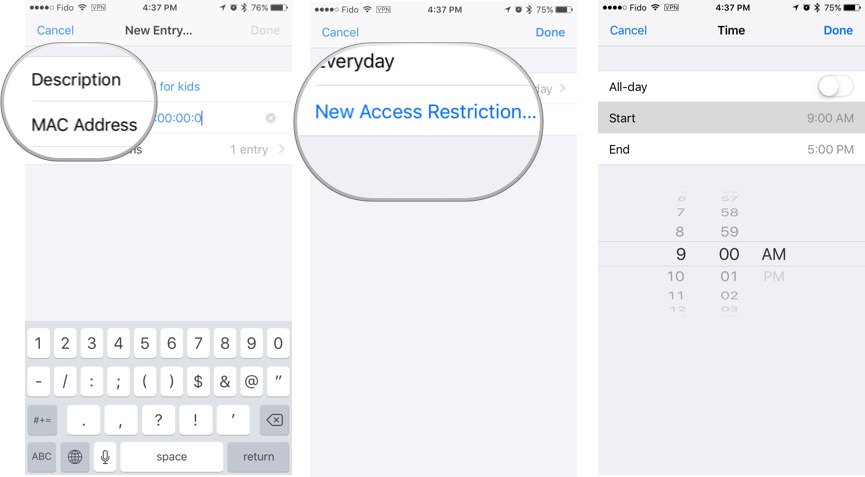
- Tap on Done and Save. Restart your AirPort when prompted.
Any Timed Access Control questions?
If you have any other suggestion on how you keep your children safe on the internet, leave a comment below.

