How to set your eGPU as your main graphics adapter
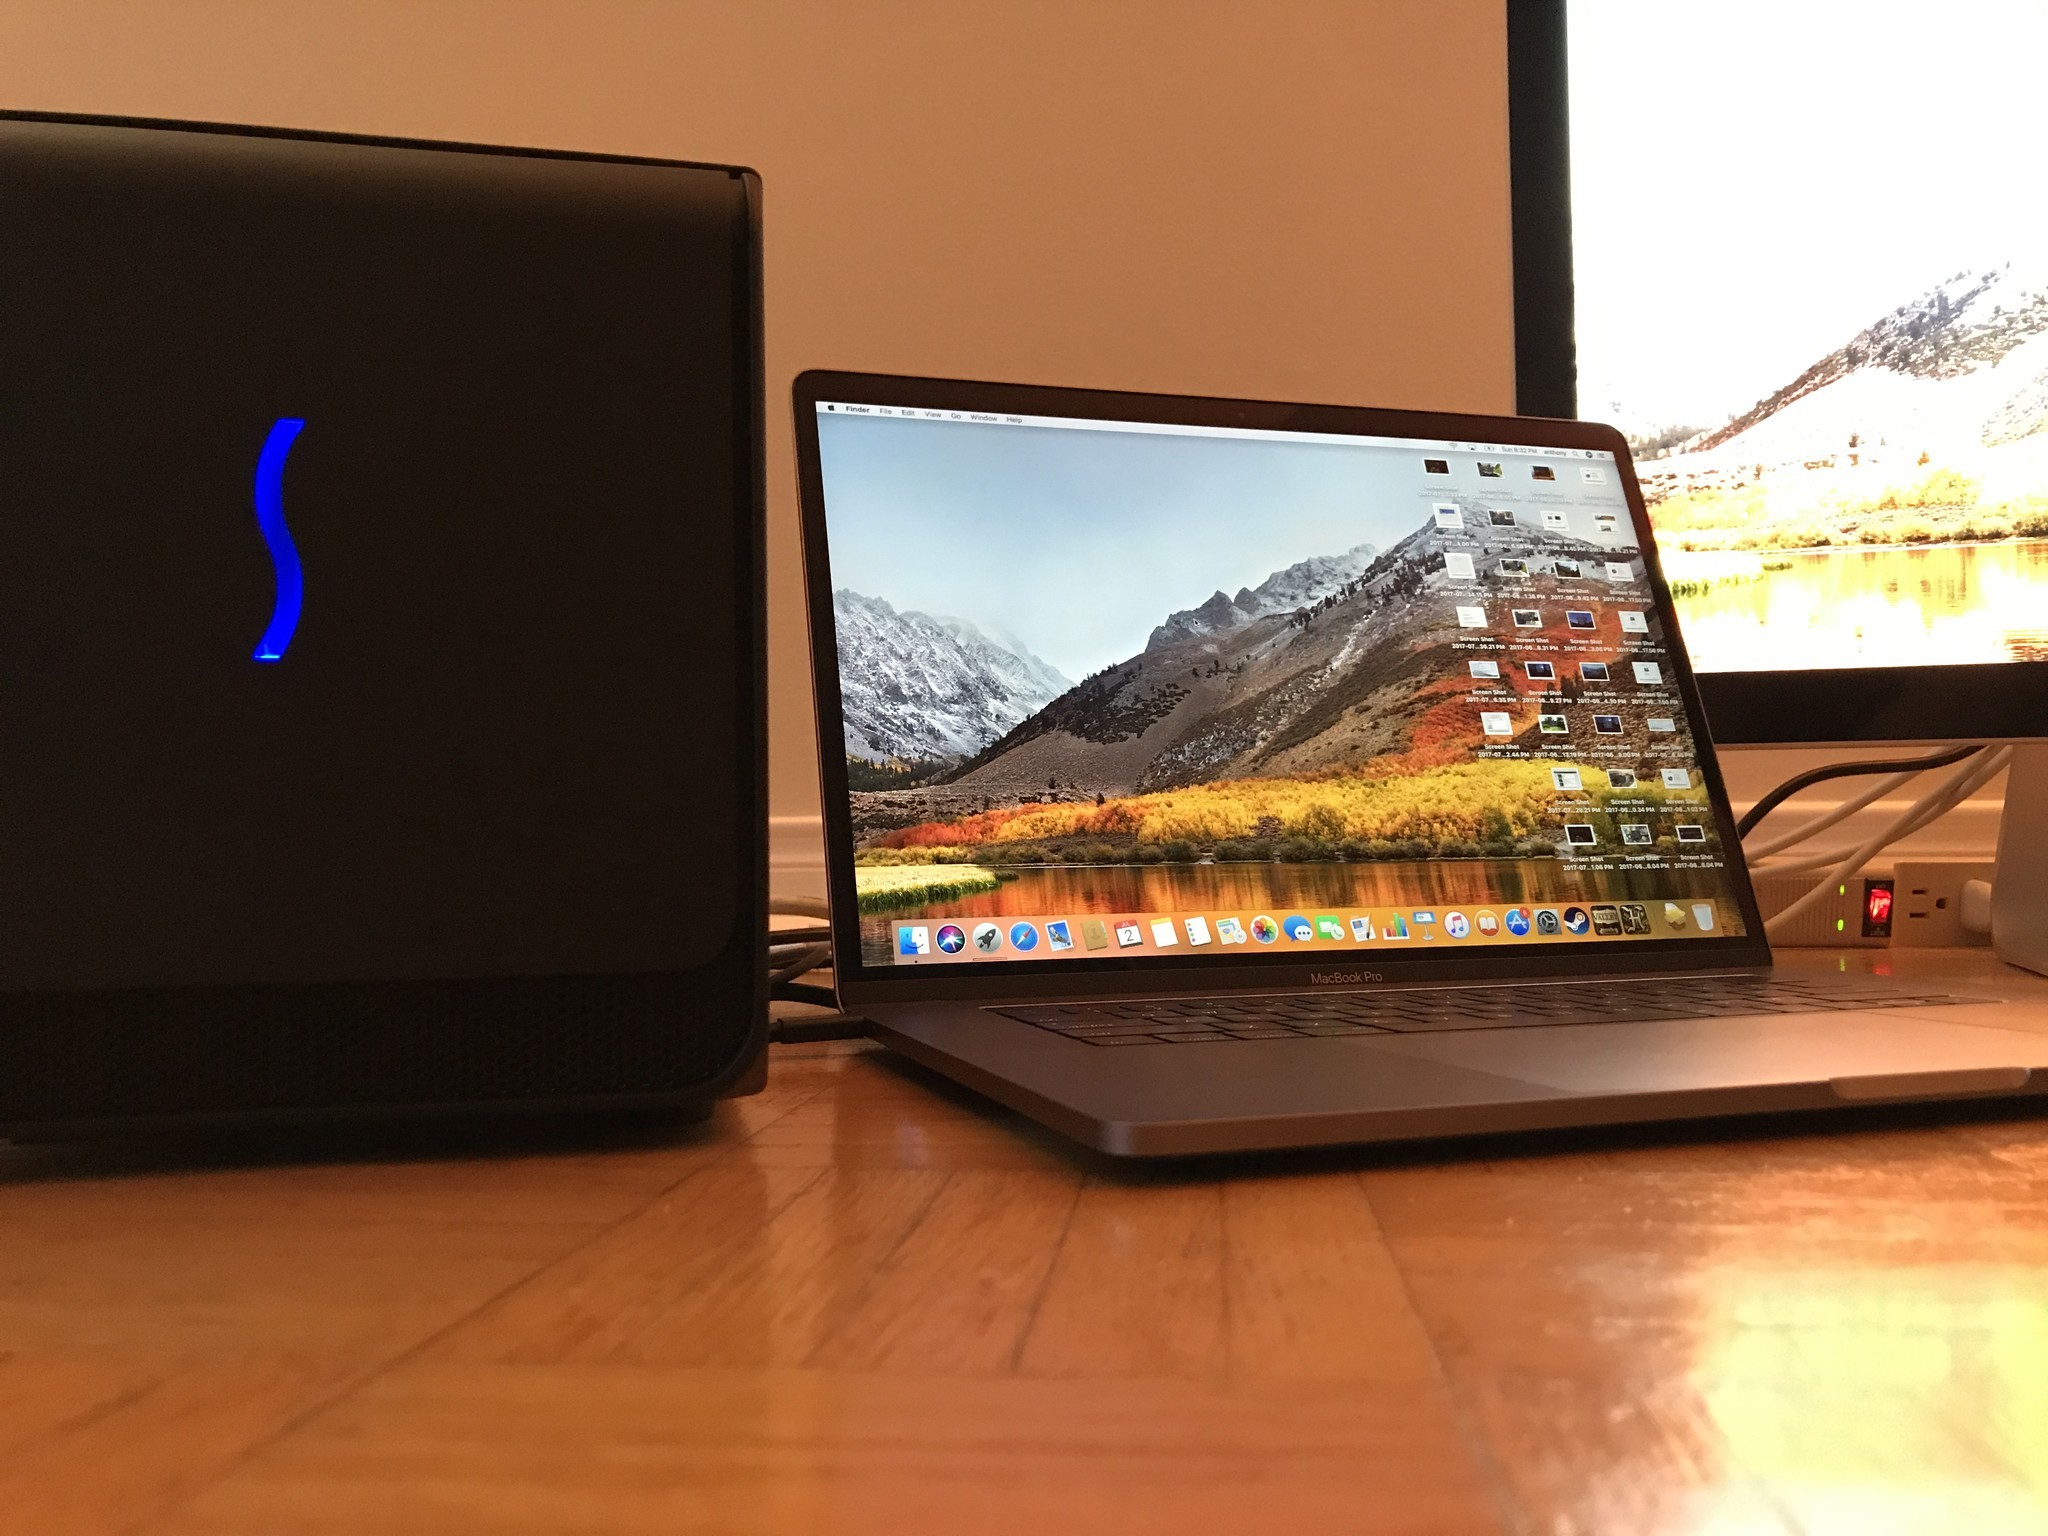
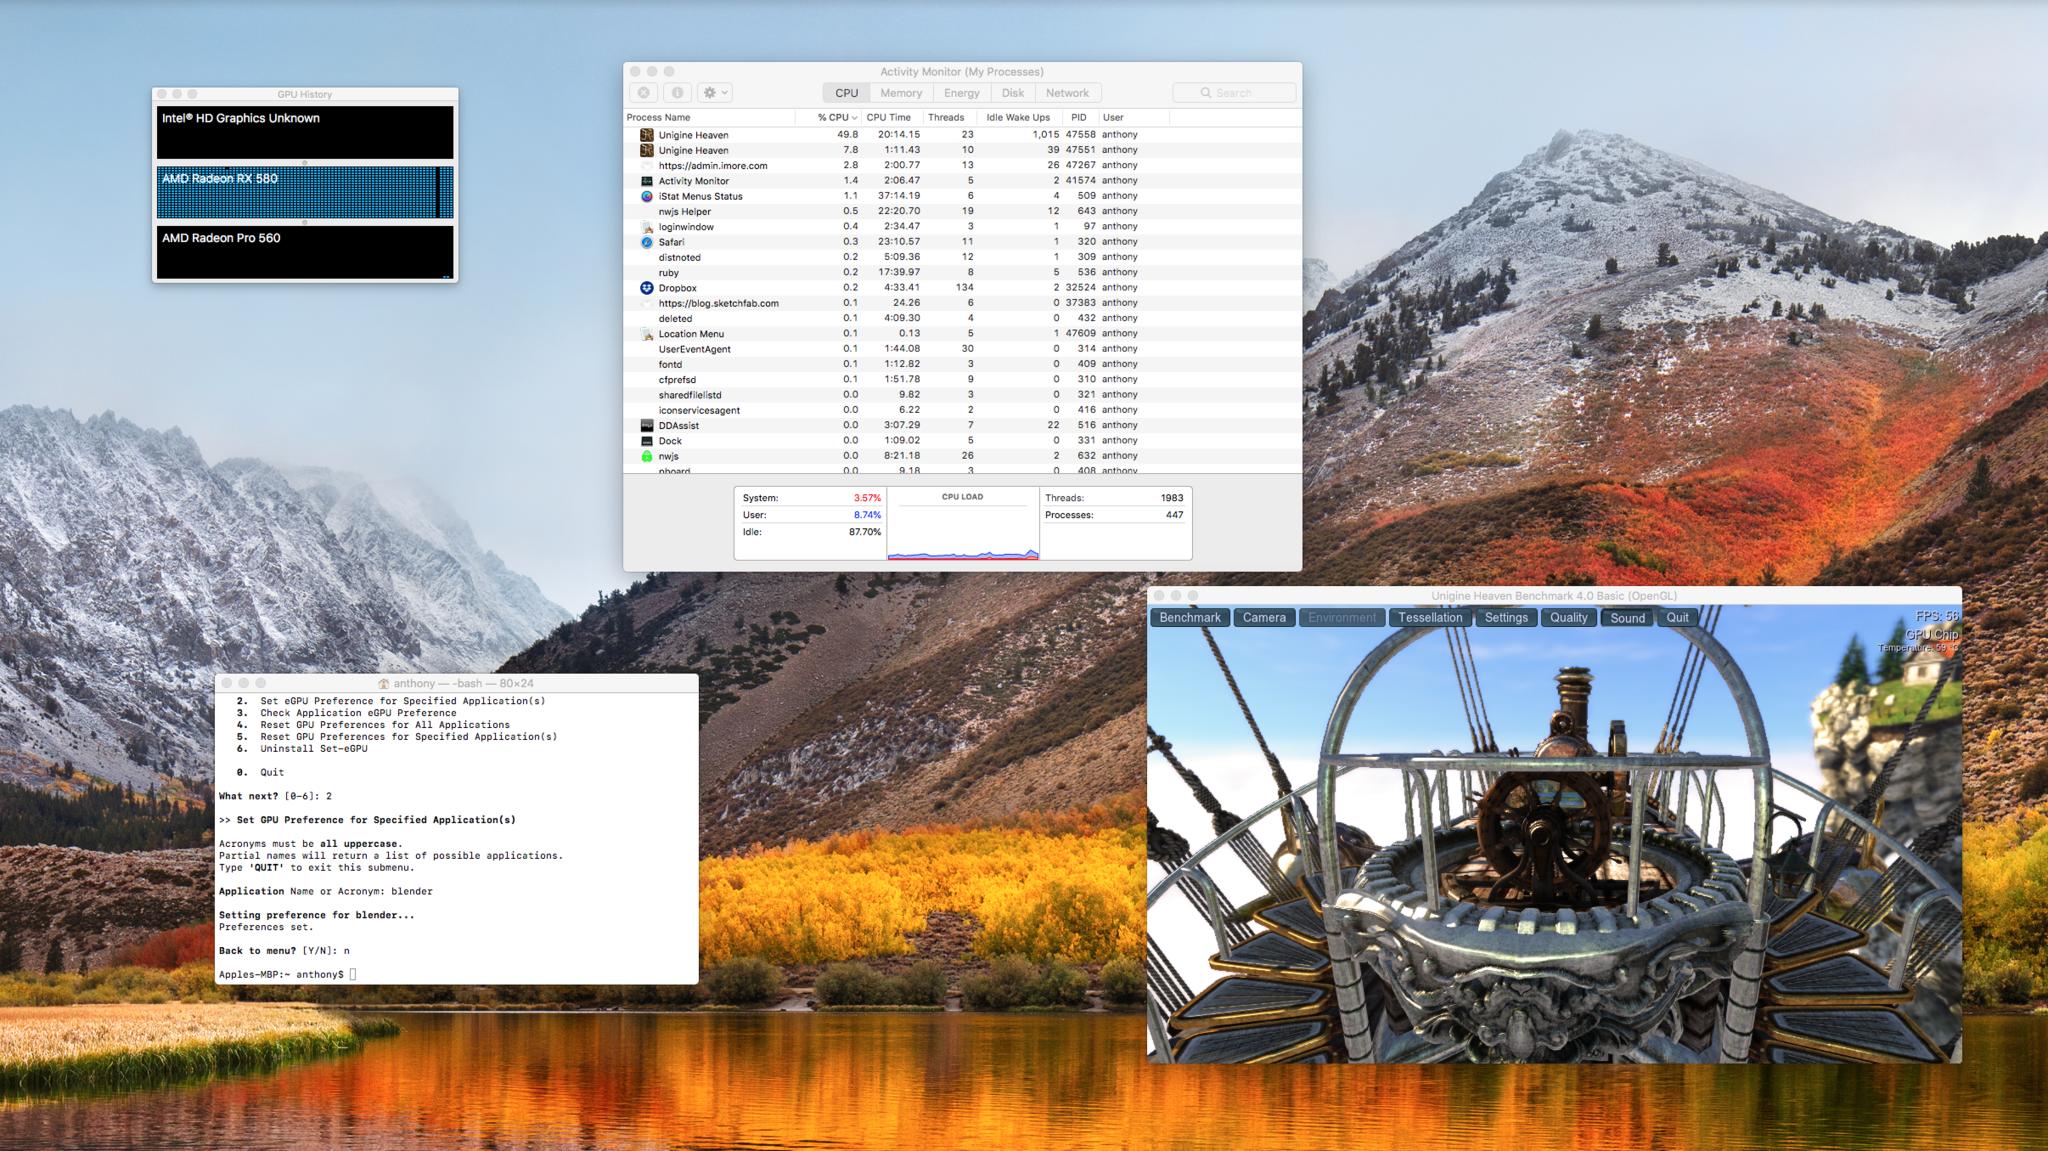
Until recently, Apple has long been anemic when it came to graphical adapter prowess. Even desktop iMacs with full fledged Intel high end enthusiast level CPUs were often paired with weak on-die Intel graphics or weak mobile versions of Nvidia and AMD offerings. Ever since Apple has started promoting AR/VR development in the form of Its eGPU development kits and has added full desktop class AMD Vega GPUs inside its iMac Pros, end users can now finally say that their Apple hardware can run graphically intensive applications without compromise. Well kind of.
Some eGPU limitations
Once paired to your Mac, an eGPU offers limited access to your system. Only applications that are running full screen on a display connected to the eGPU are able to harness the power from the enclosure.
Well, that was true until a smart user from egpu.io released an amazing script that can fully utilize your eGPU graphics adapter even if no display is connected to it directly. Yes that means if you only use your MacBook's internal display too!
You can also pick and choose what gets access to the eGPU on a per application basis. Amazing!
The set-eGPU script
User mayankk2308 has placed the set-eGPU.sh script on git hub free for download. It's open source so if you need to take a look at the internals of the script, you can do so and make changes if need be.
The script runs on macOS 10.13.4 or later and can be installed in two ways.
- Open terminal.
- At the prompt enter the following:
curl -s "https://api.github.com/repos/mayankk2308/set-egpu/releases/latest" | grep '"browser_download_url":' | sed -E \'s/.*"([^"]+)".*/1/' | xargs curl -L -s -0 > set-eGPU.sh && chmod +x set-eGPU.sh && ./set-eGPU.sh && rm set-eGPU.sh - Press enter.
- Type in your password to install the script.
Or, you can download the script directly and set the following parameters on the downloaded script.
Master your iPhone in minutes
iMore offers spot-on advice and guidance from our team of experts, with decades of Apple device experience to lean on. Learn more with iMore!
- Open terminal.
- Type in ~/Downloads
- Type enter.
- Type chmod +x set-eGPU.sh.
- Press enter.
- Type ./set-eGPU.sh.
- Press enter.
The first time you run the script you'll be asked for your password to install the script into /usr/local/bin/.
Using set-eGPU.sh
Once installed, you call up the command from terminal.
- Open terminal.
- Type set-eGPU.sh.
- Press enter.
You'll be presented with a numbered menu list.
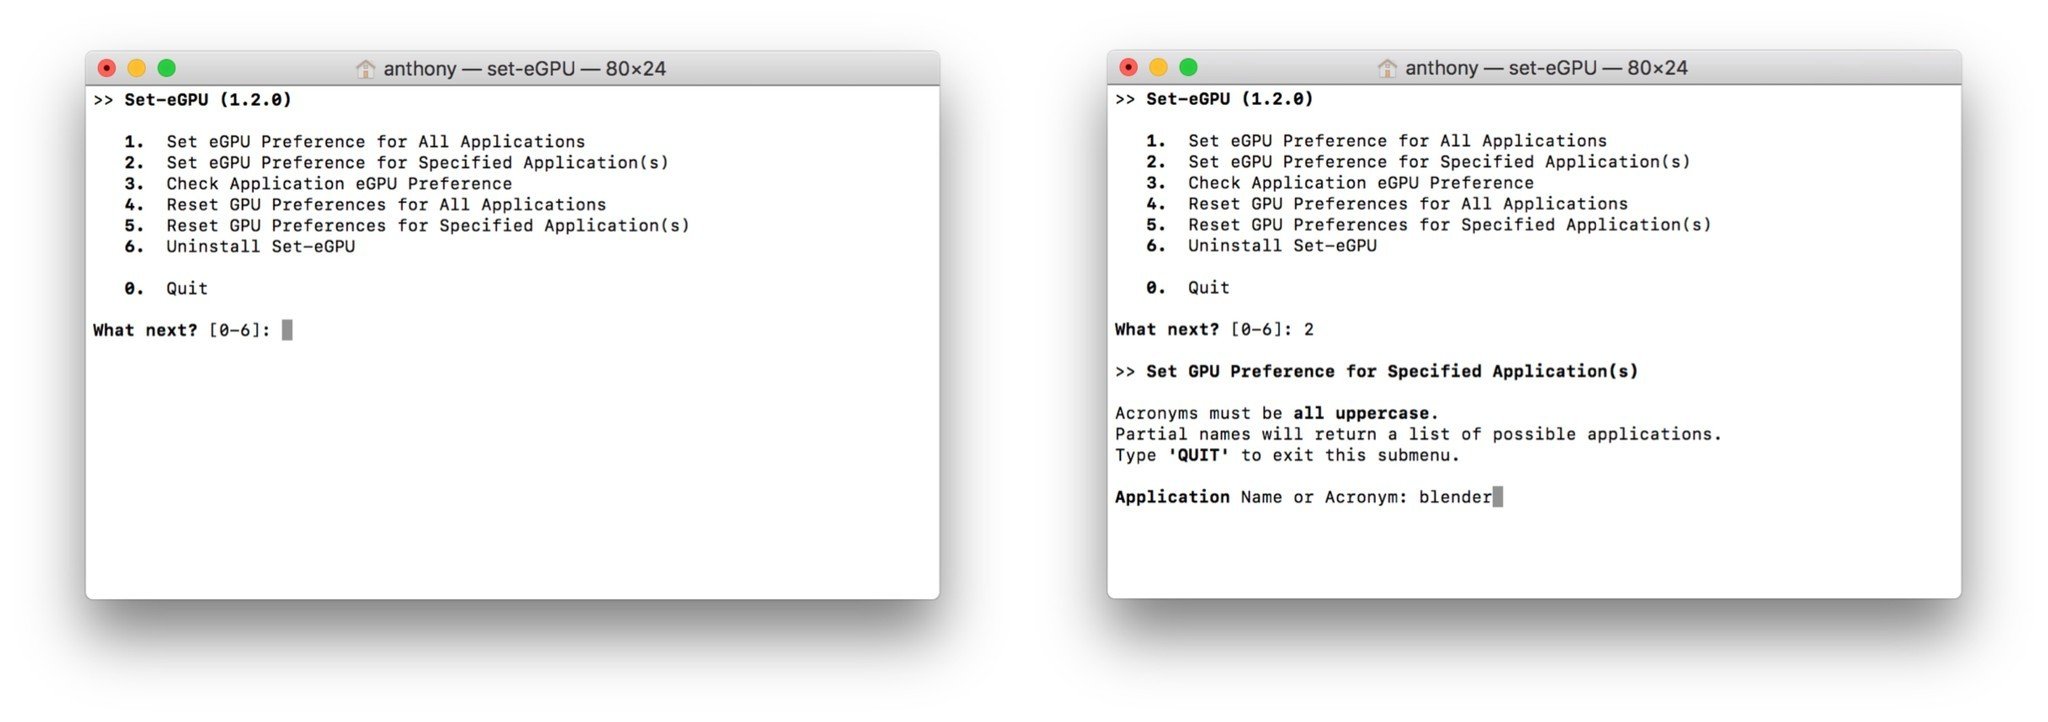
If you wanted to set all of your applications to prefer the eGPU, you would press the number 1 and press enter. The change is completely reversible by re-running the set-eGPU script and choosing the 5th option to Reset GPU Preferences for All Applications.
If you only want to have certain applications use your eGPU, choose the 2nd option of Set eGPU Preference for Specified Application(s).
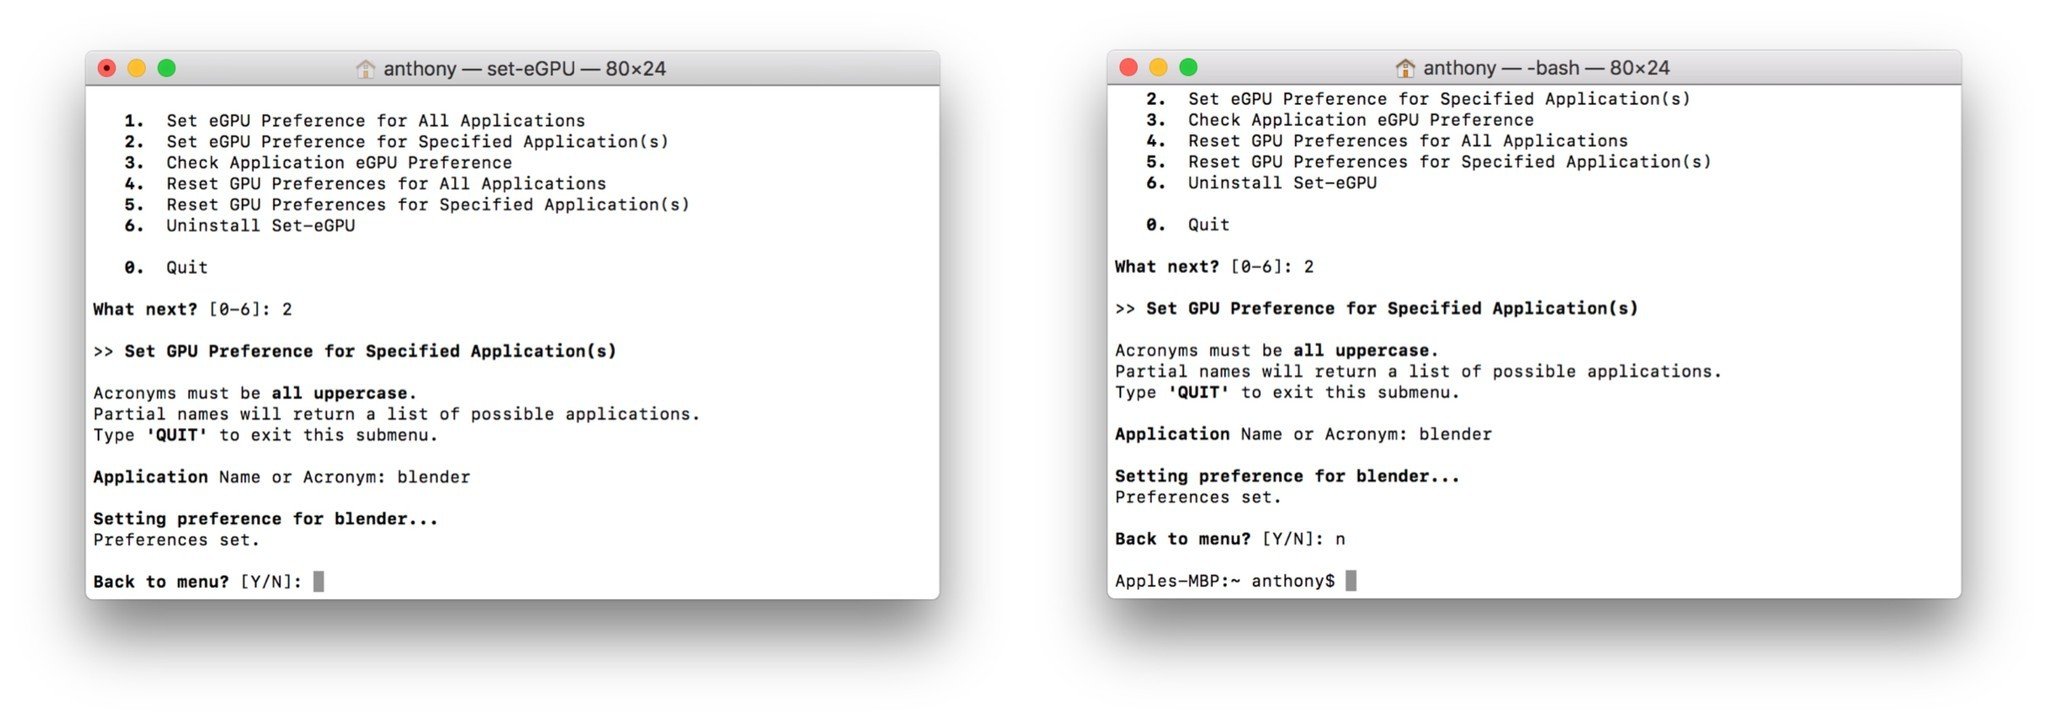
I'll be prompted to enter the Application Name or Acronym. Here, I need to type in the Application name as it appears precisely in Launchpad.
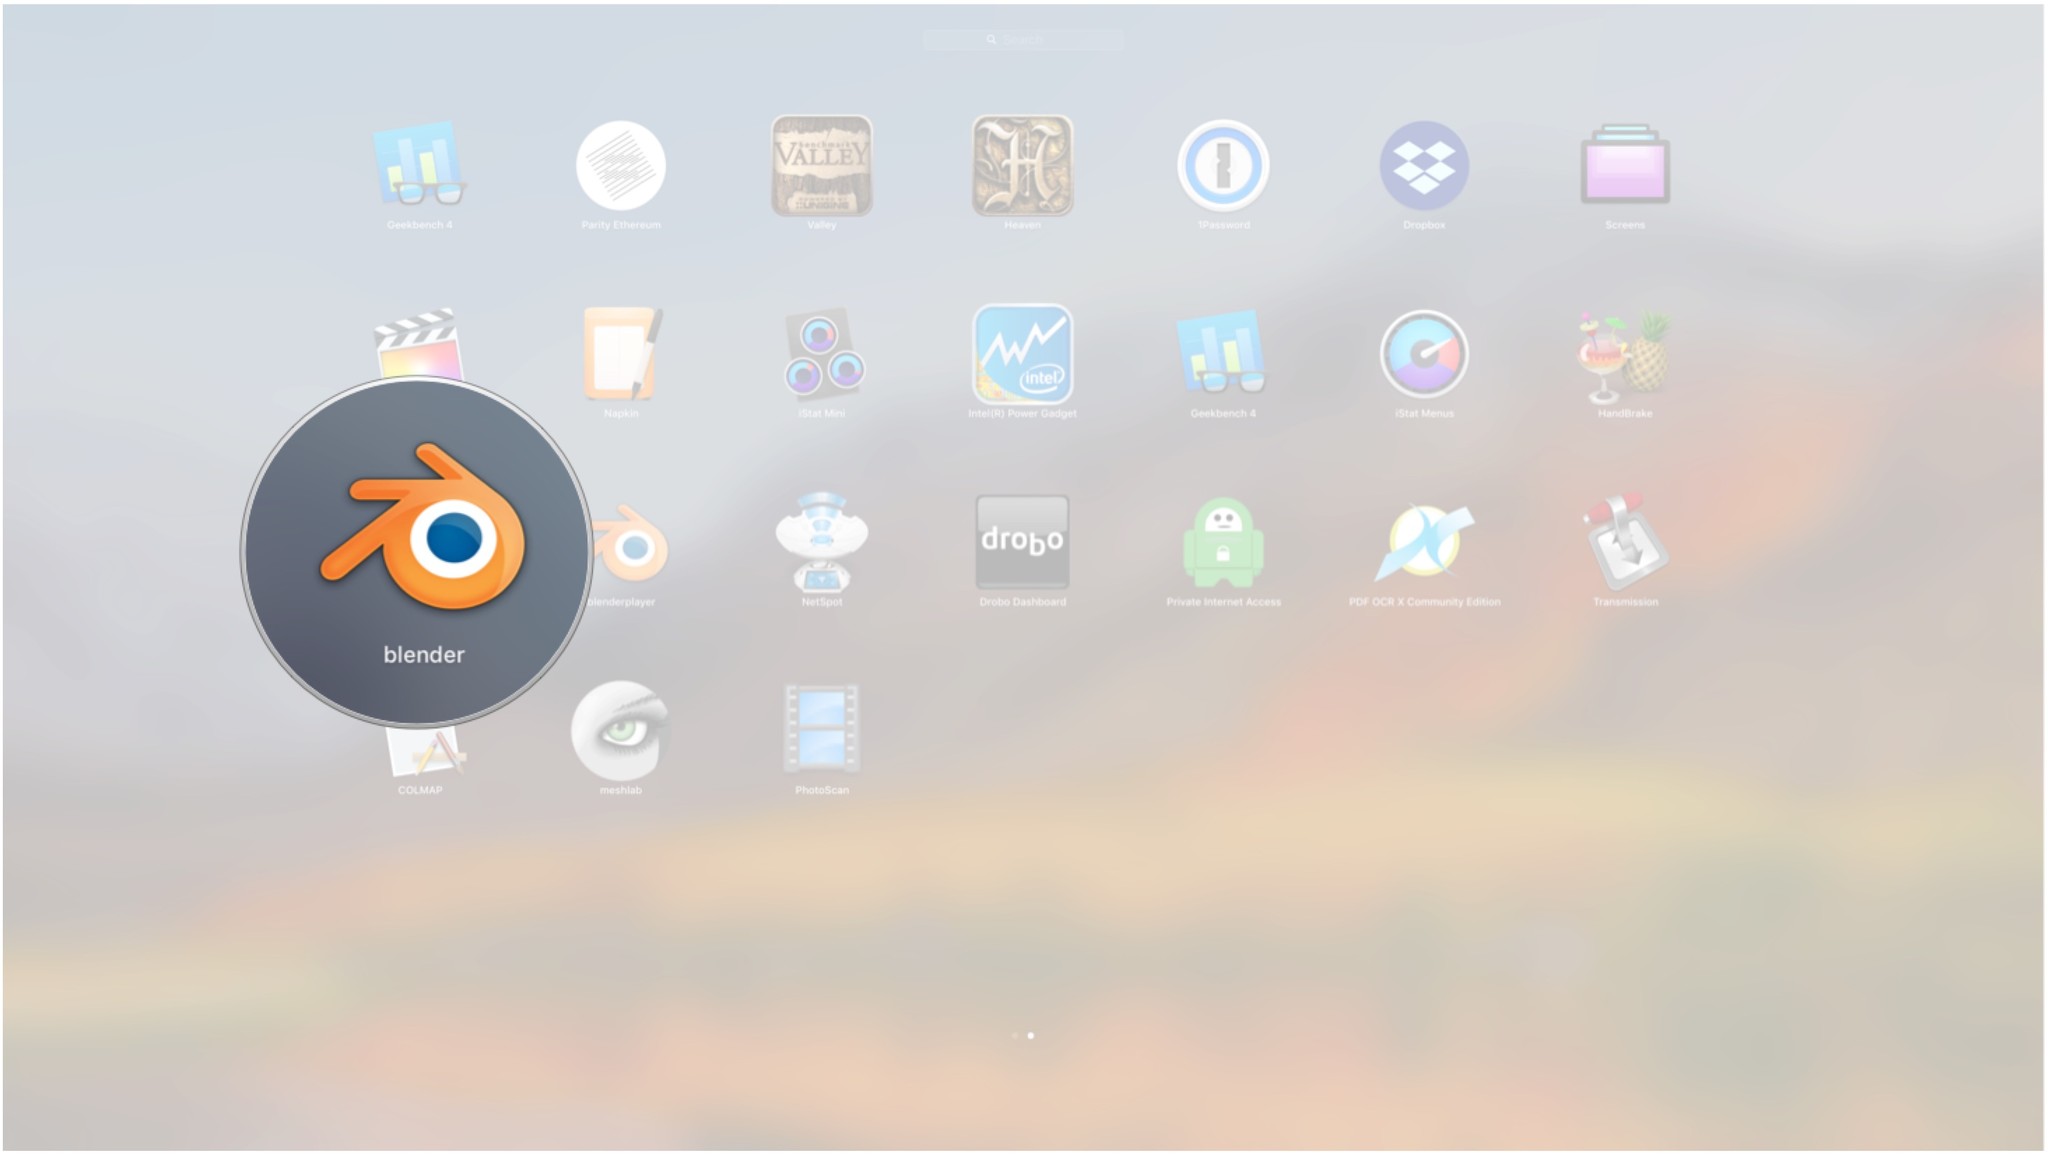
Once you type in you application and hit enter, you'll be prompted to decide if you want to go back to the main menu or quit the script. You can press N to quit the script at this point.
From now on, the application you added to the set-eGPU script, will always prefer the eGPU over the internal GPU. But what if you are disconnected from the eGPU for some reason? The system is set up so that if the eGPU is no longer present, the application will gracefully fall back to your internal GPU. Perfect!
Monitoring GPU usage
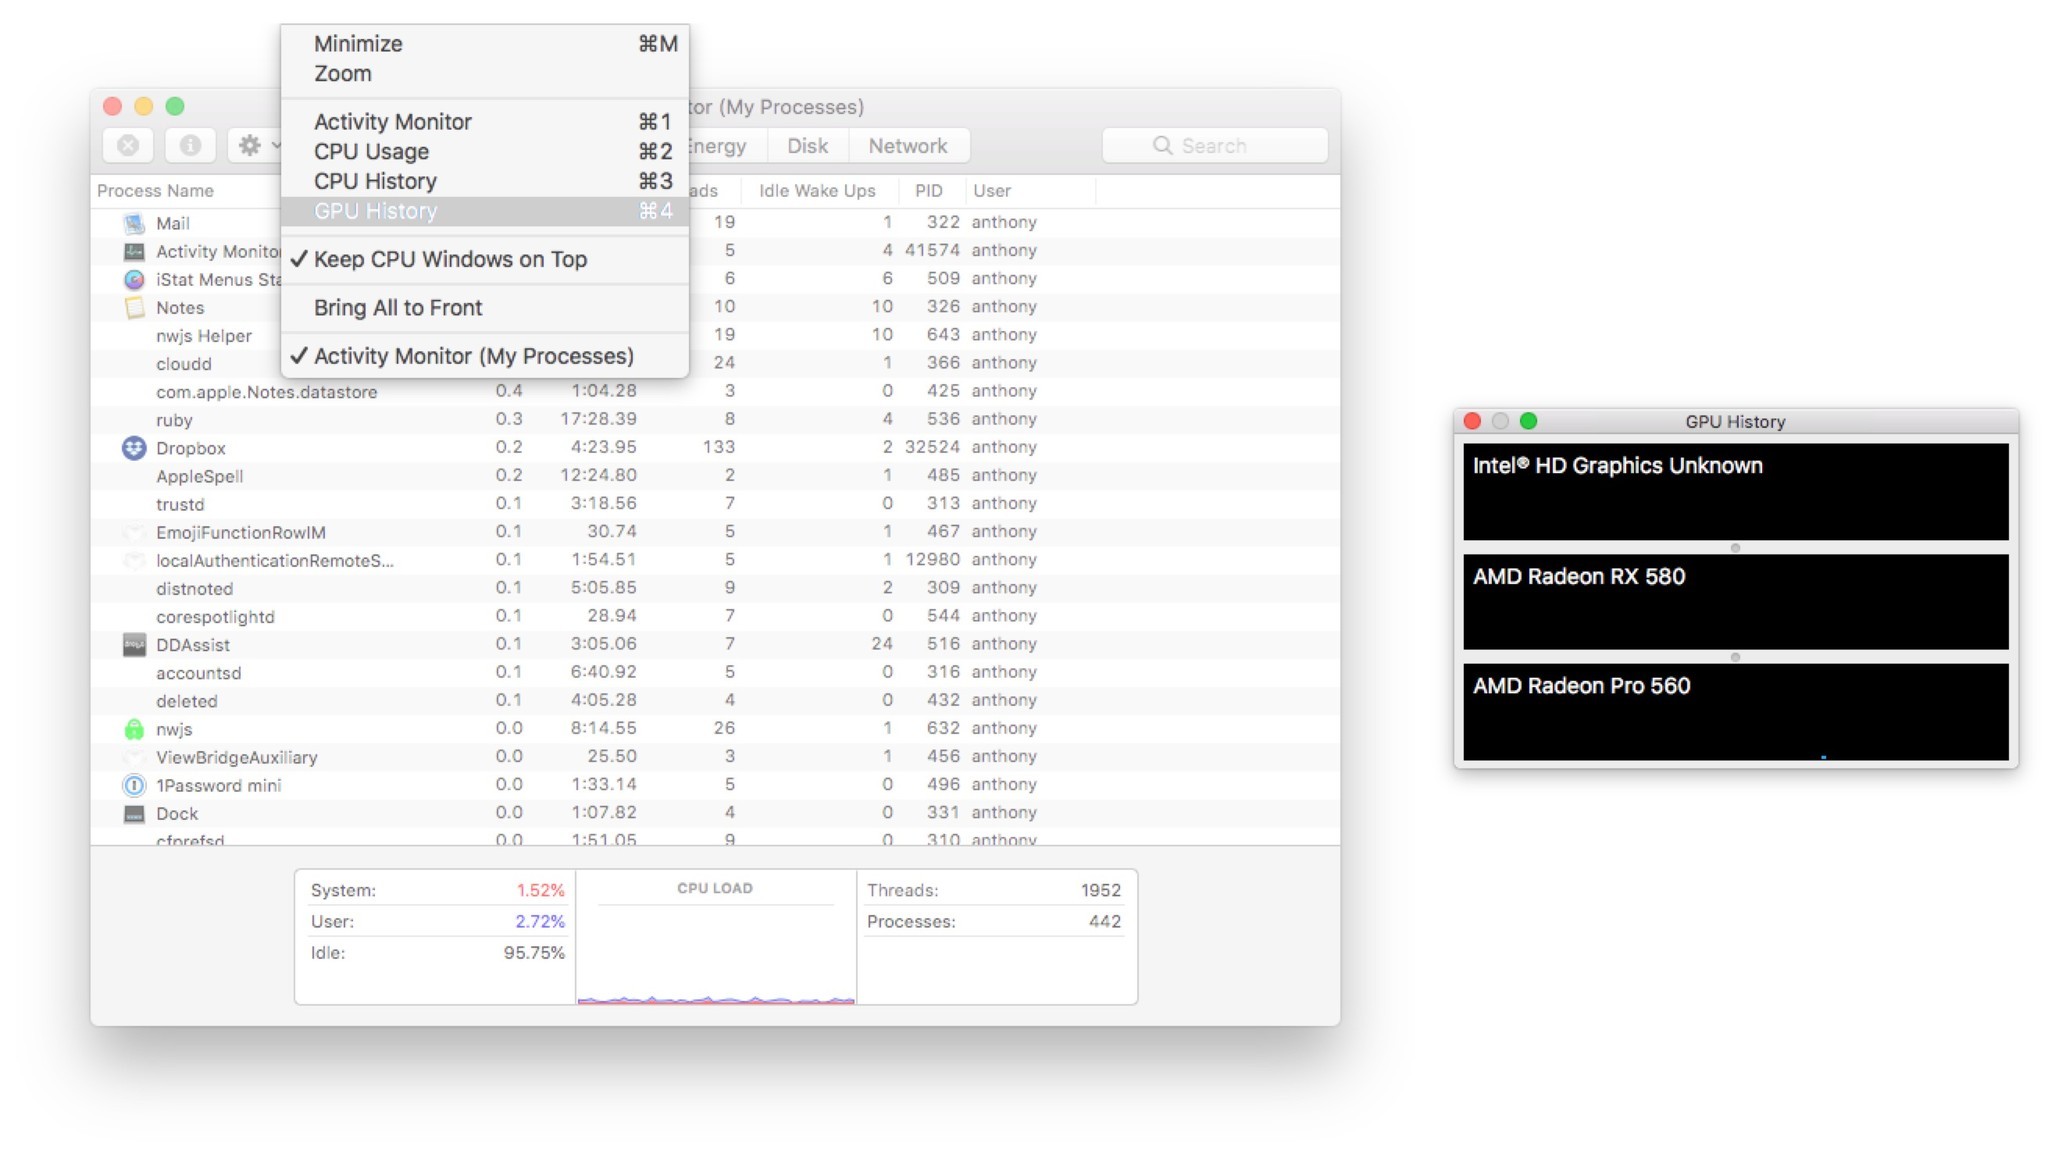
Once you've configured your applications to use the eGPU, you can monitor all of your attached GPU usage with Activity Monitor.
- Start Activity Monitor.
- Navigate to Window > GPU History.
You'll now see a list of attached GPUs and you can watch their usage in real time.
Final comments
So if you want to get the full benefits of your eGPU (with or without an attached external display), I strongly recommend giving set-eGPU.sh a try. Let us know your thoughts in the comments!

