How to share your Shortcuts with others (and how to add shared Shortcuts)
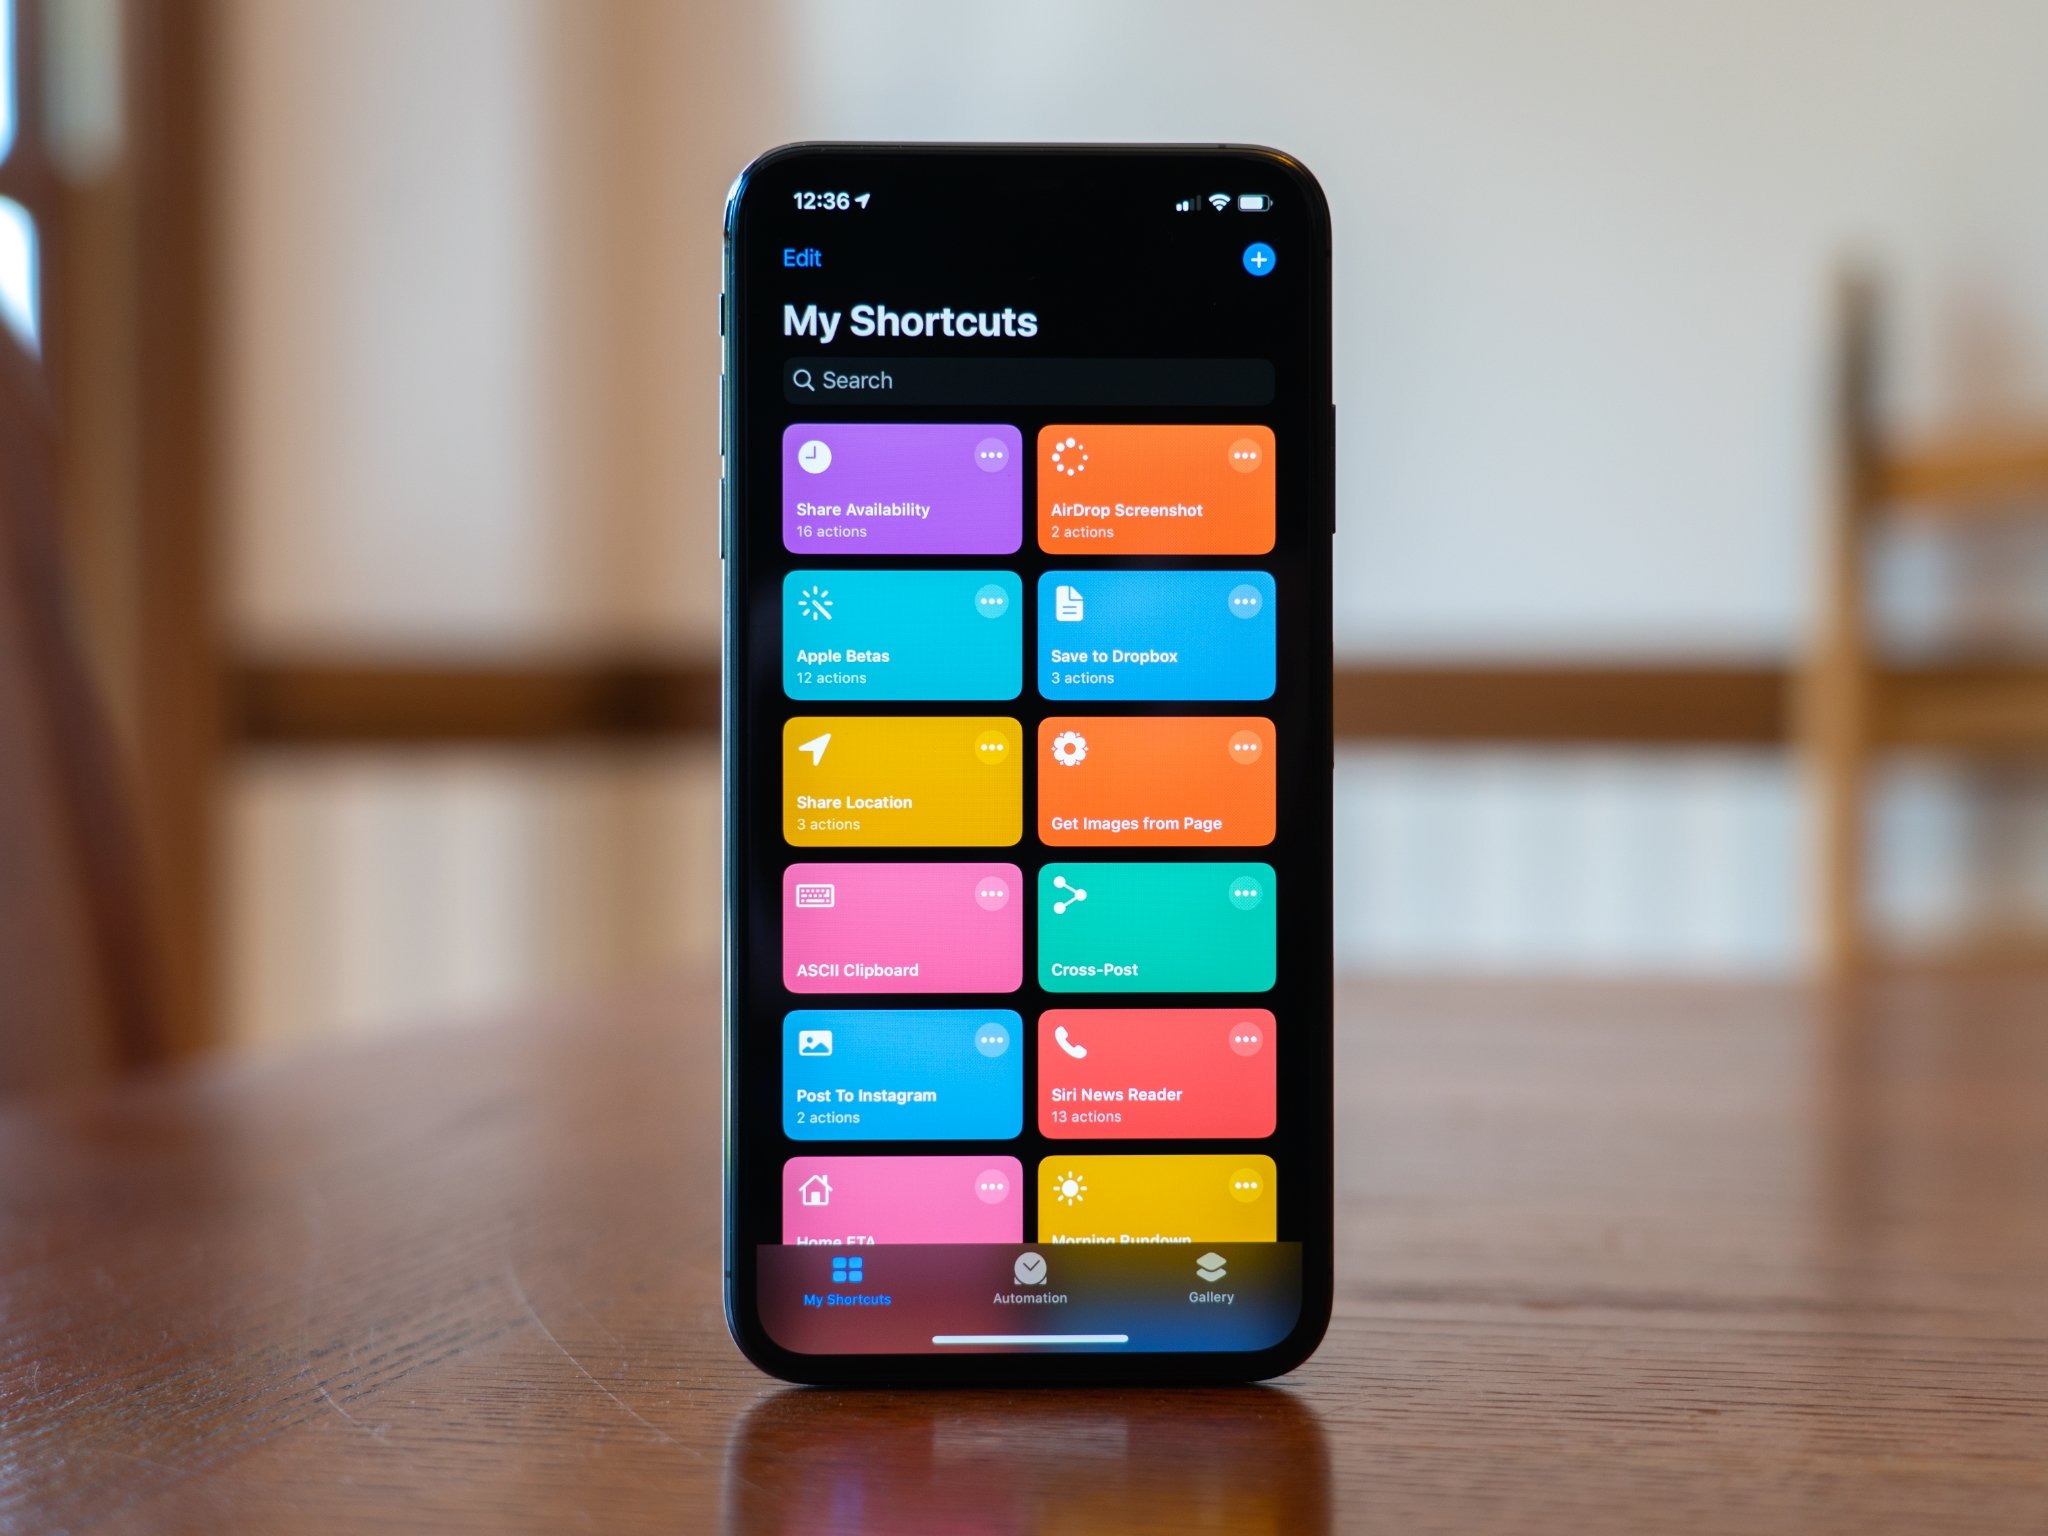
The Shortcuts app allows you to create time-saving setups both simple and complicated, but no matter what you've created, if you're proud of it, you might want to share it. This can be a great way for people to set up complicated shortcuts on their own devices without having to slog through creating them or a way for you to do the same.
- How to share shortcuts from the shortcut editor in iOS 13
- How to share a shortcut from your Library in iOS 13
- How to share links to a specific shortcut
- How to share links to all of your Shortcuts
- How to stop sharing a shortcut
- How to add a shared shortcut to your library
How to share shortcuts from the shortcut editor in iOS 13
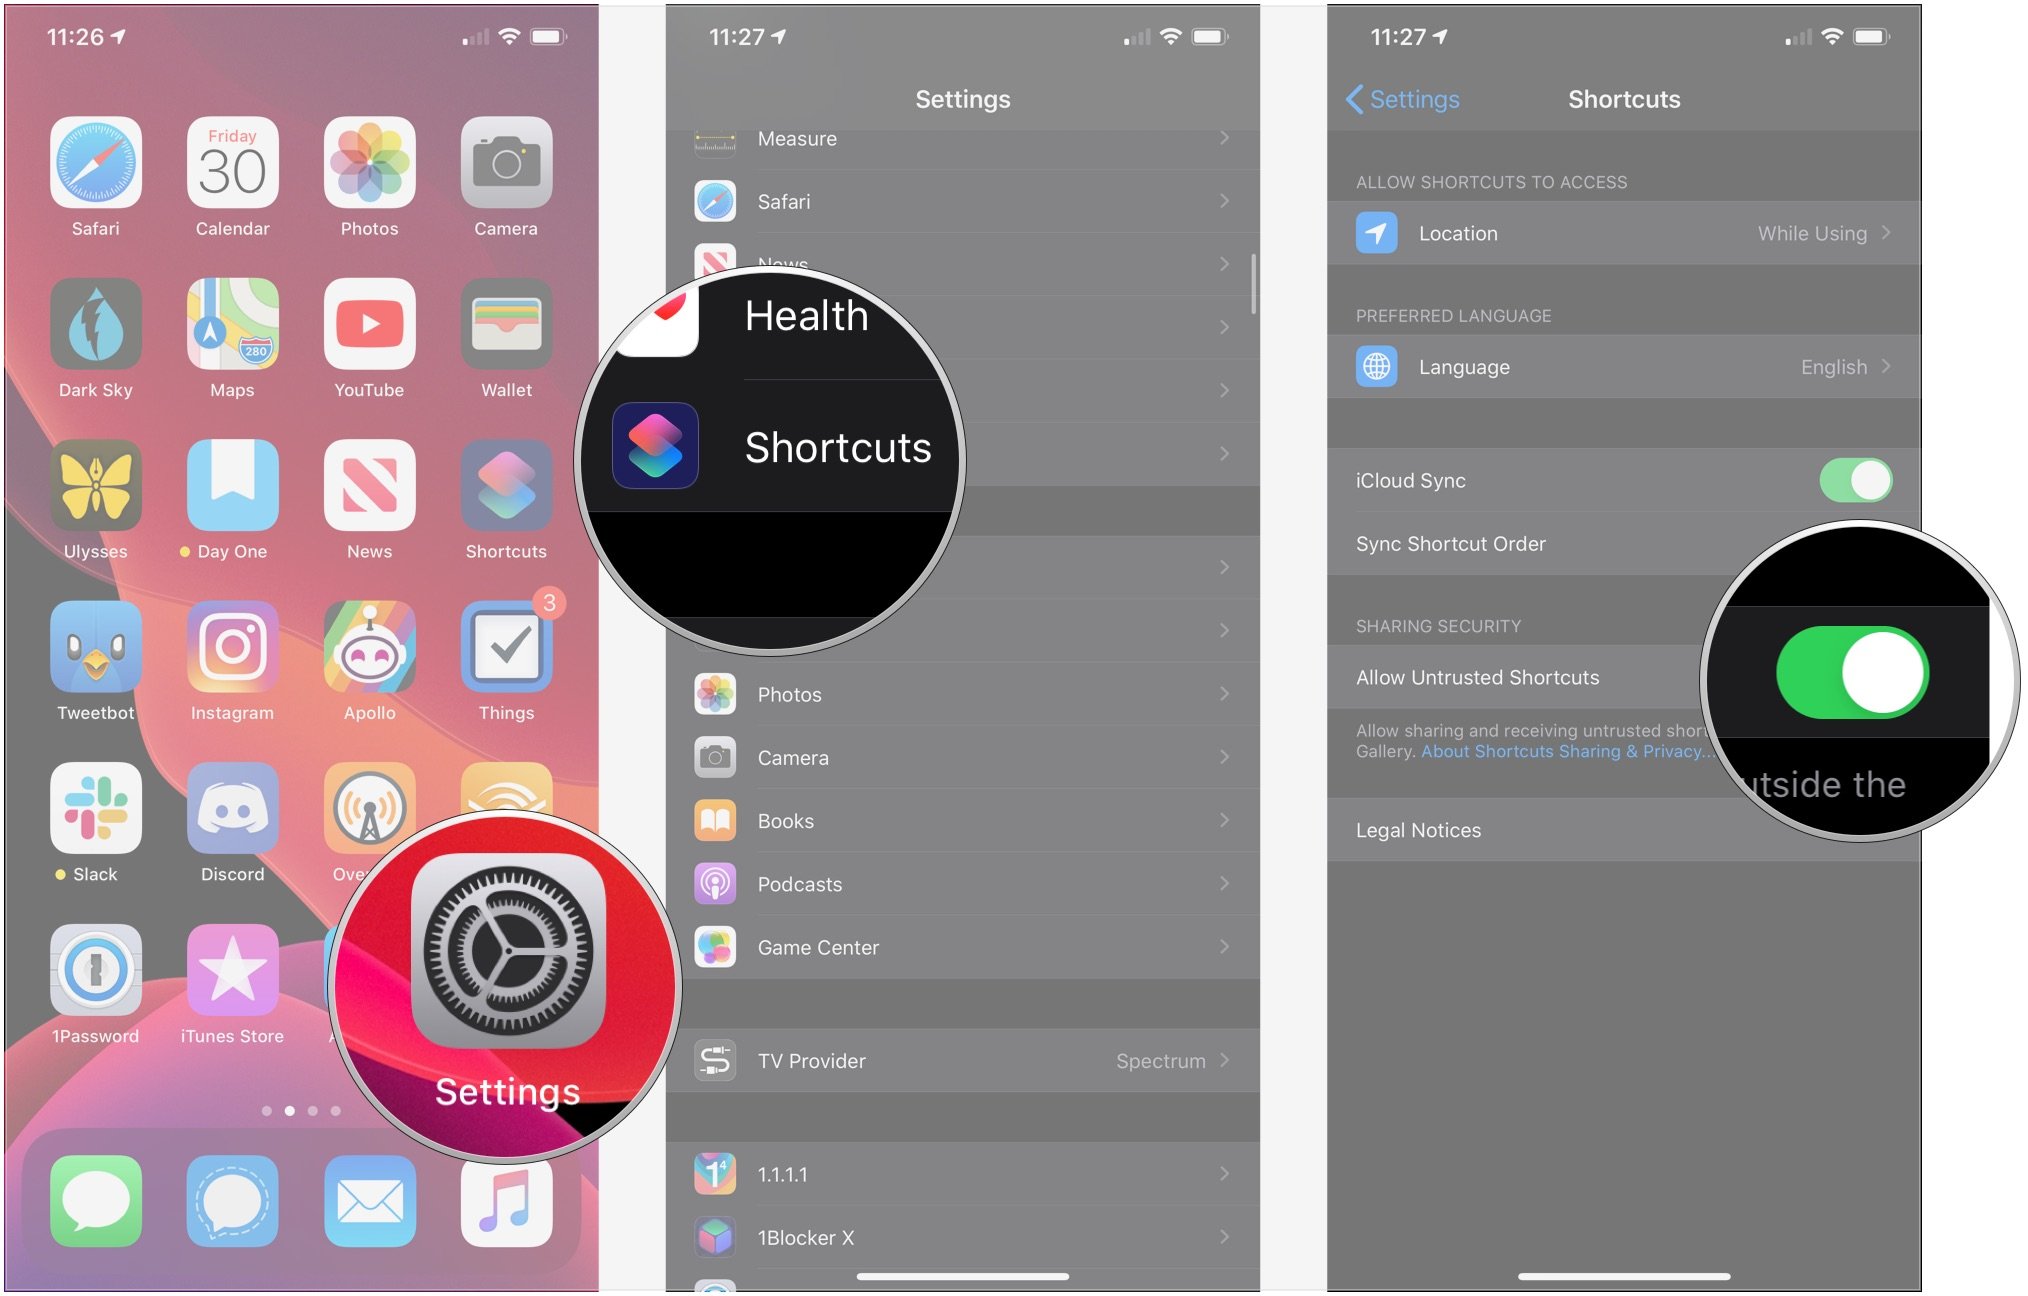
With the Shortcuts app integrated directly into the system in iOS 13, sharing shortcuts is a little more complicated. First, you have to make sure you can share shortcuts at all with the "Allow Untrusted Shortcuts" switch in settings.
Before you begin these steps, start by running any shortcut in the Shortcuts app. Just tap a simple shortcut and run it. This will make the "Allow Untrested Shortcuts" switch available to you in settings.
- Open Settings on your iPhone or iPad.
- Tap Shortcuts.
- Tap the switch for Allow Untrusted Shortcuts so it's in the green 'on' position.
With this option turned on, you will now see a share button when you open the details of a shortcut in iOS 13.
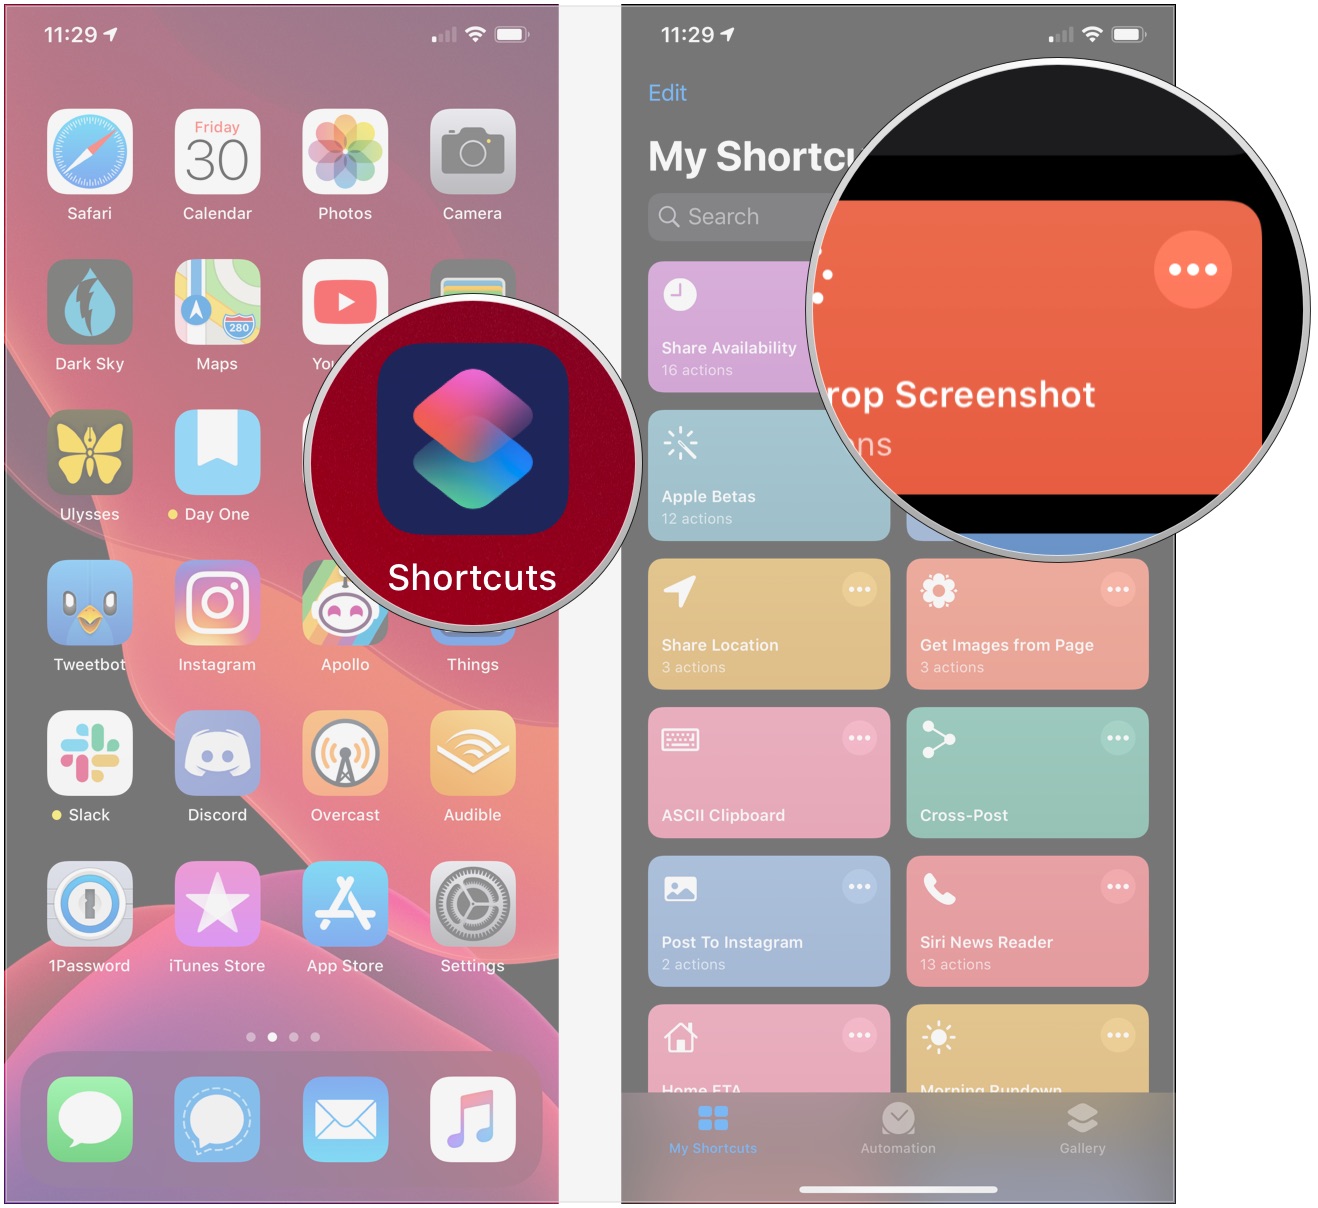
- Open Shortcuts on your iPhone or iPad.
- Tap the ... button on the shortcut you want to share.
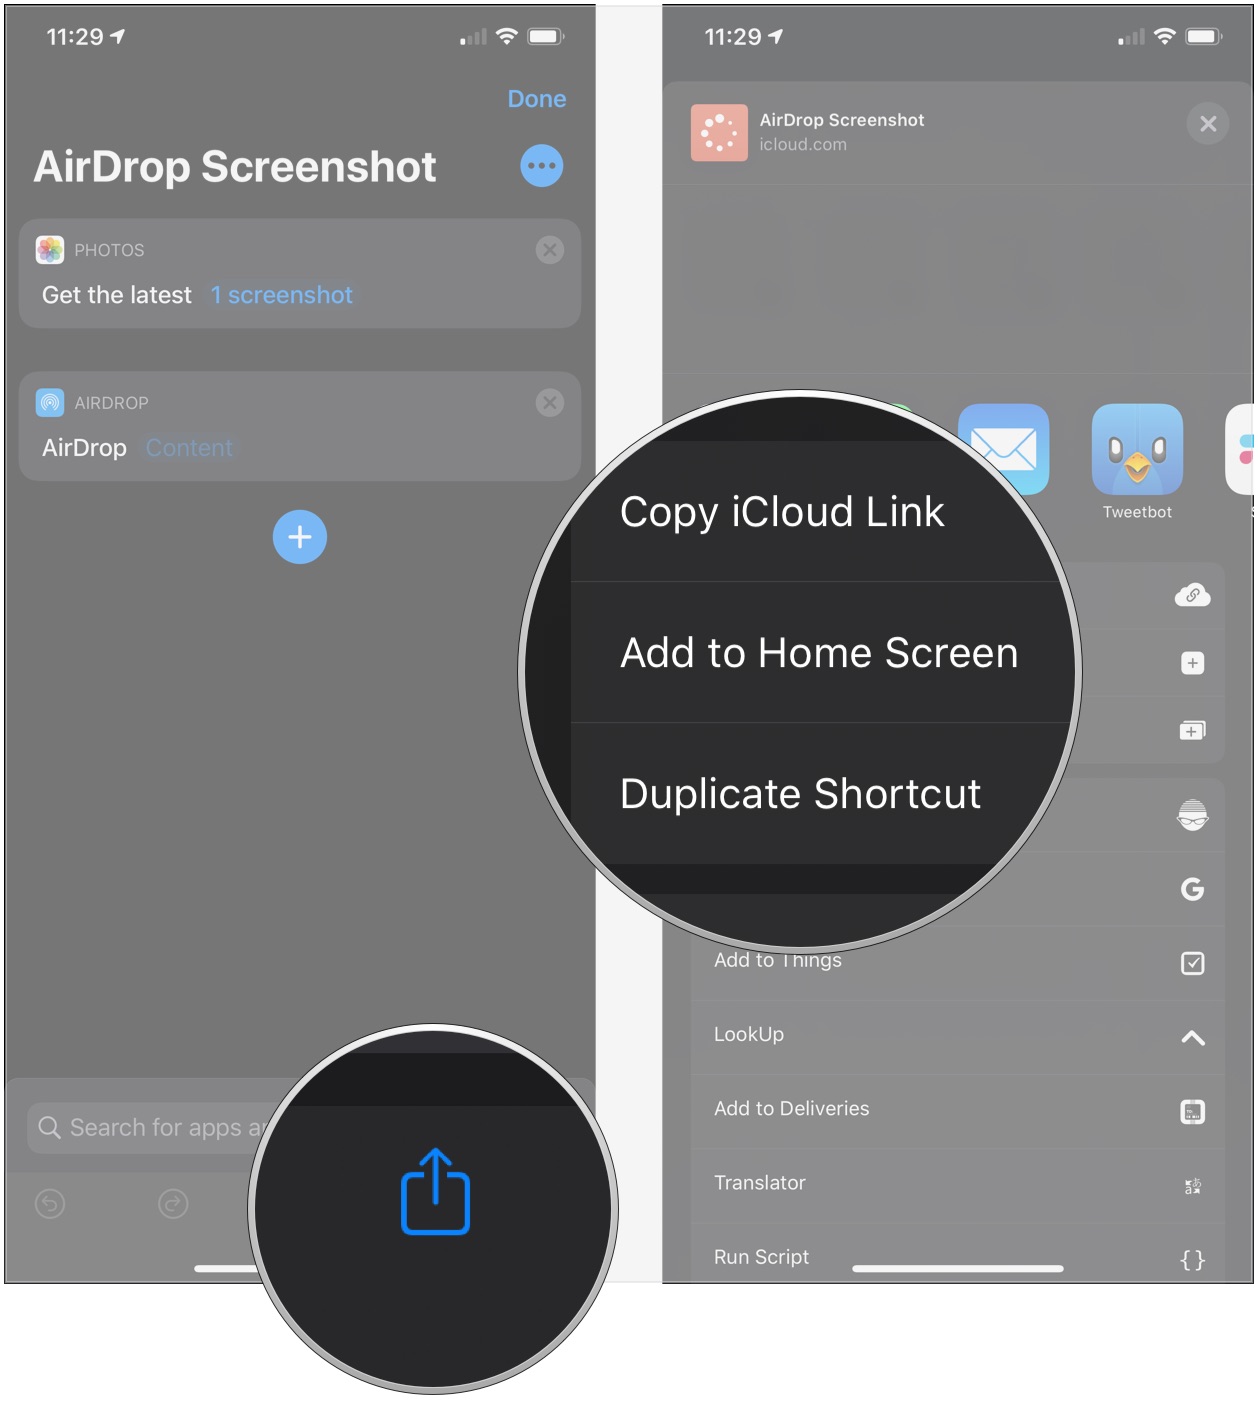
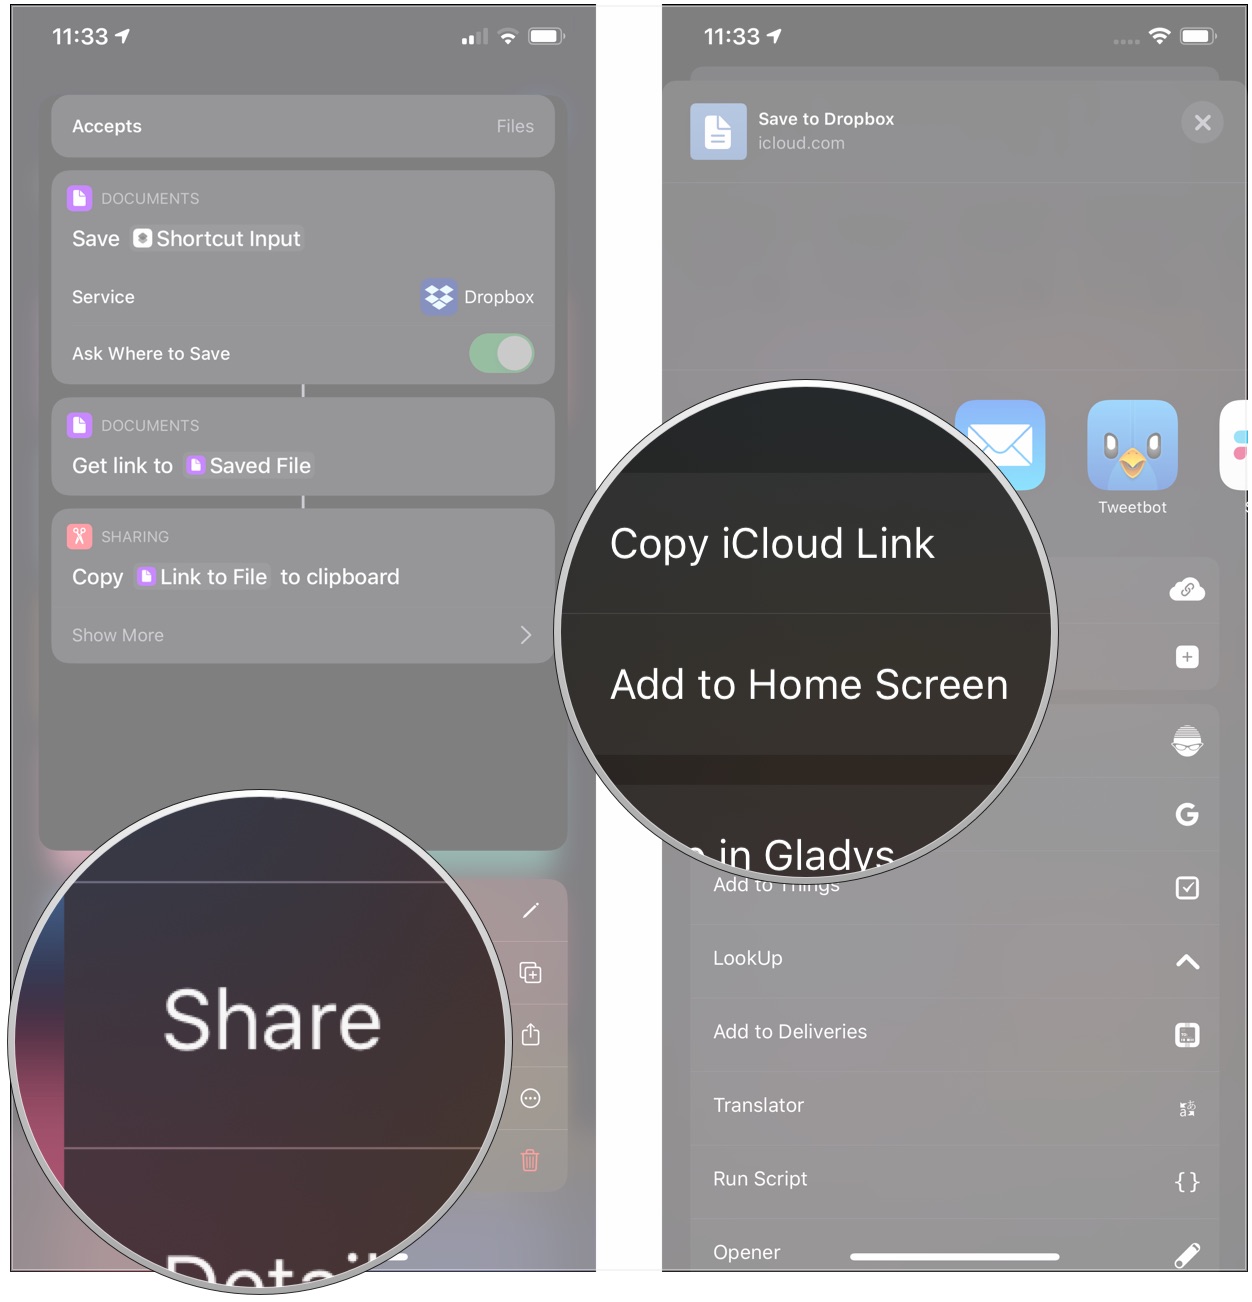
- Tap the share button towards the bottom-right corner.
- Tap one of the options on the share sheet:
- Mail, Add to Notes, or Message, Copy iCloud Link, third-party messaging apps: Creates a link that you can share with anyone. Anyone with this link can also share the shortcut.
- AirDrop: Shares the shortcut to nearby devices via AirDrop.
- Add to Home Screen: adds shortcut directly to your Home screen.
How to share a shortcut from your Library in iOS 13
On iOS 13 and iPadOS 13, sharing a shortcut can be completed using either 3D Touch or a long press.
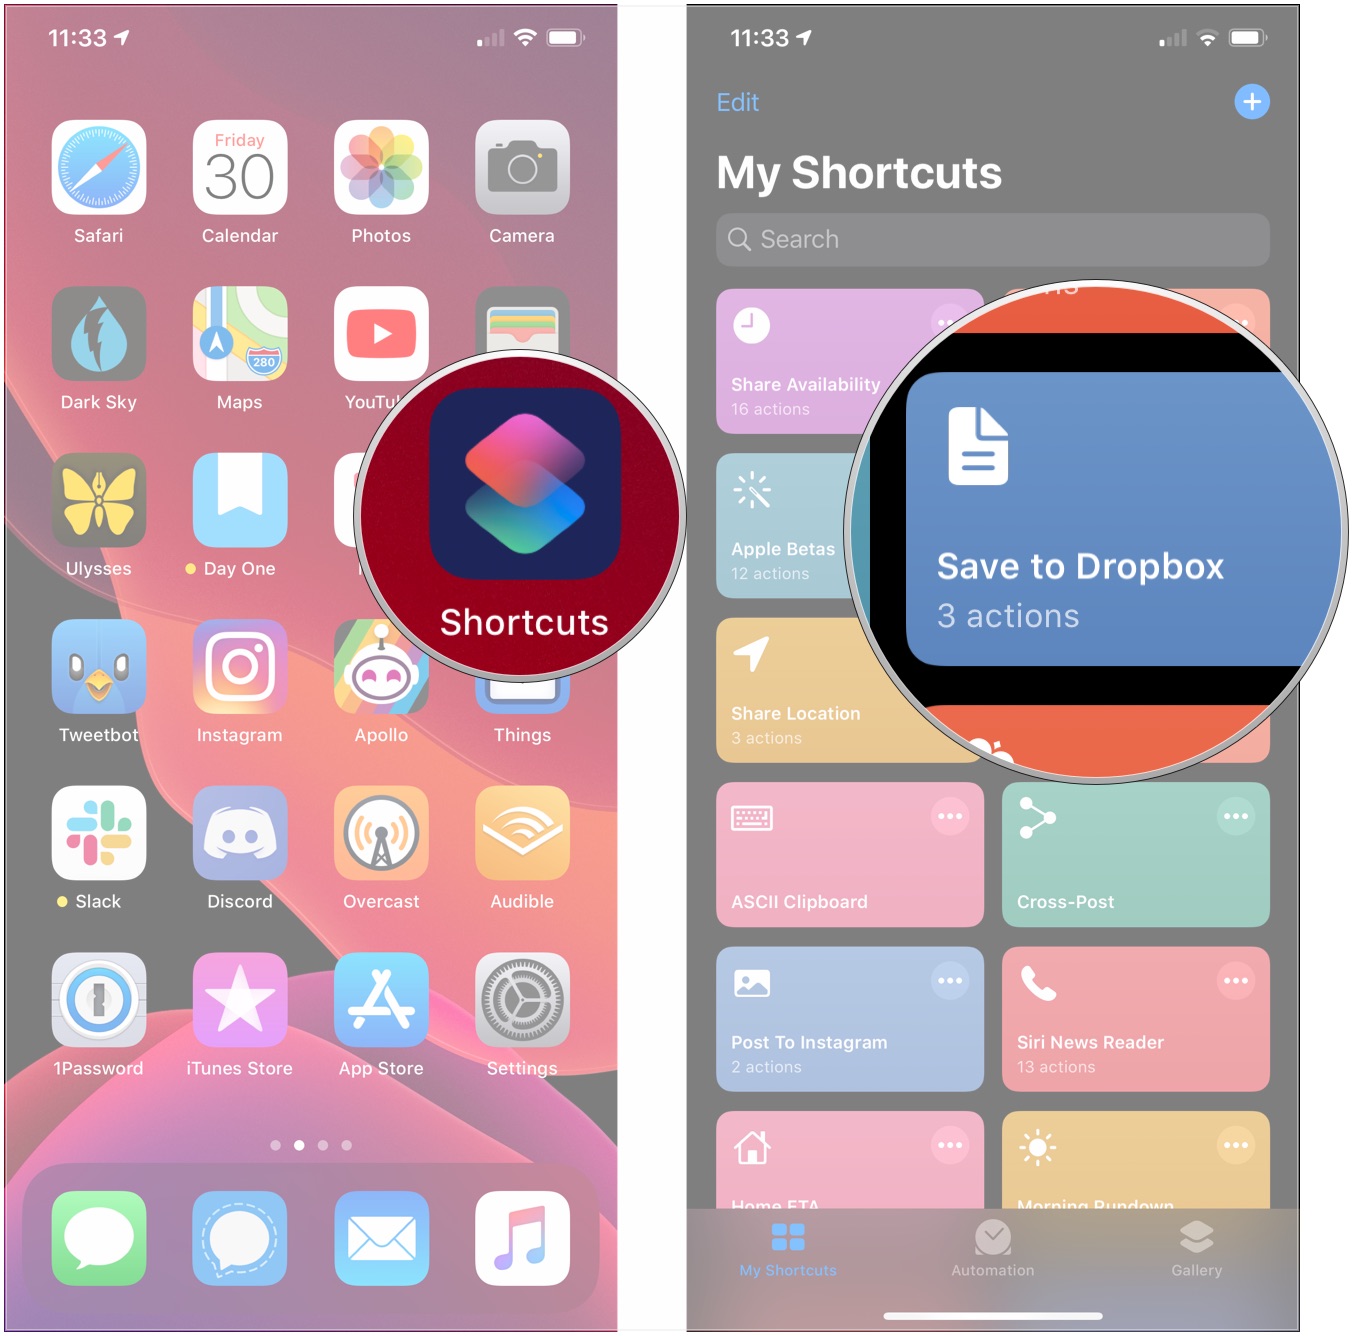
- Open Shortcuts.
- Press firmly or long-press on the shortcut you want to share.
- Tap Share.
- Choose a sharing option as outlined in the previous steps.
How to share links to a specific shortcut (in iOS 13.1 and later)
In iOS 13.1 and iPadOS 13.1 and later, Shortcuts can be shared using the "Get Link to File" shortcut action, allowing you to share shortcuts with a shortcut. Setting up the shortcut that lets you share a single shortcut is a little complex, however.
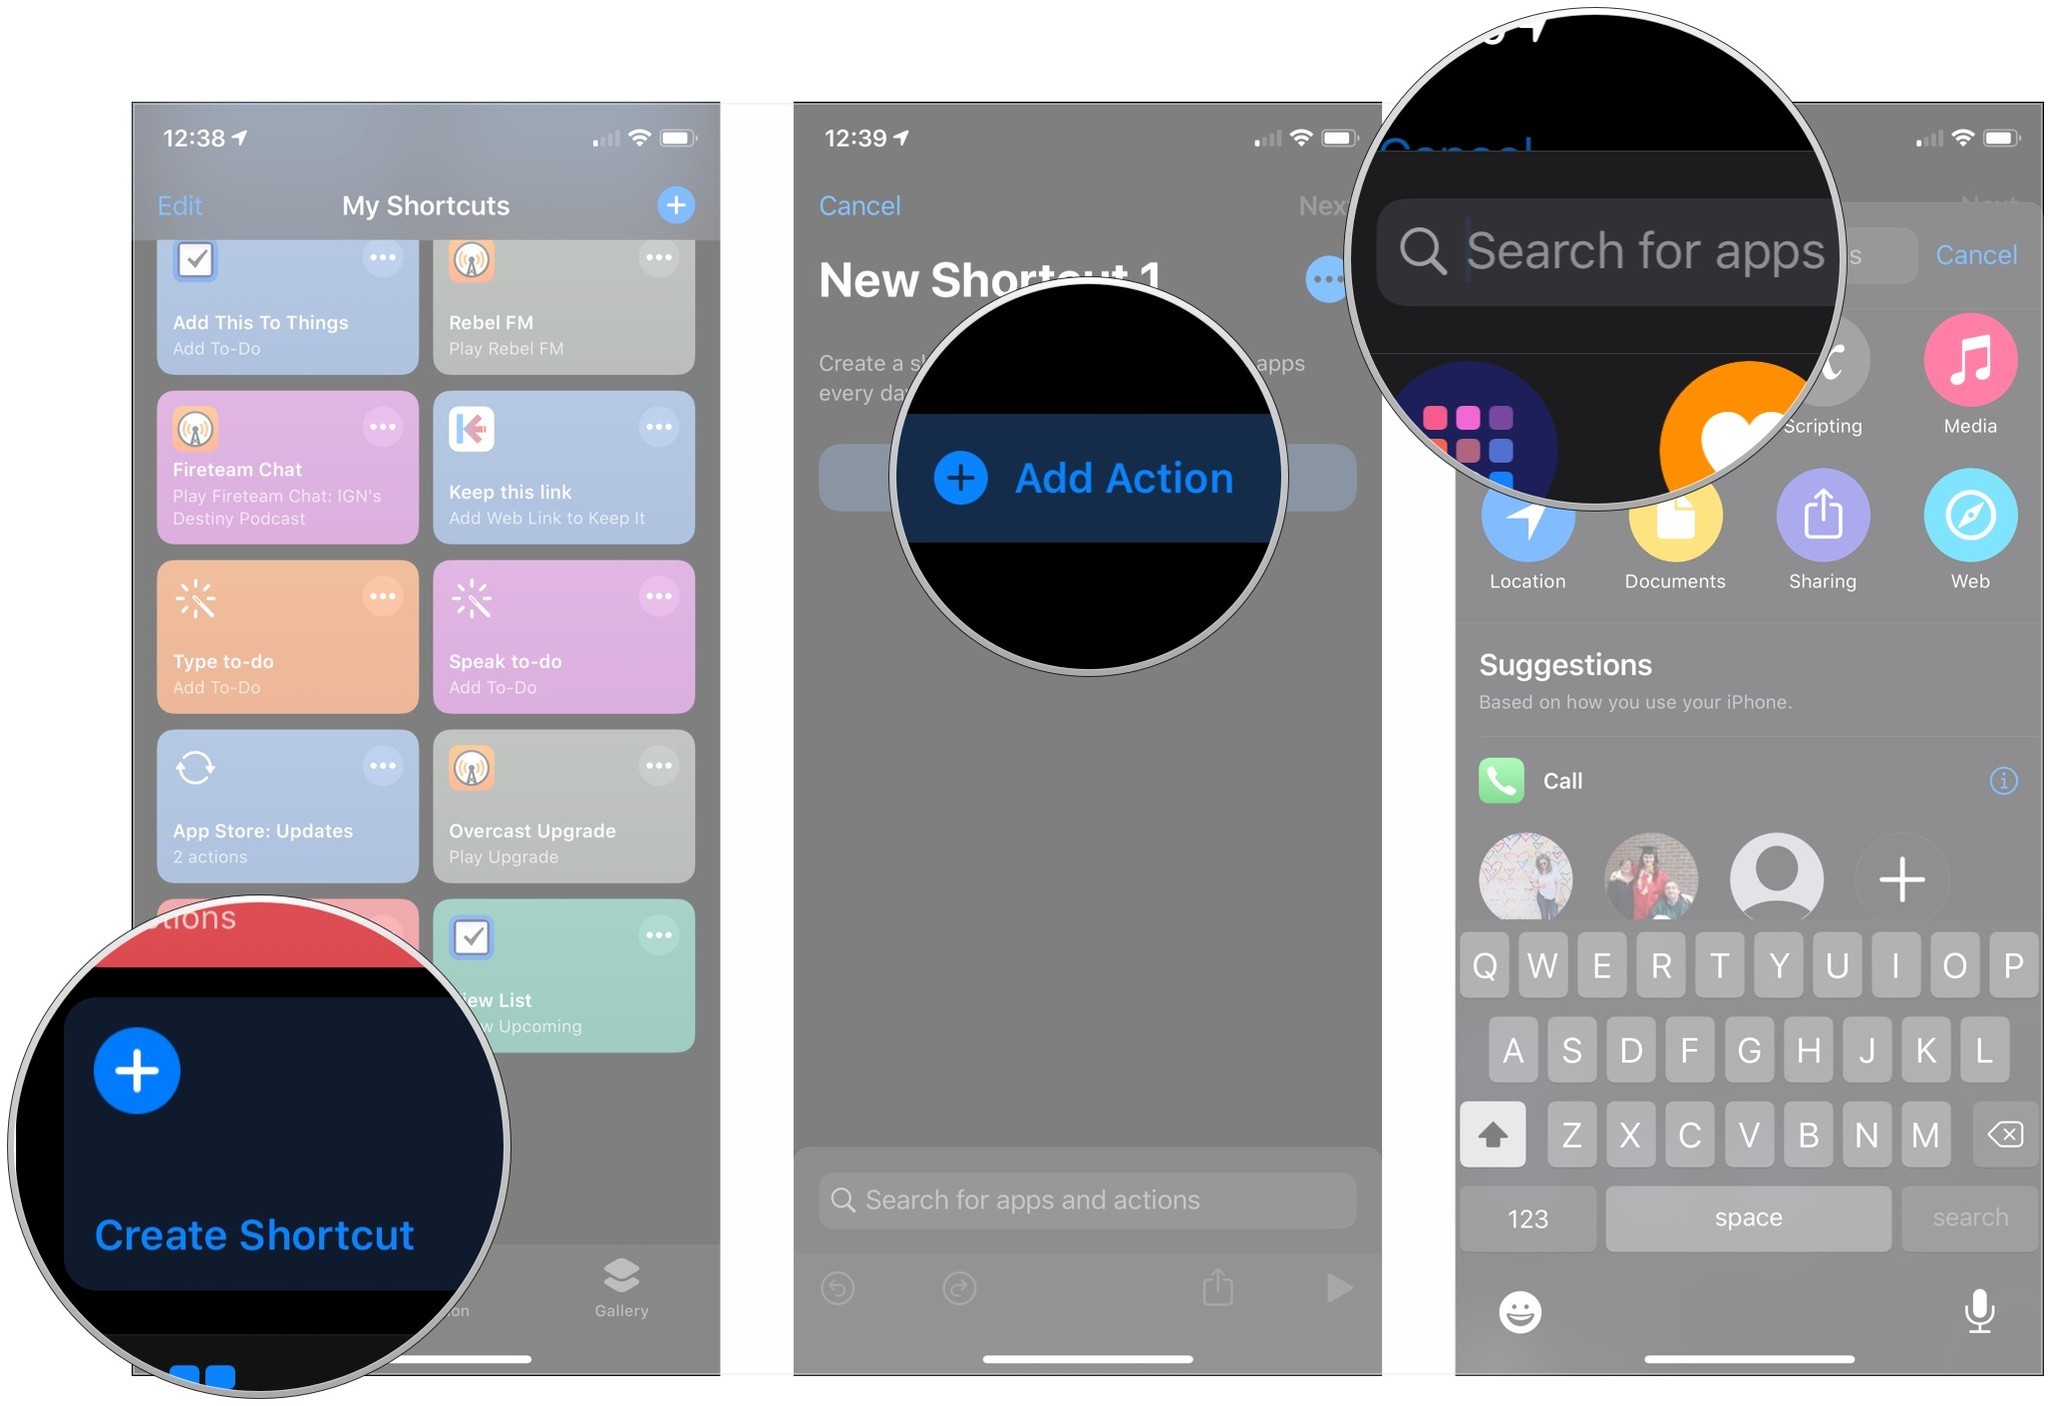
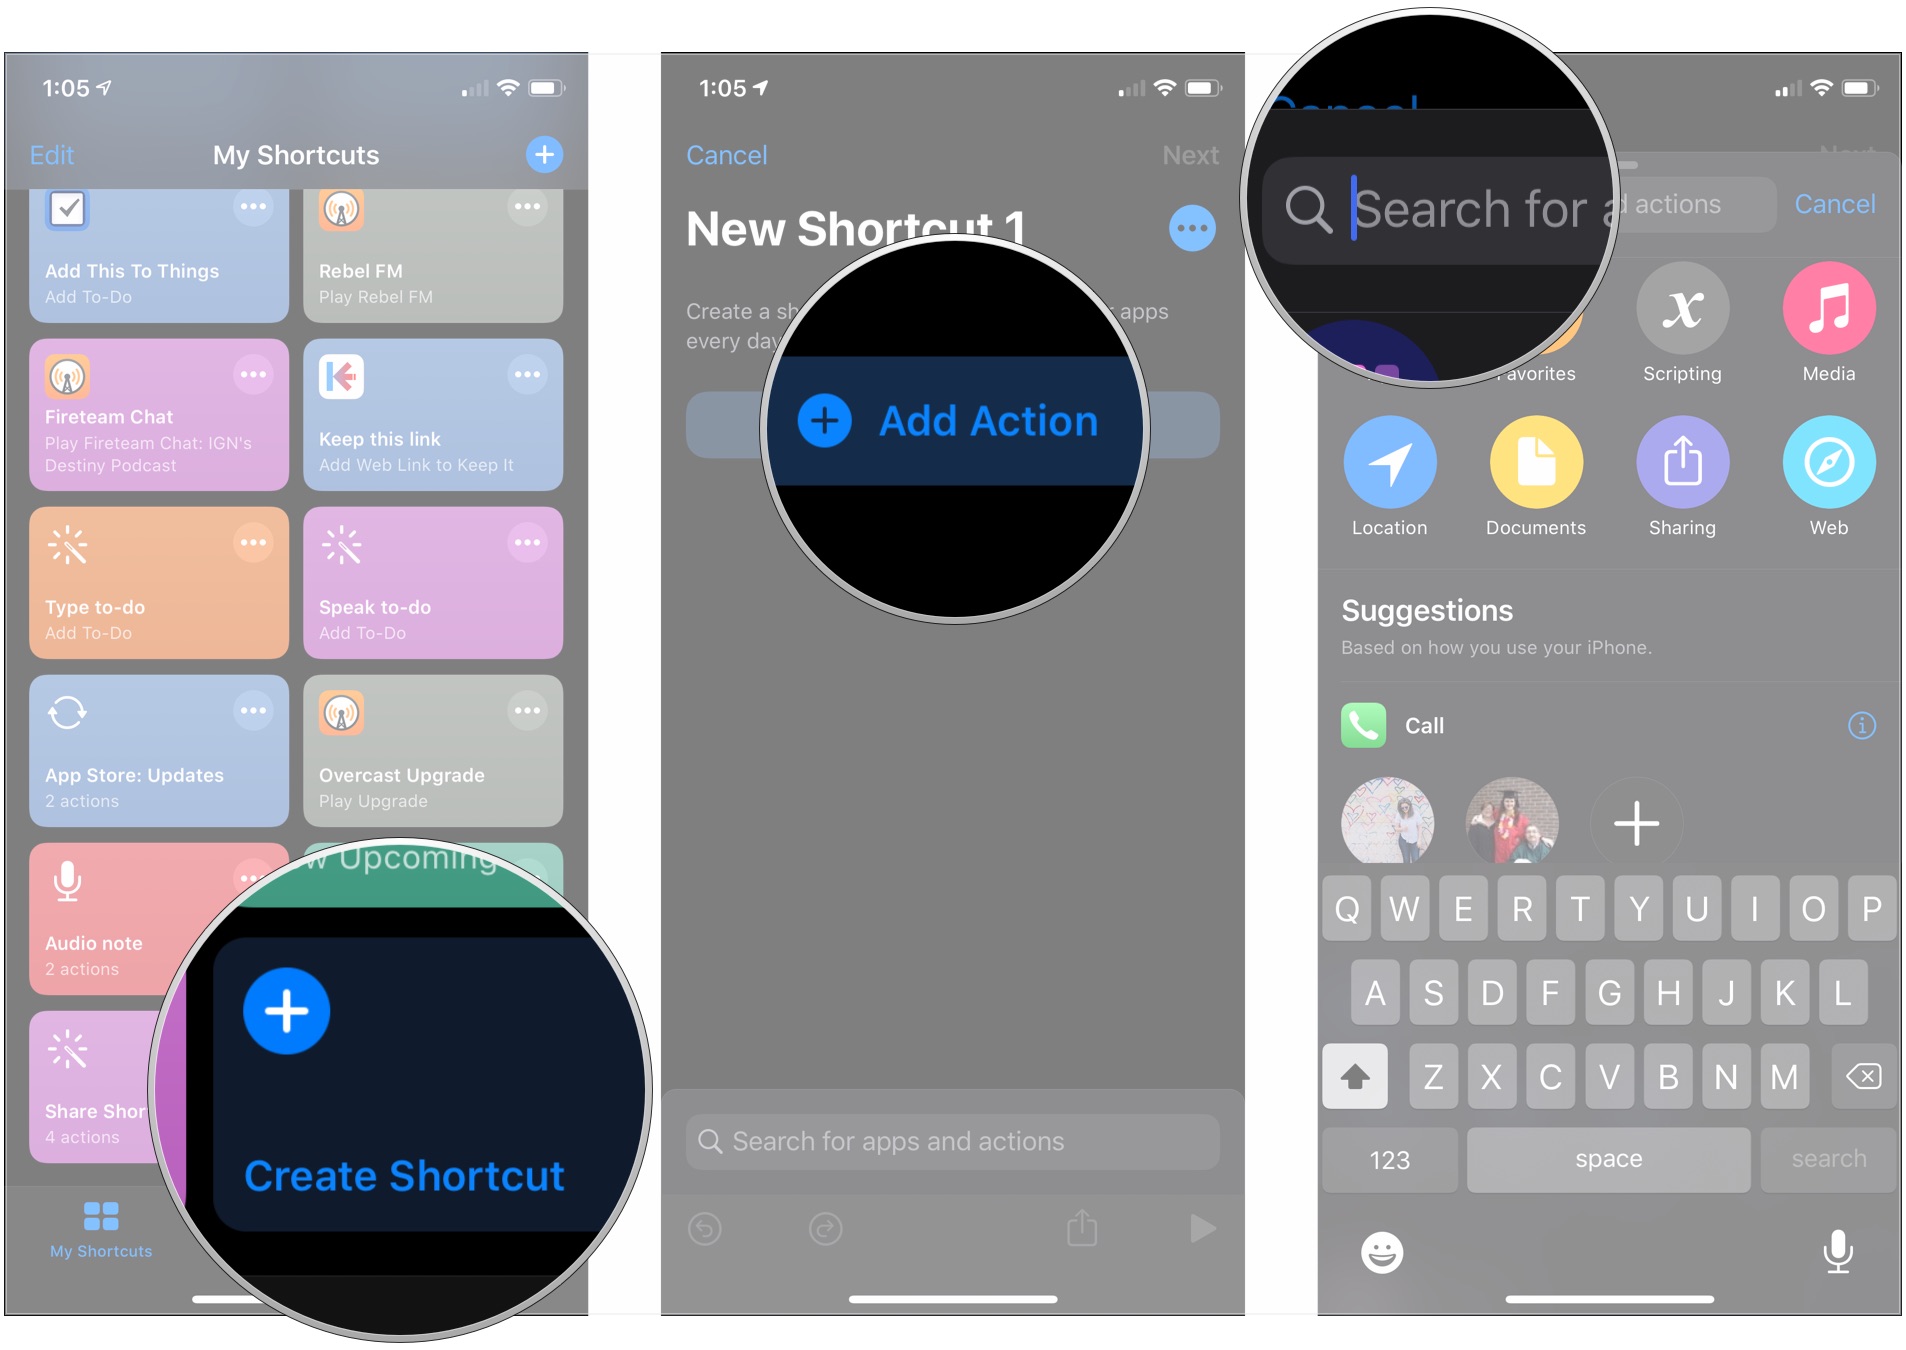
- In Shortcuts, tap Create Shortcut or the + button.
- Tap Add Action.
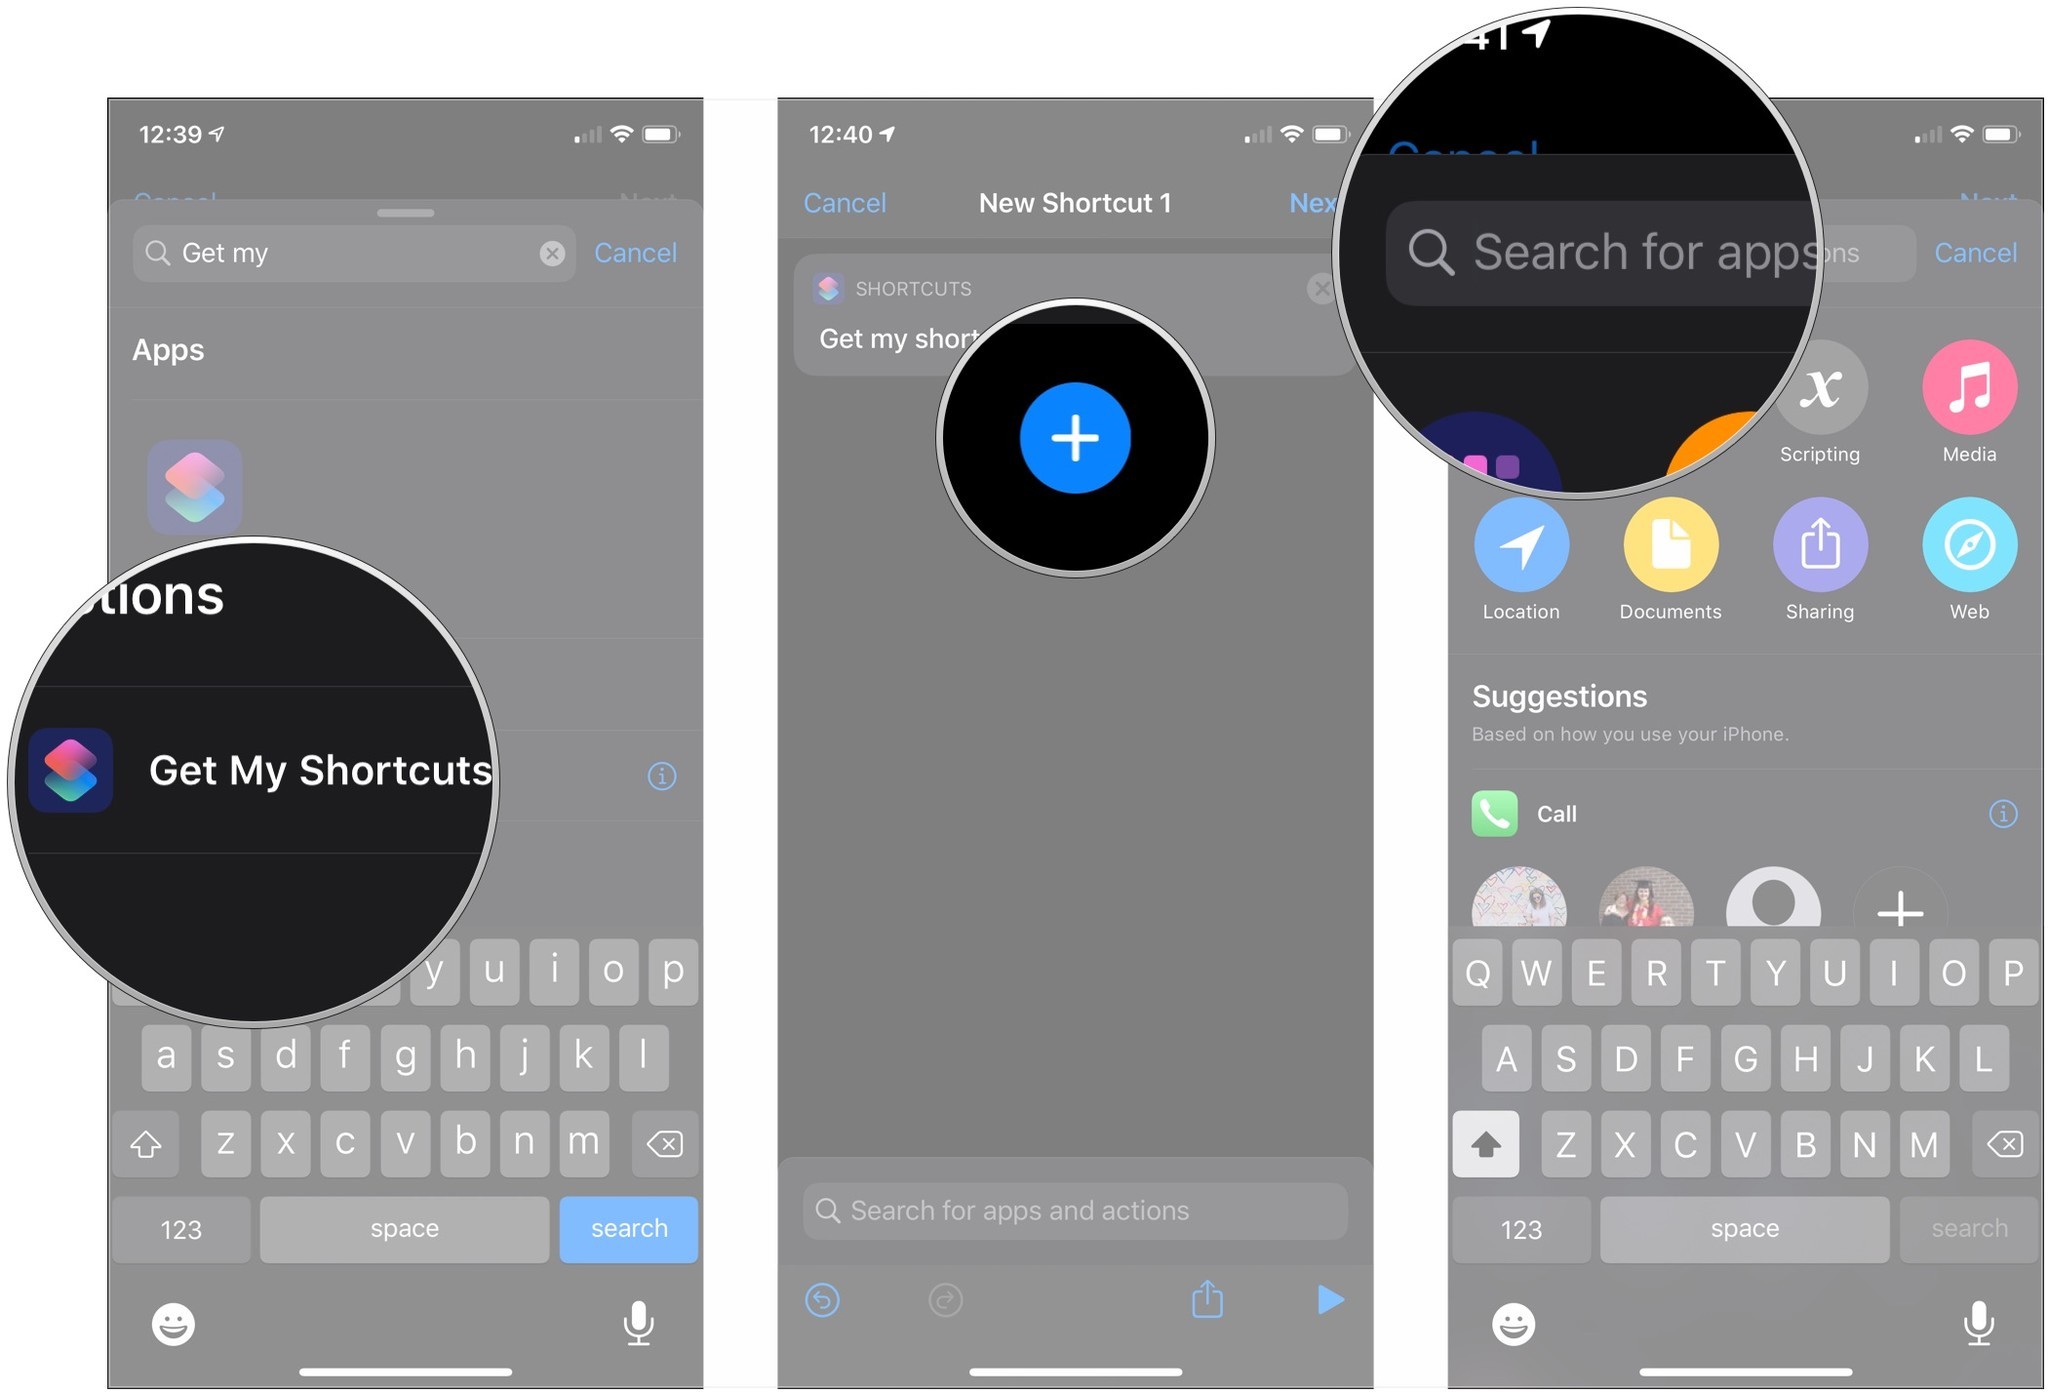
- Use the search bar to search for "Get My Shortcuts."
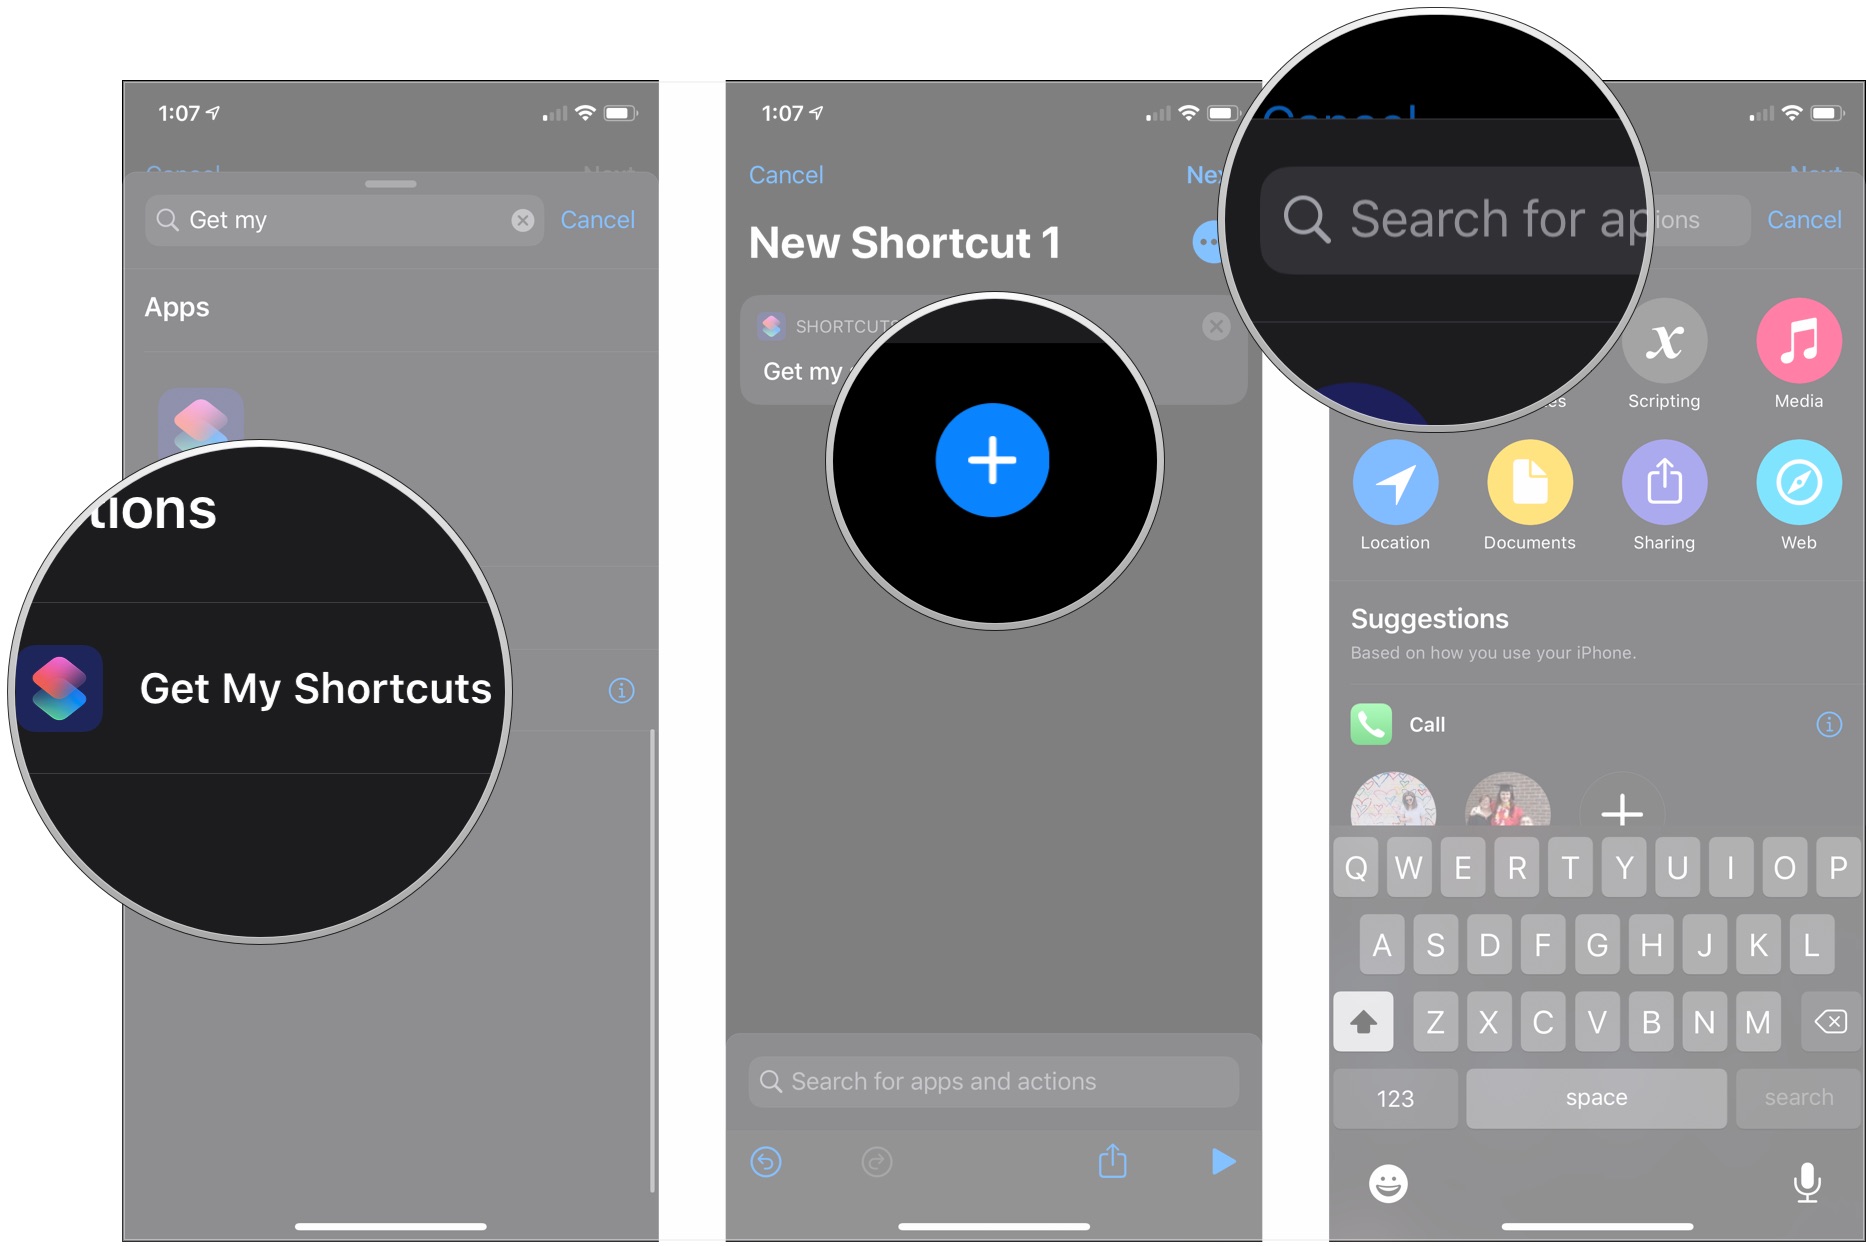
- Tap Get My Shortcuts.
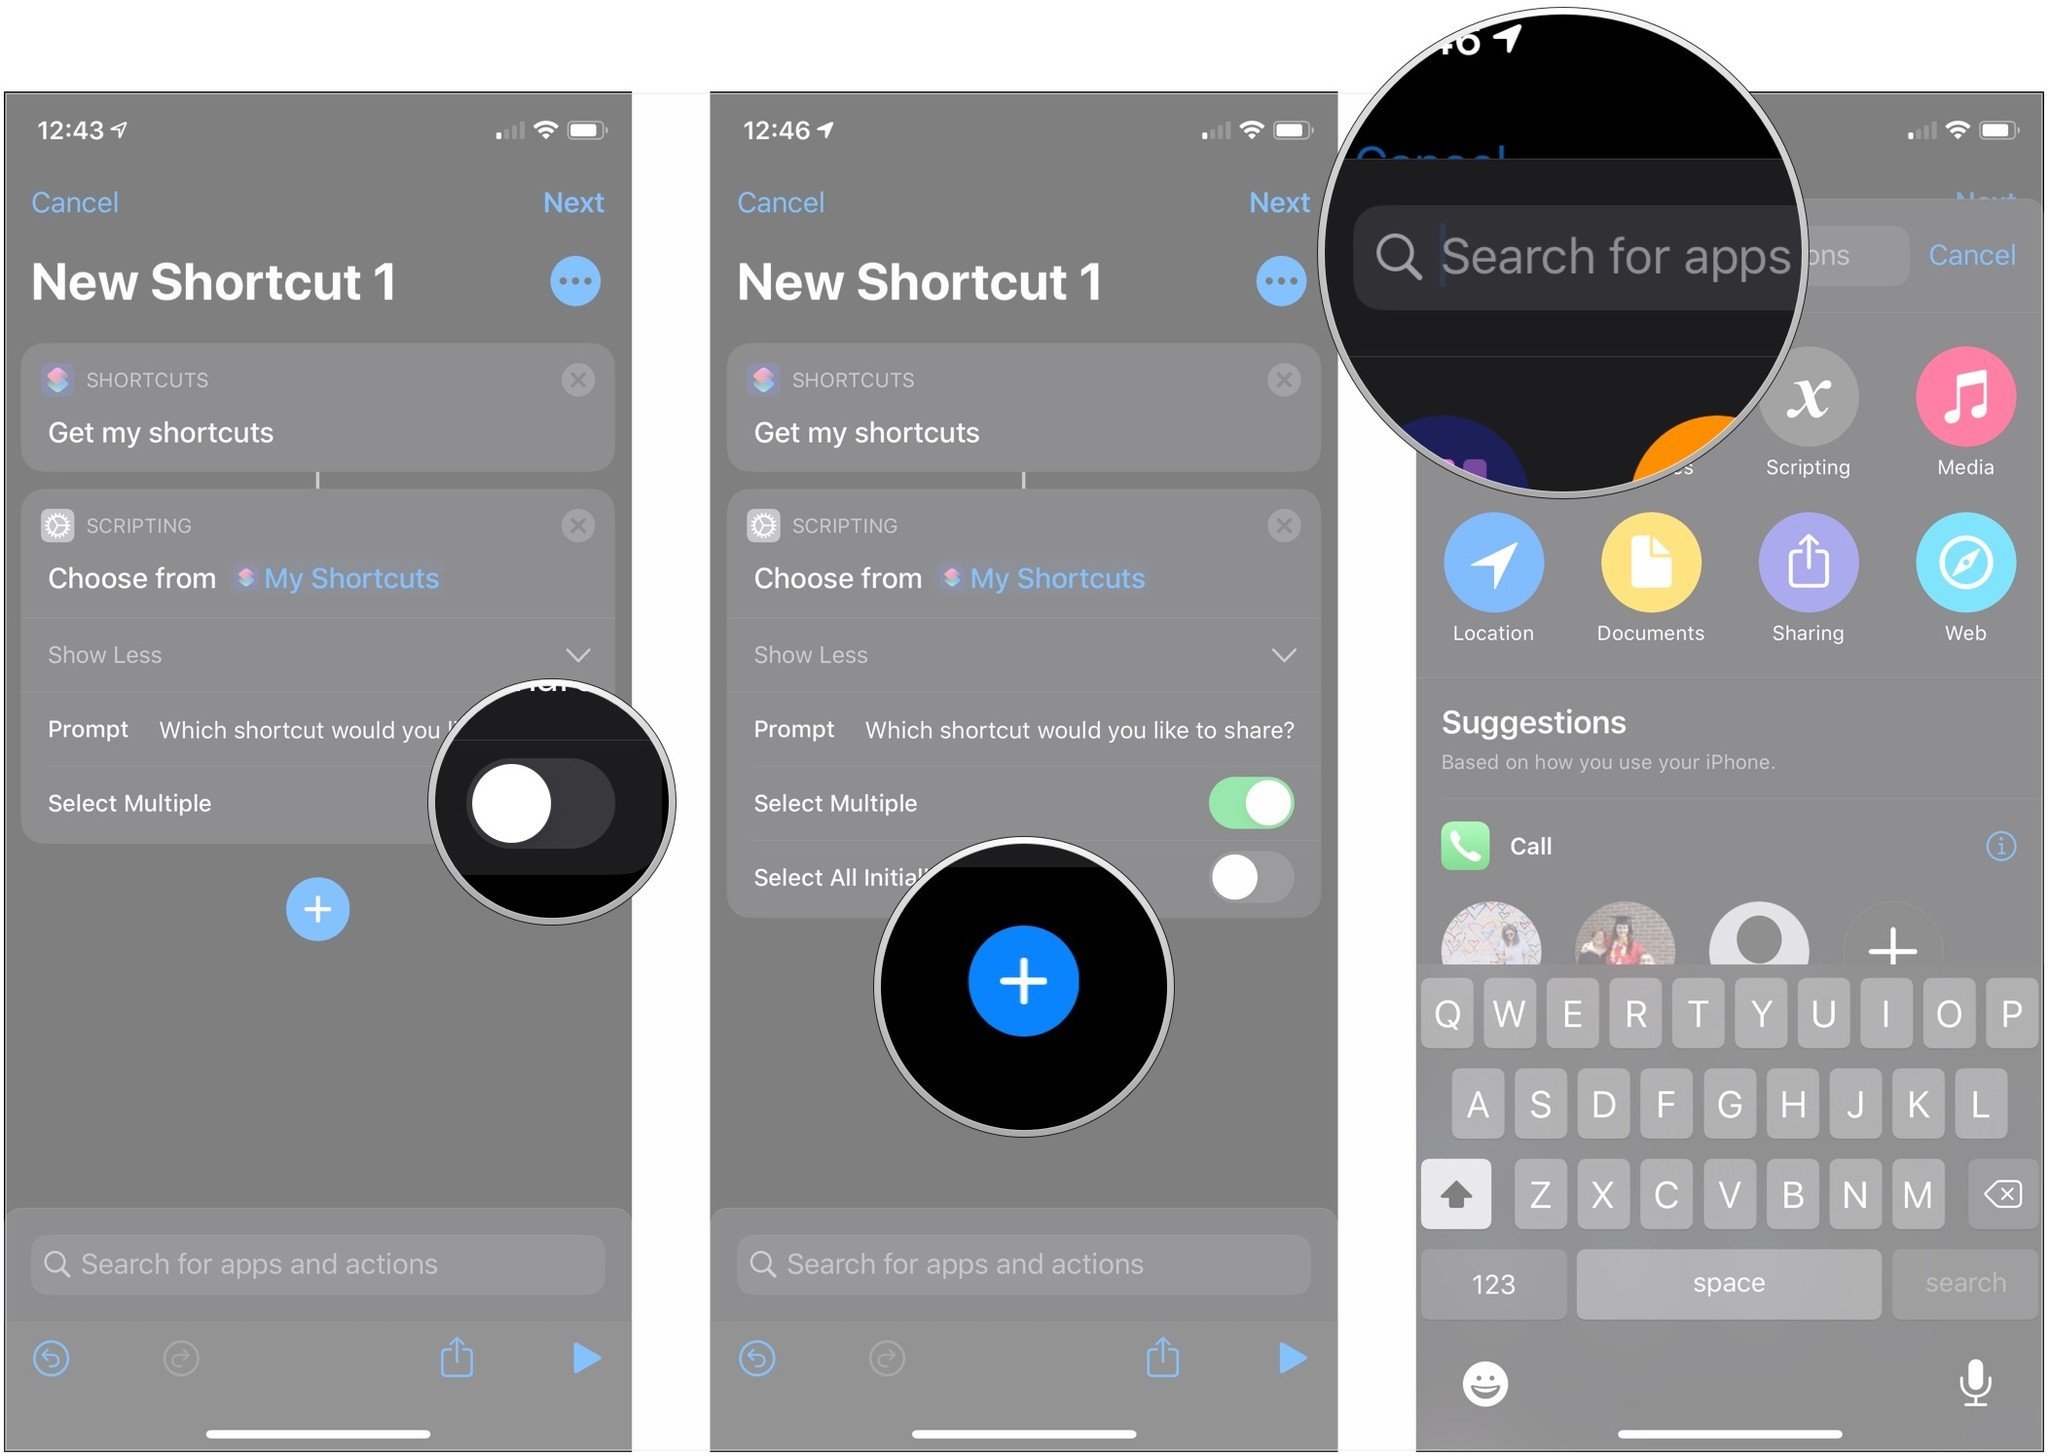
- Tap the + button.
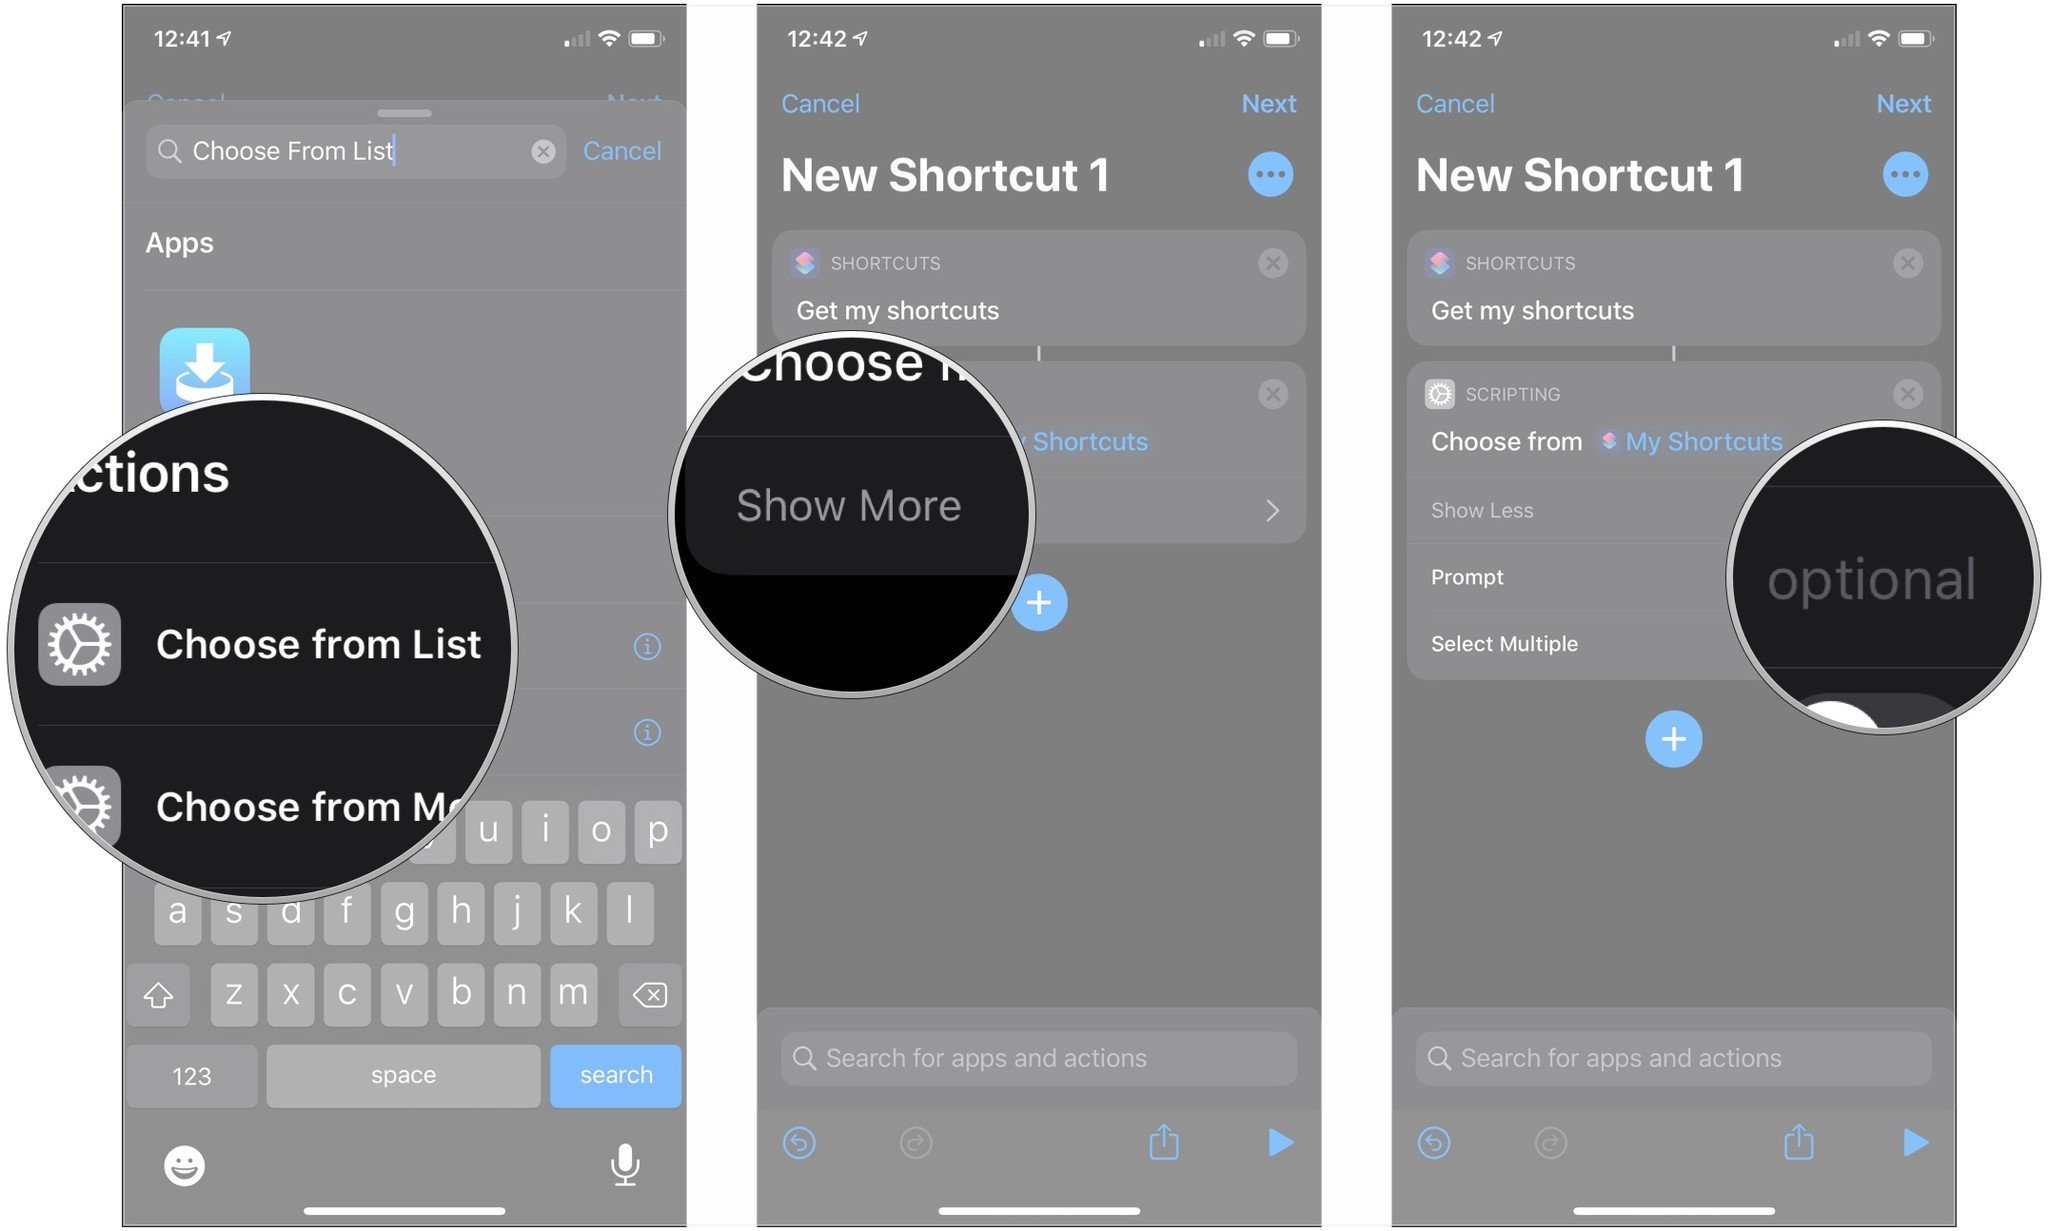
- Use the search bar to search for "Choose From List."
- Tap Choose From List.
- Tap Show More.
- Enter a prompt if you want to see a text prompt.
- Tap the switch next to Select Multiple if you want to be able to select multiple shortcuts at the same time.
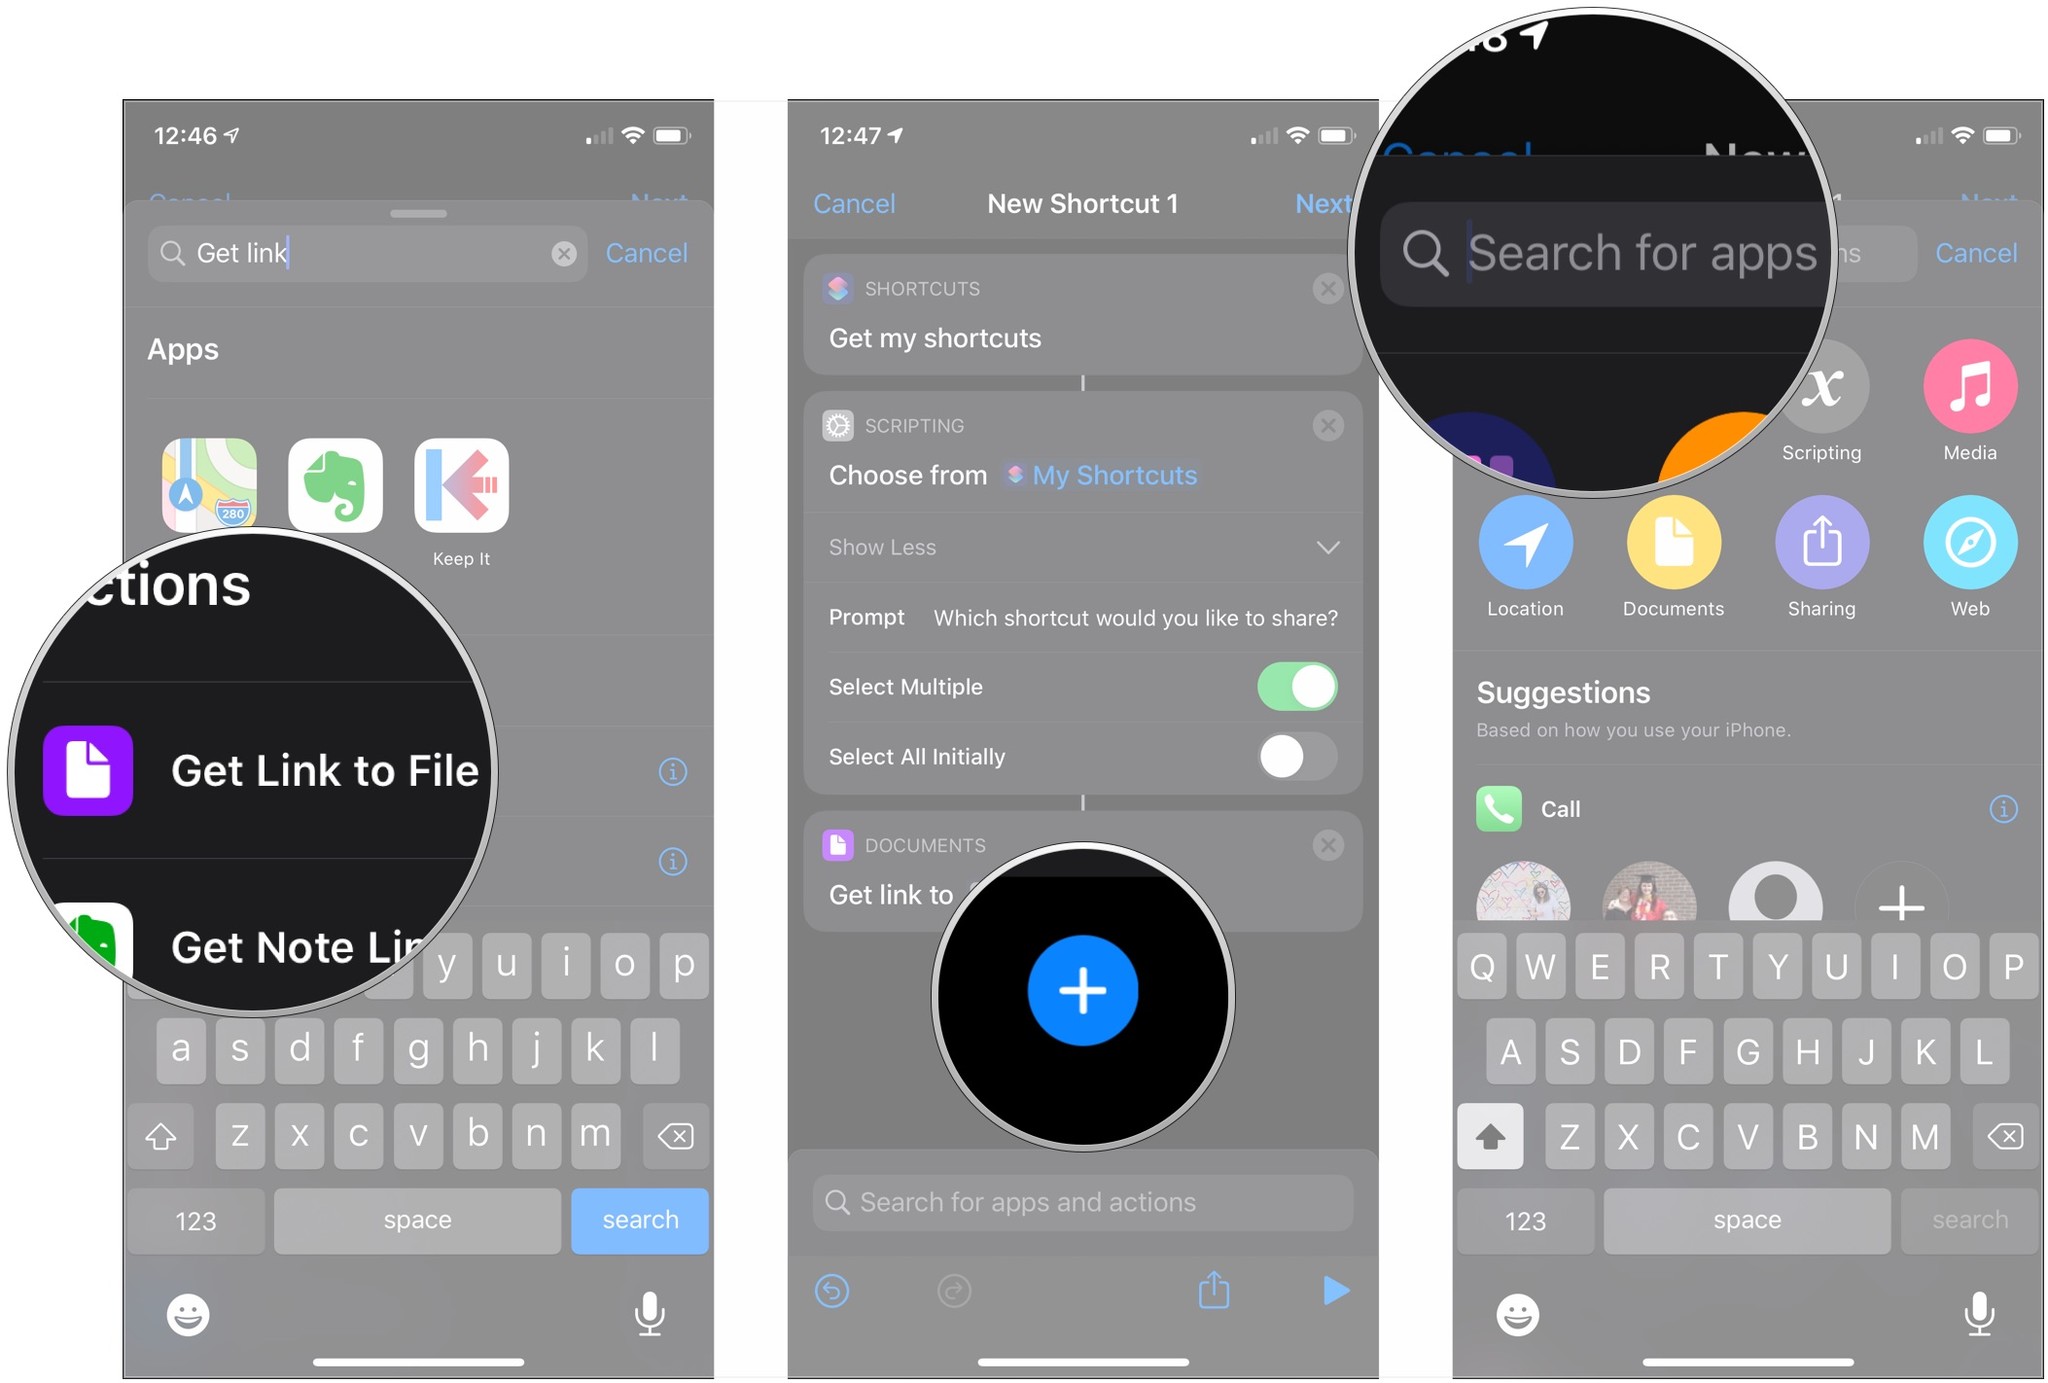
- Tap +.
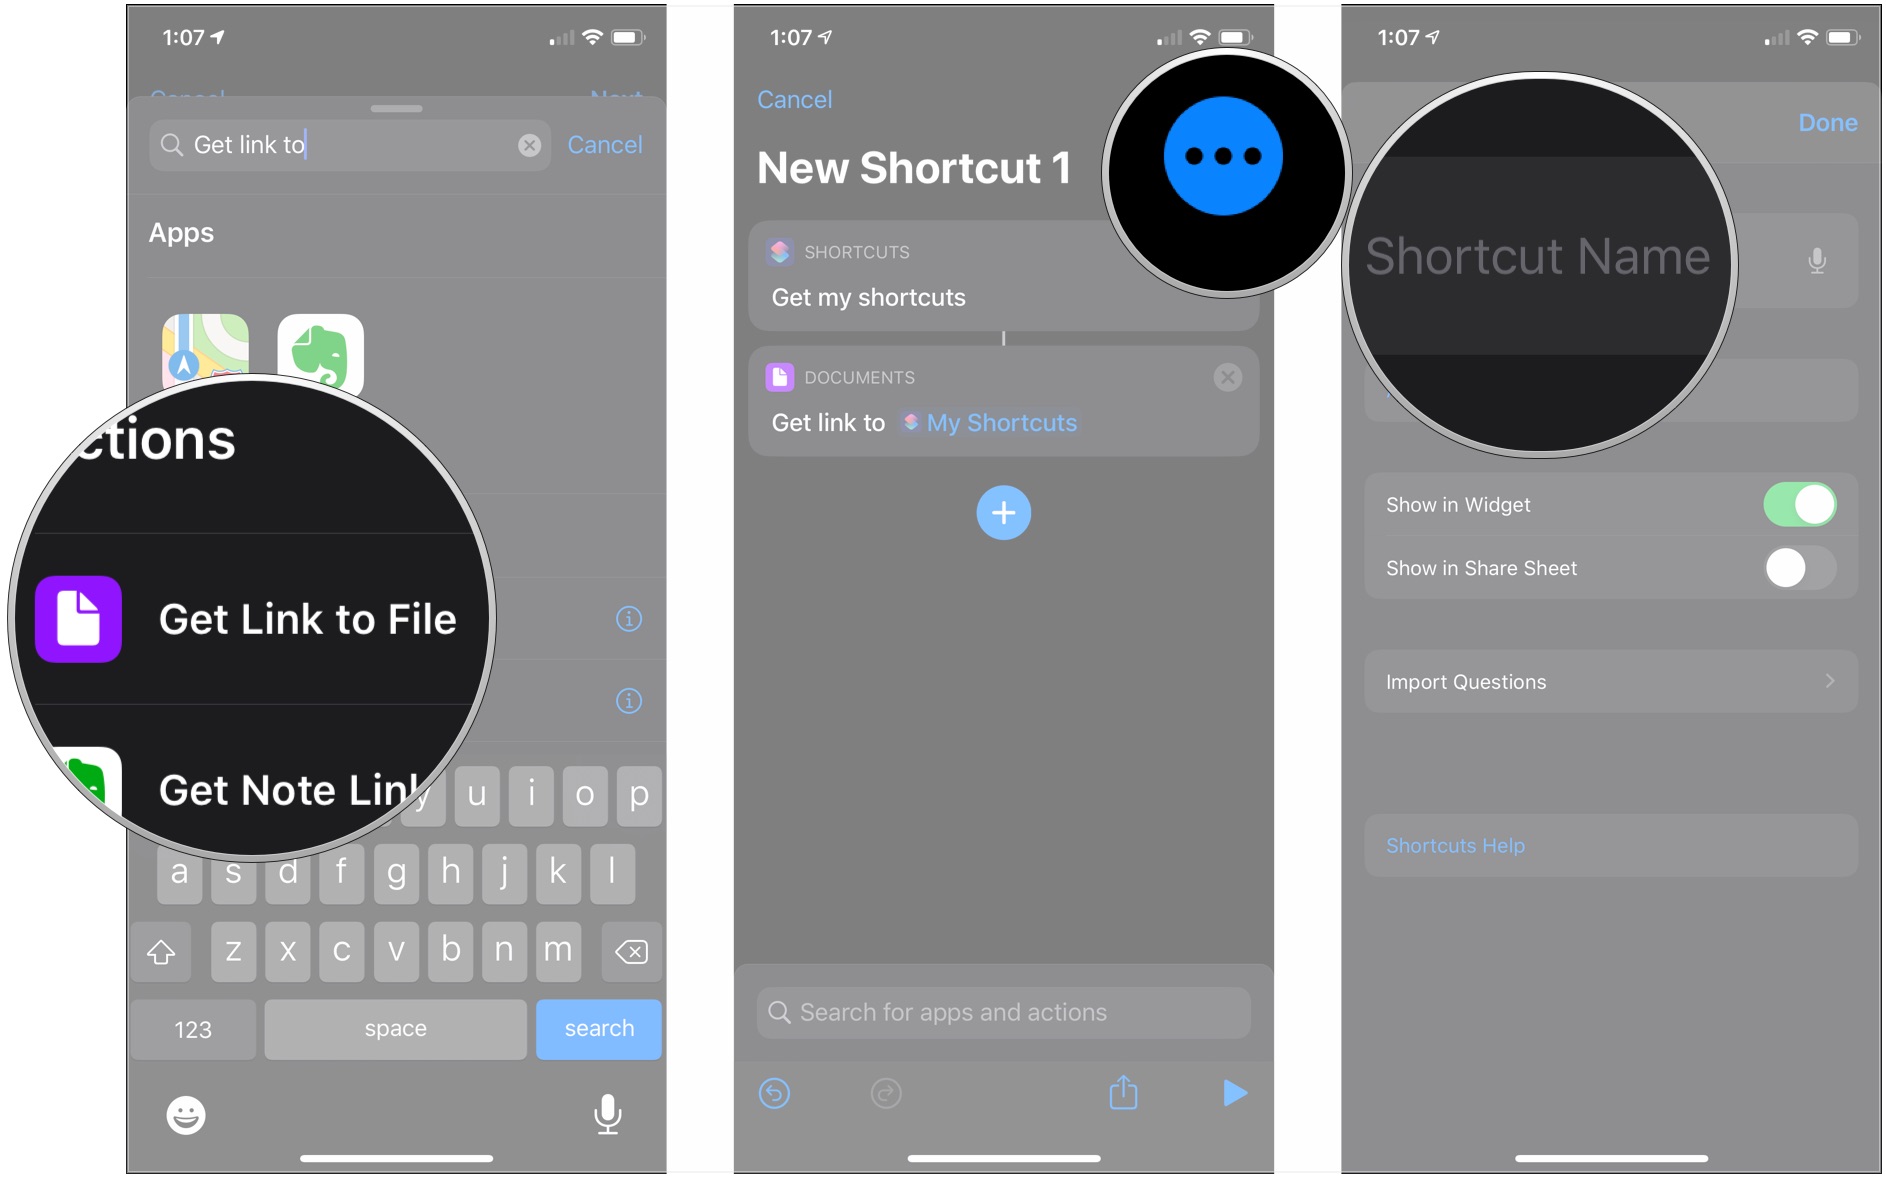
- Use the search bar to search for "Get Link to File."
- Tap Get Link to File.
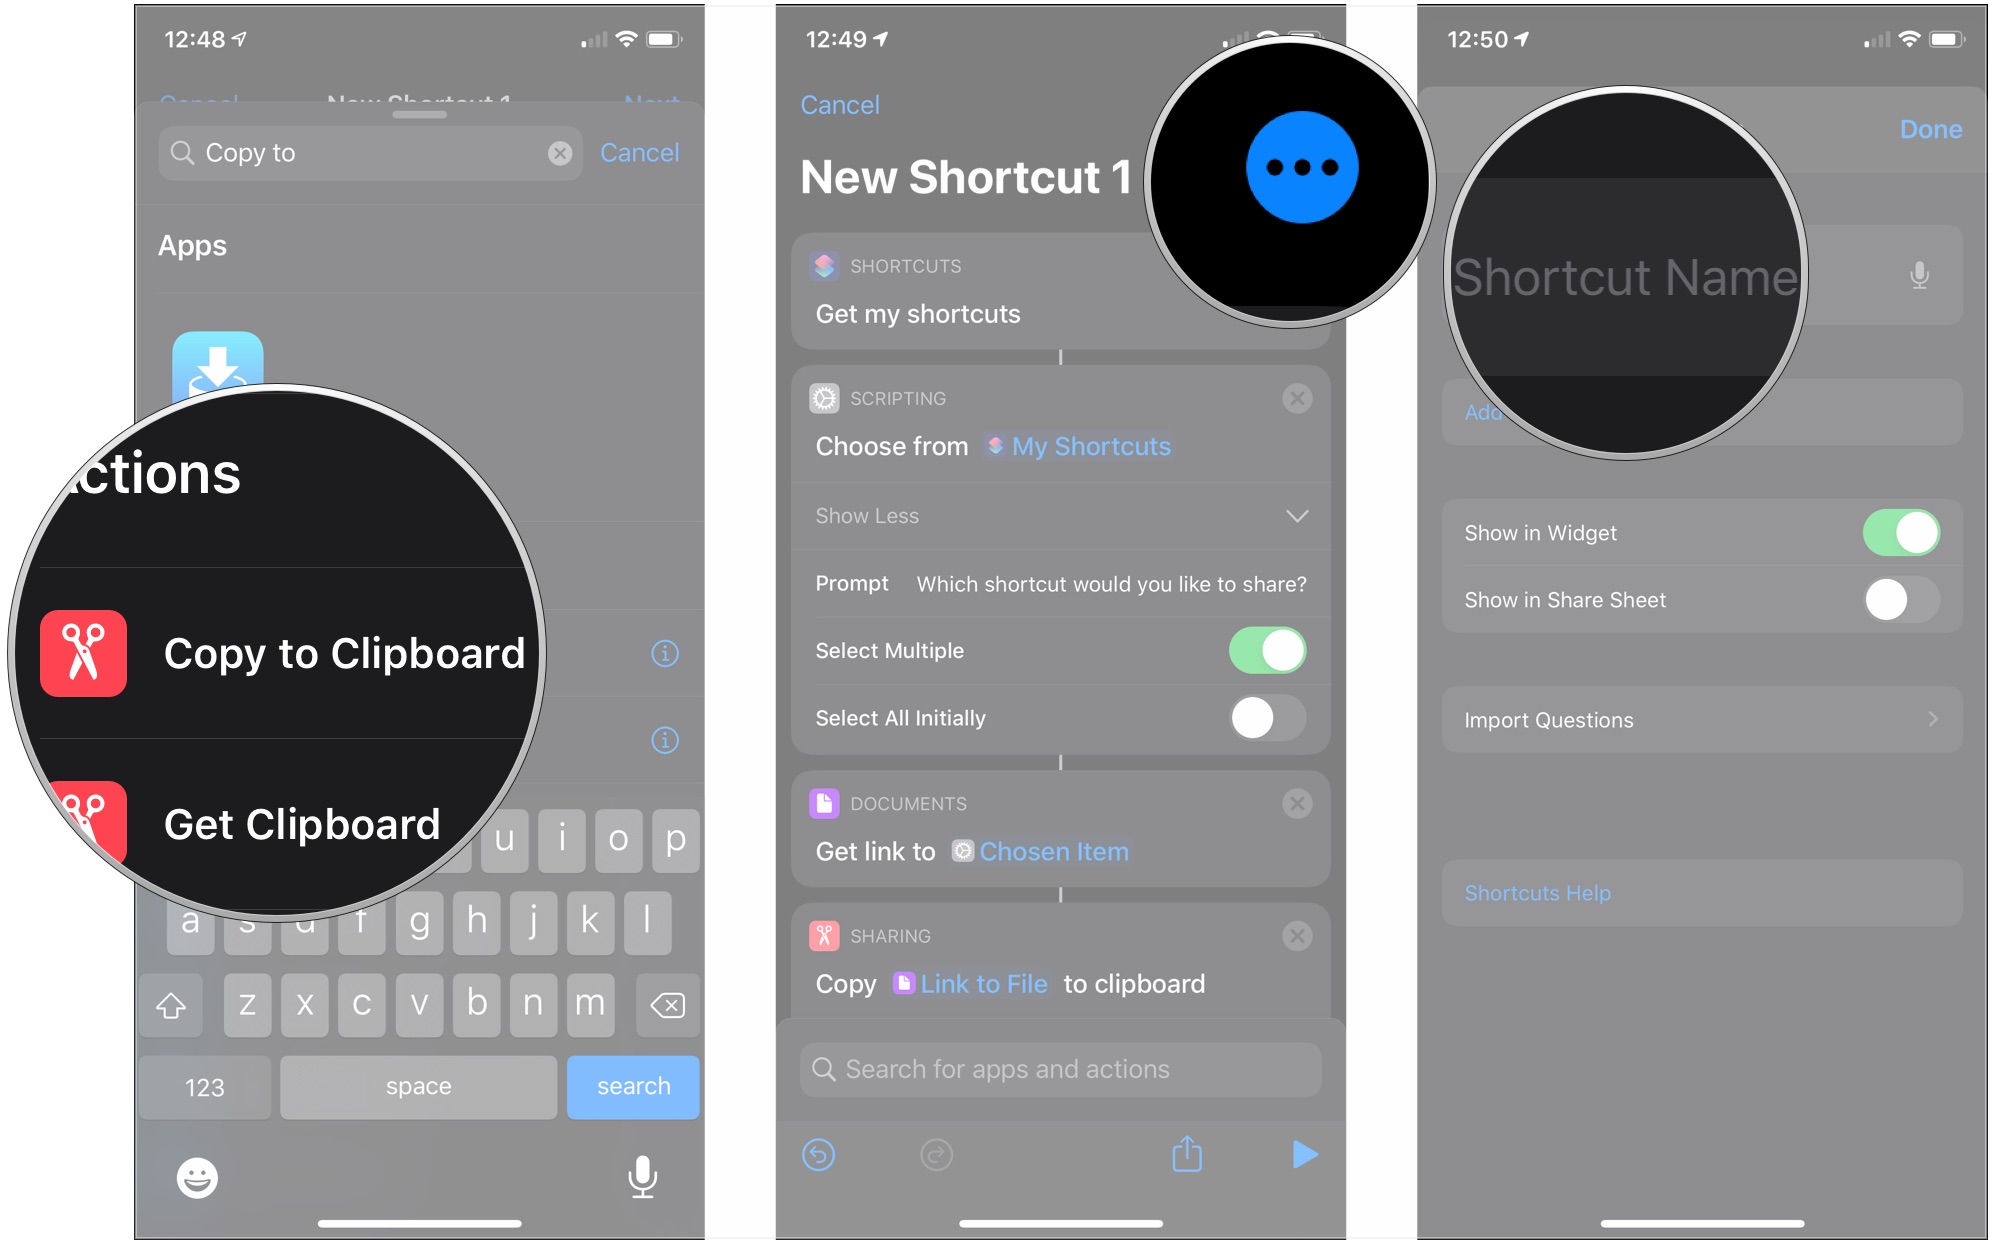
- Tap +.
- Use the search bar to search for "Copy to Clipboard."
- Tap Copy to Clipboard.
- Tap … in the top-right corner.
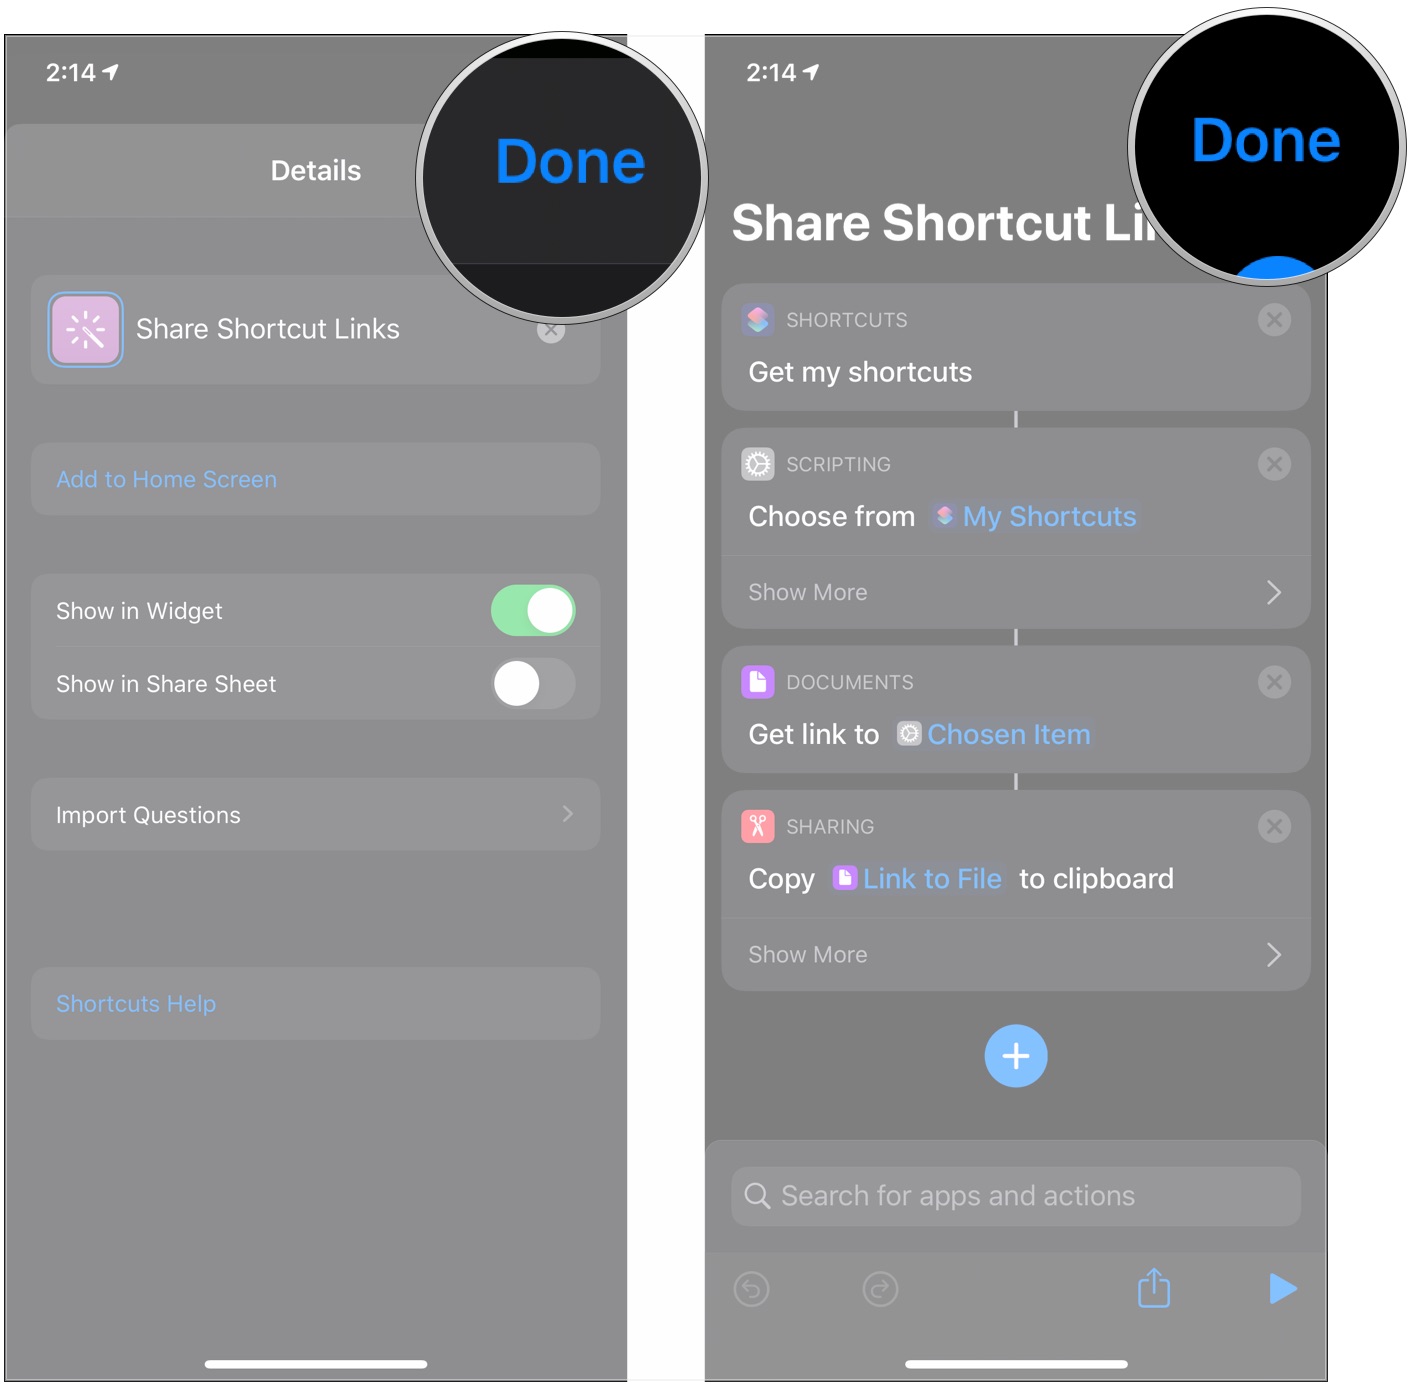
- Name your shortcut.
- Tap Done.
- Tap Done.
Then, when you want to share a shortcut or group of shortcuts, tap your newly-created shortcut.
iMore offers spot-on advice and guidance from our team of experts, with decades of Apple device experience to lean on. Learn more with iMore!
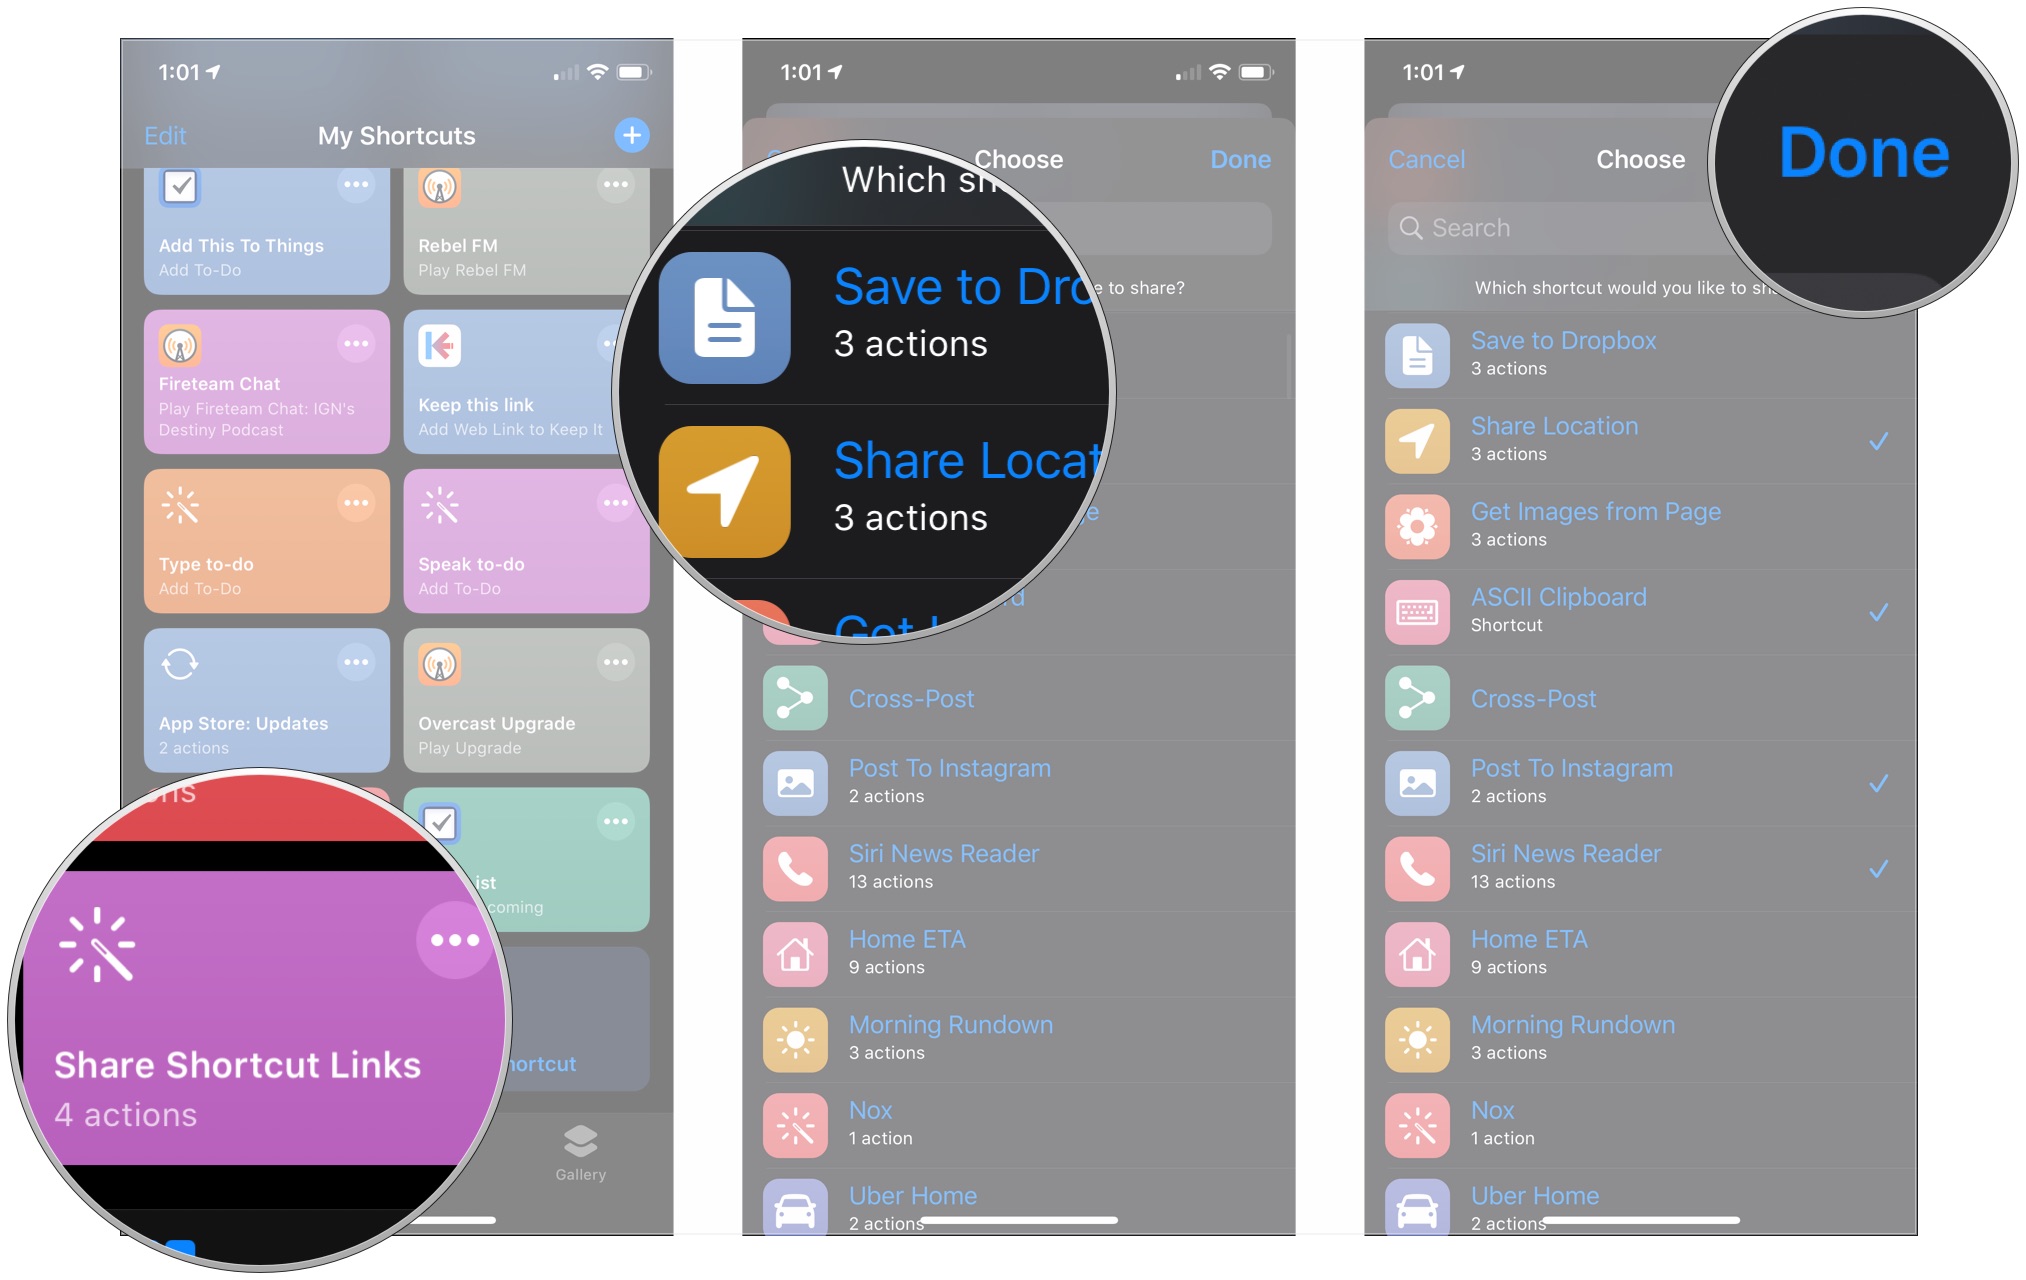
- Tap Share Shortcut Links or whatever you named your shortcut.
- Tap on the shortcuts you want to share.
- Tap Done.
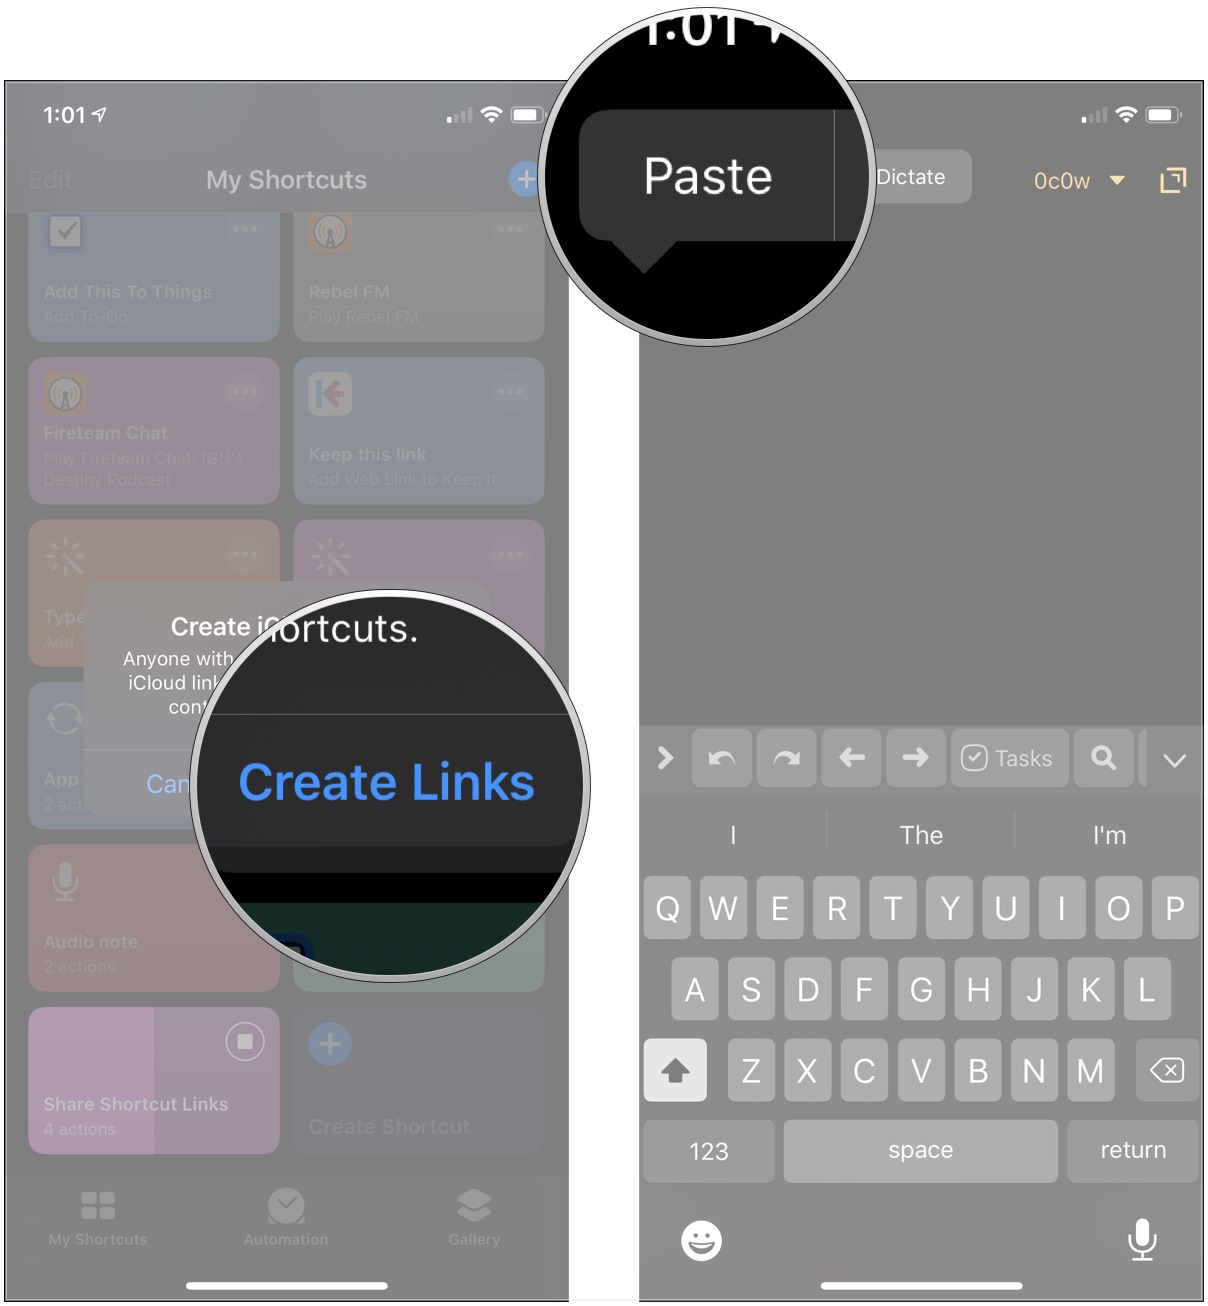
- Tap Create Links. Wait for your chosen links to be copied, when a checkmark appears on your shortcut.
- Paste your links where you want to share them.
You can grab that shortcut right here.
How to share links to all of your Shortcuts in (iOS 13.1 and later)
Creating a shortcut to share all of your shortcuts is actually a simpler matter than making one to share only select shortcuts. Like the shortcut above, this method is also only available in iOS 13.1 and iPadOS 13.1 and later.
- In Shortcuts, tap Create Shortcut or the + button.
- Tap Add Action.
- Use the search bar to search for "Get My Shortcuts."
- Tap Get My Shortcuts.
- Tap +.
- Use the search bar to search for "Get Link to File."
- Tap Get Link to File.
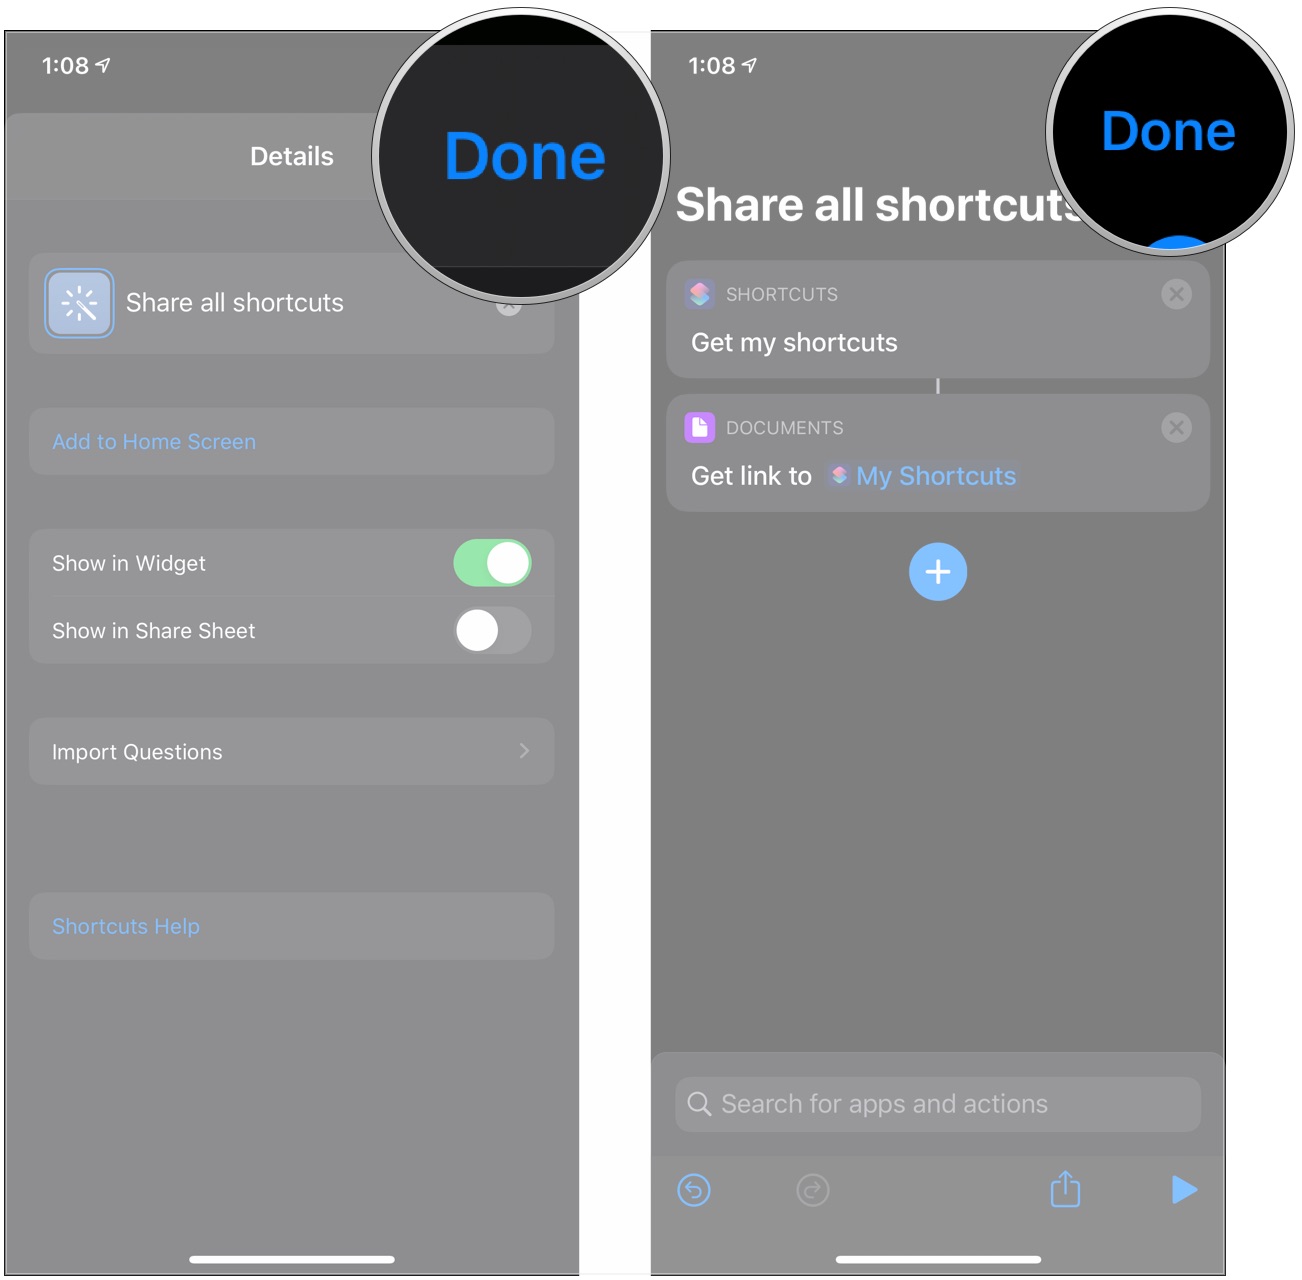
- Tap … in the top-right corner.
- Name your shortcut.
- Tap Done.
- Tap Done.
When you want to share all of your shortcuts, tap your new shortcut.
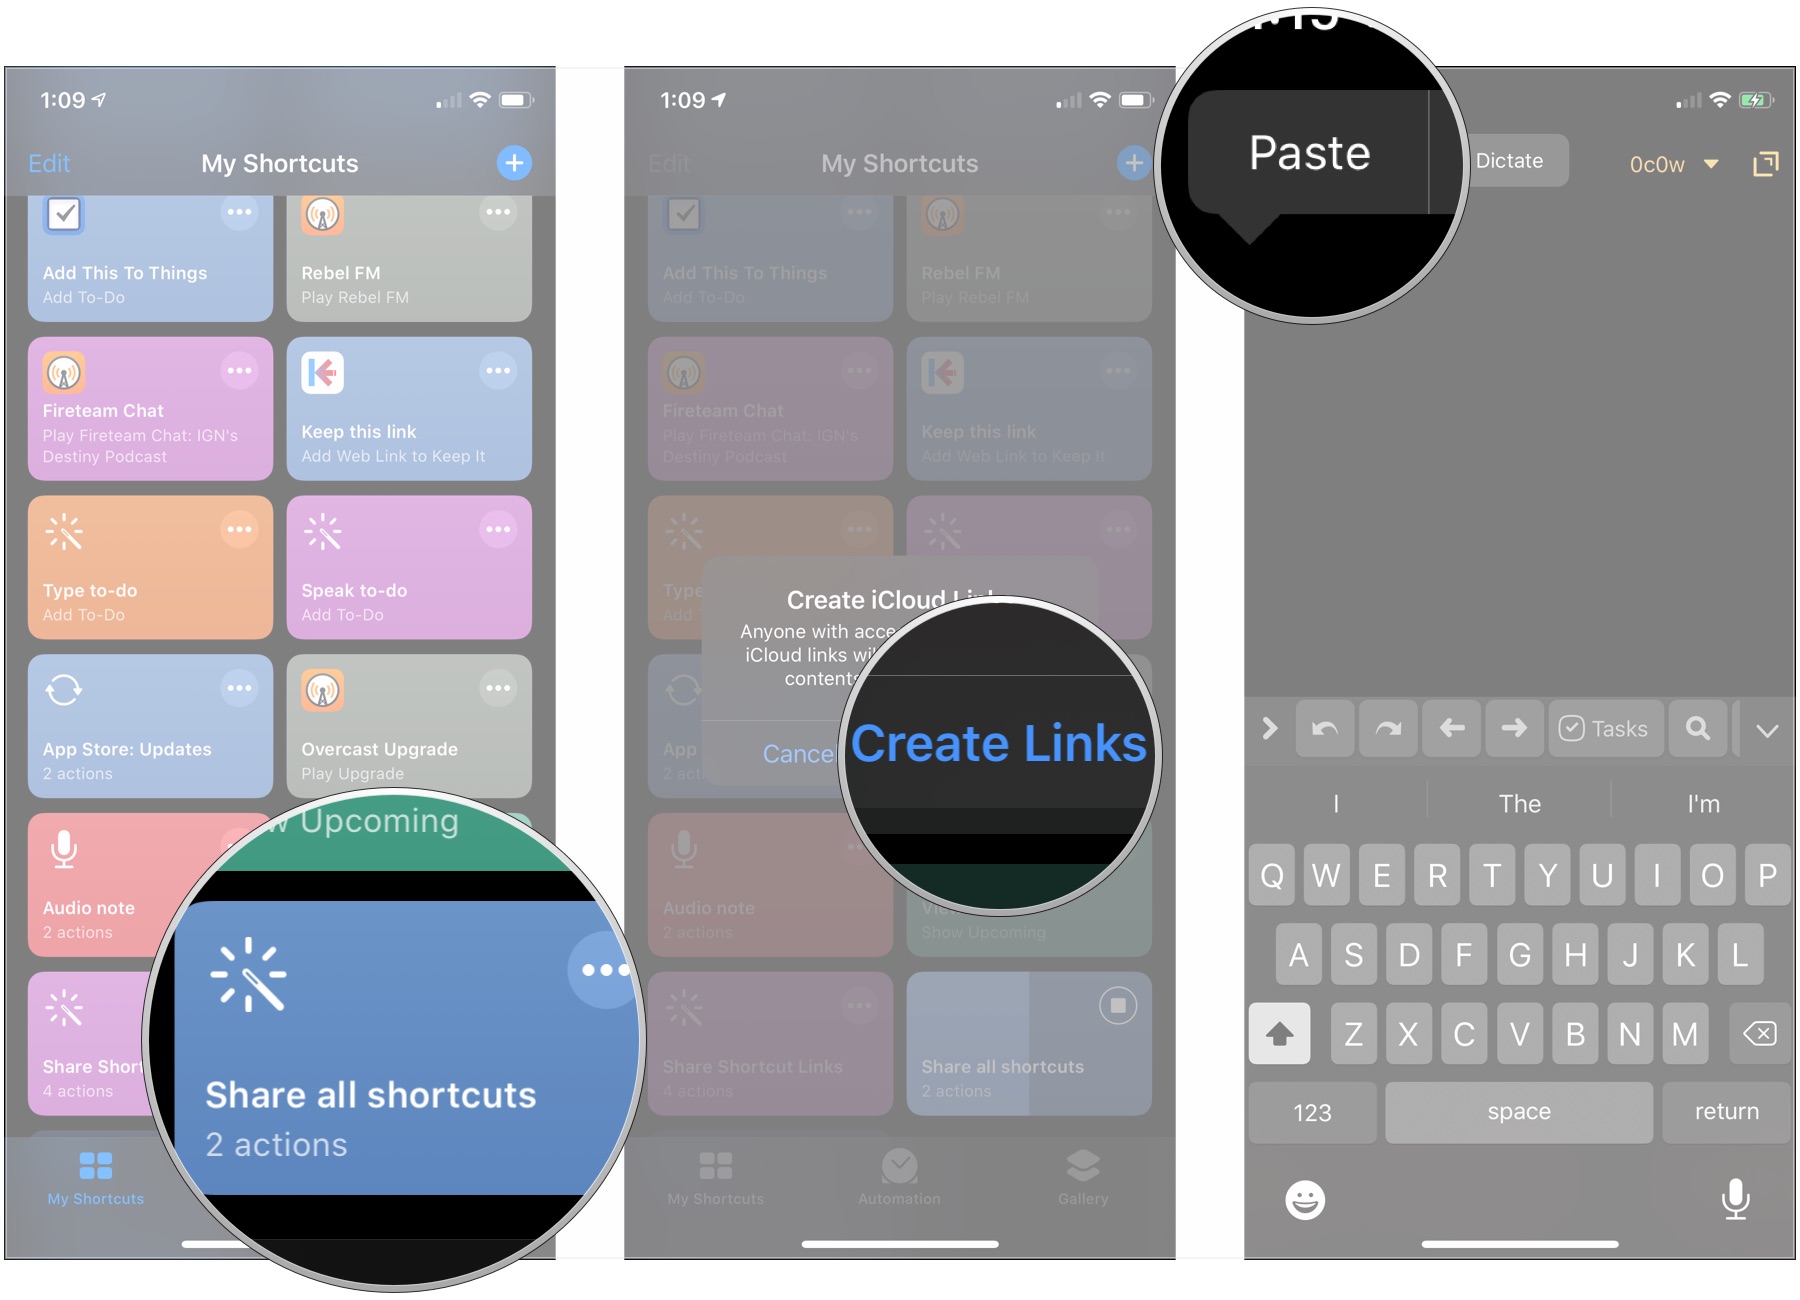
- Tap Share all shortcuts or whatever you named your shortcut.
- Tap Create Links. Wait for your chosen links to be copied, when a checkmark appears on your shortcut. This could take awhile depending on how many shortcuts you have.
- Paste your links where you want to share them.
How to stop sharing a shortcut
The process for stopping the sharing of a shortcut is actually fairly simple.
- Find the shortcut link that you previously shared. You could have shared it on the web, in a SMS or iMessage, saved it to a Note, or some other method.
- Tap the link. You will immediately be taken to the Shortcuts app to view the shortcut.
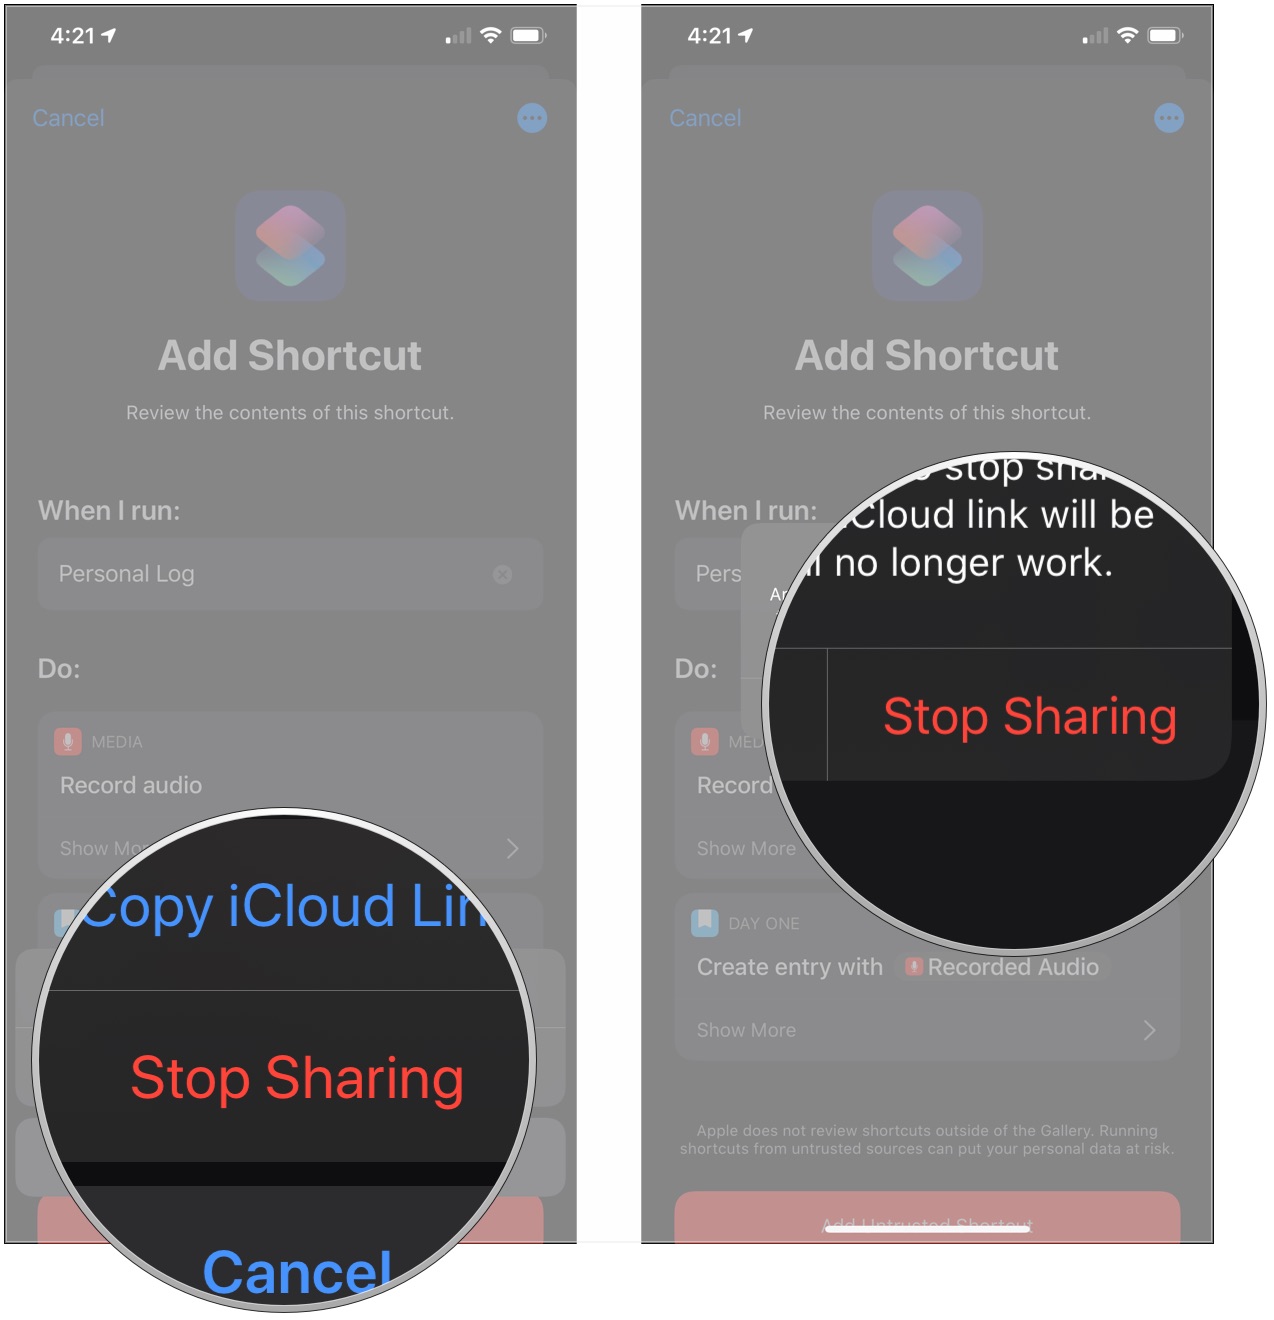
- Tap the ... in the top-right corner.
- Tap Stop Sharing.
- Tap Stop Sharing.
How to add a shared shortcut to your library
People share shortcuts in a variety of ways. Maybe a friend sent you a link, or you found something in the r/Shortcuts subreddit that you just have to add, or you're adding a shortcut from an iCloud file. No matter how you do it, the process is the same.
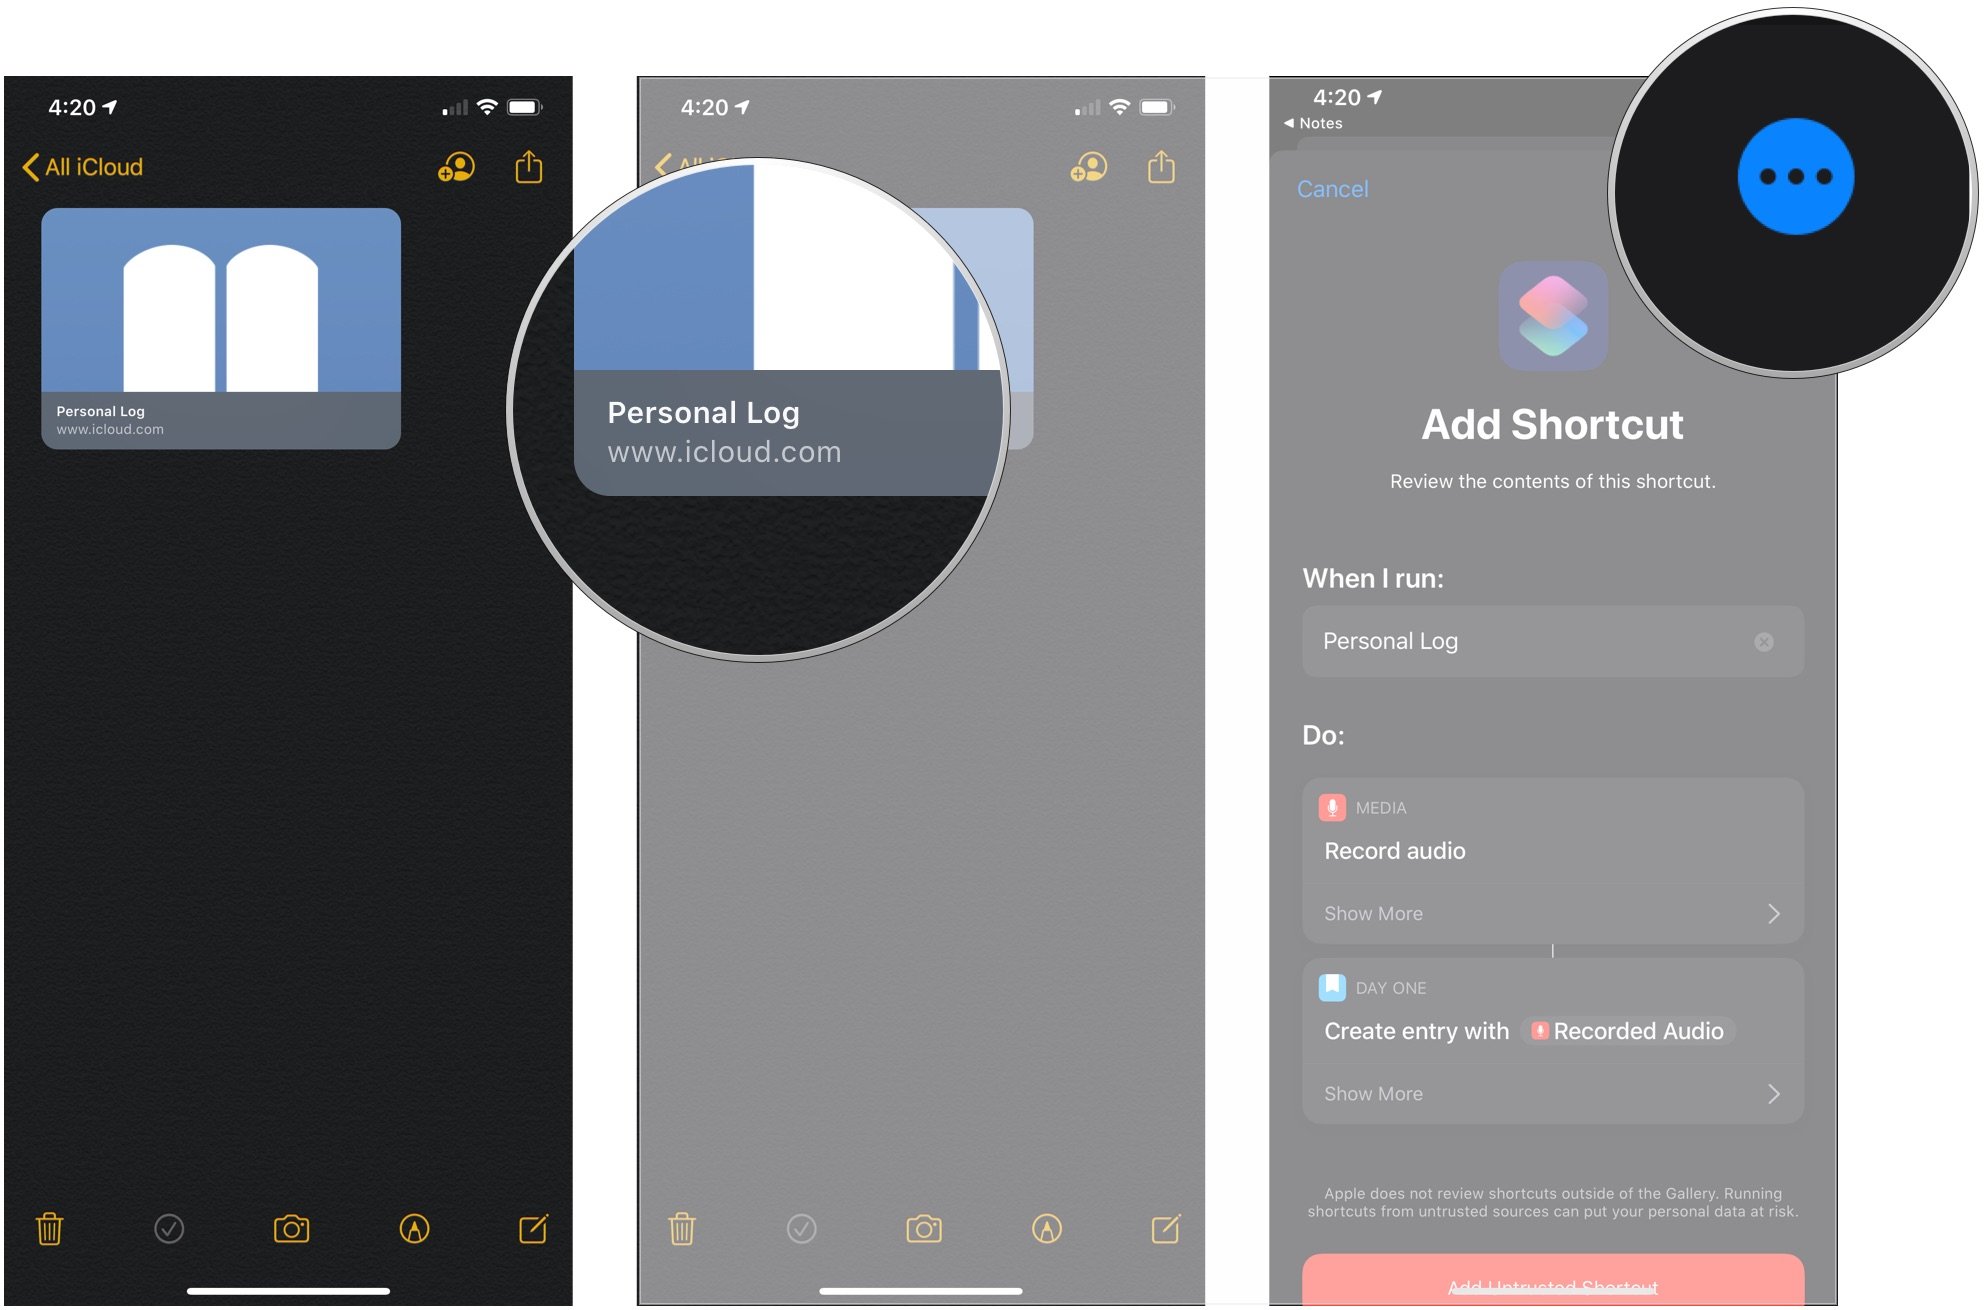
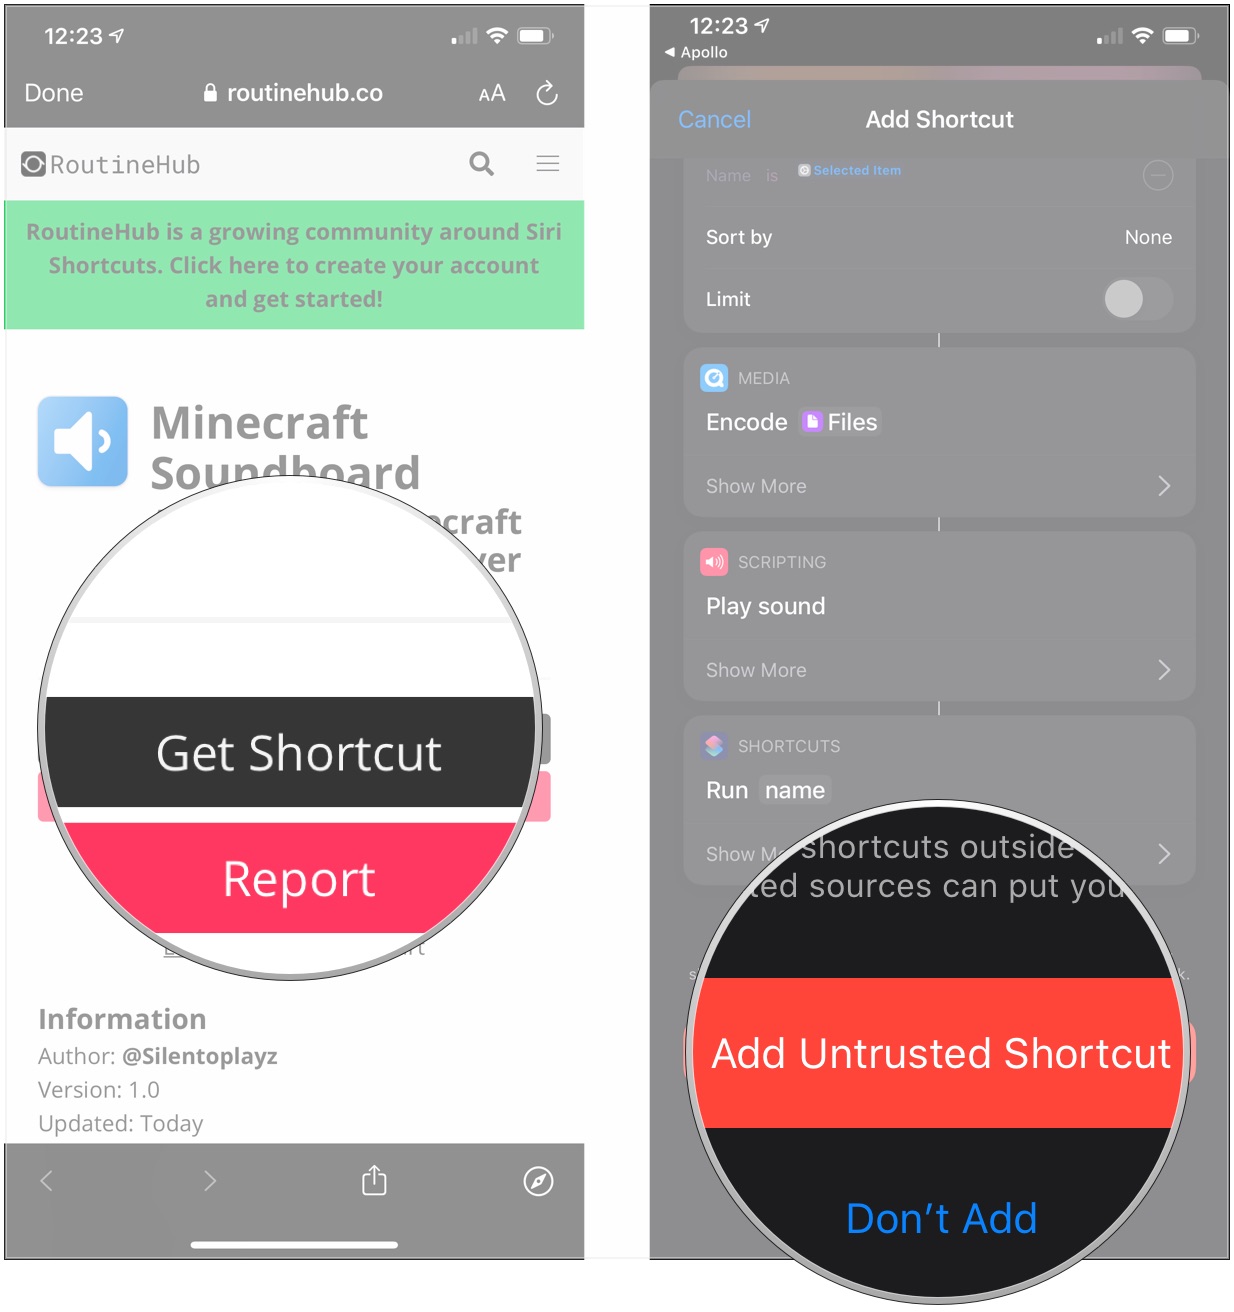
- Tap the file or link for the shortcut you want to add.
- Tap Add Untrusted Shortcut
The shortcut is now part of your library, and you can use it just like you would with any other shortcut that you created or added from the Shortcuts Gallery.
Questions?
Let us know in the comments if you have any questions about sharing shortcuts.
Updated August 2020: Everything is up-to-date through the iOS 14 beta.
Joseph Keller is the former Editor in Chief of iMore. An Apple user for almost 20 years, he spends his time learning the ins and outs of iOS and macOS, always finding ways of getting the most out of his iPhone, iPad, Apple Watch, and Mac.
