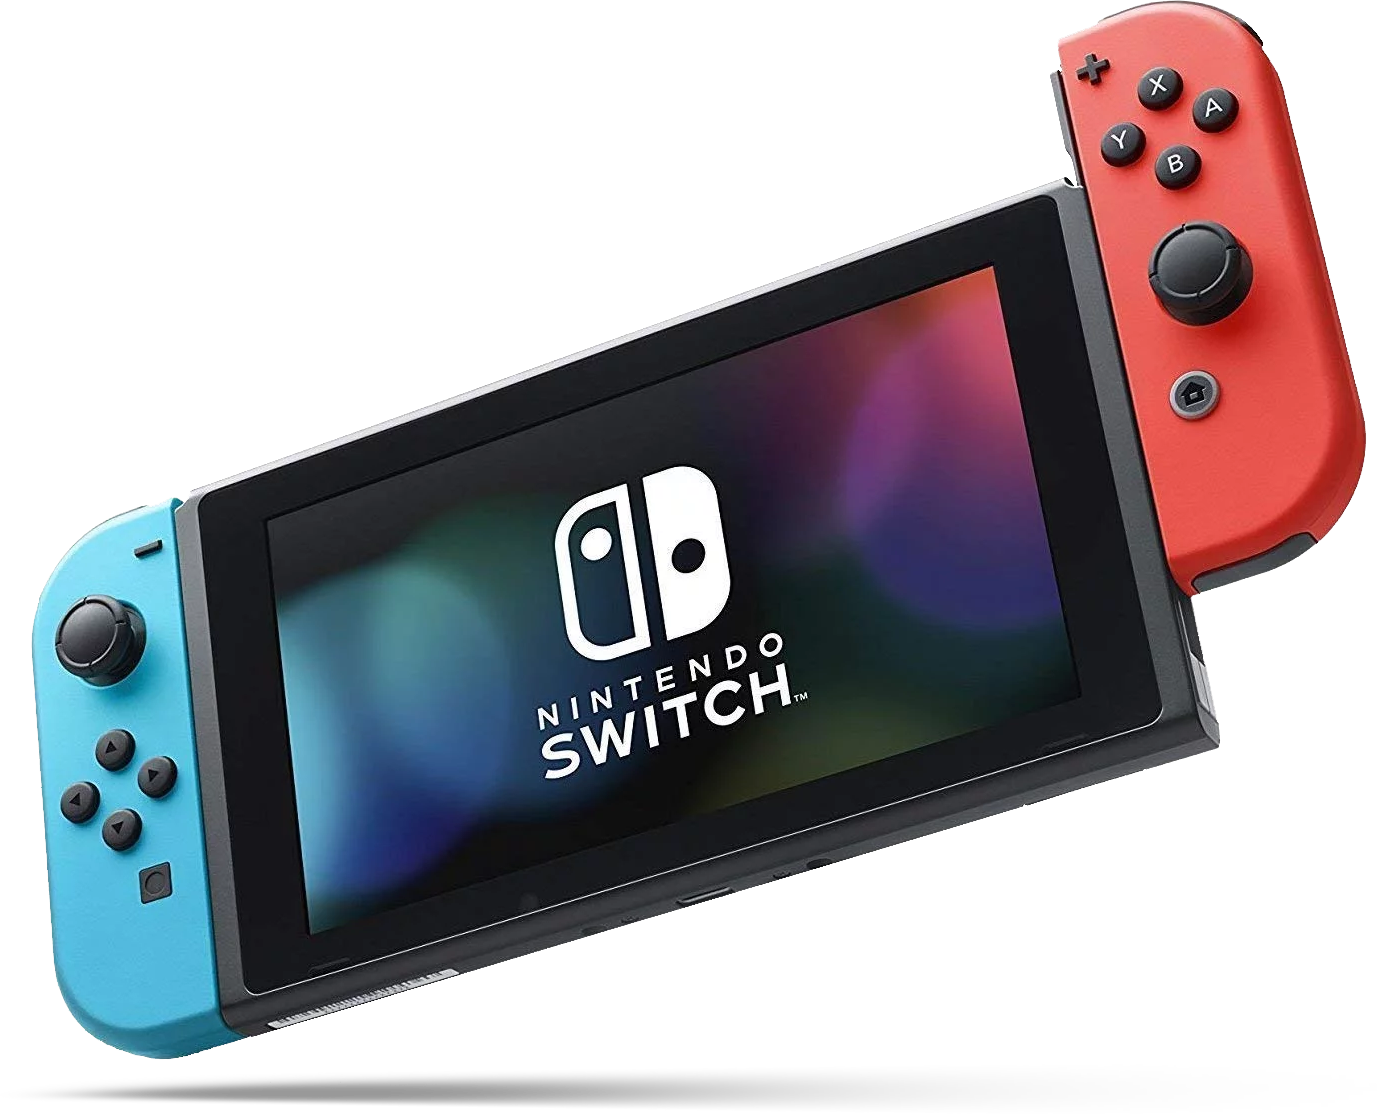
How to take a screenshot on your Nintendo Switch
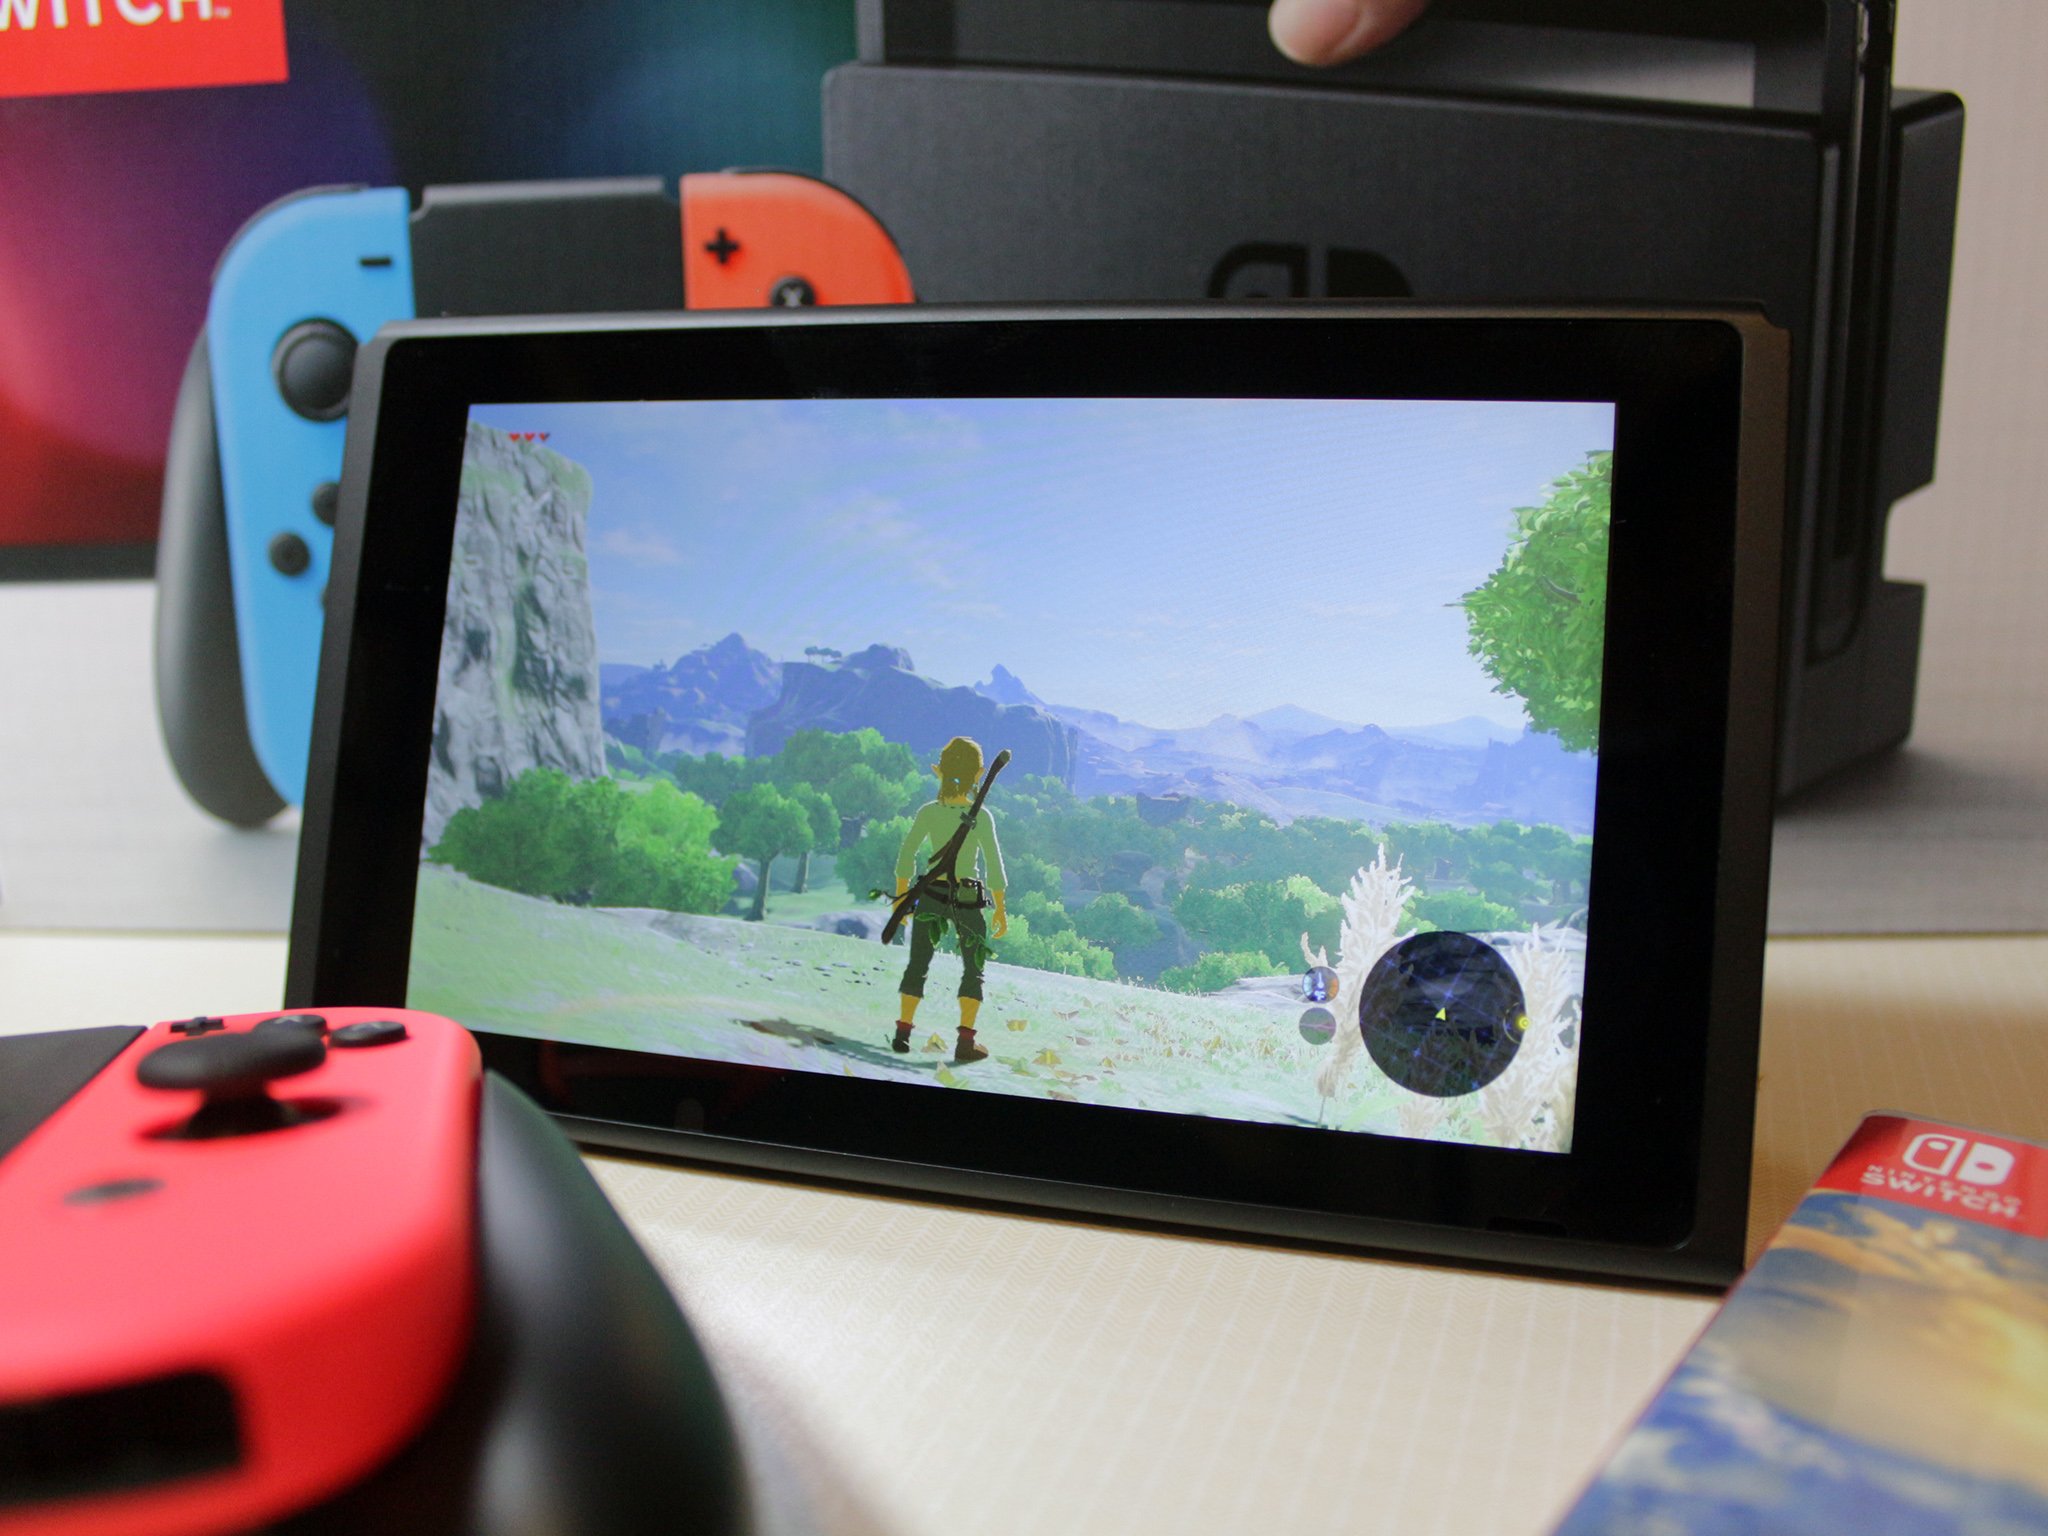
You're roaming through the beautiful landscape of The Legend of Zelda: Breath of the Wild (which is one of the best Nintendo Switch games you can buy) and you come across a breathtaking scene. So what are you going to do? Take a screenshot on your Nintendo Switch, of course! Whether you take screen captures of your progress, cool game visuals, or would like to save an image for later—it's a great way to share some of your favorite in-game memories. Here's a guide on taking all the screenshots you want and managing them in your photo album on the Nintendo Switch menu. Let's get started!
How to take a screenshot on Nintendo Switch with the Joy-Con Controllers
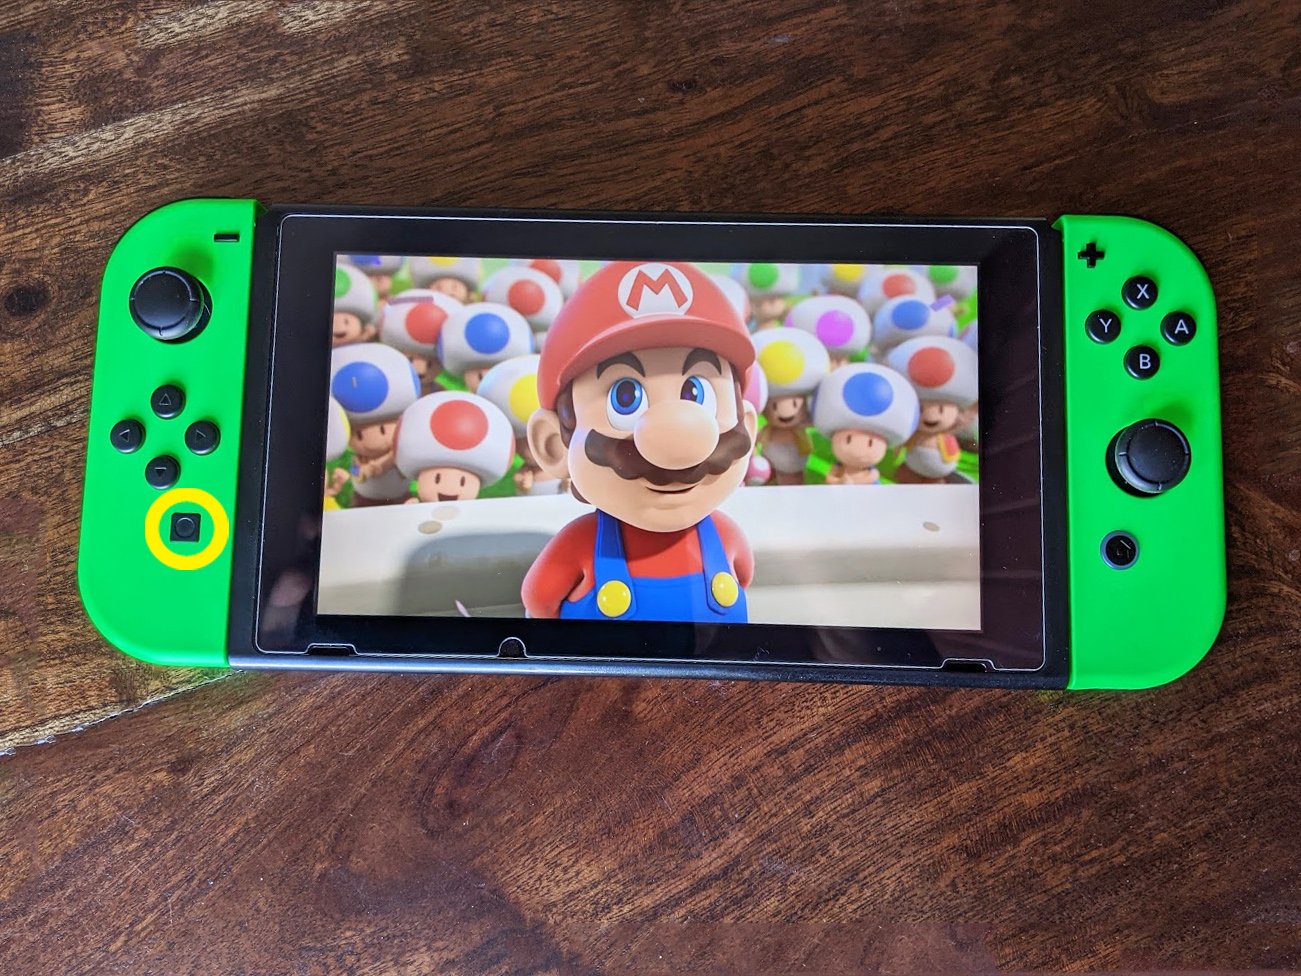
The Nintendo Switch Joy-Con controllers have a dedicated screenshot button, which makes capturing a screenshot or video a one step process. The square button is located on the left Joy-Con, and it's the closest to the bottom of the controller (see picture below).
Once you have pressed the button, you'll hear a camera shutter sound, and a notification in the top left corner of your screen will say "Capture Taken." If you hold it down for a few seconds, it will take a 30-second video clip. For more information on screenshots and video captures, check out our guide on how to record and edit video gameplay on Nintendo Switch. If you want to stream your Switch gameplay on Twitch, then you'll need a capture card.
How to take a screenshot on Nintendo Switch with the Pro Controller or other traditional controllers
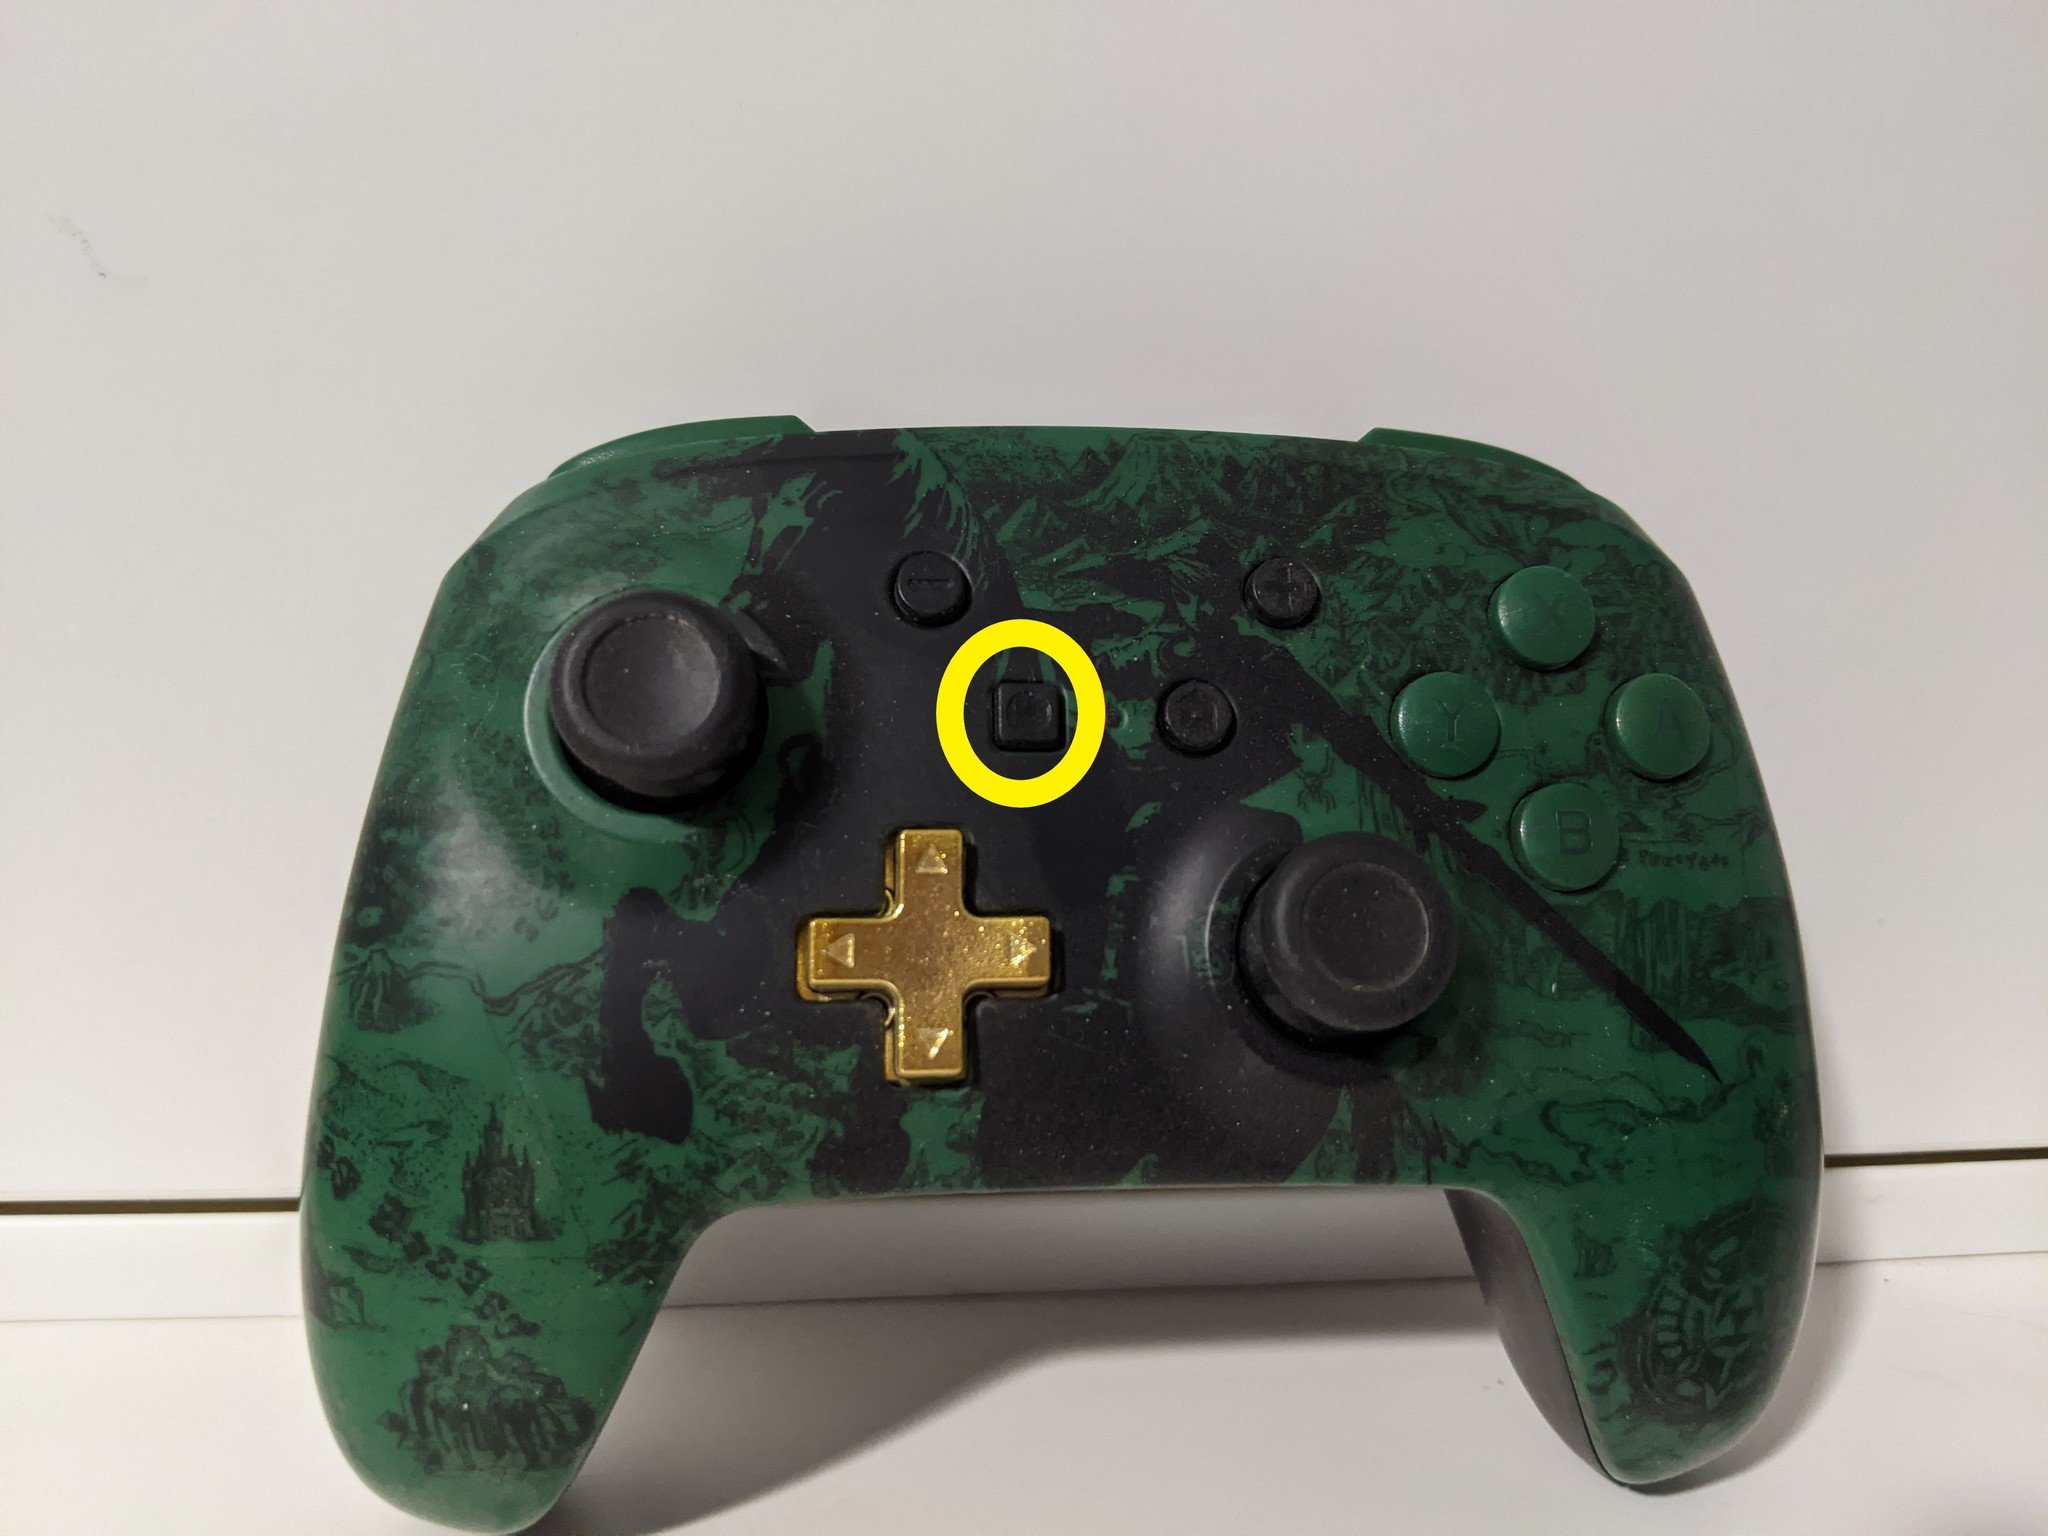
If you're a fan of the slightly larger and more conventional Pro Controller, you can still take screenshots by pressing one button. The square button is located just left of center on the Pro Controller right above the directional pad and underneath the "-" button (see picture below).
Just like with the Joy-Con Controllers, you'll hear a camera shutter sound and see the "Capture Taken" notification in the top left corner of the screen. If you hold it down for a few seconds, it will take a 30-second video clip. If you want to become a streamer, we can show you how to stream Switch gameplay on Twitch.
How to view your screenshots and videos on Nintendo Switch
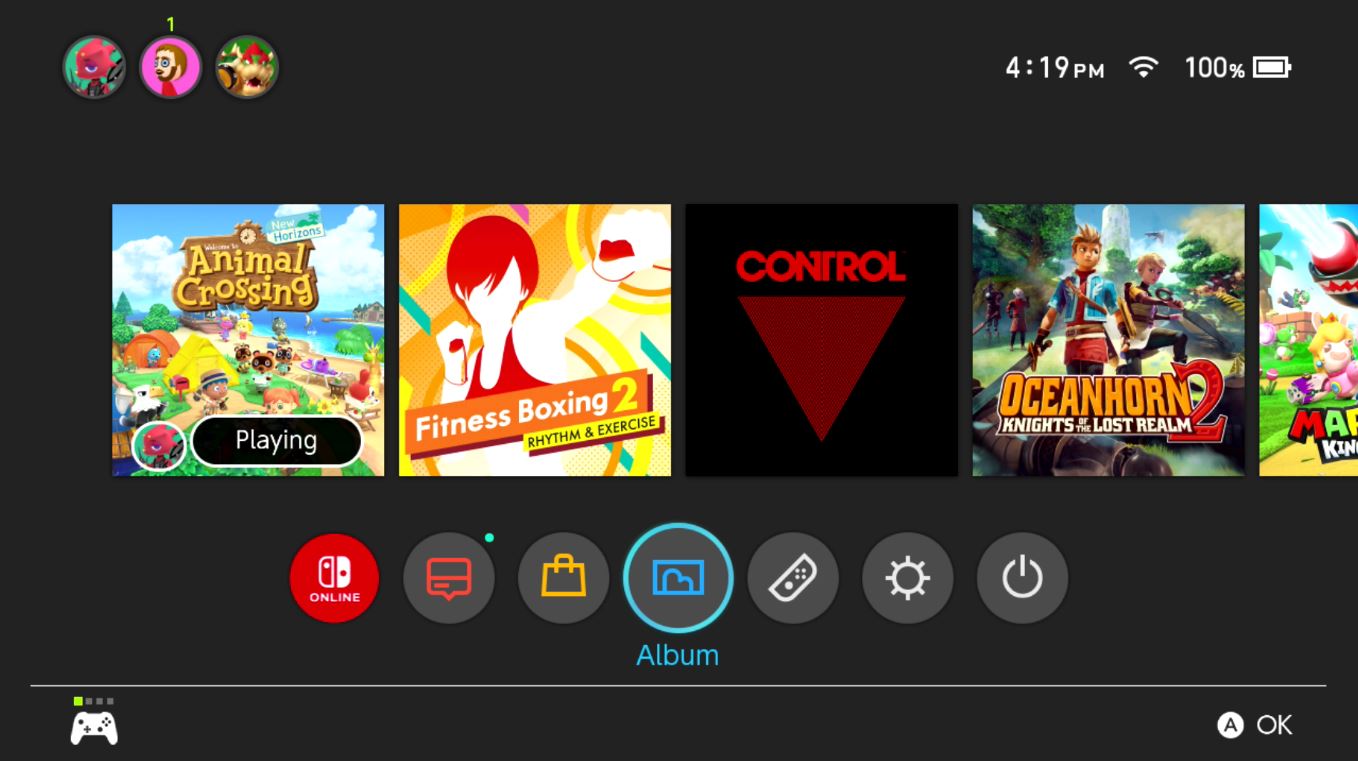
All of your screenshots and videos, whether they are saved to the system memory or a microSD card, can be found by selecting the Album icon from the Switch's main menu.
How to filter your Album by videos or screenshots only
Now that you have two different media types in your Album folder, you can filter the types to make it easier to find what you're looking for.
Master your iPhone in minutes
iMore offers spot-on advice and guidance from our team of experts, with decades of Apple device experience to lean on. Learn more with iMore!
- Select the Album button on your Home screen on Nintendo Switch.
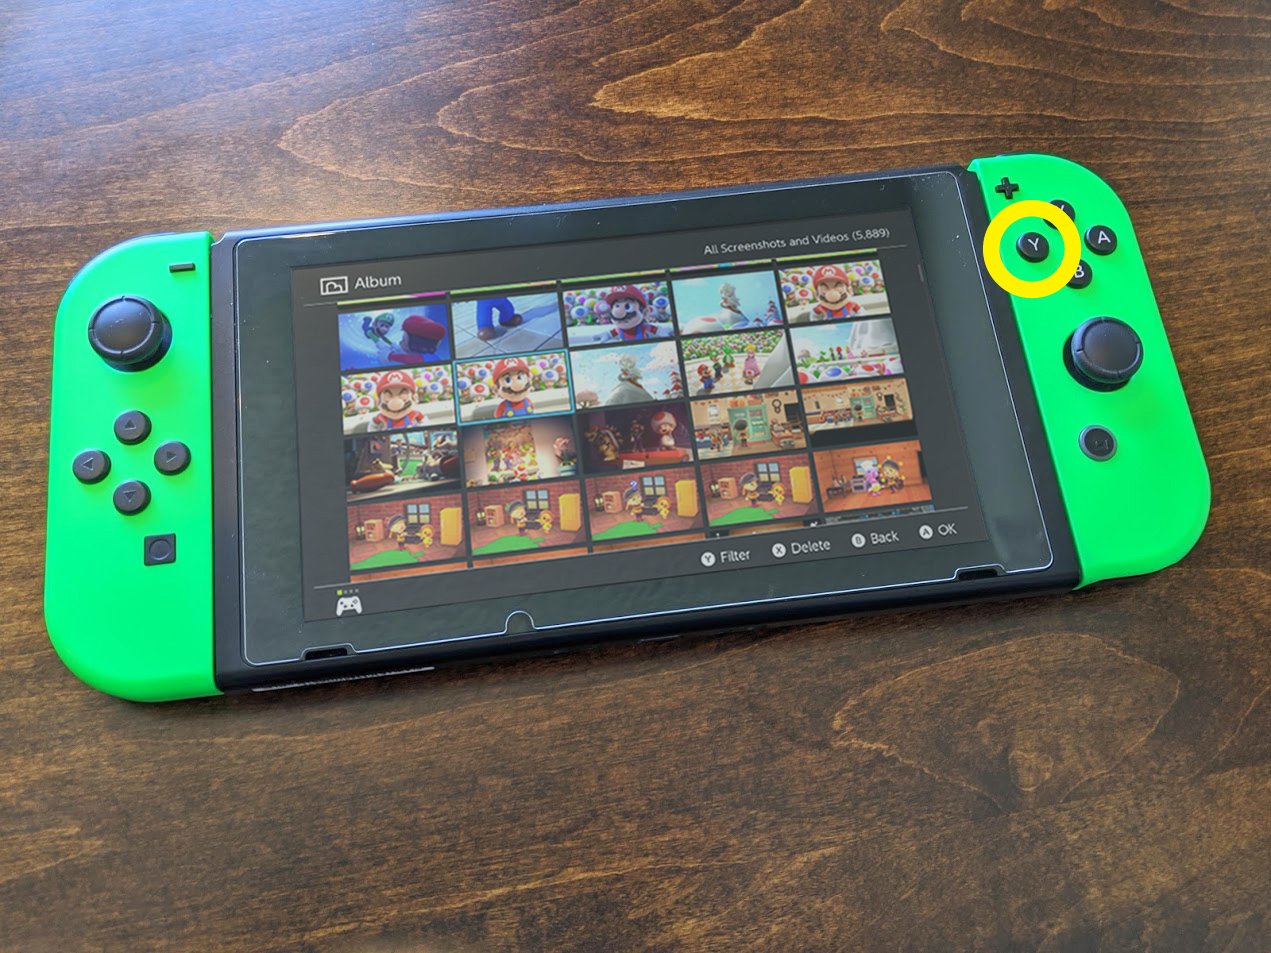
- Select Filter or press the Y button.Source: iMore and Rebecca Spear / iMore

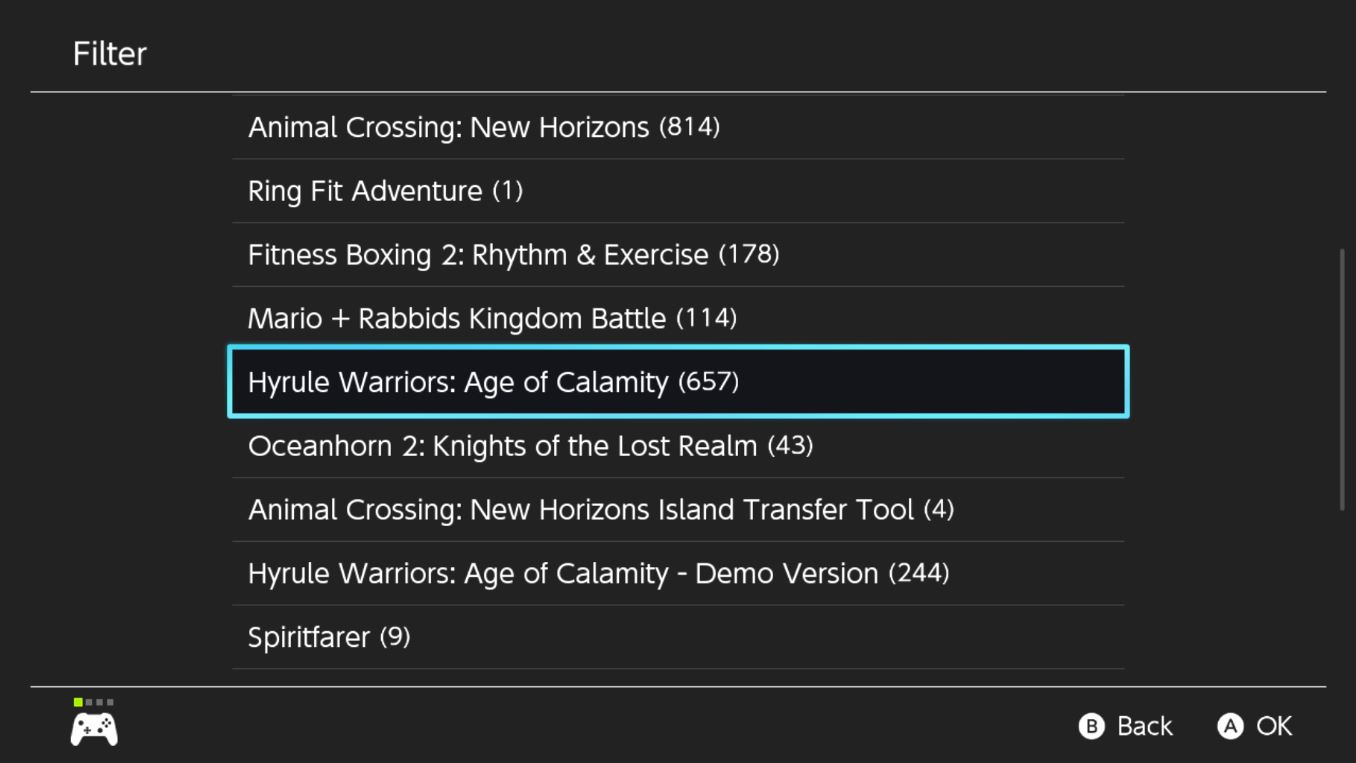
- Select which filter you want to use. You can filter media types by the following:
- Screenshots Only
- Videos Only
- System Memory
- microSD Card
- Media from a specific game
- Other (like system screenshots)
If you want to start your search over, you can clear the filter by selecting Clear Filter or pressing the B button.
How to copy a screenshot or video to a microSD card on Nintendo Switch
If you have a screenshot saved to your system memory that you would like to copy onto your microSD card, you can do so in the Album menu.
- Select the Album icon from the Switch's main menu.
- Select the screenshot or video you want to copy.Source: iMore

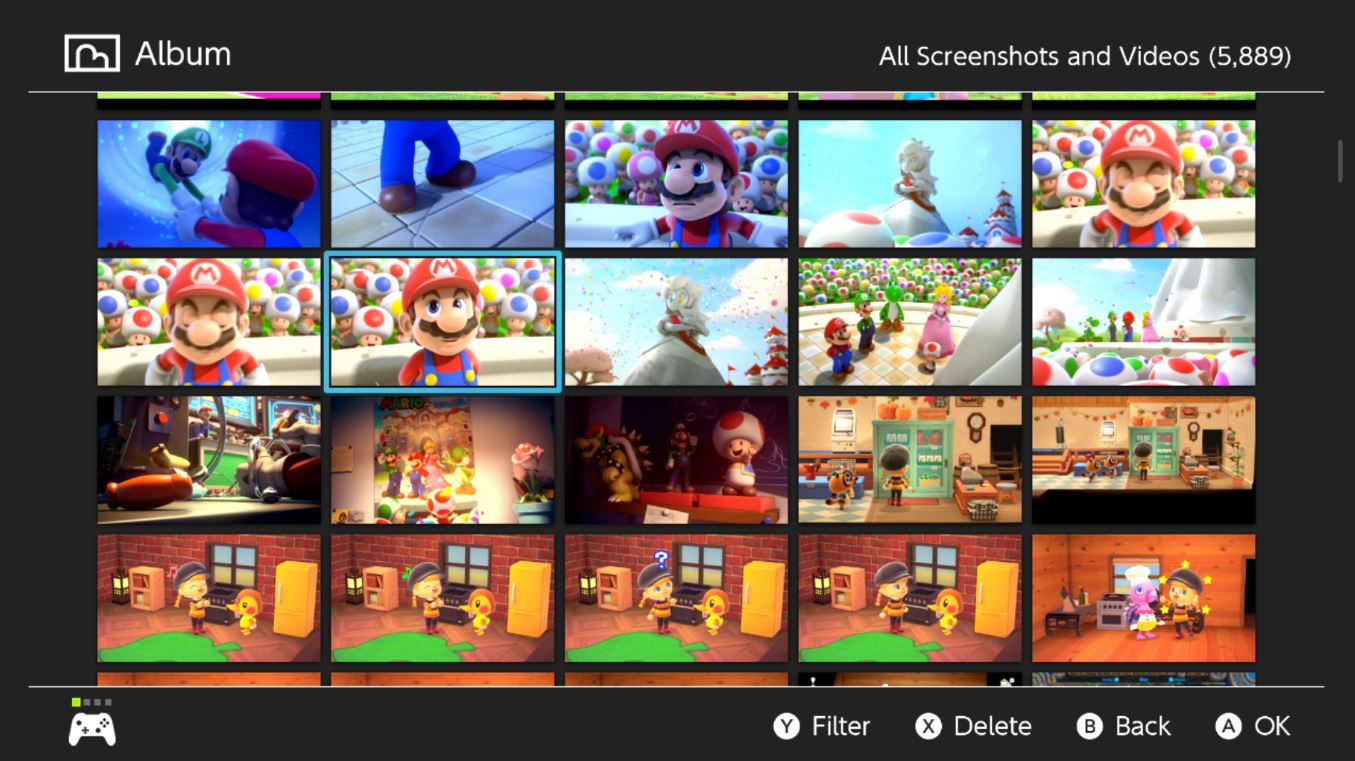
- Press the A button to get to the Editing and Posting menu.
- Select CopySource: iMore
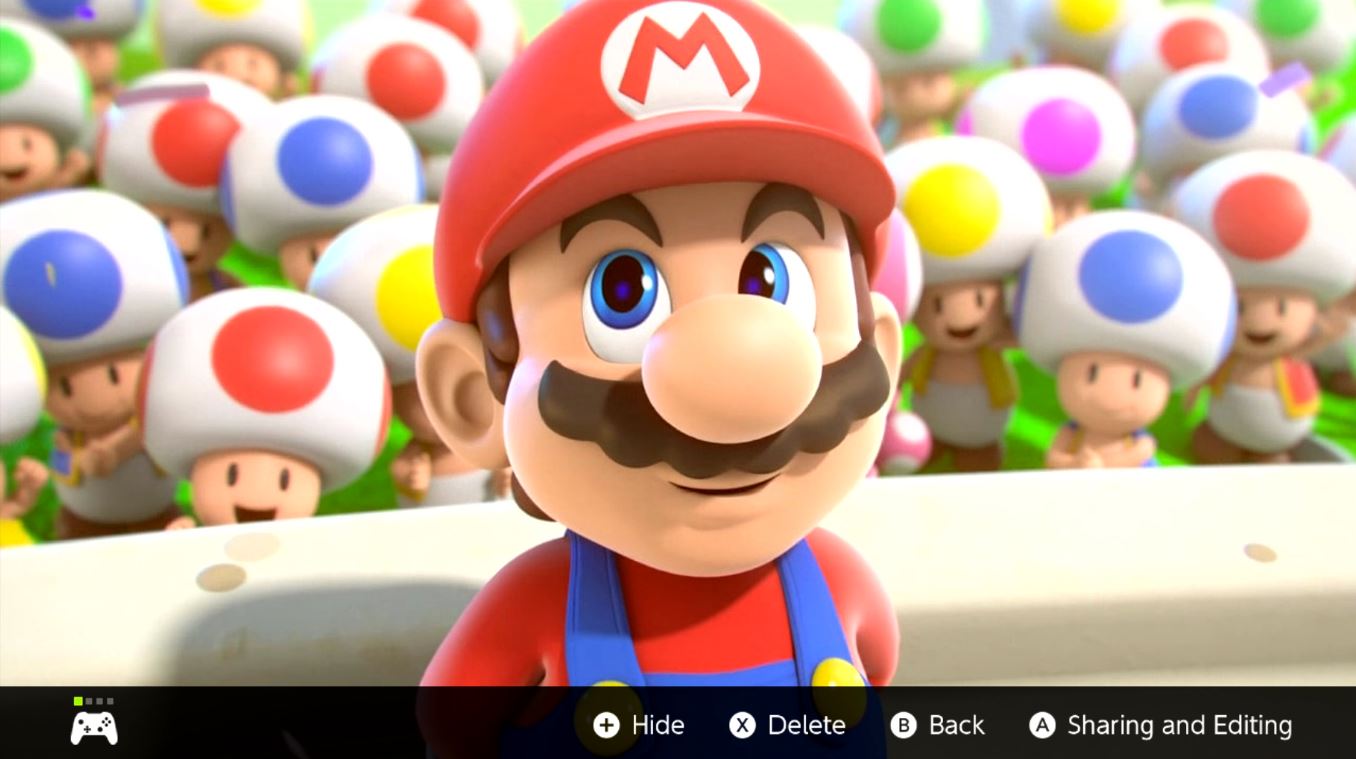
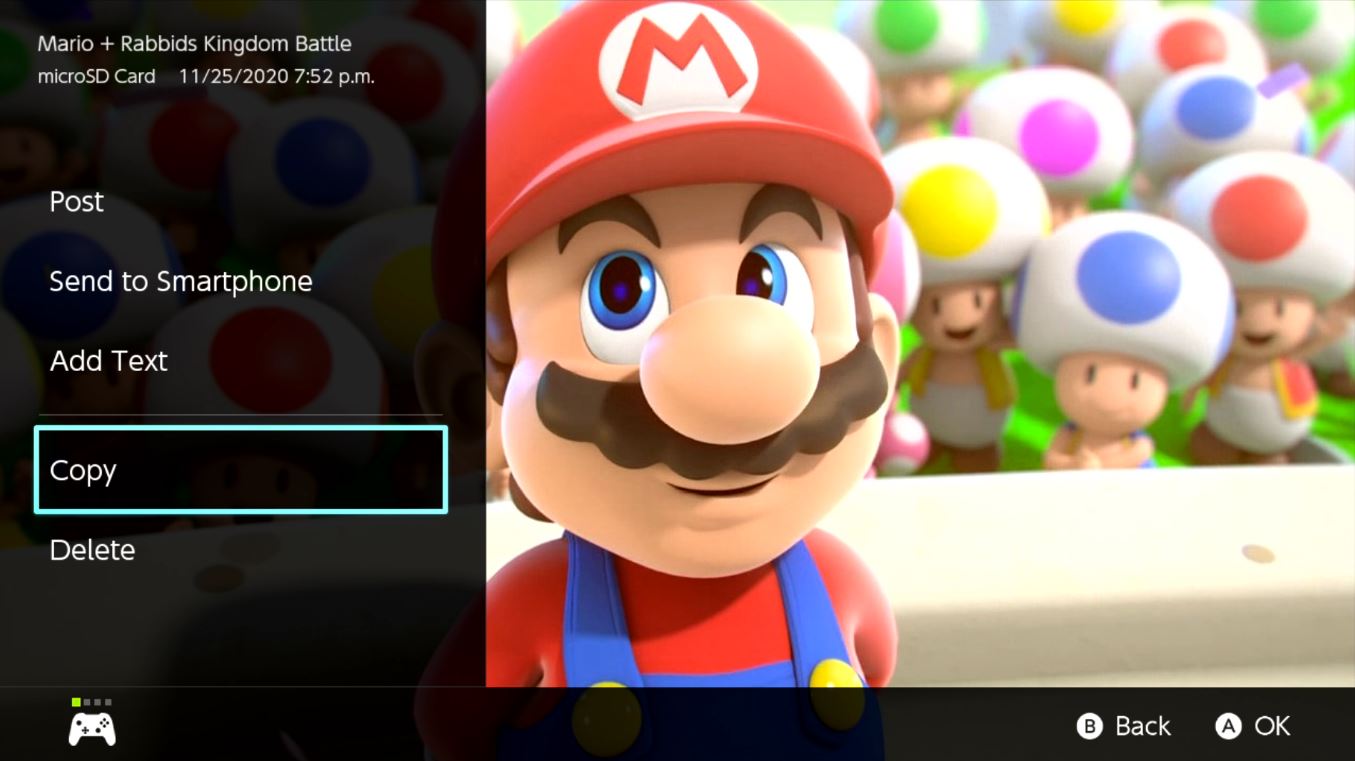
- Select Copy again.
- Select OK.Source: iMore
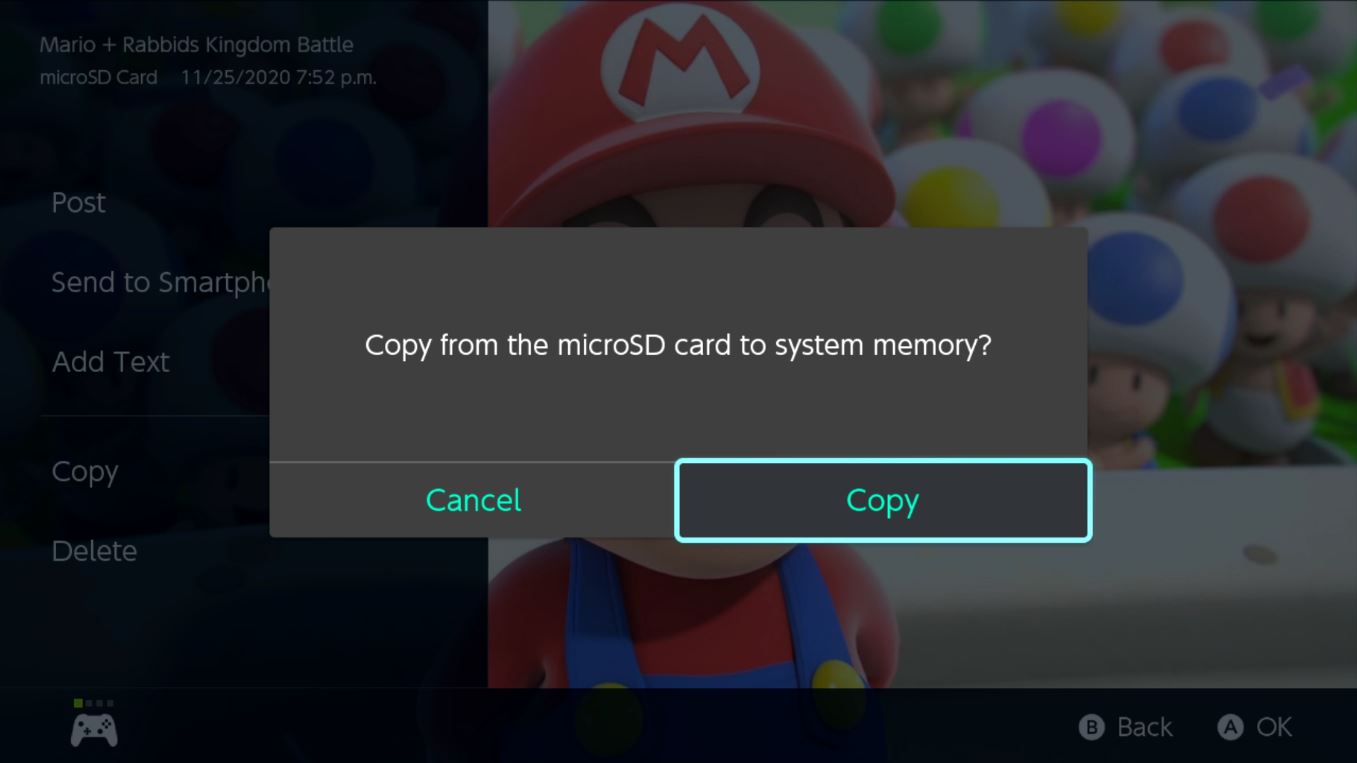
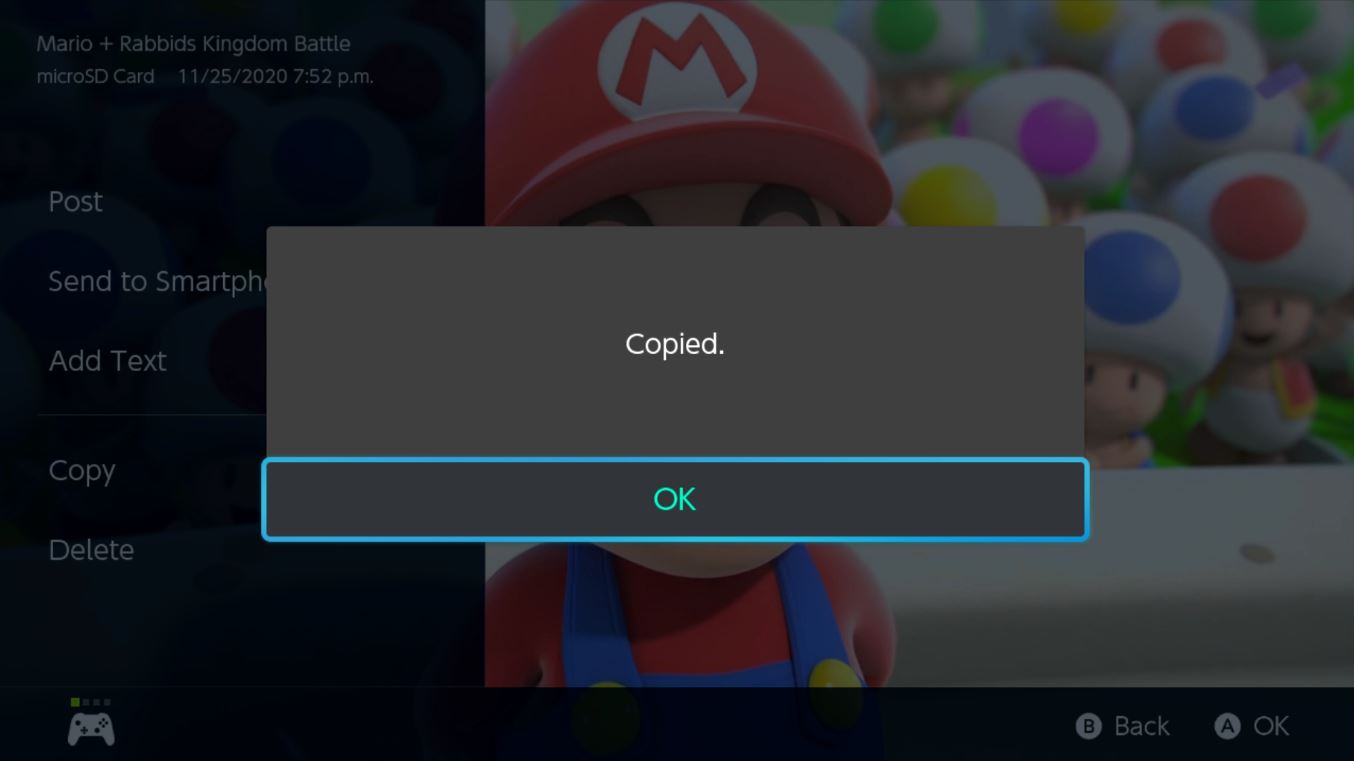
You'll now have two copies of that particular screenshot or video — one on your system memory and one on your microSD card.
How to copy all screenshots and videos to a microSD card on Nintendo Switch
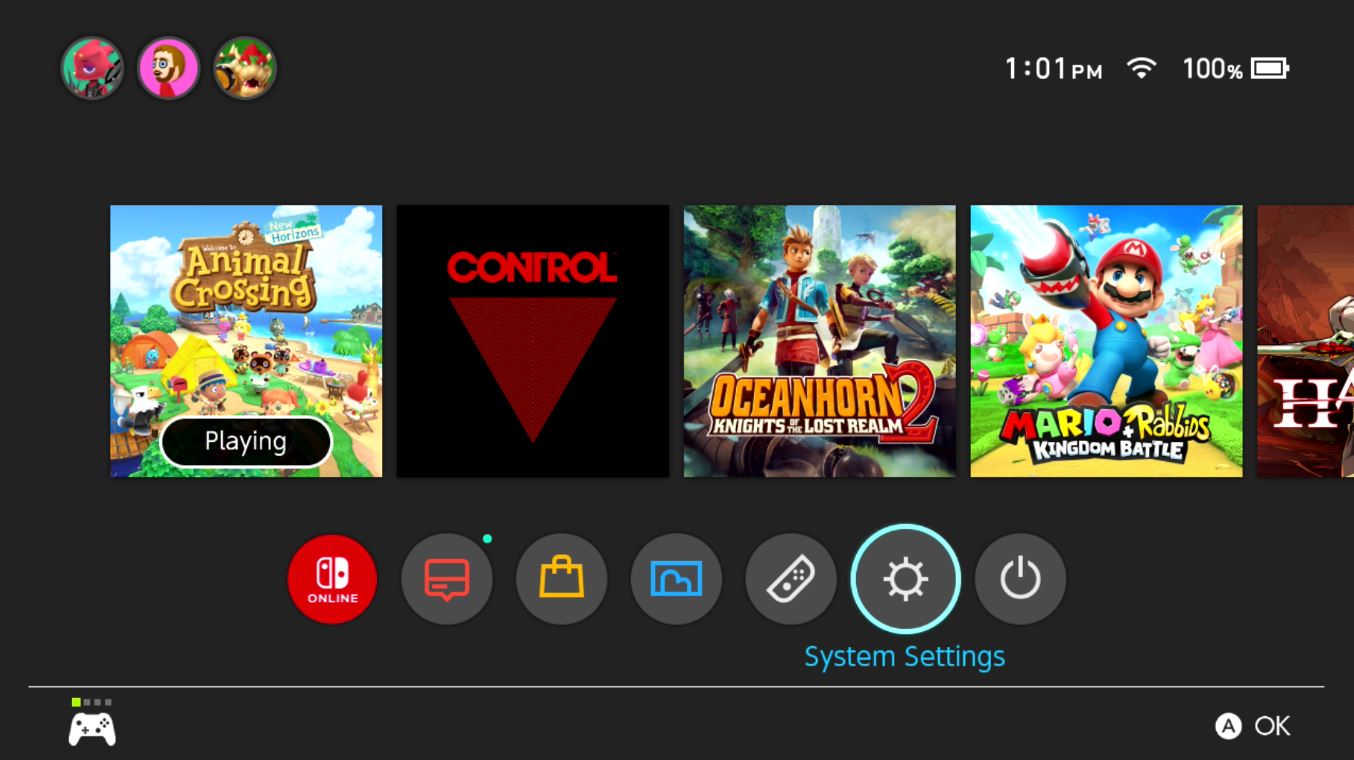
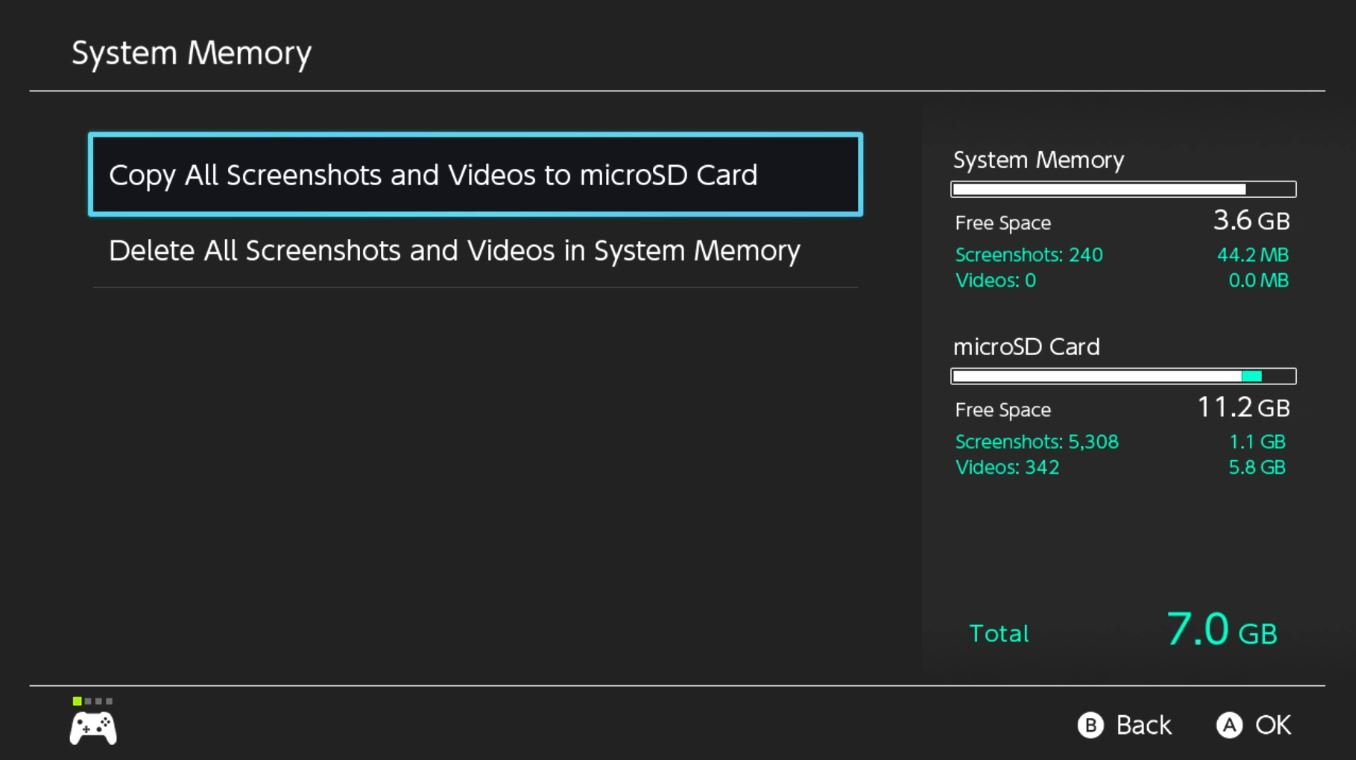
If you want to transfer all your screenshots from your system memory to your microSD card, you don't have to do it all one at a time! Hallelujah, you can do them all at once in the system settings!
- Select the System Settings icon from the Switch's main menu.
- Select Data Management from the menu.Source: iMore
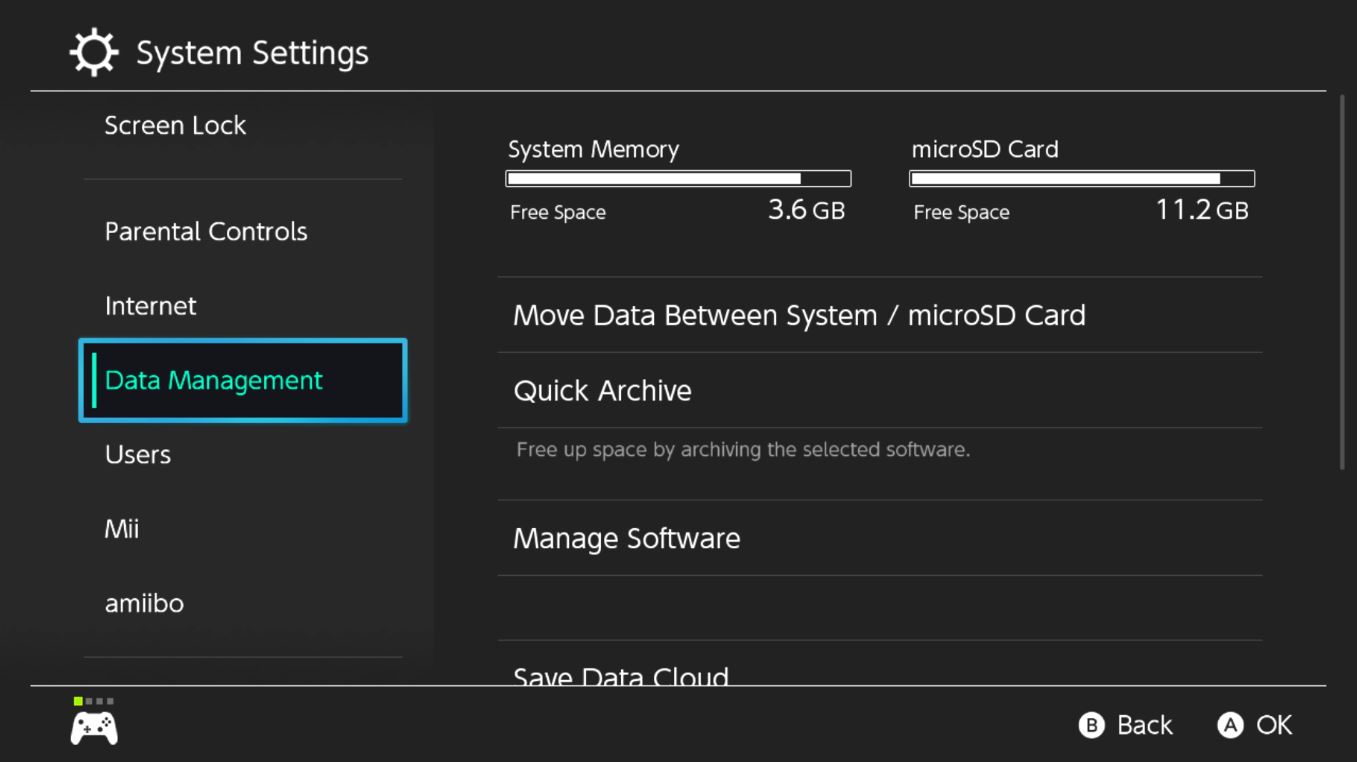
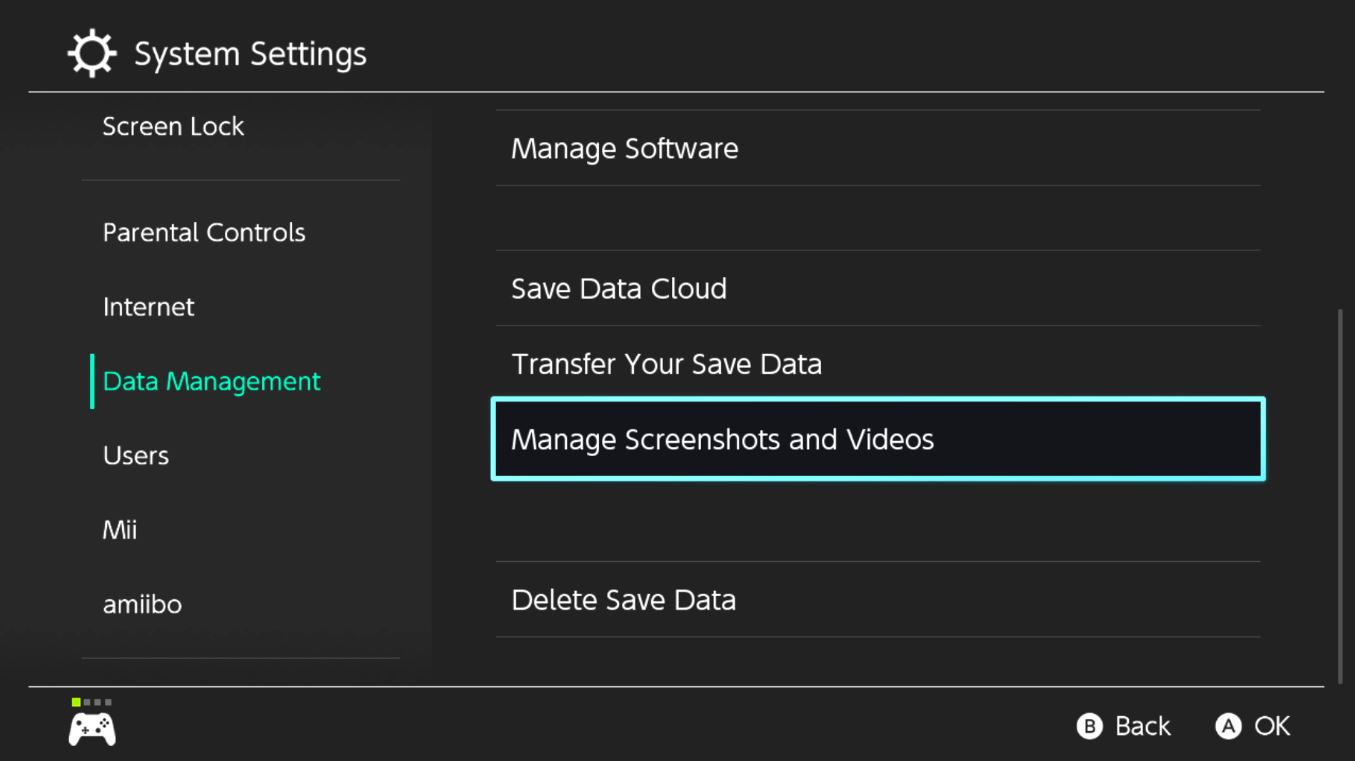
- Select Manage Screenshots and Videos.
- Select System Memory.Source: iMore
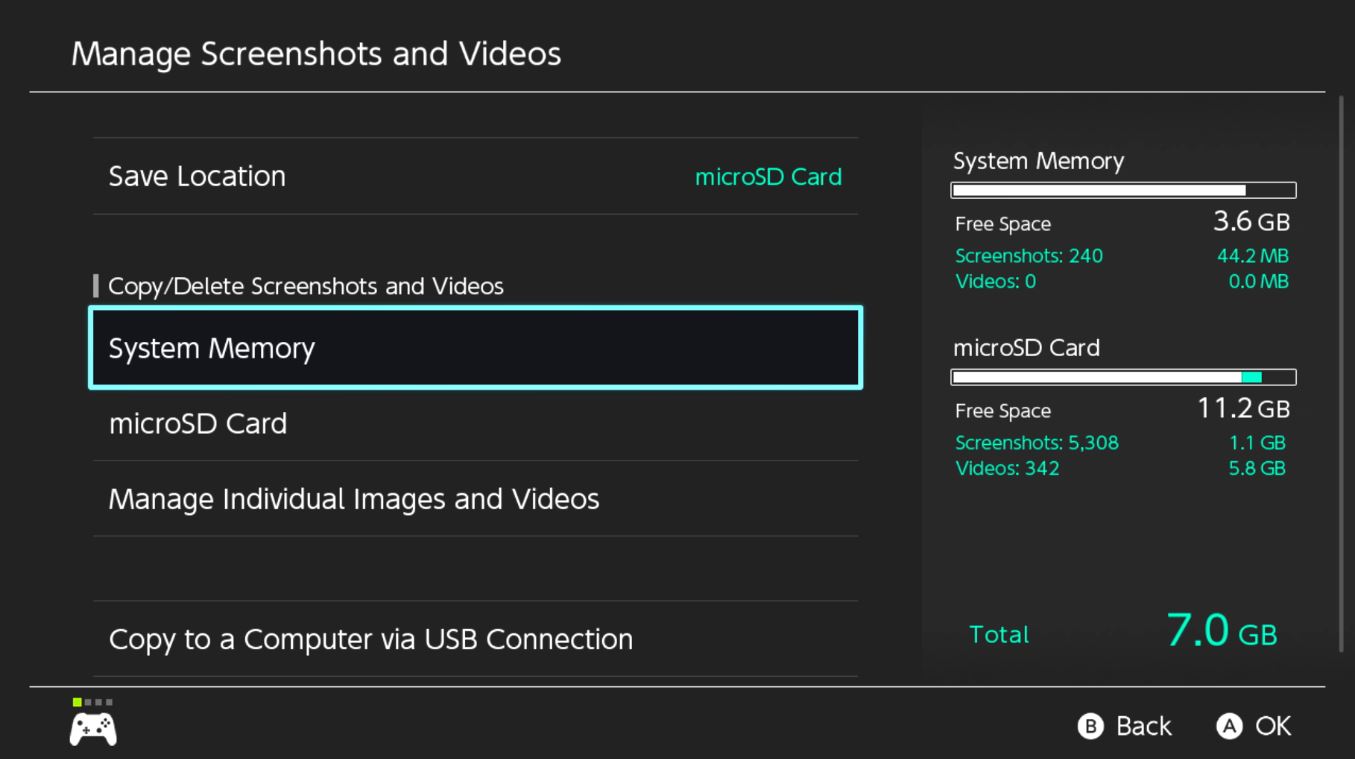
- Select Copy All Screenshots and Videos to microSD Card.
How to delete screenshots and videos on Nintendo Switch
Once you don't need a screenshot or video anymore, you can delete them at any time.
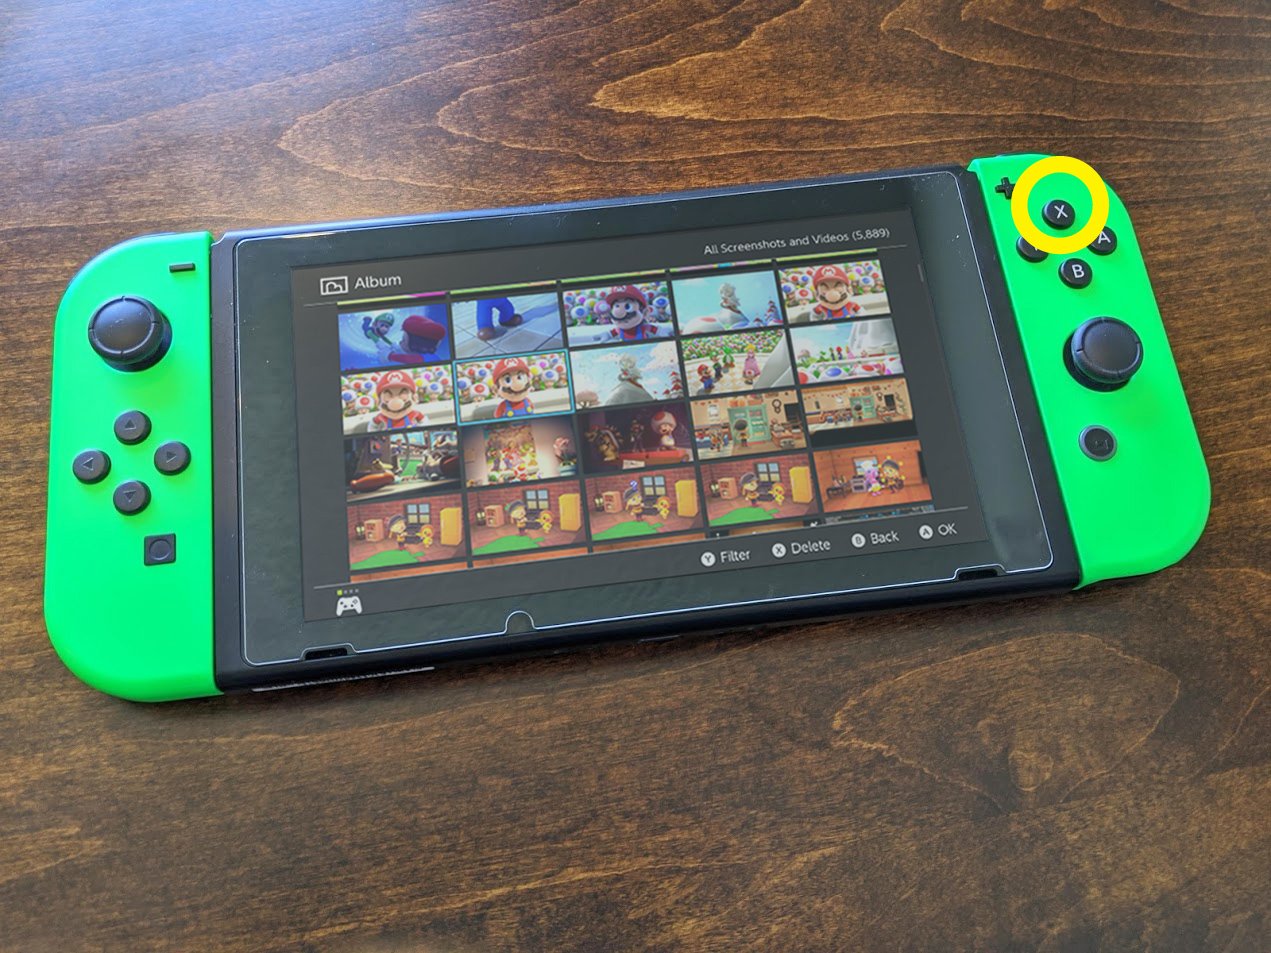
- Select the Album icon from the Switch's main menu.
- Press the X button.Source: iMore and Rebecca Spear / iMore

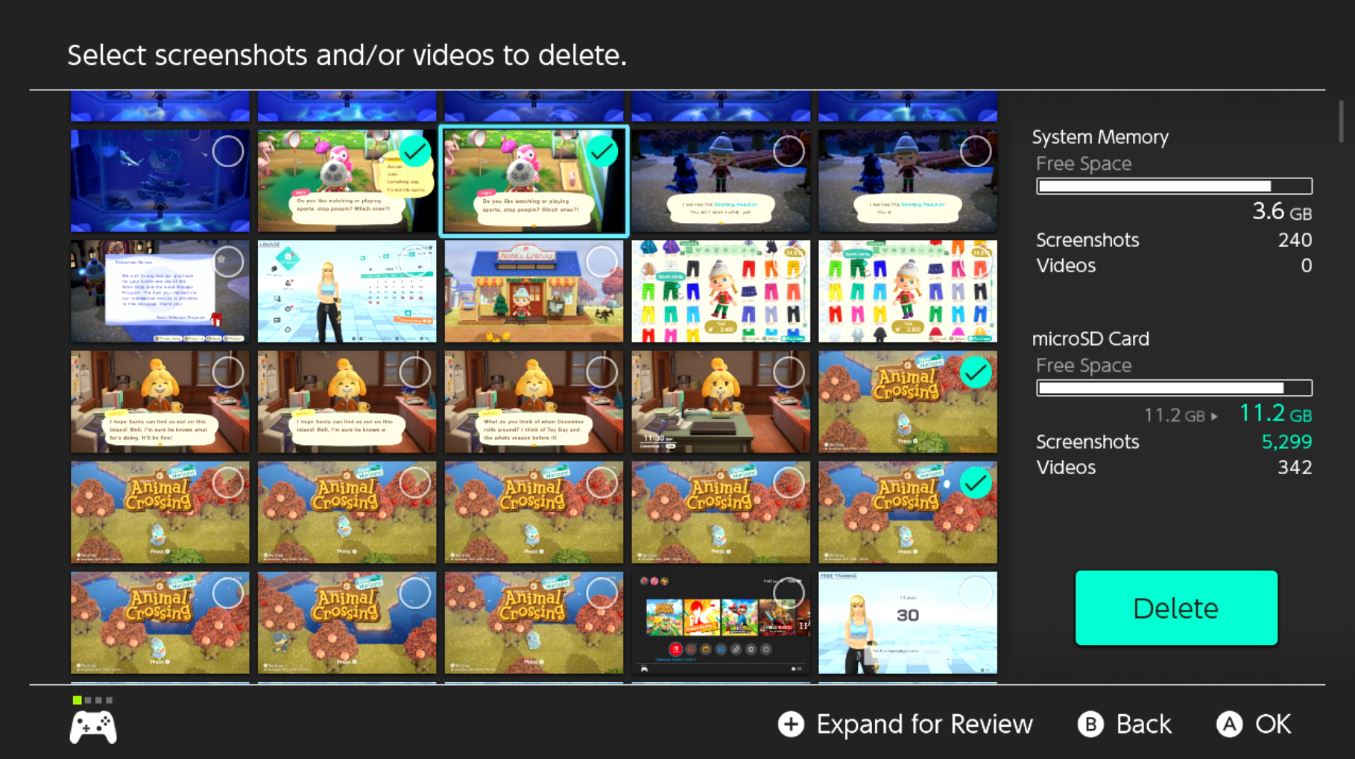
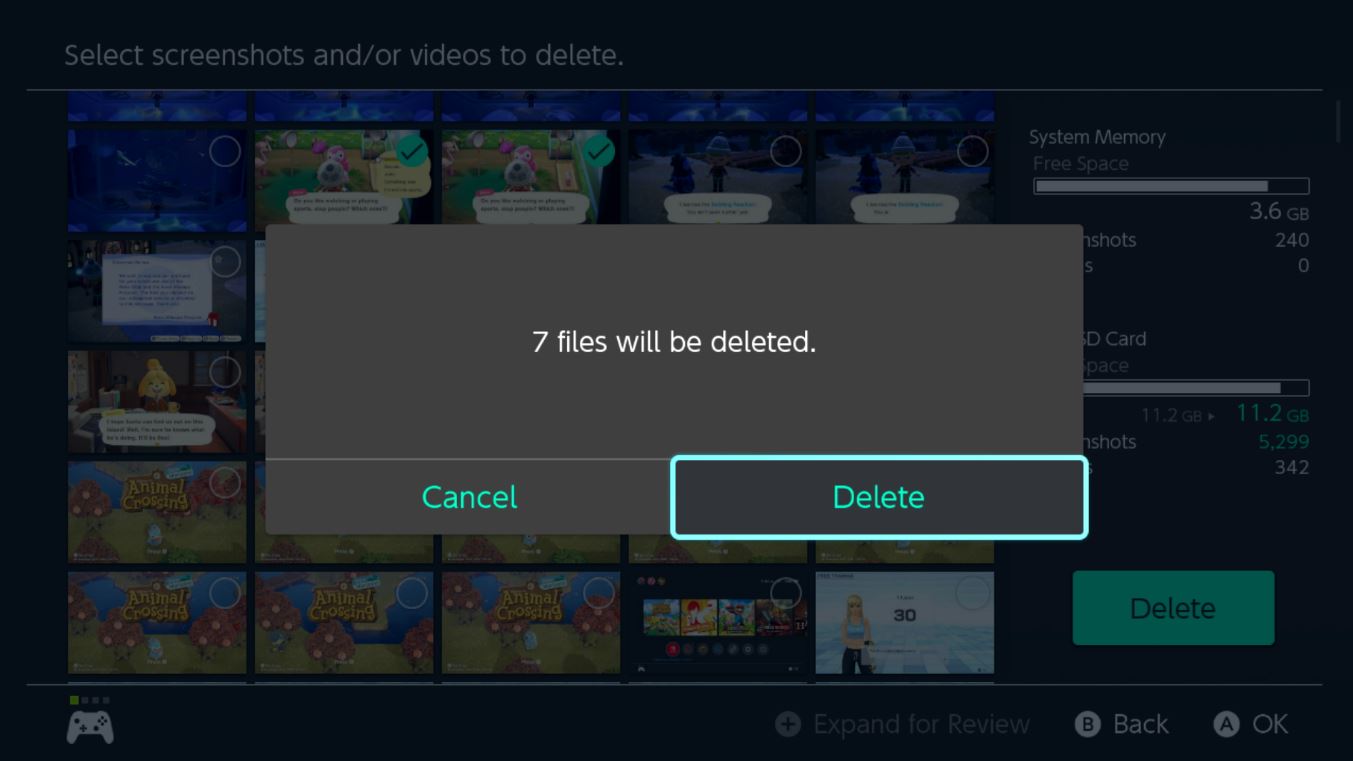
- Select all screenshots and videos you want to delete. A green checkmark will appear next to everything you've selected
- Select Delete.Source: iMore
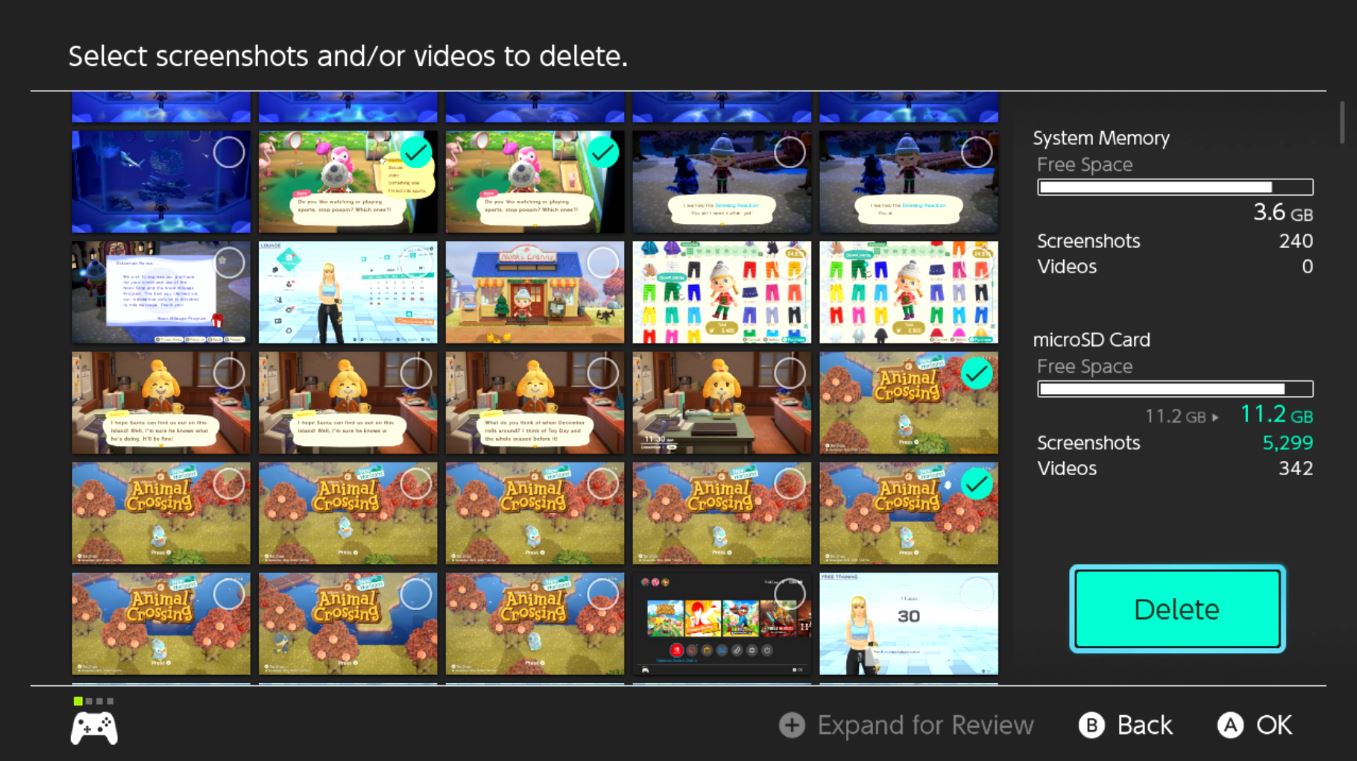
- Select Delete again.
How to delete all screenshots and videos from the system memory on Nintendo Switch
If you want to delete all your screenshots from your system memory, you don't have to do it all one at a time! Hallelujah, you can do them all at once in the system settings!
- Select the System Settings icon from the Switch's main menu.
- Select Data Management from the menu.Source: iMore


- Select Manage Screenshots and Videos.
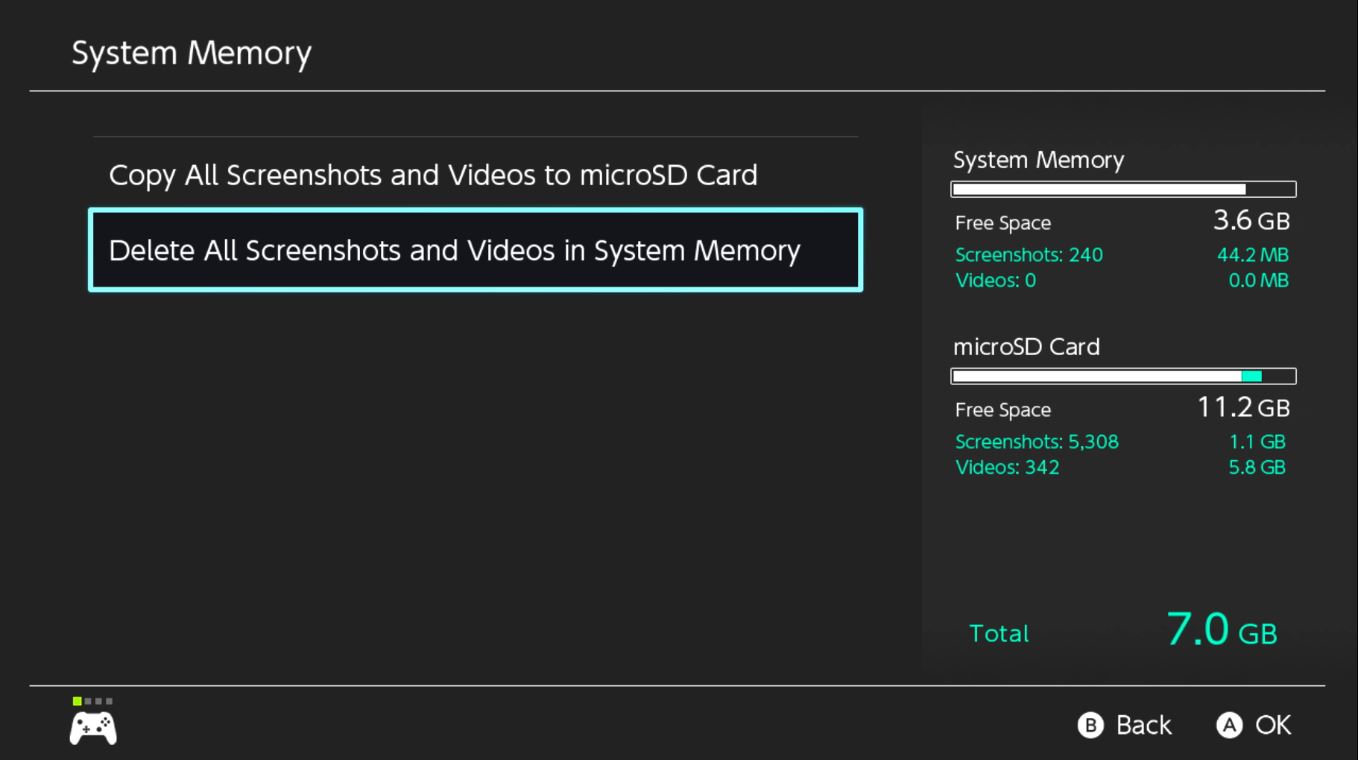
- Select System Memory.Source: iMore


- Select Delete All Screenshots and Videos to microSD Card.
How to delete all screenshots and videos from a microSD card on Nintendo Switch
If you want to delete all your screenshots and videos from your microSD card, you don't have to do it all one at a time! Hallelujah, you can do them all at once in the system settings!
- Select the System Settings icon from the Switch's main menu.
- Select Data Management from the menu.Source: iMore


- Select Manage Screenshots and Videos.
- Select MicroSD Card.Source: iMore

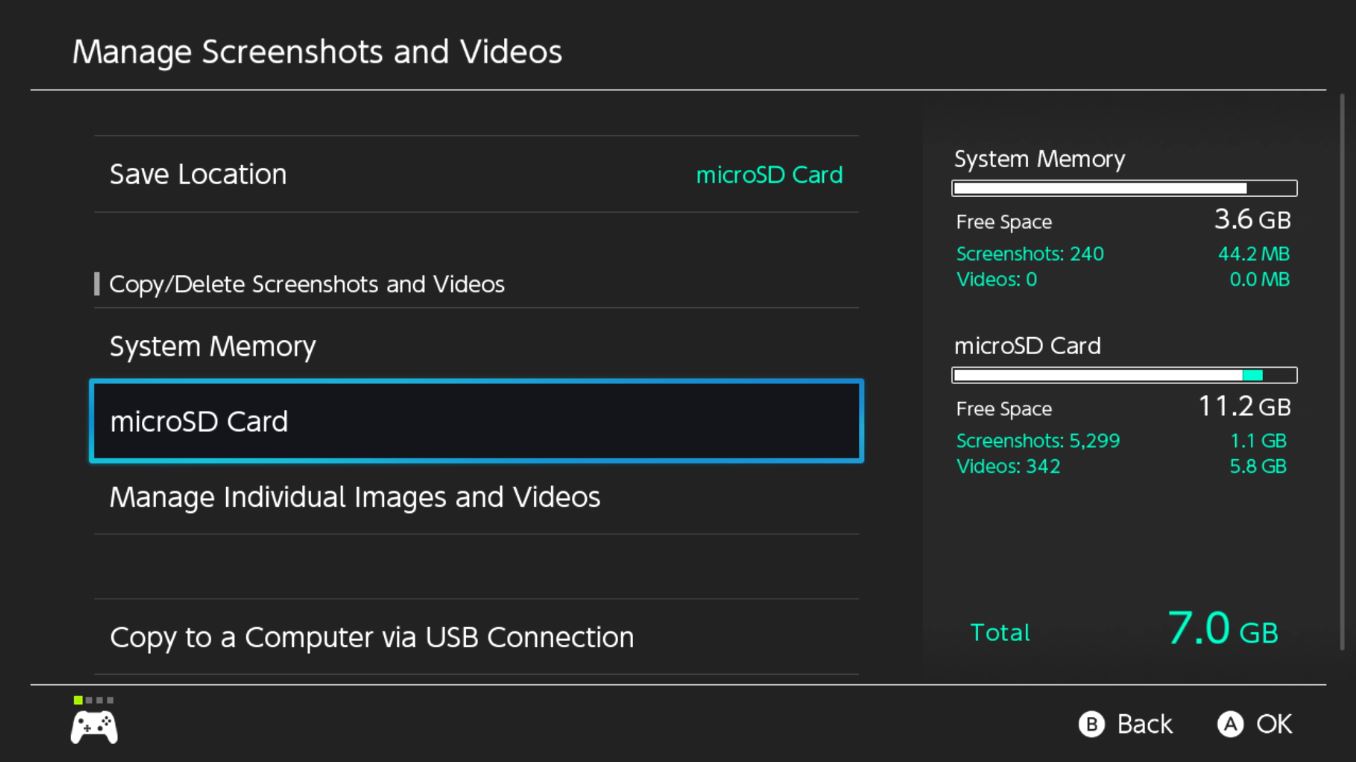
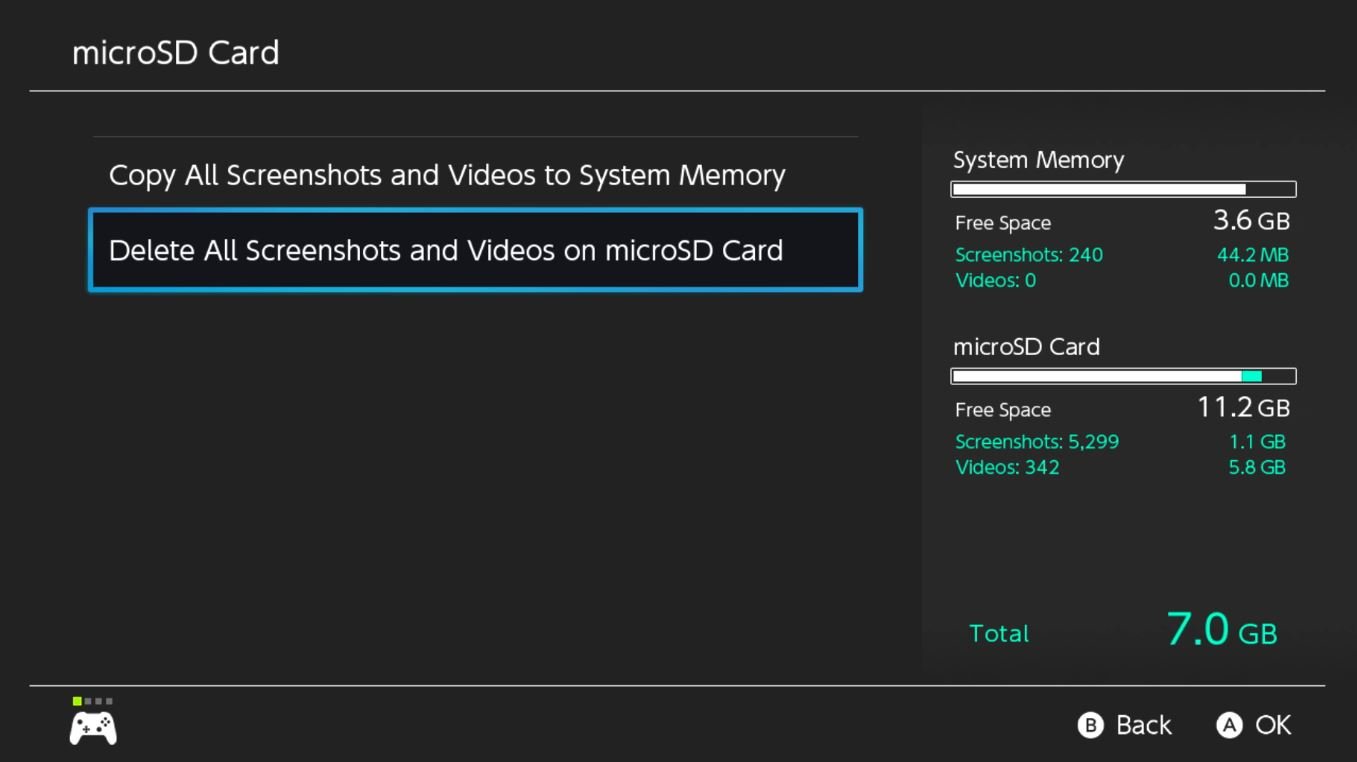
- Select Delete All Screenshots and Videos on microSD Card.
Need to know anything else about screenshots or videos?
Let us know in the comments below if you have any questions about how to do screenshots on Nintendo Switch!
Game capture accessories
If you want to stream your gameplay or capture videos and screenshots more easily, these devices will come in handy.
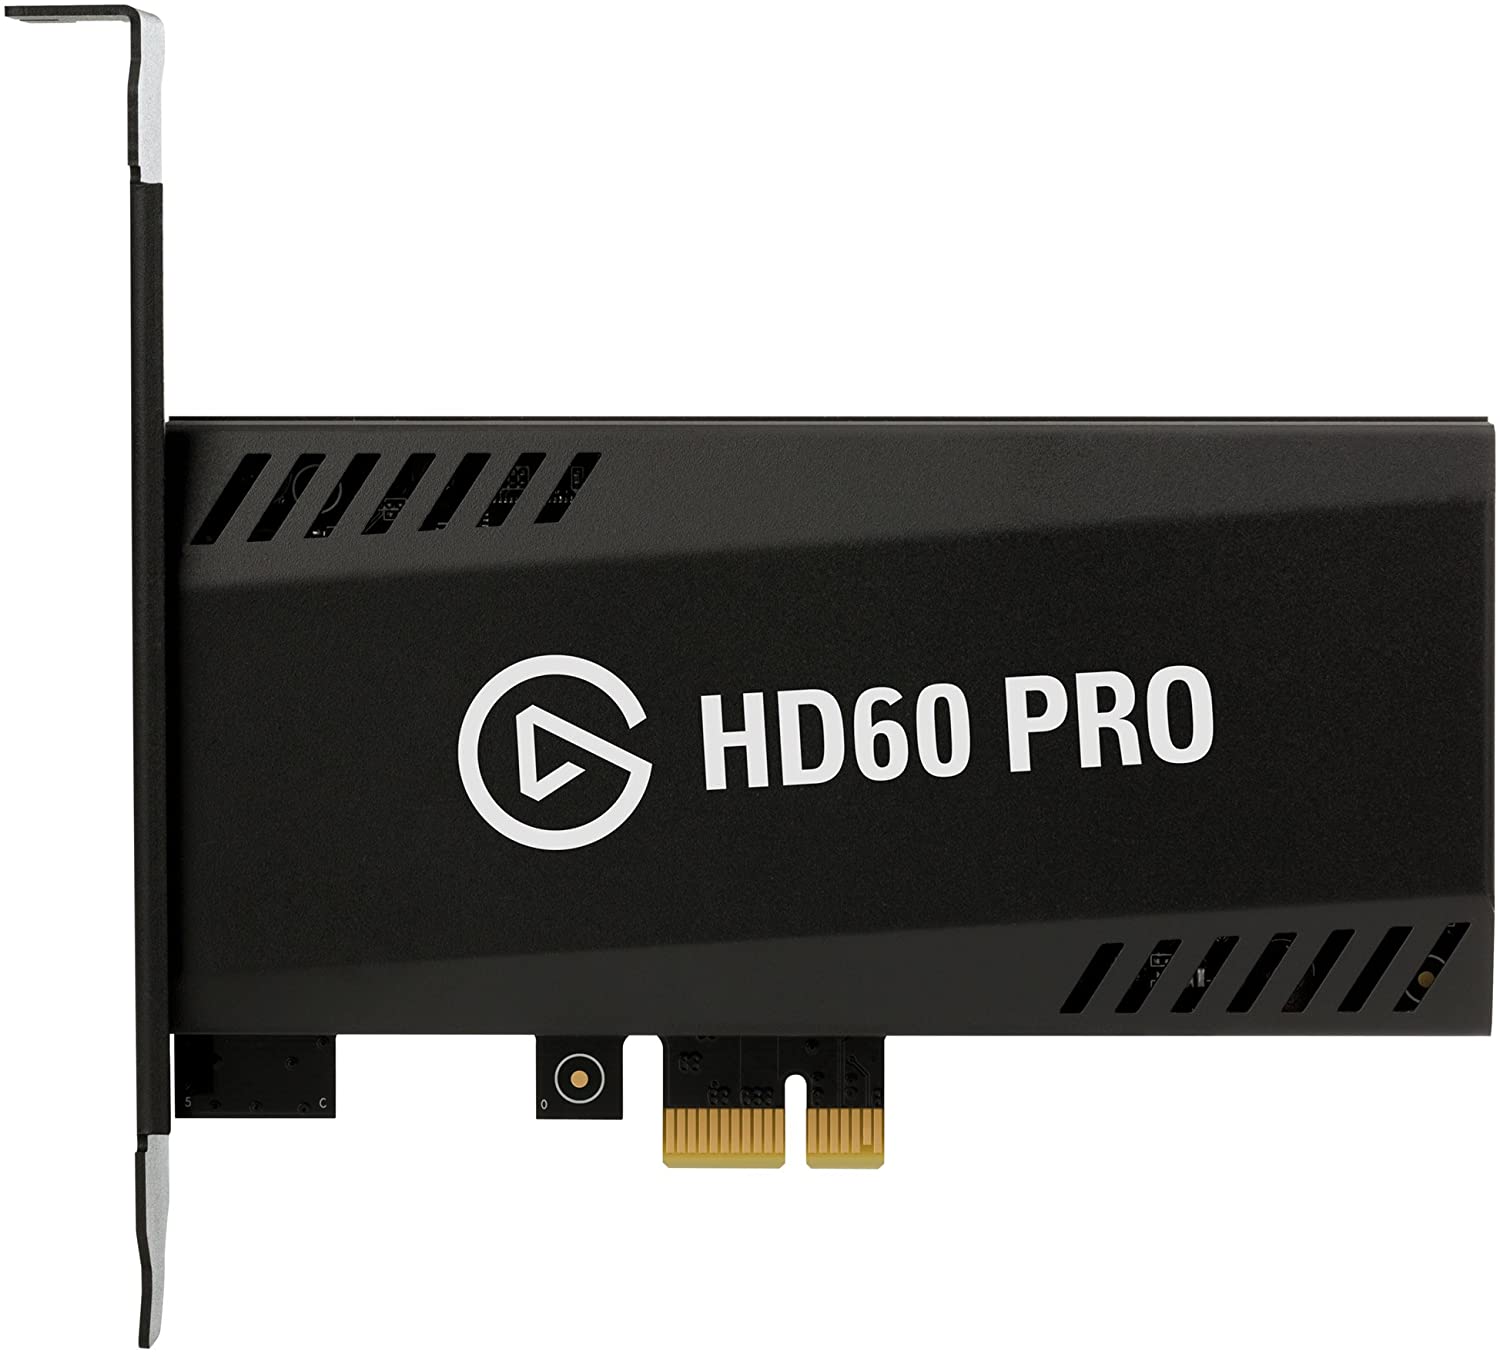
Elgato HD60 Pro ($170 at Amazon)
This device gets installed directly in a Windows Desktop computer's PCIe slots. It's pretty easy to install as long as you know how to do it.
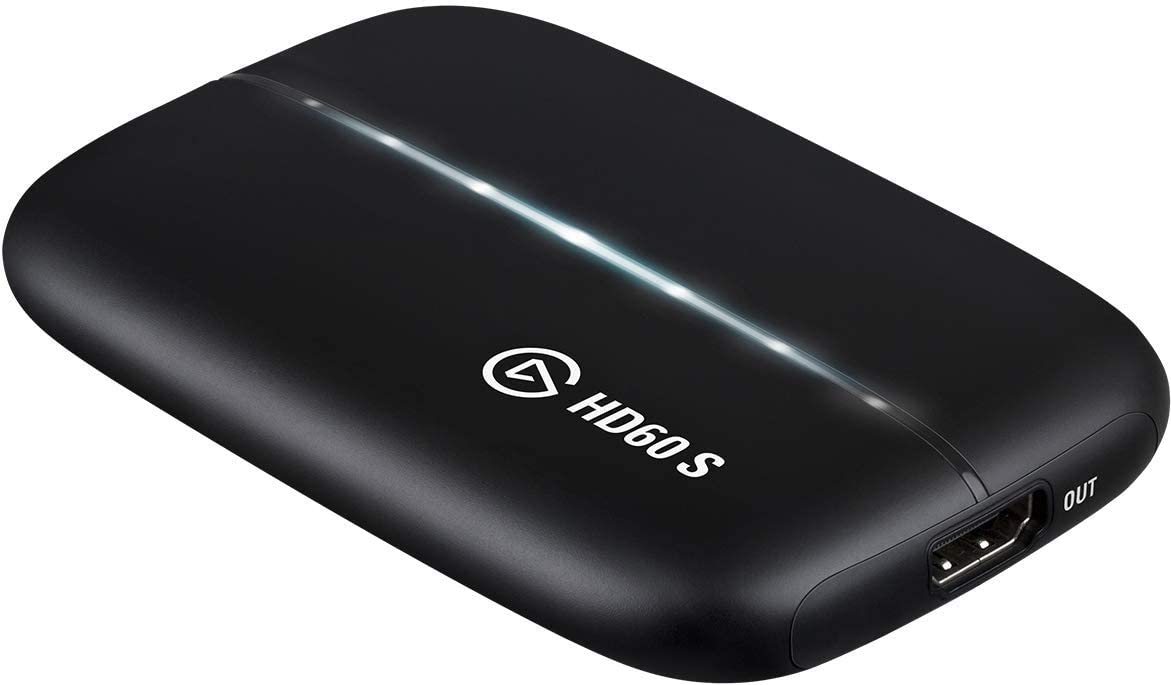
Elgato HD60 S ($142 at Amazon)
Instead of installing inside of a computer, you just connect this between your Switch and your computer with HDMI cables, and you'll be able to capture everything that shows up on your Switch's display. You'll definitely want to use some capture software to better edit and control your captures.
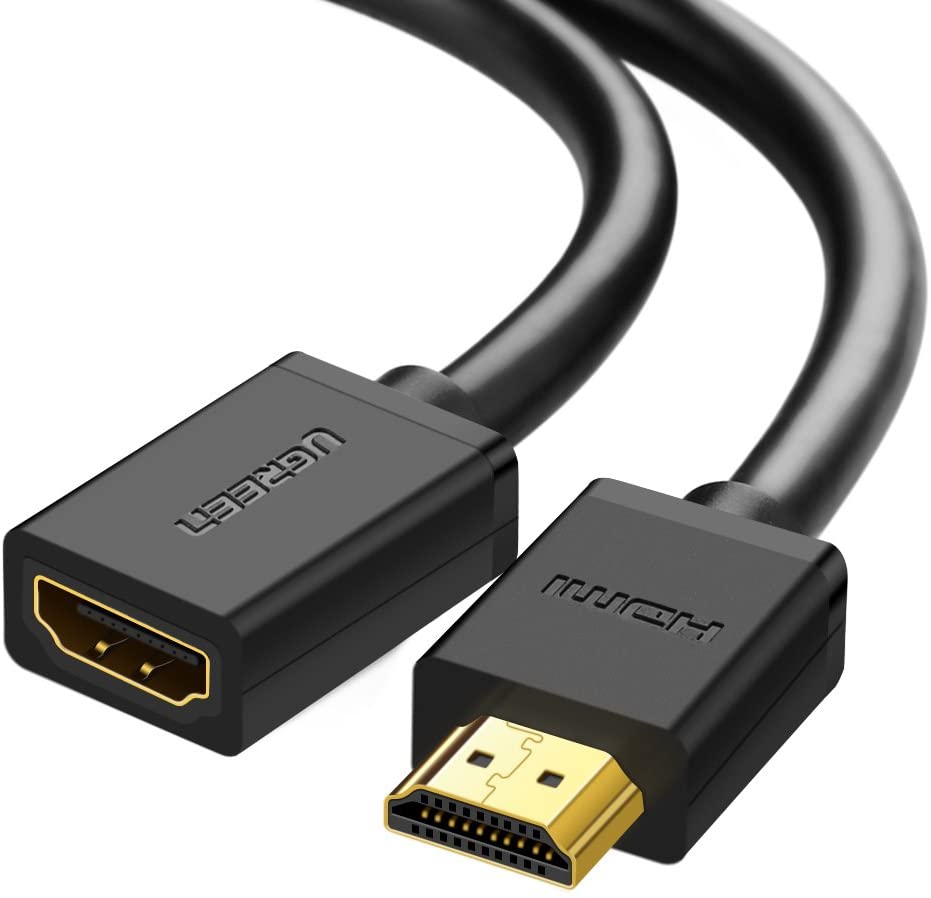
HDMI cable ($16 at Amazon)
You might find that the HDMI cable that comes with the Elgato HD60 S isn't long enough. That's where an HDMI extension cable like this one will come in handy.
Updated December 2020: Replaced most images and updated steps.

Luke Filipowicz has been a writer at iMore, covering Apple for nearly a decade now. He writes a lot about Apple Watch and iPad but covers the iPhone and Mac as well. He often describes himself as an "Apple user on a budget" and firmly believes that great technology can be affordable if you know where to look. Luke also heads up the iMore Show — a weekly podcast focusing on Apple news, rumors, and products but likes to have some fun along the way.
Luke knows he spends more time on Twitter than he probably should, so feel free to follow him or give him a shout on social media @LukeFilipowicz.
