How to lock Notes on iPhone and iPad
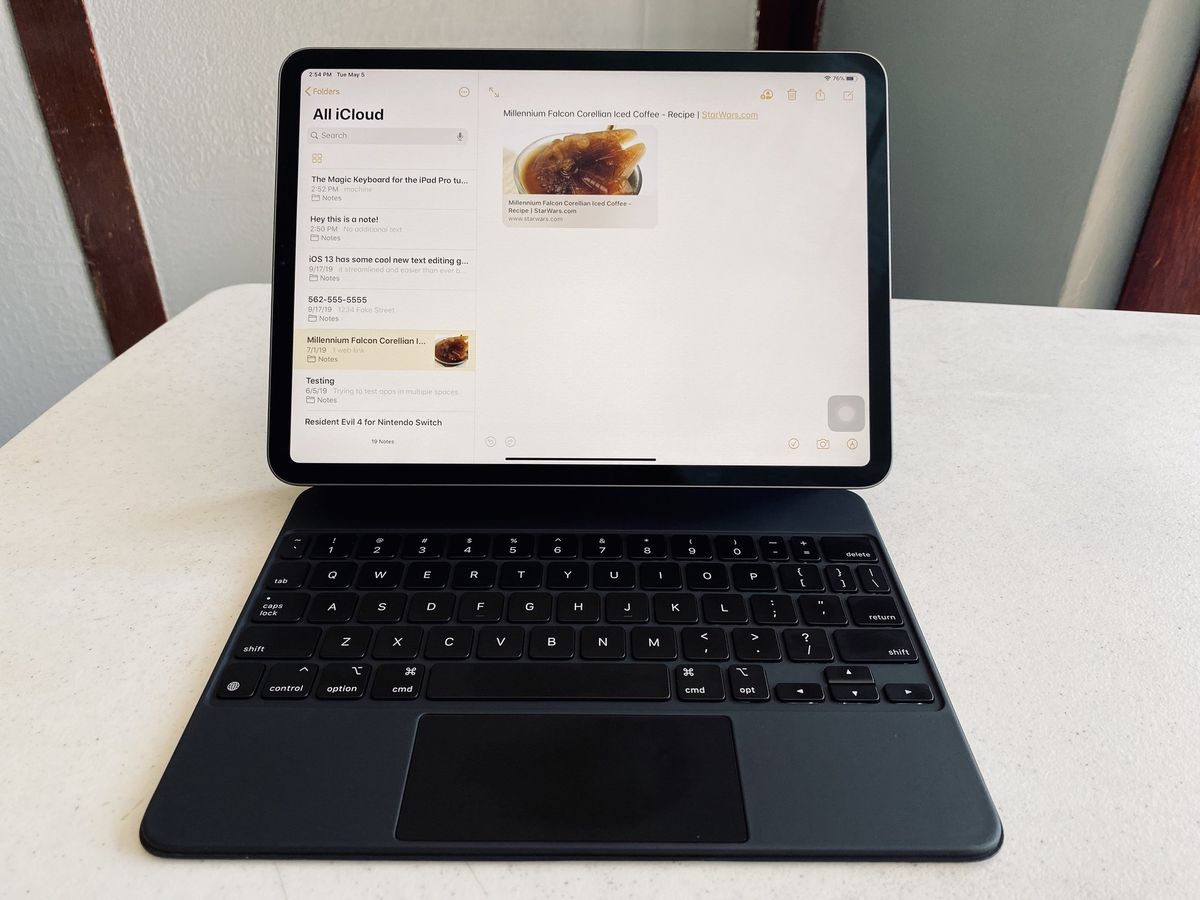
The Notes app has evolved so much over the years. With every new software update, Notes has become a useful and resourceful note-taking app. Even more so with the arrival of iOS 14 and iPadOS 14, which introduced a bunch of new features to make it easier to use. However, one of its best features is the ability to lock notes on iPhone or your iPad. You don't need any extra app to secure your private notes and information. The best part: It's really easy to do. Here's how!
Looking to hide photos on iPhone in secure folders? We can help there too!
How to set your Notes password on iPhone and iPad
Setting up your password on Notes is like setting a HomeKit door lock for your home: It's straightforward and you only have to worry about it once. You'll automatically be asked to set a global password for securing the notes the first time you try to protect a note or the first time you visit the password section in the Notes settings. If you don't want to wait, you can set it immediately by doing either of those things now.
To set a password in the Notes app:
- Launch Notes from your Home screen.
- Tap on an existing note or type a new note.
- Tap on the options menu on the top right corner.
- Tap Lock Note.
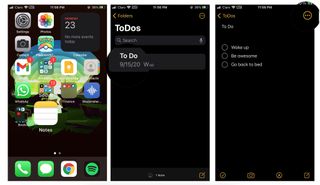
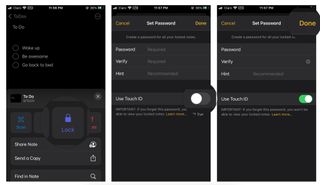
- Enter a Password — this will be for all your notes, including Notes on Mac, if you use it.
- Enter the same password again to Verify.
- Adding a hint is optional but it's highly recommended.
- Switch Touch ID or Face ID to on, if you want to use a fingerprint or your face for faster and more convenient unlocking.
- Tap Done to confirm that you want to lock the note.
To set a password from Settings:
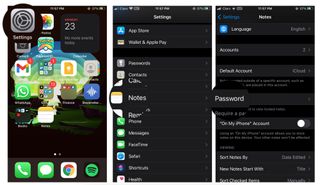
- Launch Settings from your Home screen.
- Scroll down and tap on Notes.
- Tap on Password.
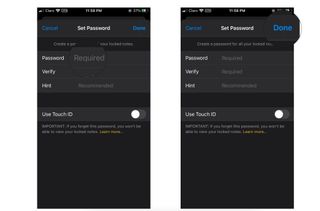
- Enter a Password — this will be for all your notes, including Notes on Mac, if you use it.
- Enter the same password again to Verify.
- Adding a hint is optional but it's highly recommended.
- Switch Touch ID or Face ID to on (green), if you want to use a fingerprint or your face for faster and more convenient unlocking.
- Tap Done to save.
Touch ID and Face ID make the process much faster and more convenient, but also means someone could try and get you to touch the sensor when you're sleeping or otherwise incapacitated. Most people will never have to worry about that, but if you're James Bond or Natasha Romanov, keep it in mind.
How to lock Notes on iPhone and iPad
Once you have a password set up you can lock a note at any time.
- Launch Notes from your Home screen.
- Tap on an existing note or type a new note.
- Tap on the Options menu on the top right corner.
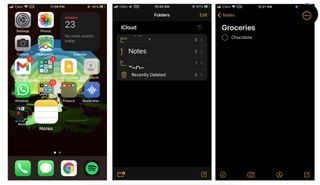
- Tap Lock Note.
- Use Touch ID or Face ID, if available, to lock your note. If you prefer not to use Touch ID or Face ID, tap Enter Password.
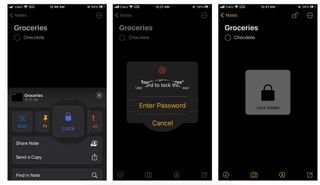
A lock animation will confirm the note has been secured.
It's important to remember that, while the body of the note will be hidden when locked, the title of the note will still be visible. (So you can find it later when you want to unlock it.) To make sure you don't leak any information unintentionally, never put anything in the title you wouldn't want anyone else to see.
Master your iPhone in minutes
iMore offers spot-on advice and guidance from our team of experts, with decades of Apple device experience to lean on. Learn more with iMore!
How to unlock a note with your password, Face ID, or Touch ID
You can't see a locked note, other than the title, but you can unlock it to see, edit, or otherwise work on at any time.
- Launch Notes from your Home screen.
- Tap on the note you want to unlock.
- Tap on View Note in the center or the Lock button at the top right.
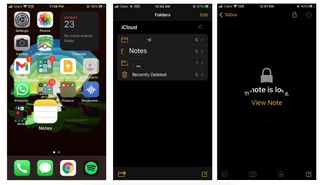
- Use Touch ID or Face ID to unlock, or if they aren't enabled or available, enter your Notes password. An unlock animation will confirm the note has been opened.
How to re-lock a note
Notes will lock automatically if you lock or reboot your iPhone or iPad, or if the Notes app quits and is restarted. You can also re-lock a note manually at any time.
- Launch Notes from your Home screen.
- Tap on the note you want to re-lock.
- Tap on the Lock button at the top right.
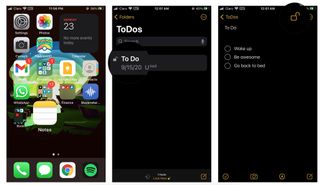
The note will be secured immediately and you'll have to unlock it to access it again.
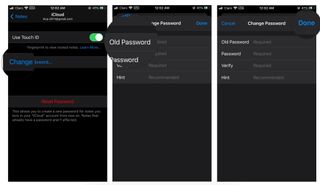
How to change your Notes password
Your Notes password unlocks any and all your notes. If you want to change it, it will also change it for all your notes.
- Launch Settings from your Home screen.
- Tap on Notes.
- Tap on Password.

- Tap Change Password...
- Enter your Old Password
- Enter a New Password — this will be for all your notes, including Notes on Mac, going forward.
- Enter the same password again to Verify.
- Add a hint, if you really need one.
- Tap Done.
How to reset your Notes password
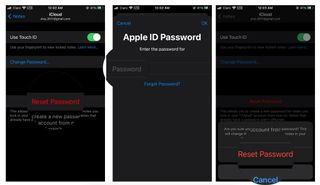
If you ever forget your Notes password, you can use your iCloud password to reset it.
- Launch Settings from your Home screen.
- Tap on Notes.
- Tap on Password.

- Tap Reset Password
- Enter your Apple ID password — the password you use for iCloud.
- Tap on Ok on the top right corner.
- Tap Reset Password to confirm.
- Enter a New Password — this will be for all notes going forward, including Notes on Mac.
- Enter the same password again to Verify.
- Adding a hint is optional but it's highly recommended.
- Turn on the toggle if you want to use Face ID or Touch ID.
- Tap Done.

Questions on how to lock Notes on iPhone or iPad?
That's all there is to it! When it comes to locking your notes, it adds another level of security and privacy, just in case you don't want anyone seeing any sensitive data. Do you still have questions about how to lock notes on iPhone or your iPad? Make sure to drop them in the comments and we'll help you out.
Updated November 2020: Updated for iOS 14 and iPadOS 14.
Christine Romero-Chan was formerly a Senior Editor for iMore. She has been writing about technology, specifically Apple, for over a decade at a variety of websites. She is currently part of the Digital Trends team, and has been using Apple’s smartphone since the original iPhone back in 2007. While her main speciality is the iPhone, she also covers Apple Watch, iPad, and Mac when needed. When she isn’t writing about Apple, Christine can often be found at Disneyland in Anaheim, California, as she is a passholder and obsessed with all things Disney, especially Star Wars. Christine also enjoys coffee, food, photography, mechanical keyboards, and spending as much time with her new daughter as possible.
