How to use Contacts on Mac
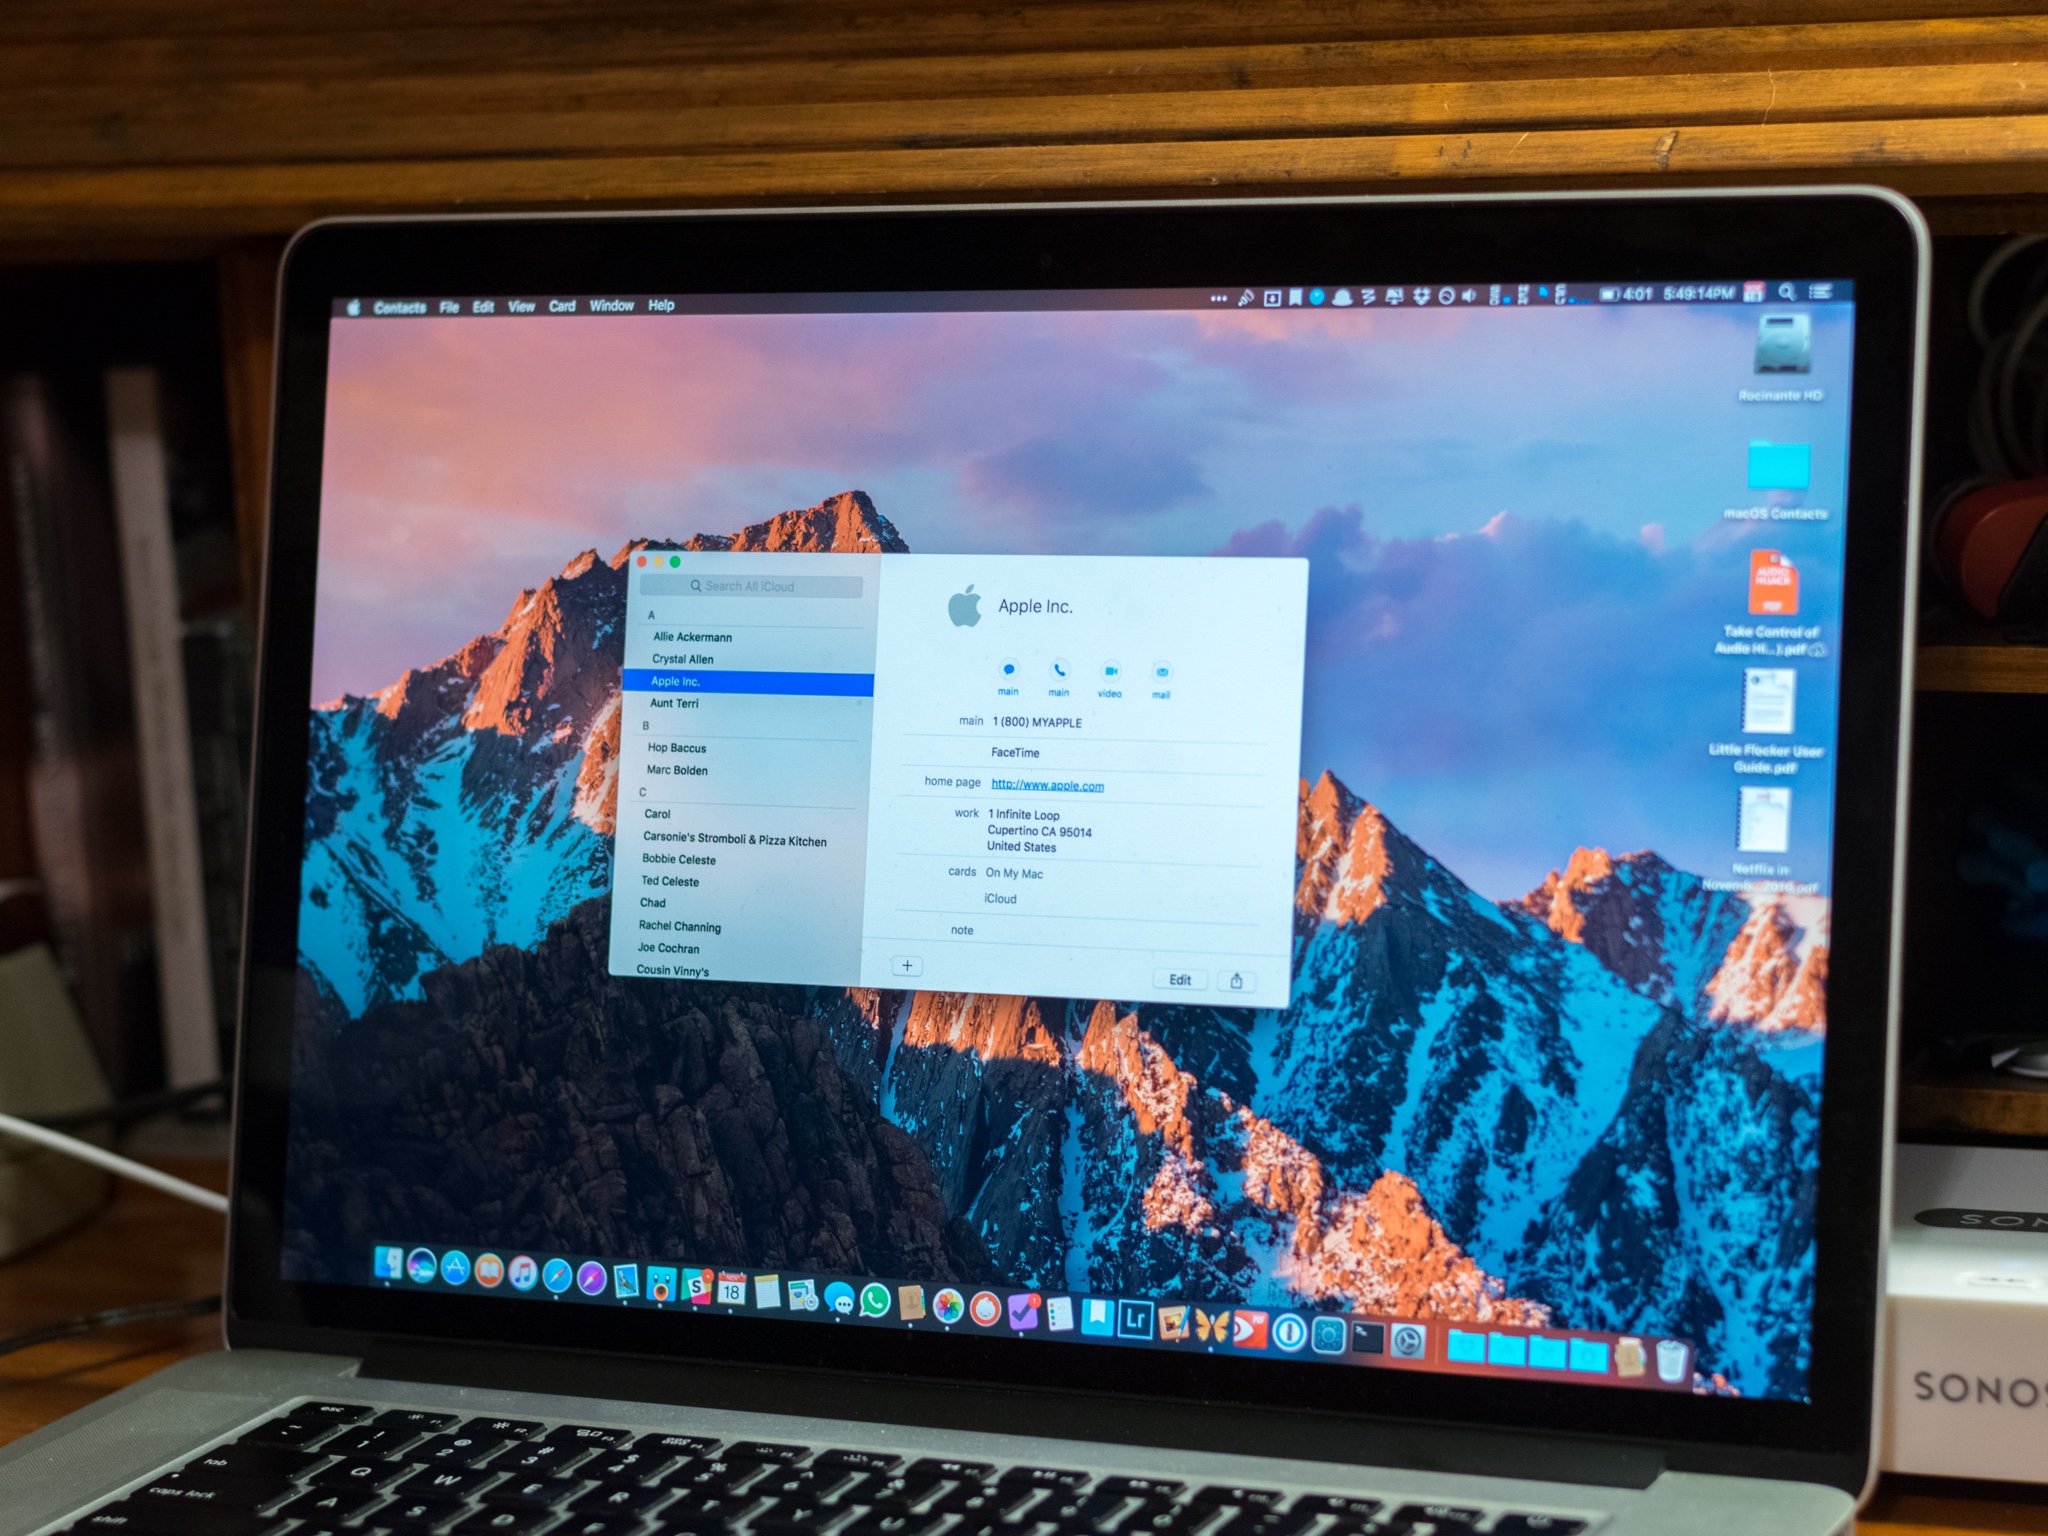
The Contacts app is the central repository on your Mac for everyone you know, including their email addresses, phone numbers, and even social media information. Now, with macOS Sierra, you can also start a call or a text someone right from a contact's card.
How to connect iCloud, Google, Yahoo, and more to Contacts
Before you can use contacts, you need to get them onto your Mac. If you use an existing online service, it's incredibly easy.
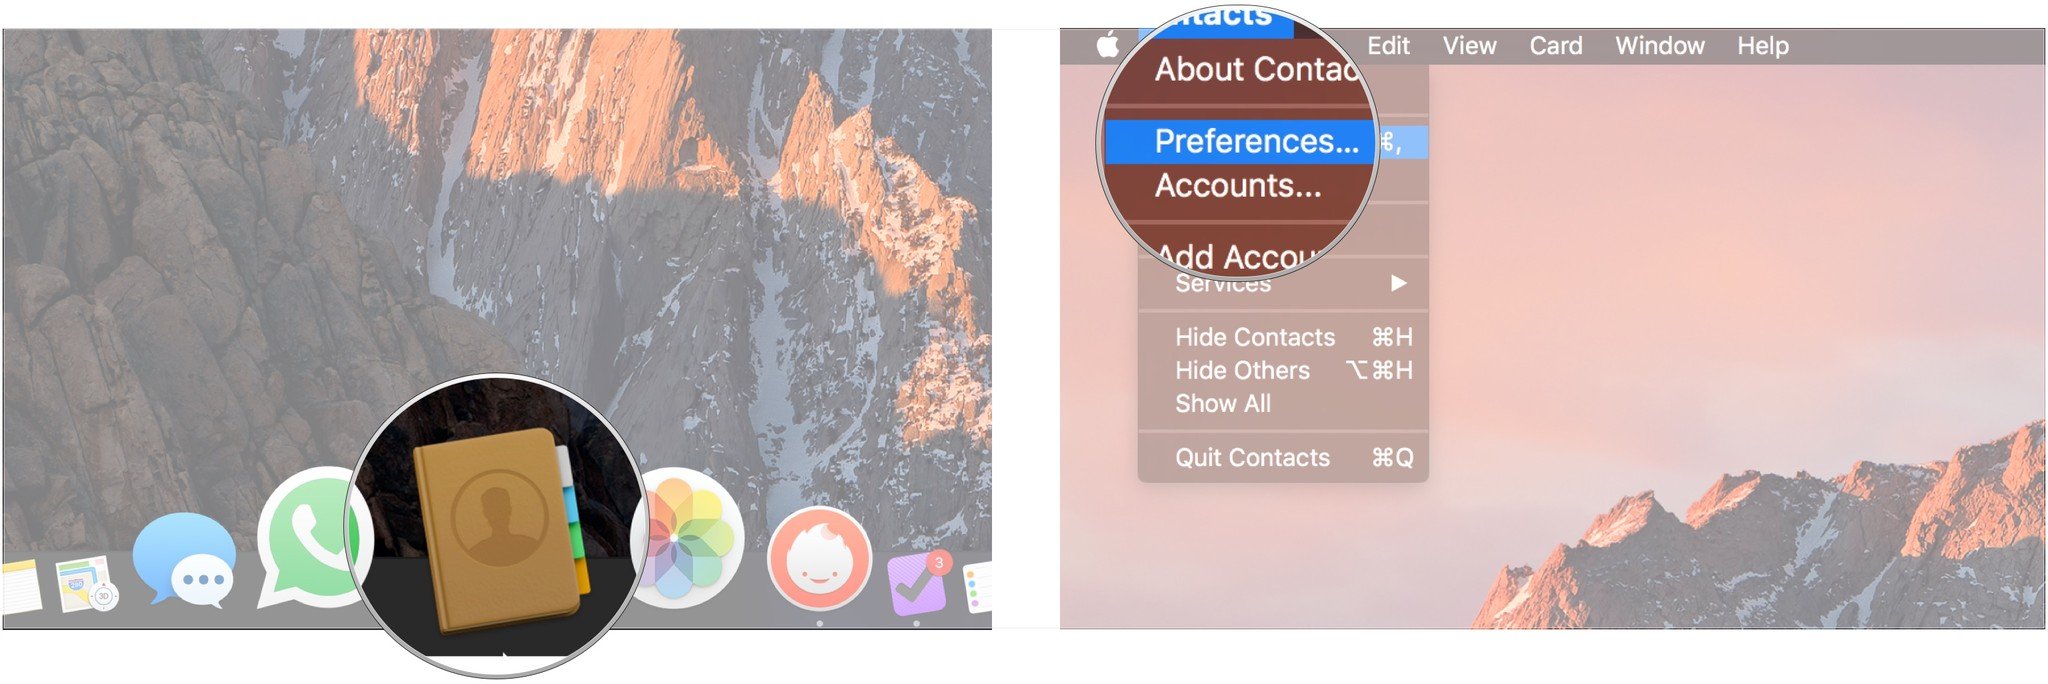
- Open Contacts on your Dock.
- Click Contacts in the Menu bar and select Preferences.
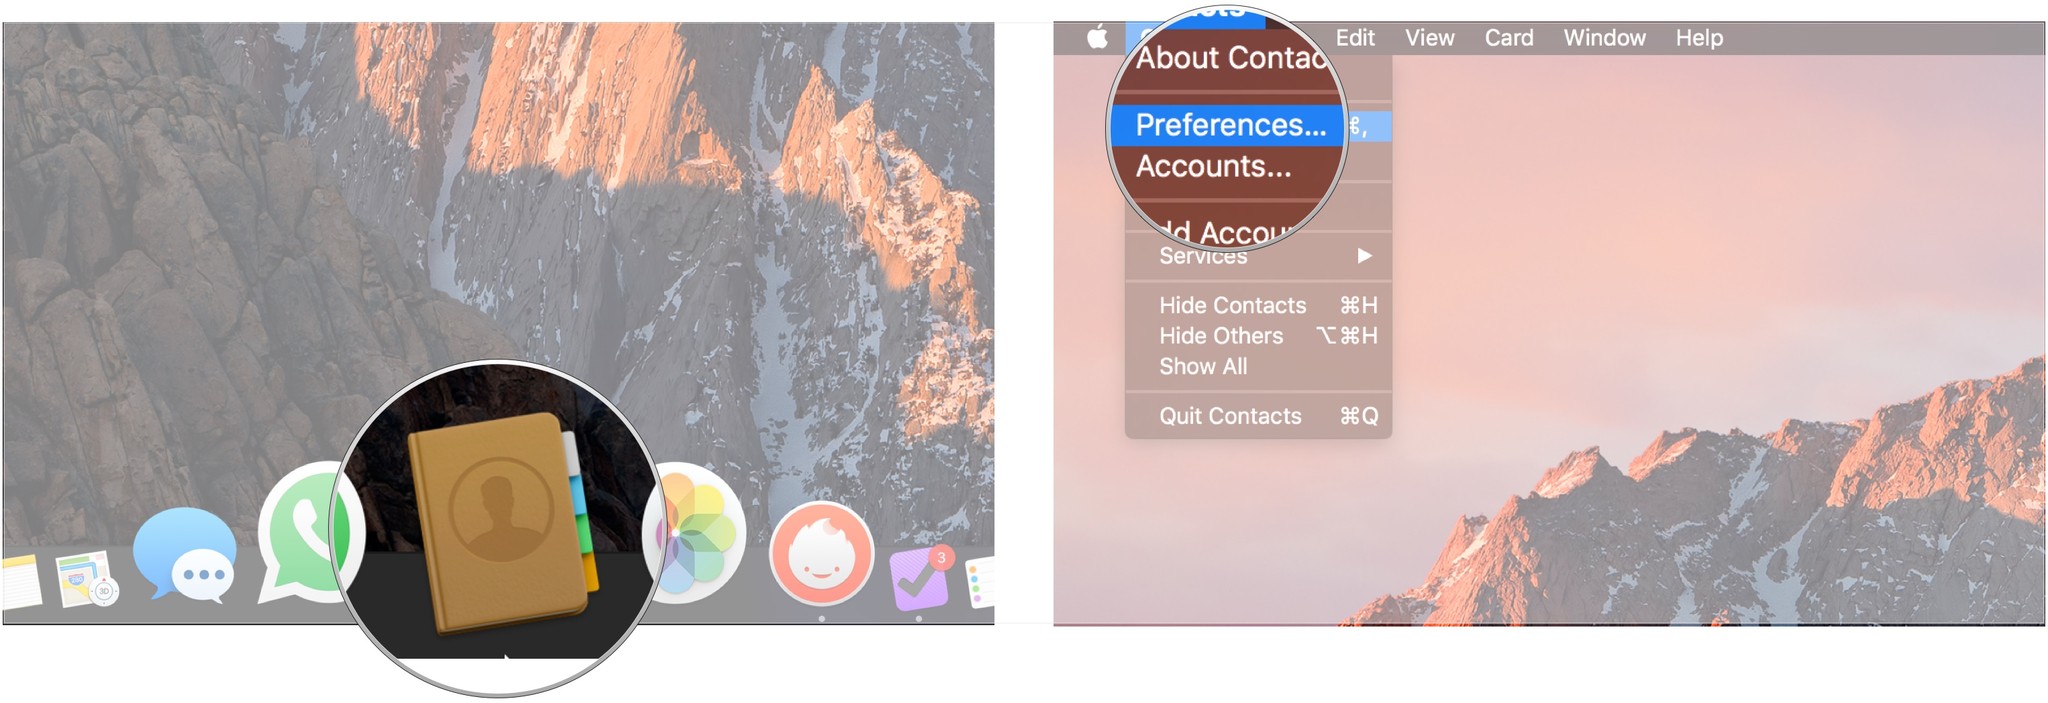
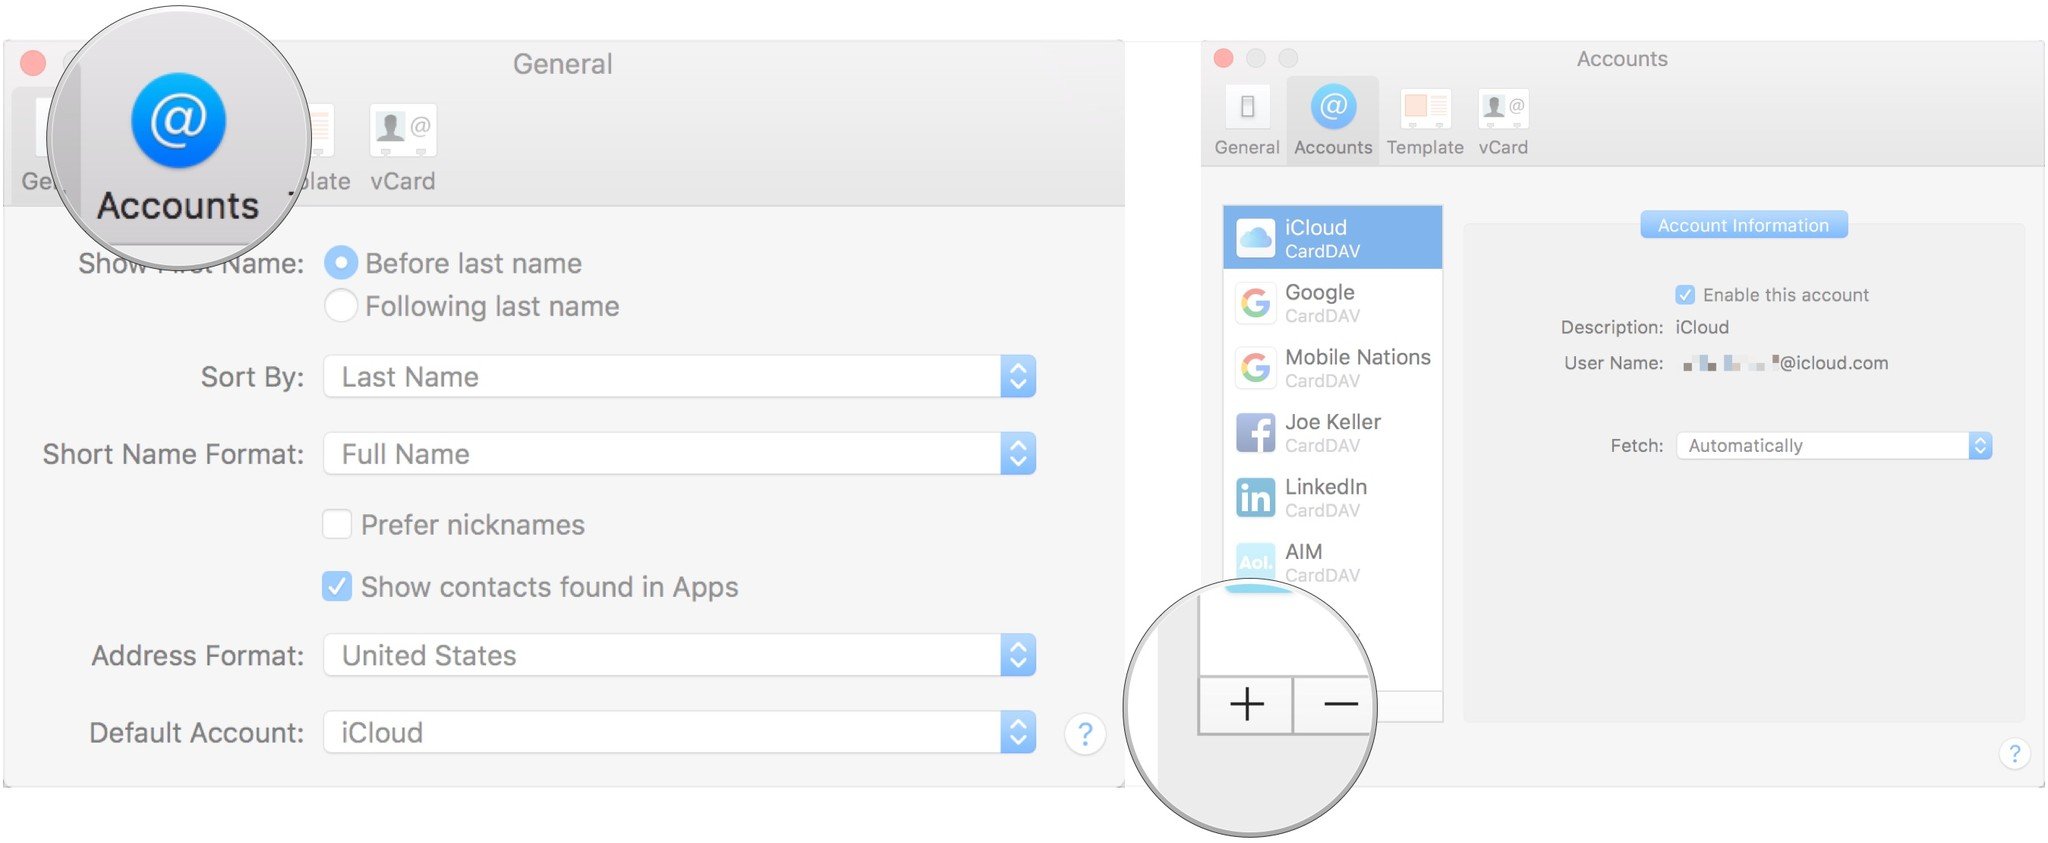
- Click the Accounts tab.
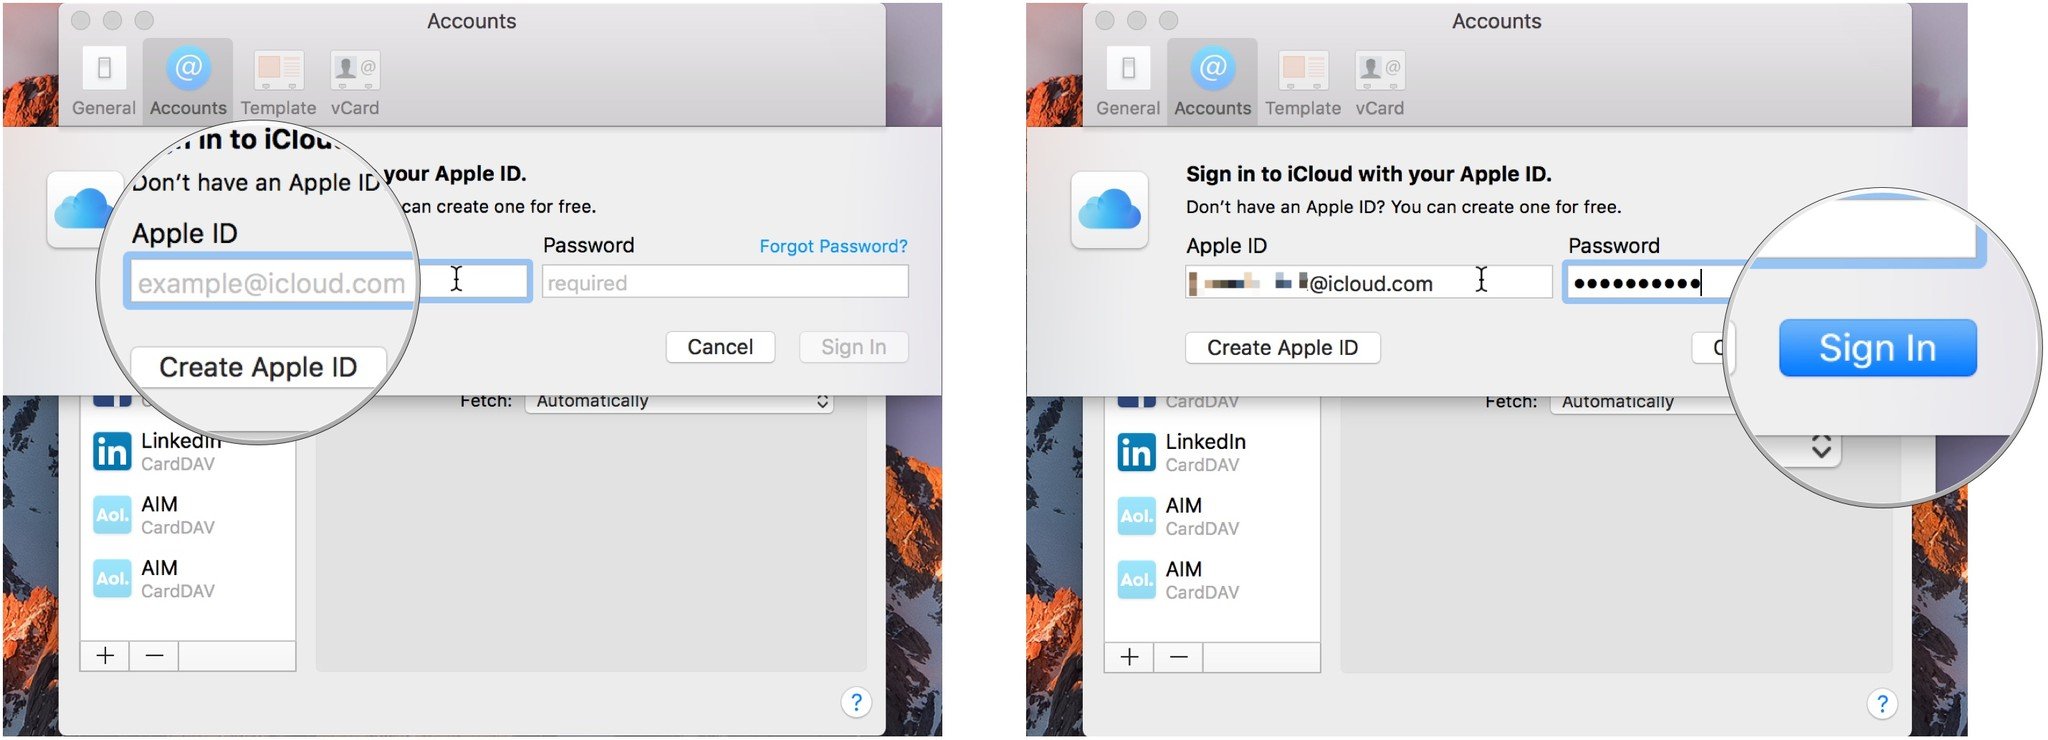
- Click the + button.
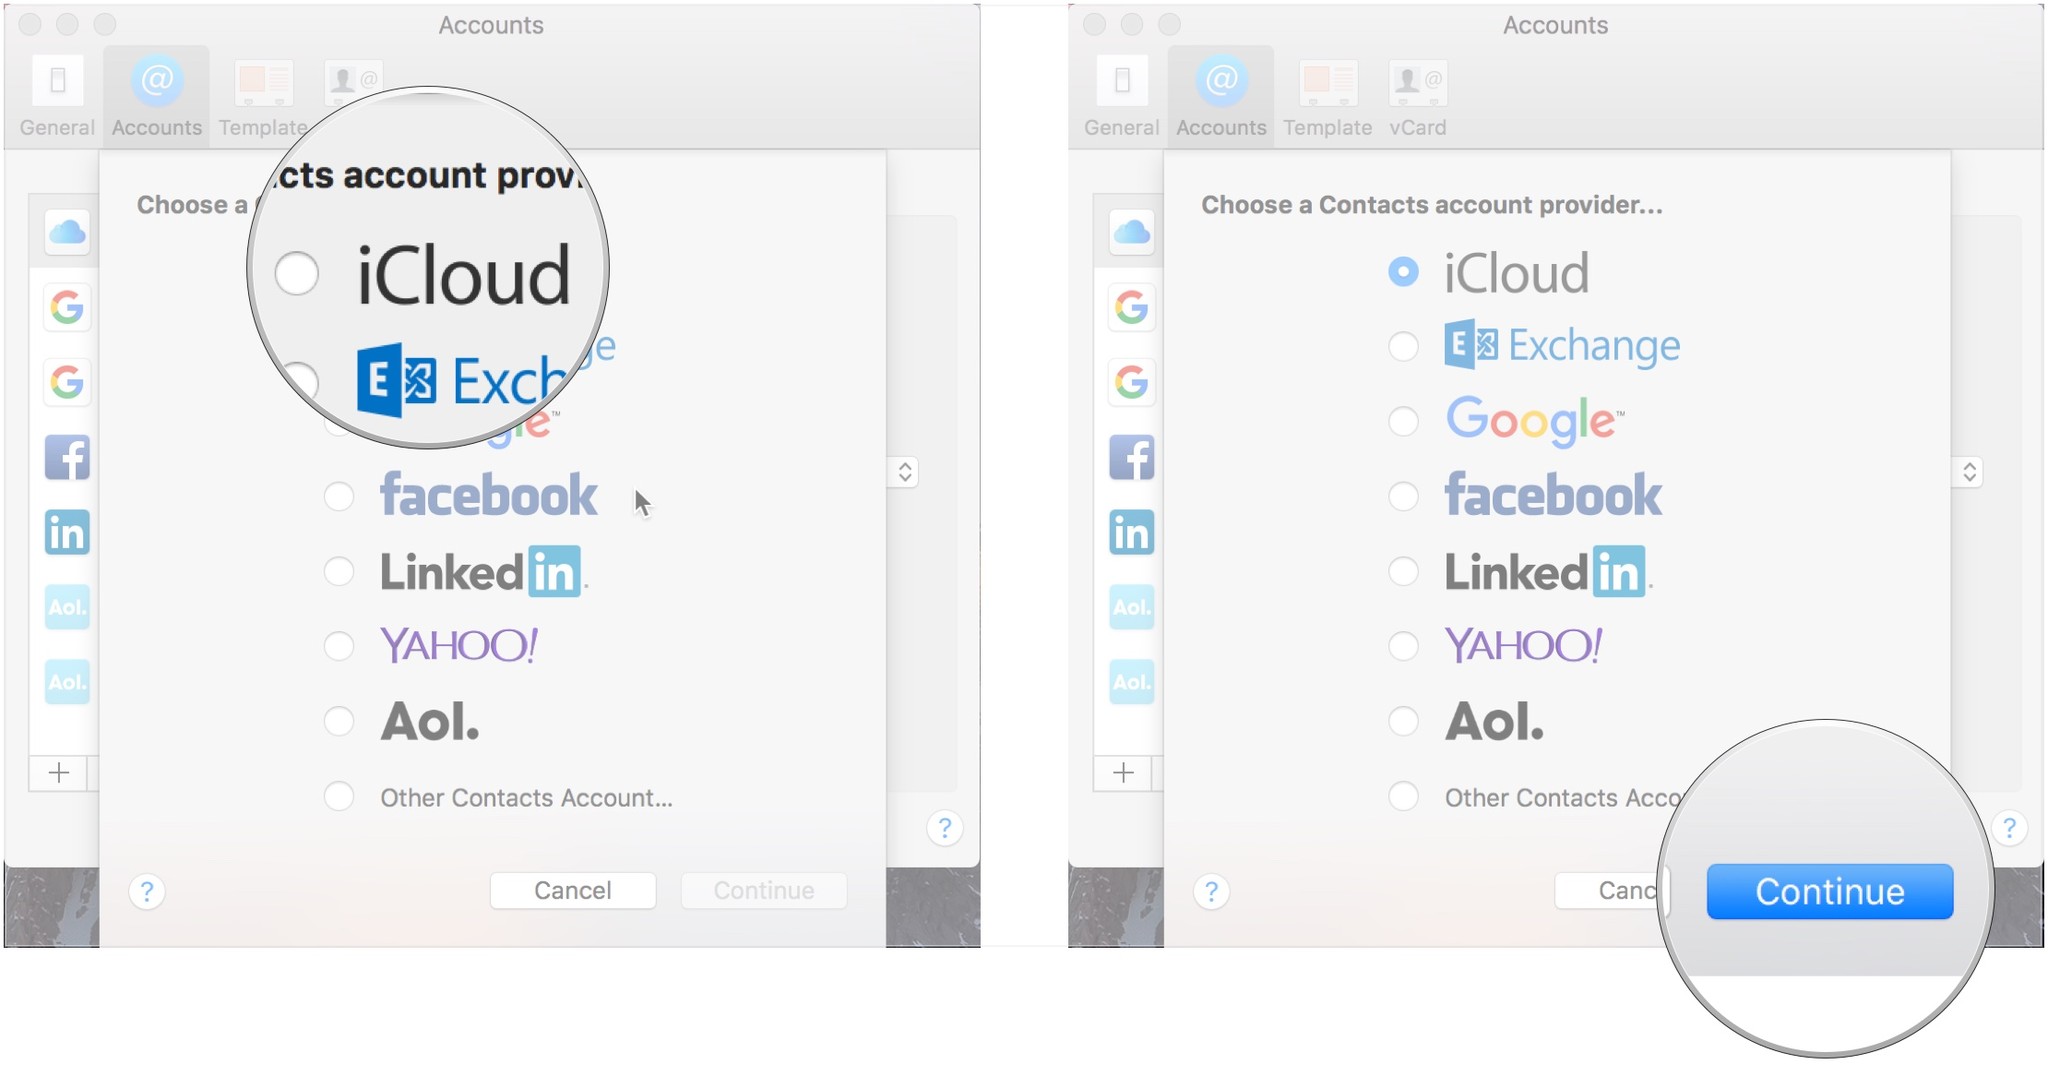
- Click on the type of account you'd like to add.
- Click Continue.
- Enter your account credentials.
- Click Sign In.
How to set contact display preferences
If you're used to seeing your contacts in a certain way — last name first, for example — you can have your Mac show them to you in exactly that way.
- Open Contacts on your Dock.
- Click Contacts in the Menu bar and select Preferences.
- Click on the General tab.
- Choose whether to display the first name first or the last name first.
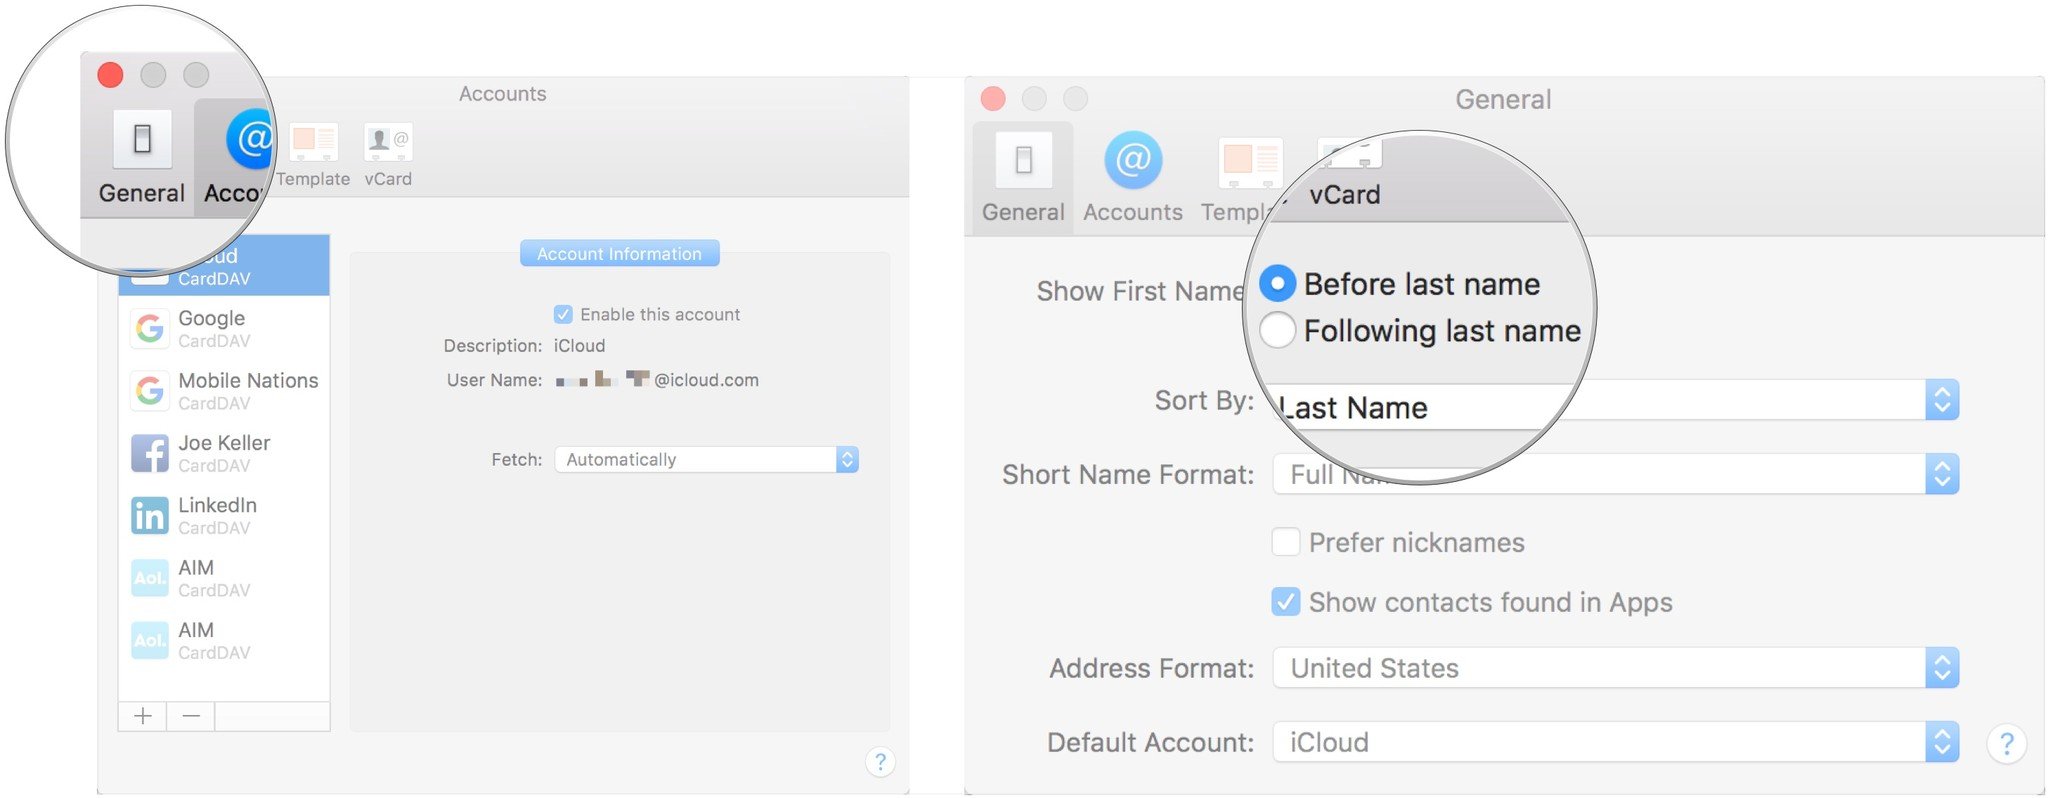
- Click on the Sort By drop down menu to sort contacts by first or last name.
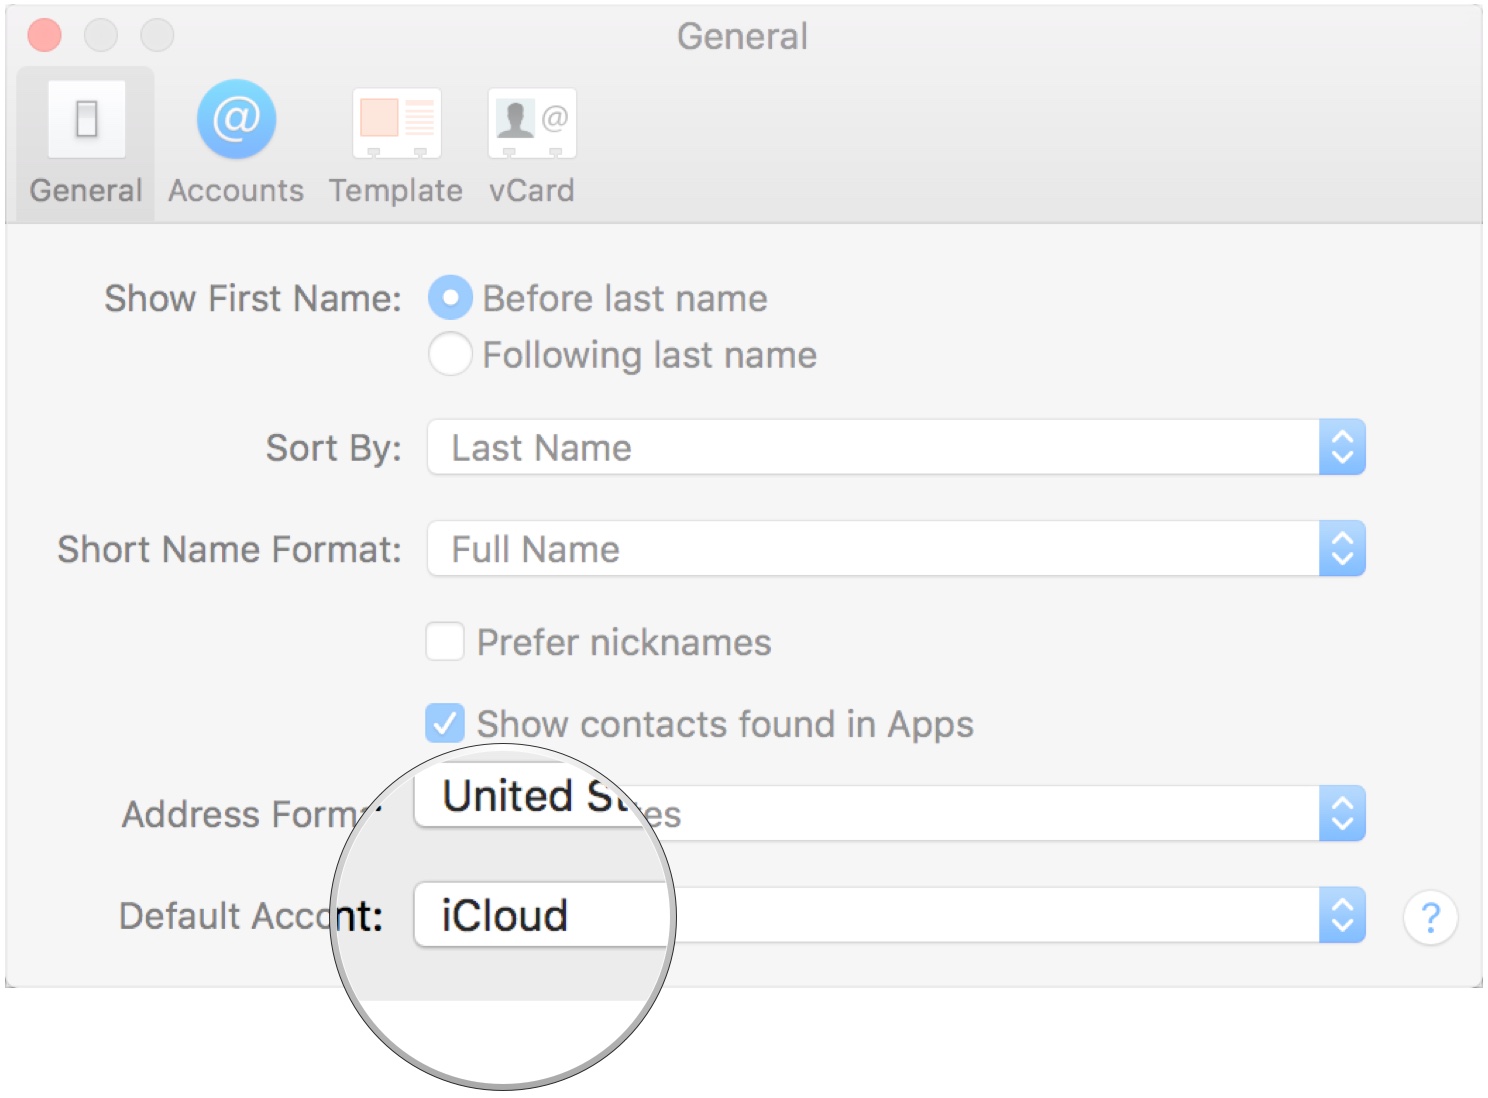
- Click the Short Name Format drop-down menu to select how names should be displayed.

- Click the check boxes to decide whether or not to prefer nicknames and if you should show contacts found in apps.
- Click the Address Format drop-down so select the display format for your contacts' addresses.

- Choose your default Contacts account from the drop down menu.
How to add a new contact
If you want to add your contacts manually, or if you get new contacts you want to add, you can input them straight into the app.
- Open Contacts on your Dock.
- Click the + button at the bottom of the current contact card.

- Click New Contact.
- Enter the contact's first and last names.
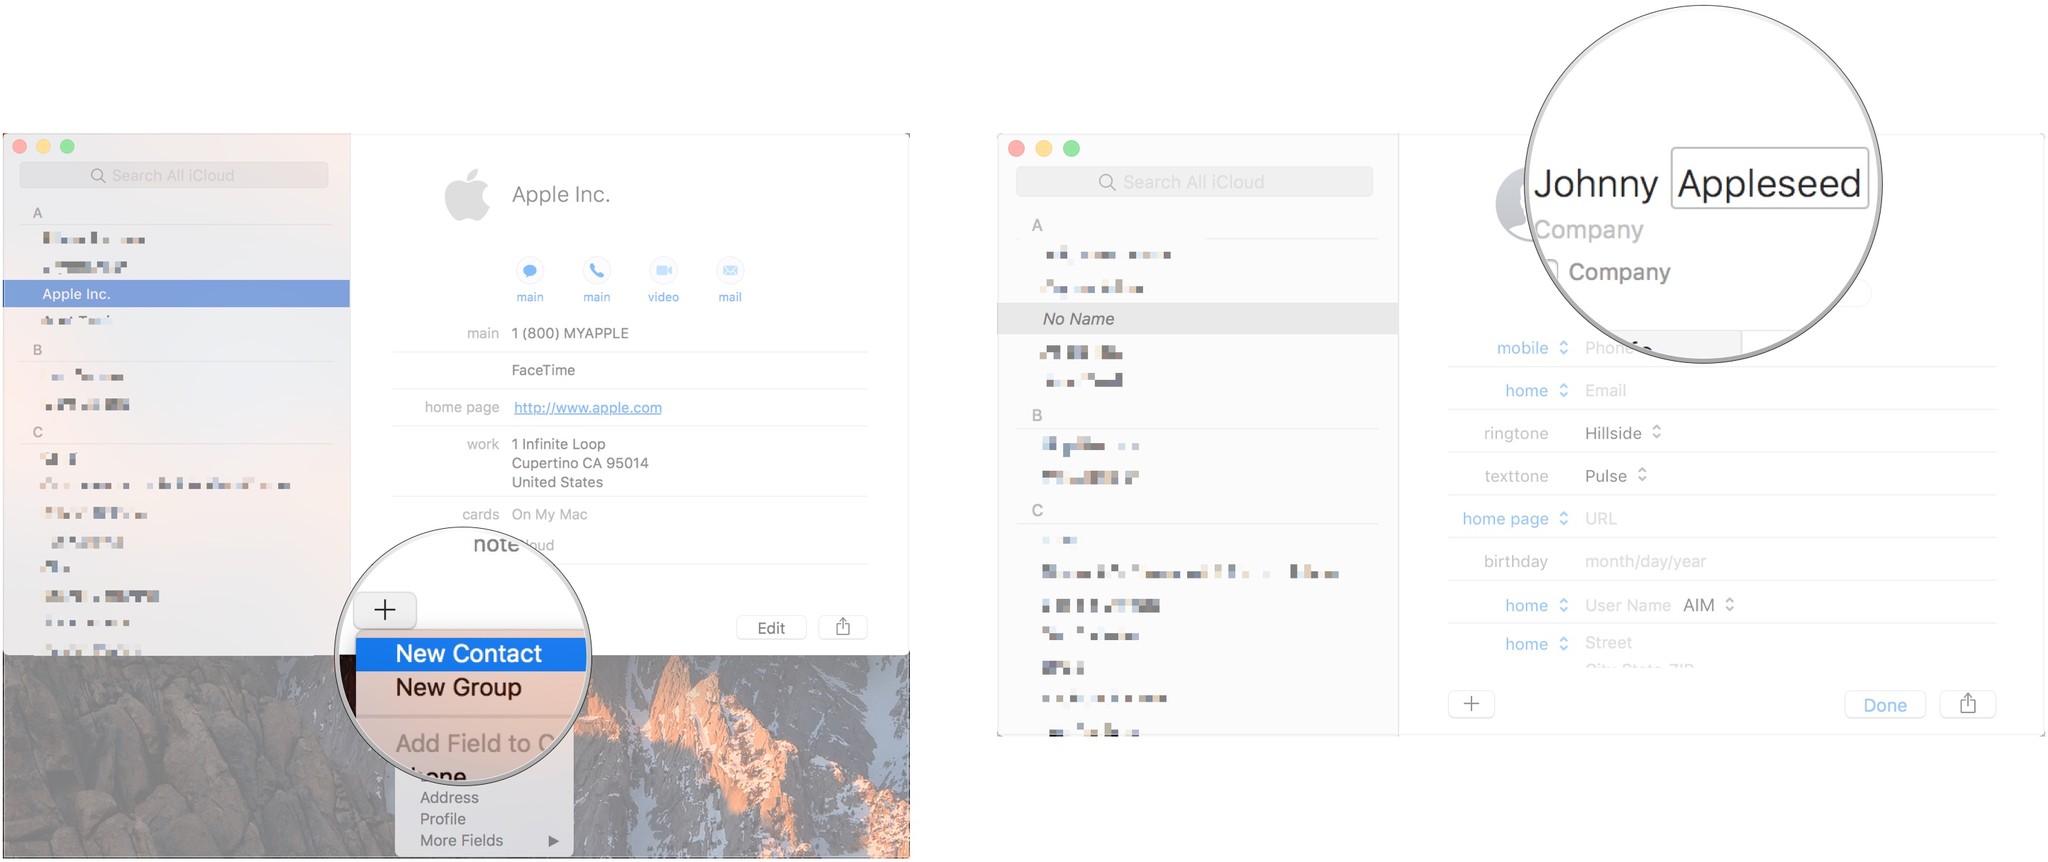
- Fill out the fields on the card with the relevant information.
- Click Done.

How to add a new contact group
If there's a certain set of people you want to organize together, for work, for a club, for family, or for any reason at all, you can create a group.
- Open Contacts on your Dock.
- Click View and select Show Groups.
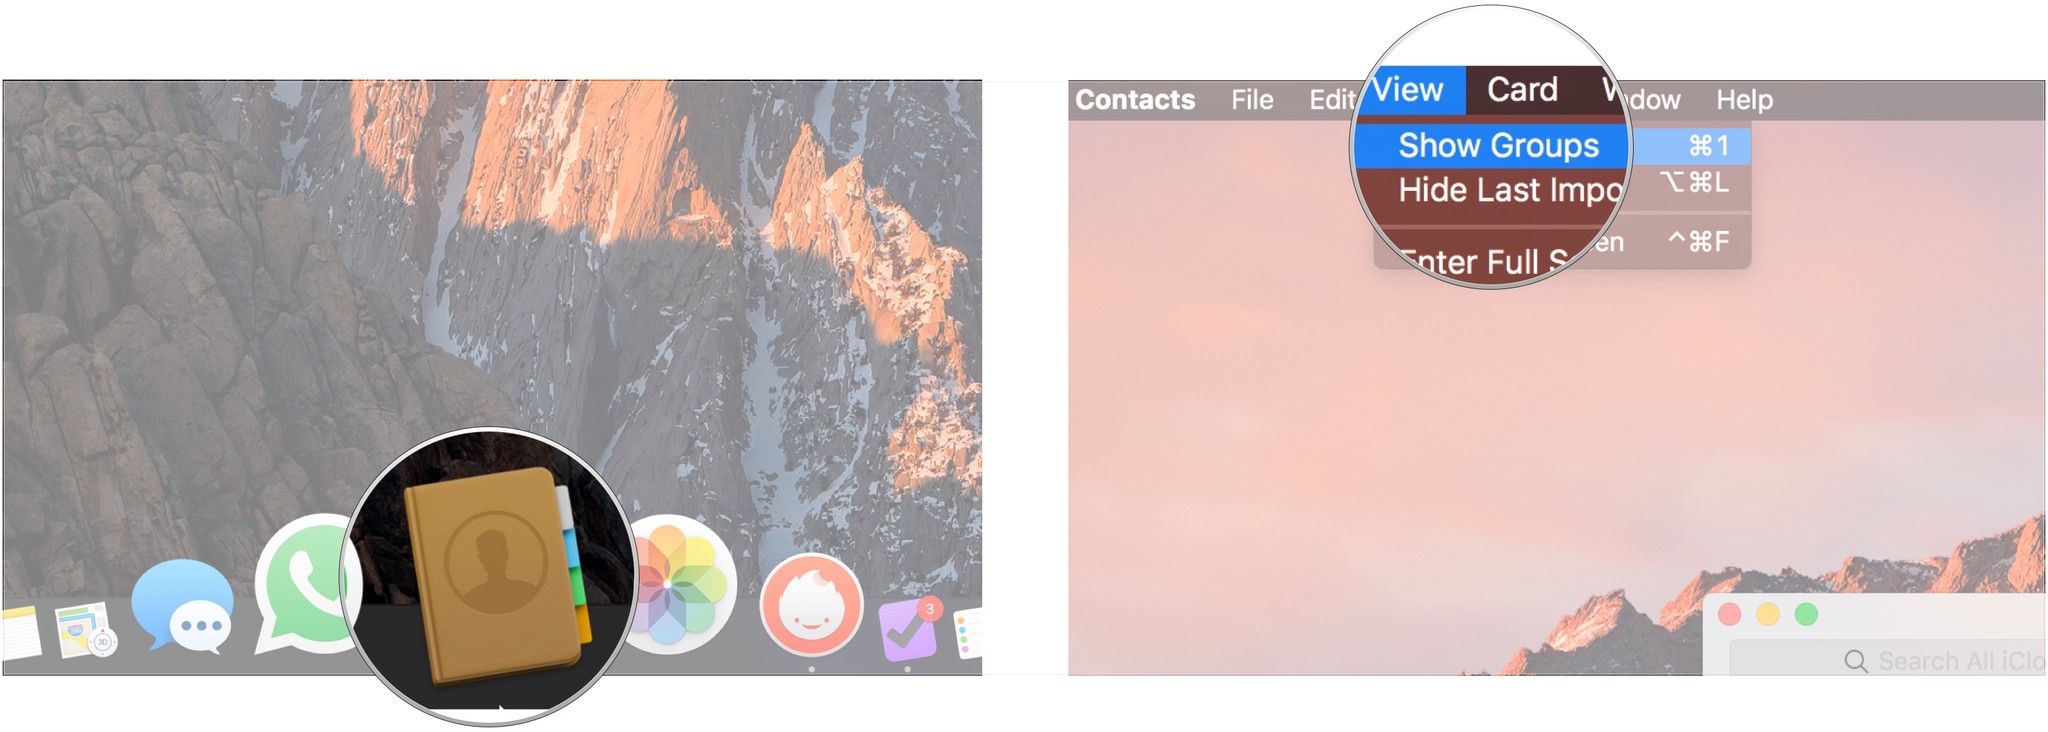
- Click the + button at the bottom of the current contact card.
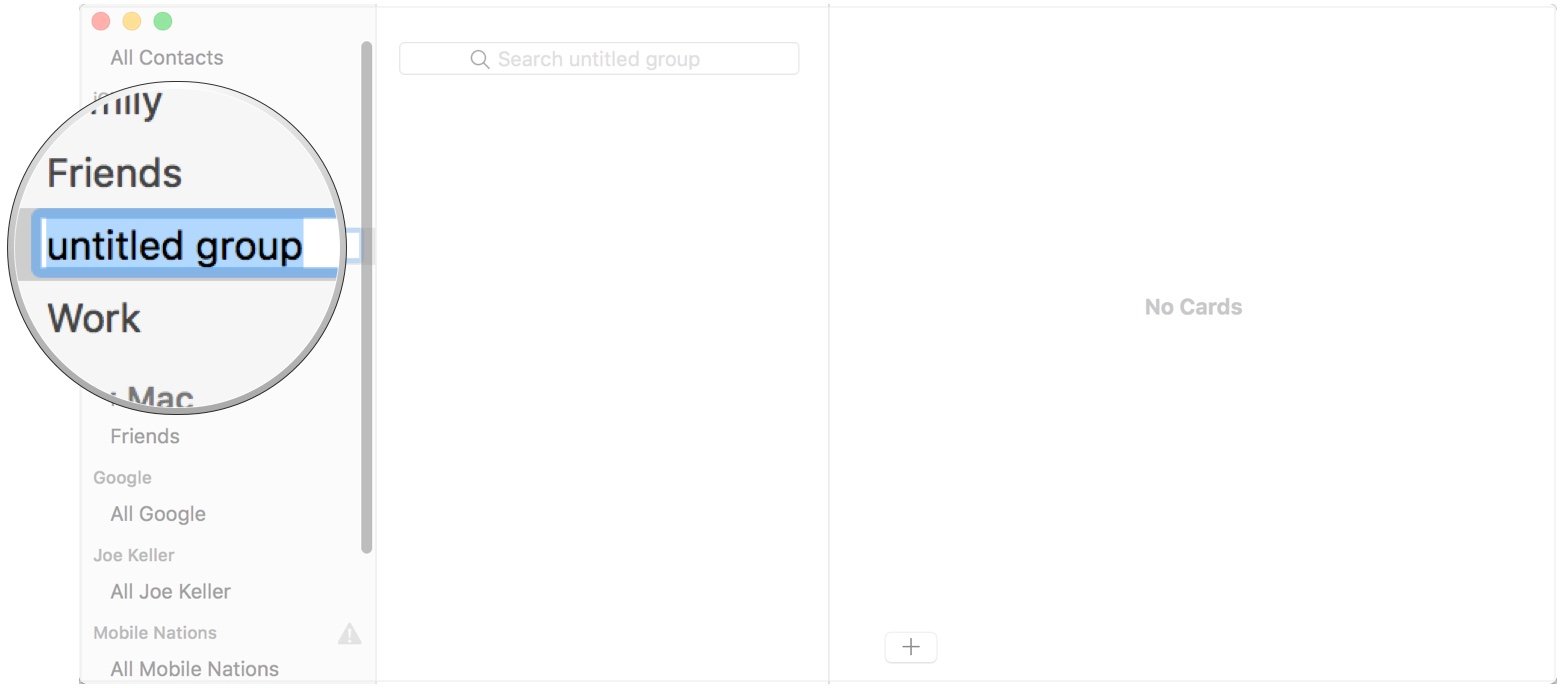
- Click New Group.

- Enter a name for your group.
How to add a picture to a contact
Sometimes it's faster to recognize a contact by a picture than it is a name, and it's always faster if you have both.
- Open Contacts on your Dock.
- Click on the contact to which you want to add a picture.

- Click Edit.
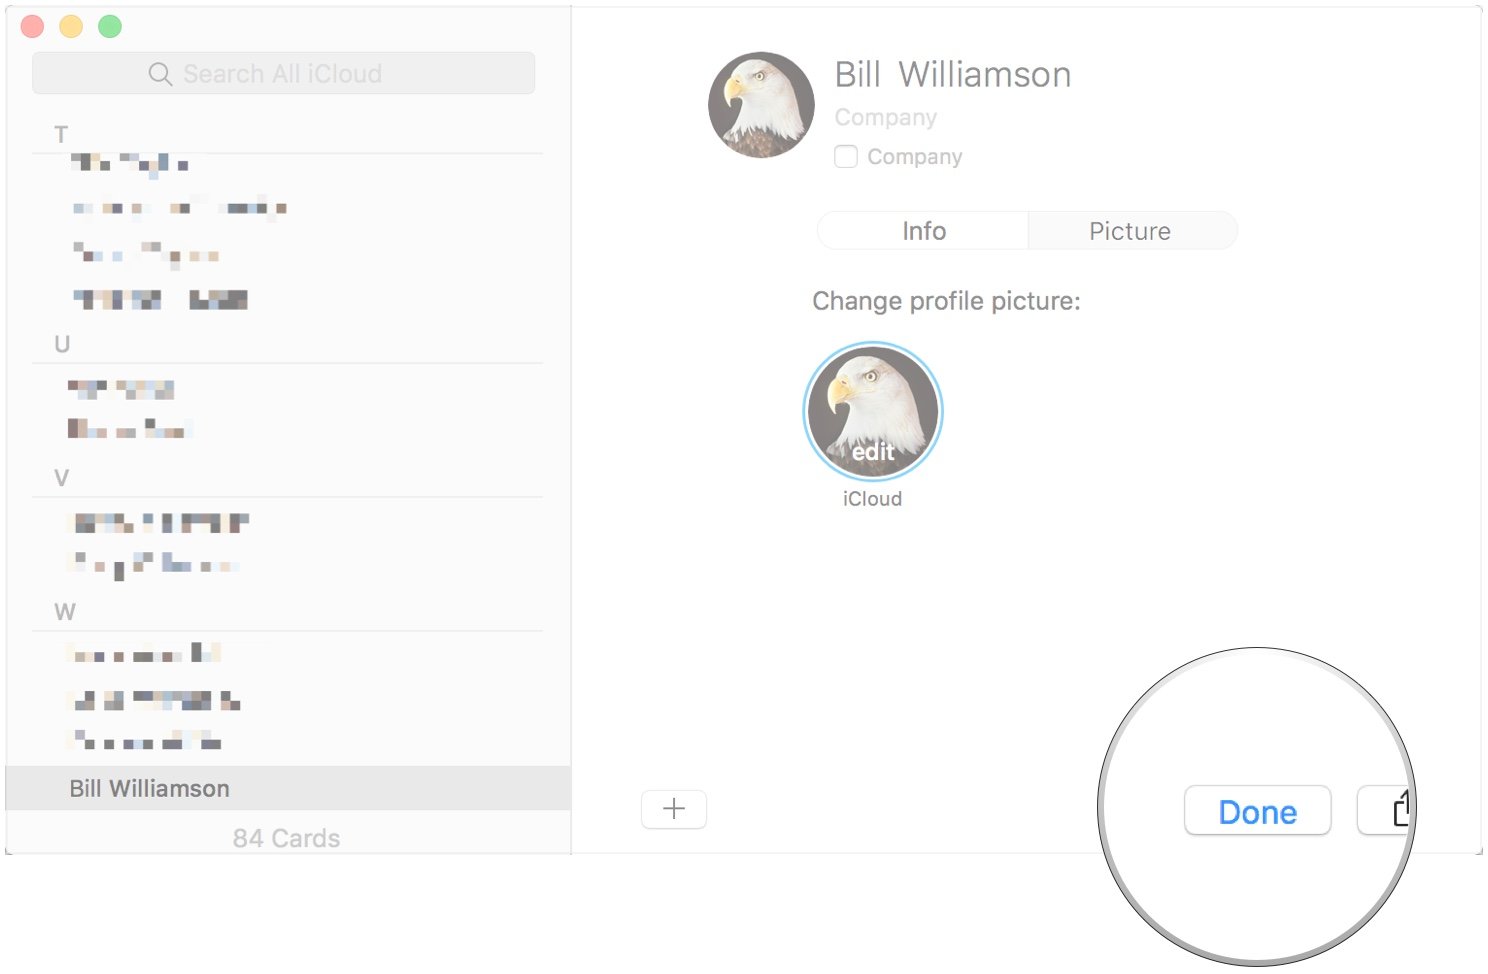
- Click the Edit button that appears when you hover your cursor over the contact photo circle.
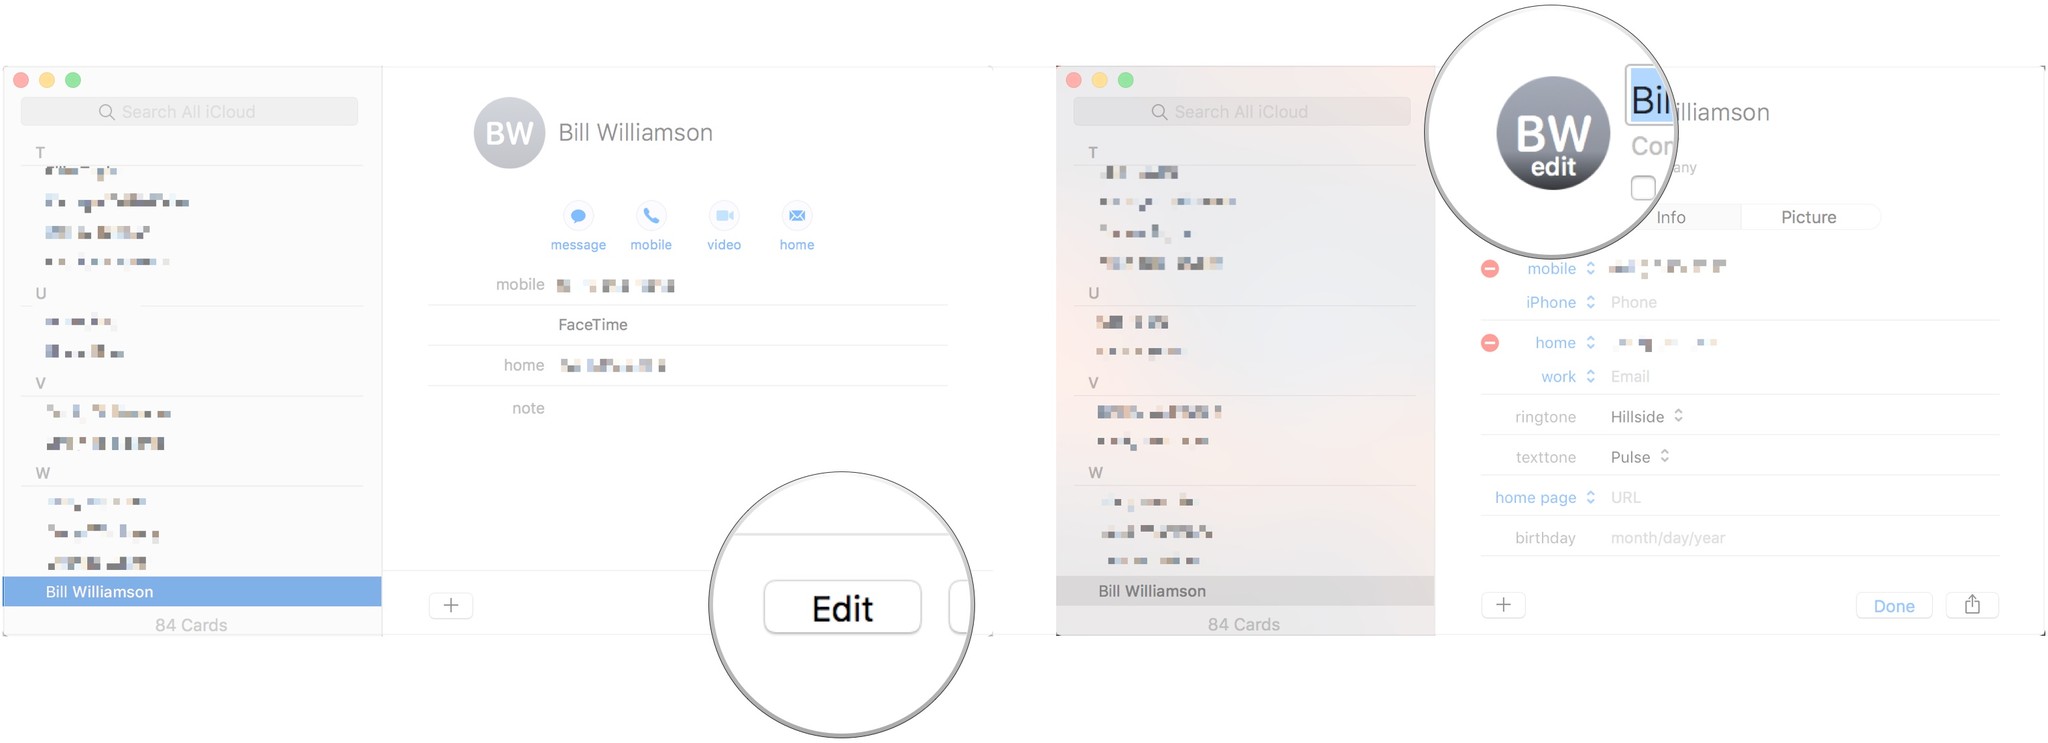
- Click the + button.
- Choose Default, Camera, or a section of your Photo Library as you image source.
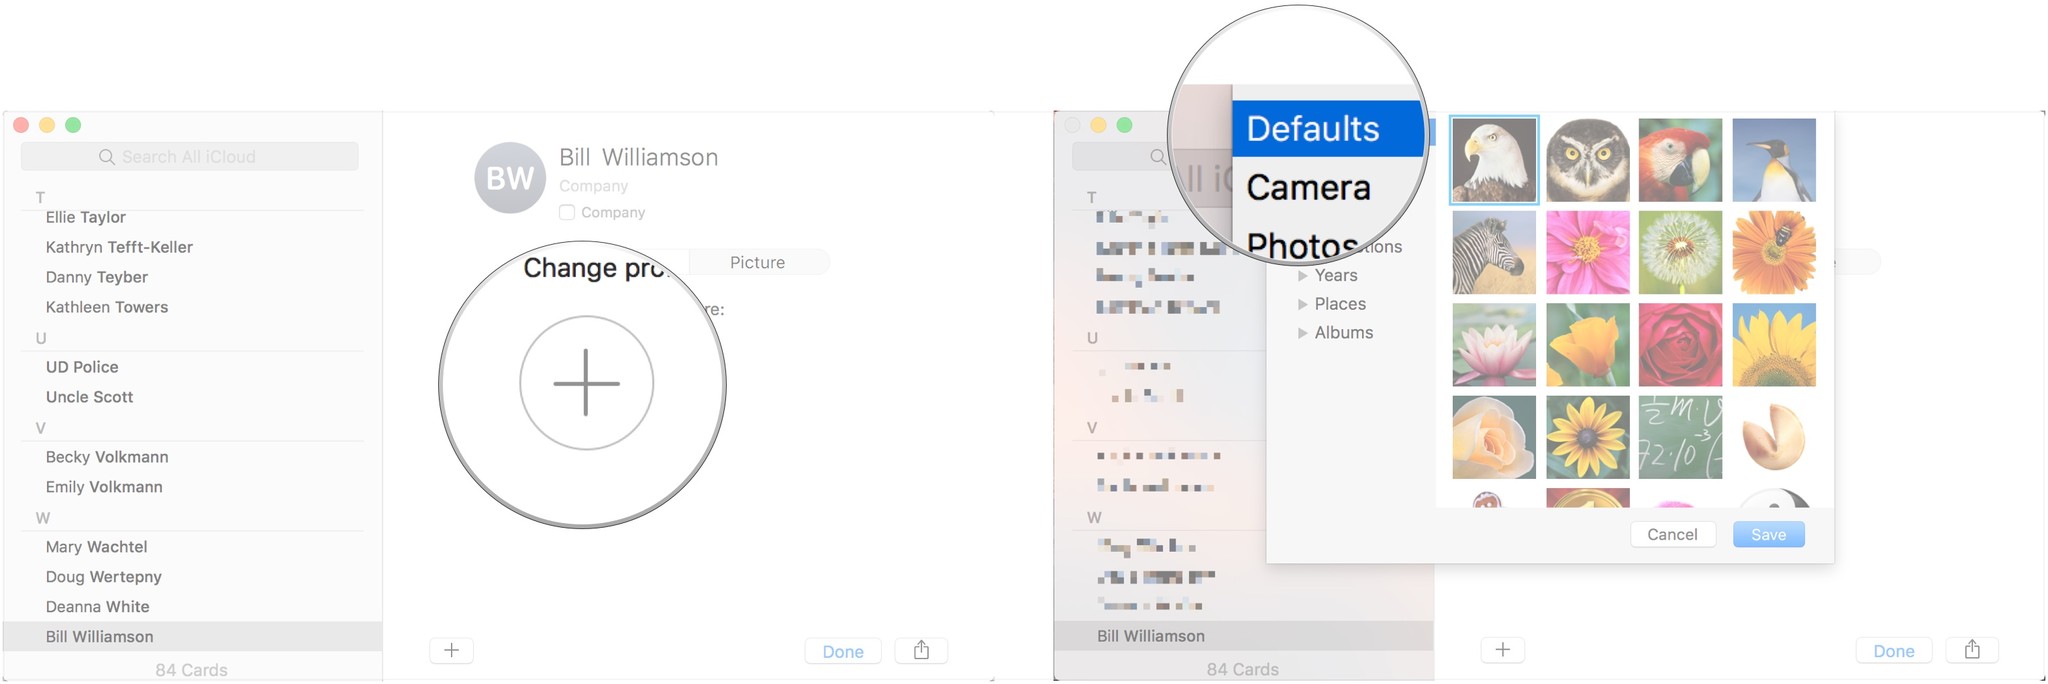
- Choose the profile image.
- Click Save.

- Click Done.
How to call, email or message from a contact card
Once you have all your contacts in place and set up the way you like, you can put them to use!
Master your iPhone in minutes
iMore offers spot-on advice and guidance from our team of experts, with decades of Apple device experience to lean on. Learn more with iMore!
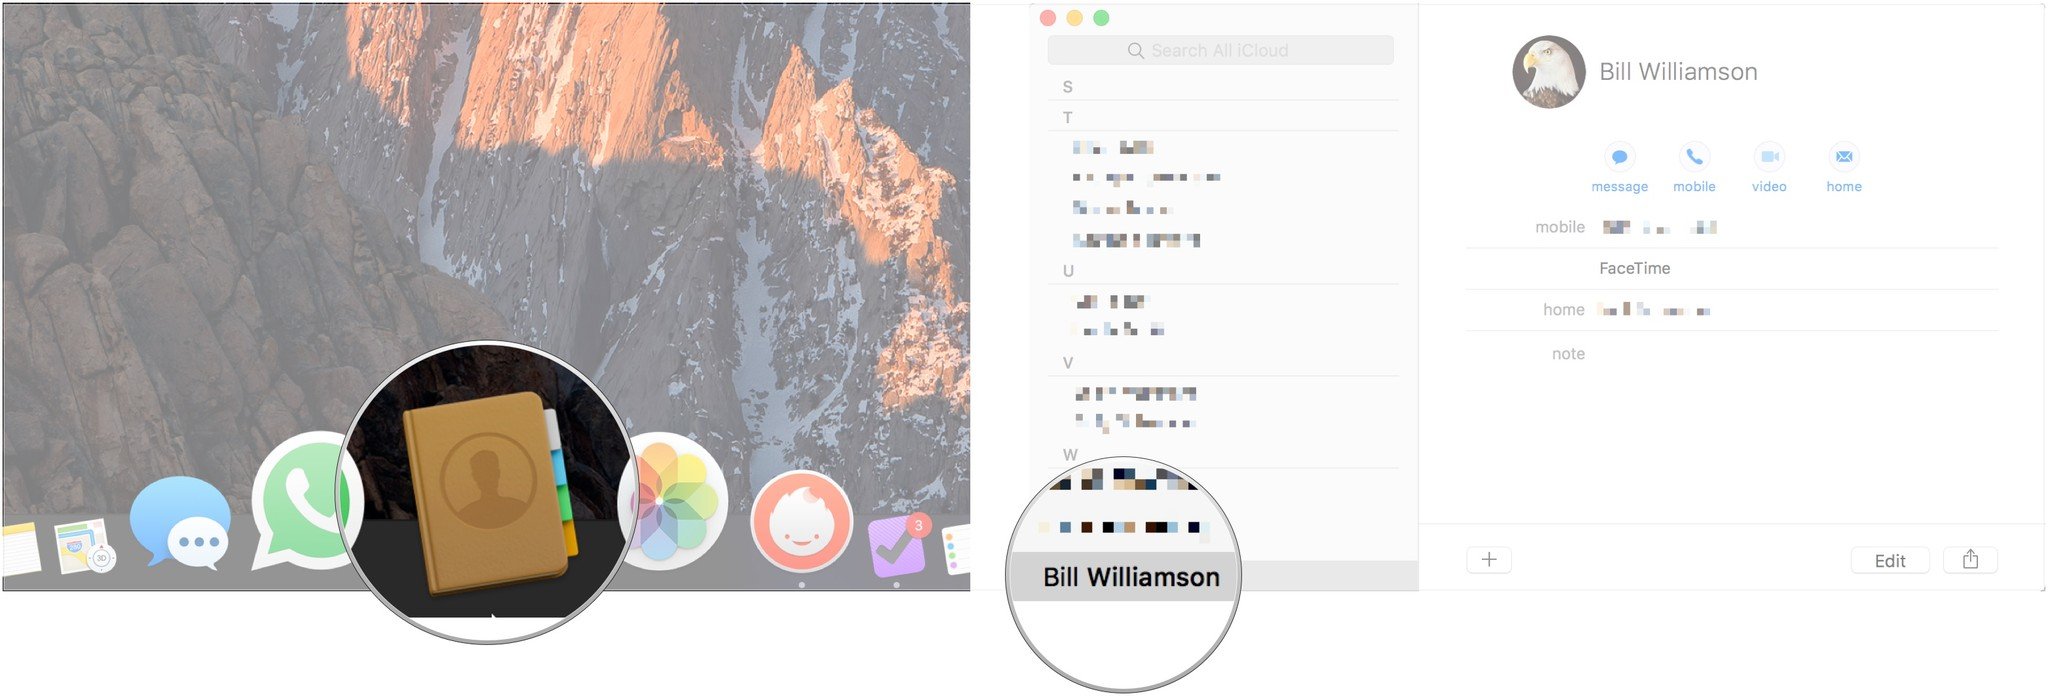
- Open Contacts from your Dock.
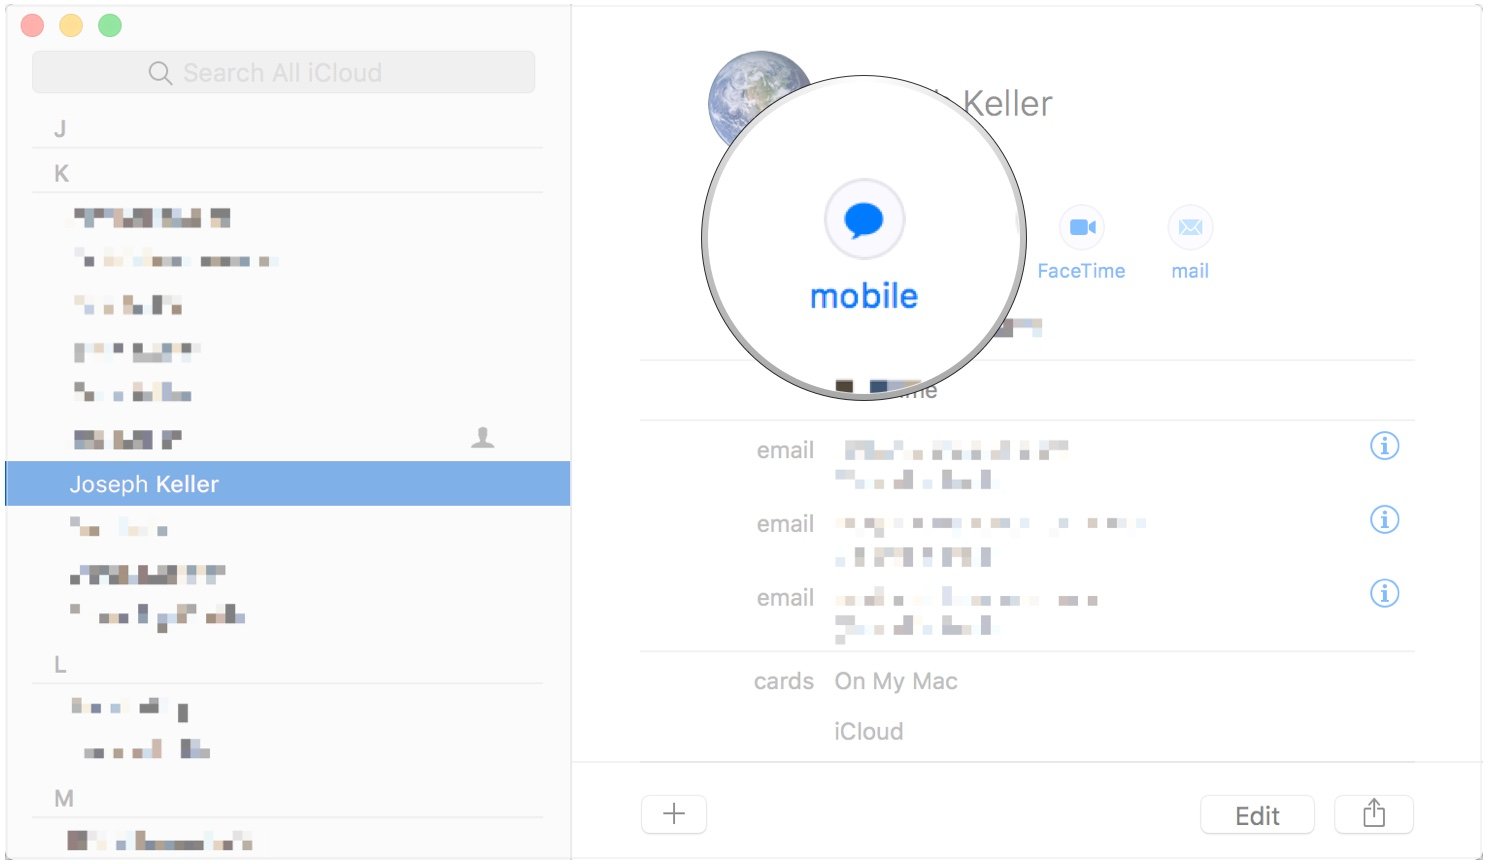
- Click on the contact you want to call or message.

- Click the Message, Call, Video chat, or Email buttons towards the top of the card to communicate with that contact using your preferred method.
How to delete a contact
No longer connected to a contact? Clean them out!
- Open Contacts from your Dock.
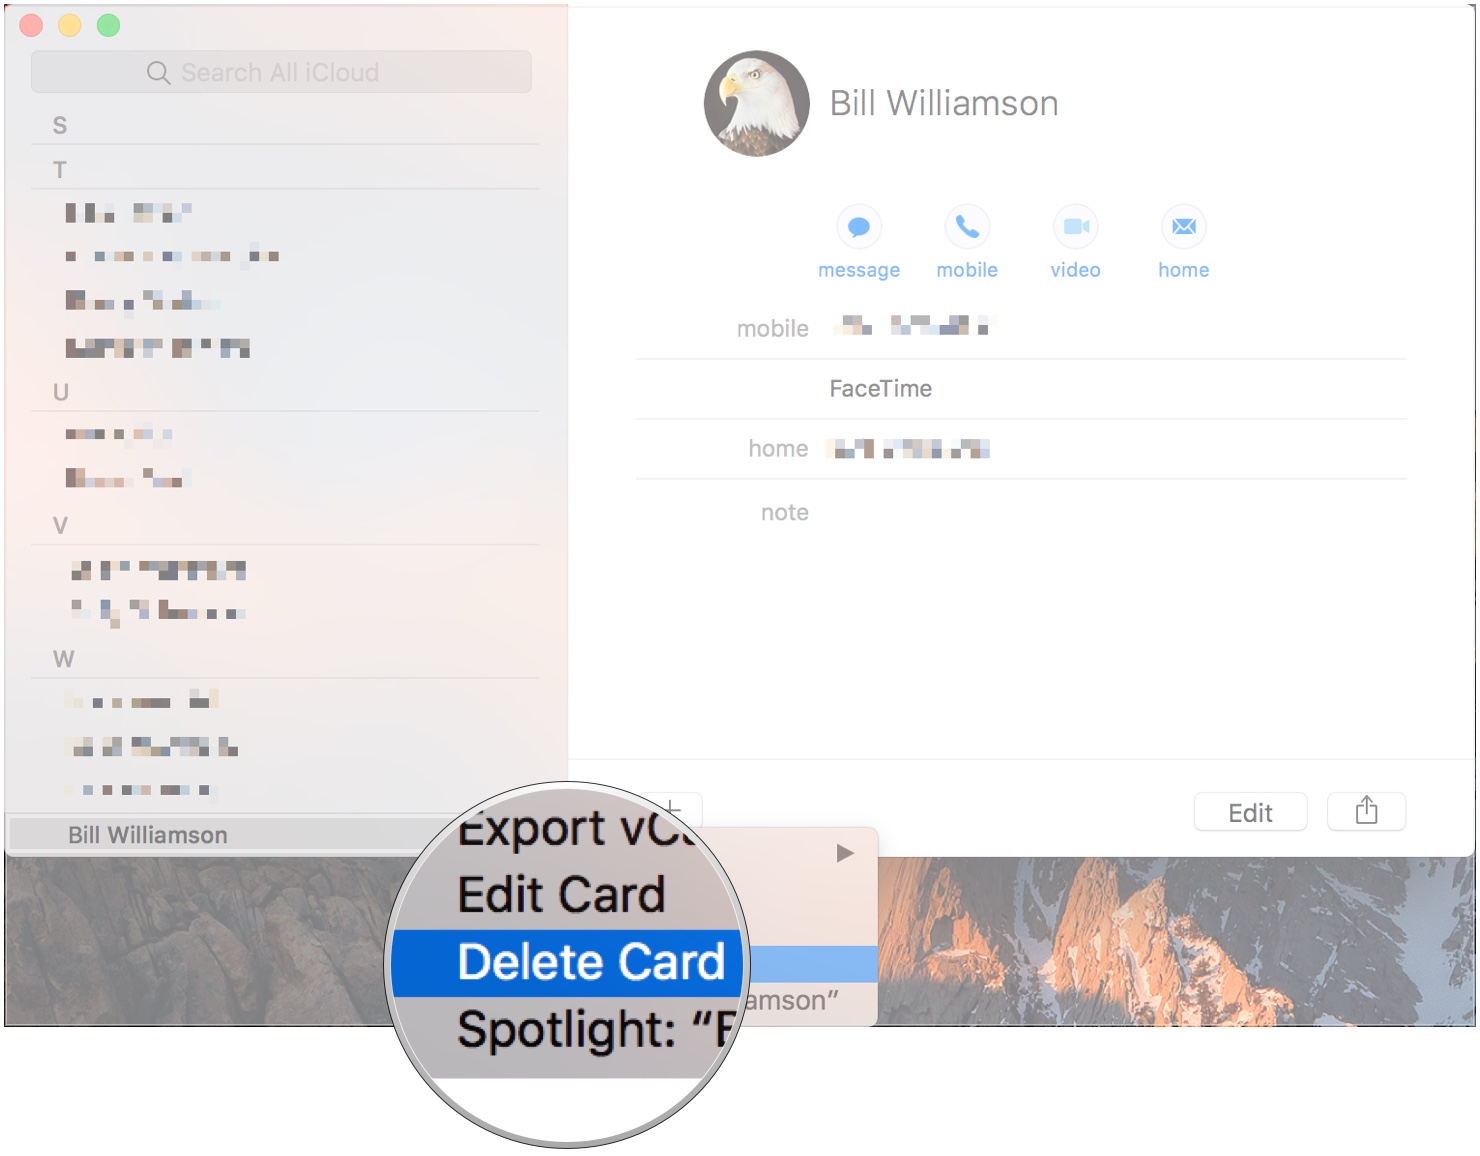
- Click on the contact you want to delete in the sidebar.
- Right-click on the contact's name in the sidebar and select Delete from the drop down menu. You can also select Edit from the Menu bar and click on Delete Card.
How to share a contact card
If you're asked for contact information, rather than writing it all out, simply share the card!
- Open Contacts from your Dock.
- Click on the contact whose card you want to share.
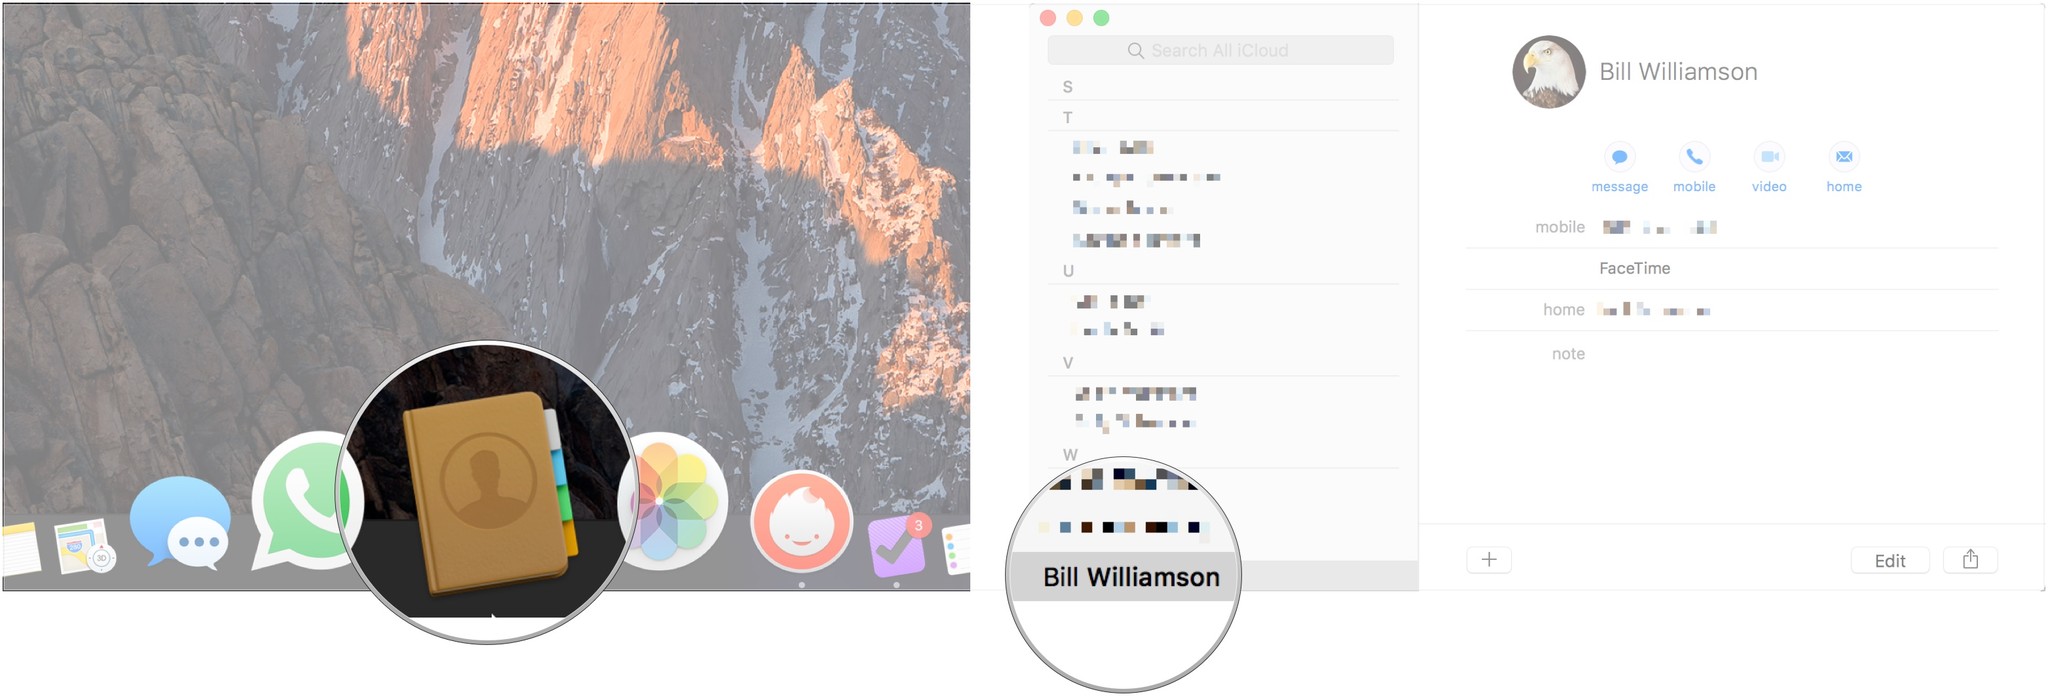
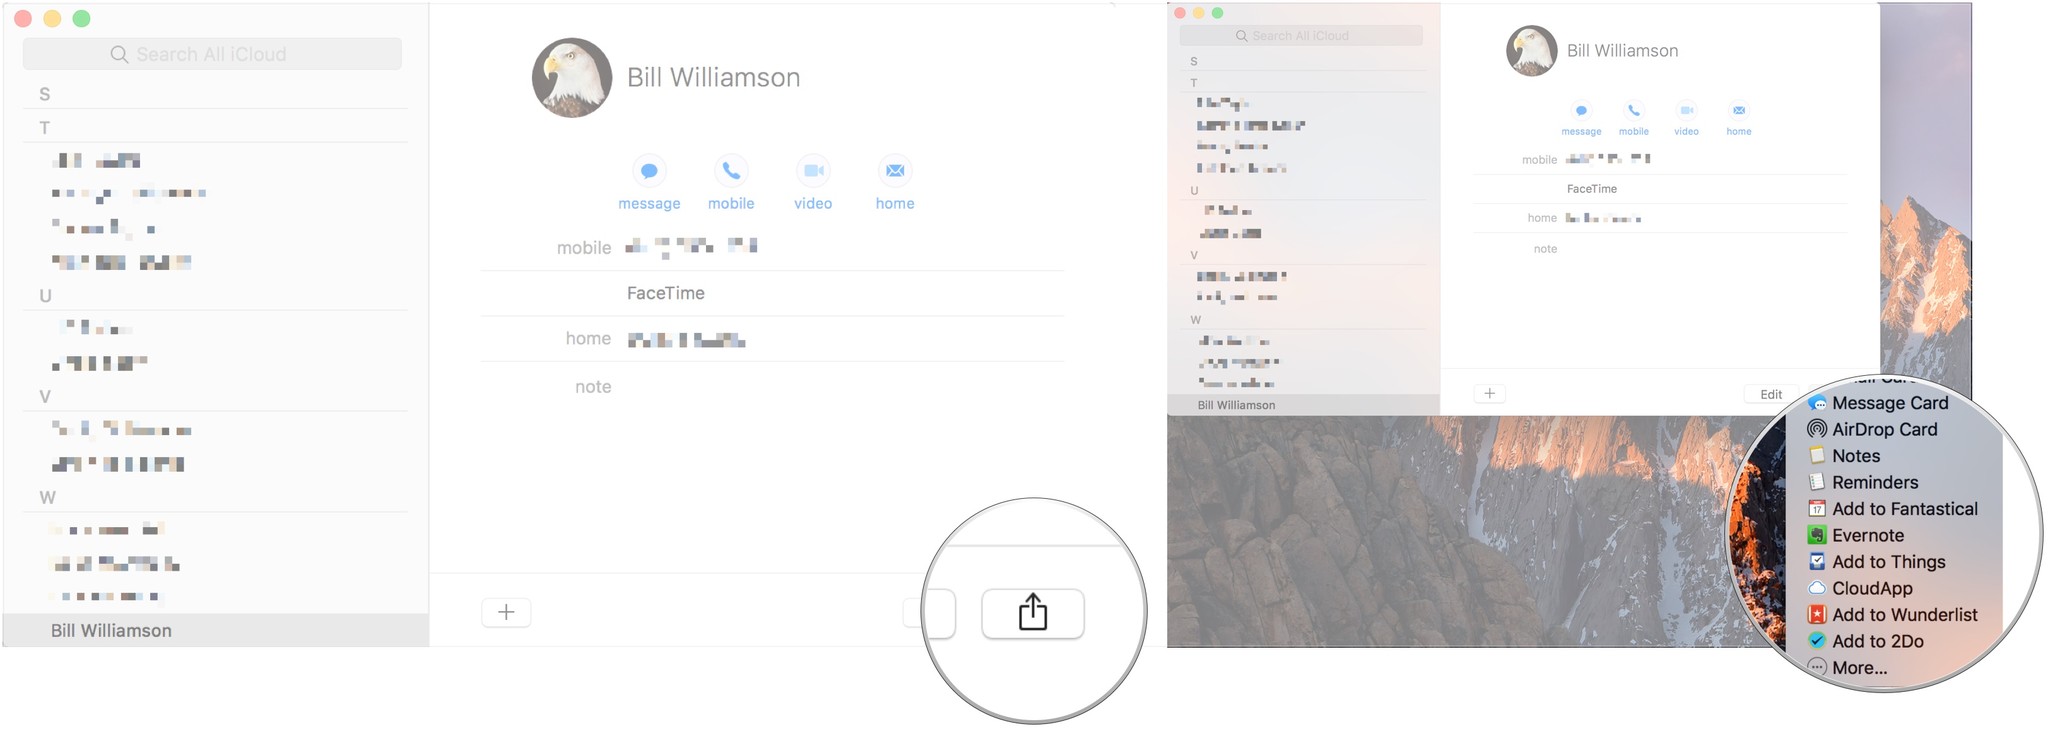
- Click the Share button in the bottom-right corner of the contact card.
- Choose how you would like to share the card.
Joseph Keller is the former Editor in Chief of iMore. An Apple user for almost 20 years, he spends his time learning the ins and outs of iOS and macOS, always finding ways of getting the most out of his iPhone, iPad, Apple Watch, and Mac.

