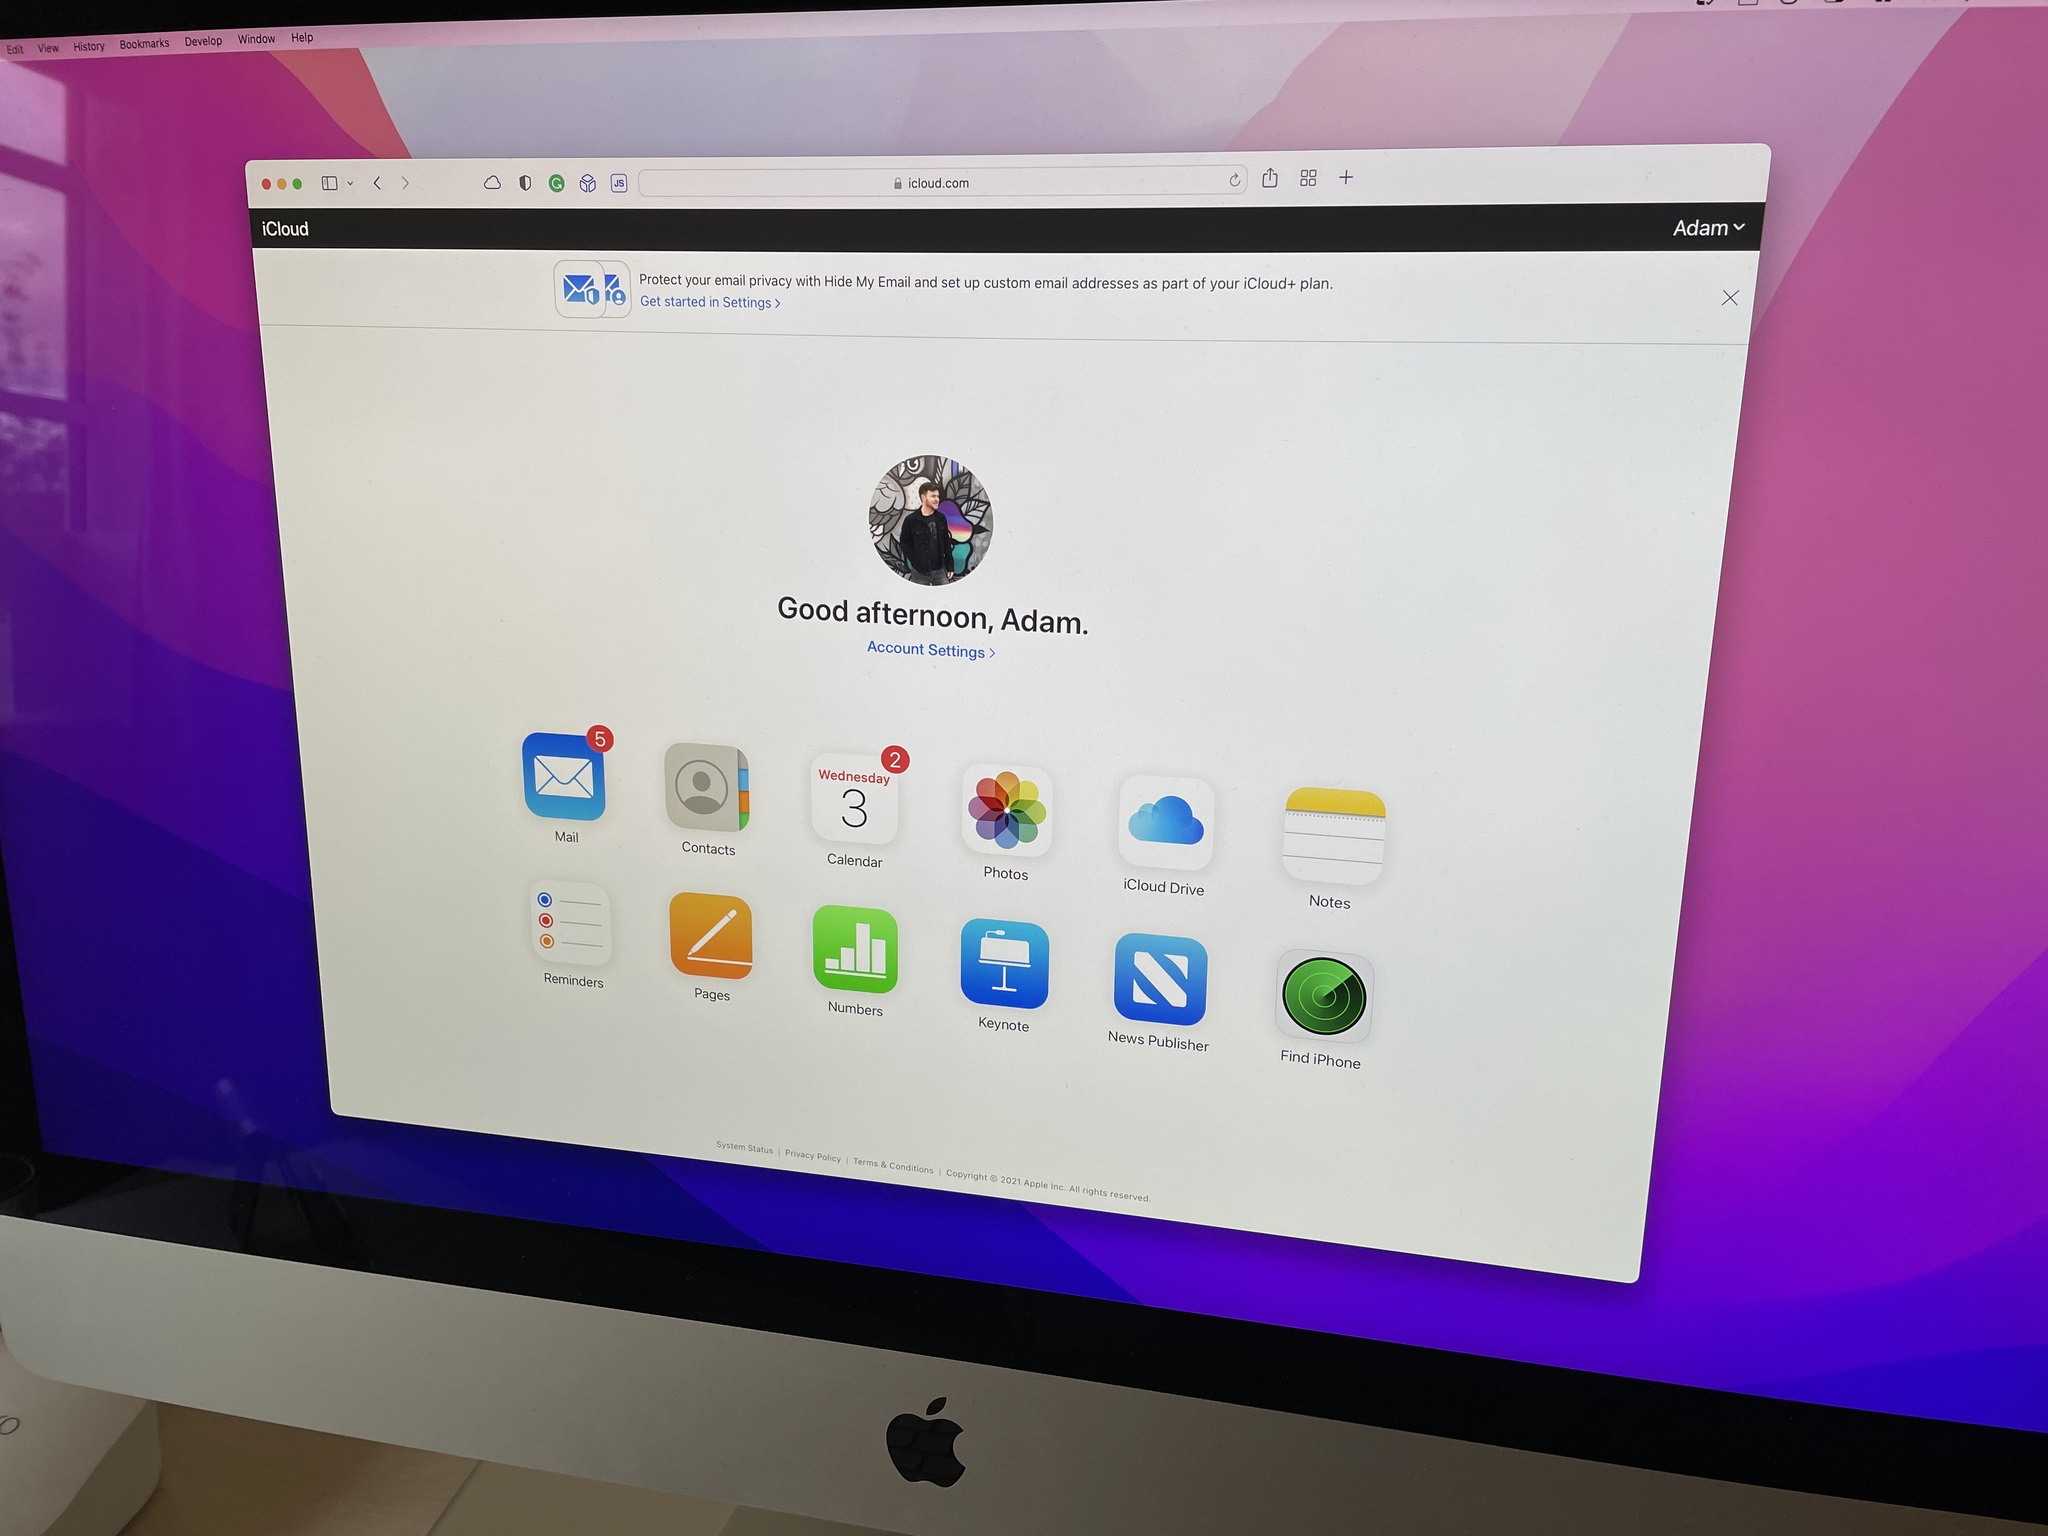
In 2021, Apple rebranded paid iCloud accounts as iCloud+. Though pricing didn't change, the new plus-branded accounts gained some new features, including the ability to use a custom email domain with iCloud Mail.
If you already have a domain that you own and want to use with iCloud Mail, we're here to show you how to get it set up.
How to add a custom email domain for iCloud Mail
To set up a custom email domain in iCloud Mail, you must first ensure you are an iCloud+ subscriber. If you pay for iCloud storage or subscribe to the Apple One bundle, then you already are.
You also need to have Apple ID two-factor authentication enabled and a primary iCloud email address set up. Further, the domain name you want to use must be owned by you.
If you check the above boxes, you can then follow these instructions to add a custom email domain to iCloud Mail.
- Open iCloud.com and log in.
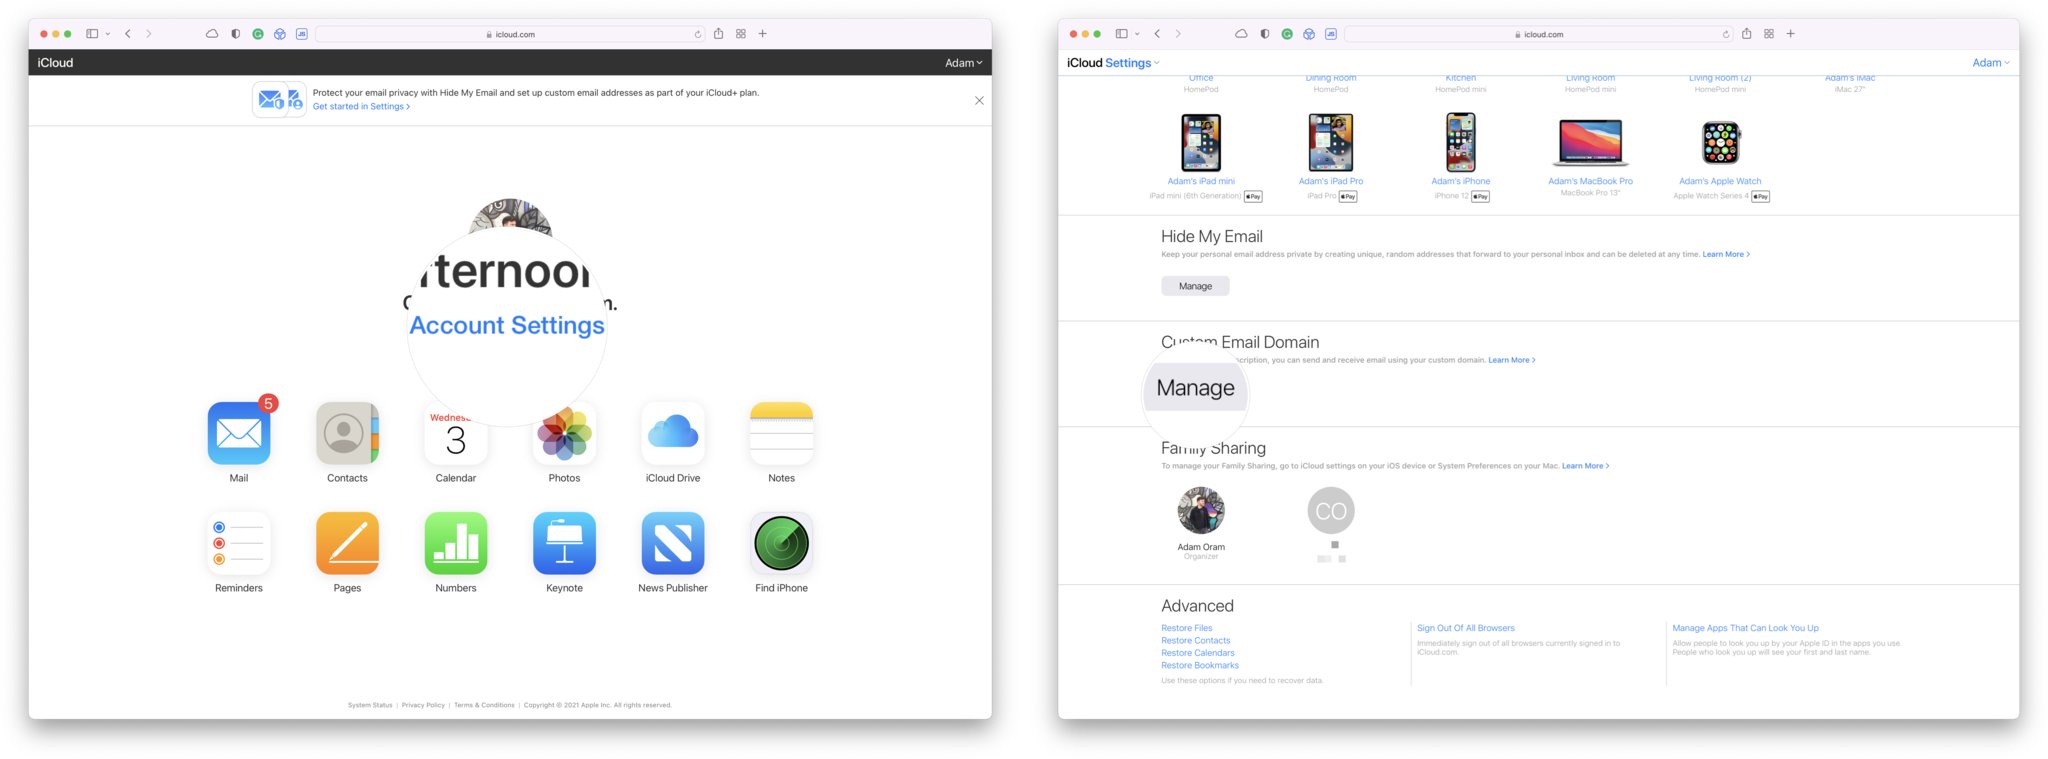
- Click on Account Settings.
- Scroll down and click Manage in the Custom Email Domain section.
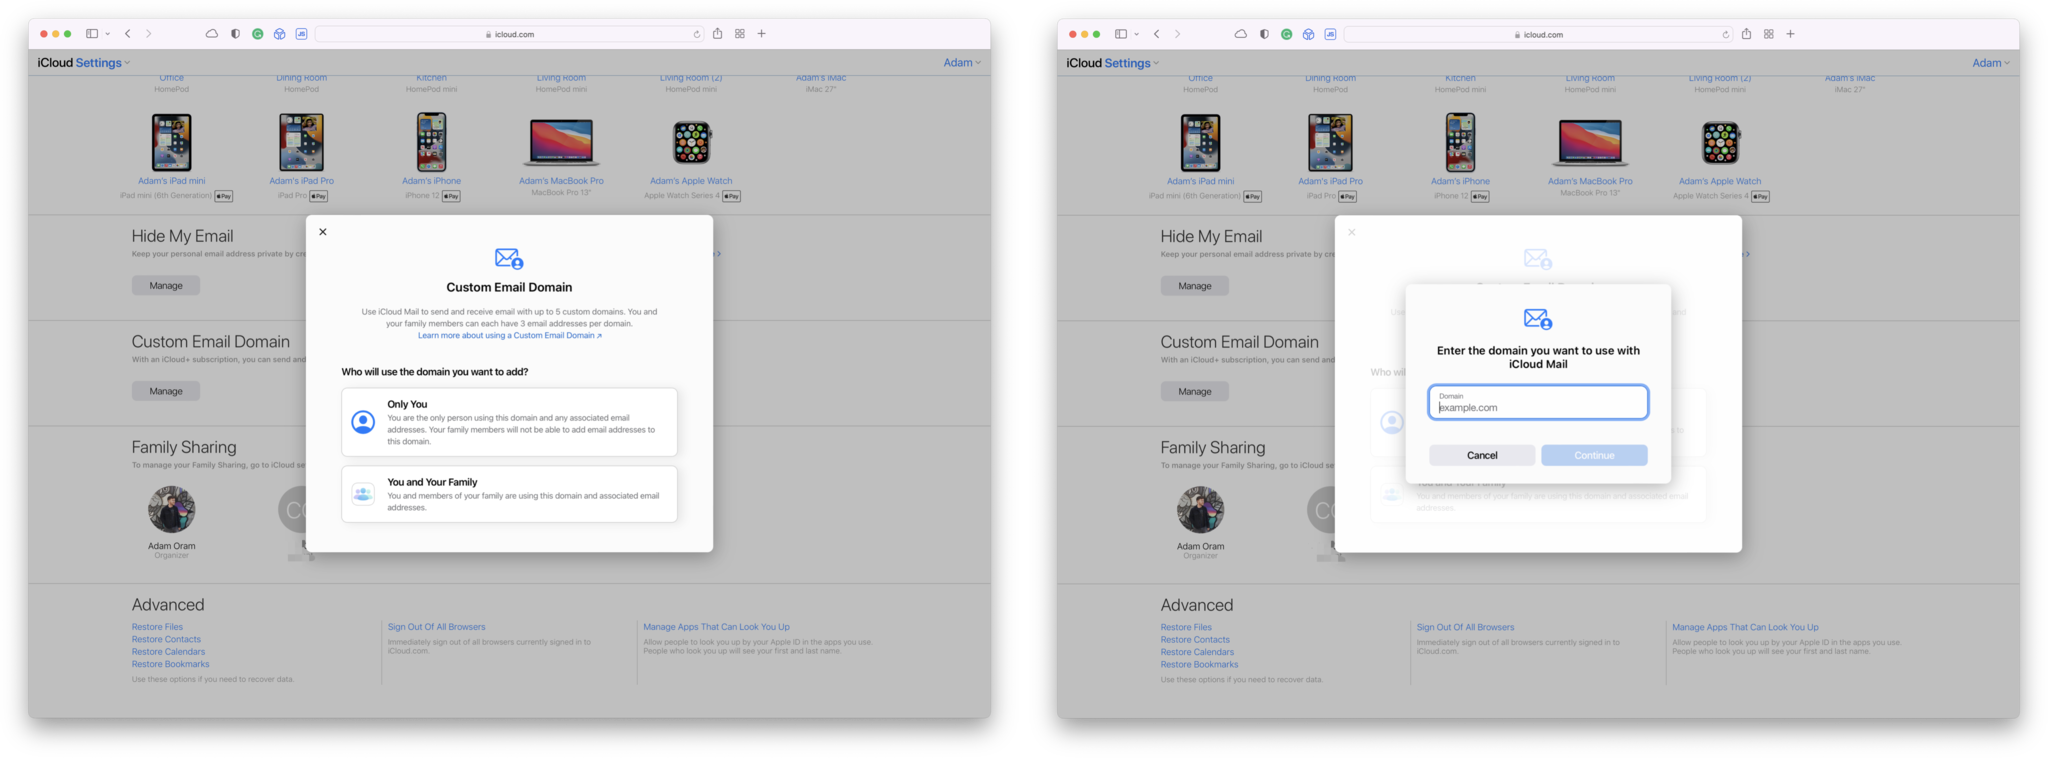
- Indicate who will use the domain by selecting either Only You or You and Your Family.
- Enter the domain name and click Continue.
- If you have existing email addresses that use this domain, add them when prompted.
- Click View and follow the onscreen instructions to finish setting up your domain.
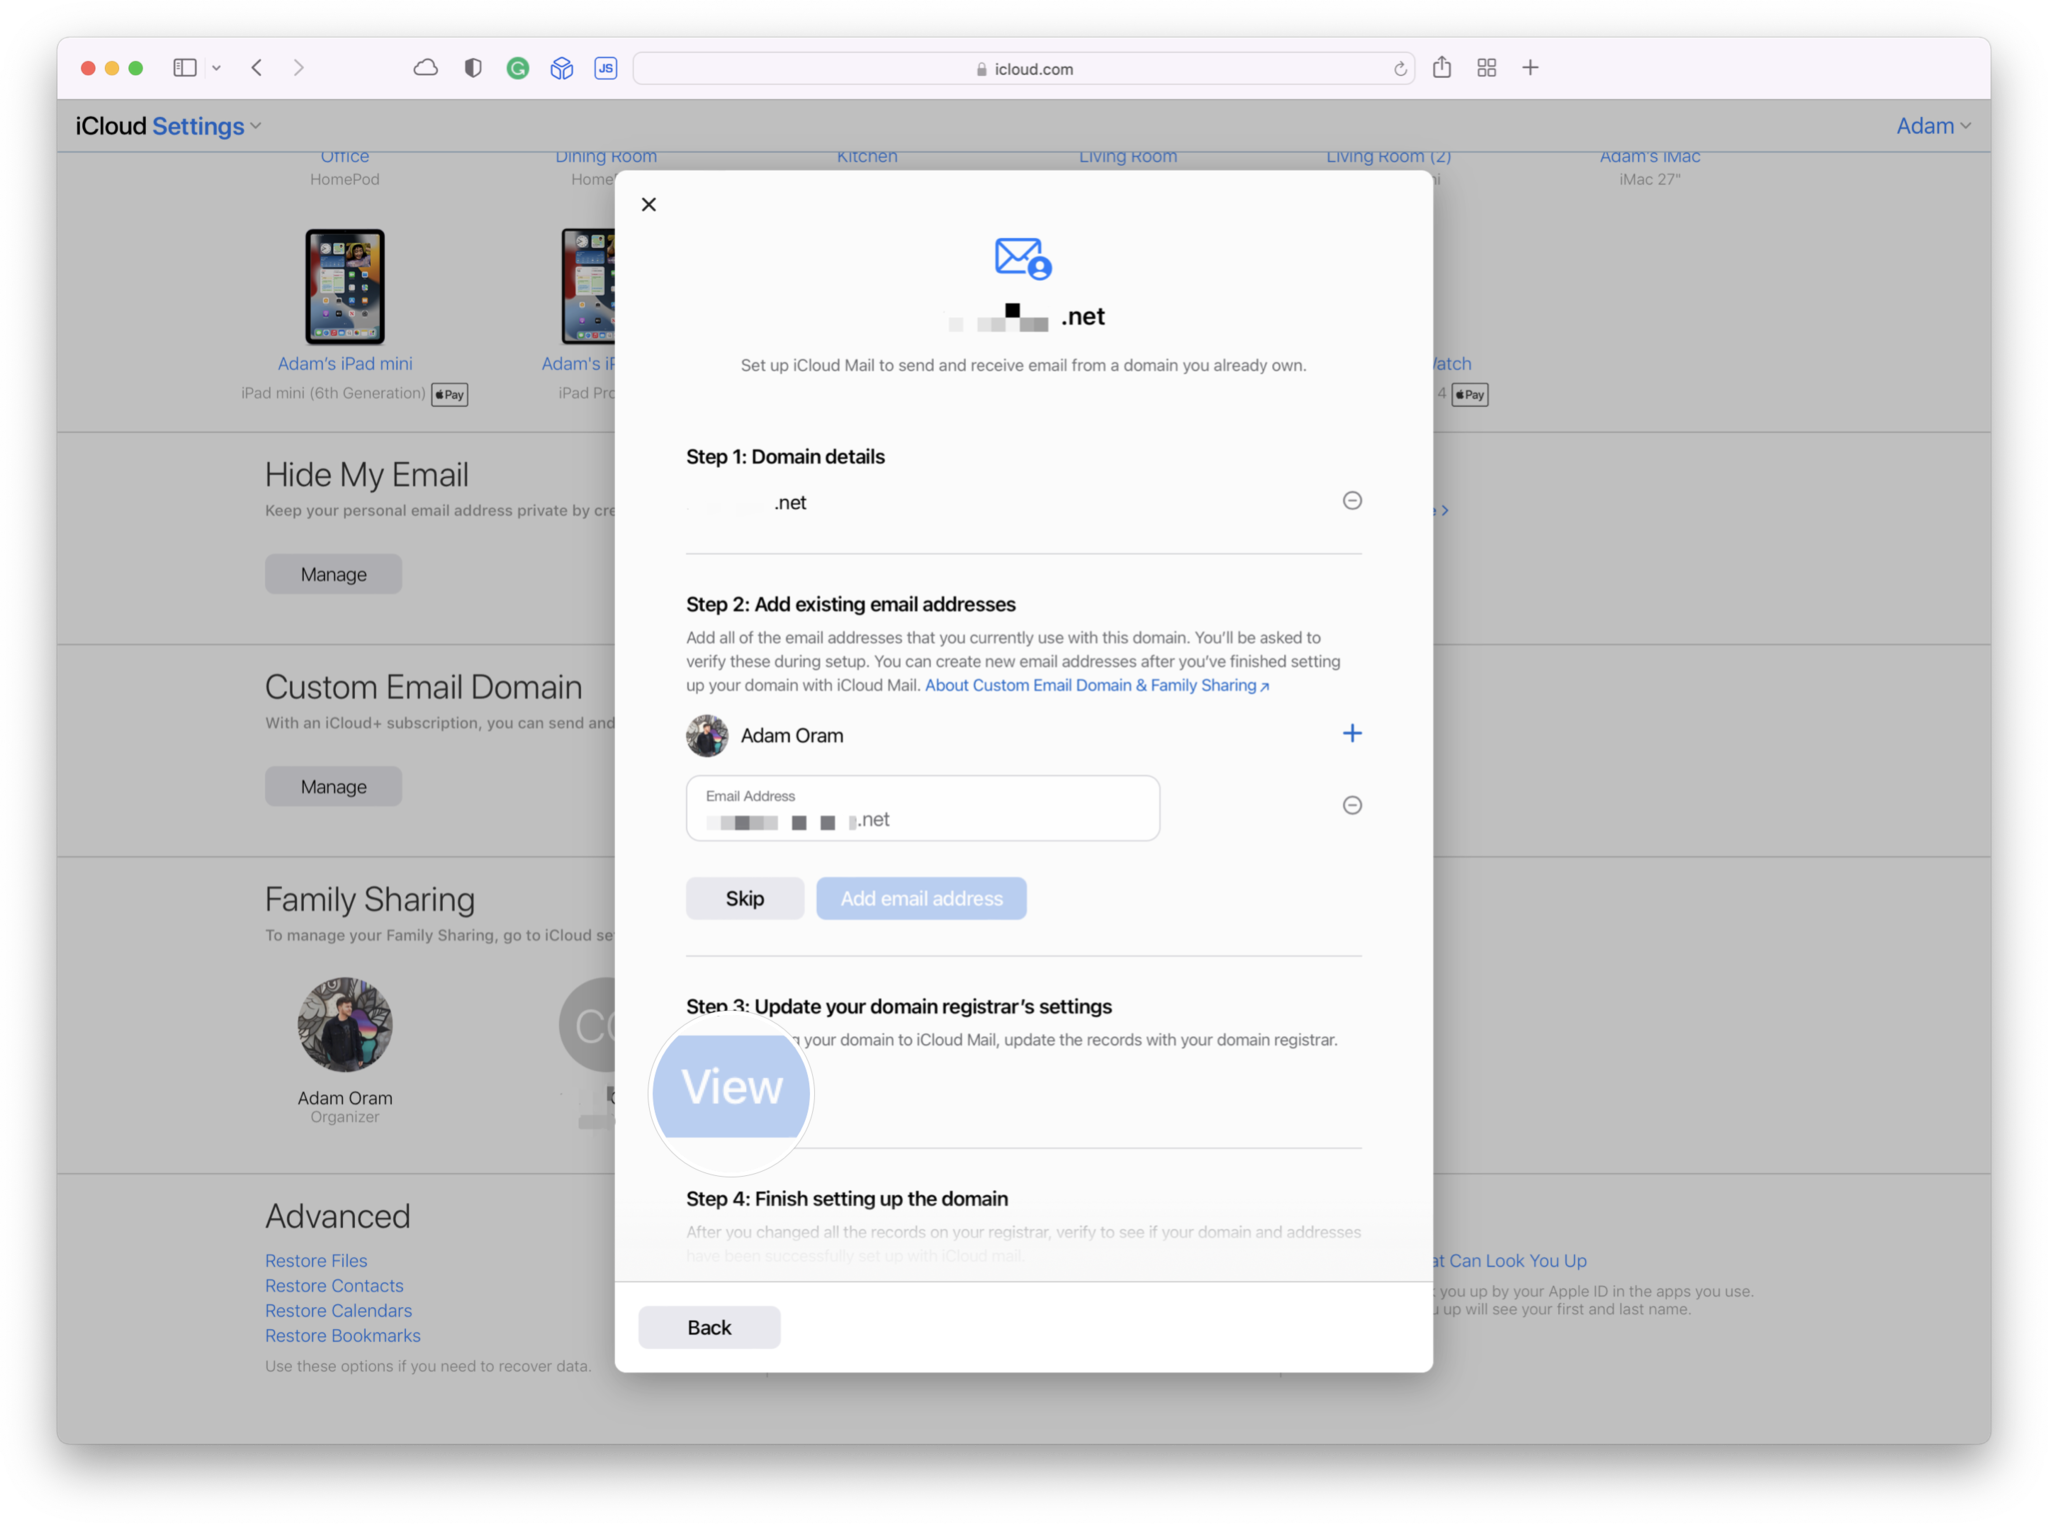
Depending on the domain, you may be prompted to sign in to your domain registrar to update your records automatically. Alternatively, you may need to manually update your DNS records.
- Choose a default email address to use when you send iCloud Mail.
If you want to share the custom domain name with your family members, you must have Family Sharing set up. In addition, each member of your family who wants to use the custom domain must also have two-factor authentication turned on, as well as have a primary iCloud email address set up.
Master your iPhone in minutes
iMore offers spot-on advice and guidance from our team of experts, with decades of Apple device experience to lean on. Learn more with iMore!
How to stop using a custom email domain for iCloud Mail
- Open iCloud.com and log in.
- Click on Account Settings.
- Scroll down and click Manage in the Custom Email Domain section.

- Select the domain you want to stop using.
- Scroll to the bottom, click Stop using this domain, and then follow the onscreen instructions.
How to add a custom email domain for iCloud Mail on iOS
Though the custom iCloud Mail domain feature is live on the iCloud.com site, the feature hasn't officially shipped to iPhone and iPad users just yet. That being said, the iOS 15.4 beta does include the ability to set up a custom email domain for iCloud so we're including the steps below.
Apple occasionally offers updates to iOS, iPadOS, watchOS, tvOS, and macOS as closed developer previews or public betas. While the betas contain new features, they also contain pre-release bugs that can prevent the normal use of your iPhone, iPad, Apple Watch, Apple TV, or Mac, and are not intended for everyday use on a primary device. That's why we strongly recommend staying away from developer previews unless you need them for software development, and using the public betas with caution. If you depend on your devices, wait for the final release.
Note that you'll only have the option to add a custom email domain if you're running the latest iOS 15.4 developer or public beta release and that these instructions may change during the beta process.
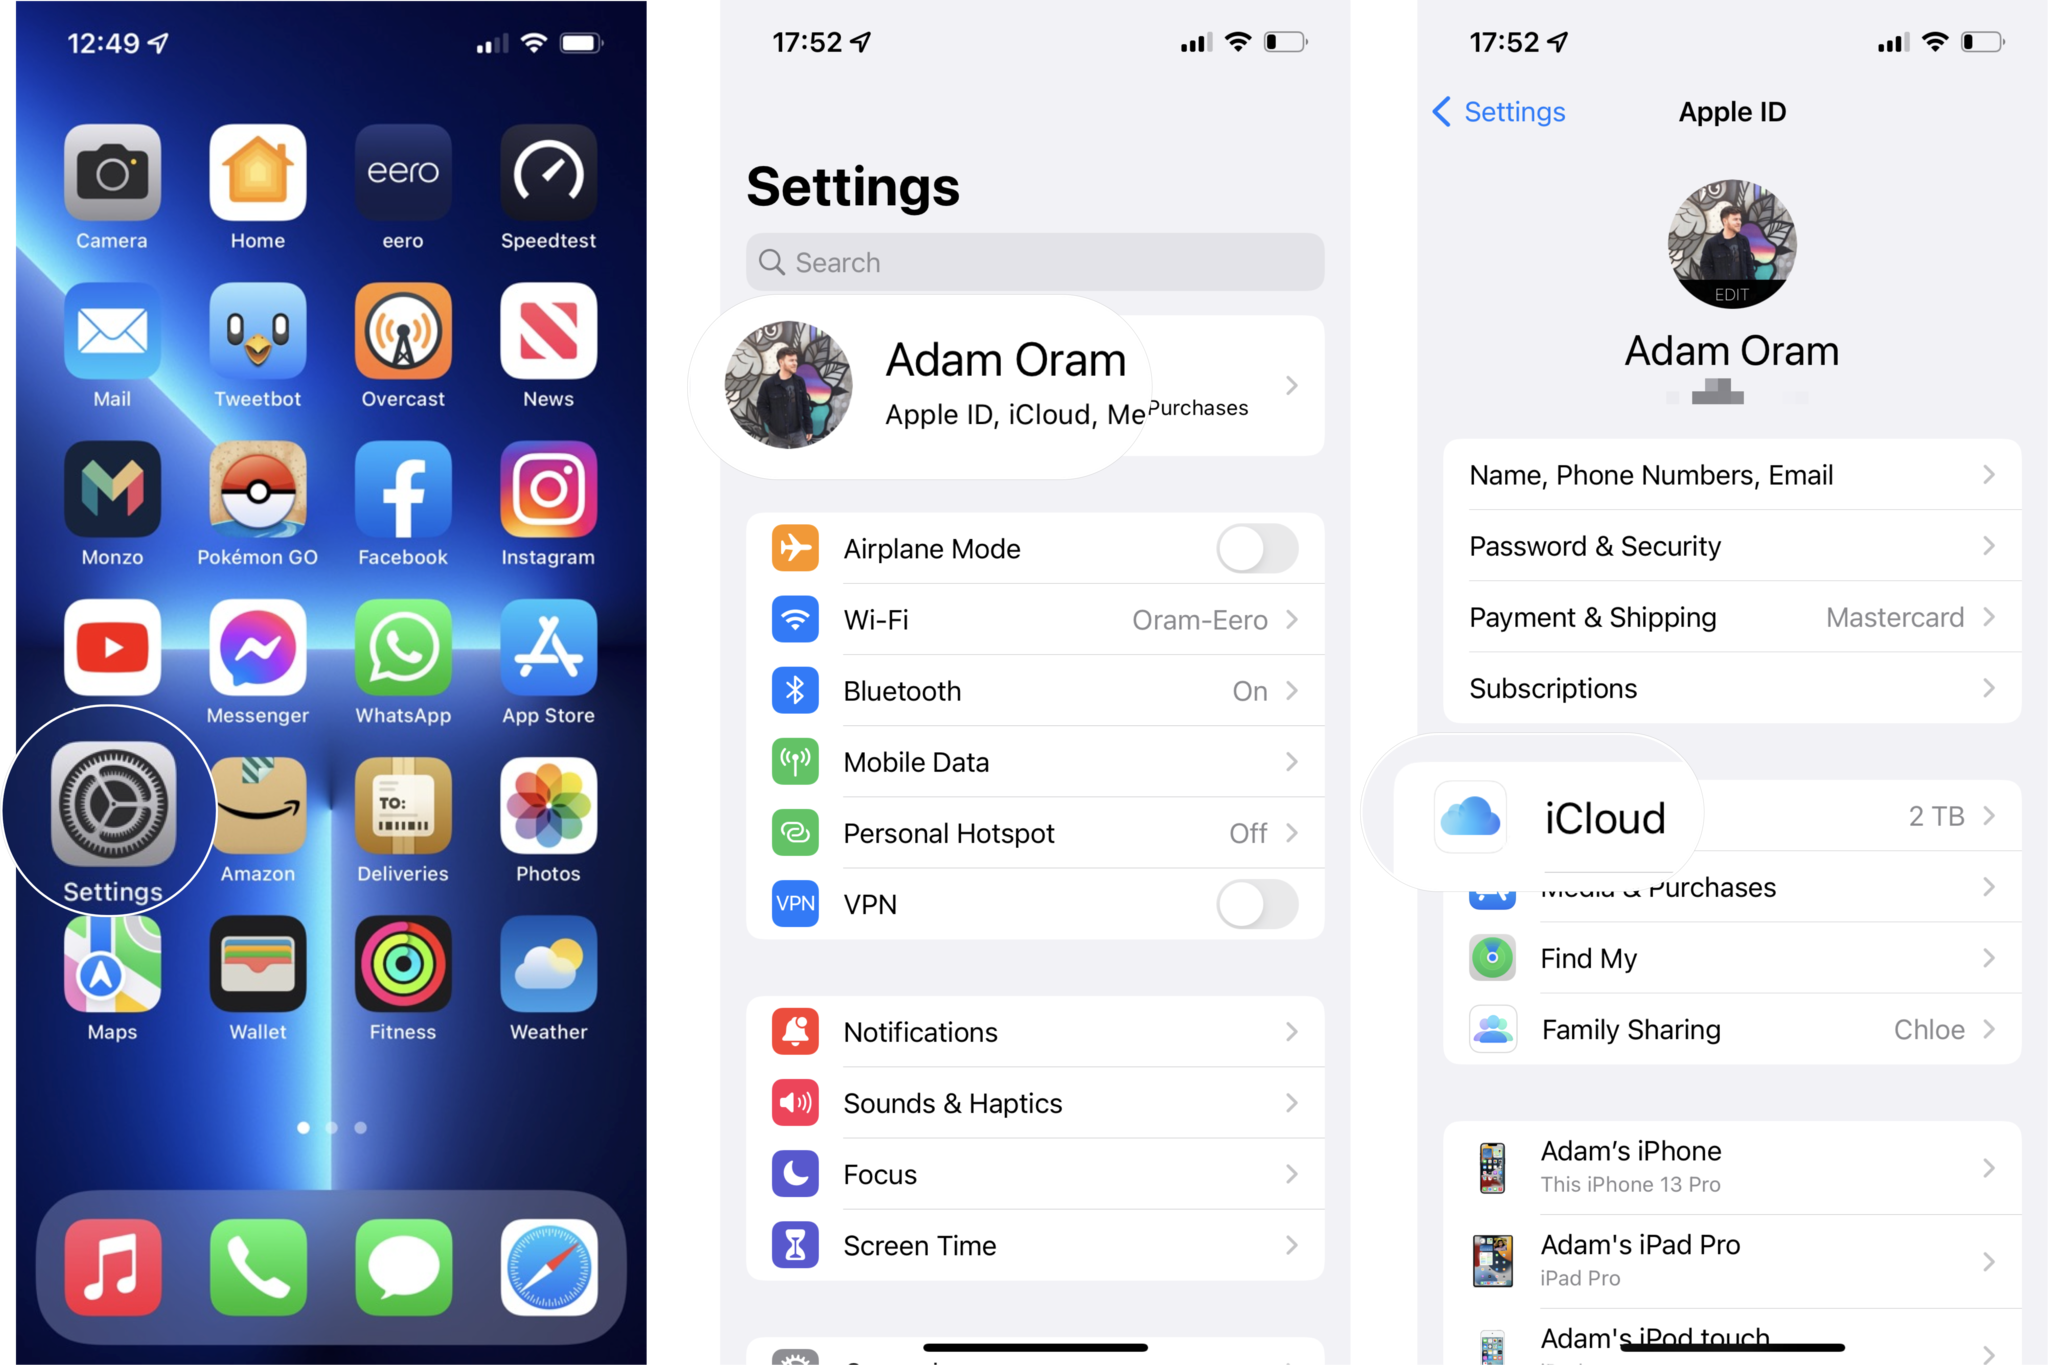
- Open Settings.
- Tap Your Name.
- Tap iCloud.
- Tap iCloud Mail.
- Tap Custom Email Domain.
- Tap Add Domain and fill out the details for your domain as instructed.
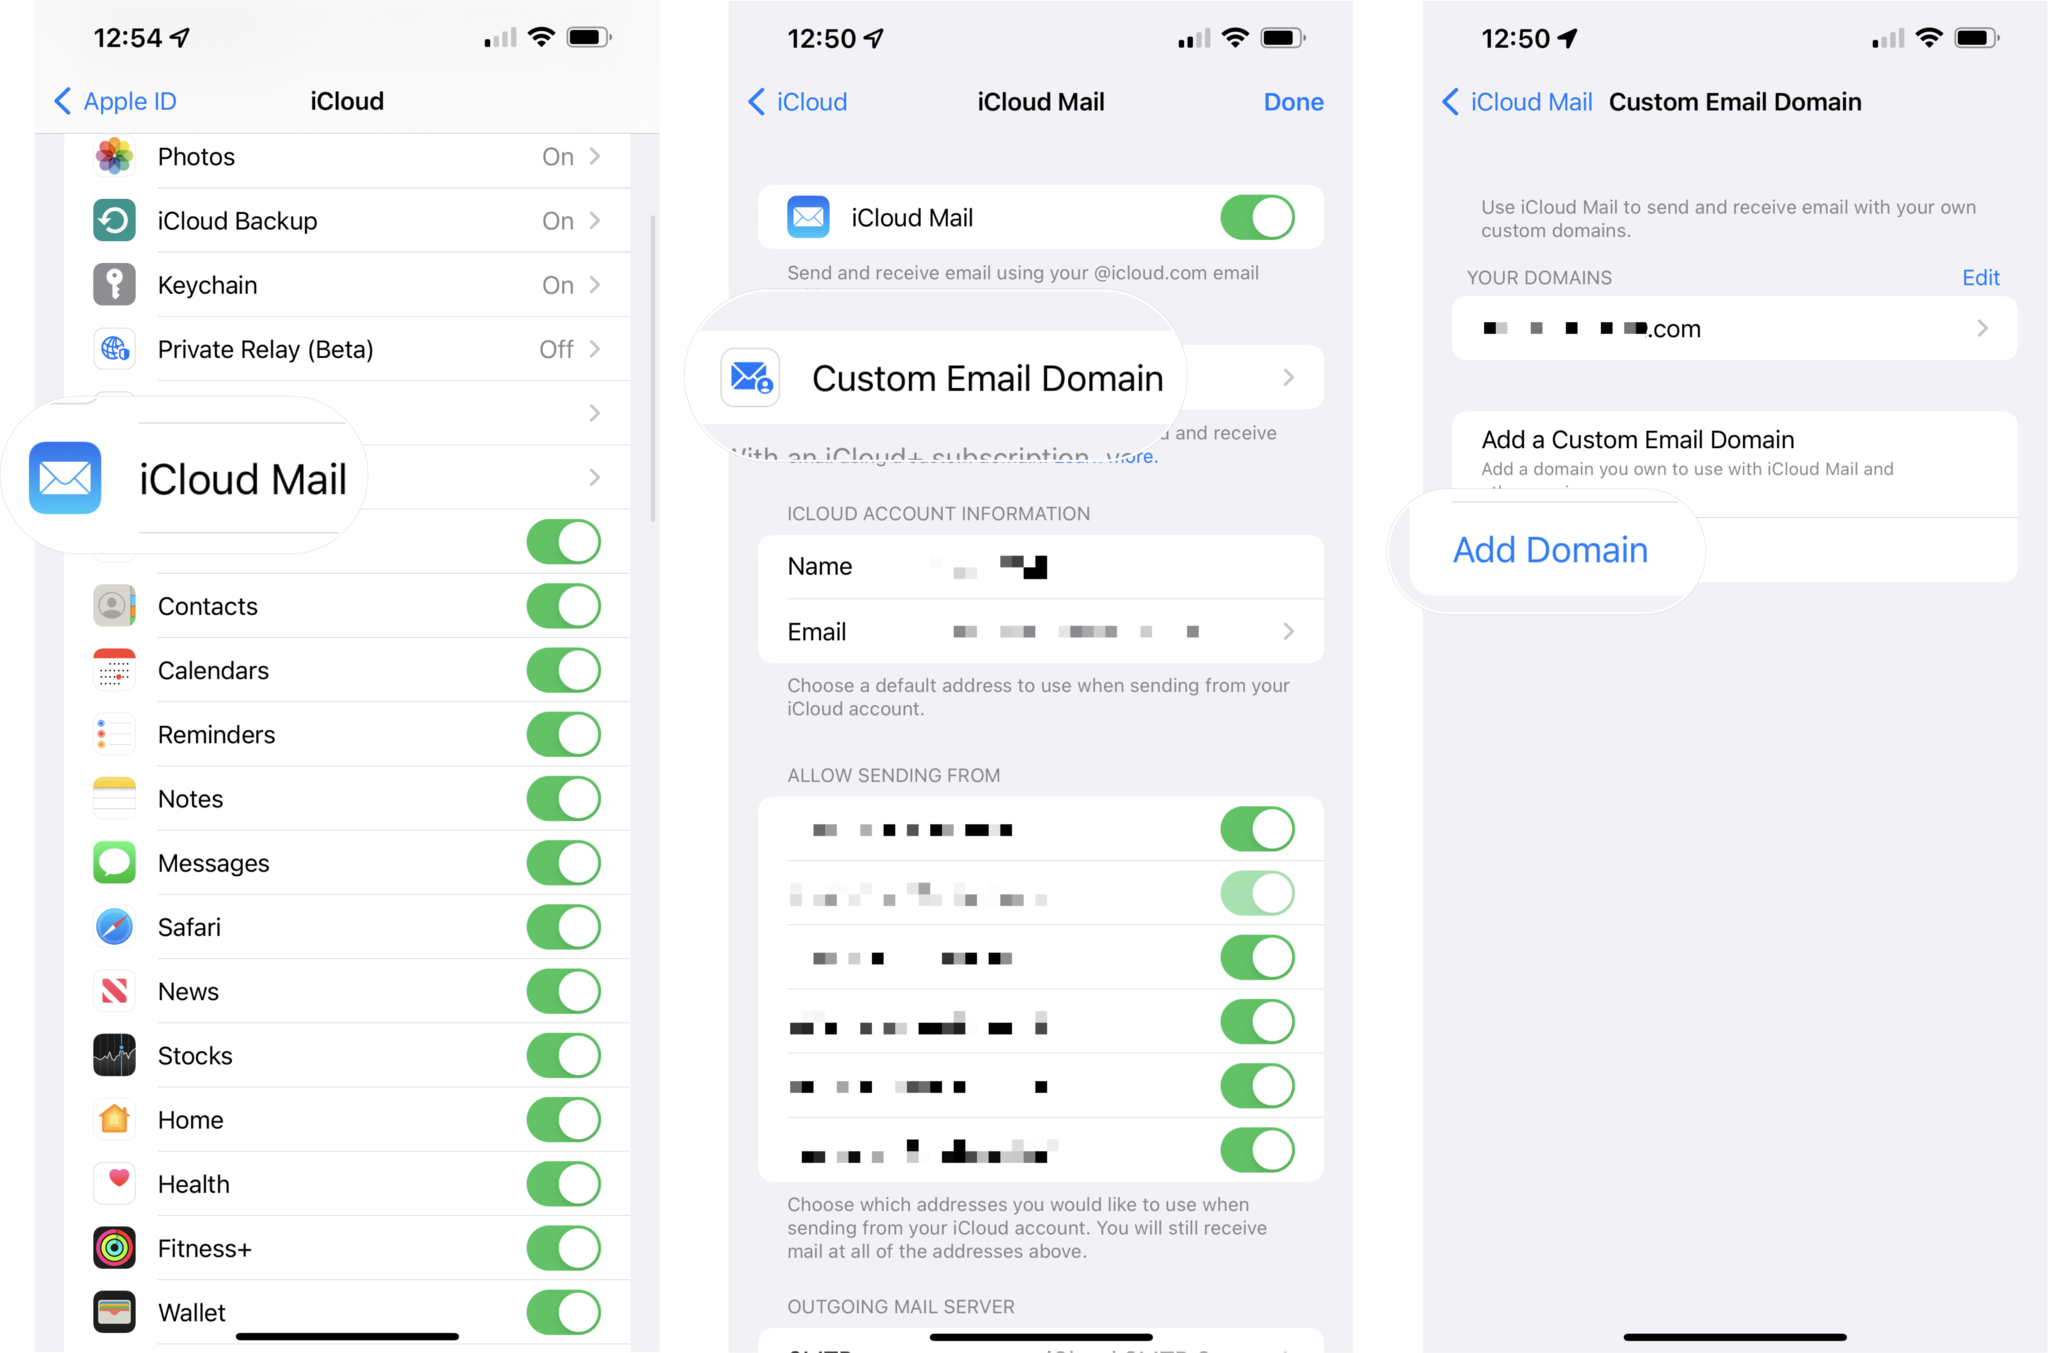
Again, depending on the domain, you may be prompted to sign in to your domain registrar to update your records automatically or you might have to do this manually.
Very professional
If you want to turn your device into the best iPhone or iPad for business, getting set up with a custom domain is a great way to give off a professional vibe. In addition, setting it up via iCloud.com means you still get to use Apple's underlying iCloud Mail infrastructure rather than relying on something like Gmail to do the same thing.
Updated February 2022: Updated with instructions for iOS 15.4 beta.
Adam Oram is a Senior Writer at iMore. He studied Media at Newcastle University and has been writing about technology since 2013. He previously worked as an Apple Genius and as a Deals Editor at Thrifter. His spare time is spent watching football (both kinds), playing Pokémon games, and eating vegan food. Follow him on Twitter at @adamoram.

