How to use a HomePod or HomePod mini as a HomeKit and Home app security alarm
Create your own security system with your HomePod and a HomeKit-enabled smart sensor. Here's how!
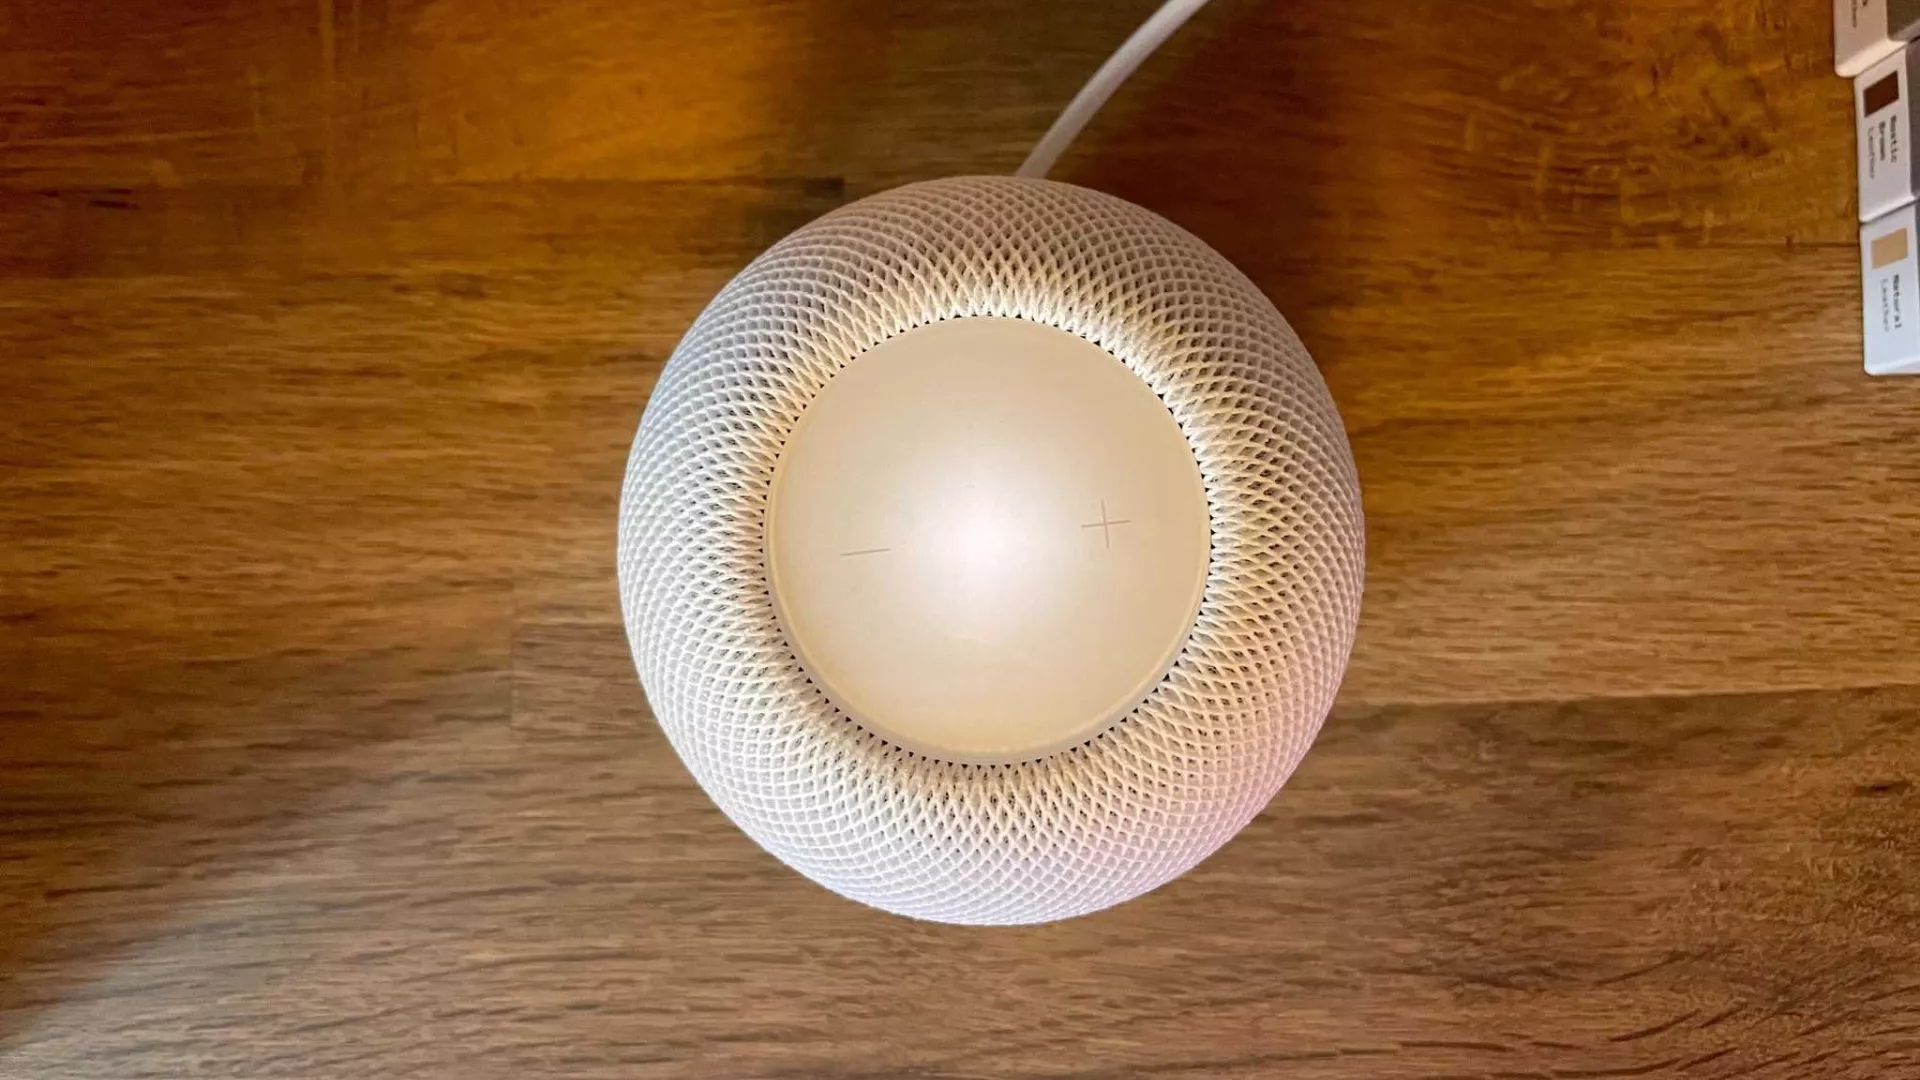
The HomePod and HomePod mini are known for room-filling sound and hands-free Siri control, but did you know that you can use Apple's smart speaker as a HomeKit security alarm? That's right, the HomePod and HomePod mini can work with various HomeKit sensors, allowing you to create a DIY security system using the accessories you may already have. All it takes is a few taps in the Home app and a subscription to Apple Music. Here's how to use HomePod as a HomeKit alarm.
How to use HomePod or HomePod mini as a HomeKit security alarm
In this example, we will be using a HomeKit door and window sensor to create an alarm automation. You can also use a HomeKit motion sensor — including those built-in to most HomeKit security cameras.
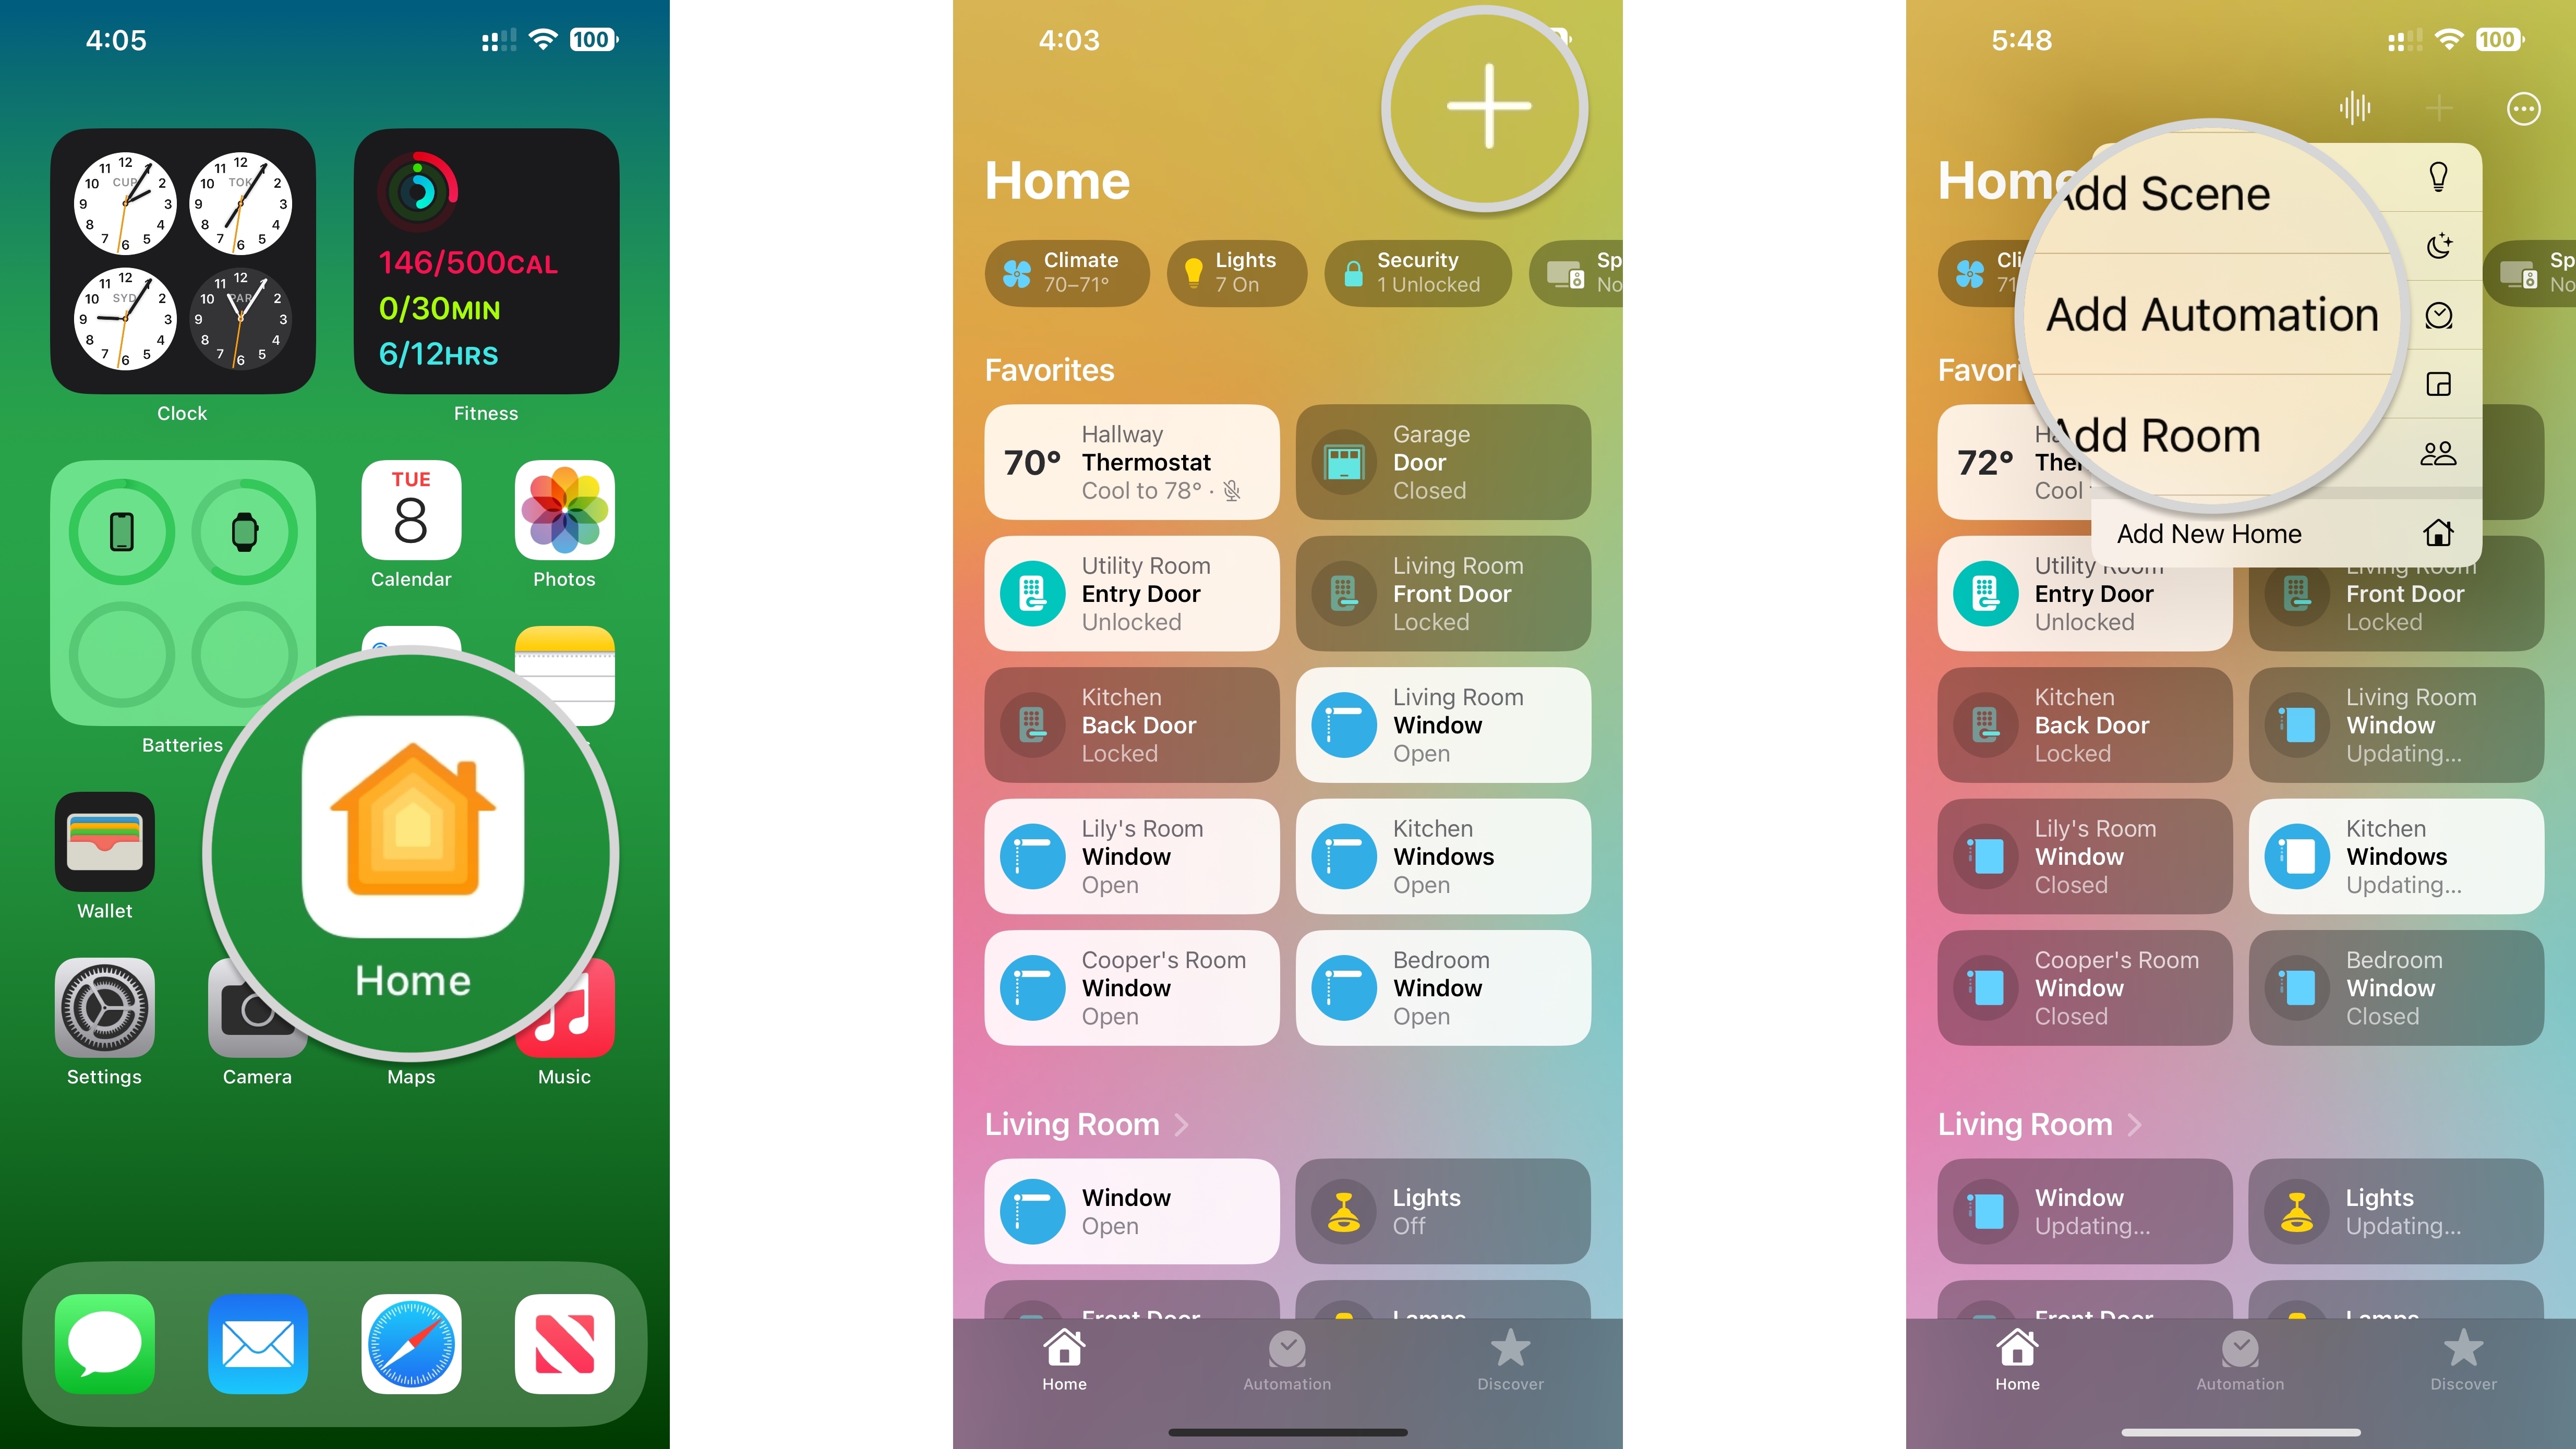
- Launch the Home app.
- Tap the Add Button (it looks like a plus sign).
- Tap Add Automation.
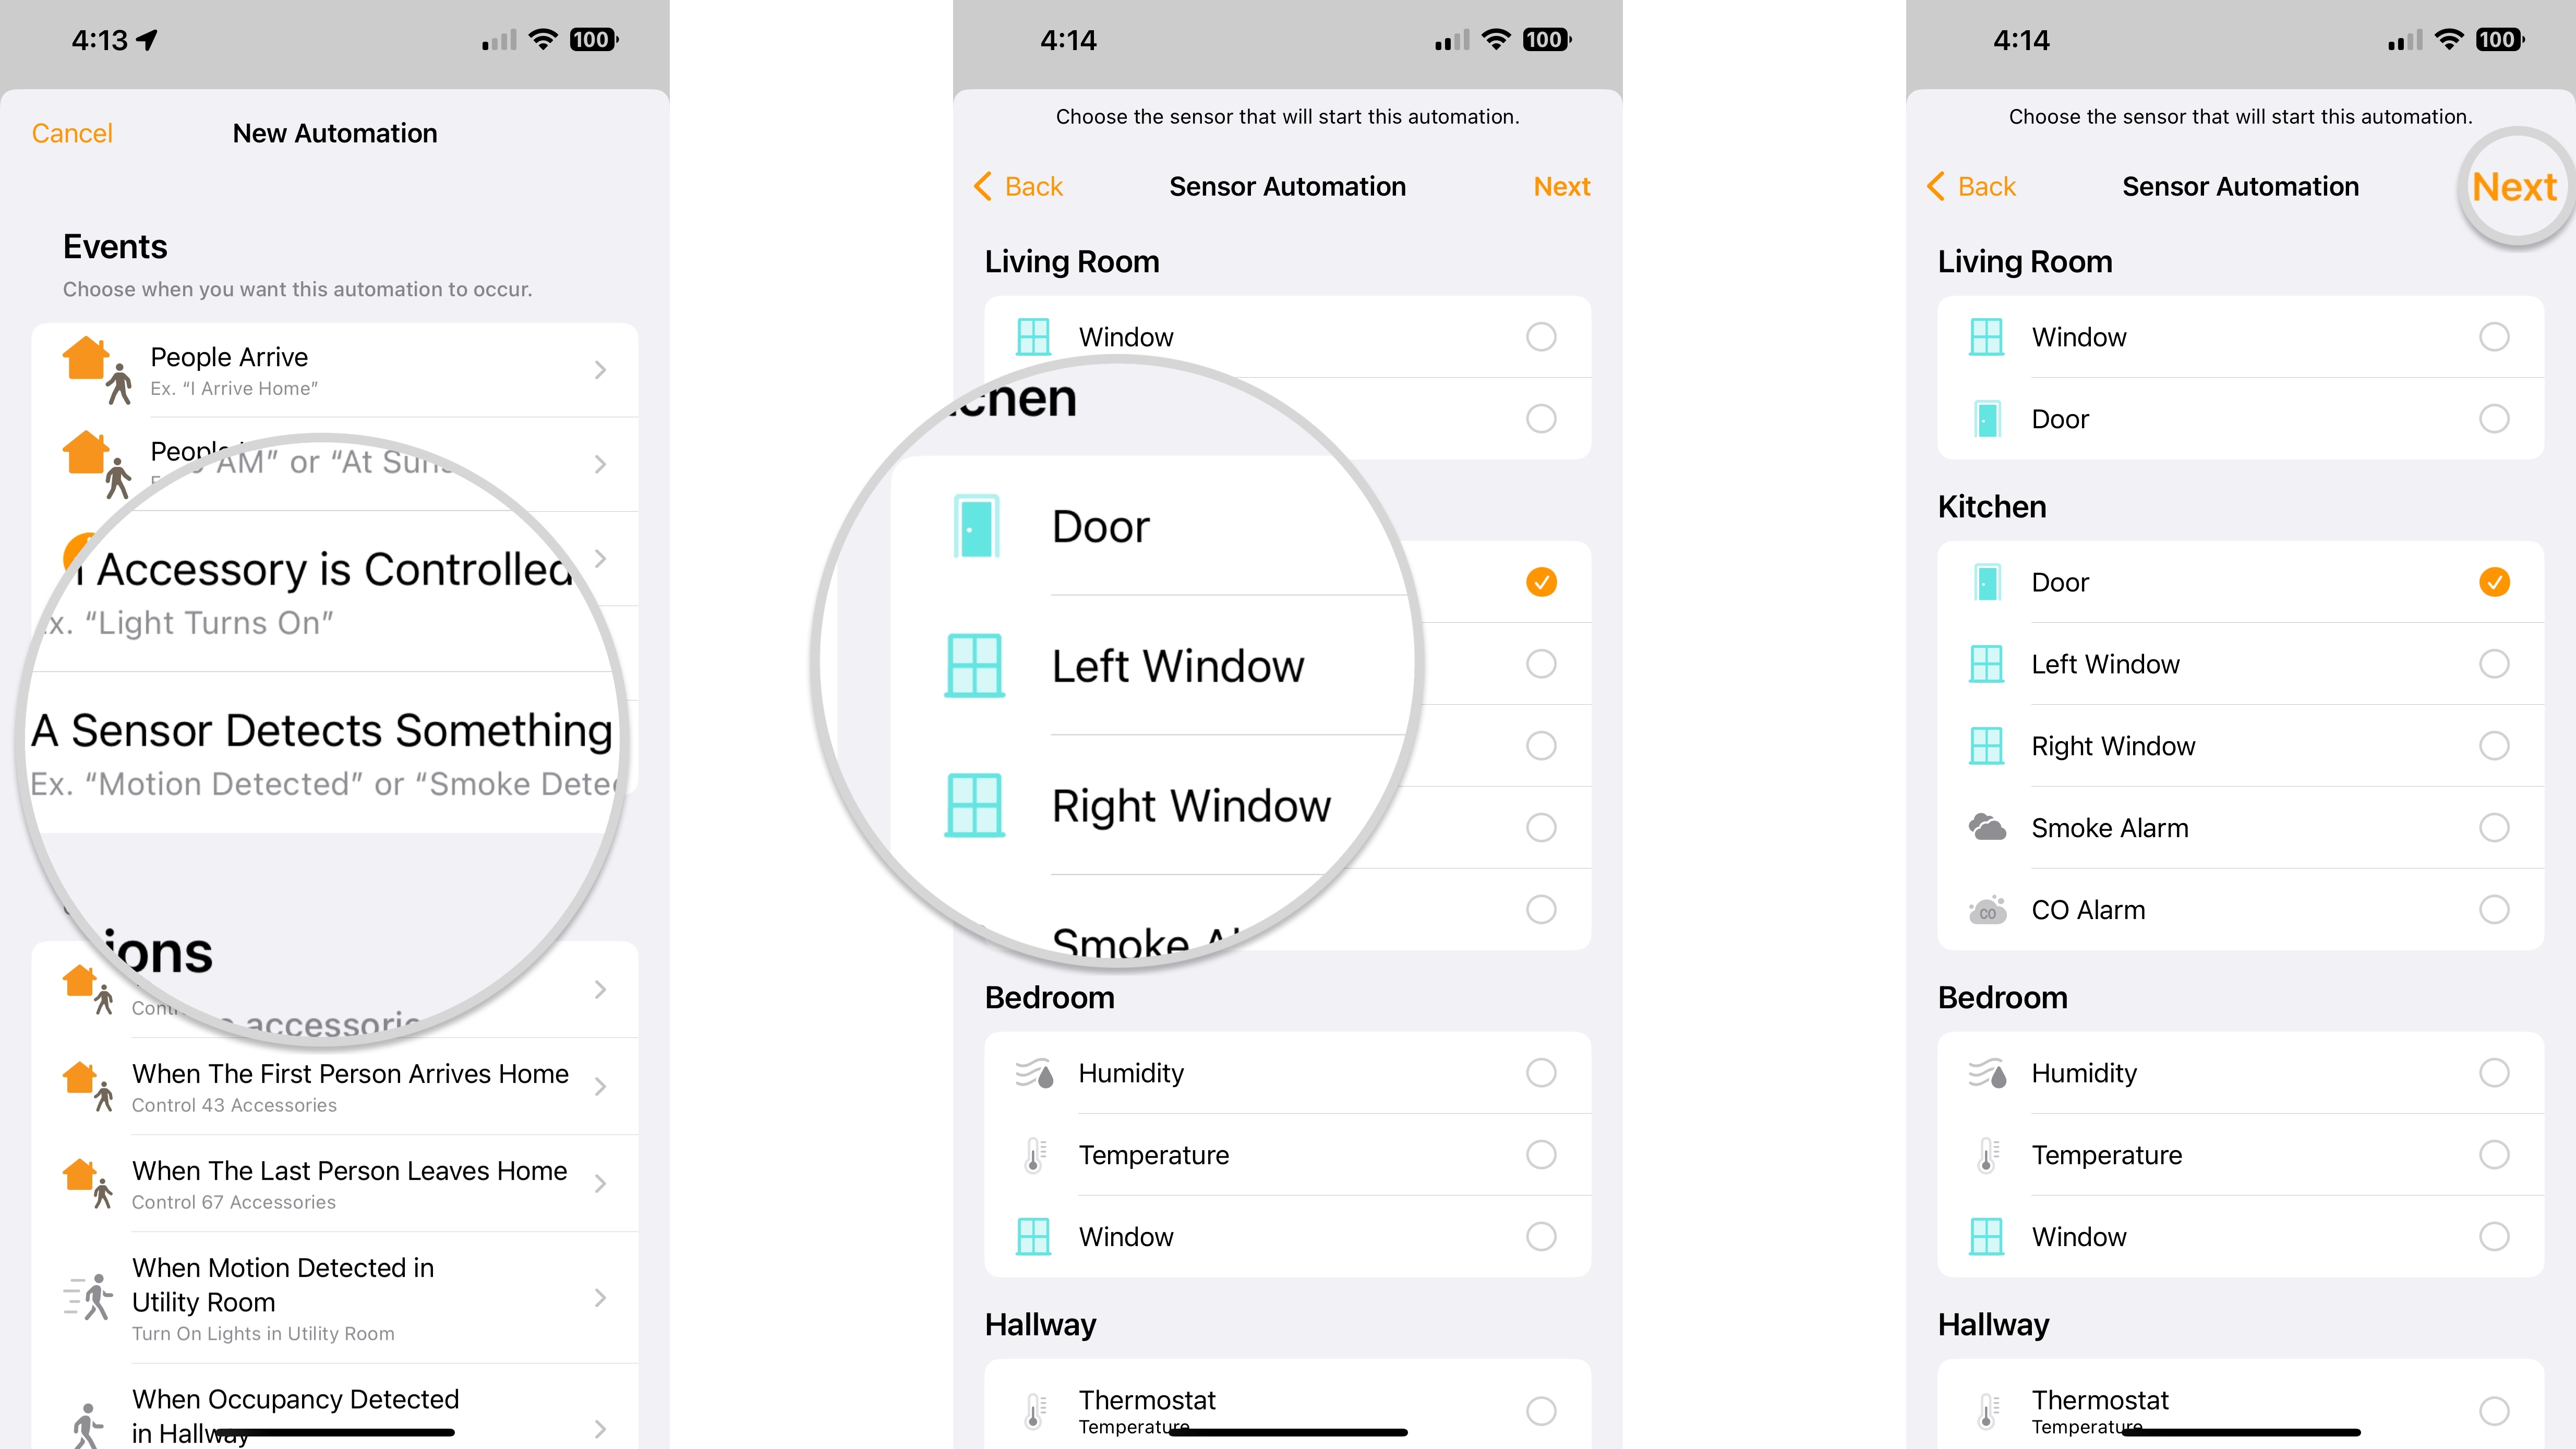
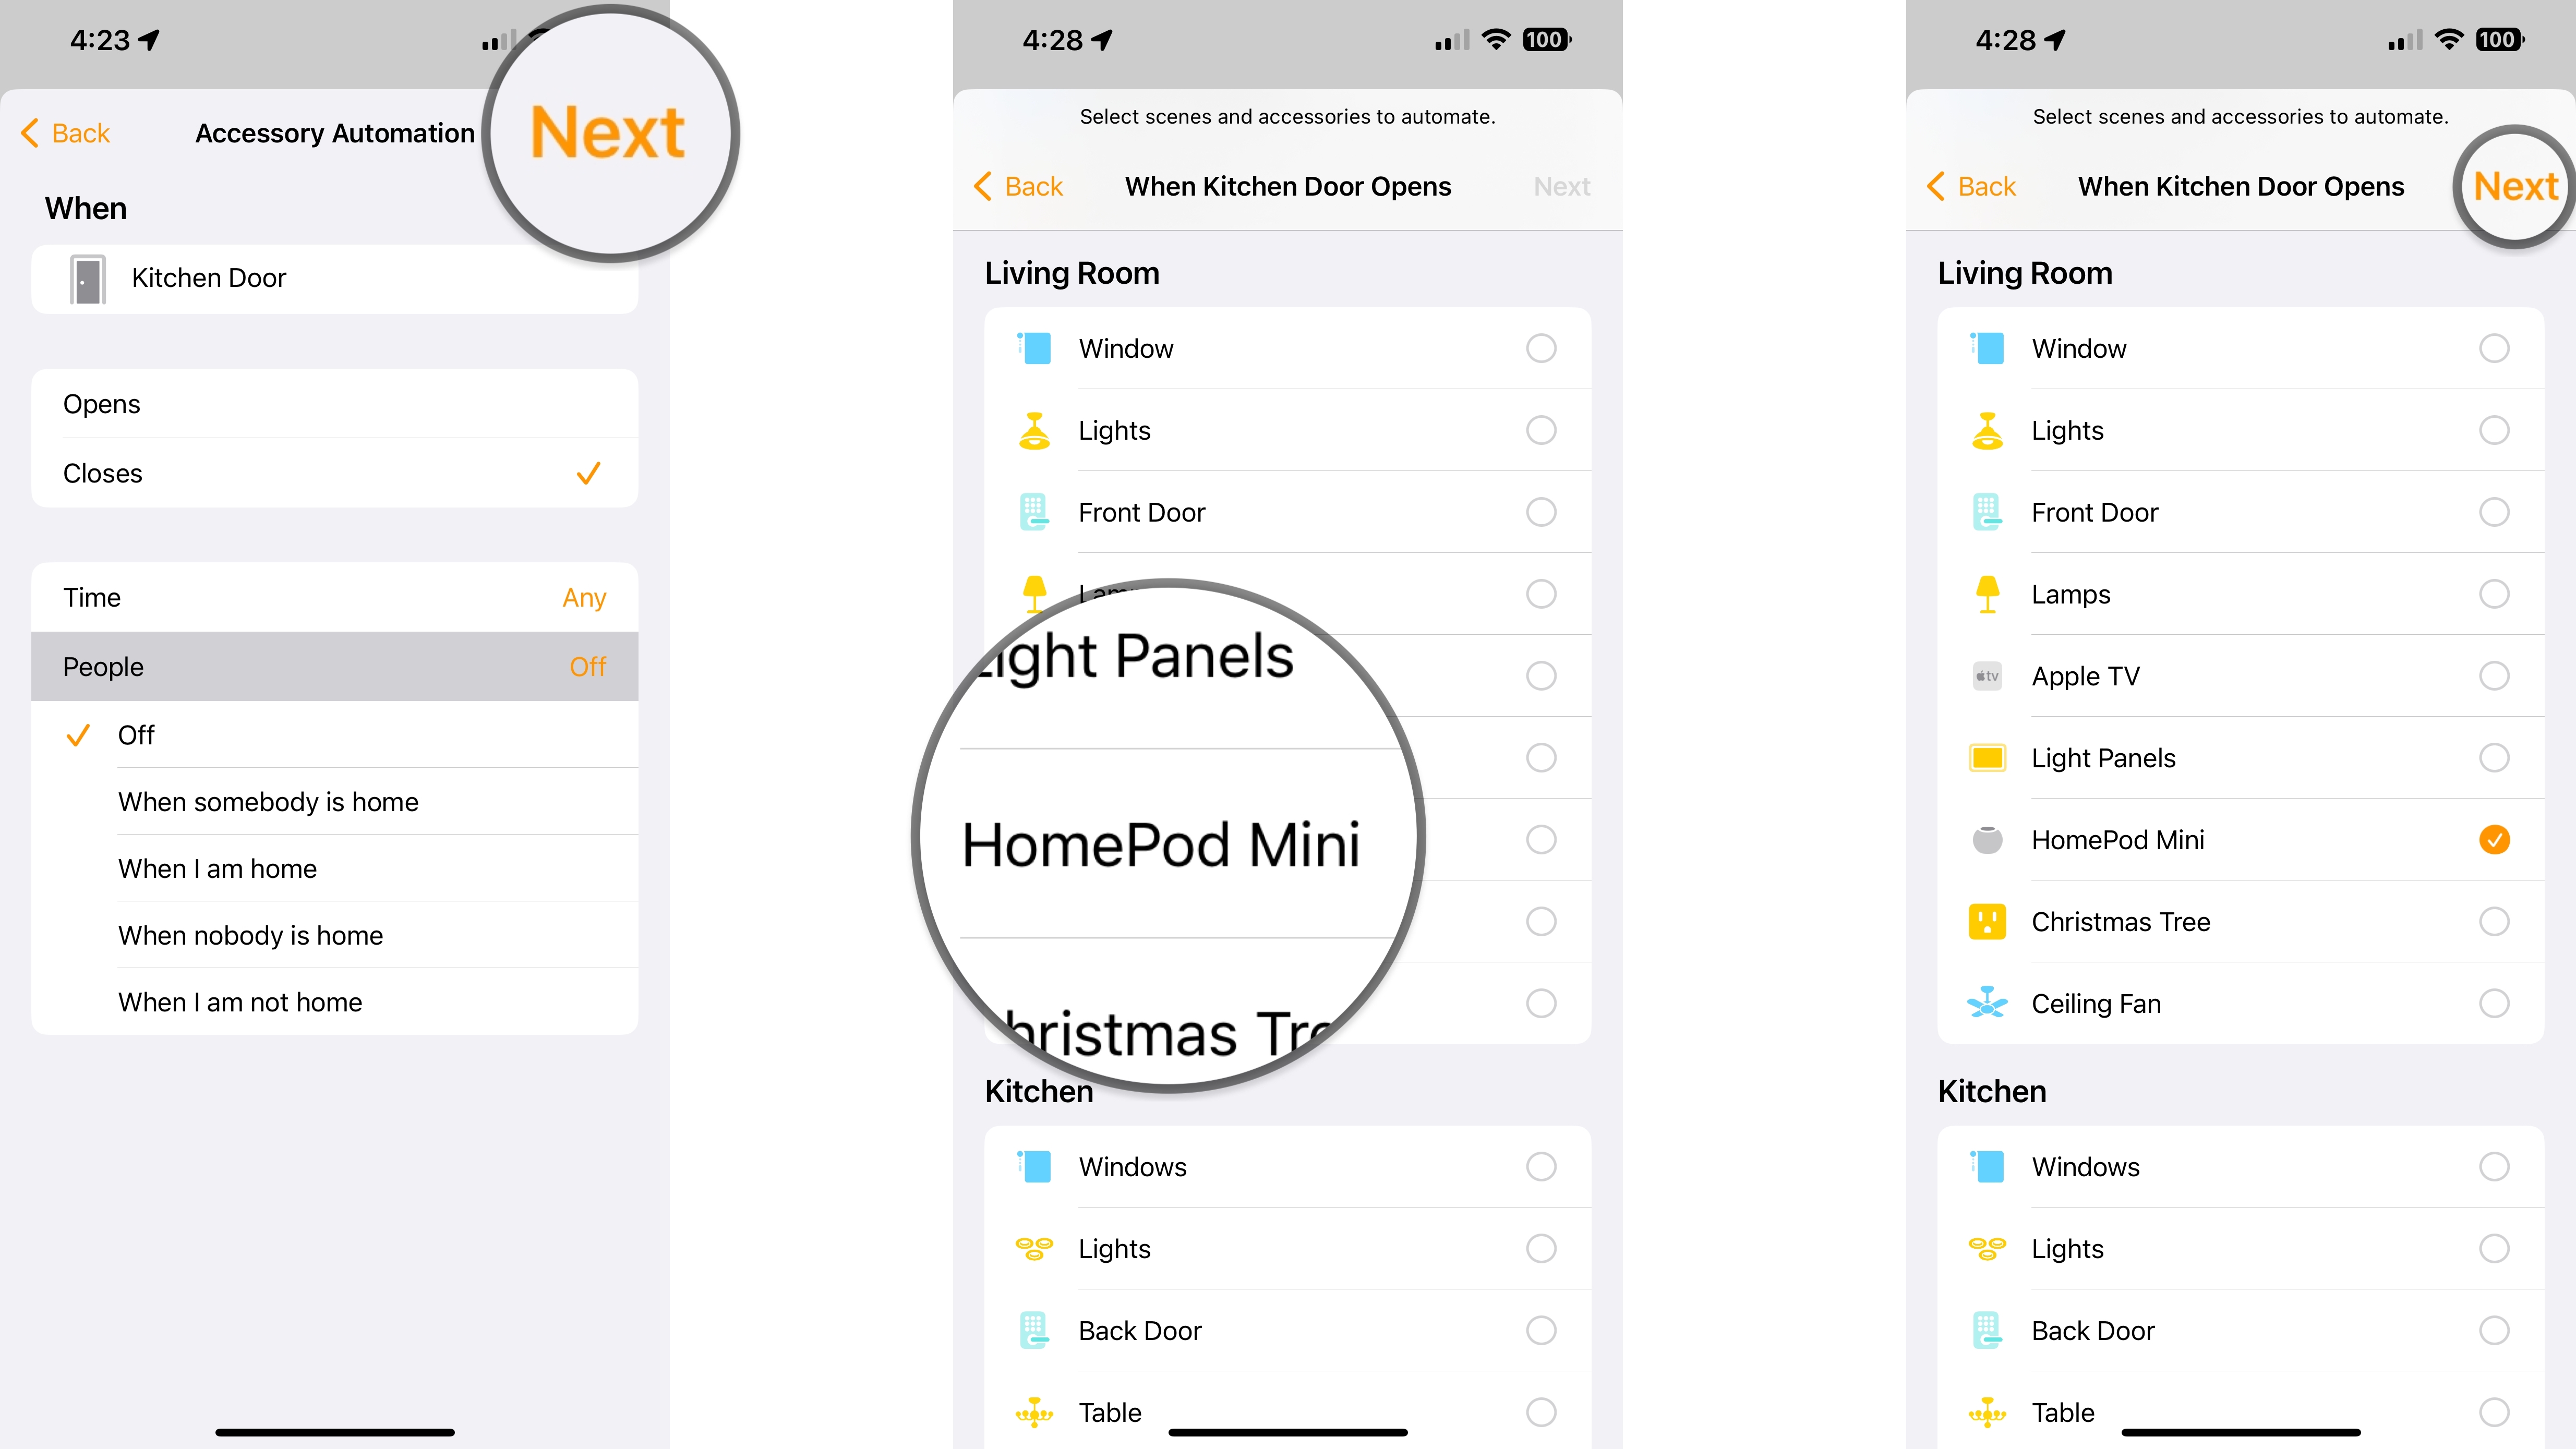
- Tap A Sensor Detects Something.
- Tap the Accessory that you want to use as your trigger for the HomePod.
- Tap Next.
- Tap Opens/Closes or Detects Motion/Stops Detecting Motion depending on your accessory type.
- Tap Time and set the specific times that you want the automation to be active.
- Tap People to set location-based conditions for when the automation will run.
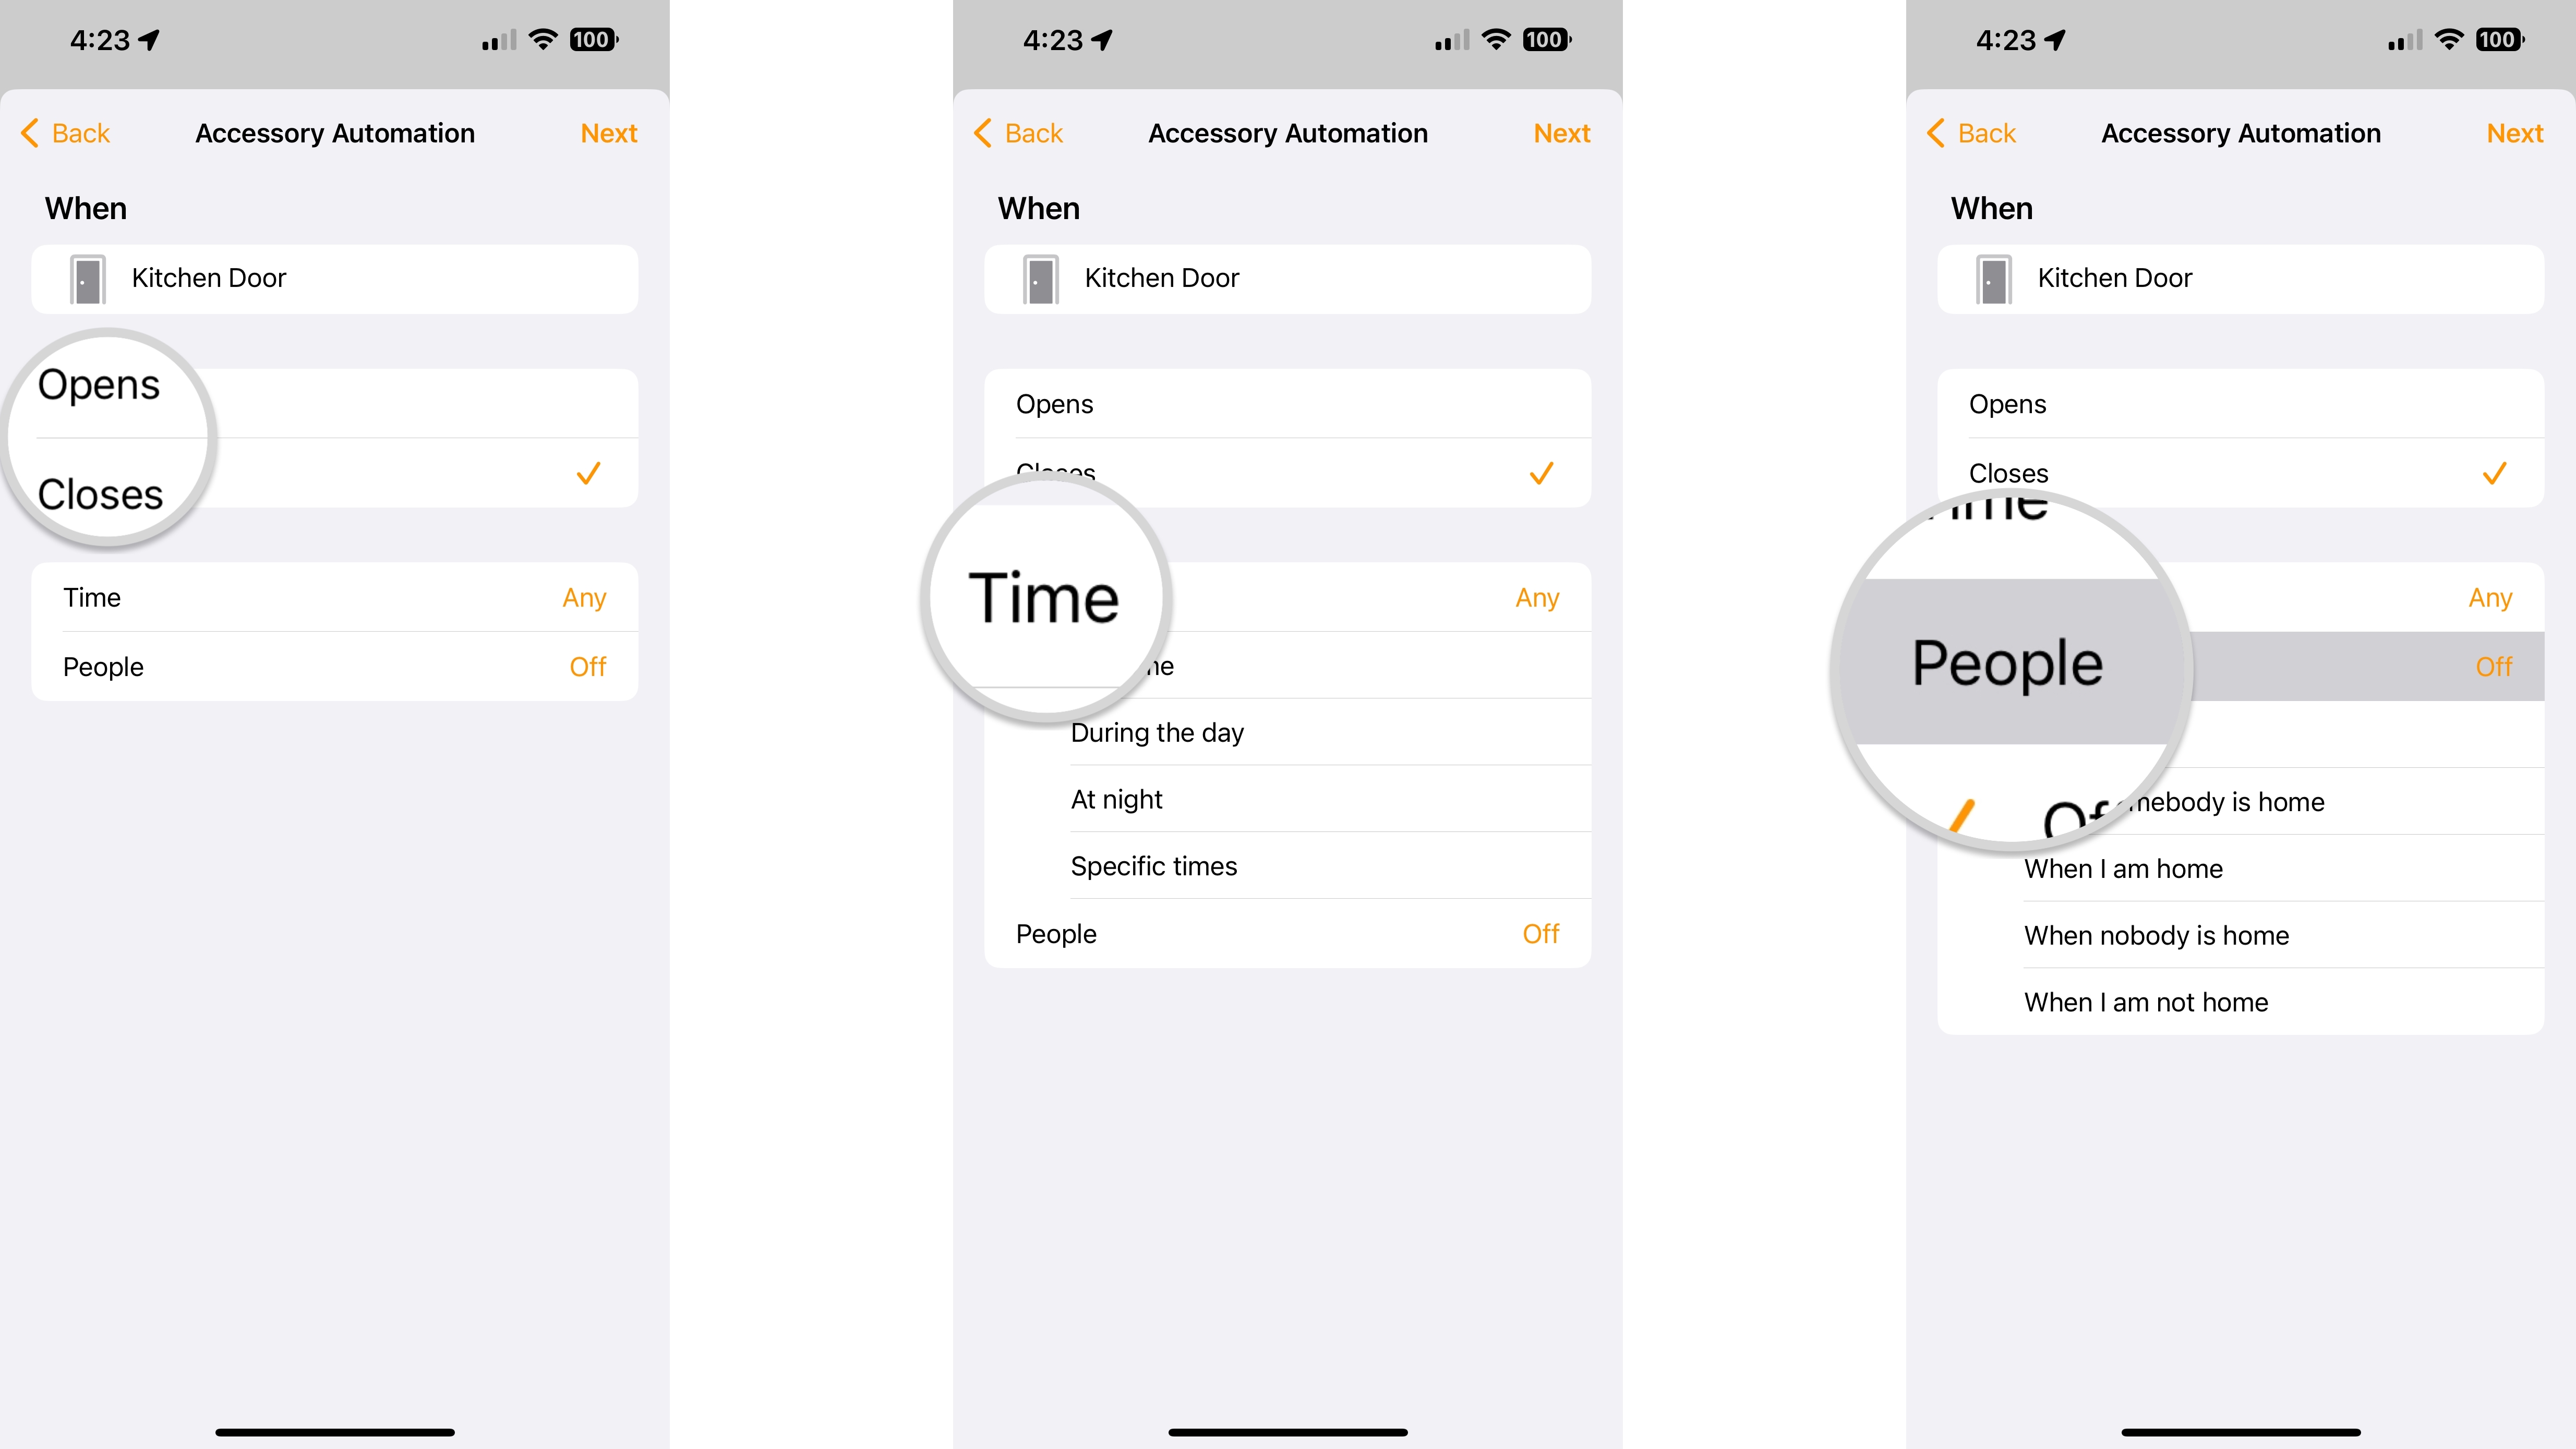
- Tap Next.
- Tap your HomePod or multiple HomePods if you have more than one.
- Tap Next.
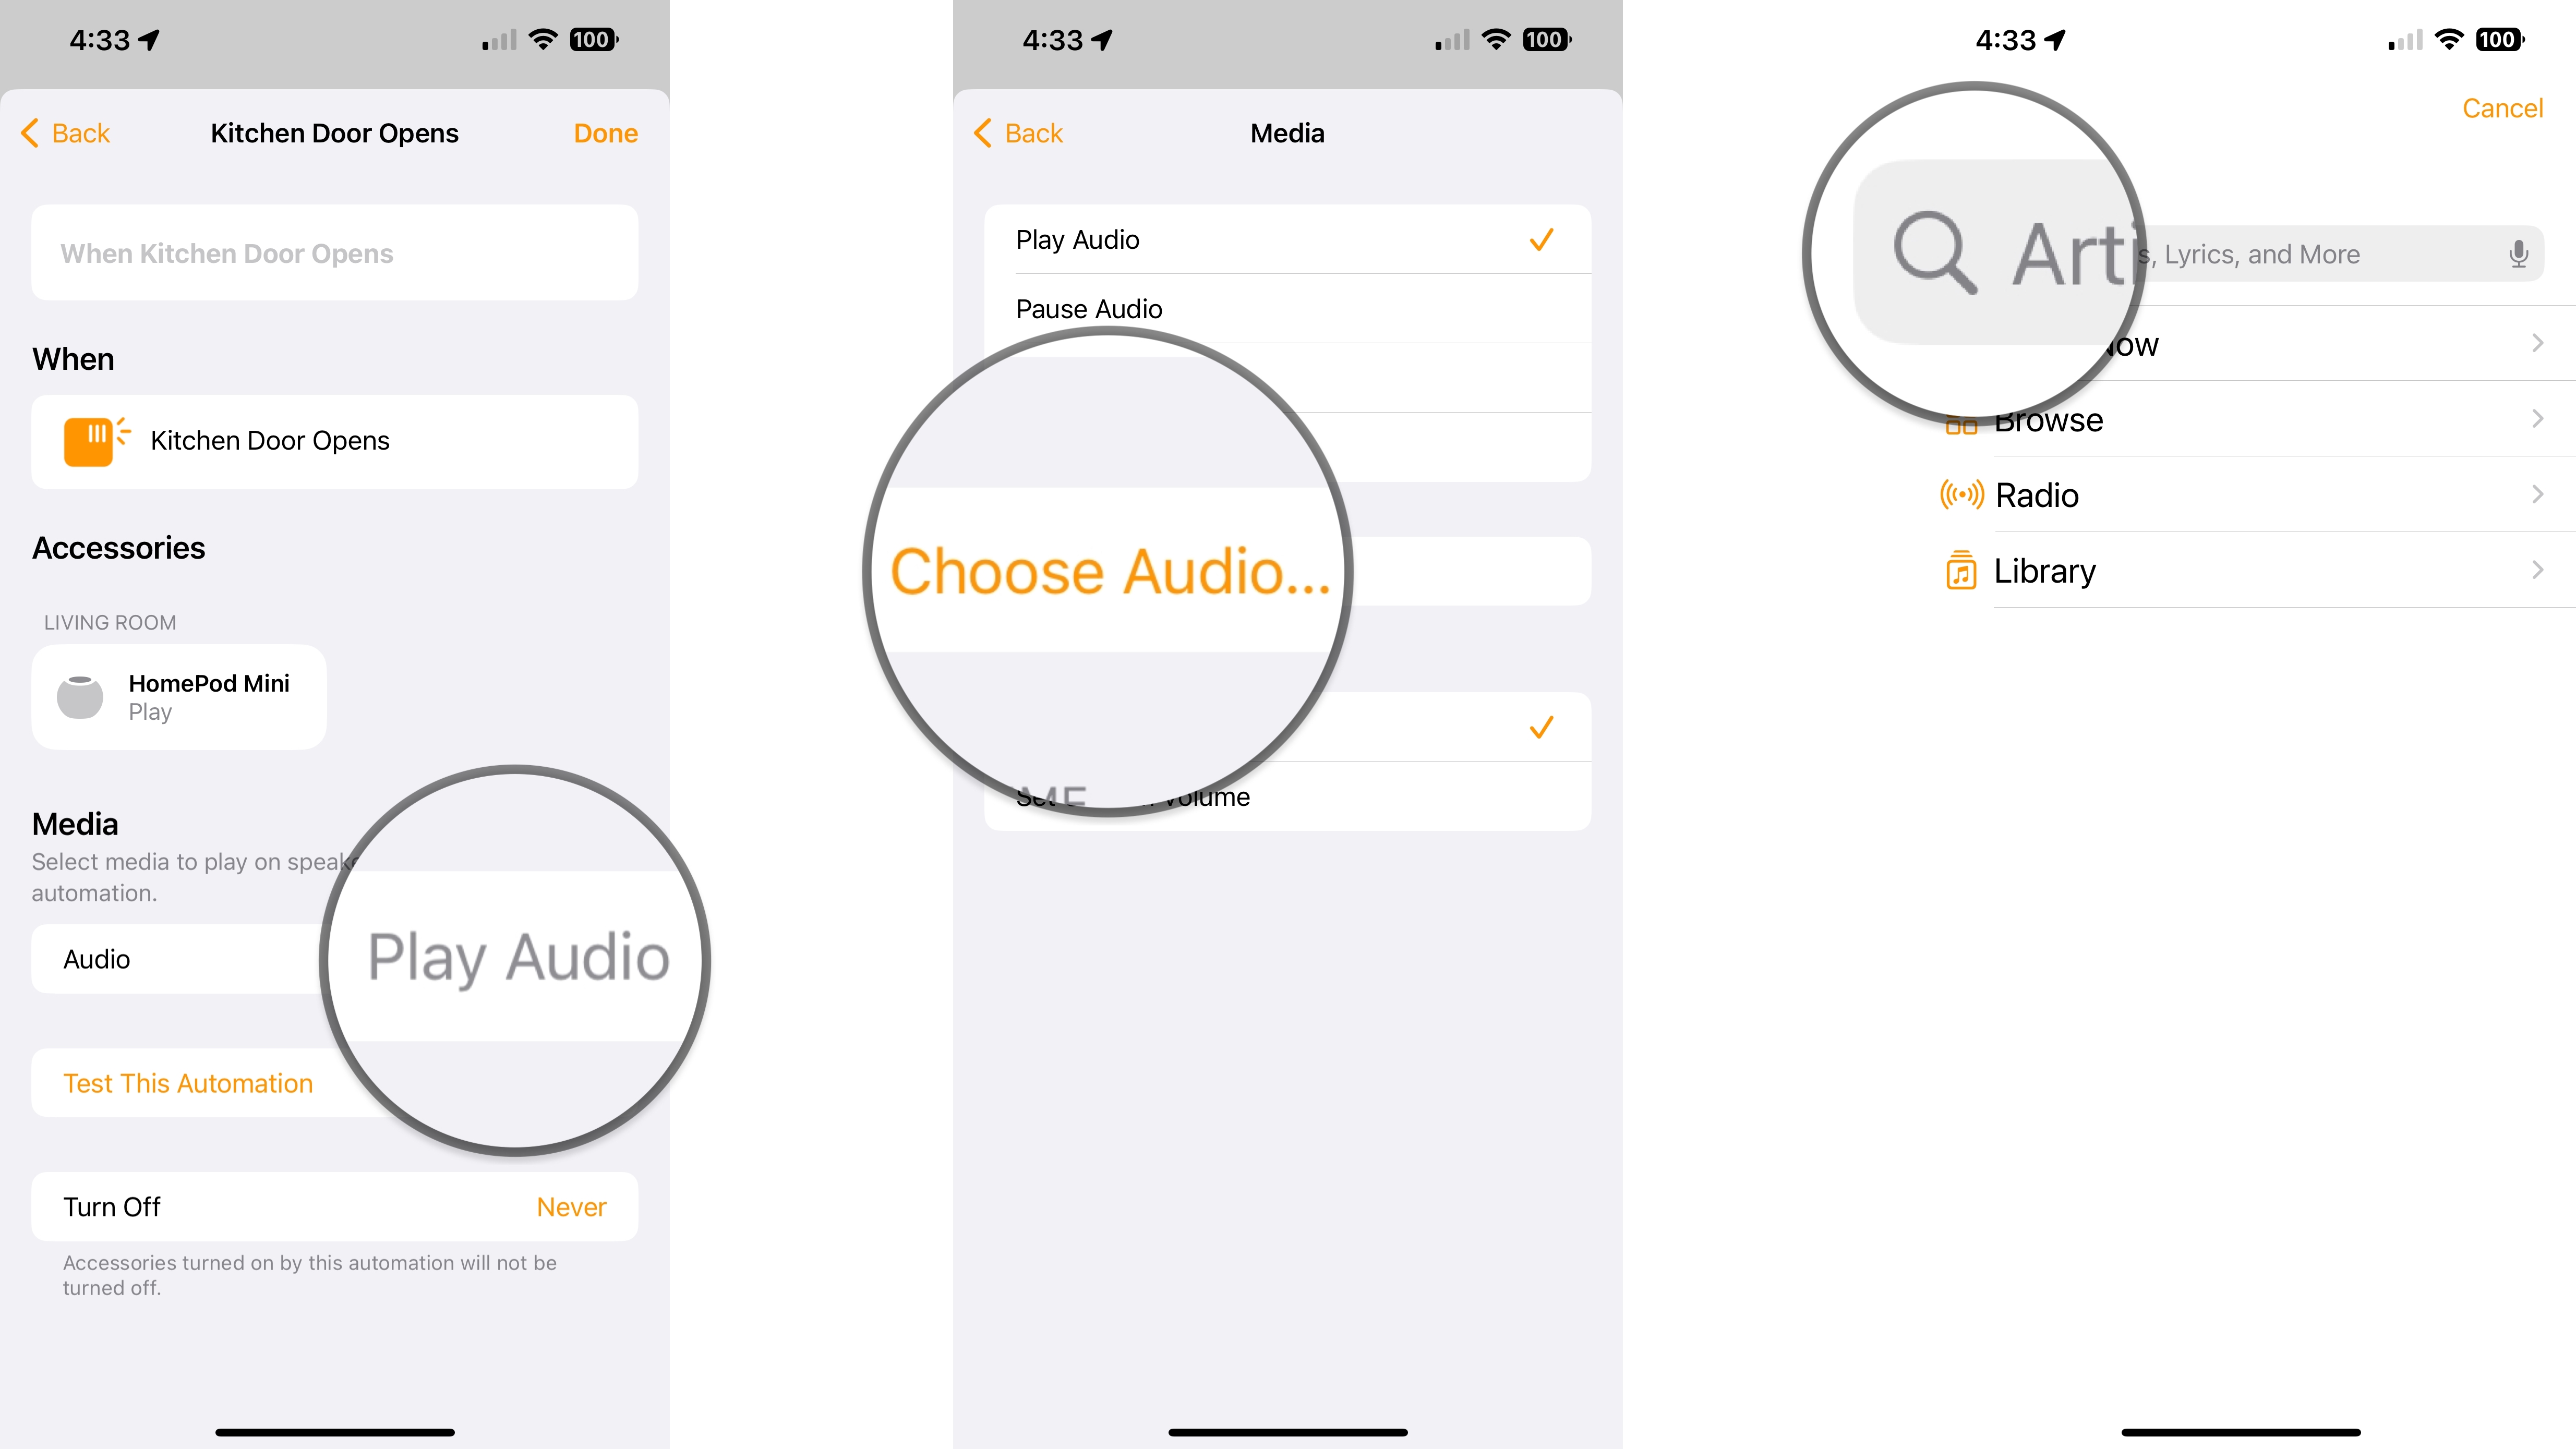
- Tap Play Audio.
- Tap Choose Audio....
- Tap the Search field or navigate to a song or sound in your music library.
- Type a name of an album, song, or sound using the keyboard.
- We recommend searching for "alarm sounds," but you can use any song or sound from Apple Music.
- Tap Search.
- Tap an Album or skip to the next step if you see a song or sound that you want to use in the search results.
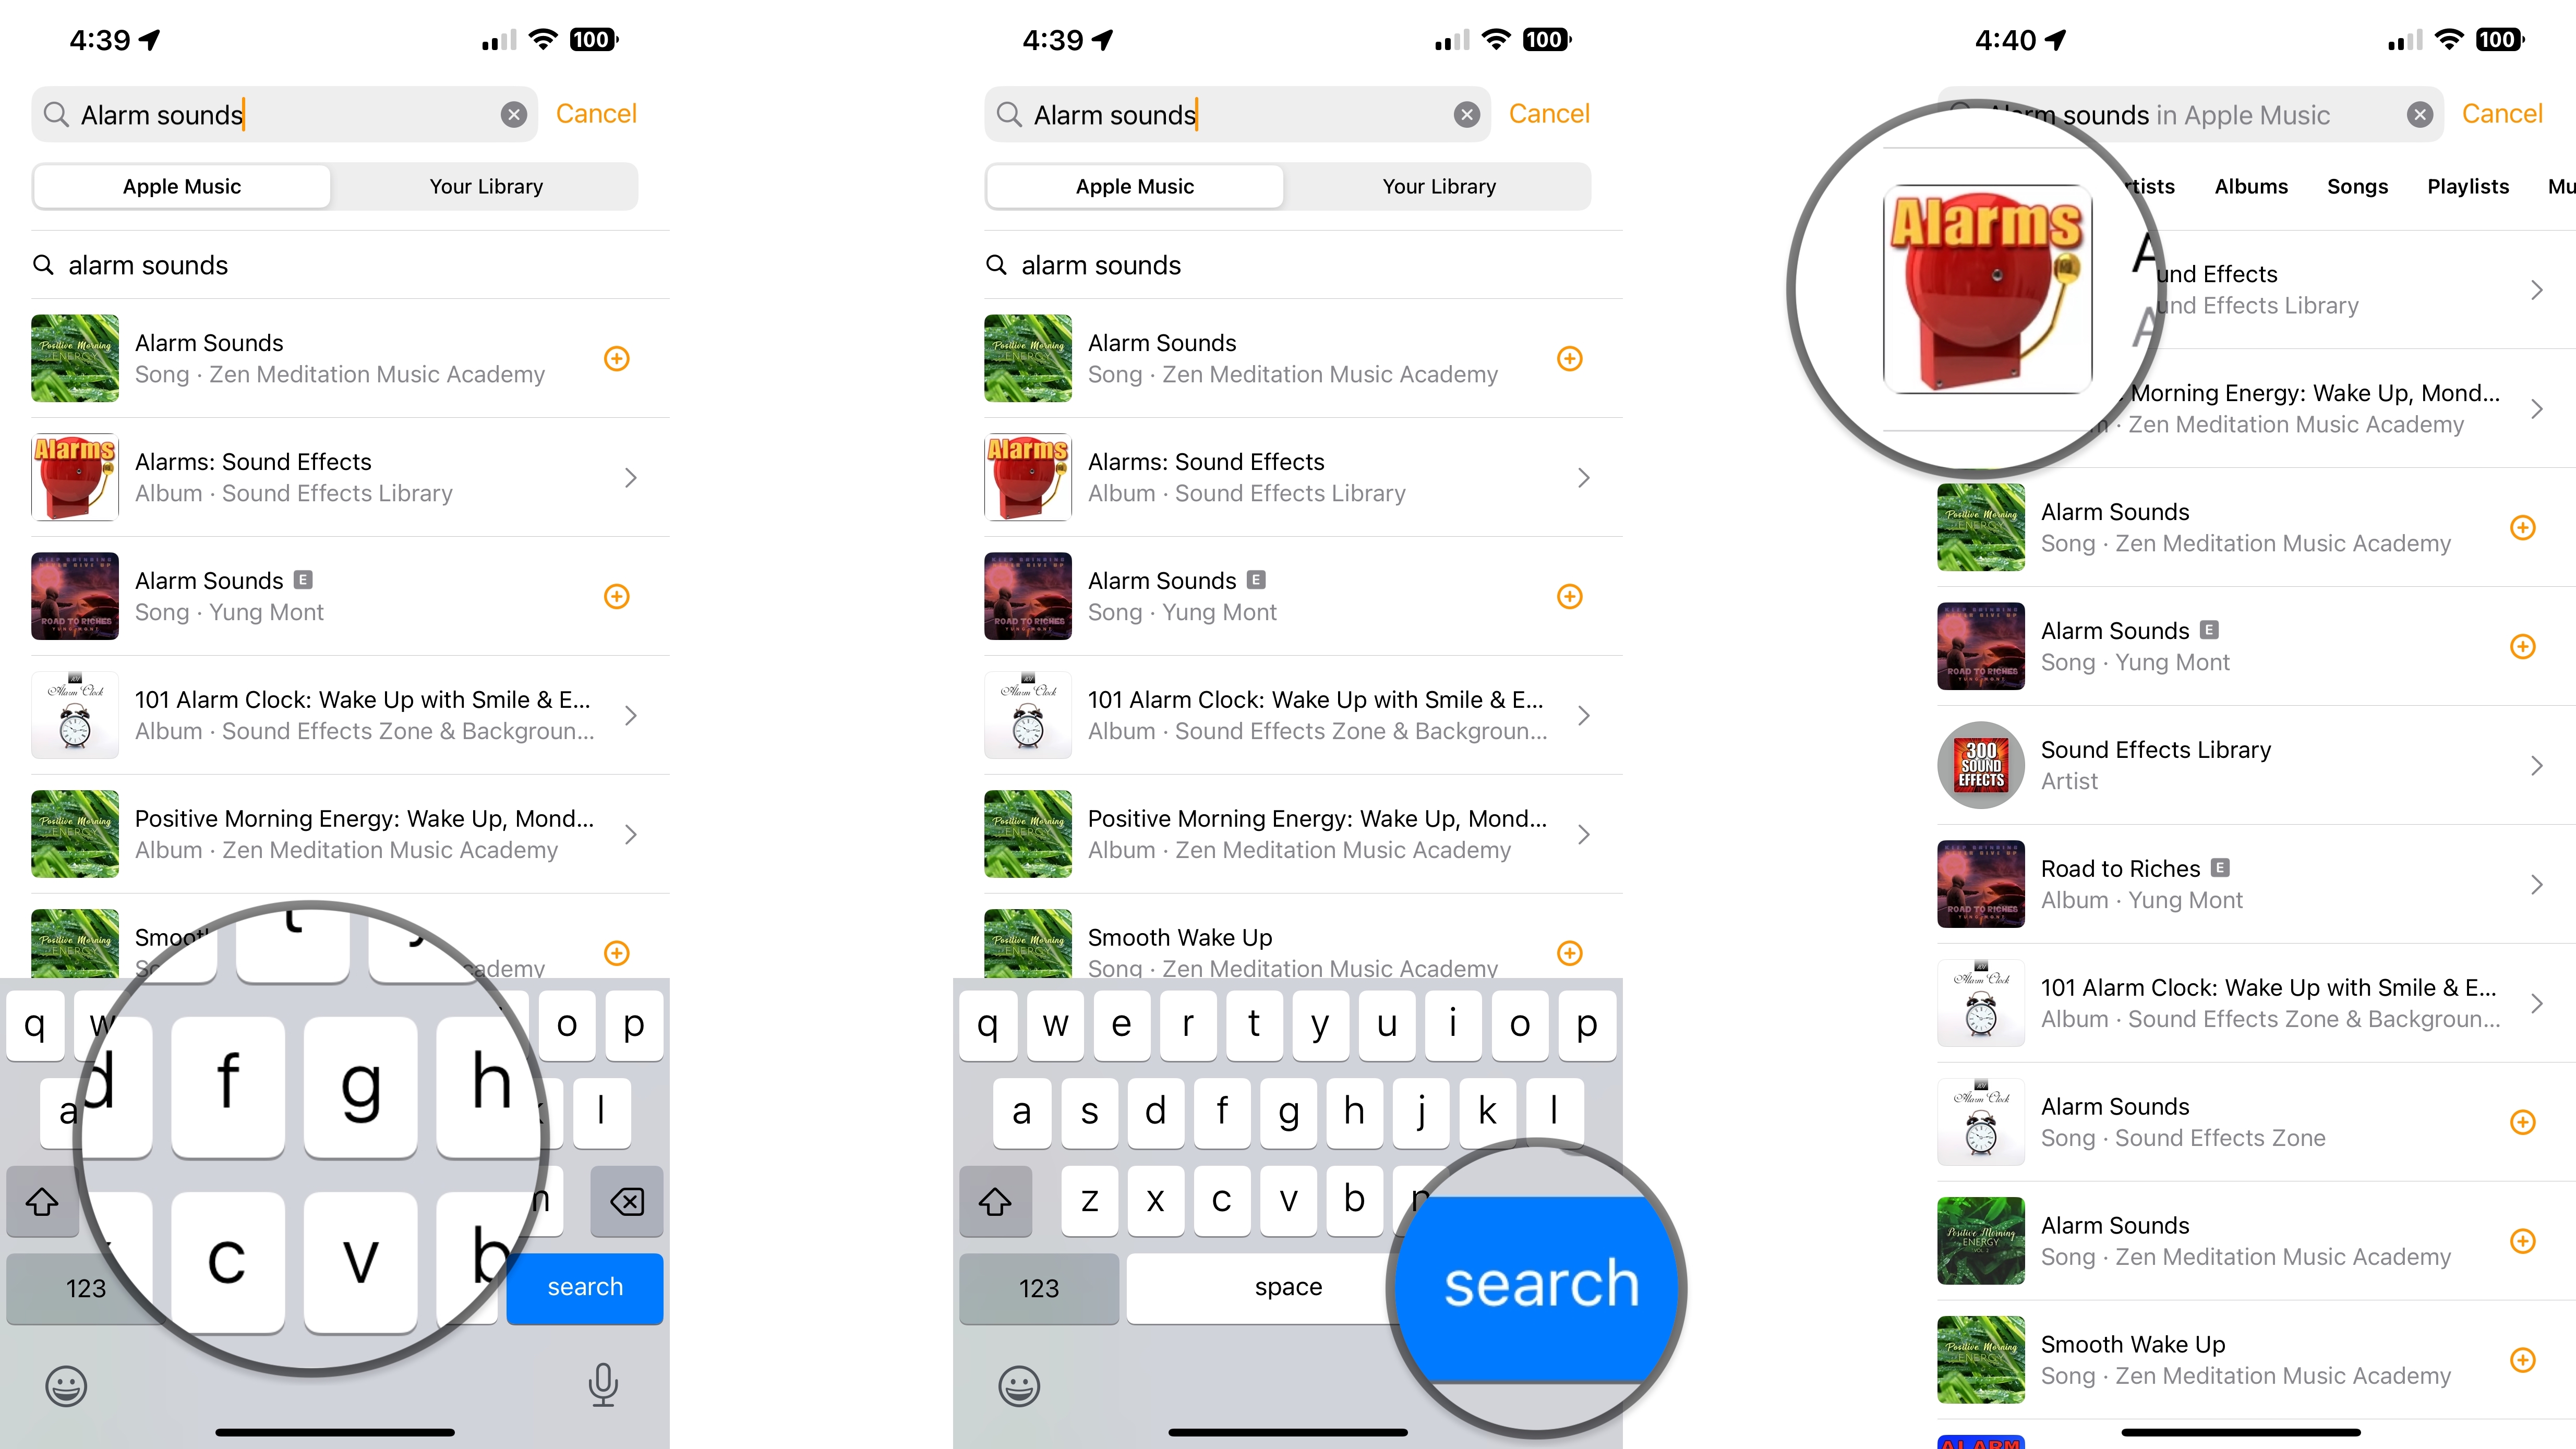
- Tap the Add icon (looks like a plus sign) next to a sound or song.
- Tap the toggle next to Repeat.
- You can leave this off if you want your sound or song to only play once.
- Tap Set Custom Volume and use the slider to set your desired volume level.
- You can also choose Use Current Volume if you want your HomePod to use the last volume level.
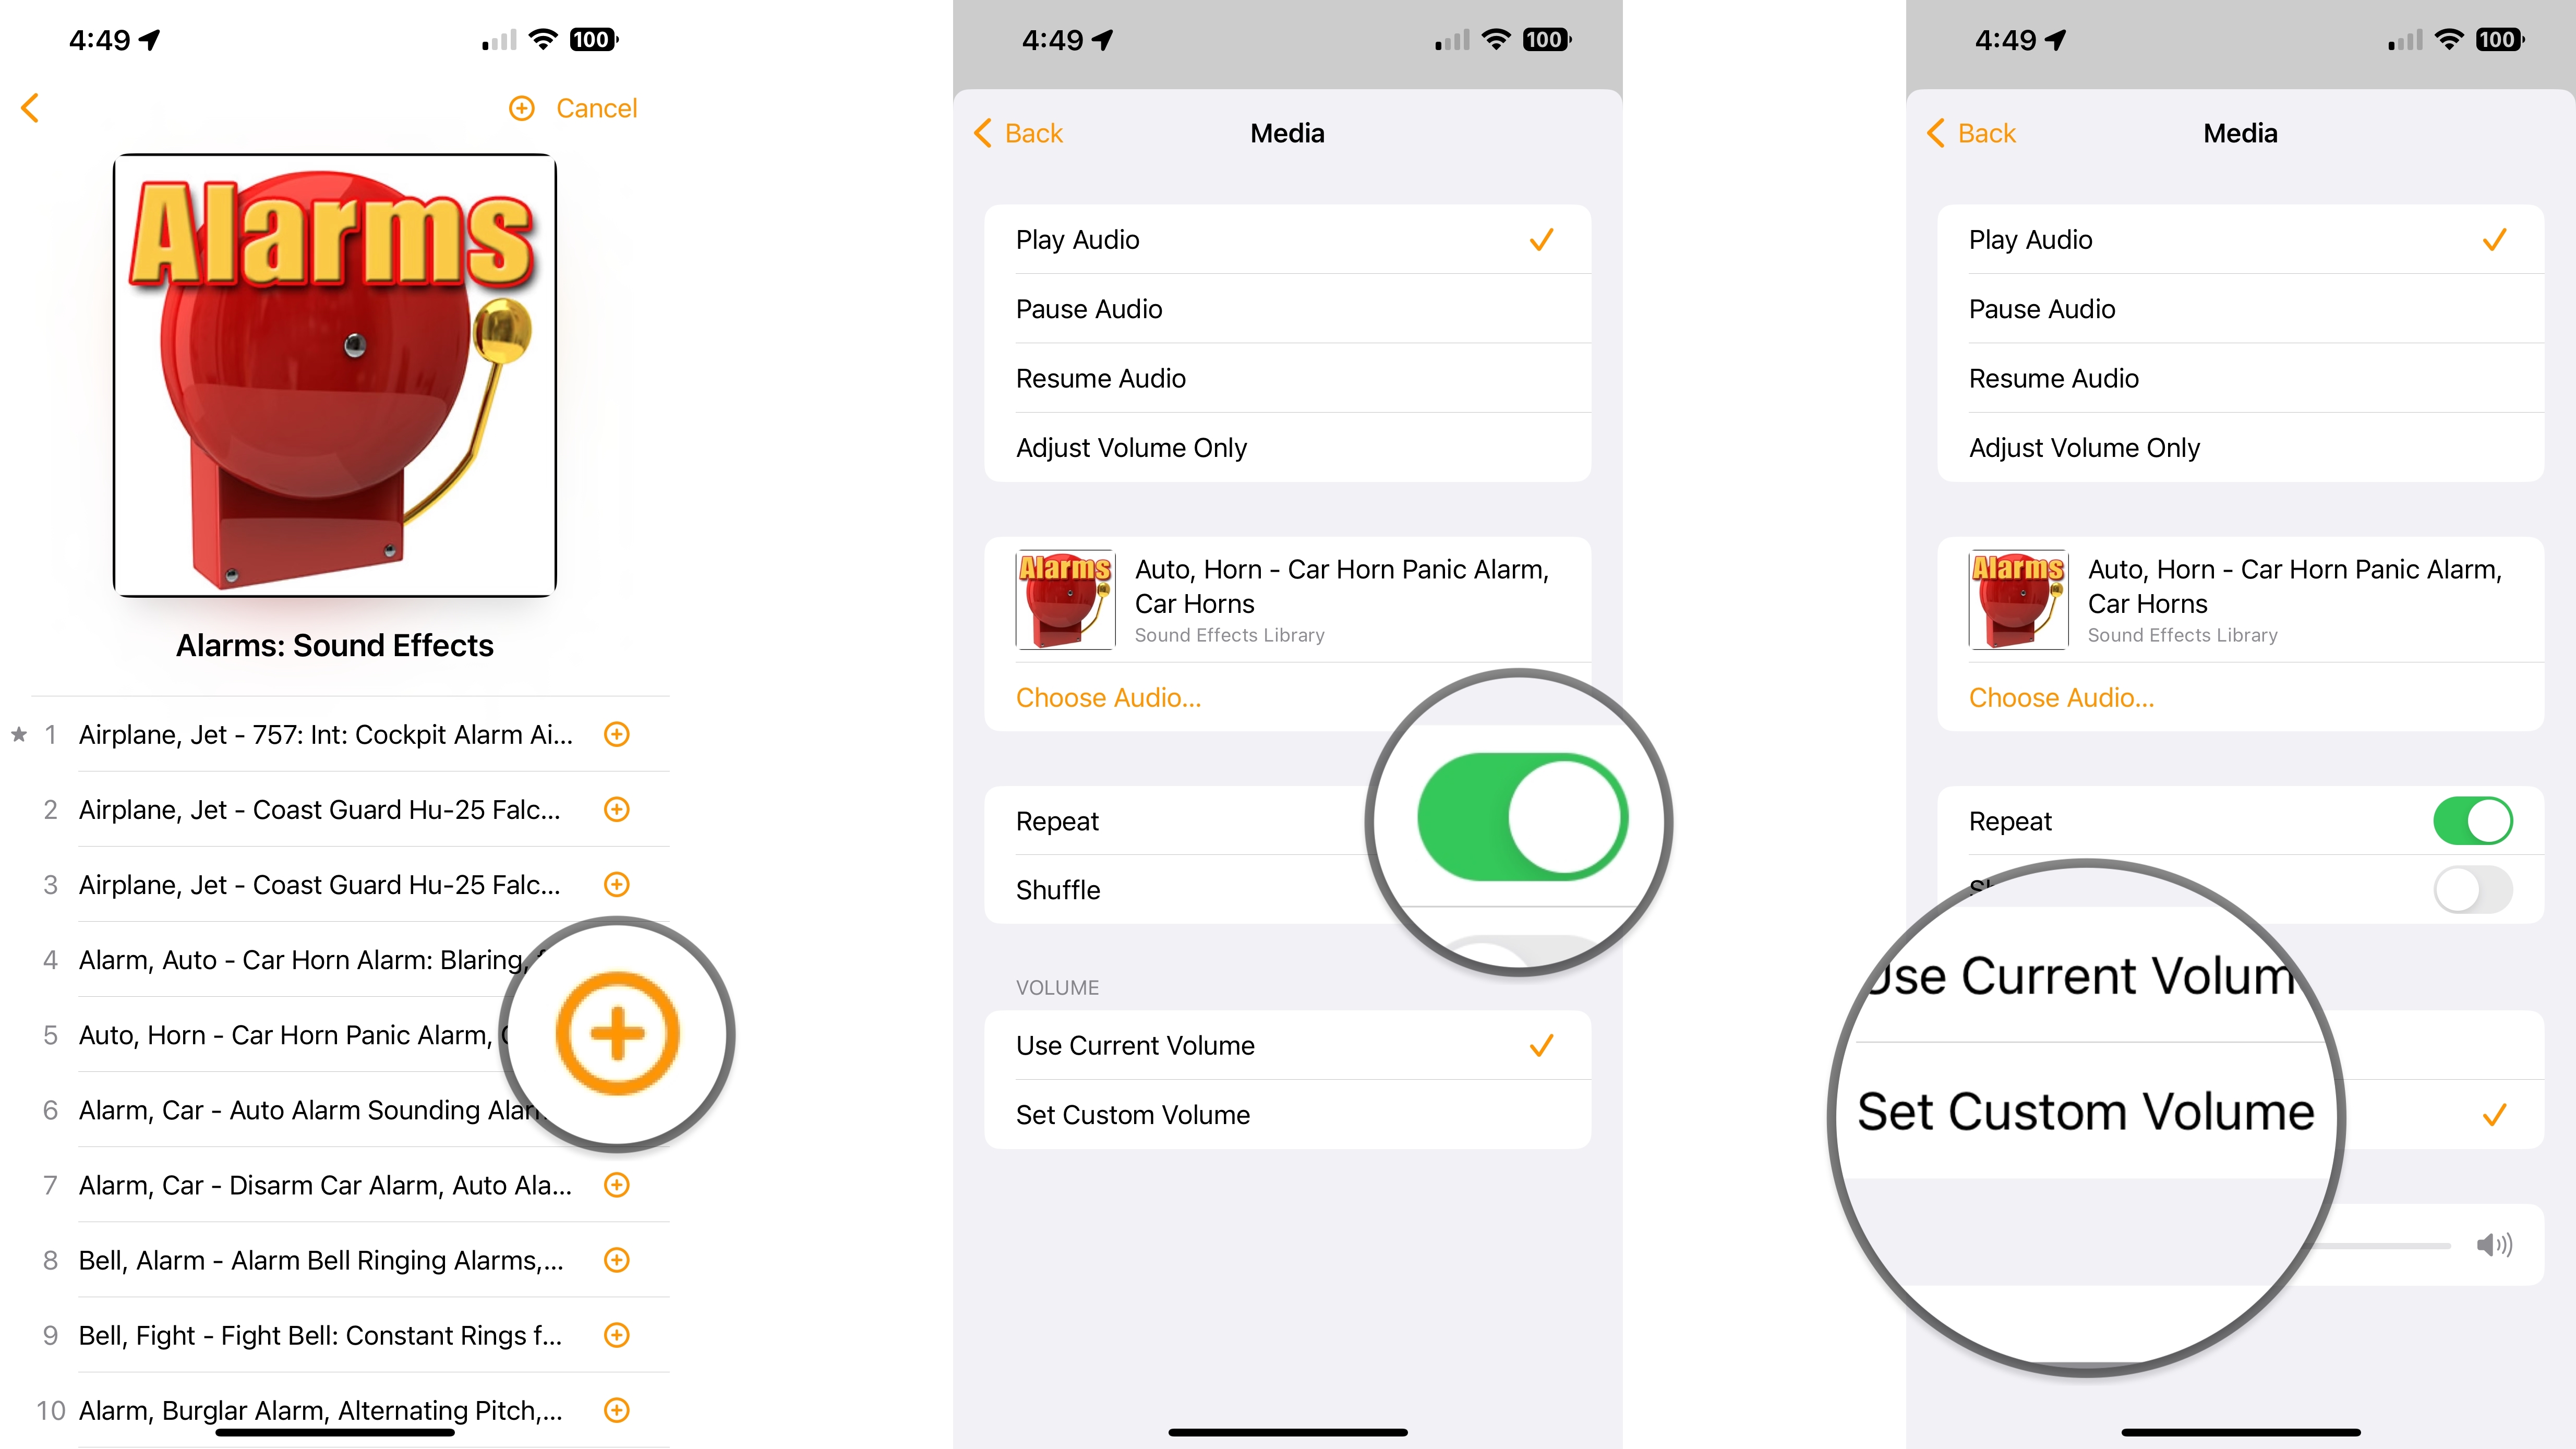
- Tap Back.
- Tap Turn Off and set your desired duration for how long your alarm should sound.
- If you want your sound to play until you turn it off, choose Never.
- Tap Done to save your automation.
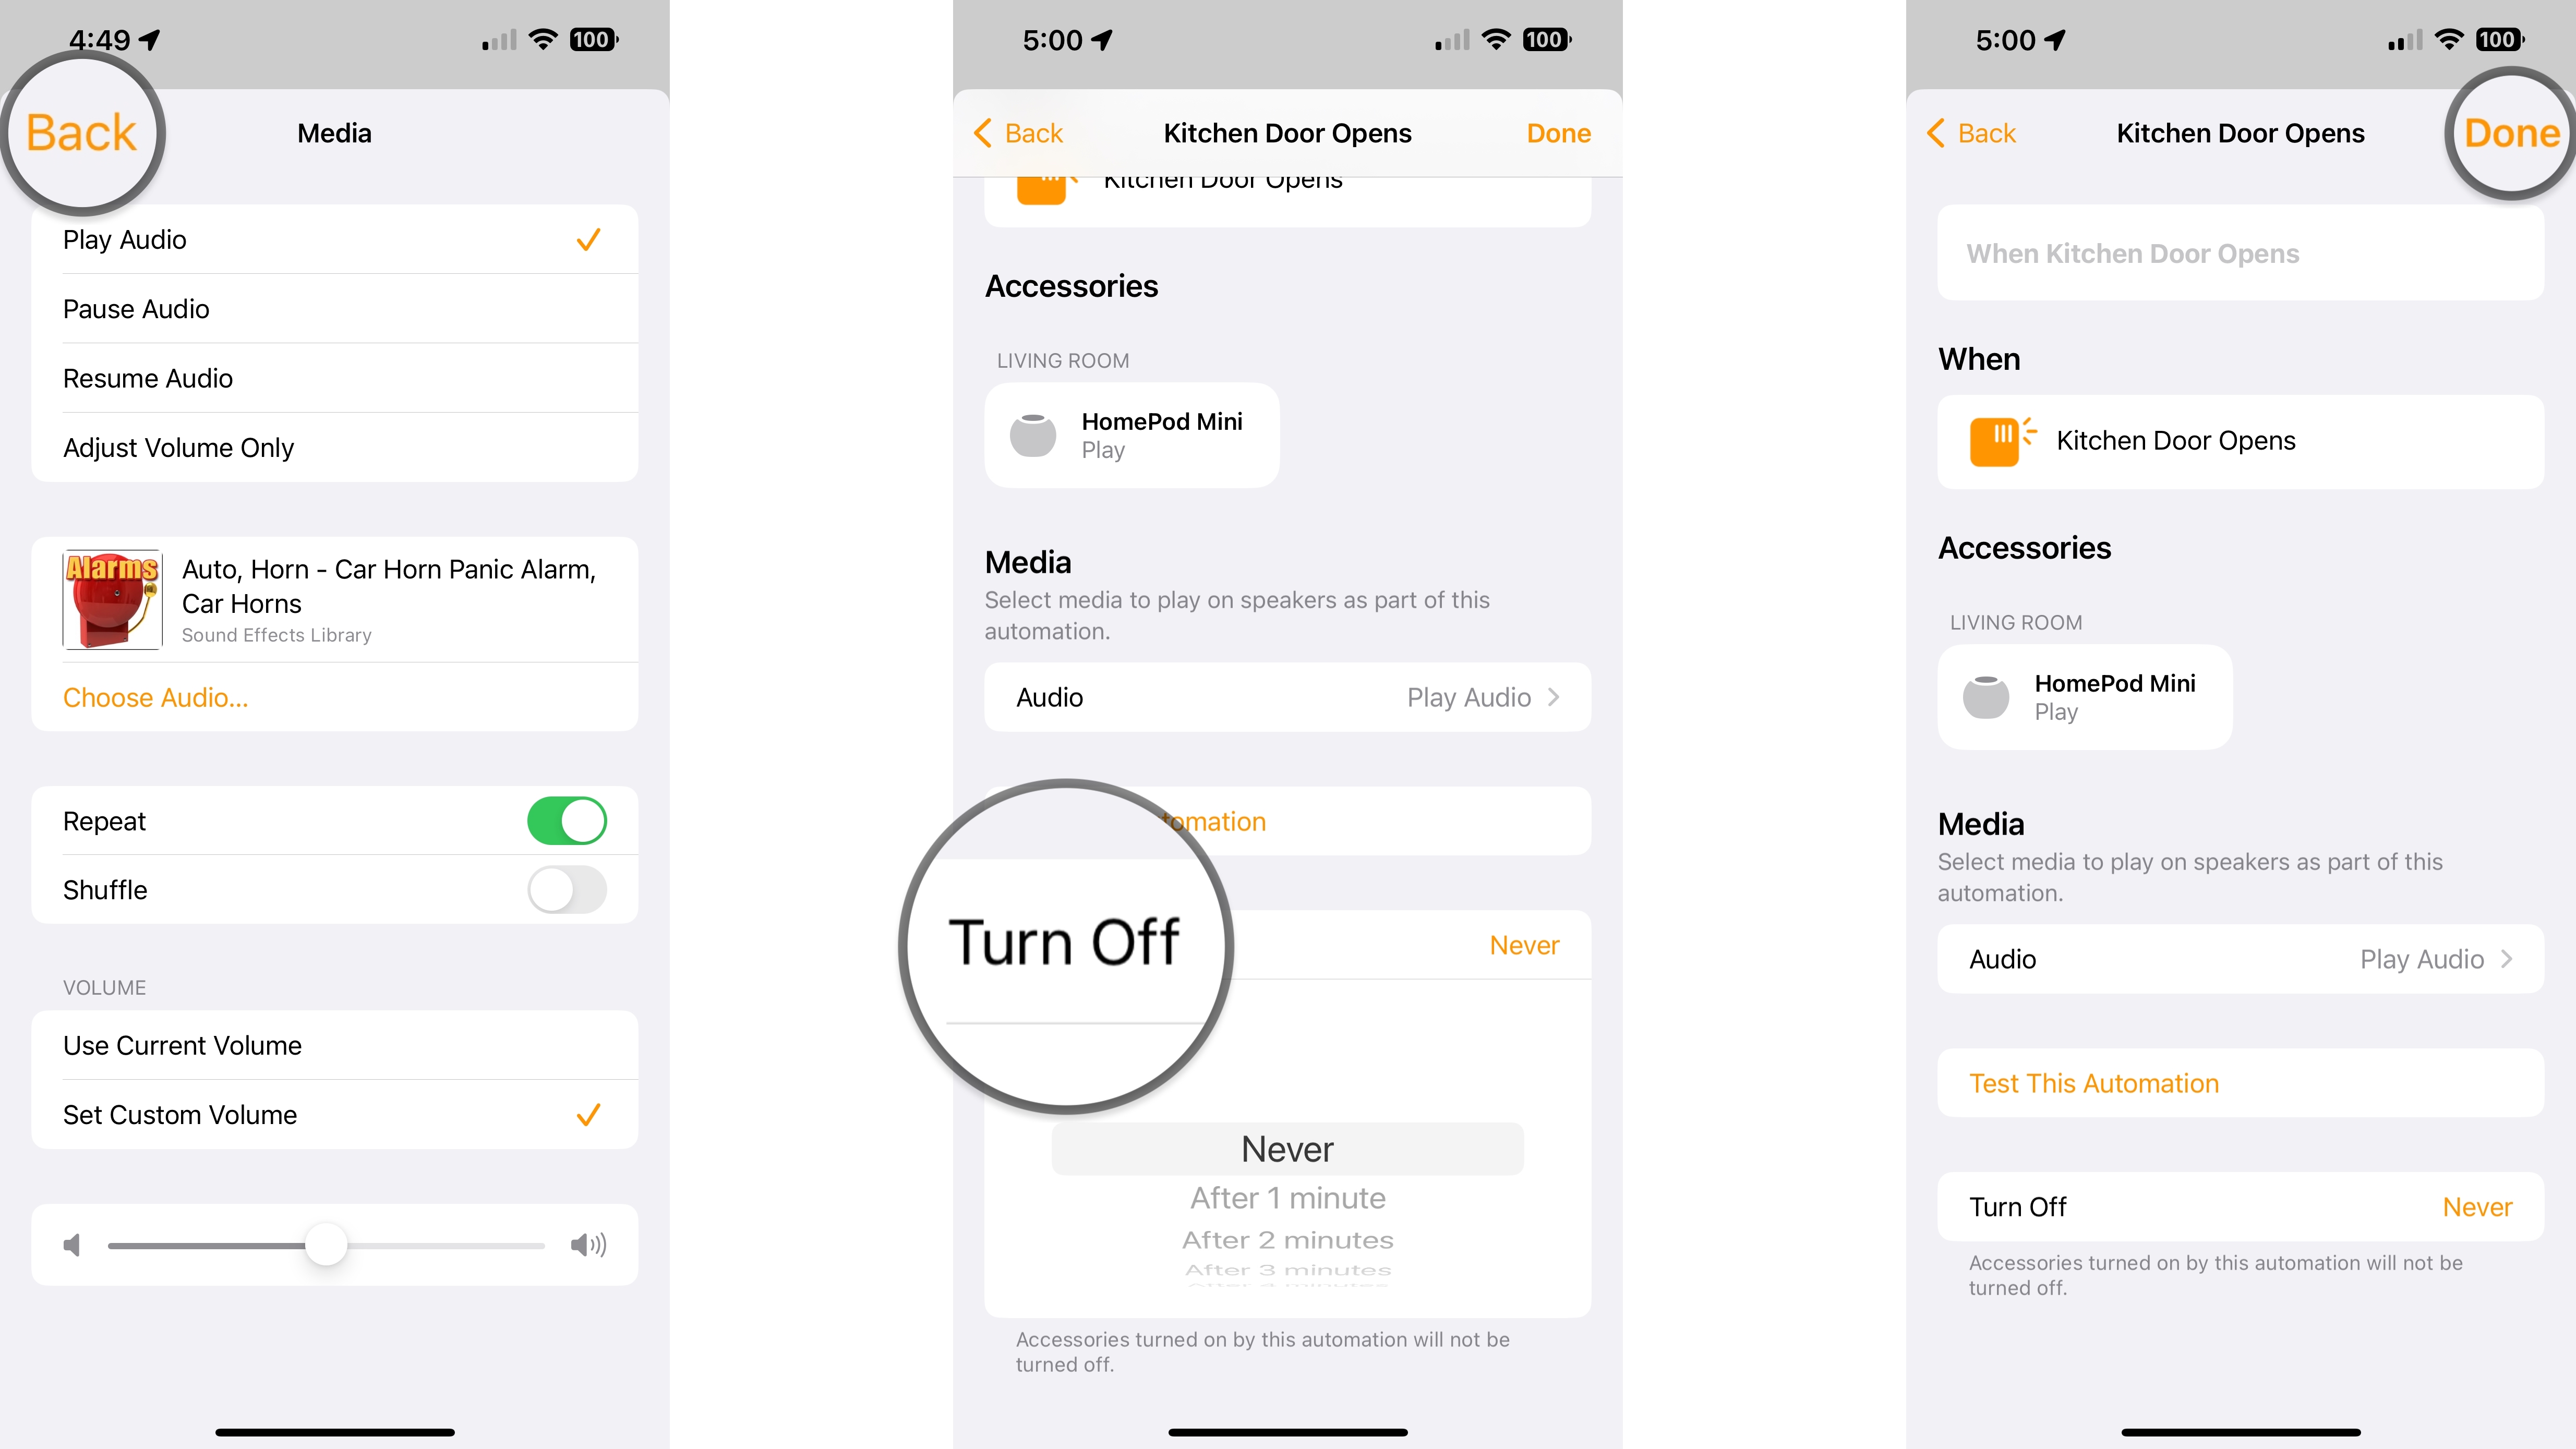
You now have your HomePod set to activate the assigned alarm sound when a motion event occurs or when your security device triggers. To stop your alarm, tell Siri on the HomePod to stop or create a HomeKit scene that pauses playback on the HomePod. You can then assign it as a favorite in the Home App for easy access.
Secure your home with your HomePod and the Home app
As you can see, using your HomePod as a DIY security alarm is a breeze. All you need is a security device like a HomeKit motion sensor and an Apple Music subscription. There are tons of sounds available to keep would-be intruders at bay, including horns, sirens, and even dogs barking — all just a tap away. For maximum security, be sure to leverage the HomePod or HomePod mini's power by cranking up the volume for your automation.
Master your iPhone in minutes
iMore offers spot-on advice and guidance from our team of experts, with decades of Apple device experience to lean on. Learn more with iMore!
Christopher spends most of his time writing and dreaming about all things HomeKit and the Home app. Whether it is installing smart light switches, testing the latest door locks, or automating his households daily routines, Christopher has done it all.

