How to use Instagram Reels: The ultimate guide

Instagram may have started as a simple app to share photos with your followers, but in recent years it has become so much more than that. The massive social media platform is continually trying to find new features to add to its app to keep users coming back for more, and its latest feature is called Instagram Reels.
Instagram Reels is a new way to create and share content on Instagram, and it works differently than the other video features such as live video, Instagram TV, and your Instagram Story. Here's what you need to know about how to use Instagram Reels.
What is Instagram Reels
Instagram Reels lets you record and edit 15-second videos to share with your followers, or if you have a public account, it will show your Reels can show up in the explore feed.
Unlike your Instagram Story, which can also capture videos that you can edit with emojis, GIFs, and other fun features, Reels lets you use multiple clips like TikTok.
There are multiple effects you can add to any clip in the 15 seconds as well as music through Instagram music. There are also some other fun features like changing the playback speed of a clip and an align feature that lets you line up your clips so you can try to be in the same spot in each clip.
How to create an Instagram Reels
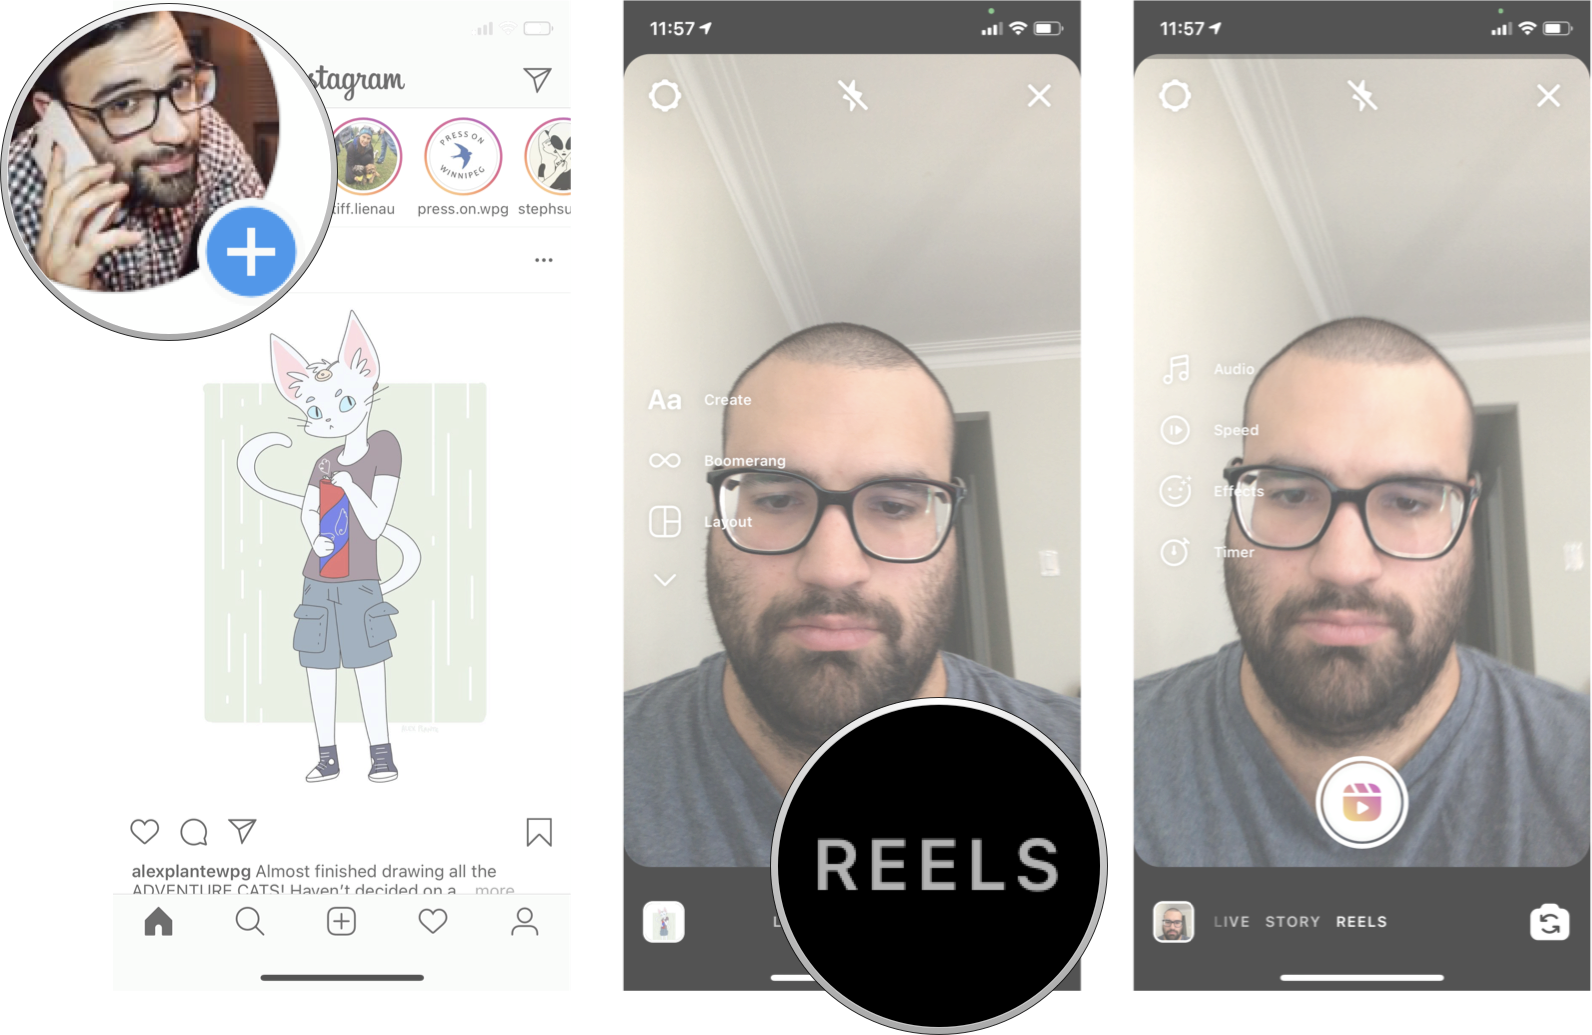
If you've used Instagram before to make videos for your Story, the interface is pretty similar, but Reels does give you a few more options. When you open your Instagram camera, you'll now see three options at the bottom of the screen. Live, Story, and Reels. Tap on Reels to get started.

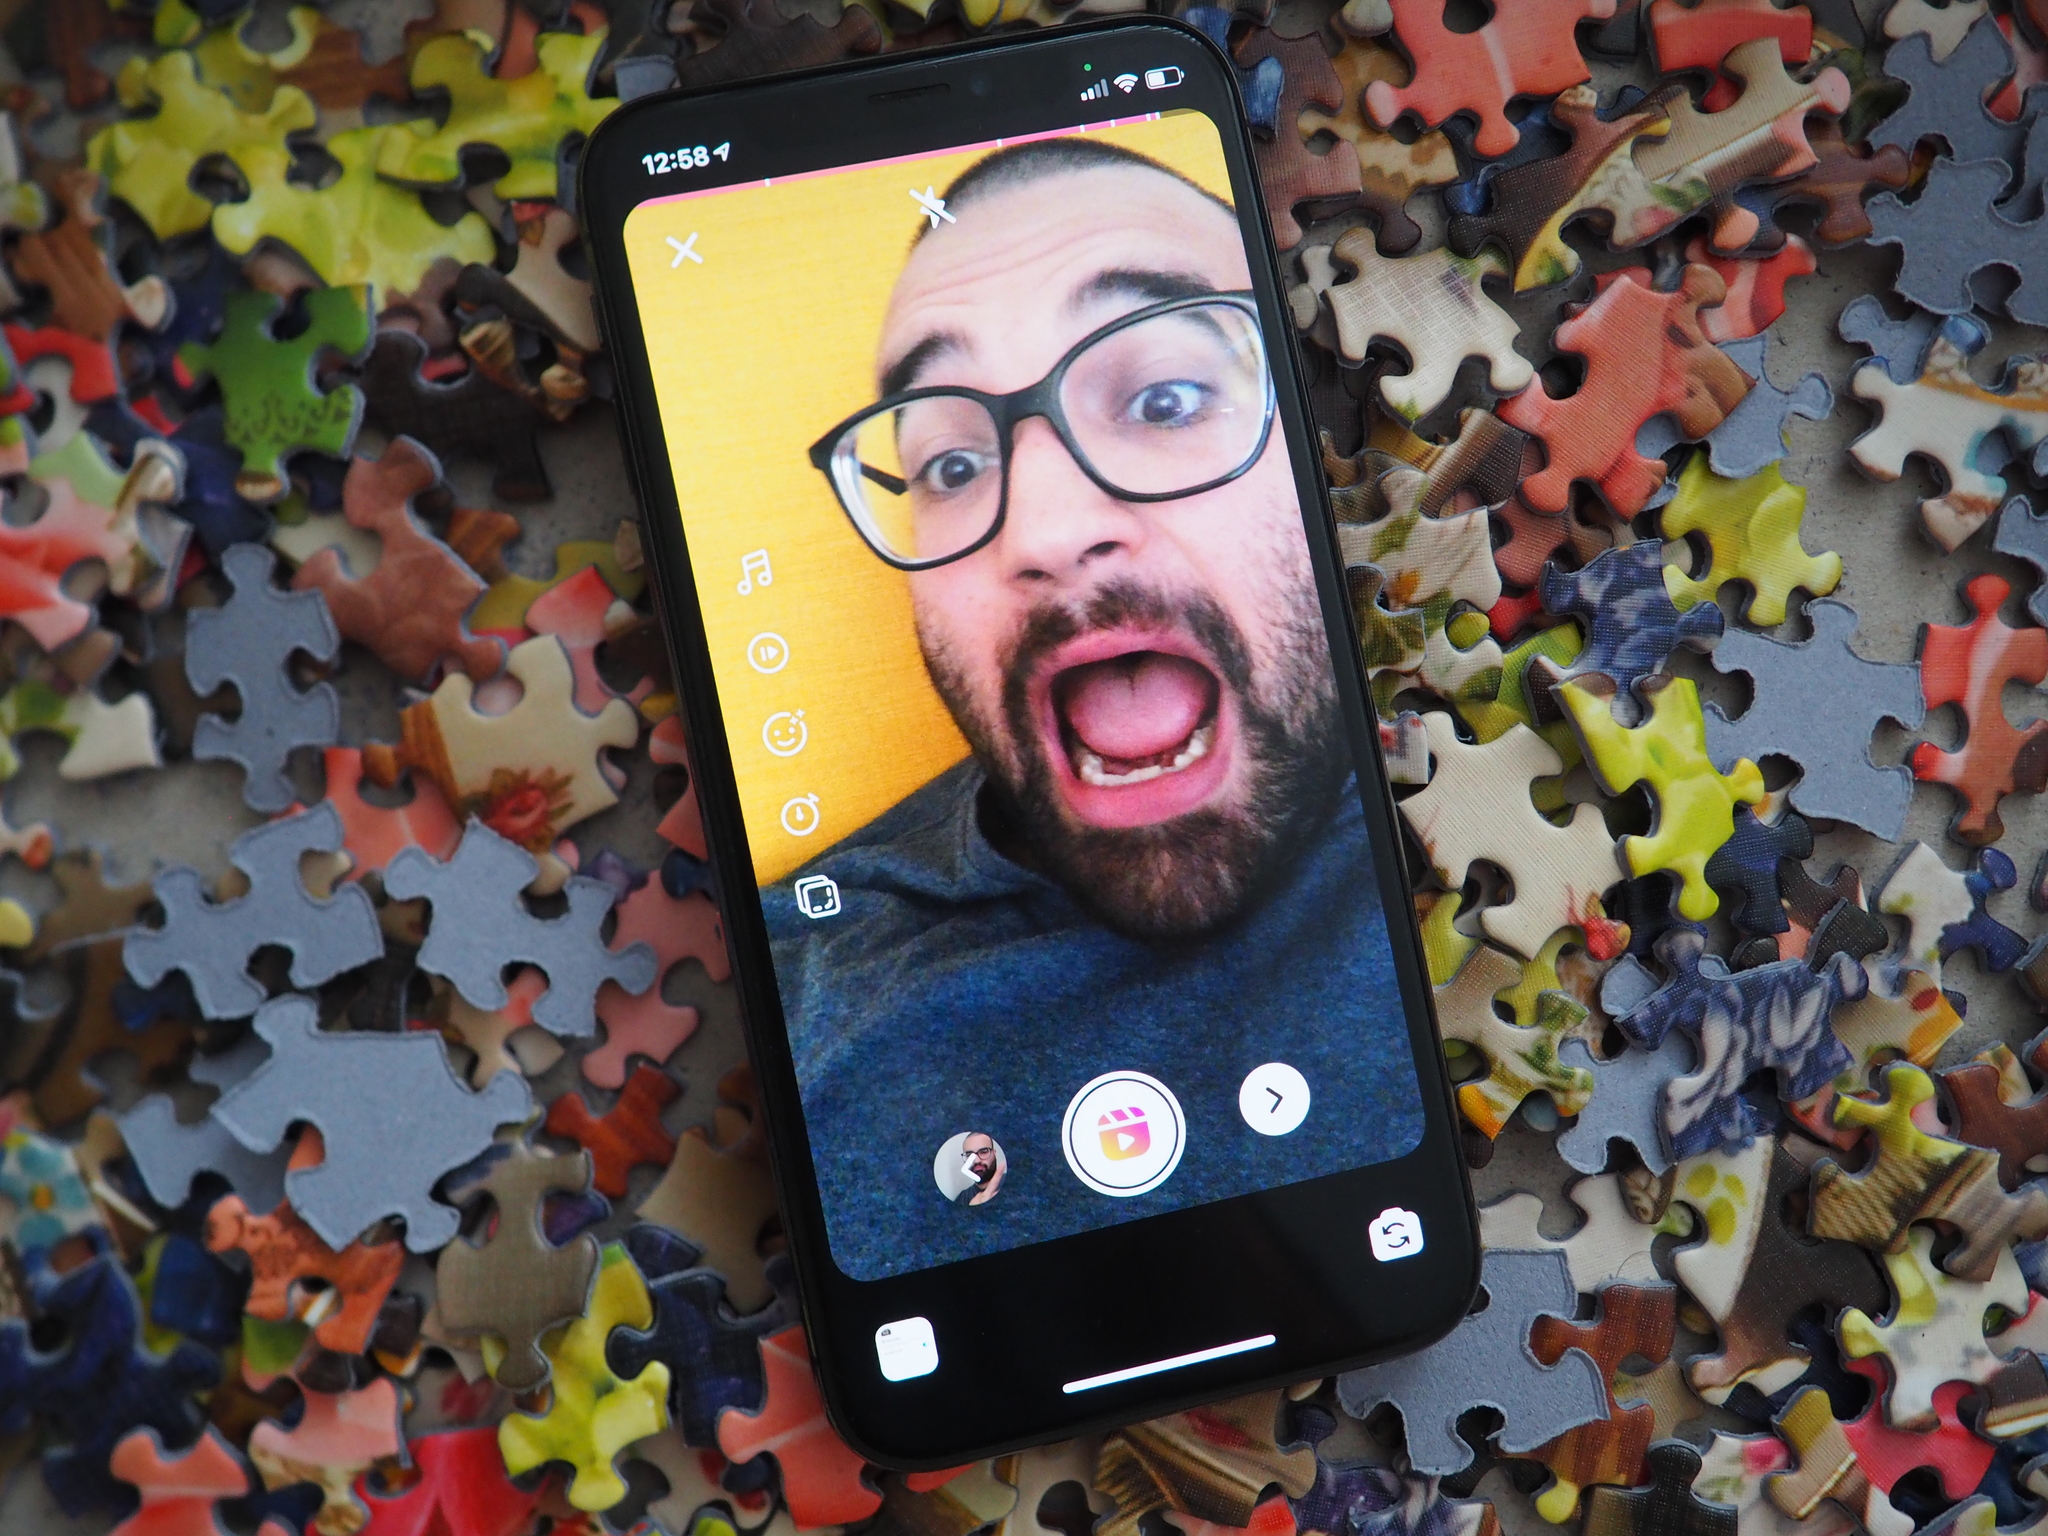
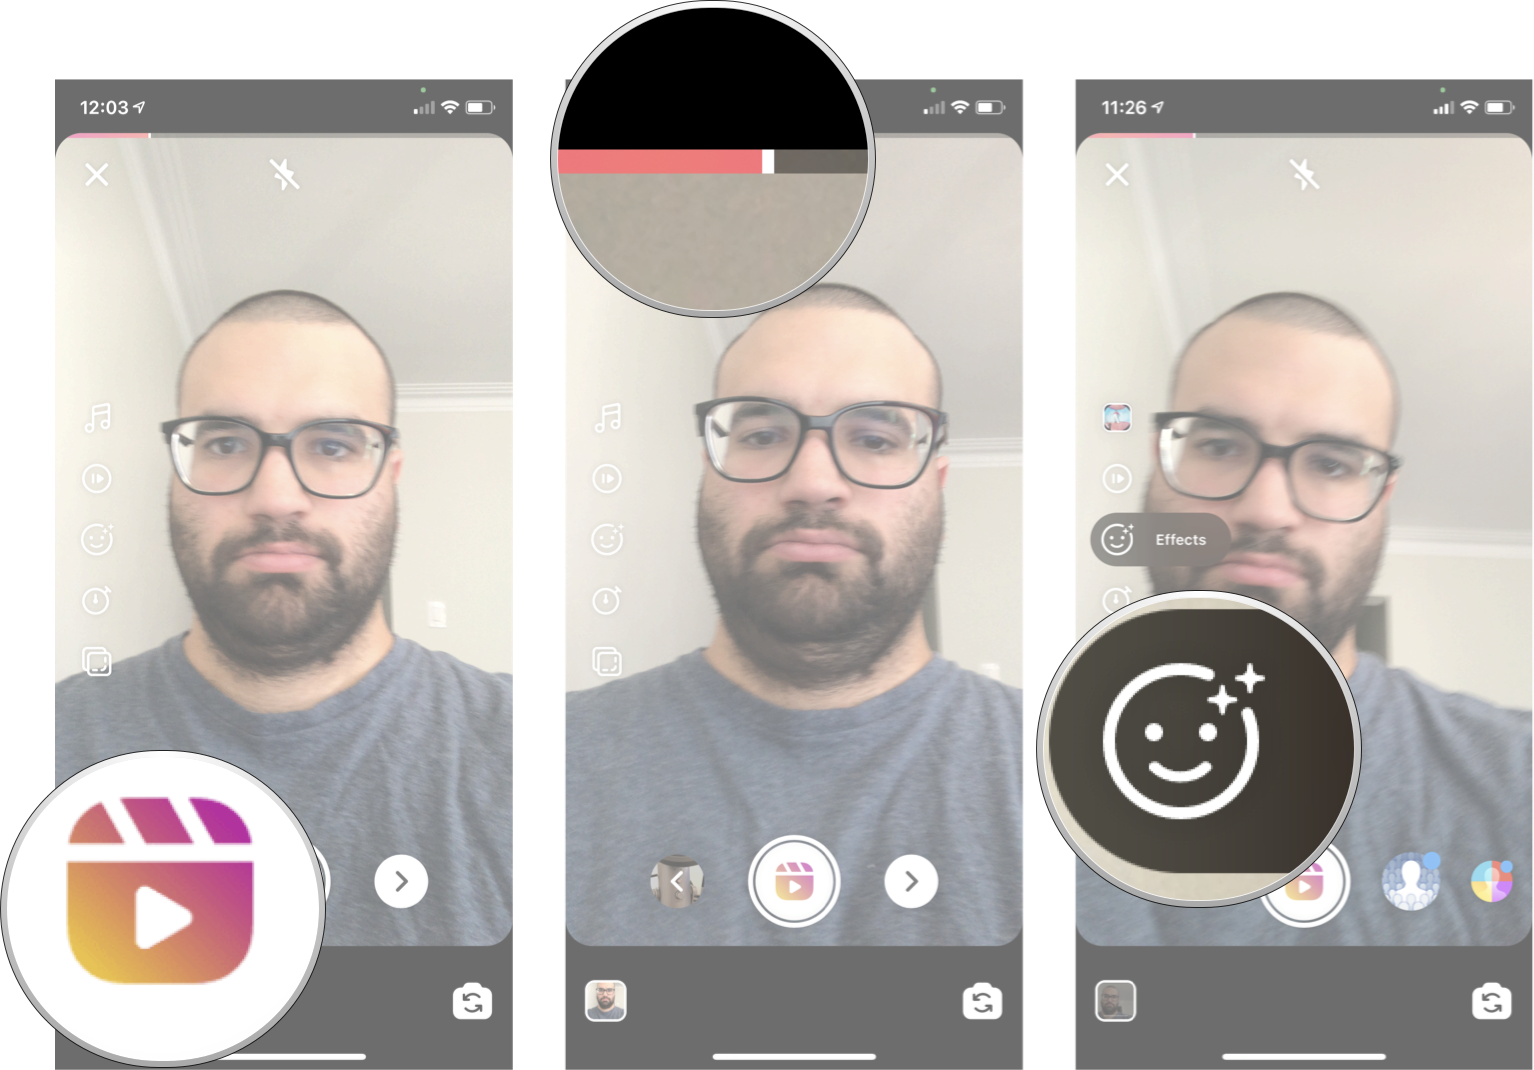
When you have the Reels camera open, you can tap and hold on the camera button to record a video clip. When you let go of the camera button, it will stop recording, creating a clip. As you record a clip, you'll notice the progress bar at the top of the page, which shows how much time you have left before the clip is full — as long as you have time left, you can continue to add clips to your Reels.
Master your iPhone in minutes
iMore offers spot-on advice and guidance from our team of experts, with decades of Apple device experience to lean on. Learn more with iMore!
On the left-hand side of the screen in the Reels camera, you'll see a variety of different options for editing. You can add music, add effects, speed up or slow down a clip, and more.

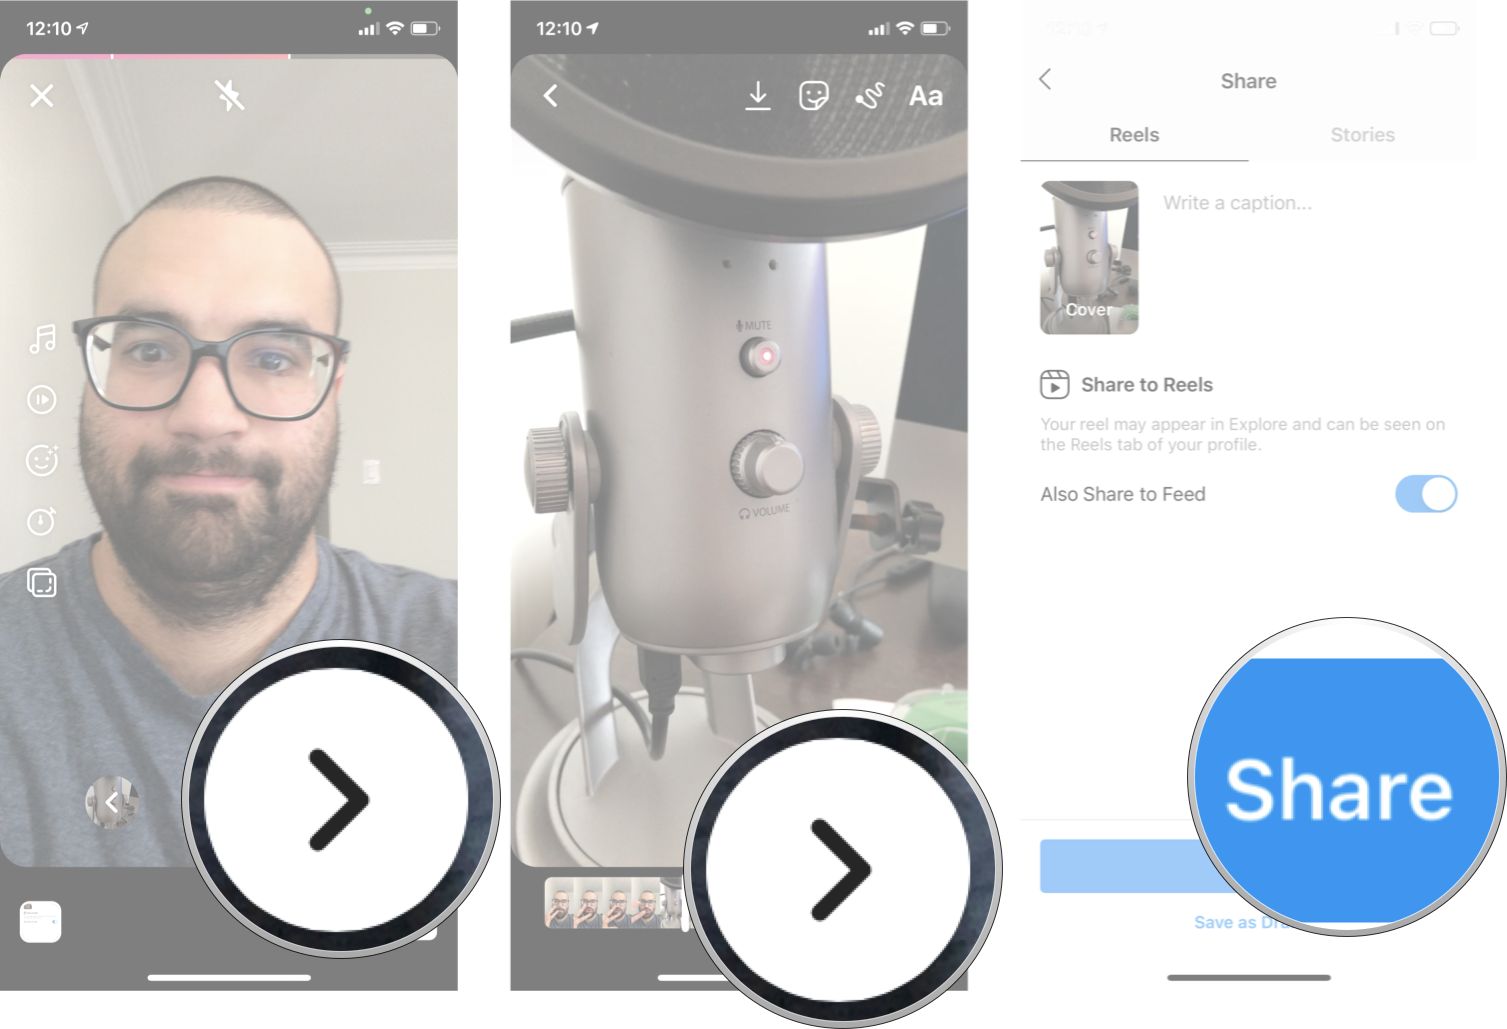
Once you're happy with your Reels video clips, you can tap the arrow to what the finished product and do even more editing. From here, you can now edit the Reels, much like an Instagram Story post, by adding text, stickers, and more.
Once you're done that, you can tap the arrow again to finish posting your Reels video. You'll be able to add a caption, choose a cover shot, add your Reels to your feed, and your Story if you choose, plus you can even opt-out of making the Reels video part of the Explore tab if you want. You can even save it as a draft if you don't want to post it right away.

That's the basics of creating and posting using Instagram Reels. Try it out for yourself, and see how fun it can be!
Breakdown of editing tools
A big part of Instagram Reels is using the different editing tools to make unique and fresh short-form videos _ here's a breakdown of what those editing tools are.
Audio: Much like you can on Instagram Stories, you can search Instagram's audio library to find songs or audio clips to use in your Reels. You can even choose the section of the audio clip you want to use (up to a maximum of 15 seconds) and have it on multiple clips or just one clip. If you use original audio by recording it with your Reels, that audio will be attributed to you; that way (if you have a public account), other people can use your audio in their Reels.
Effects: With plenty of options to choose from, effects will let you add different filters and effects to a Reels clip. Maybe you want a pulsating screen or a thousand copies of your head filling the frame; you can have a different effect for every clip if you want!
Timer: You can set a timer to record a specific amount of time (up to 15 seconds), so you can record video without having to hold down the camera button. Once you've set the timer, you can tap the record button, and it will give you a three-second countdown before it begins recording.
Align: Allows you to line up objects from your previous clip; this will help you create smooth transitions that will be seamless, meaning you can get funky by changing your outfits in between video clips.
Speed: You can choose to speed up or slow down video and audio clips as you desire so you can keep your dance movies on the beat, or even create keep slow-motion clips.
Any Questions?
Let us know in the comments down below.

Luke Filipowicz has been a writer at iMore, covering Apple for nearly a decade now. He writes a lot about Apple Watch and iPad but covers the iPhone and Mac as well. He often describes himself as an "Apple user on a budget" and firmly believes that great technology can be affordable if you know where to look. Luke also heads up the iMore Show — a weekly podcast focusing on Apple news, rumors, and products but likes to have some fun along the way.
Luke knows he spends more time on Twitter than he probably should, so feel free to follow him or give him a shout on social media @LukeFilipowicz.
