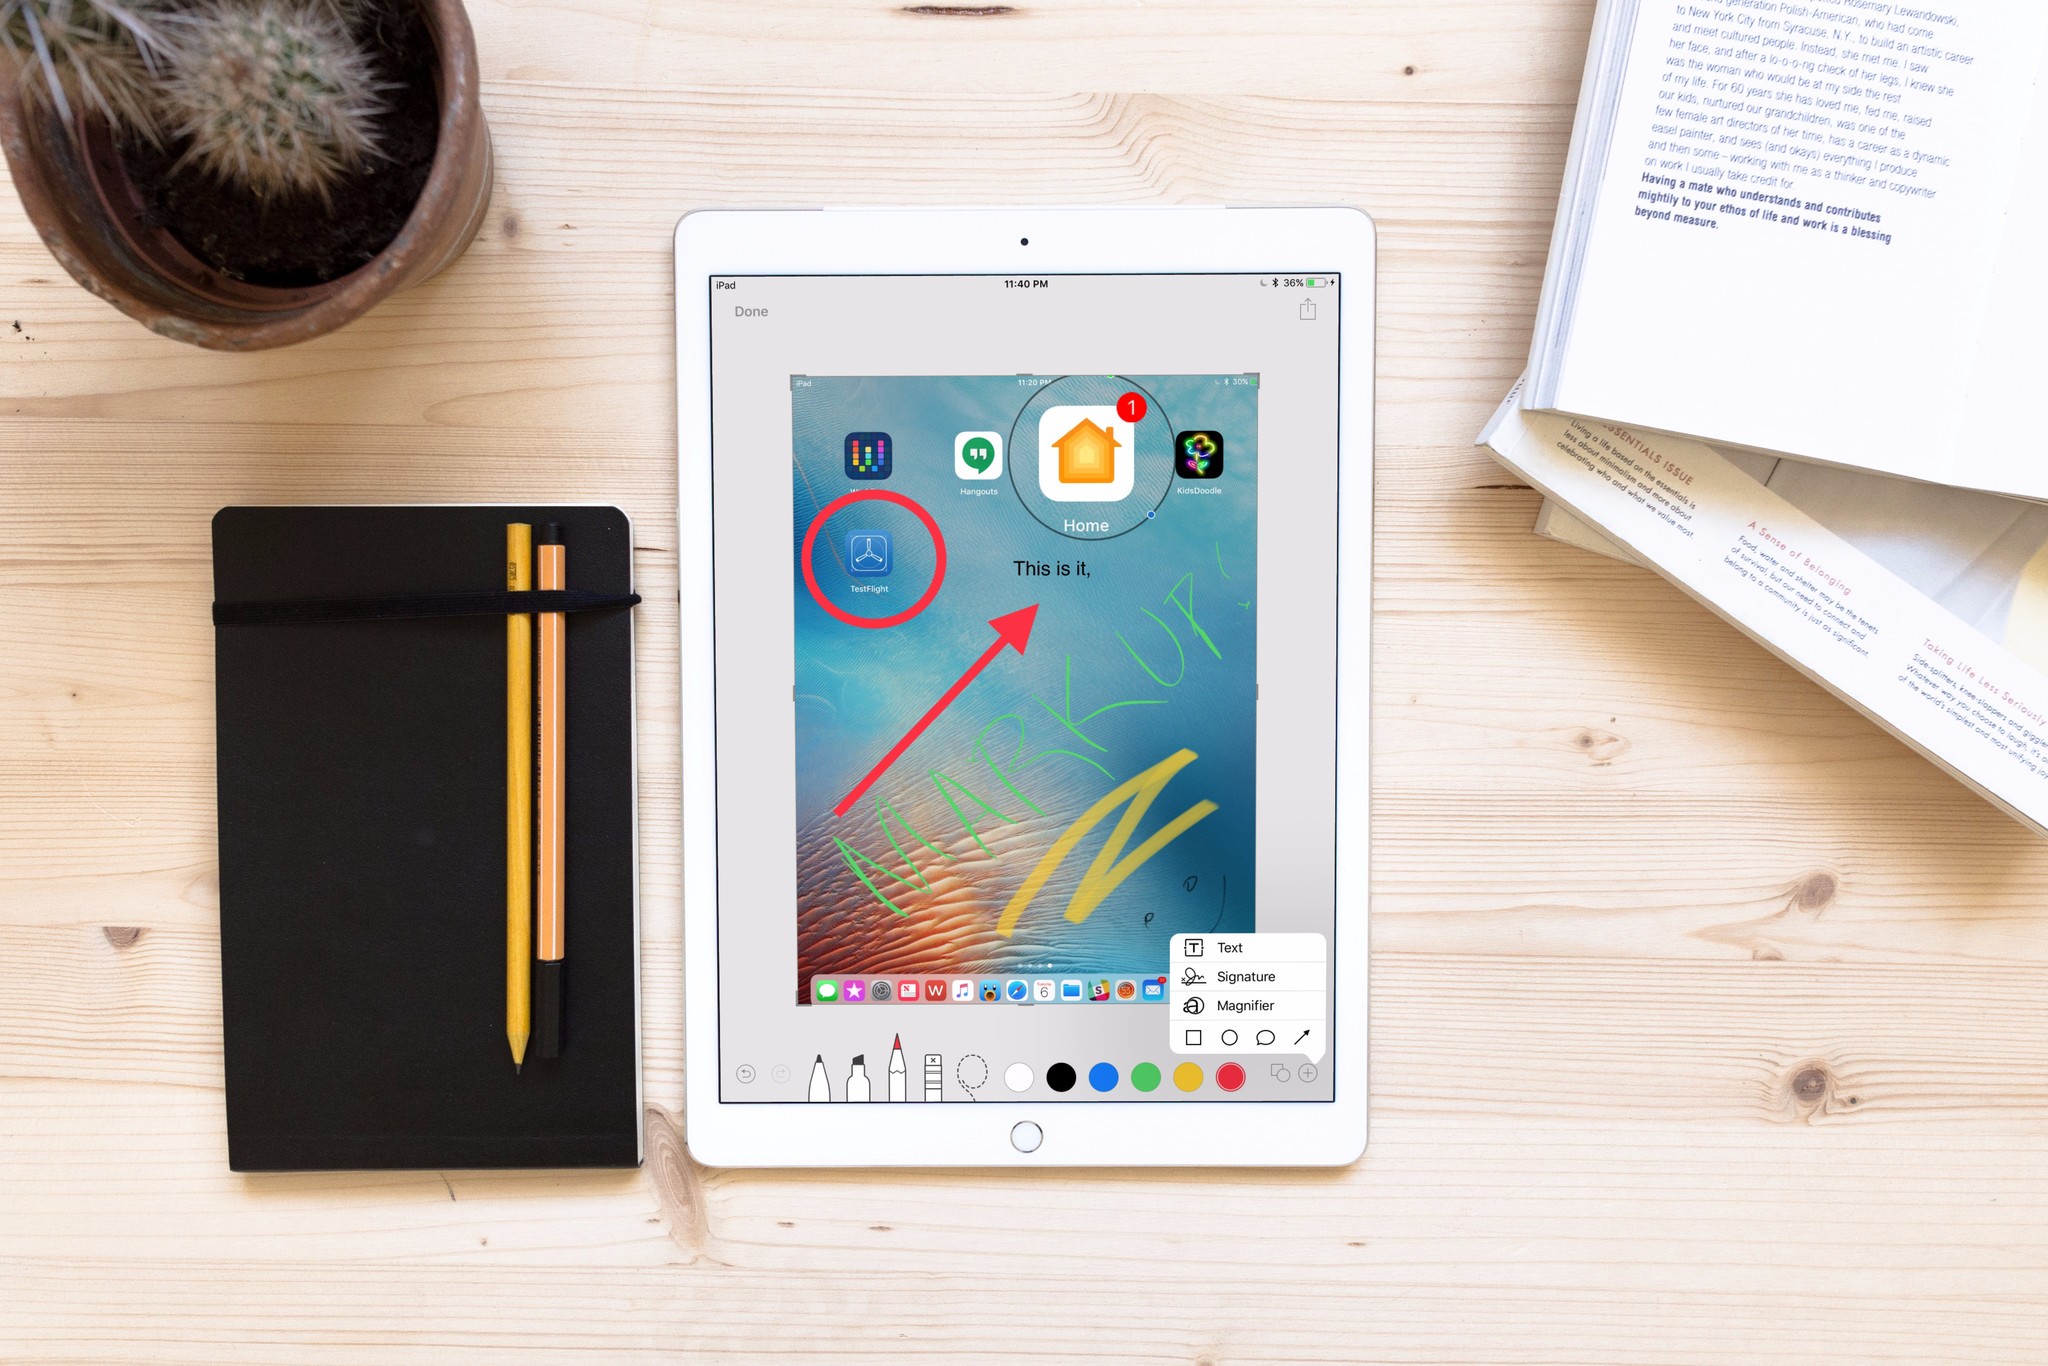
Around here, we take a lot of screenshots, and I mean a lot. We also send them through the wringer, marking them up, slapping arrows and cutouts on them, really giving them the run-through. With Instant Markup, you can access your screenshots immediately after you've taken them, and even mark them up before shipping them off to their final destination. Here's how!
- How to access Instant Markup
- How to edit a screenshot with Instant Markup
- How to save an edited screenshot from Instant Markup
- How to share an edited screenshot from Instant Markup
- How to disable Instant Markup
How to access Instant Markup
It's easy! All you have to do is tap the little PiP (picture-in-picture) box that appears in the bottom left corner of your iPad's screen right after you take a screenshot.
If you take multiple screenshots, they will all sit in the PiP drawer. When you open Instant Markup, you can switch between screenshots.
You do, however, have to take those multiple screenshots fast. The Instant Markup PiP only sticks around for five seconds before it disappears and you have to go back into Photos to mark up your screenshots ... like an animal.
How to edit a screenshot with Instant Markup
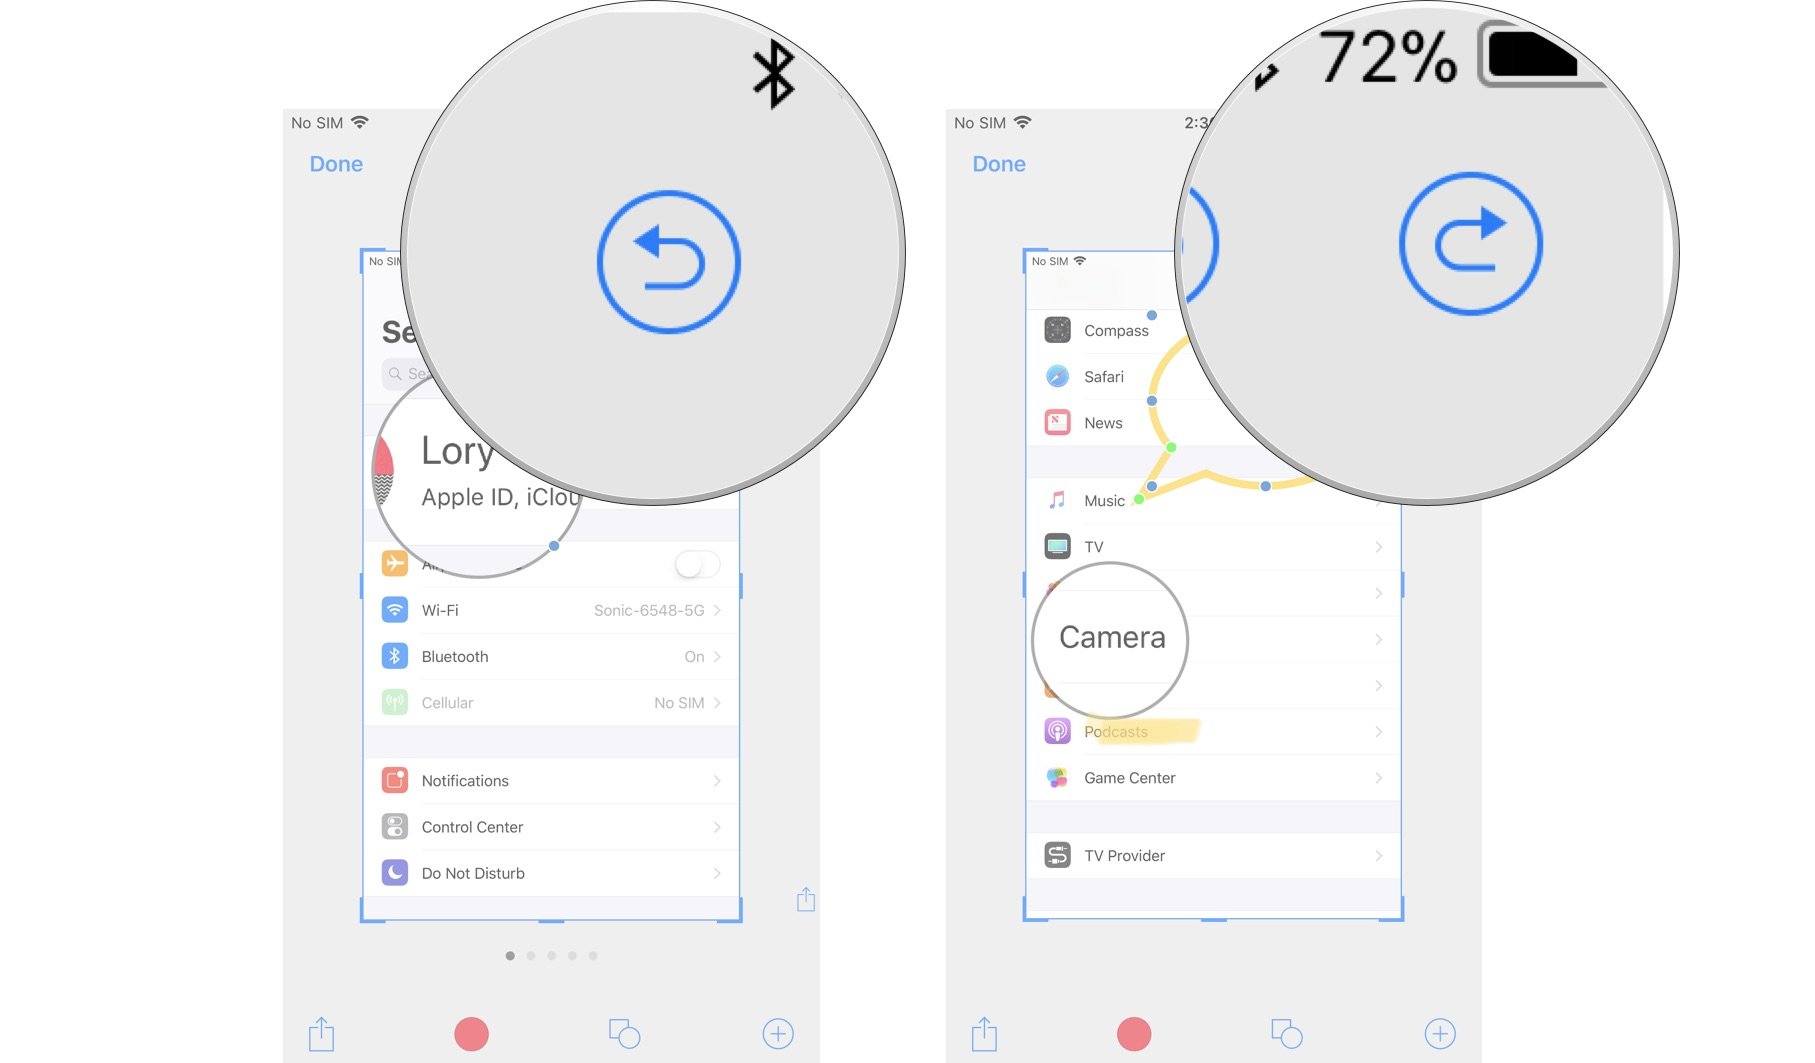
Once you've tapped into the Instant Markup Pip, you'll see a list of tools at the bottom of the screen. You can use a marker, highlighter, pencil, eraser, or Magic Rope. Tap one of the tools to select it.
You can also change the color of the writing tools from white, black, blue, green, yellow, and red.
Instant Markup lets you crop your screenshots, too. Touch and hold one of the edges or corners and drag it to the new crop.
Master your iPhone in minutes
iMore offers spot-on advice and guidance from our team of experts, with decades of Apple device experience to lean on. Learn more with iMore!
There are four additional tools you can add to a screenshot in Instant Markup by tapping the More button in the bottom right corner of the screen (it looks like a plus symbol), which are:
- Add a text field - This lets you add a layer of text to your screenshot. Tap it to select the tool, then tap the newly added text field to call up the keyboard so you can write your funny quip.
- Signature - If you've already created a signature in Preview, you'll be able to add it to your screenshot from here.
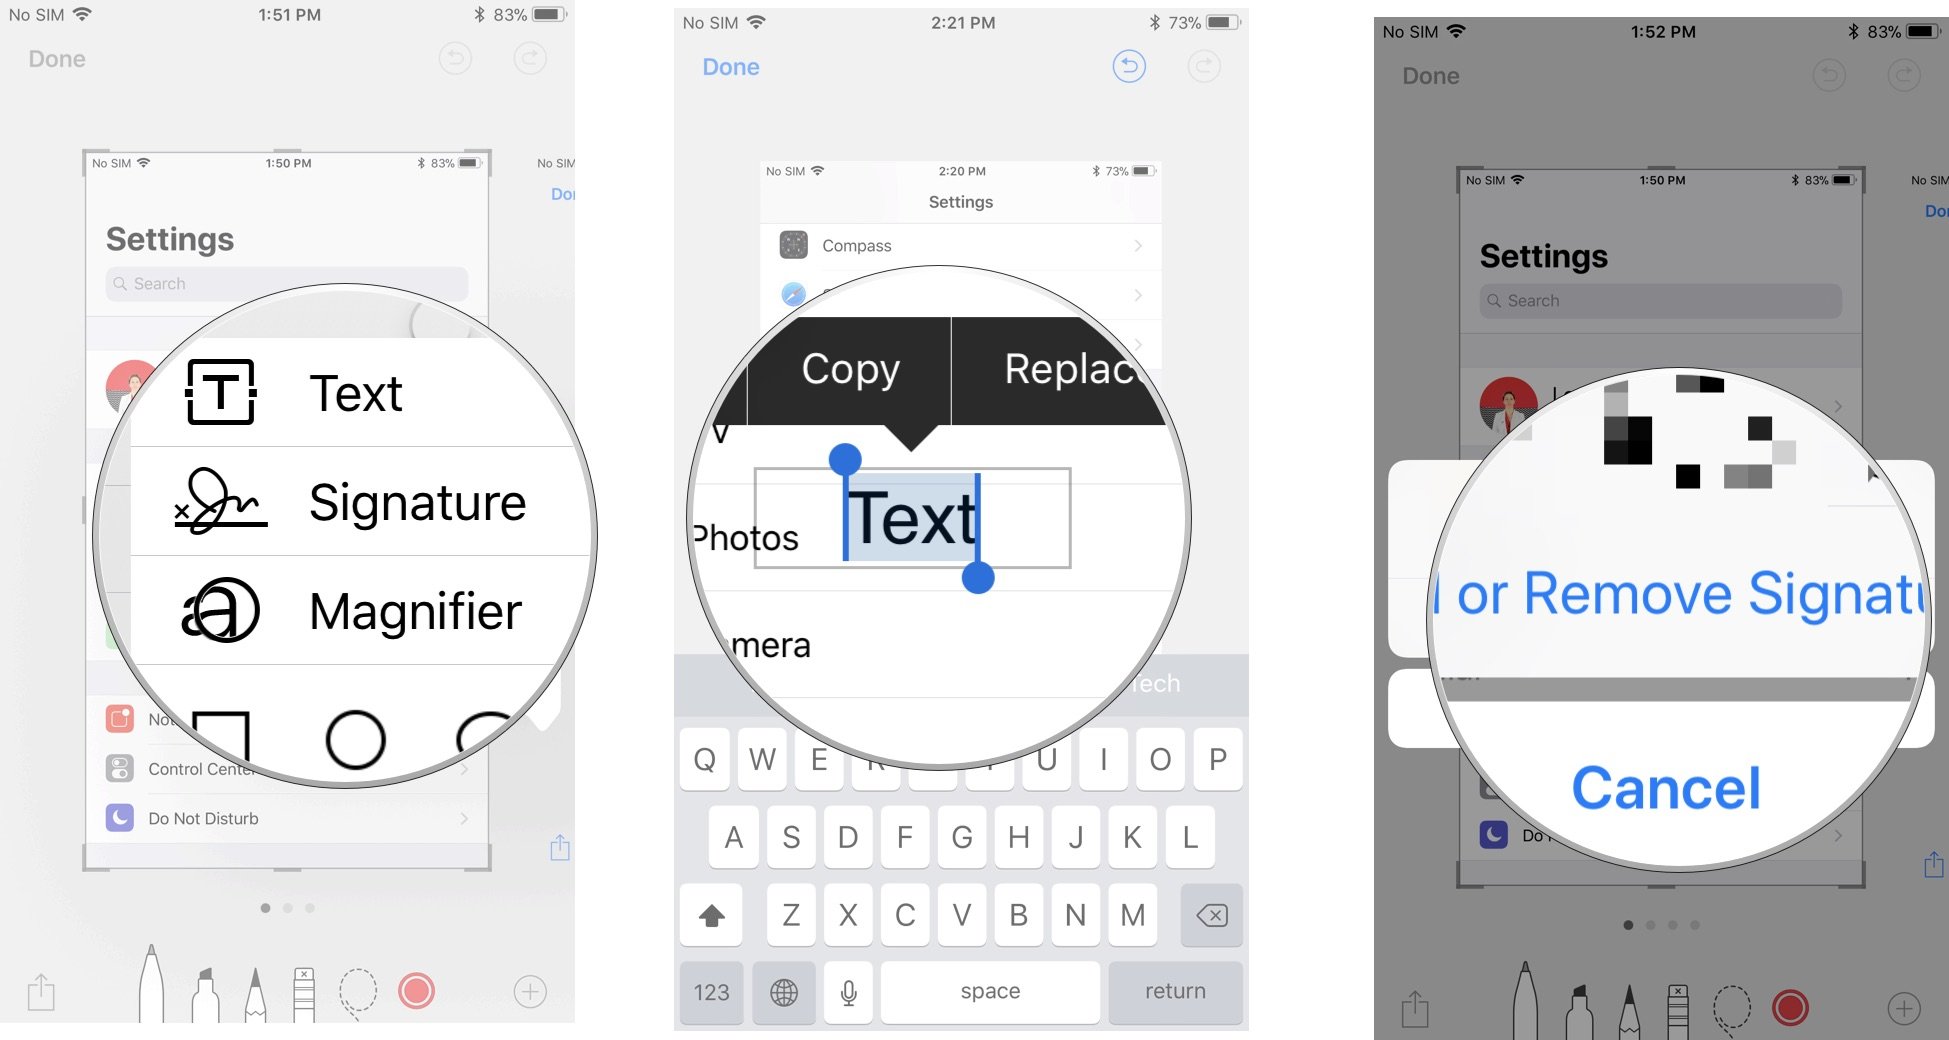
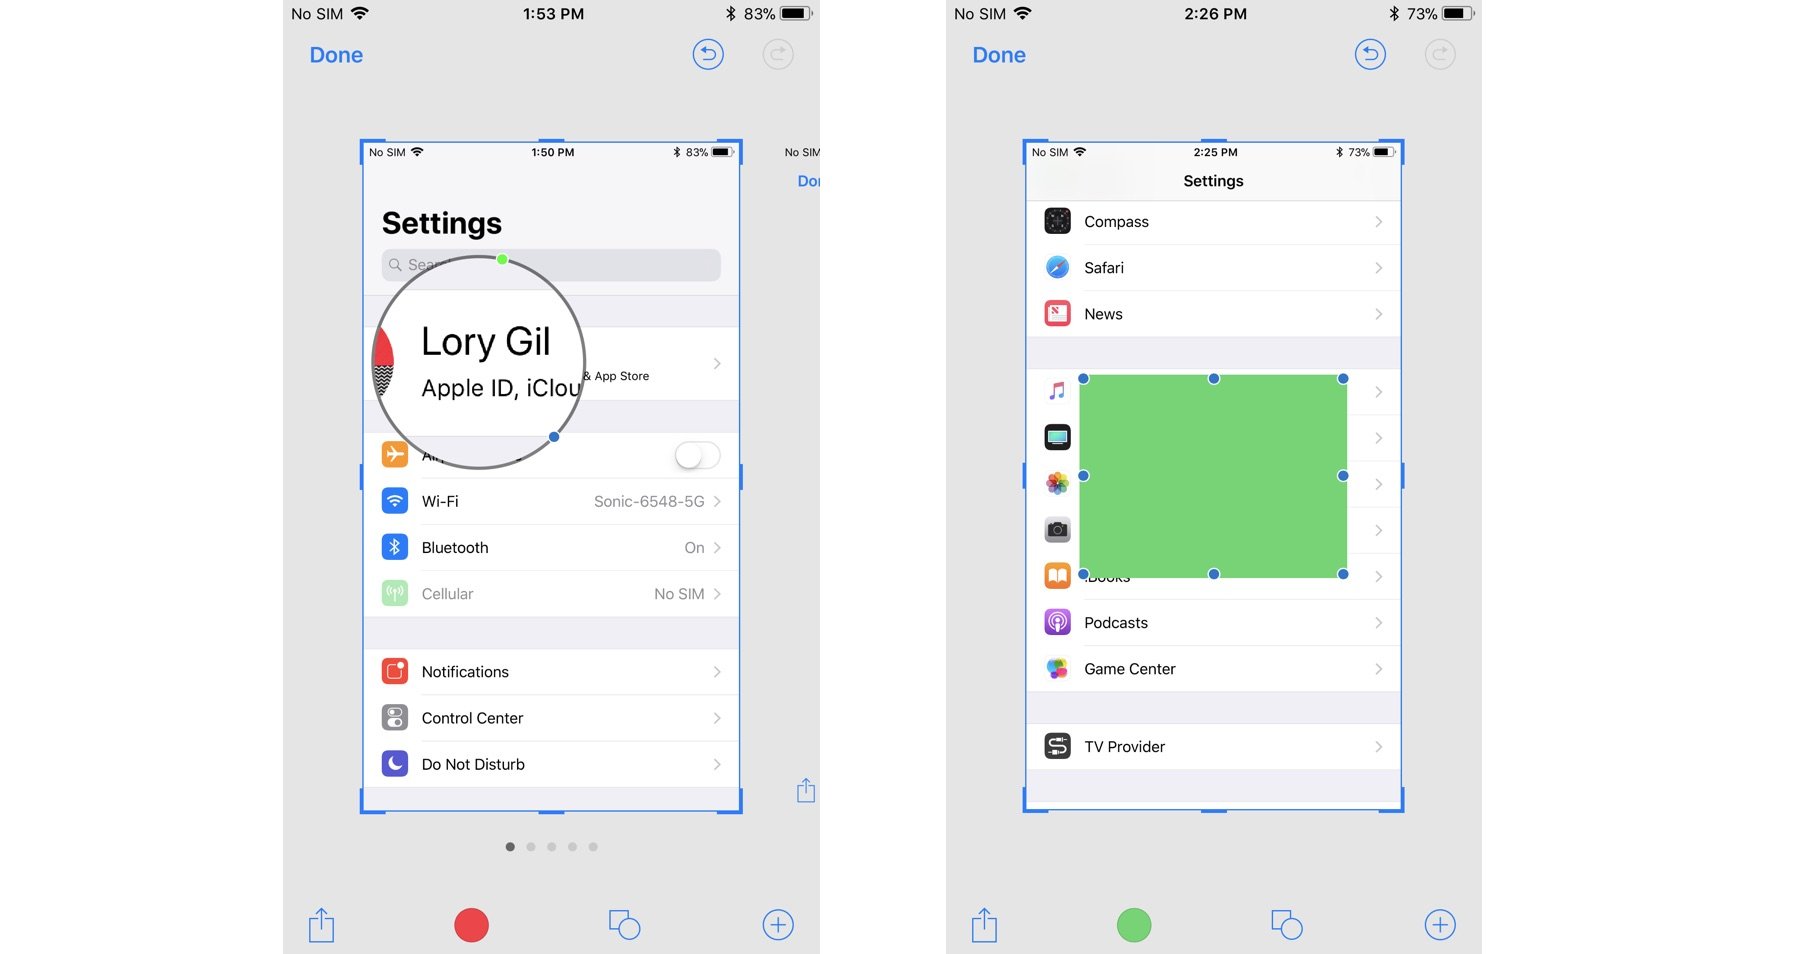
- Magnifier - This is a call-out feature that will zoom in to a particular area that fits within the magnifier you've placed. You can resize and reshape the Magnifier border, and increase or decrease the amount of zoom.
- Shapes - You can add a particular shape to your screenshot from square, circle, speech bubble, and arrow. You can either have a solid or outlined shape, and you can adjust its size and shape by dragging the edges.
If you make a mistake, you can undo each previous step by tapping the undo button in the bottom left of the screen. Conversely, you can redo any steps by tapping the redo button in the same location.
How to save an edited screenshot from Instant Markup
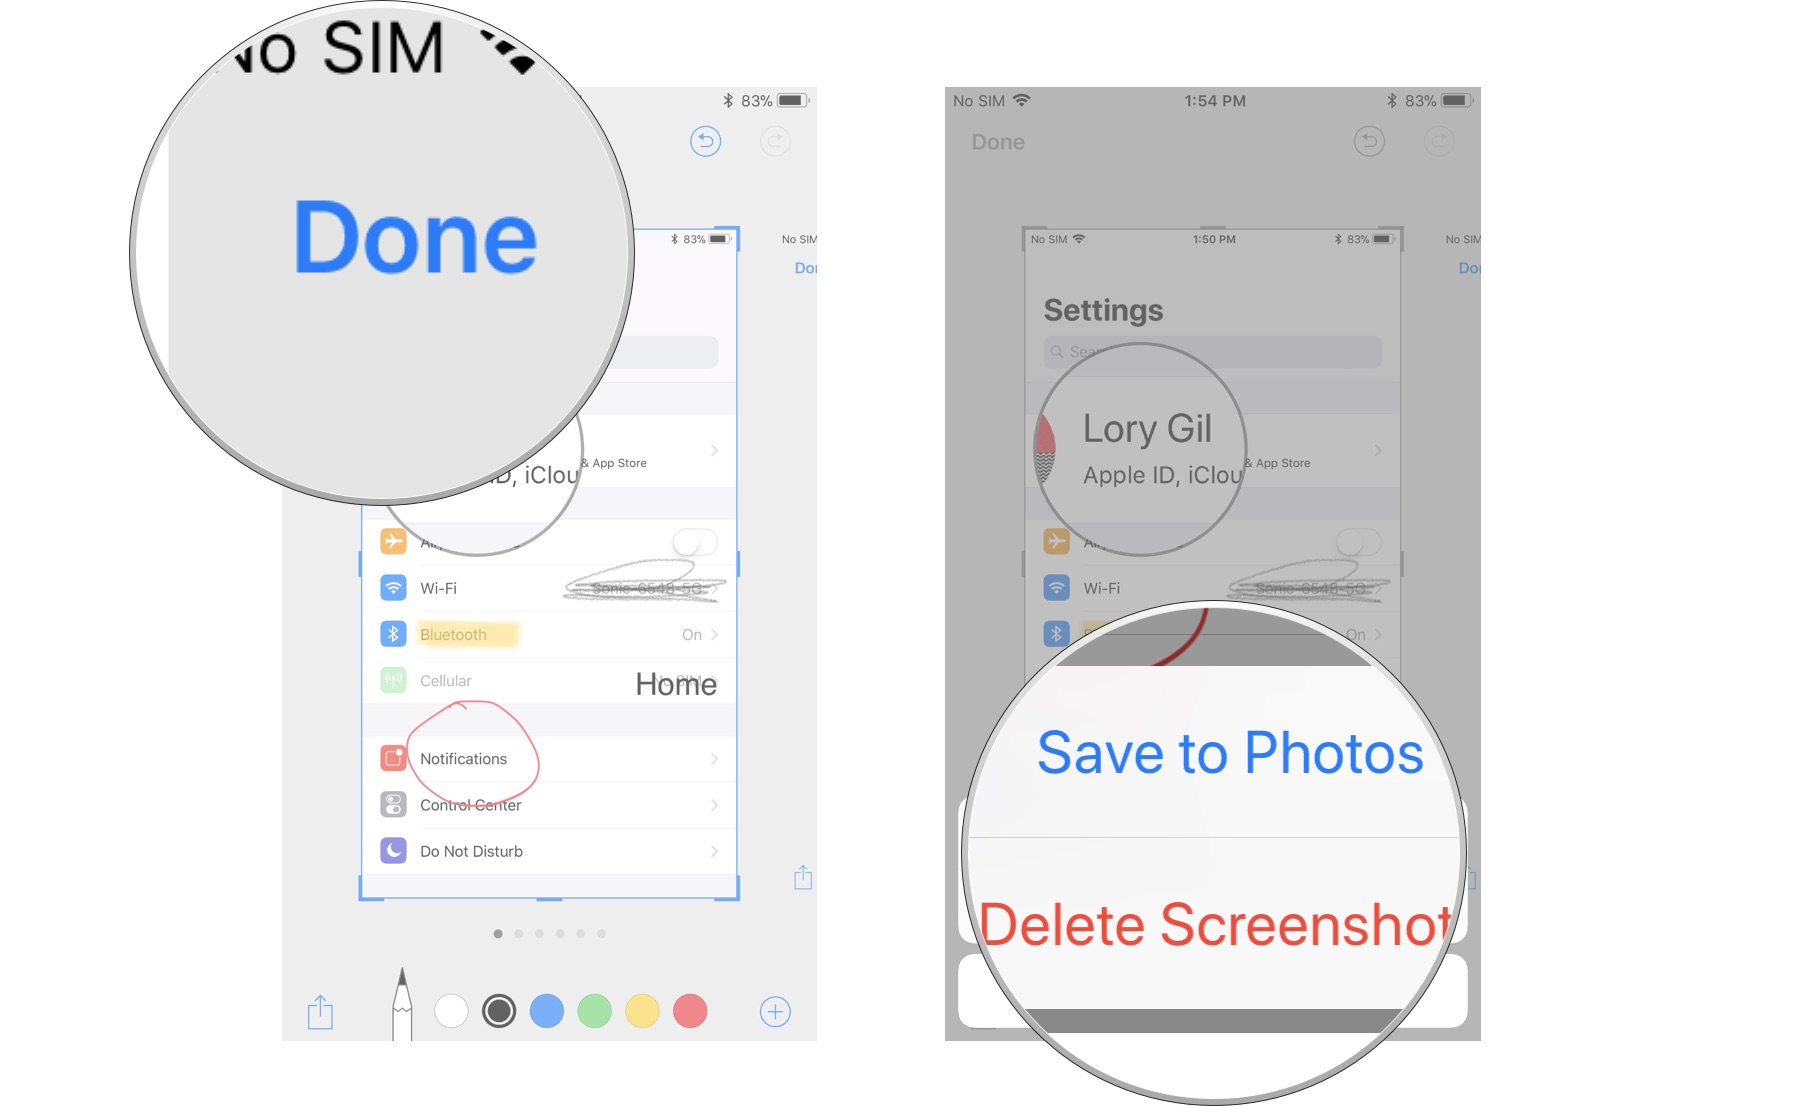
Screenshots that have been edited with Markup will not automatically be saved to your Photo library. You'll want to save them before you close Instant Markdown.
- Tap Done in the upper left corner of Instant Markup.
- Select Save to Photos.
- Alternatively, you could select Delete Screenshot if you want to delete the marked up screenshot.
How to share an edited screenshot from Instant Markup
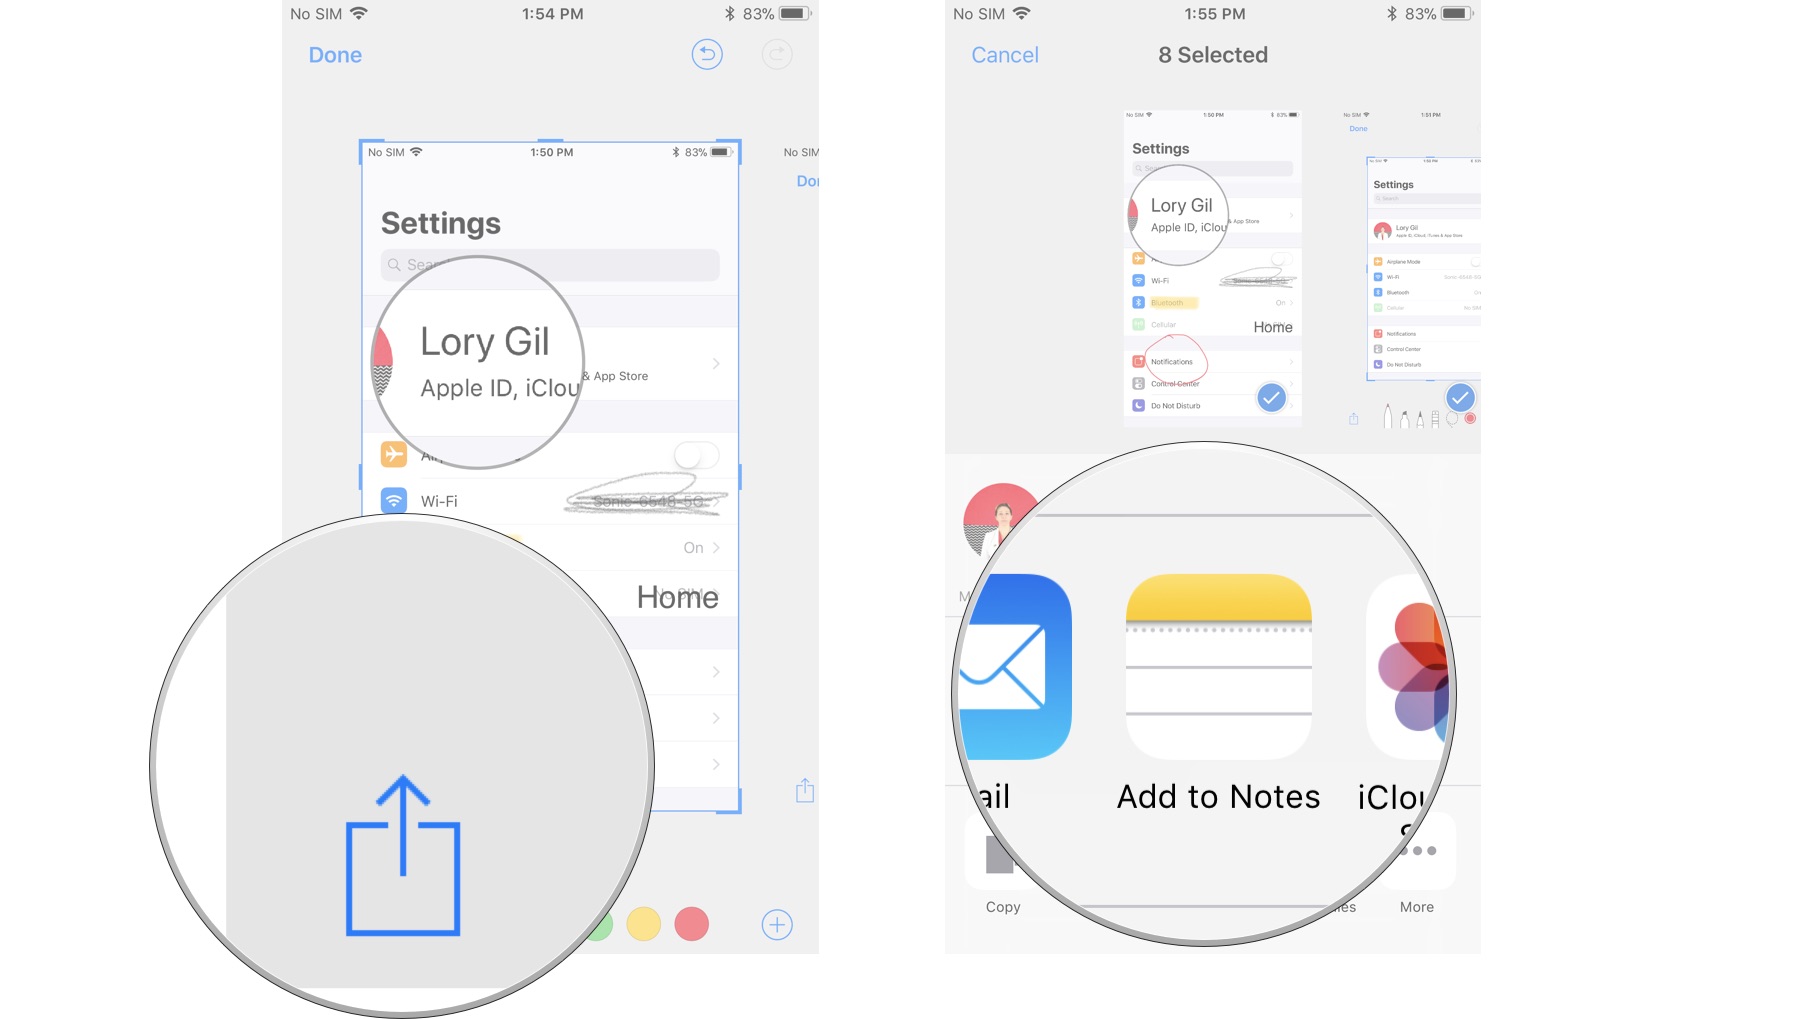
Once you've annotated the bah-jeesus out of your screenshot, you can share it using the Share feature in iOS. It works the same way that sharing documents and other media work across iOS.
- Tap the Share icon in the upper right corner of the Instant Markup screen.
- Select how you want to share the screenshot.
- Fill out the appropriate contact information or status update and send it.
How to disable Instant Markup
At this time, you can't disable Instant Markup. While I know I'm going to love having this feature, I can see it being a bother for some people. Hopefully, Apple will update iOS with the ability to disable Instant Markup soon.
Any questions?
Do you have any questions about using Instant Markup?
Lory is a renaissance woman, writing news, reviews, and how-to guides for iMore. She also fancies herself a bit of a rock star in her town and spends too much time reading comic books. If she's not typing away at her keyboard, you can probably find her at Disneyland or watching Star Wars (or both).
