How to use Stickies on Mac
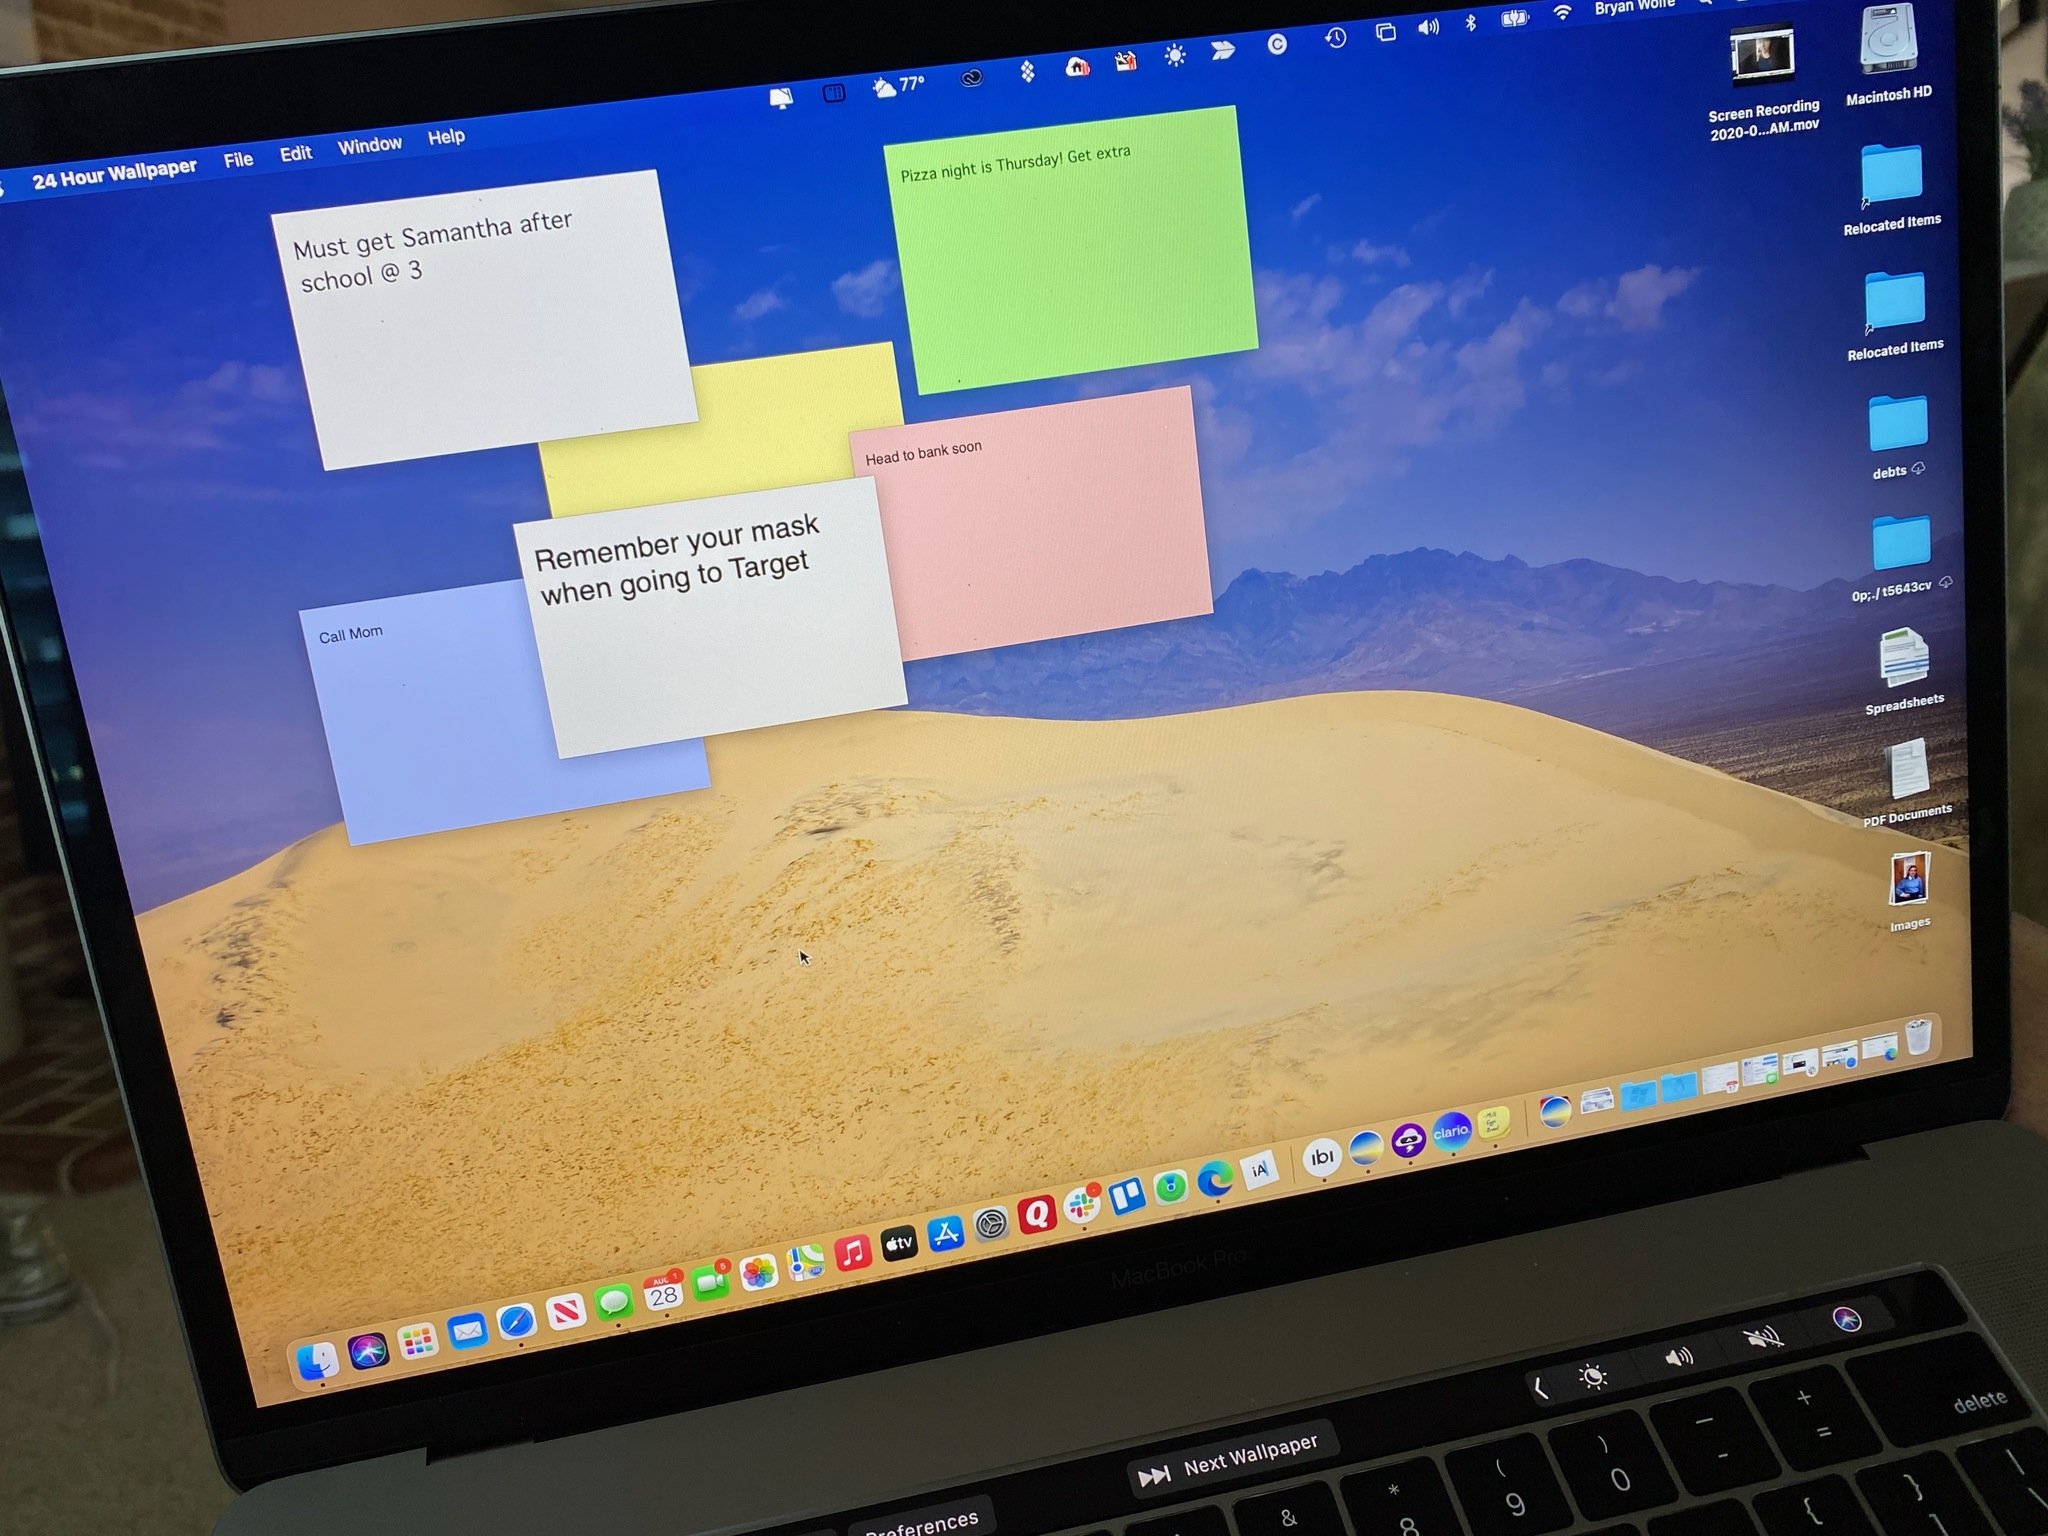
Using Stickies is a great way to keep track of the quick notes you jot down during the day, especially if the subject matter is timely or is of the utmost importance.
- What's a Stickie and why would I use it?
- How to create a new Stickies note
- How to make a Stickies note float on top of all windows
- How to make a Stickies note translucent
- How to collapse Stickies notes
- How to change a note's color
- How to change a note's Font
- How to arrange Stickies notes in a specific order
- How to expand Stickies notes
- How to save Stickies notes
What's a Stickie, and why would I use it?
Stickies notes are essentially digital Post-its. The app works similarly to the Notes app, in that you make yourself notes so that you remember stuff. But Stickies notes stay on your desktop as a visual reminder.
If the note is very pressing, you can choose to keep it in front of all windows so that you have a constant reminder. Or, if you need to remember to lock up the office at the end of the day, you can leave it in behind so that you see it when you close all your apps for the day.
If you need to remember essential tidbits of information, you'll want to use Stickies so that you're not cluttering your desk with real-life Post-its, only to waste paper and lose a phone number from time to time.
How to create a new Stickies note
- Launch Stickies from the Applications folder on your Mac. A new note should pop up. If not, skip to Step 2.
- Click File in the menu bar on the top left of your screen.
- Click New Note. Alternatively, you can press Command-N on your keyboard.
- Type your note.
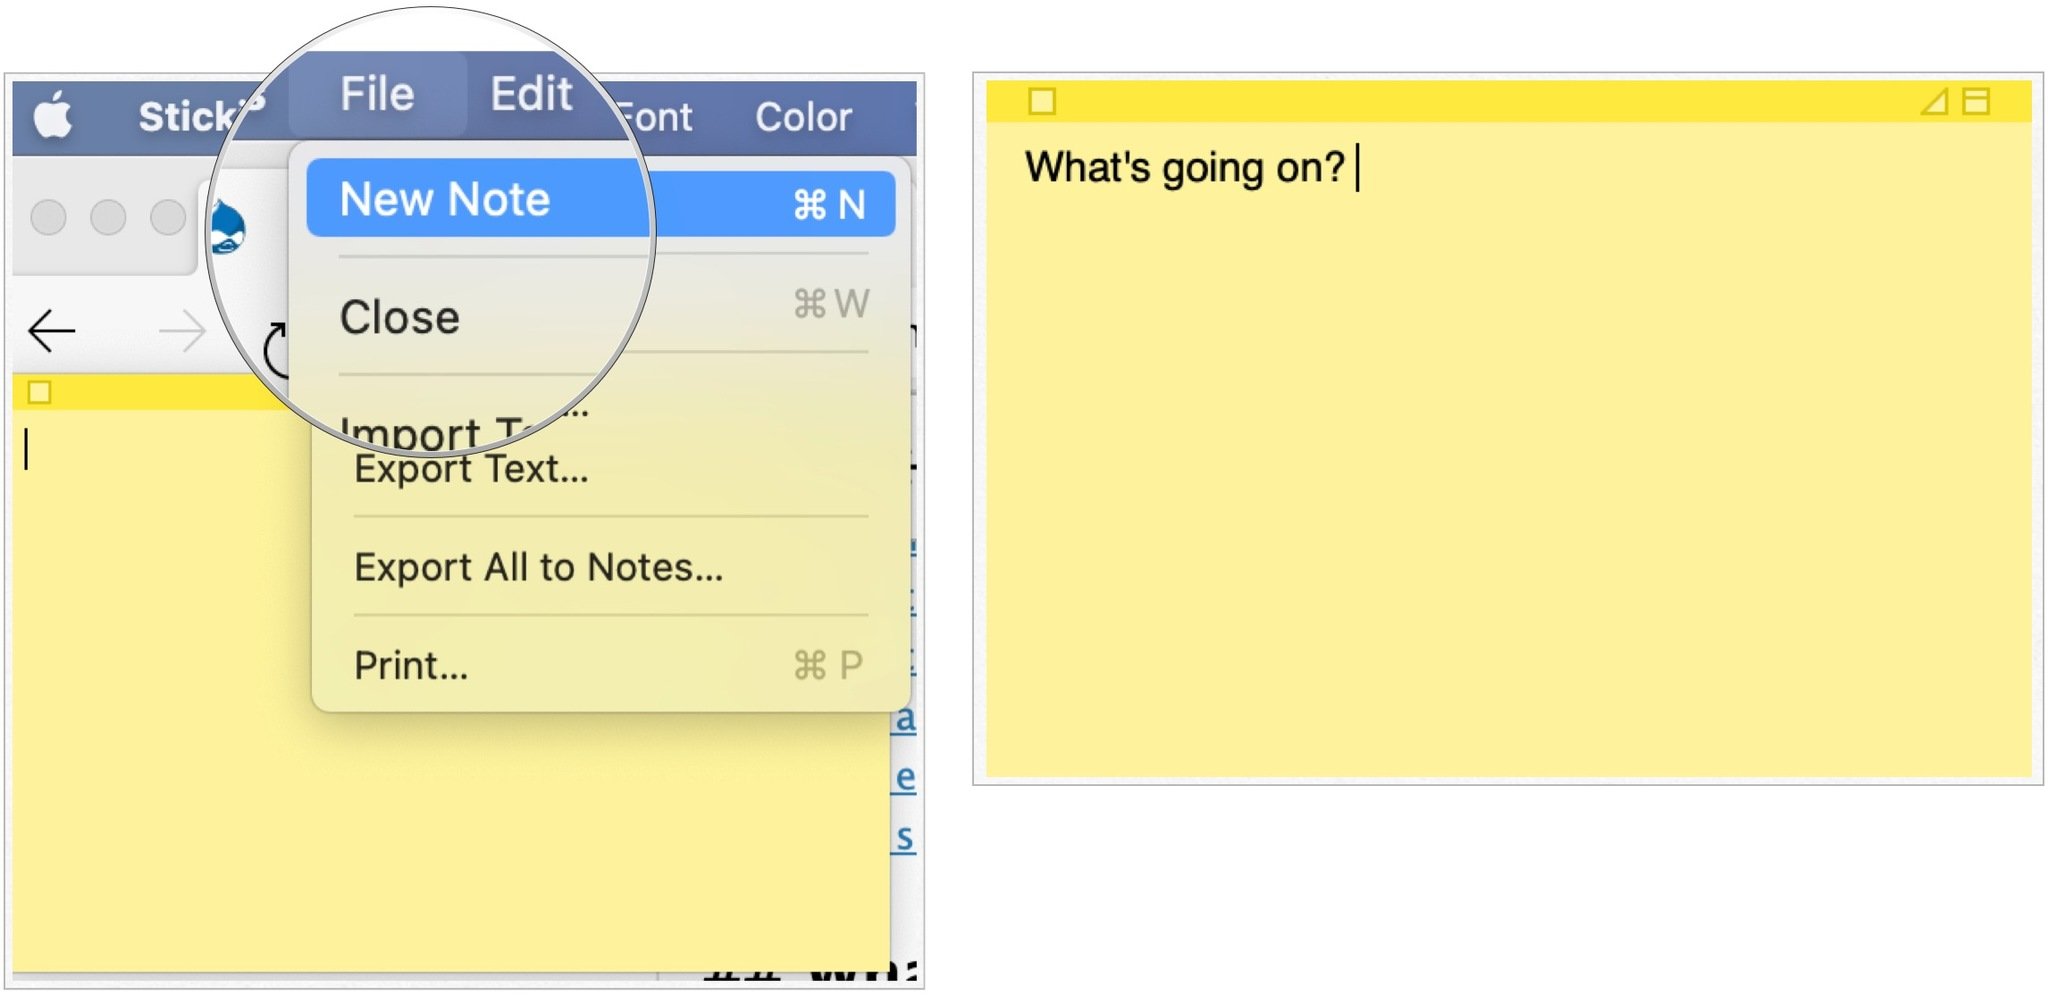
That's it; you've made a Stickie!
How to make a Stickies note float on top of all windows
If you want your note to follow you wherever you go on your Mac, you can make it float on top of every Window, so that even when you change apps, you'll see your Stickie.
- Launch Stickies from the Applications folder on your Mac.
- Create a new note or click on an existing one.
- Click Window in the menu bar at the top of your screen.
- Choose Floating Window.
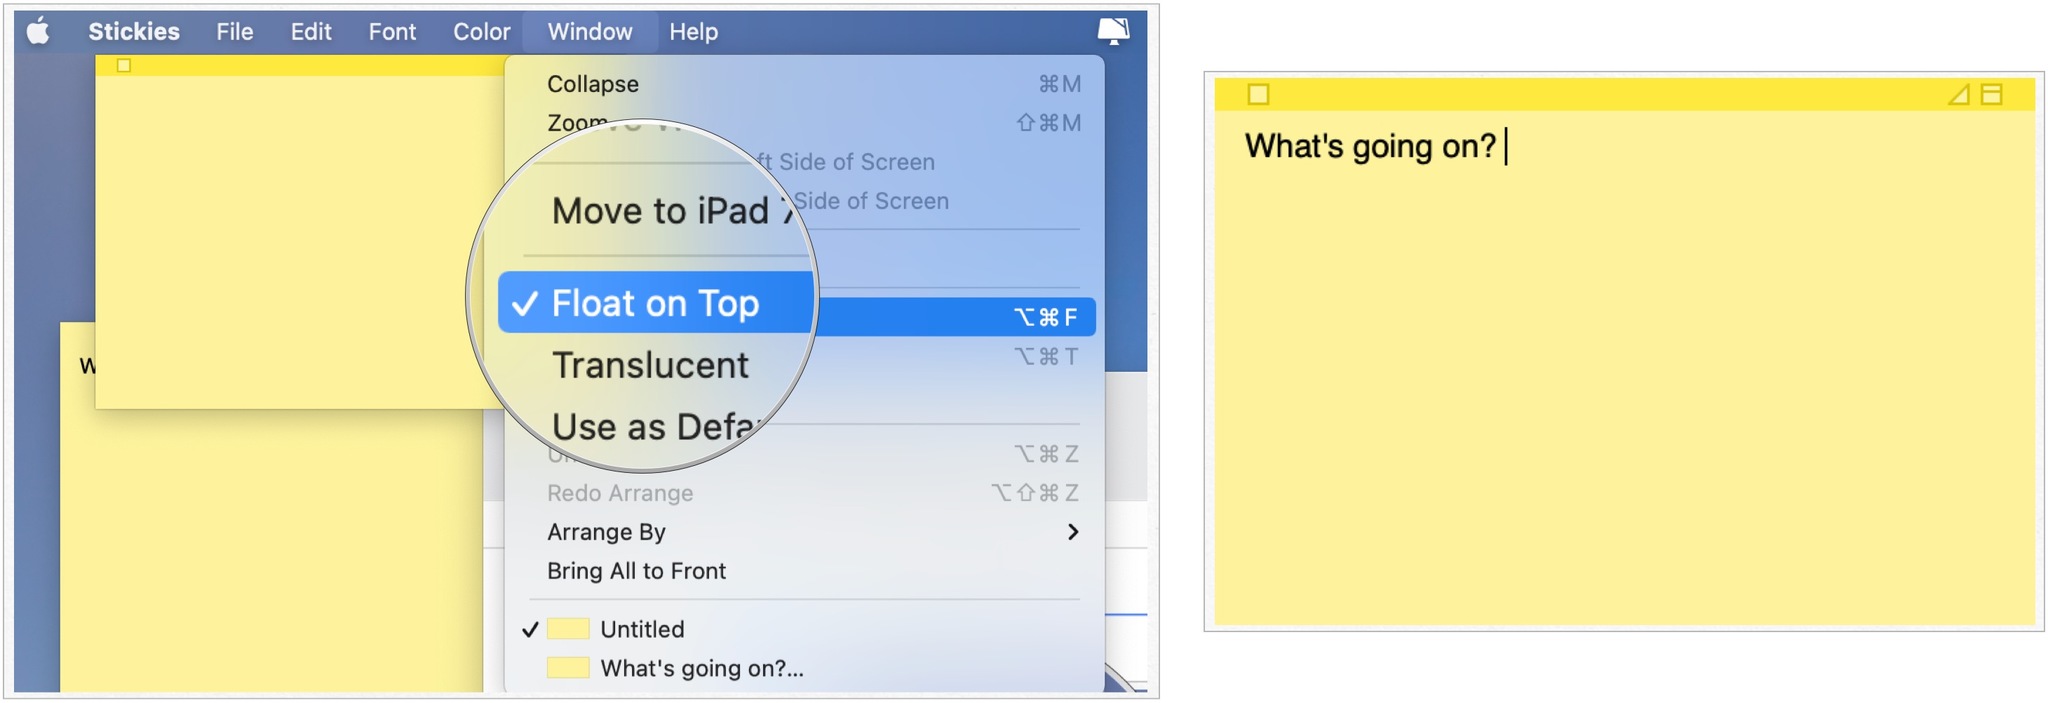
Now you'll see your note all the time, no matter the app you're using.
Master your iPhone in minutes
iMore offers spot-on advice and guidance from our team of experts, with decades of Apple device experience to lean on. Learn more with iMore!
How to make a Stickies note translucent
If you have your Stickies note as a floating window, but feel like it's a bit obtrusive, you can make it translucent so that it doesn't feel like it covers up too much of your screen.
- Launch Stickies from the Applications folder on your Mac.
- Create a new note. Or click on an existing one.
- Click Window in the menu bar at the top of your screen.
- Select Translucent.
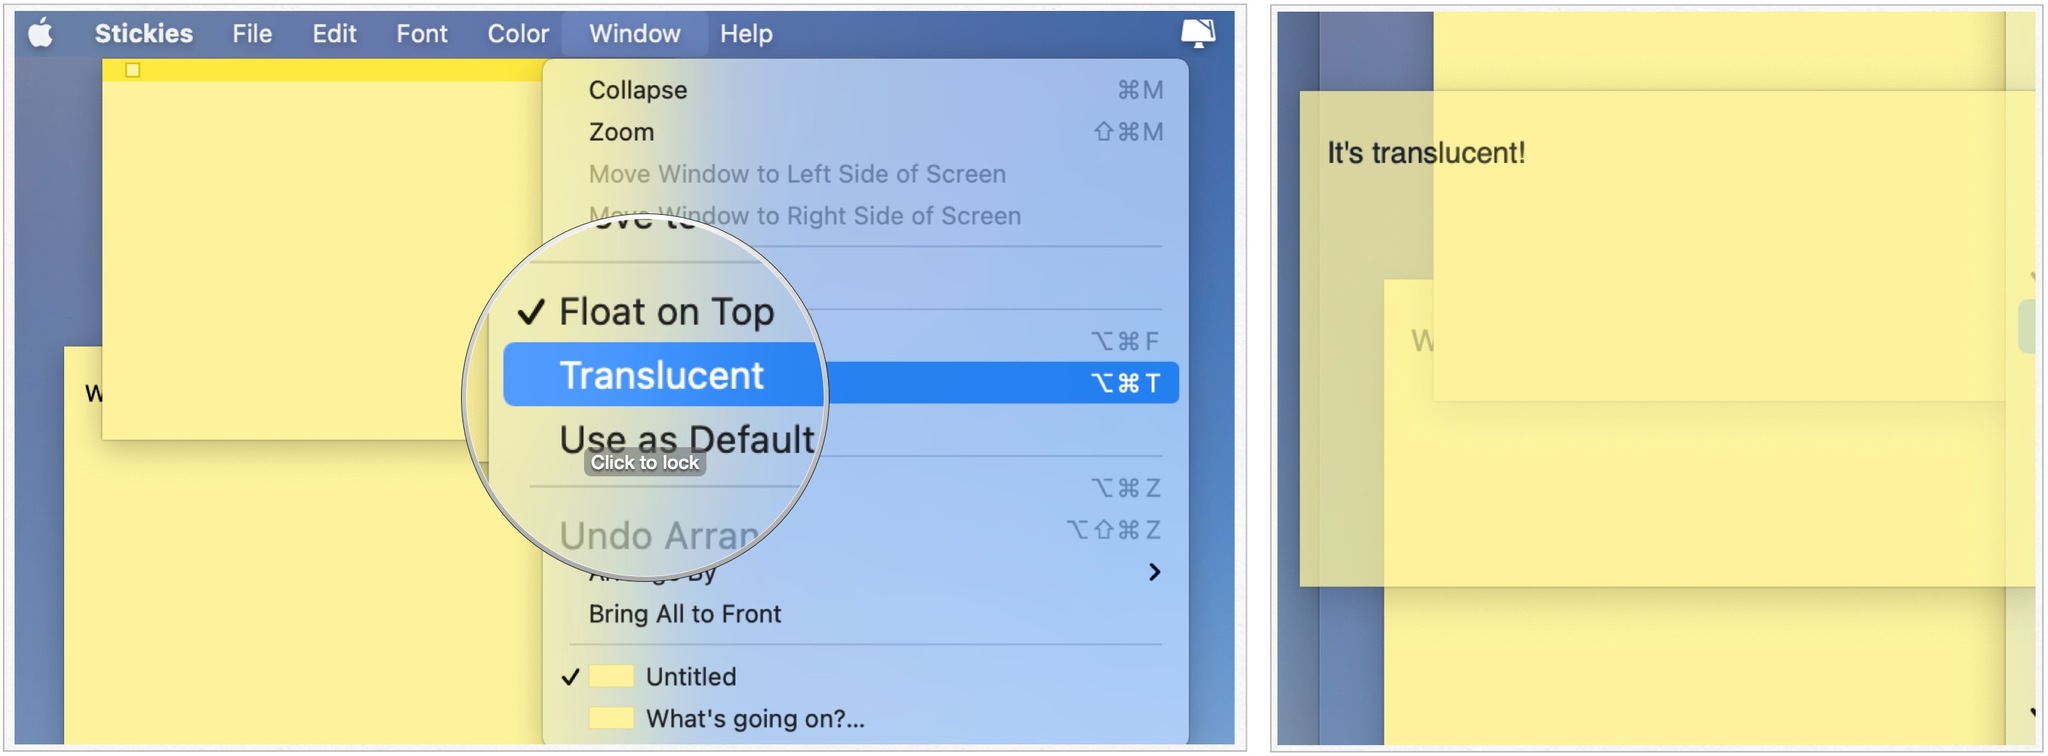
Now your Stickies note will become translucent, like the ghost of future tasks!
How to collapse Stickies notes
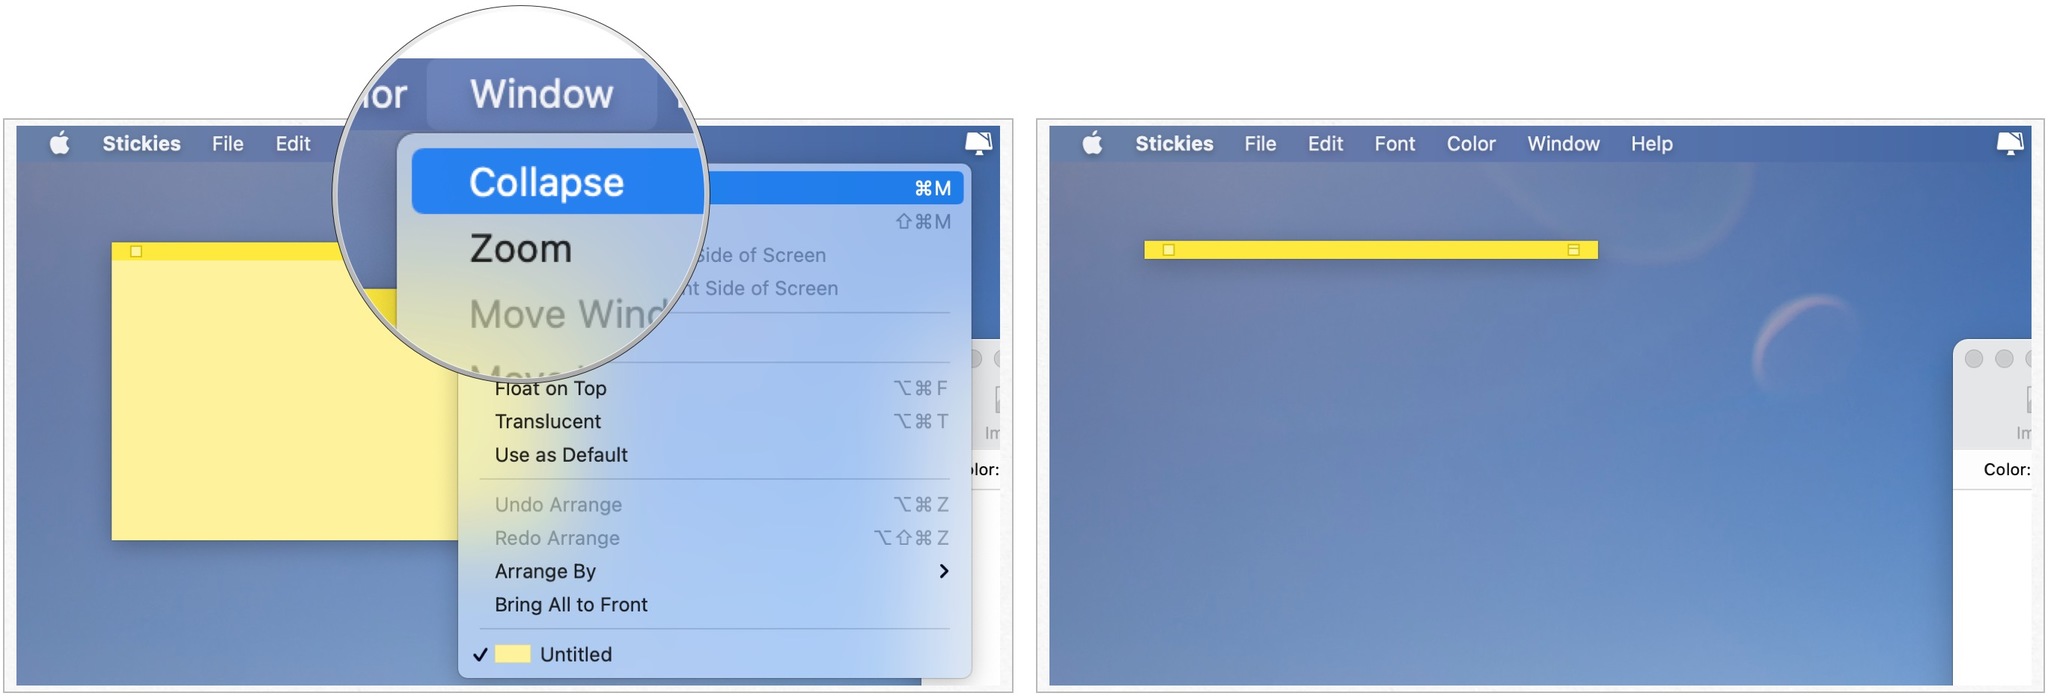
Maybe you want your Stickies to follow you everywhere on your Mac, but you don't want the full note shown all the time. You can collapse them into little bars to help keep your screen clutter-free!
- Launch Stickies from the Applications folder on your Mac.
- Create a new note or click on an existing one.
- Click Window in the menu bar at the top of your screen.
- Select Collapse. Alternatively, you can press Command-M on your keyboard to quickly collapse or expand the note you're clicked on.
How to change a note's color
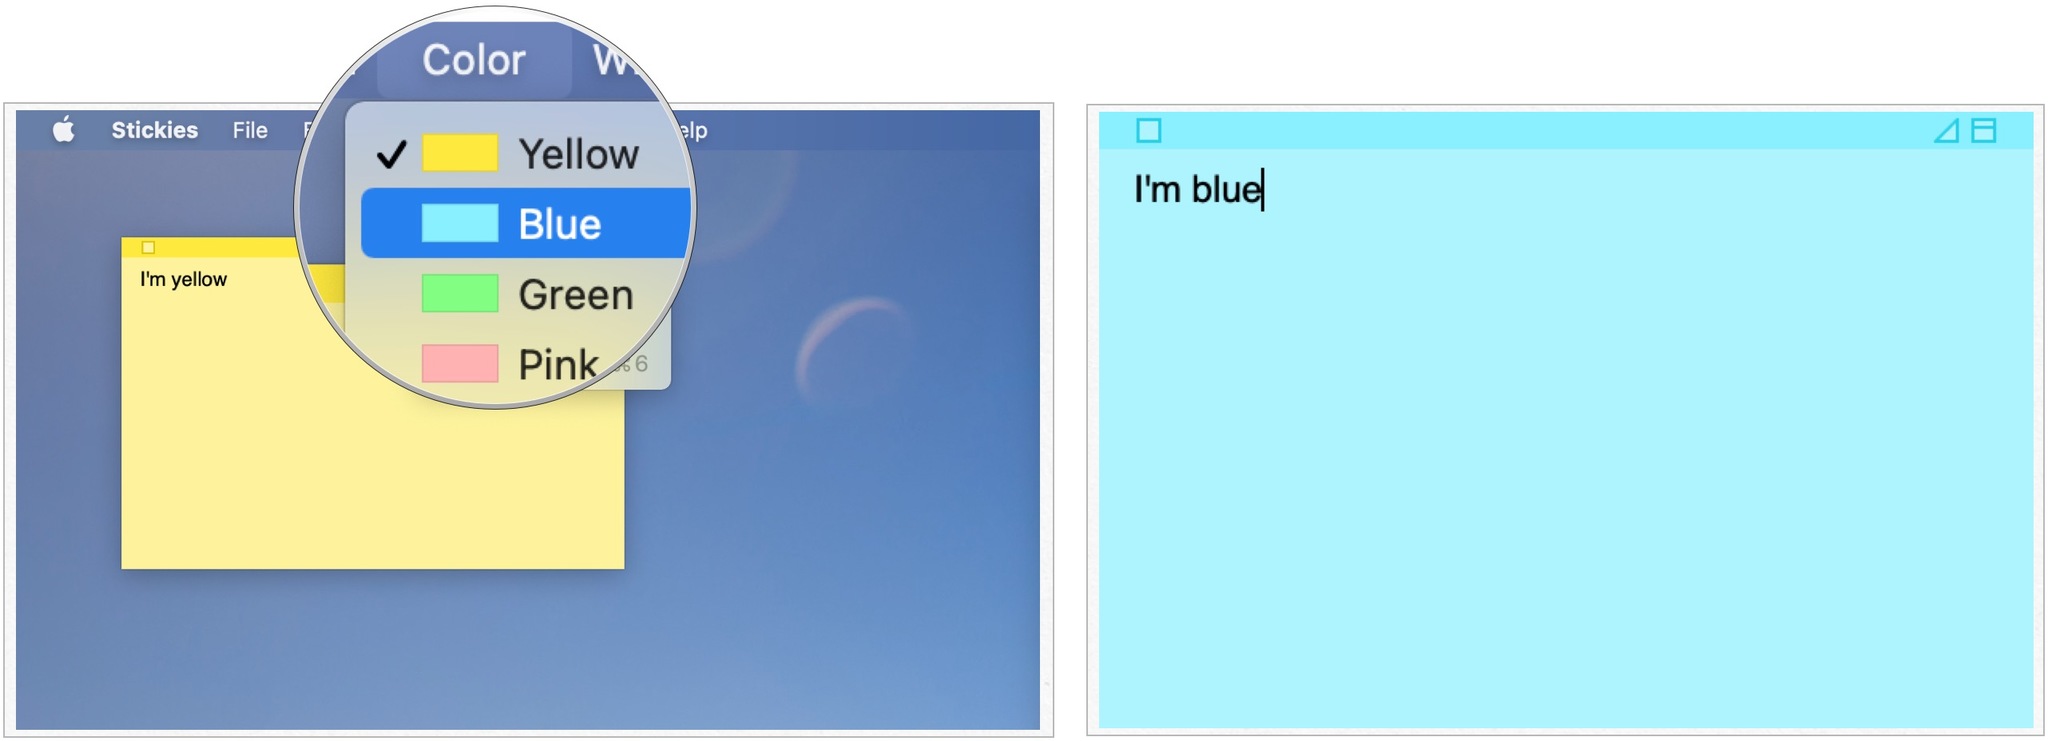
If you like to color-code your Stickies notes based on the subject matter, you can change the color of each message.
- Launch Stickies from the Applications folder on your Mac.
- Create a new note or click on an existing one.
- Click Color in the menu bar at the top of your screen.
- Click the color you'd like to use for that note.
How to change a note's font
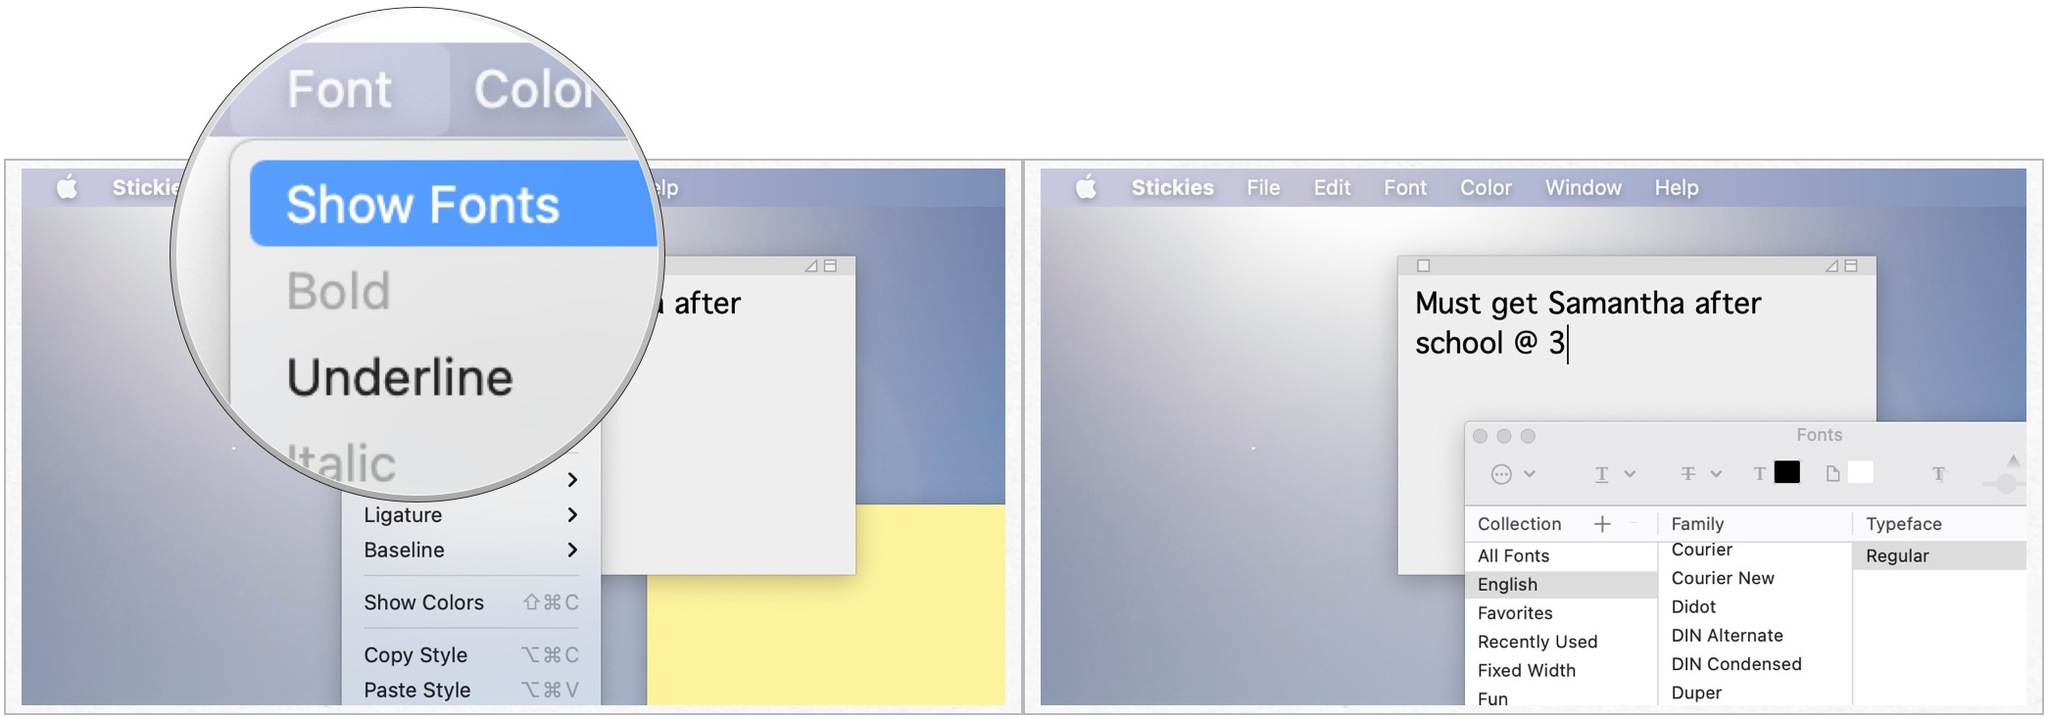
You can change the Font and Font's size of any of your Stickies notes.
- Launch Stickies from the Applications folder on your Mac.
- Create a new note or click on an existing one.
- Click Font in the menu bar at the top of your screen.
- Select Show Fonts and make changes.
How to arrange Stickies notes in a specific order
Do you make a ton of Stickies throughout your day? It can be challenging to keep track of them all, which is why you can arrange them in specific orders so you can get to what you want more quickly.
- Launch Stickies from the Applications folder on your Mac.
- Click Window at the top of your screen.
- Select Arrange By.
- Click an Arrangement option:
- Color: Arranges notes by color in reverse order of how they appear under Color
- Content: Arranges notes alphabetically by the first let in the note
- Date: Arranges notes by the time they were created — most recent at the bottom
- Location on Screen: Arranges notes based on their location from left to right. Leftmost Stickies go at the top.
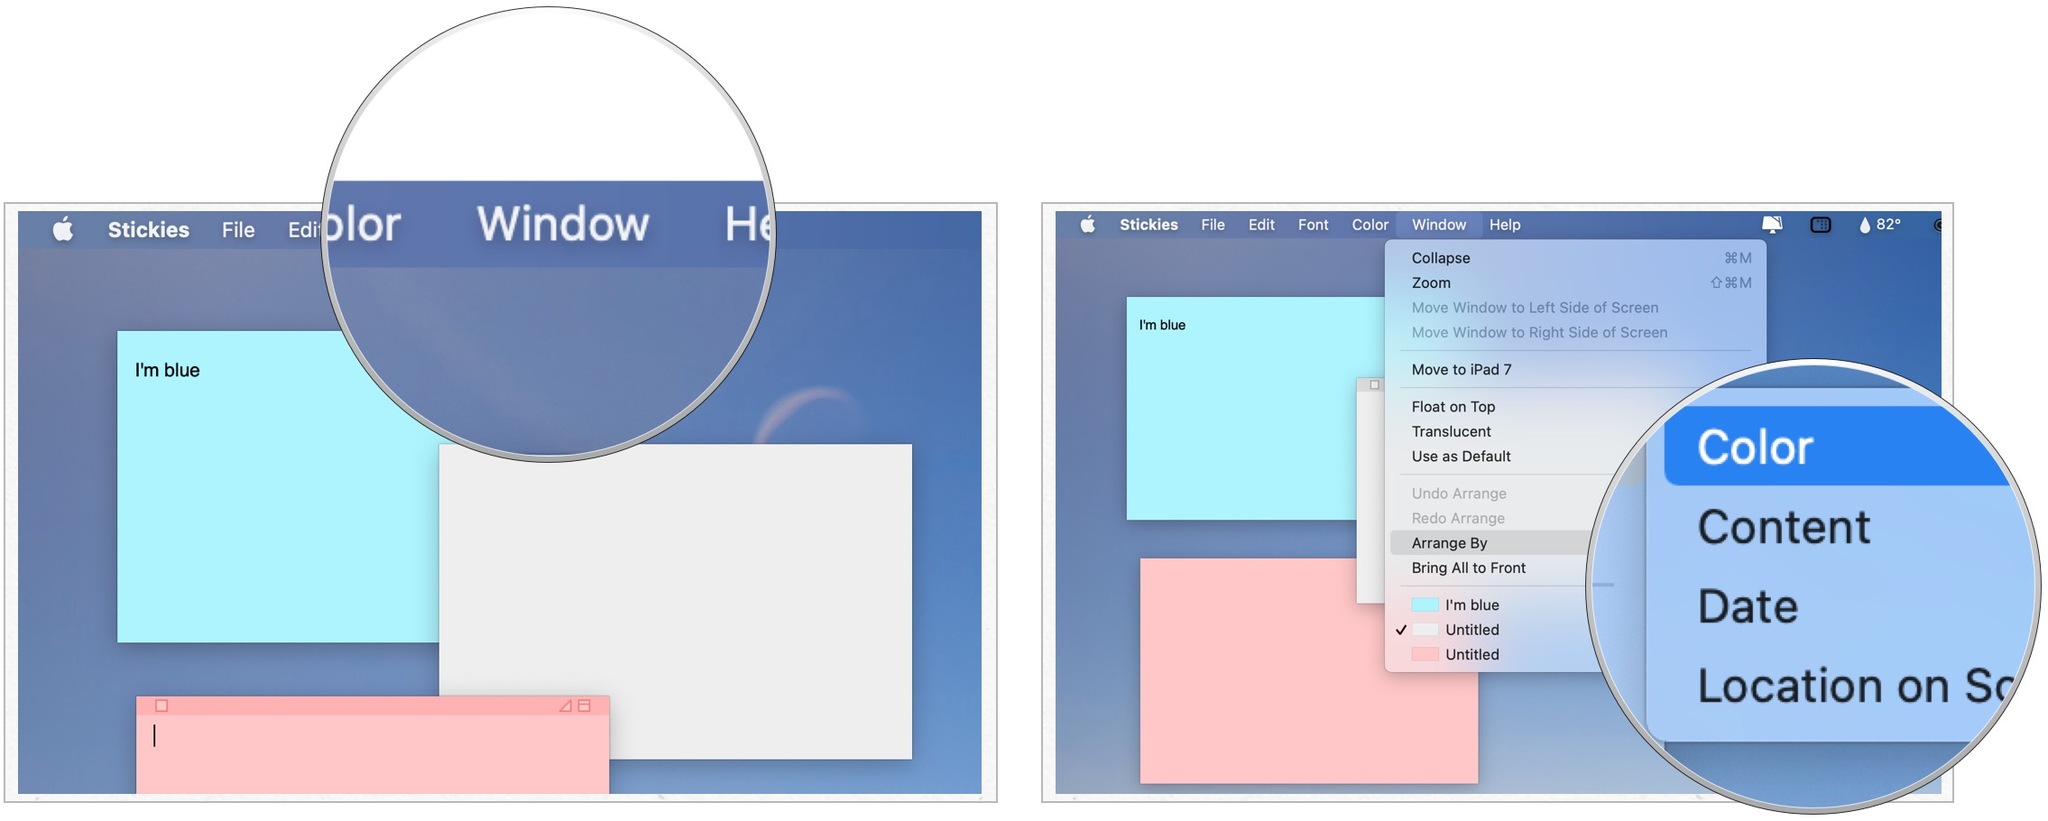
Now, all of your Stickies will be collapsed into a tight stack of bars on the left side of your screen.
How to expand Stickies notes
After you've arranged your Stickies into a nice neat stack, you may want to open them all up again and read them. Here's how:
- Launch Stickies from the Applications folder on your Mac.
- Click on a collapsed note.
- Select Window in the menu bar at the top of your screen.
- Expand Expand. You can alternatively press Command-M on your keyboard.
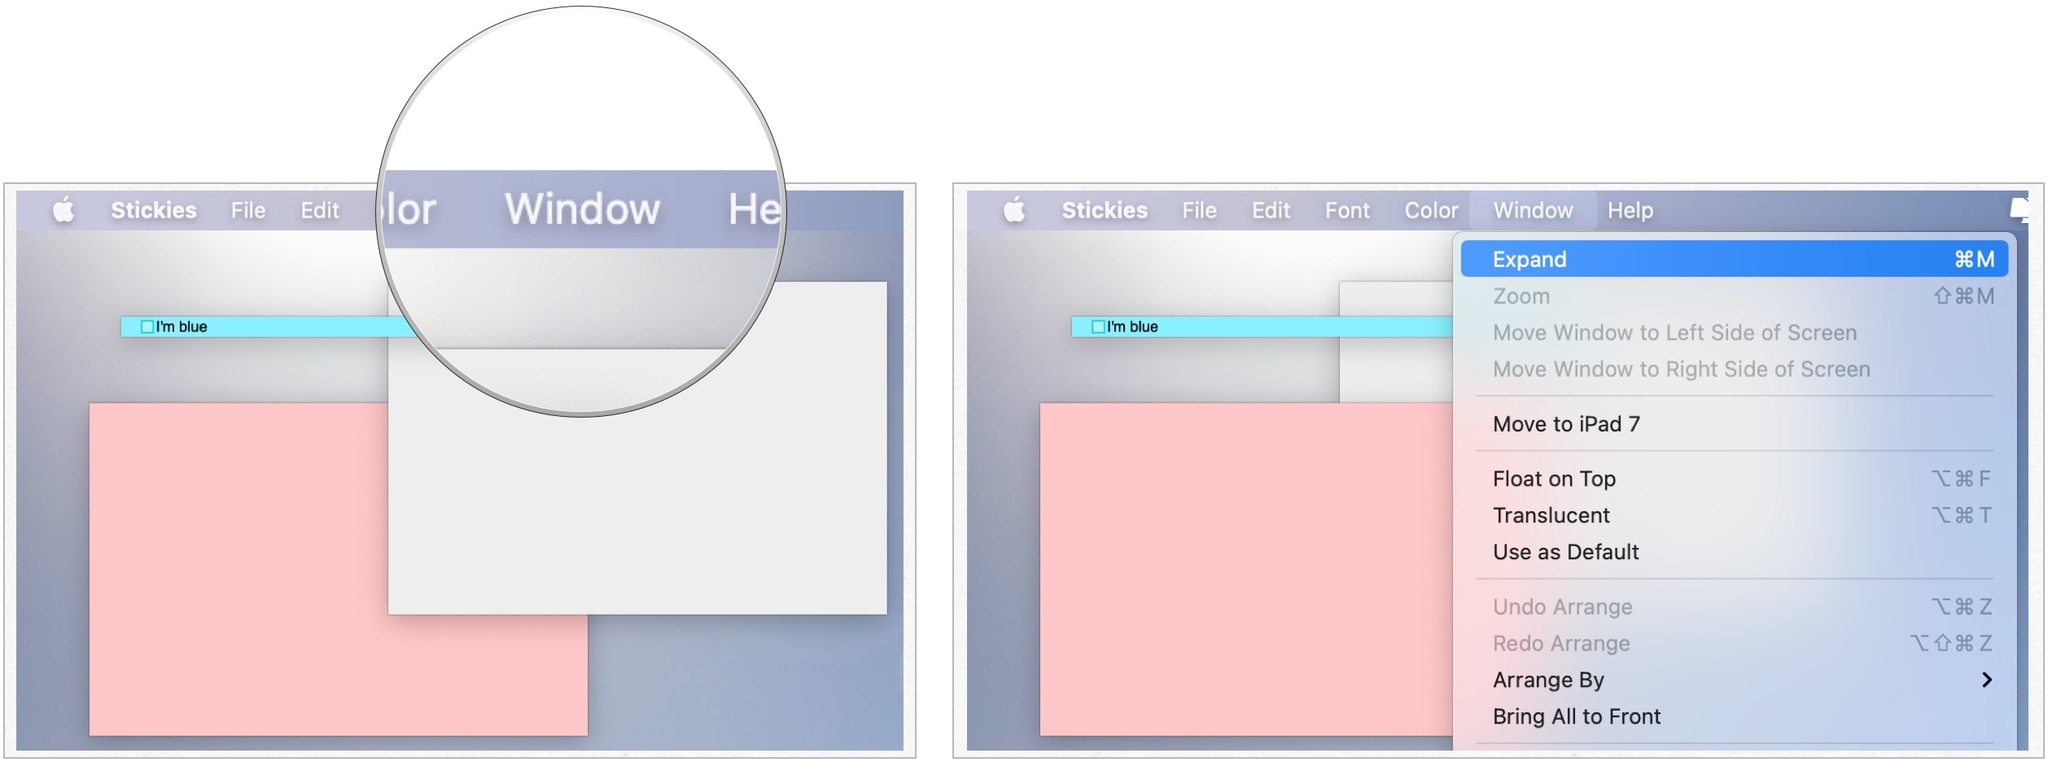
If you've just arranged your Stickies notes but want to open them again, you can also hit Command-Z on your keyboard to undo the arrangement. This will only work if arranging them was the last thing you did.
How to save Stickies notes
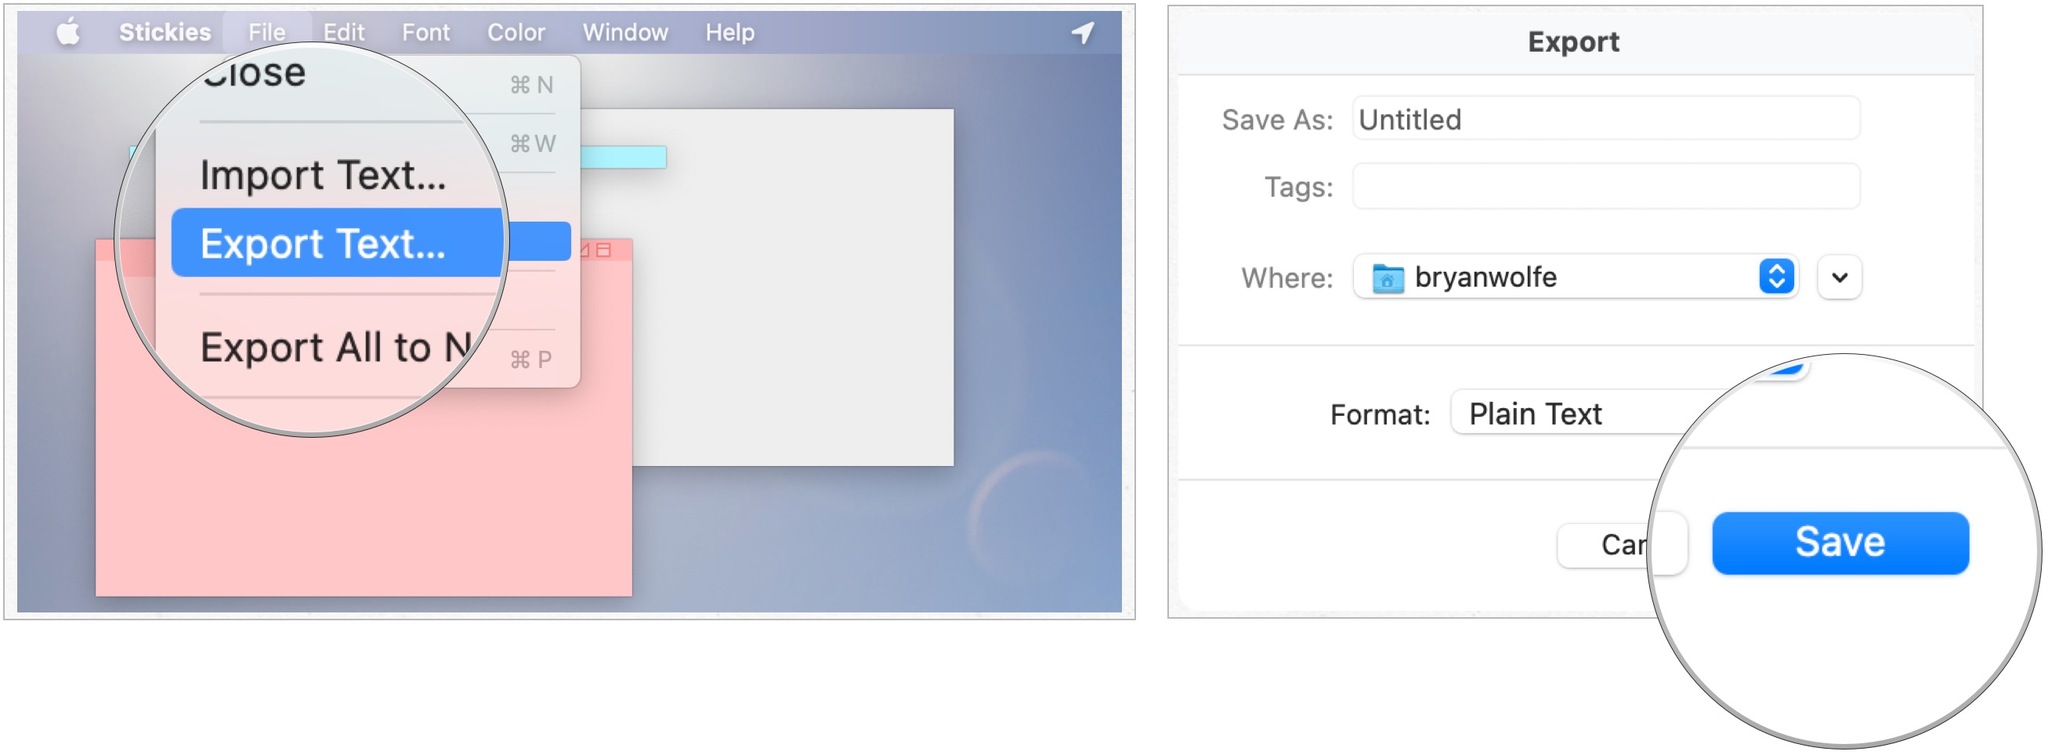
If you'd like to save your Stickies for good or want to keep them to share with friends, you can do so, though they only save as Plain Text (.txt) files.
- Launch Stickies from the Applications folder on your Mac.
- Create a new note or click on an existing one.
- Select File on the top left of your screen.
- Click Export Text…
- Name your note and choose where you want to save it.
- Click Save.
Questions?
Got a question about using Stickies that we didn't cover here? Let us know in the comments below!

Bryan M. Wolfe has written about technology for over a decade on various websites, including TechRadar, AppAdvice, and many more. Before this, he worked in the technology field across different industries, including healthcare and education. He’s currently iMore’s lead on all things Mac and macOS, although he also loves covering iPhone, iPad, and Apple Watch. Bryan enjoys watching his favorite sports teams, traveling, and driving around his teenage daughter to her latest stage show, audition, or school event in his spare time. He also keeps busy walking his black and white cocker spaniel, Izzy, and trying new coffees and liquid grapes.
