How to manually update DNS settings on your Apple TV
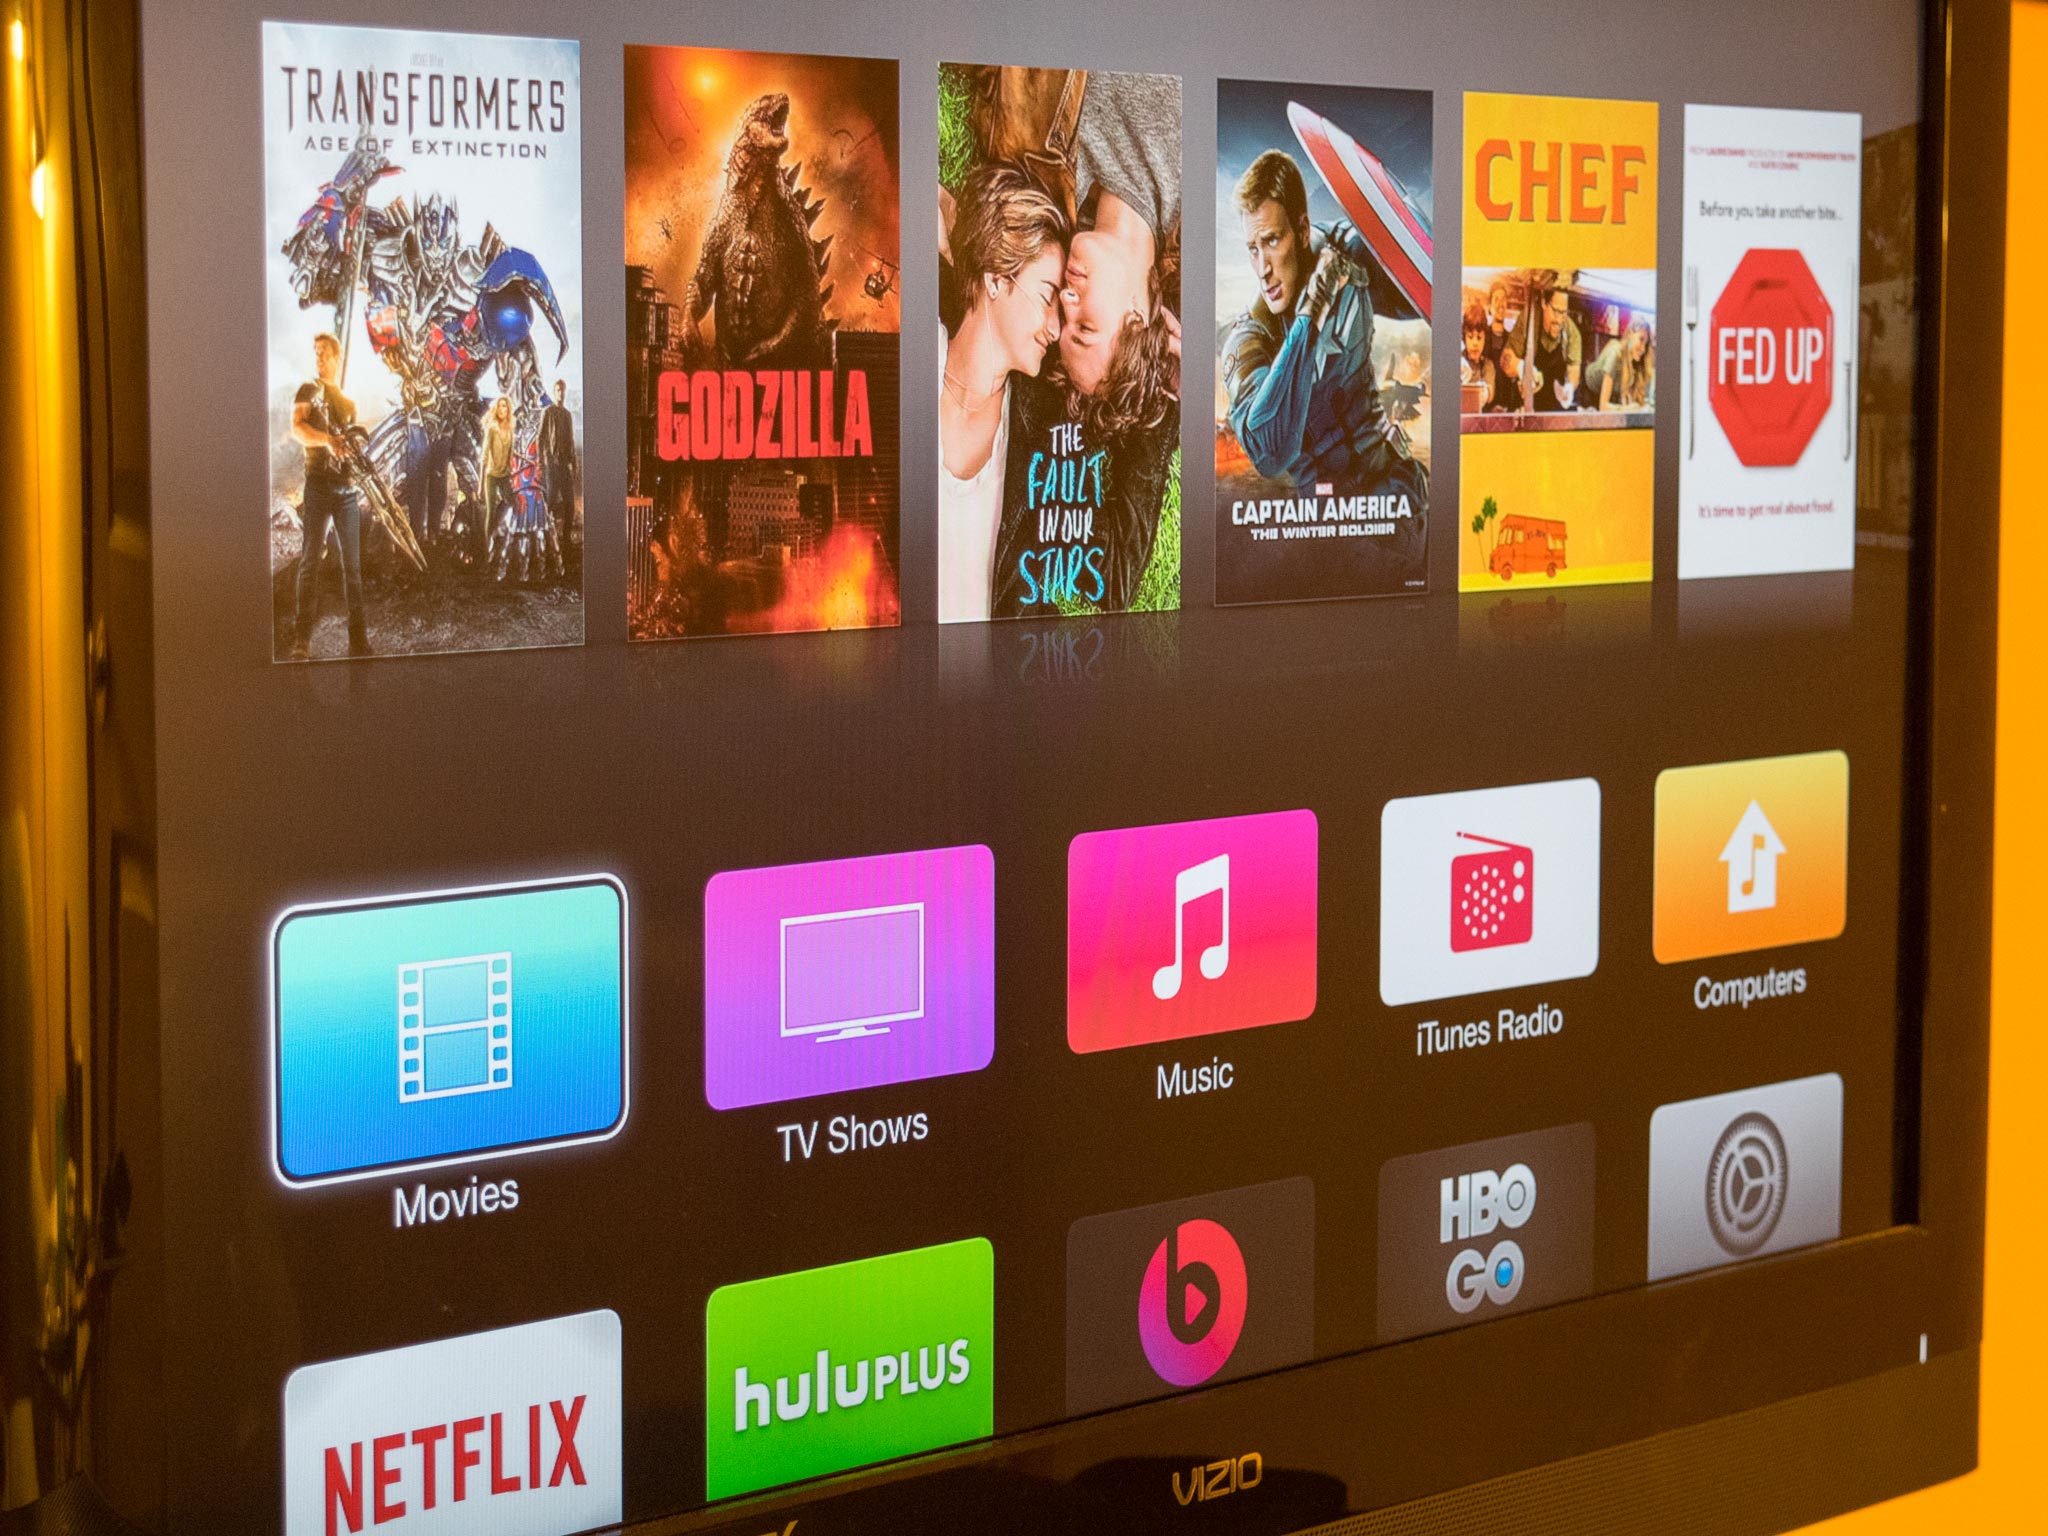
Your Apple TV can be connected to a Wi-Fi network right out of the box and, for the most part, it just works. If you have custom network settings, however, or your experiencing slow streaming performance — particularly with iTunes purchases — changing the DNS settings can sometimes help alleviate the problem. Here's how!
It's best to choose Automatic for DNS and the Apple TV choose for itself. If, however, you have problems with your ISP's DNS, you can try some alternatives.That's what I did after experiencing very slow streaming over a very fast internet connection for iTunes purchases after updating my third generation Apple TV to version 7.0.
Since then, I've tried many different fixes to remedy the issue. While some of them worked temporarily, none of them seemed to stick. After some more research, what worked for me was changing my DNS settings to Google's settings. That's what I'll be using in this guide, but you're free to use whatever other DNS settings you want to use.
How to change or update the DNS settings on your Apple TV manually
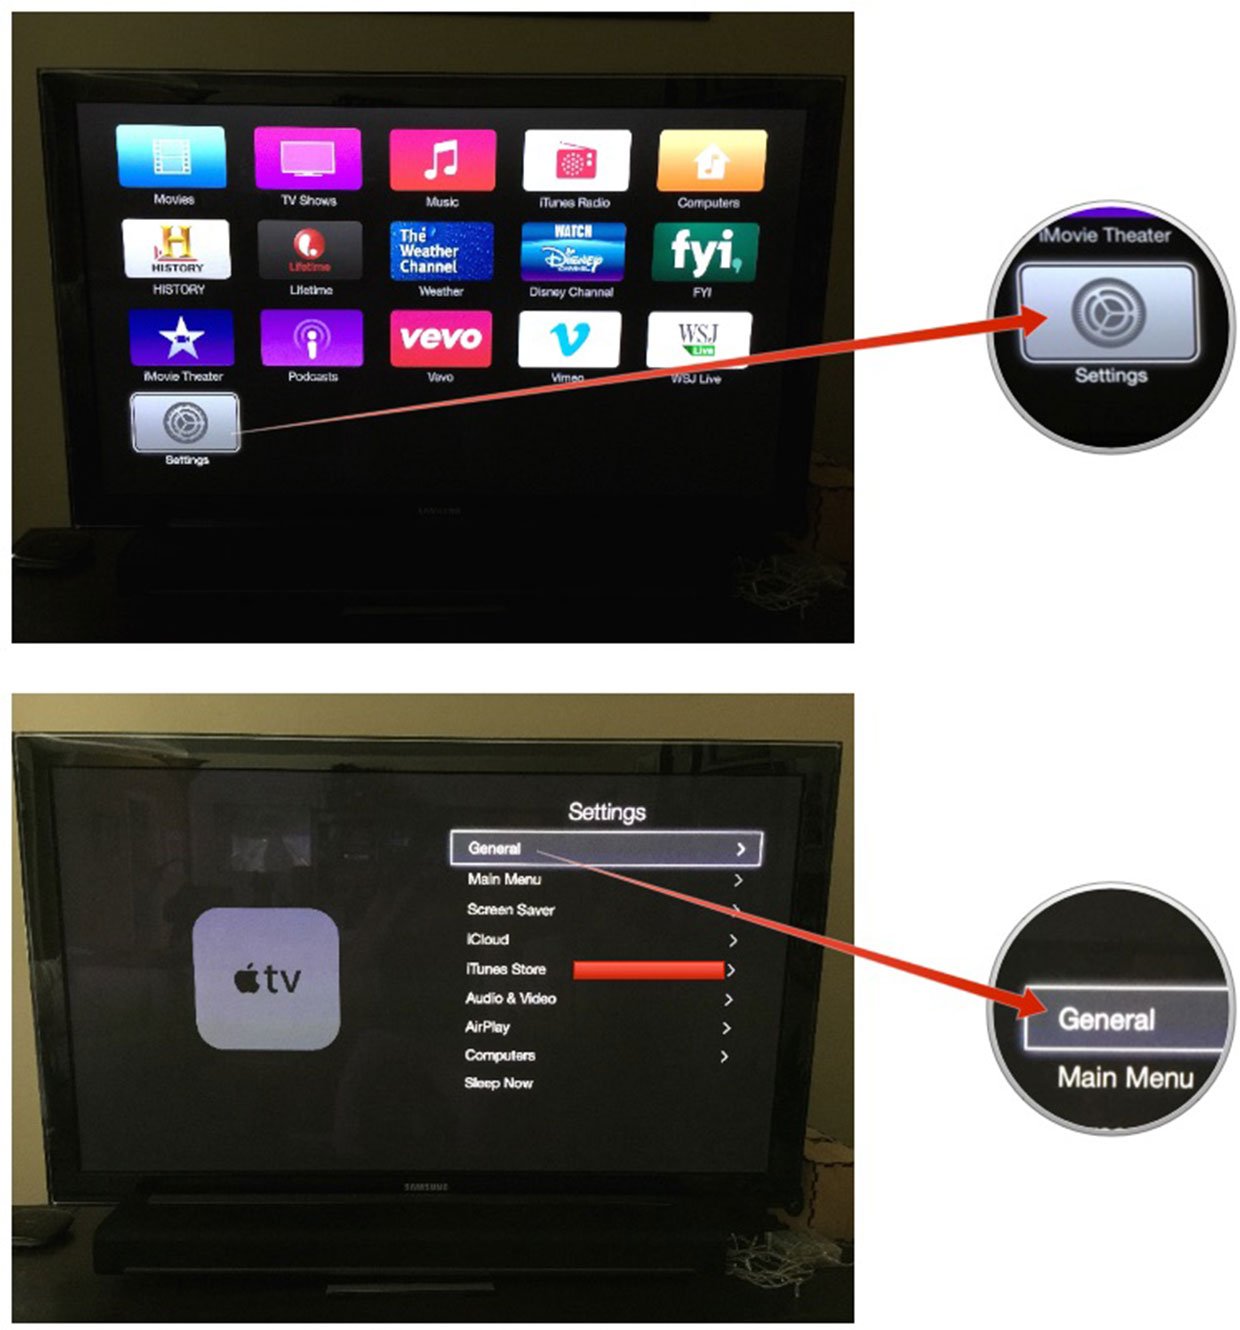
- From the main menu of your Apple TV, click on the Settings icon.
- Click on General.
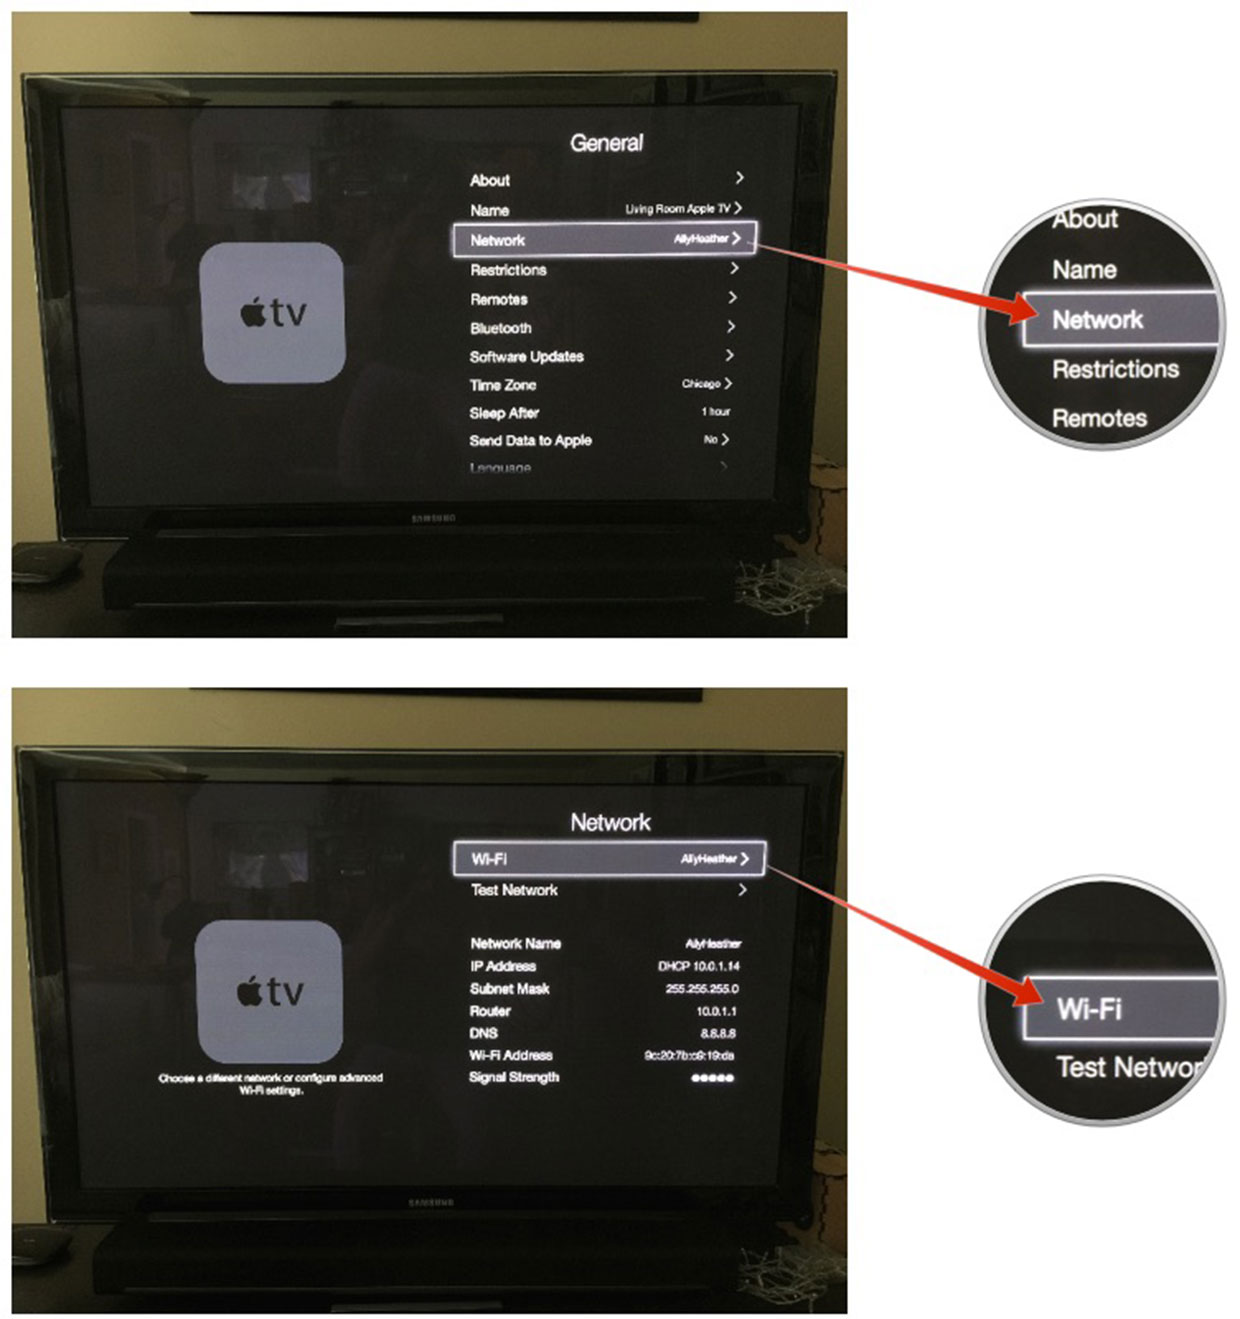
- Click on Network.
- Click on Wi-Fi at the top.
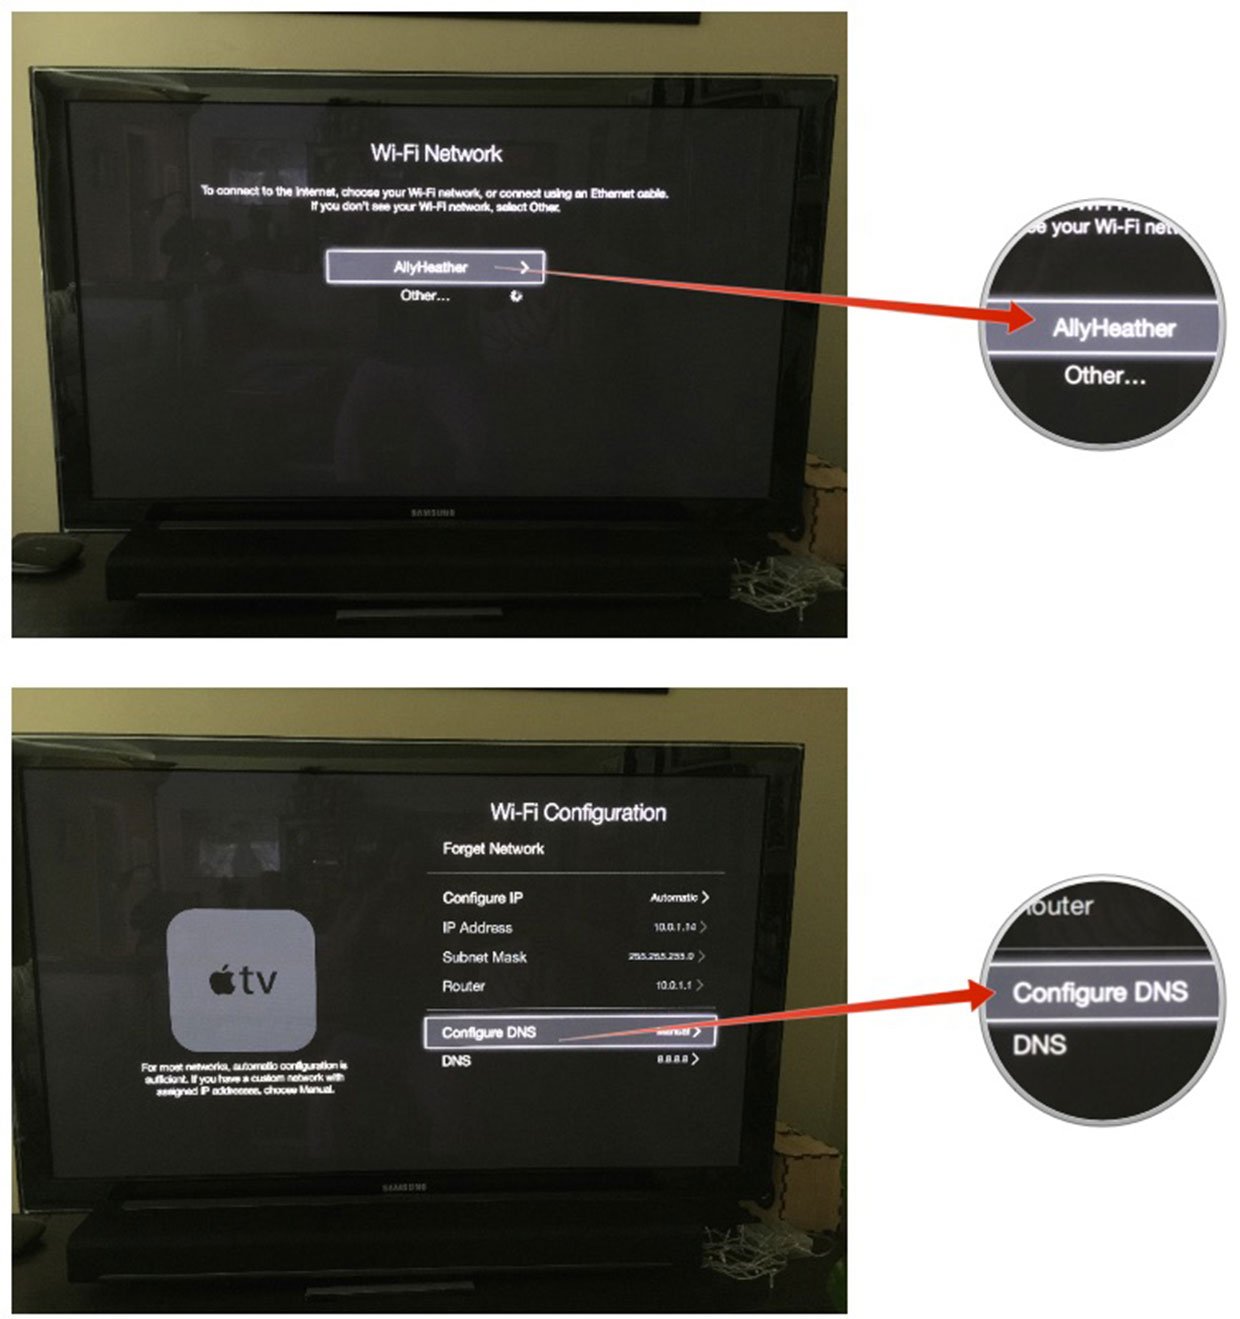
- Click on your network.
- Click on Configure DNS.
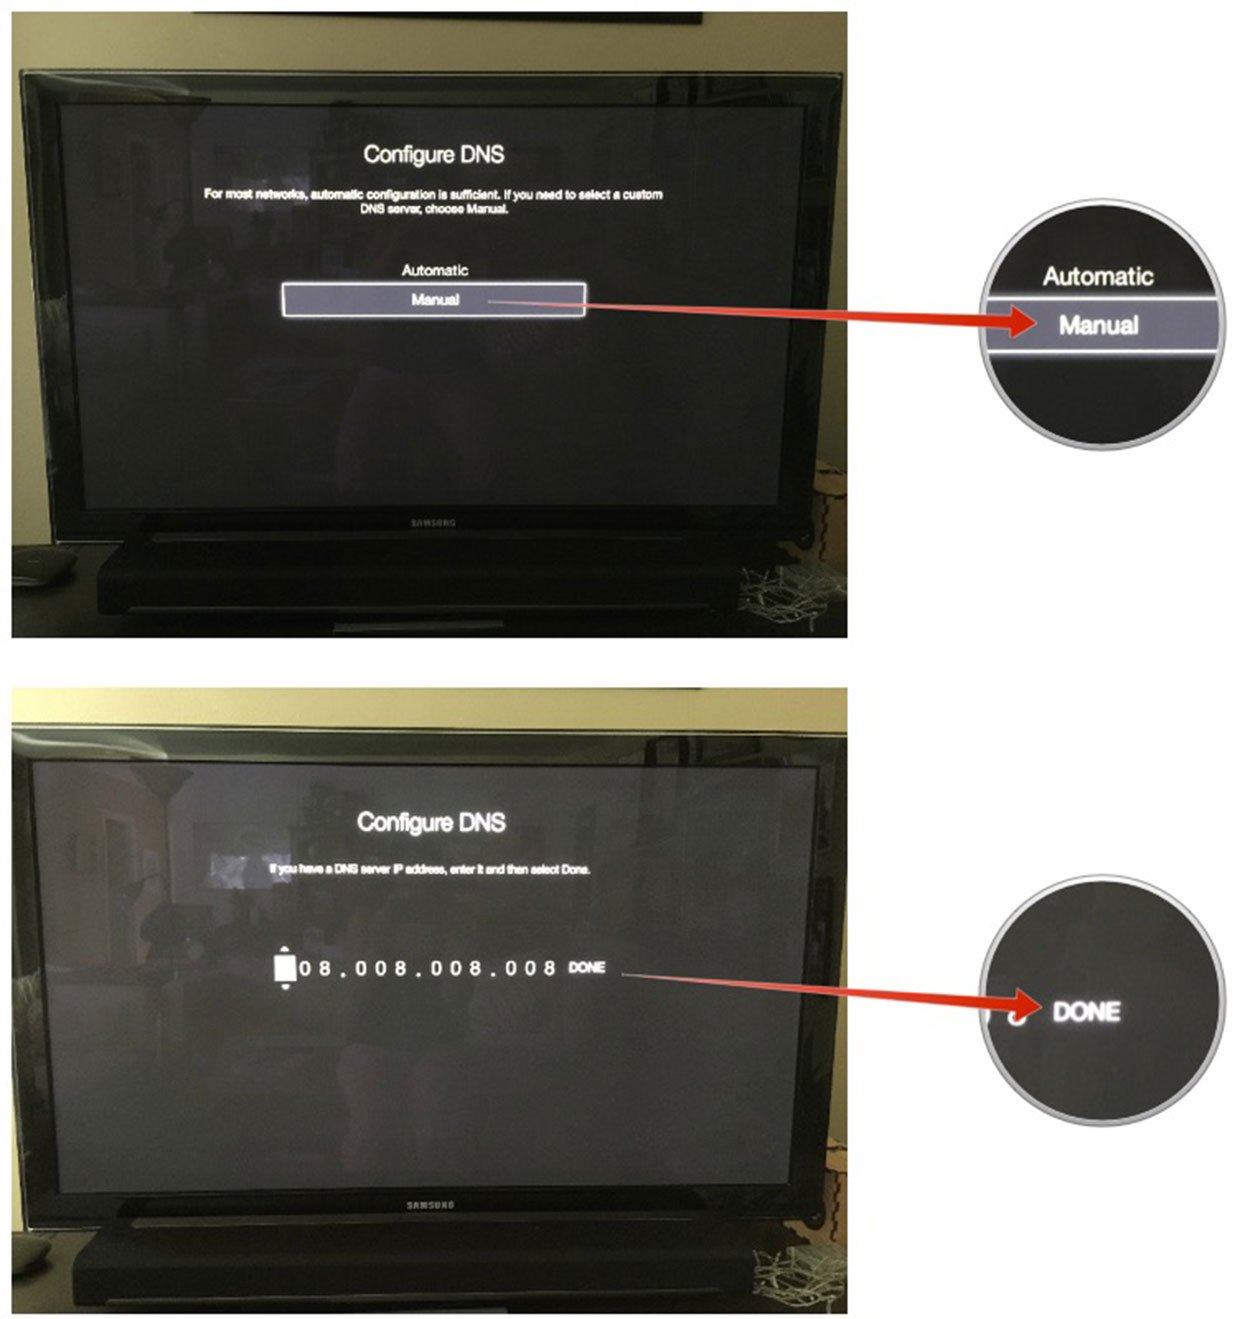
- Click on Manual.
- Enter your DNS. If you'd like to use Google's to resolve streaming issues, you can use either 8.8.8.8 or 8.8.4.4 — that translates to the format 008.008.008.008 on the Apple TV.
- Click Done and that's it!
Master your iPhone in minutes
iMore offers spot-on advice and guidance from our team of experts, with decades of Apple device experience to lean on. Learn more with iMore!
iMore senior editor from 2011 to 2015.

