Jailbreak How-To: Back Up Apps in Rock and Cydia

In lieu of iOS4 and iPhone 4 next week, we know a lot of you will be upgrading to either a new OS or new hardware altogether. Those of you that jailbreak may find backing up your jailbroken apps a lot easier than reinstalling everything once you re-jailbreak. Now keep in mind, I wouldn't suggest upgrading if you're unlocked as unlocks are never a sure thing until they're released. But if you're just jailbreaking, we're already aware of a working jailbreak that's ready for iOS4. Given nothing changes, this should ease your transition.
Before we proceed, one more warning; as with any OS upgrade on iDevices, not all apps will be compatible immediately. We saw this with 3.0 with things such as custom keyboards not working. This may very well be the case again, so if you have jailbreak apps you just can't live without, make SURE they'll be compatible with iOS4 before you upgrade. Now hit the jump for Cydia and Rock back-up walkthroughs!
Cydia

Now Cydia is a little bit more complicated than Rock, but a lot of users much prefer Cydia, so we'll cover this one first. It's still a pretty easy process. To backup your jailbroken apps via Cydia, you'll need to download a free app called Aptbackup.
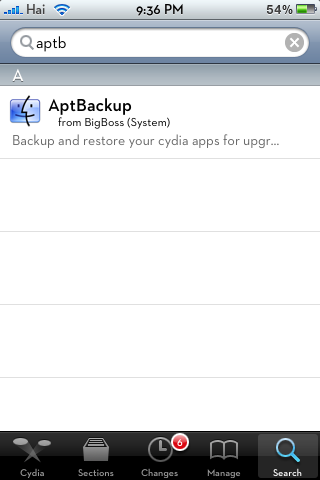
Once you've got Aptbackup installed, you'll see this icon on your homescreen:

Tap that icon and you'll see 2 buttons, backup and restore. Before you upgrade or do anything, click backup.
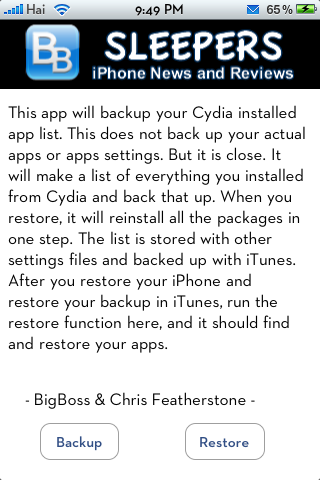
After you do this, you'll need to sync with iTunes. This will allow Aptbackup to sync your jailbroken apps to your PC/Mac. After you've done this you are okay to go ahead and install iOS4. After your install is finished, go ahead and sync/backup with iTunes.
Once you've restored from your backup in iTunes, go ahead and re-jailbreak. Then go into Cydia and re-download Aptbackup. This time you'll click the restore button. This will restore all your jailbreak apps. Easy enough, right? Now lets cover Rock users...
Master your iPhone in minutes
iMore offers spot-on advice and guidance from our team of experts, with decades of Apple device experience to lean on. Learn more with iMore!
Rock

Rock's process is dead simple. Every Rock user should already have a Rock ID, if you don't, you'll need to get one in order to save backups to it, so that after a new OS install or restore, you can just sign into your ID and have your backups waiting. After you've saved everything to your Rock ID, you can do your restore. After you re-jailbreak and install Rock, you'll just sign in and click on your settings tab like below:
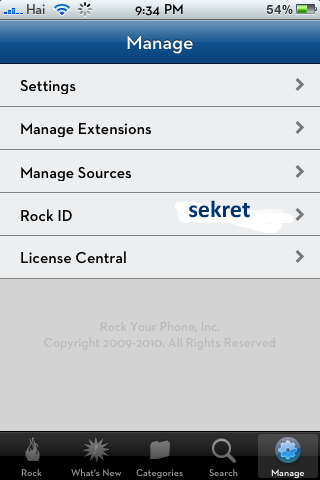
You're going to want to click Settings and scroll down a ways. You'll see app backup options. Now before you start installing a new OS, you need to make sure Rock is actually making backups for you. The option to save packages to your Rock ID should always be checked. If it isn't, check it and make SURE you have a backup if you're using Rock.
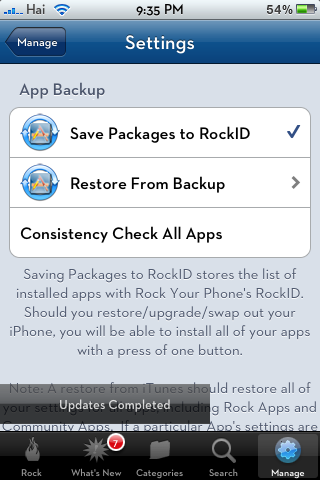
All you're going to do here is choose "Restore from Backup" - you'll then be presented with however many backups you have saved to your Rock ID. I normally choose the most recent under most circumstances.
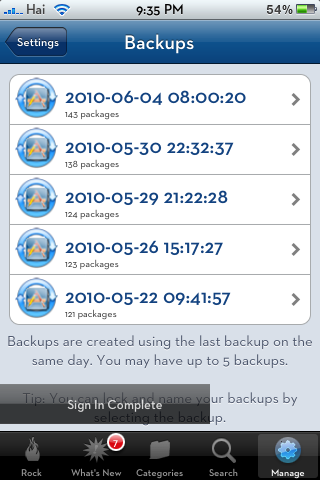
That's pretty much it! Rock will do the rest for you. It may take a bit depending on how many packages you have installed, so if need be, turn your auto-lock to never and plug your phone in, leave Rock open, and let it do its thing!
Now you're all ready for a new jailbreak on iOS4! Questions, comments? Leave 'em below!
iMore senior editor from 2011 to 2015.

