How to use Keyboard Maestro to automate sending an email to a group of people
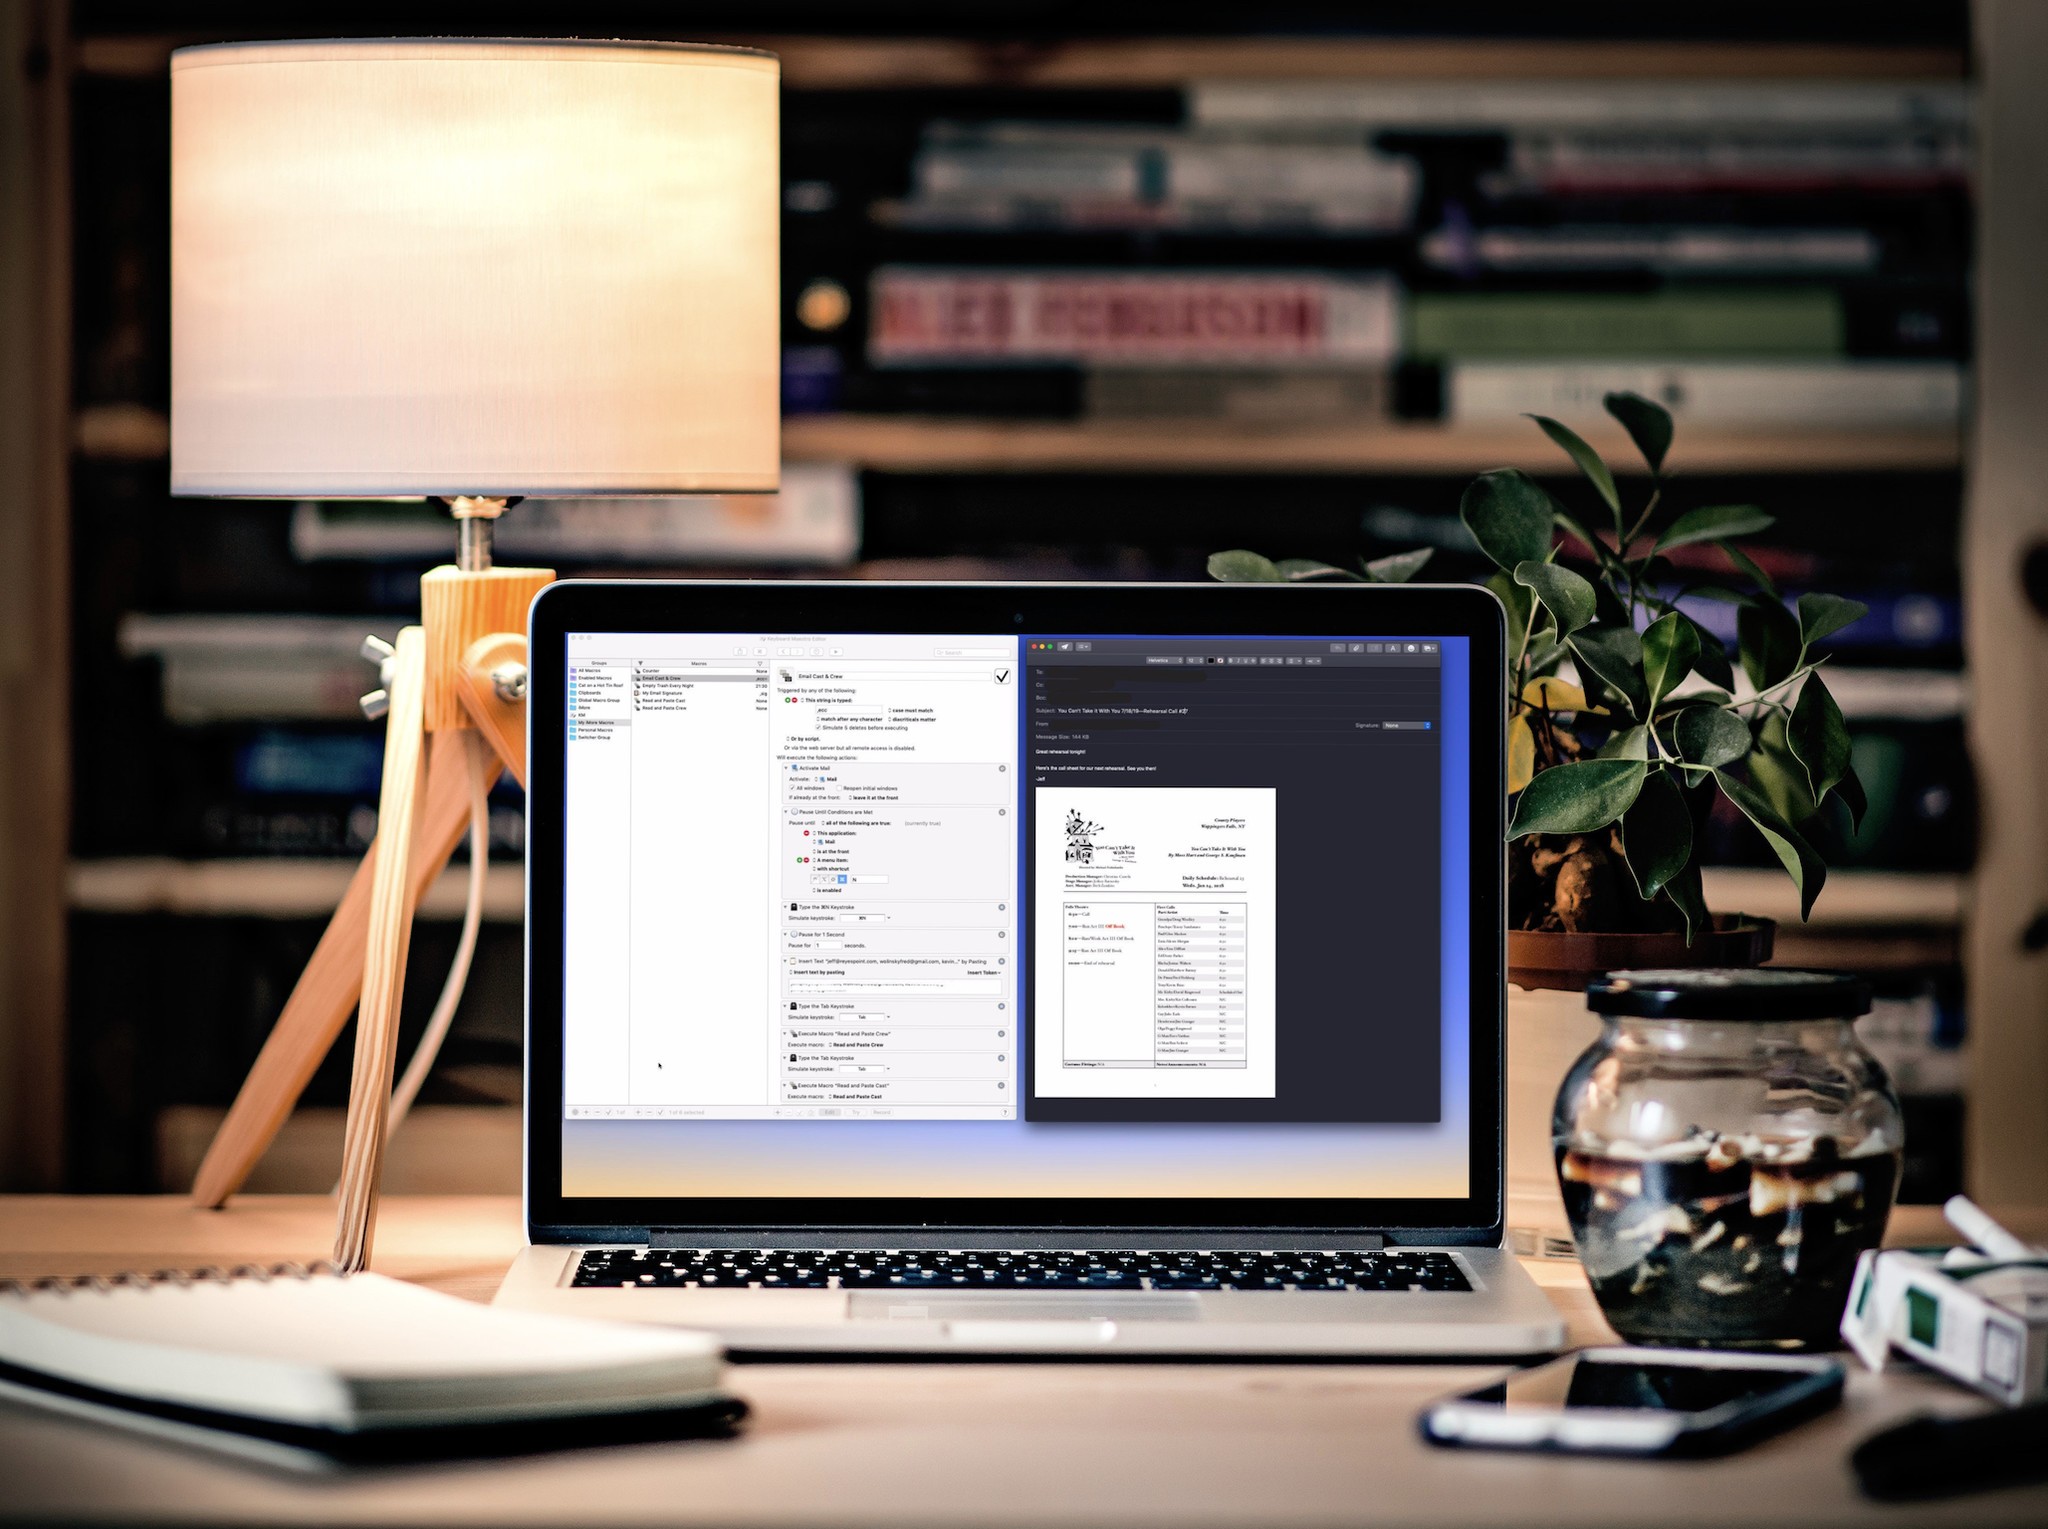
In the last two segments, we created variables, created counters and read text from a file. Now we're going to create a macro that uses everything we just created to send an email out to a group of users and automatically create a subject with an incremented sequential number.
As noted previously, I use something similar to this to send messages to actors and production staff when I'm stage managing plays. Feel free to change the specifics here to do something more suitable for you.
The Setup
In order to make this macro work properly, we need to make sure a few things are in place:
- We need to create a keyboard shortcut for the macro
- The Mail app needs to be open
- The Mail app needs to be ready to create a new email message
To do this we'll use some Actions we've used in the past and some Actions that will be new to us.
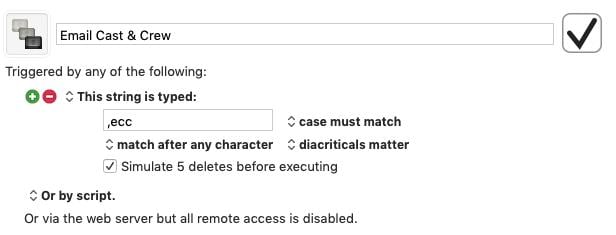
- Create a new macro in your iMore Macros group called "Email Cast & Crew"
- In the Triggered by any of the following: section, click the "+" button and enter ",ecc ", which is: comma-e-c-c-space
- Make sure the checkbox that says Simulate 5 deletes before executing is selected
What you see should look like this:
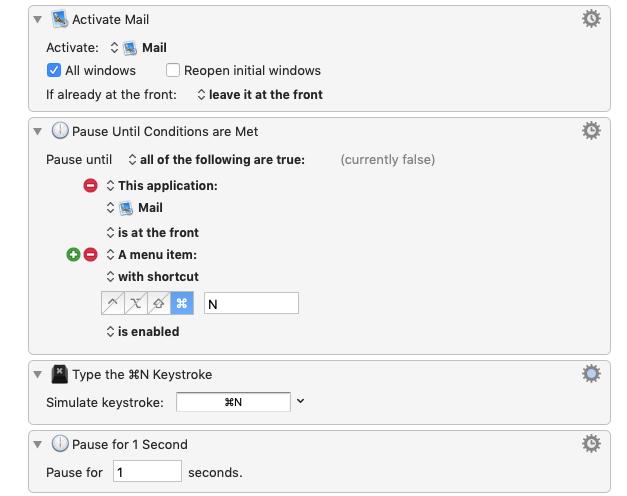
Next, we'll get the Mail app open and ready to create a new email message, then wait long enough for the new email window to be ready to receive information:
- Click the New Action button
- Add the Activate a Specific Application Action
- Select the Mail app from the "Activate" menu
- Locate and add the Pause Until action
- Select All of the following are true: from the Pause until menu
- Click the "+" next to New Condition
- Select This Application from the resulting menu
- Select Mail from the application menu
- Select is at front
- Click the "+" next to This application to add a new condition
- Select A menu item:
- Select with a shortcut
- Make sure the Command key is selected and type an "N" in the text field
- Search for and add the Pause Until action and set the pause for one second (Note that if you have an older computer you may need to set the pause for a little longer)
What you have so far should look something like this:
Master your iPhone in minutes
iMore offers spot-on advice and guidance from our team of experts, with decades of Apple device experience to lean on. Learn more with iMore!
Add Addresses and an Incremented Subject Line
Our final step is to use the macros we created previously to add address information to address fields and to add an incremented subject line.
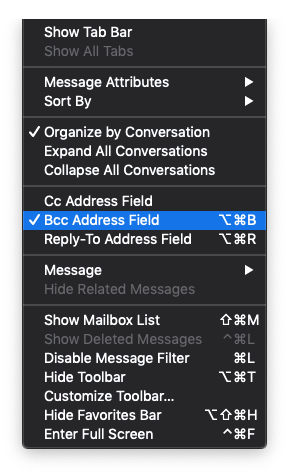
We're going to use the BCC field in Mail, so that actor's email addresses aren't sent to the entire cast and crew, so before we get started, open the Mail app, select the View menu and make sure Bcc Address Field has a check next to it. If not, select it from the View menu now.
Now, let's add our final Actions:
By default, the Mail app places the insertion point in the To: field when you create a new email message. We're going to paste email addresses in the To: field that won't change for the duration of the show:
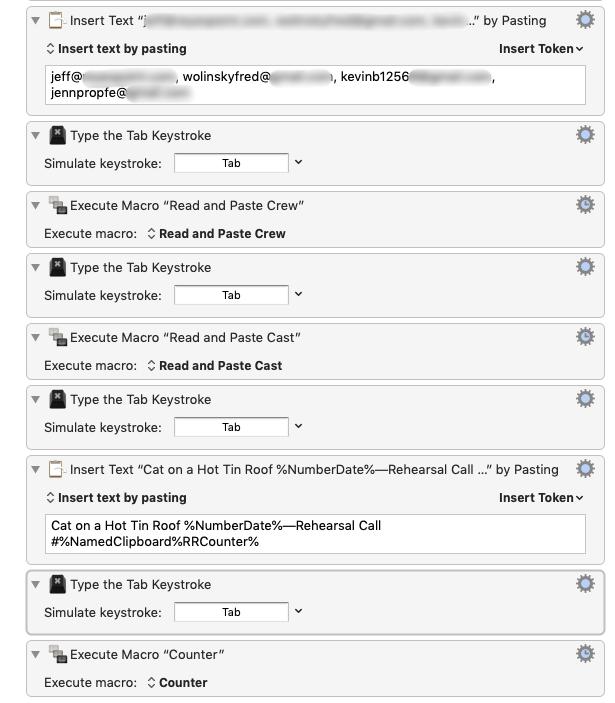
- Add the Insert Text by Pasting Action to your macro just below the Pause action you added a moment ago.
- Enter a couple of email addresses in the text field
- Add the Type a Keystroke Action
- In the Simulate keystroke: field type the "Tab" key
Next, we'll add the two "Read and Paste" macros we created previously:
- Drag your "Read and Paste Crew" macro just below the "Tab" key macro you just created previously
- Select the "Tab" key Action you just created and type Command-C to copy it
- Type Command-V to paste it and then, if necessary, drag it just below your "Read and Paste Crew" macro
- Drag your "Read and Paste Cast" macro below the "Tab" key macro
- Type Command-V to paste the "Tab" key macro again
- Click the "+" next to New Action
- Add the Insert Text by Pasting Action
- In the text field type "Cat on a Hot Tin Roof"
- Add a space
- Click the Insert Token menu and select All then select Number Date
- Type Shift-Option-Dash to insert a long dash
- Type "Rehearsal Call"
- Add a space
- Type the "#" key
- Click the Insert Token menu and select Named Clipboard and then select RRCounter
- Type Command-V to paste your "Tab" key macro again
- Drag your "Counter" macro to the bottom of the list.
This final section of your macro should look like this:
Prime the Pump and Run the Macro
Before we run the macro we need to make sure that our counter is properly primed and ready to go:
- Open the Keyboard Maestro Preferences
- Select the Variables tab
- Select Current Counter variable
- Replace whatever the counter number is with a one
- Select the Clipboards tab
- Select the RRCounter clipboard
- Replace whatever the counter number is with a zero
- Close the Keyboard Maestro Preferences
We're ready to go!
We're going to use a Keyboard Shortcut to kick off this macro:
- Open TextEdit or any other application you can type text in to
- Type ",ecc " (make sure to type a space at the end)
If everything is working properly, Mail should open, a new message should be created, all the appropriate fields should be addressed, and your subject field should are ready to go.
In our final segment, we'll create palettes we can use to run our Keyboard Maestro macros.
Jeff is a writer, actor, Apple Certified Trainer, and IT consultant, born and raised in A-town and now living in NY. You can often catch him behind the scenes and on stage at County Players, Falls Theatre. Up next? He's stage managing *Cat on a Hot Tin Roof* at the aforementioned County Players.

