How I built a custom mechanical keyboard, and you can too!
Mechanical keyboards don't have to be complicated.
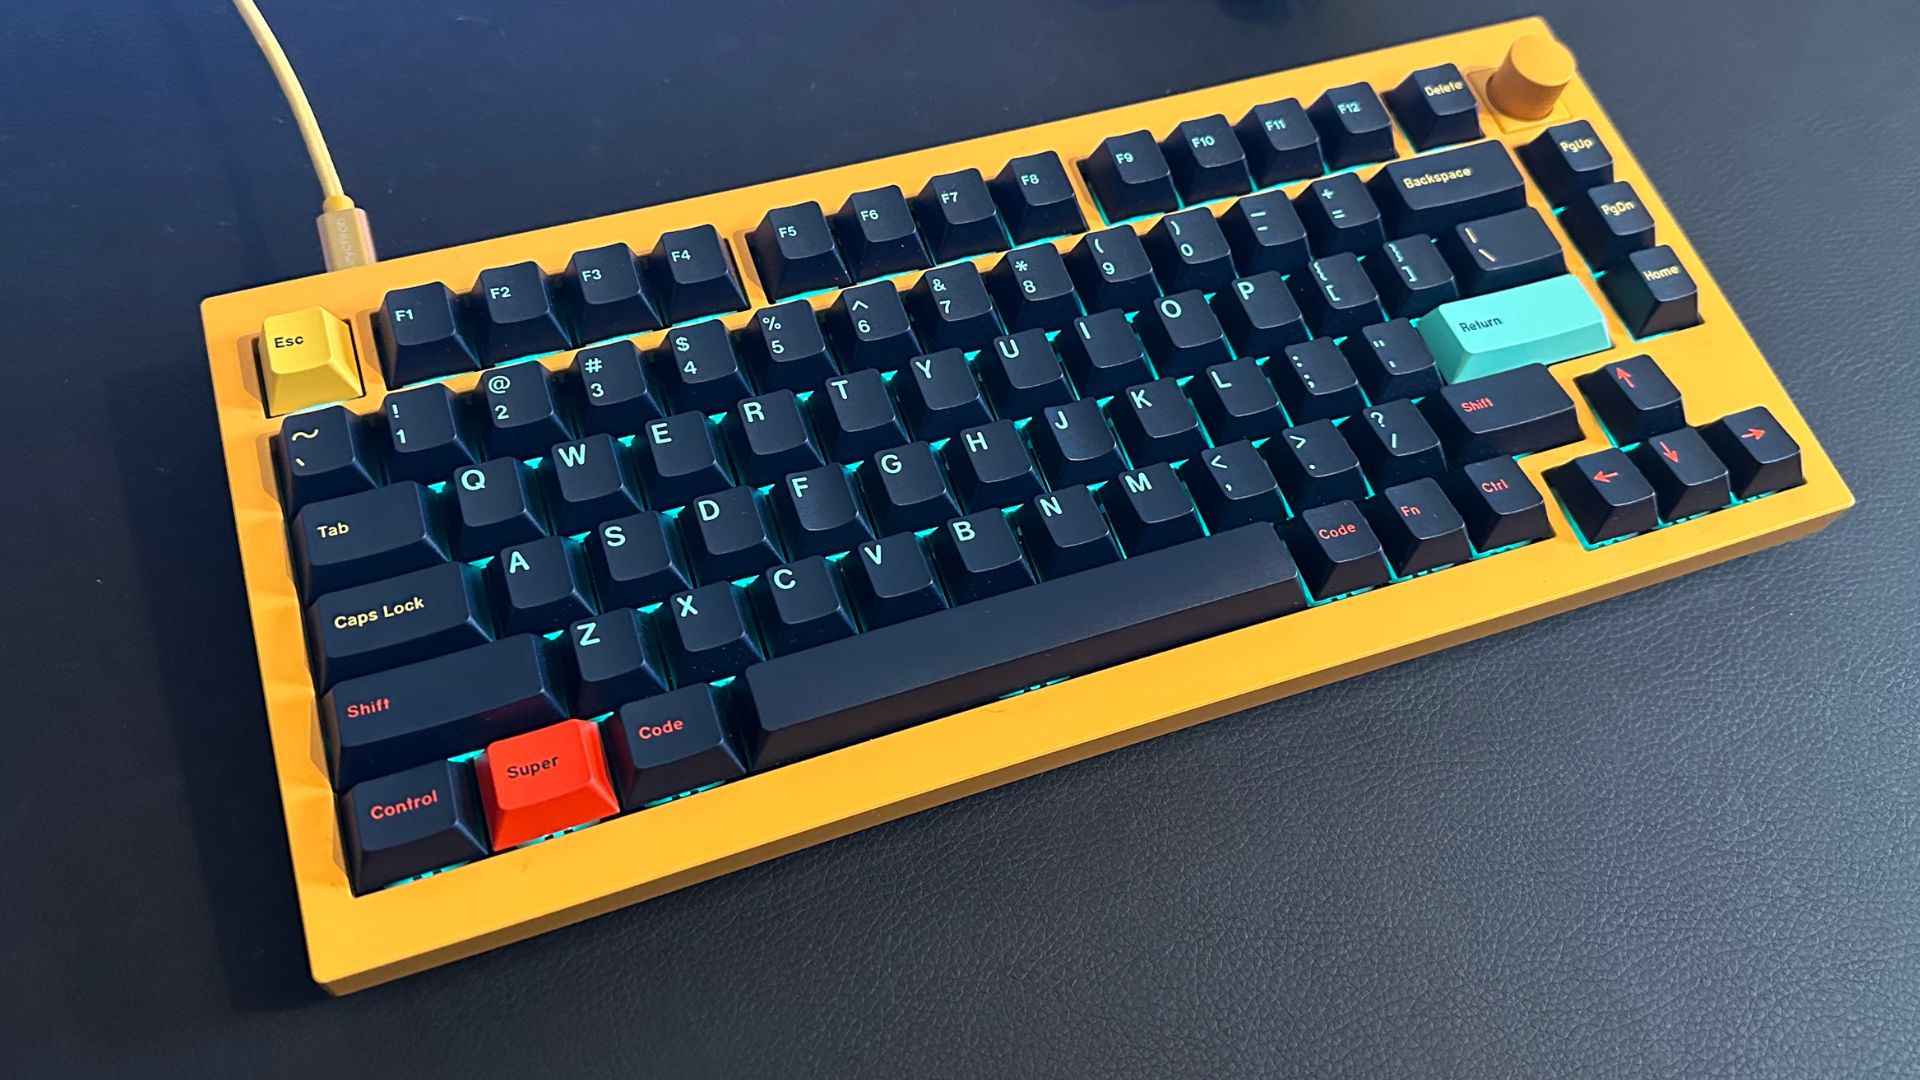
I’ve wanted a fancy-looking retro-inspired keyboard for a while, but I’ve always turned away from the thought of building my own custom mechanical keyboard. I’ve been subscribed to mechanical keyboard enthusiast YouTube channels for years and watch them religiously, yet I had never taken the leap.
Until, my Keychron K2, a pre-built trusty mechanical keyboard that works on Mac and other platforms, died a quick death as soon as my Matcha Latte spilled over its surface. As soon as the heartbreak happened, I decided it was time to finally delve deeper into the world of mechanical keyboards.
If you don’t know what a mechanical keyboard is or why you should even care, I’ve written about my love for switches previously, where I discussed why you, reading these very words, should build a custom mechanical keyboard for your Mac.
In this How To guide, I’m going to show you how I built a custom mechanical keyboard and how it’s far less daunting and complicated than it seems. I’m no expert, there are plenty of passionate content creators on YouTube who showcase building keyboards. I am however, someone who loves well-made and personalized technology - something that is easily achievable in a keyboard if you want it to be.
Picking the Keyboard
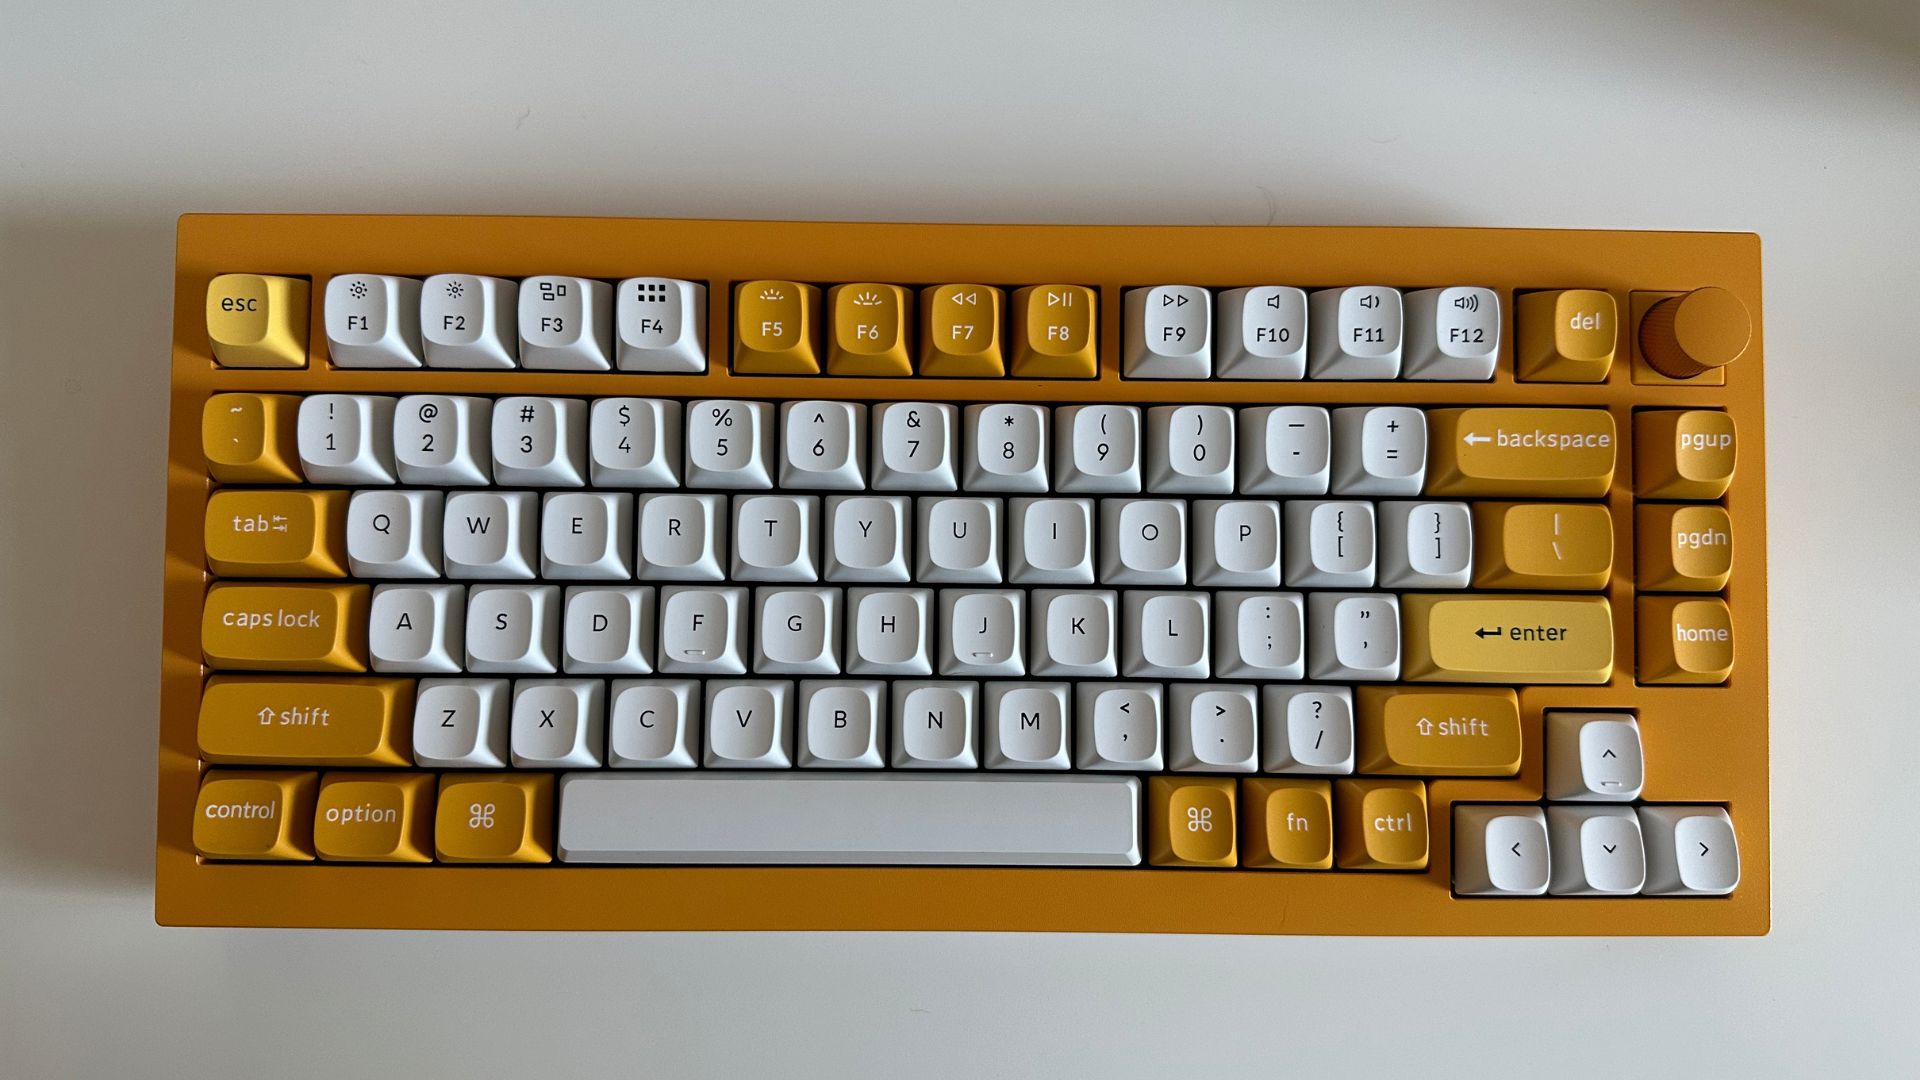
The first step in your custom mechanical keyboard journey is picking a keyboard. This can be quite complex as there are so many different cases to choose from, with long wait times and pre-order processes in check. Luckily, as mechanical keyboards became more and more popular, innovations and accessibility to the category did as well. It’s why the accessible nature of Keychron’s keyboards stood out to me as a great starting point for this project.
Mechanical keyboards come in all shapes and sizes - from aluminum to plastic, full-size to 60% (60% of a full-size keyboard). From my research, I decided to opt for a Keychron Q1, which is part of Keychron’s premium custom lineup of keyboards that are meant to ease people like me, and hopefully, you, into the hobby.
The Keychron Q1 is a 75% gasket-mounted aluminum keyboard with a hefty build and an optional customizable knob (I use mine for music controls). The Q1 and all other Keychron keyboards offer a pre-built version and a barebones option. For those that don’t want to go through the customization process, you can’t go wrong with a pre-built Q1, it includes switches and keycaps as well as a screwdriver and all the other tools you need so you can get typing straight out of the box.
Master your iPhone in minutes
iMore offers spot-on advice and guidance from our team of experts, with decades of Apple device experience to lean on. Learn more with iMore!
As I have an unhealthy obsession with the color yellow, I opted for a fully built version of the Q1 rather than the barebones alternative, just so I could get access to the yellow case as the first building block of my keyboard. I would suggest however, that if you want to build a similar keyboard to the one I’m about to show you, barebones is the way to go as you’ll save some money rather than have extra parts lying around.
Modding the keyboard
If you’ve spent any time in the mechanical keyboard world, you’ll have heard the term “keyboard modding”. The idea of having to “mod” something is complicated to say the least, although it’s fairly basic and less high-tech than it sounds. In mechanical keyboard terms, the concept of modding is changing aspects of the keyboard to make it sound a particular way, and this can go as far as stuffing pillow foam inside the case to dampen the noise.
For the Keychron Q1, some simple mods help improve the stock keyboard experience. Luckily, all you need is some masking tape and some patience to not only make the keyboard sound better and feel better too.
Bounciness
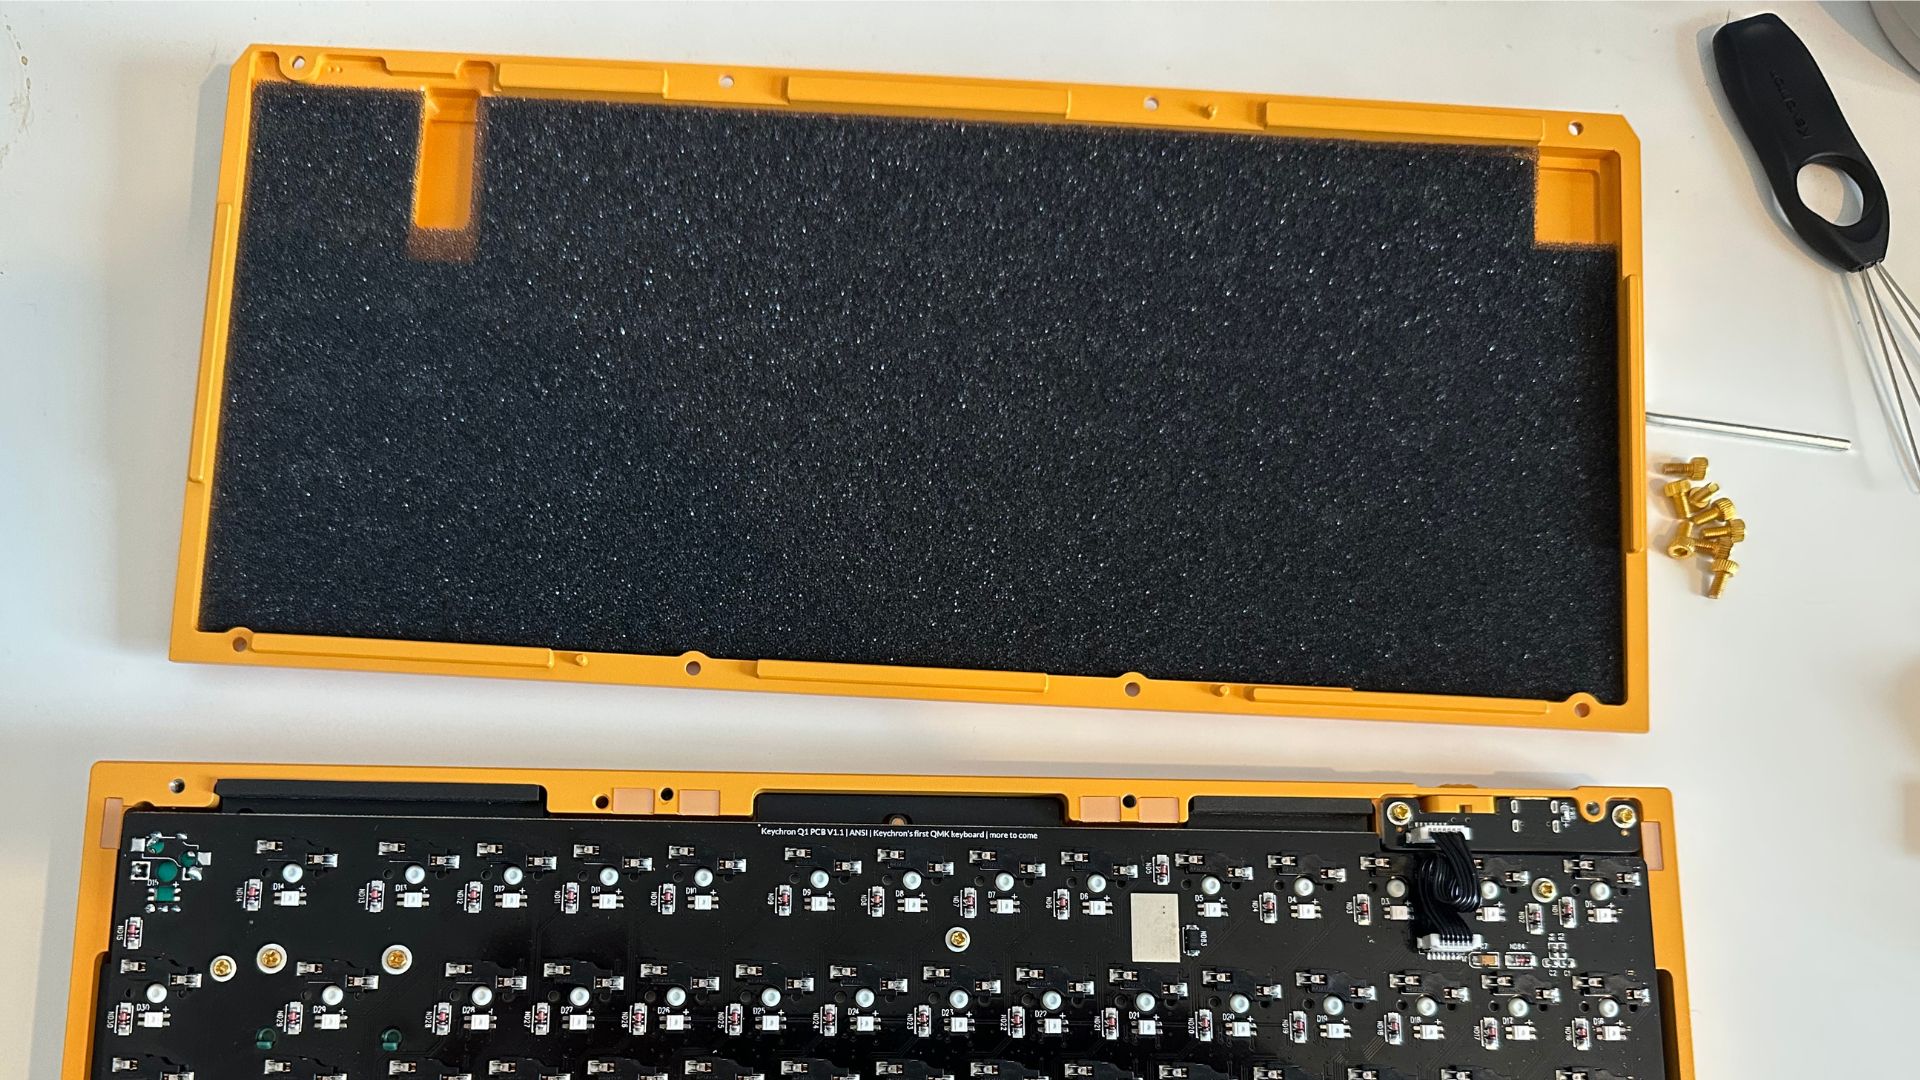
When I first tried the Keychron Q1 I found the typing experience to be a little hard. The gaskets that are installed in the keyboard, to begin with, are meant to create a bounciness that helps with typing over long periods - but I wanted more bounce.
Turns out, the plate is the biggest factor for the “bounciness” of your keyboard. The plate sits above the PCB (printed circuit board) and is where your keyboard switches are installed. The Q1’s plate is made of steel which adds to the weight of the keyboard but makes the typing experience a little unpleasant for my liking. Checking online with other owners of this keyboard, I spotted that changing the plate to polycarbonate was the key to a softer and bouncier typing experience.
Rather than purchase another plate, I chose to remove some of the foam from the bottom of the keyboard’s case to create more space between the case and the PCB - this seems to have improved the bounciness, although I’m planning to replace the plate soon.
Tape your problems away
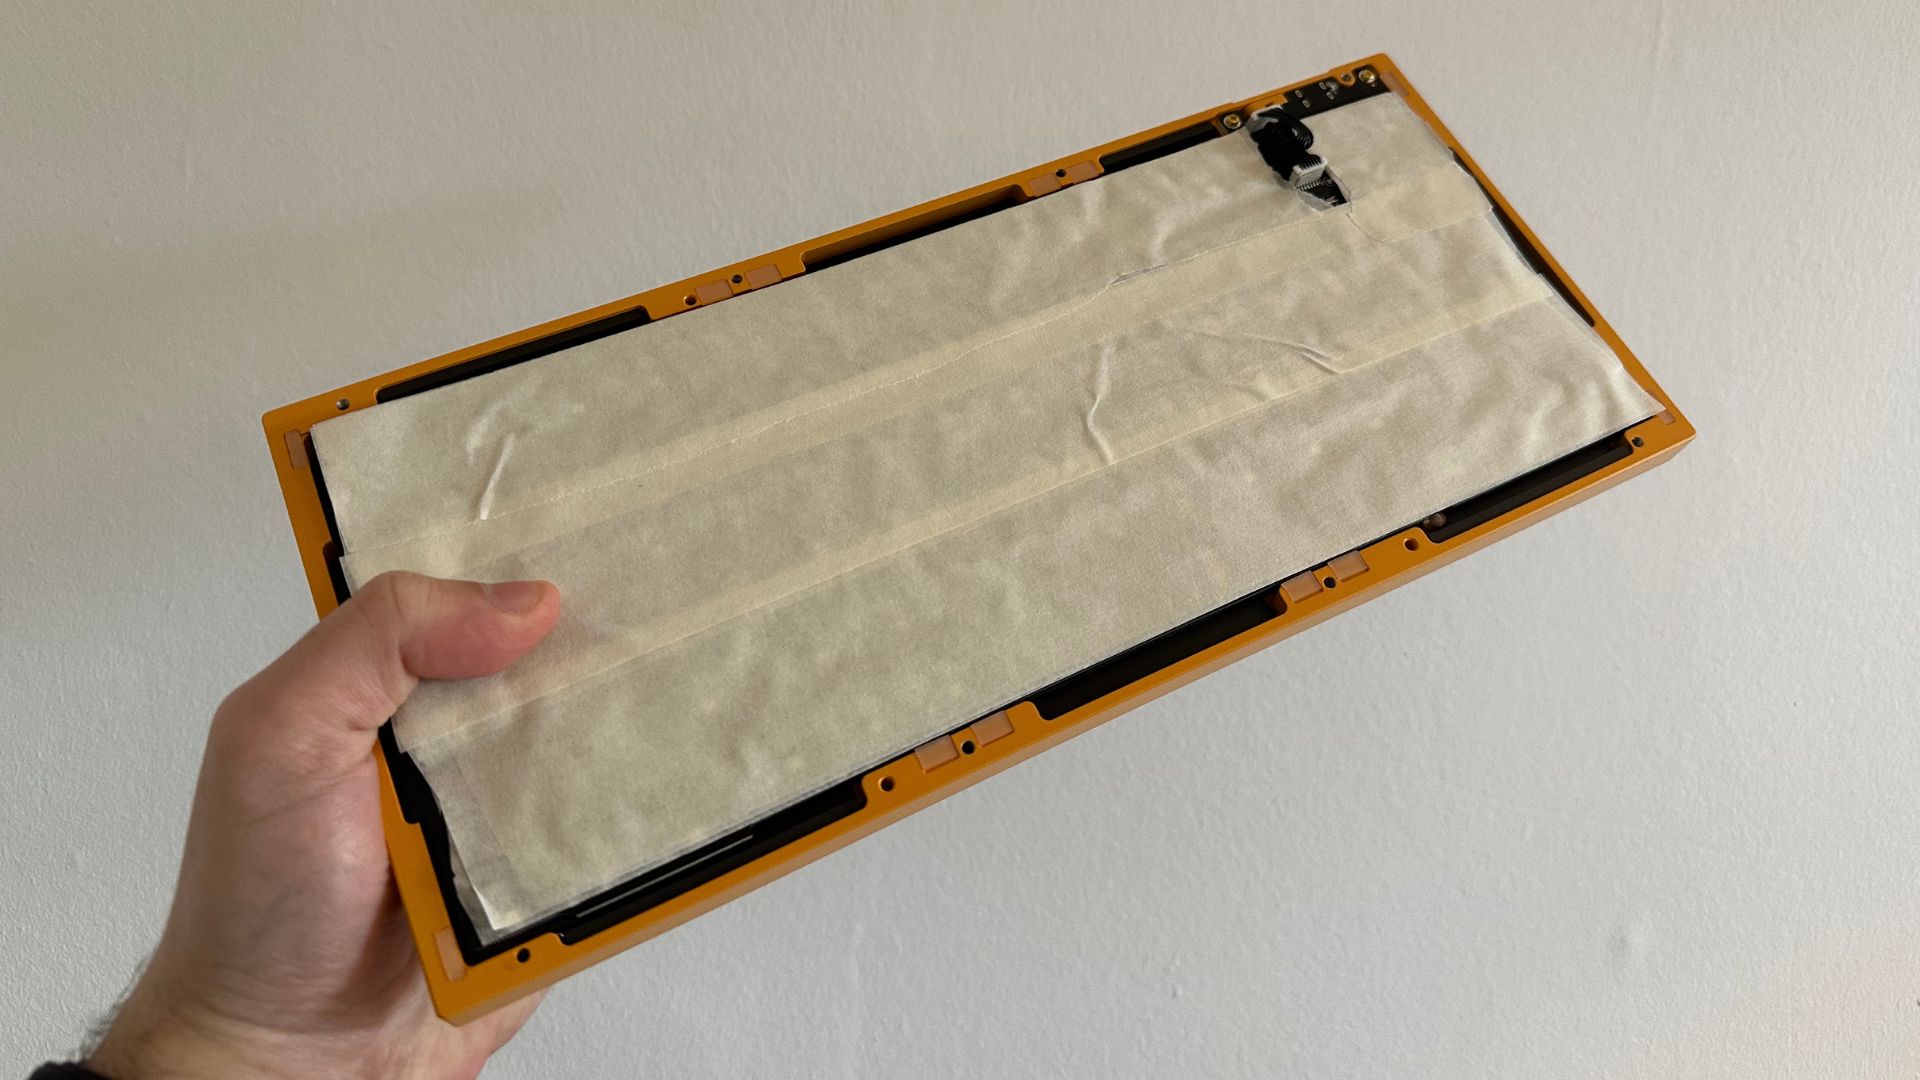
As the keyboard is made of aluminum, there is often a metallic ‘pinging’ noise as you type which can be annoying, to say the least. This is where some masking tape comes in. The two most popular mods for the Q1 are the Tempest Tape Mod and the Force Break Mod.
Tempest Tape Mod
I opened my keyboard case with the included Allen key (there are eight gold screws on the bottom). After opening the case, I had full access to the bottom of the PCB – time for the masking tape. Using this, I covered the bottom of the PCB with three layers of tape only leaving space for the connectors. Below you’ll find an in-depth video that explains how to do the Tempest Tape Mod but essentially, by taping the bottom of the PCB you help with dampening the typing noise in the keyboard. Super easy to do, and I recommend this to anyone that has a mechanical keyboard.
Force Break Mod
The second tape-based mod I completed was the Force Break Mod. This uses masking tape to cause a circuit breaker between the top and bottom aluminum casing and in turn removes the metallic pinging noise that is so frustrating out of the box. All you have to do is cut small pieces of tape, then position them on both sides of the casing, I placed two layers of tape for each small cutout. Again, there’s a simple video below if you’re struggling.
Modding sounds scary, but in actual fact in this case it’s just tape and scissors. Easy peasy.
Choosing keyboard switches
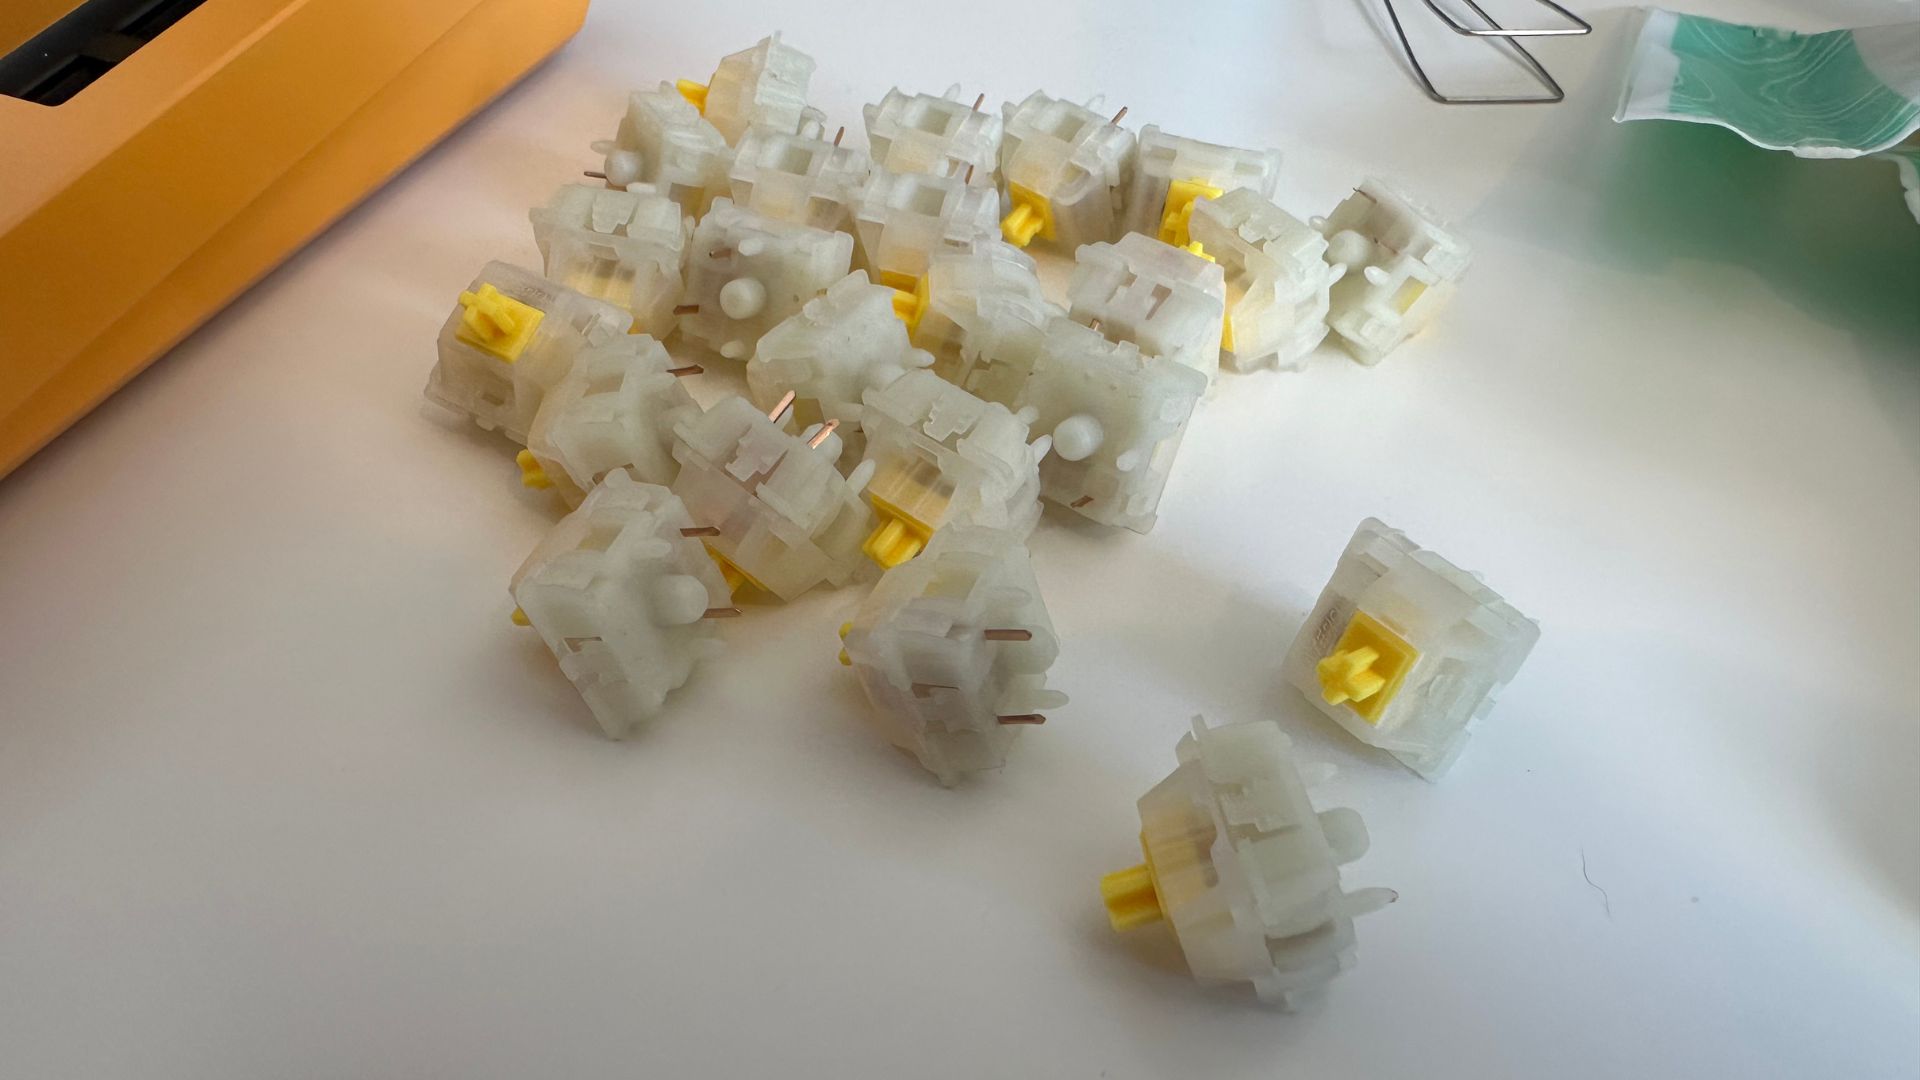
If you opted for the pre-built version of a keyboard, it will probably have shipped with Red (linear), Brown (tactile, or Blue (clicky) keyboard switches. These switches are what you are pressing every time you press an individual key on your keyboard. On my old Keychron K2, I had Gateron Blue switches, which provide a clicky noise and that irritating mechanical keyboard sound that you’re probably aware of. Some people love having a clicky switch as you’re able to feel when a switch is pressed. For those that like that feedback but want less of a clicky noise, Brown is the way to go and for those that just want a smooth experience, red seems to be the way.
There are so many different switches to choose from and it all comes down to personal preference. From my limited use of Mechanical keyboards, I knew I liked the sound and feel of linear switches.
After researching the different linear options, I chose the Gateron Milky Yellow Pro which is a very affordable switch option and they come pre-lubed. In mechanical keyboard terms, lubing is the process of adding some form of grease to the switch so that the experience feels and sounds smooth. In my opinion, pre-lubed does the job for my level of expertise and it saves so much time - in the future I'll probably have to lube these switches myself but in the meantime, they work a treat.
Installing keyboard switches
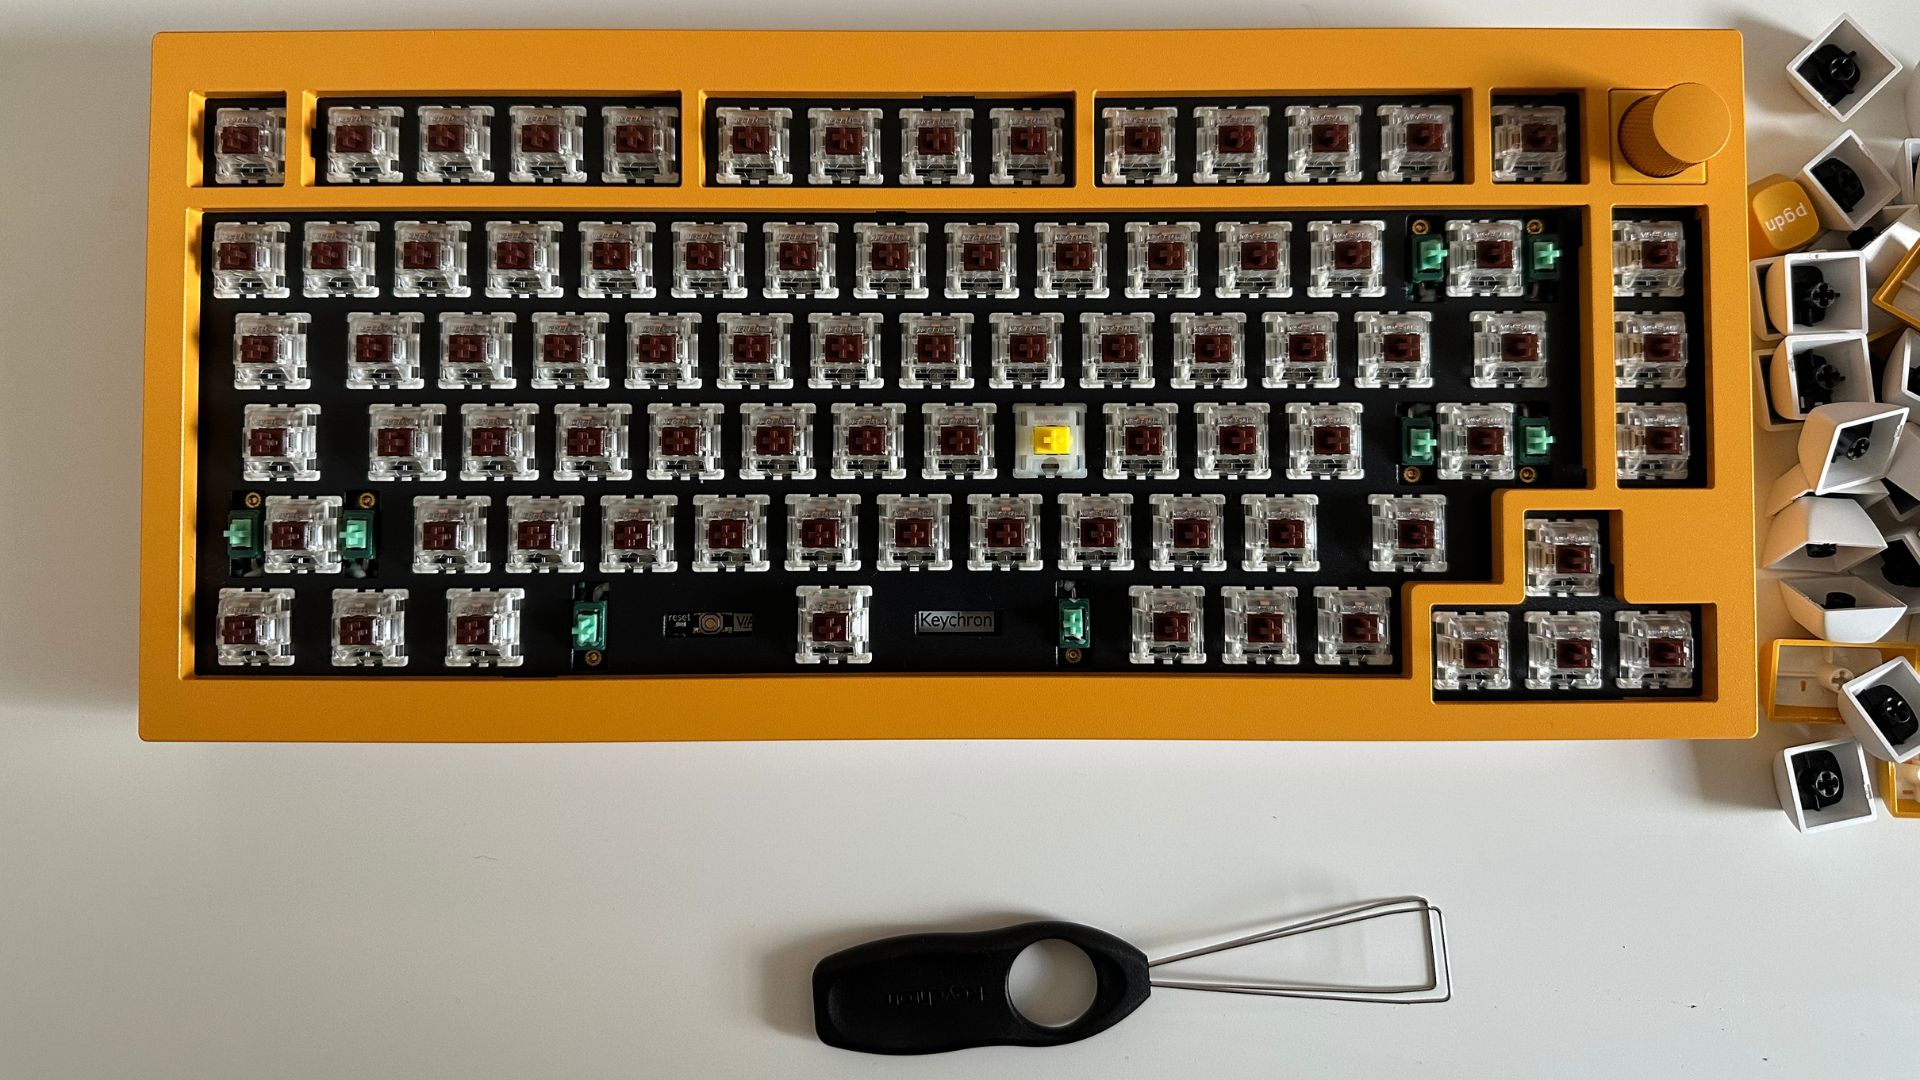
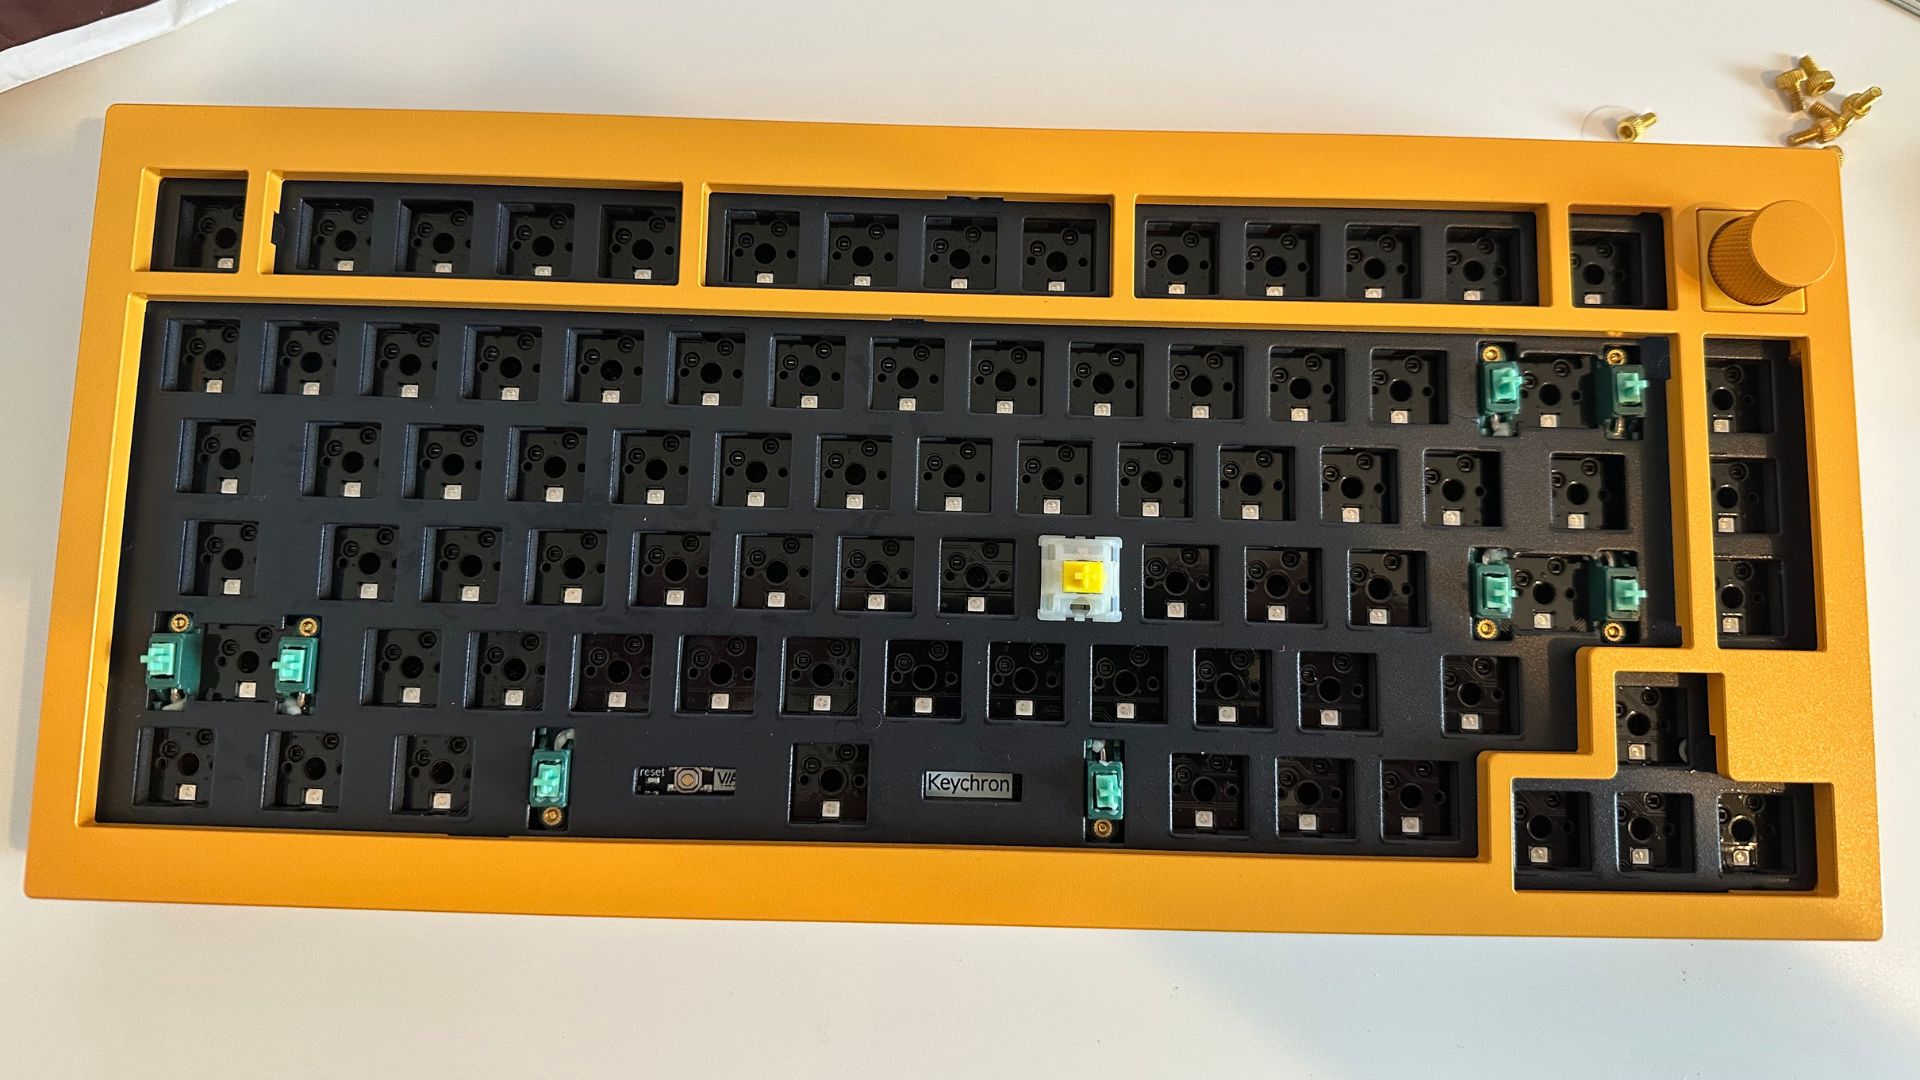
I had chosen my Milky Yellow Pro switches and purchased 10 packs of 10 switches for a 75% layout keyboard, which has 84 keys. Now it was time to install the switches.
If you bought a barebones keyboard, you can get started straight away by making sure the pins of the switches are straight and lined up before pushing each switch into the slots on the PCB. If you already have switches pre-installed and want to change them you’ll need a switch remover tool, but most mechanical keyboards come with these.
In my first attempt, I messed up and bent the first switch’s pins.But on the second attempt, I found that lining up the top part where the fragile pins are, before applying force, was the easiest way to not break the switch. After 20 minutes my keyboard was nearly good to go - it just needed keycaps.
The wonderful world of keycaps
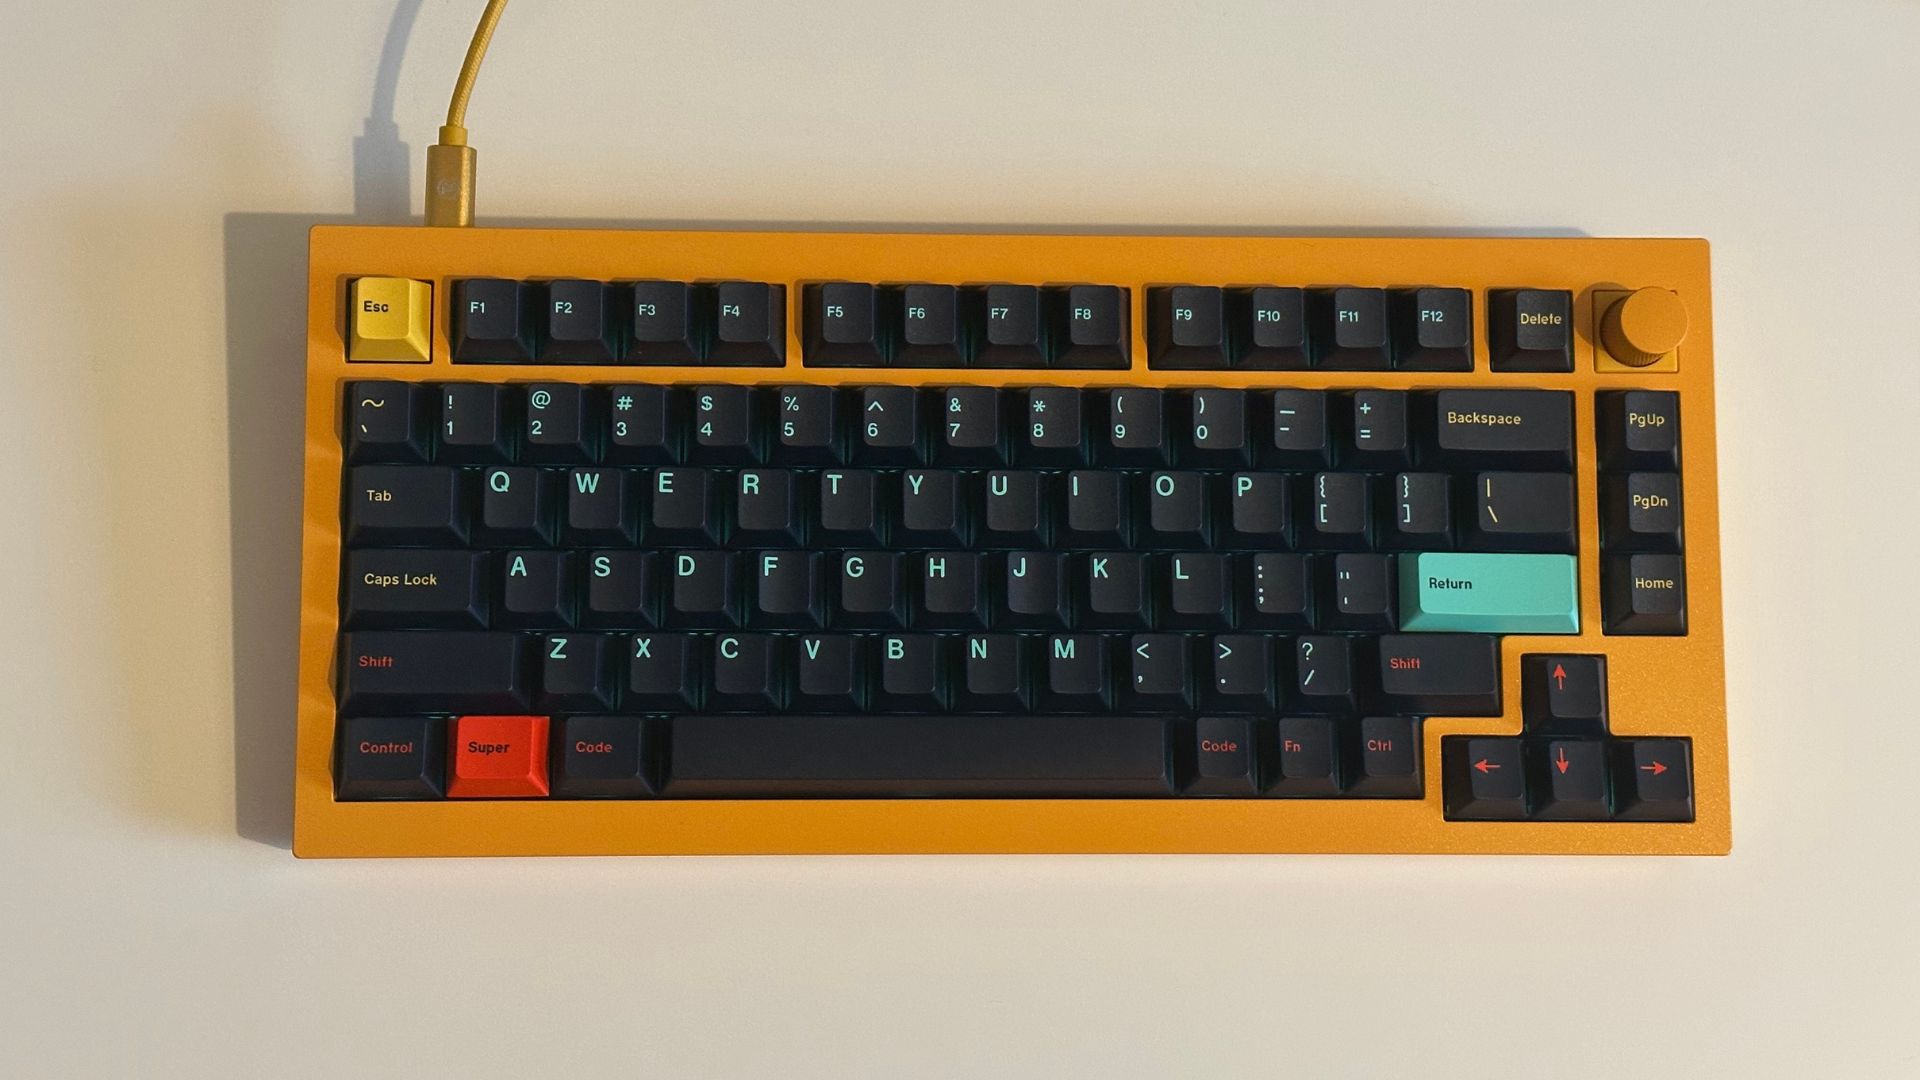
The final decision to make when building your custom mechanical keyboard is selecting a set of keycaps to finish your build. There are so many keycaps to choose from, all slightly different in material and shape. When you’re shopping for keycaps, you’ll see different profiles such as OEM, Cherry, and KSA. These different profiles fit different keyboards and layouts as well as provide differing typing experiences. Make sure to check the compatibility of the keycap profile with the type of keyboard you have.
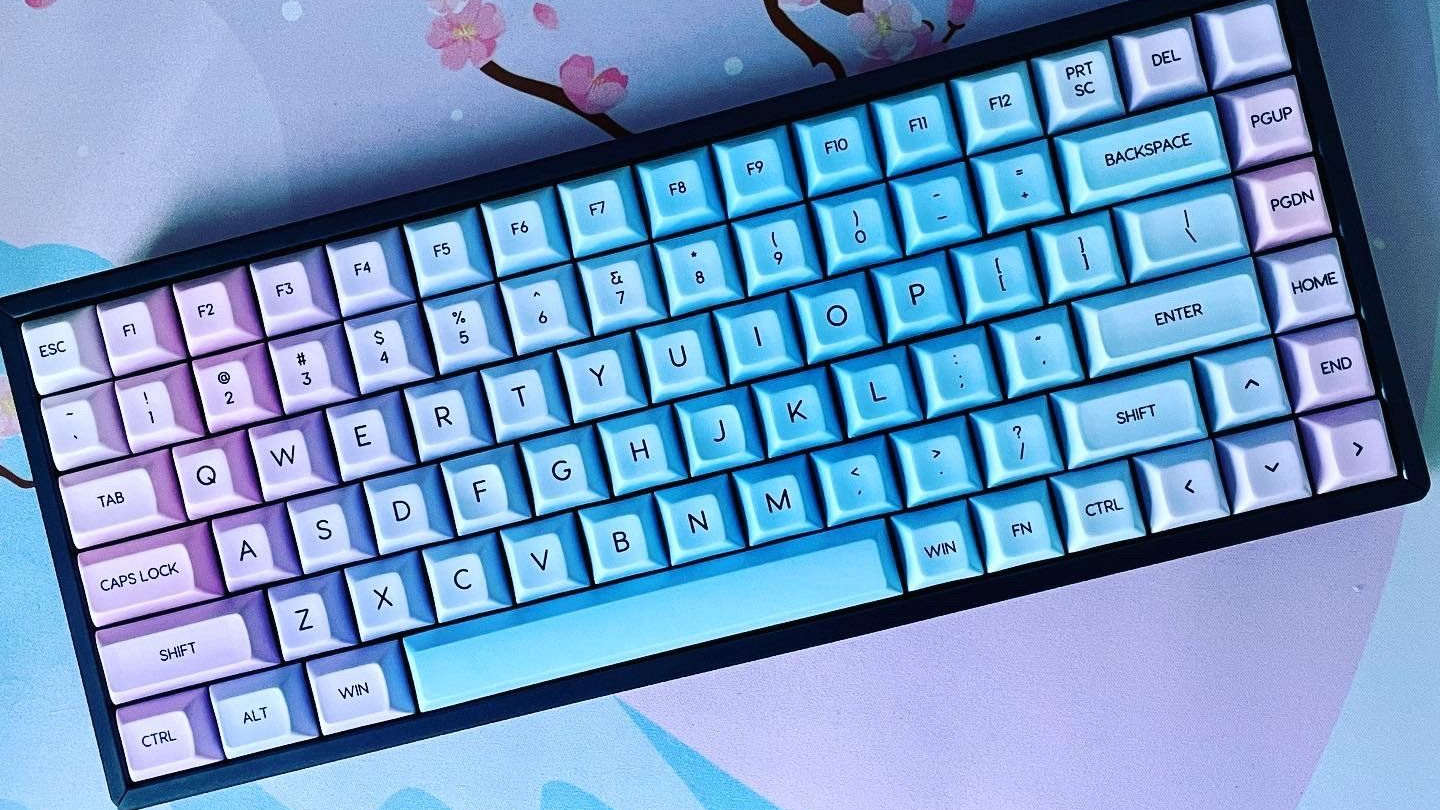
The other huge factor that impacts the look, feel, and sound of your keyboard is the material of the keycaps you choose to buy. Most keycaps are made with Double-shot PBT (Polybutylene terephthalate) nowadays; the name comes from the process of two separate plastic injections during construction. This means that Double-shot PBT has a different plastic for the legends (the letters and numbers on the keycap) and the keycap itself, meaning the legends will never rub off.
If you want a nice set of keycaps for a reasonable price there are many Double-shot PBT colorways on Amazon for under $50.
When it comes to installing the keycaps into the keyboard, it’s a simple affair - line up the keycap and push down to click the keycap into the switch.
Now you can tinker
The world of custom mechanical keyboards is vast and overwhelming at times. My goal with this guide was to show that you can make some adjustments to an already functioning keyboard to dip your toes in the water of a fantastic hobby.
Now that I’ve built my first keyboard, the journey has just begun and I'm looking for new ways to improve and modify my Keychron Q1 to make it the best mechanical keyboard for my preferences.
If you’re someone that wants to make their technology fit their needs and customize it to your heart’s content, then building your first mechanical keyboard could be the experience for you.

John-Anthony Disotto is the How To Editor of iMore, ensuring you can get the most from your Apple products and helping fix things when your technology isn’t behaving itself. Living in Scotland, where he worked for Apple as a technician focused on iOS and iPhone repairs at the Genius Bar, John-Anthony has used the Apple ecosystem for over a decade and prides himself in his ability to complete his Apple Watch activity rings. John-Anthony has previously worked in editorial for collectable TCG websites and graduated from The University of Strathclyde where he won the Scottish Student Journalism Award for Website of the Year as Editor-in-Chief of his university paper. He is also an avid film geek, having previously written film reviews and received the Edinburgh International Film Festival Student Critics award in 2019. John-Anthony also loves to tinker with other non-Apple technology and enjoys playing around with game emulation and Linux on his Steam Deck.
In his spare time, John-Anthony can be found watching any sport under the sun from football to darts, taking the term “Lego house” far too literally as he runs out of space to display any more plastic bricks, or chilling on the couch with his French Bulldog, Kermit.
