How to convert an image easily on macOS
Convert to JPEG or PNG in seconds.

When it comes to macOS, no tool is as helpful as Quick Actions, an easy-to-access menu built-in into Finder. One of the most useful aspects of Quick Actions is converting image formats in split seconds, an absolute godsend for anyone that works with image files daily.
Here’s how to convert an image on macOS using Quick Actions.
How to convert an image on macOS
Using Quick Actions is so simple that once I’ve shown you how to convert an image once, you’ll likely never need this How To again. Not only can you convert an image in seconds with Quick Actions, but you can also quickly remove the background from an image without needing third-party applications.

- Open Finder and find the image you want to remove the background from
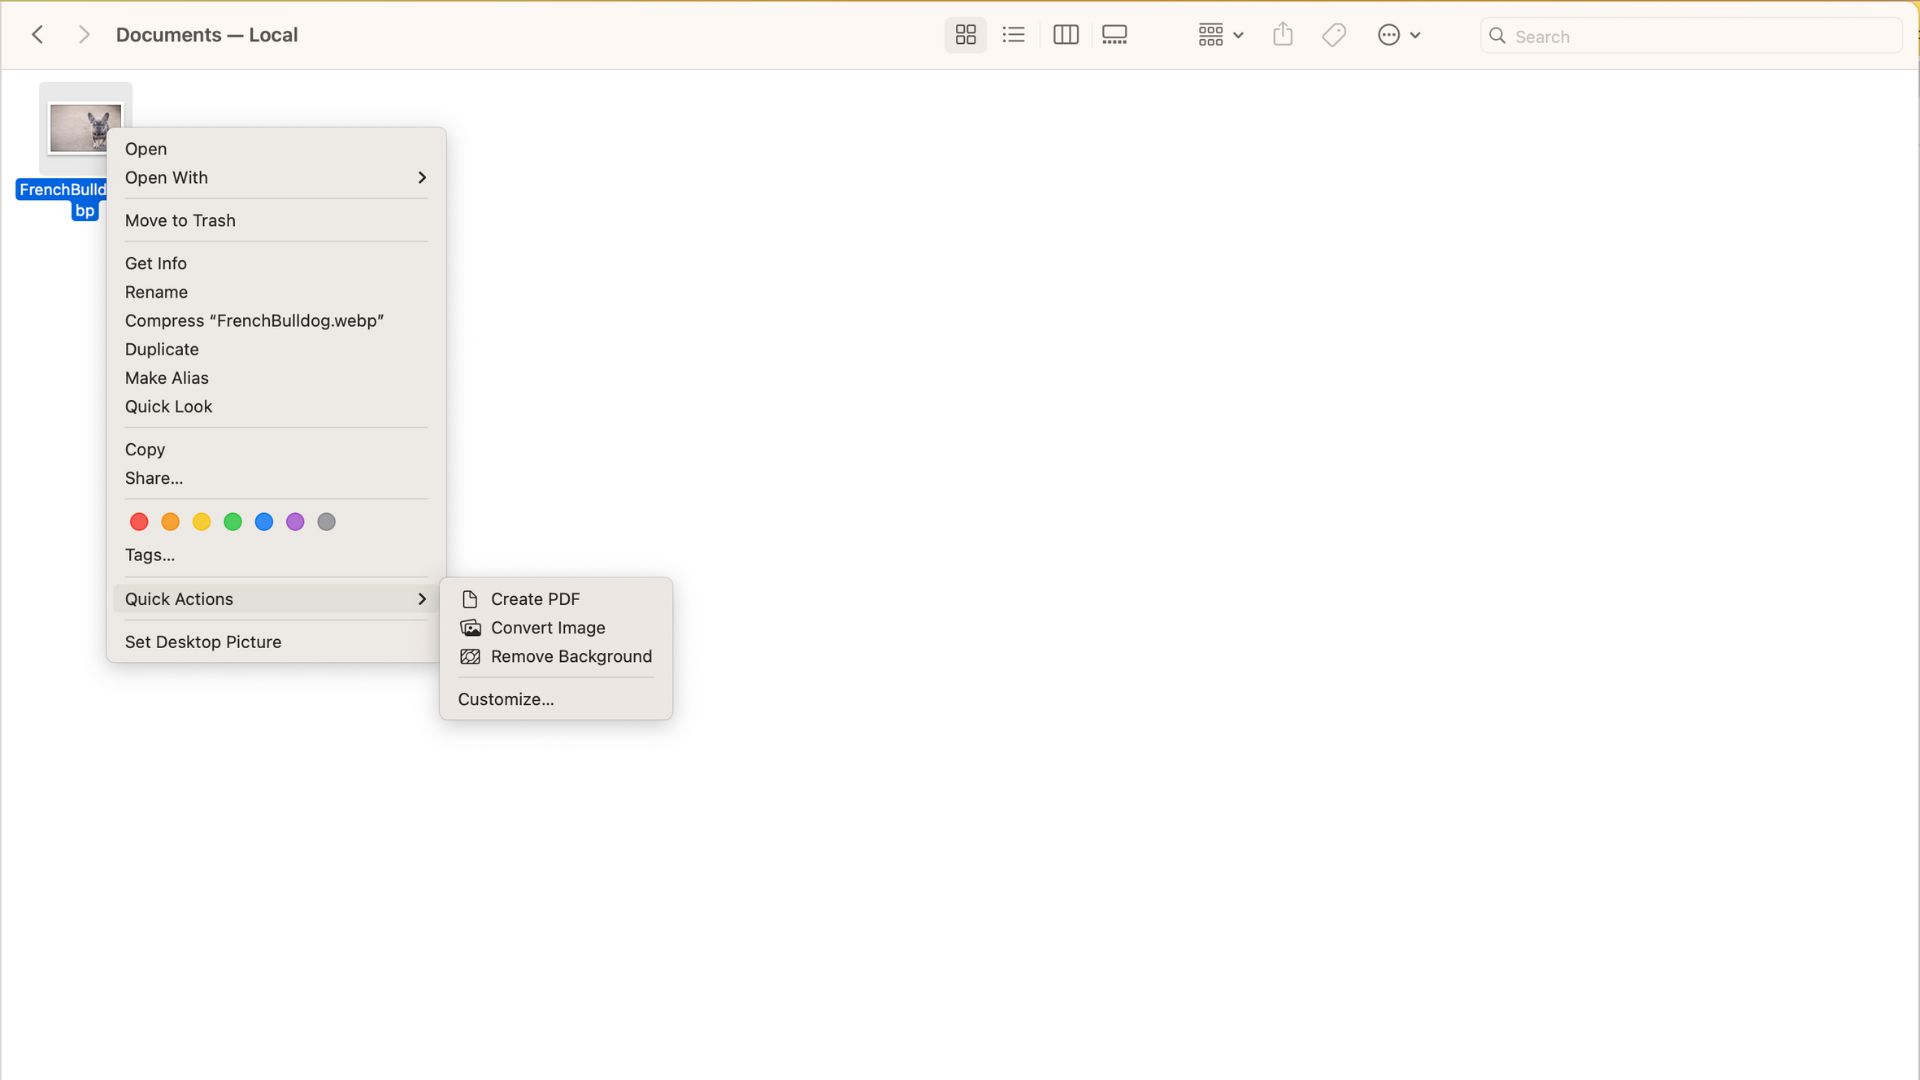
- Right-click and select Quick Actions
- Click Convert Image
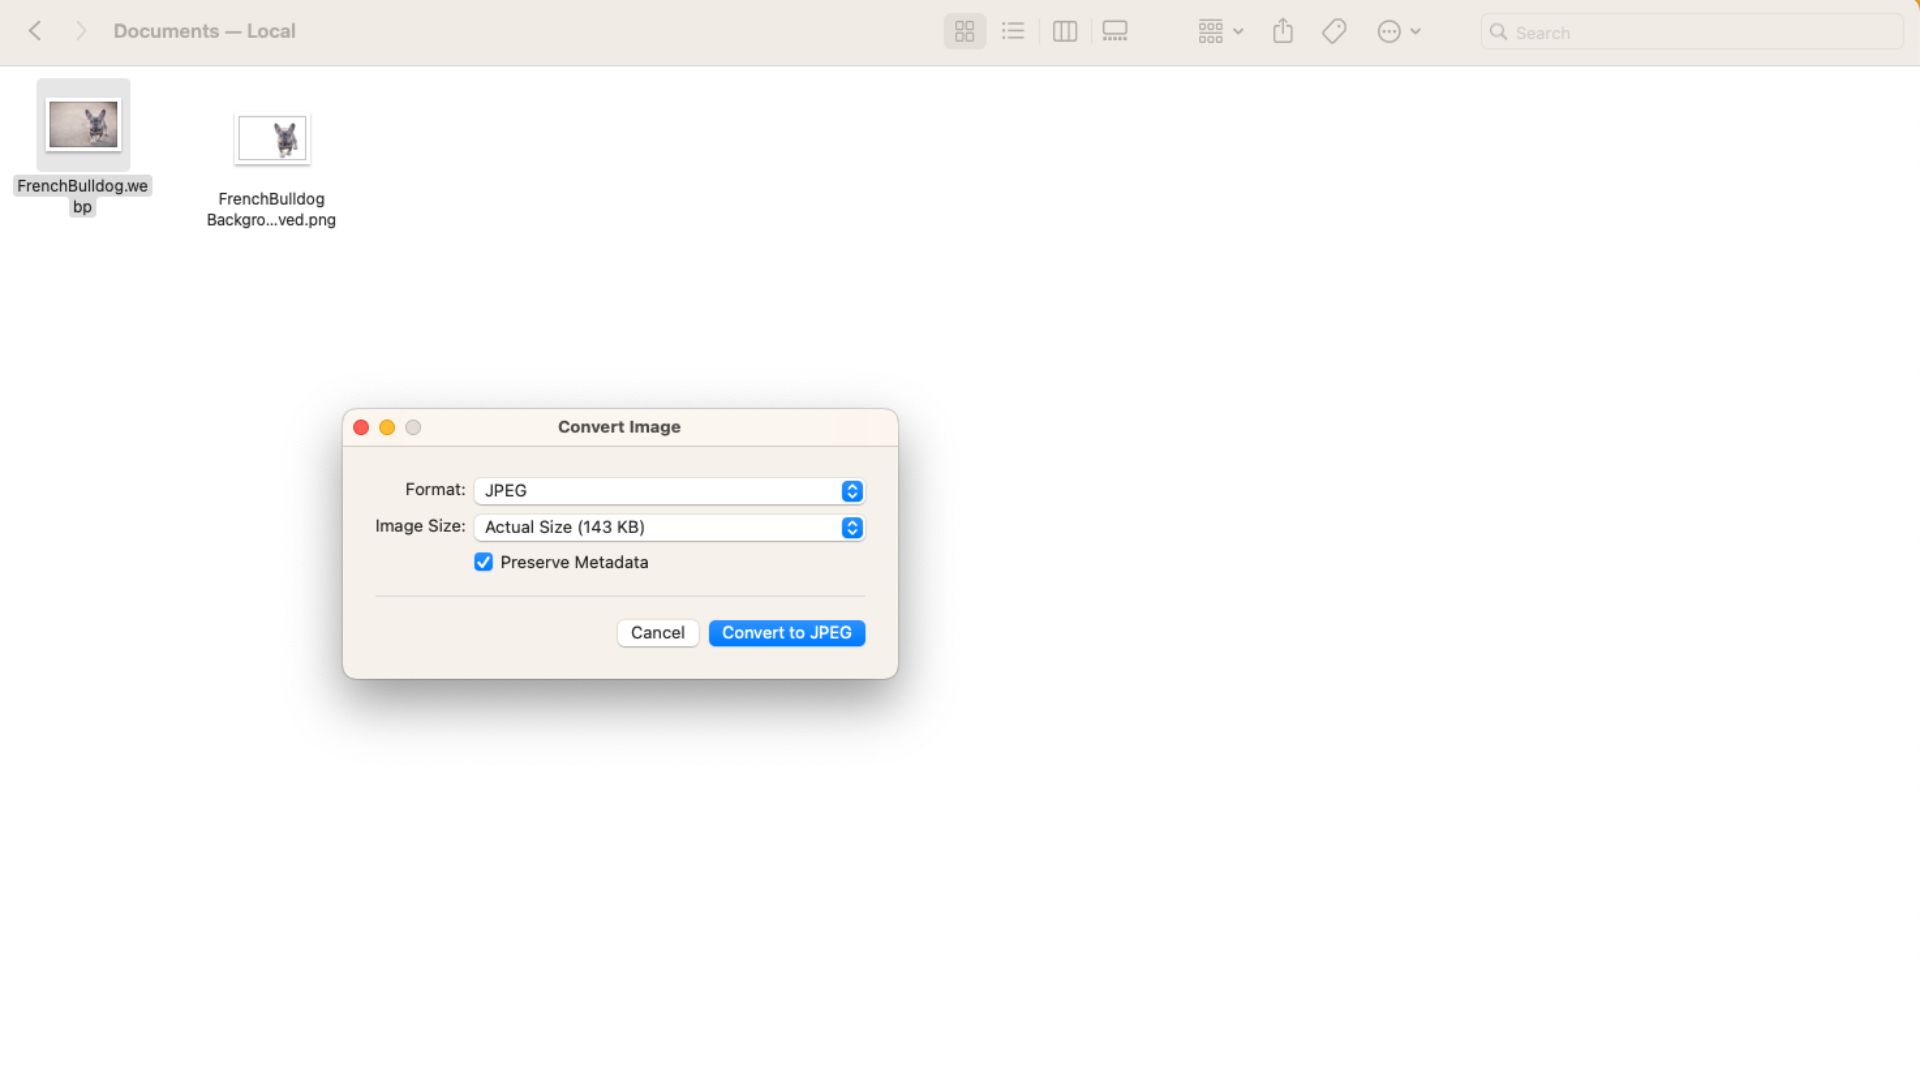
- Select the Format (for this example, I chose JPEG) and Size, then click Convert to JPEG

It couldn’t be any simpler. For far too long, I’ve AirDropped HEIC images from my iPhone to my Mac and then used Canva or Photoshop to convert them. Now, I can quickly get JPEGs on my Mac without having to go through any hassle at all.
Quick Actions, my new best friend
After I started to use Quick Actions to convert images quickly on Mac alongside the ability to remove backgrounds from any image, I began to wonder how I ever lived without it. Quick Actions is fantastic, and it has so many capabilities thanks to Apple allowing third-party developers to access the menu.
Now, I feel far more in control of my Mac and never have to worry about jumping through extra steps just to upload a scanned document of my passport photo onto a website. Gone are the days of smashing my head off the table as a red exclamation mark prevents me from uploading a HEIC to an online form. Quick Actions has made my life so much easier, and I’ll never stop singing its praise.
Master your iPhone in minutes
iMore offers spot-on advice and guidance from our team of experts, with decades of Apple device experience to lean on. Learn more with iMore!

John-Anthony Disotto is the How To Editor of iMore, ensuring you can get the most from your Apple products and helping fix things when your technology isn’t behaving itself. Living in Scotland, where he worked for Apple as a technician focused on iOS and iPhone repairs at the Genius Bar, John-Anthony has used the Apple ecosystem for over a decade and prides himself in his ability to complete his Apple Watch activity rings. John-Anthony has previously worked in editorial for collectable TCG websites and graduated from The University of Strathclyde where he won the Scottish Student Journalism Award for Website of the Year as Editor-in-Chief of his university paper. He is also an avid film geek, having previously written film reviews and received the Edinburgh International Film Festival Student Critics award in 2019. John-Anthony also loves to tinker with other non-Apple technology and enjoys playing around with game emulation and Linux on his Steam Deck.
In his spare time, John-Anthony can be found watching any sport under the sun from football to darts, taking the term “Lego house” far too literally as he runs out of space to display any more plastic bricks, or chilling on the couch with his French Bulldog, Kermit.
