Minecraft for Nintendo Switch: The ultimate starter kit

One of the best things about Minecraft is the need to explore in order to fully understand everything in the game. There's no starter manual for new players, and this game contains far more than the colorful blocks you see on the surface. This is a game for explorers, creators, and adventurers alike, as long as you know where to look for things.
To help you get pointed in the right direction, we've assembled a quick walkthrough of the more complicated beginning topics. With these tools, you'll be able to venture forth and accomplish anything!
How to create a world
When you start playing Minecraft for the first time, you'll want to create your first world. You can create a world from scratch, using texture packs of your choosing, or by selecting from pre-made worlds, like Super Mario World.
When you create a world from scratch, start by giving it a name. Then, select the game mode from Survival or Creative. If you select Survival, you'll be vulnerable to attack from other creatures in the world, as well as other players if you've created an online game with others.
You can then select your level of difficulty from Peaceful, Easy, Normal, and Hard. Each level provides different adventures with increasingly harder means to survive, even in Creative mode.
You can select a texture pack from 14 options. Six are included with the base price of the game. The other eight can be played as a trial version, but you won't be able to save the game. When you try to save, you'll be offered the option to purchase the texture pack, but you'll still lose all of your progress. So, don't spend too much time building stuff using one of the premium textures because you'll lose all of your hard work, even if you decide to buy the texture pack.
Texture packs included with the game:
Master your iPhone in minutes
iMore offers spot-on advice and guidance from our team of experts, with decades of Apple device experience to lean on. Learn more with iMore!
- Classic
- City
- Fantasy
- Festive
- Super Mario
- Natural
Texture packs you can purchase for $2.99 each:
- Candy
- Cartoon
- Chinese Mythology
- Greek Mythology
- Halloween 2015
- Pattern
- Plastic
- Steampunk
Decide whether your world will be available for online gameplay. This is how you create a multiplayer game that your friends can join when they see that you're playing Minecraft online.
There are a few more advanced options you can select before you create a world. Select More Options to choose advanced world creation options.
You can then enter the seed code to generate a specific pre-made world. Seeds codes can be found online. If you don't enter a seed, a random one will be generated for you, which is totally fine.
If you want to explore a relatively small region, change the world size to Small. You can expand your exploration area by selecting Classic or Medium.
Tack on a few little extras, like pre-built structures, a chest filled with items that is conveniently near where you spawn, or a completely flat world.
When you're ready, select Create World and you'll be ready to go!
The secrets of biomes
Minecraft divides the Overworld into biomes, which are essentially connected areas with a variety of specific features, adding a sense of exploration to your game. Different biomes are home to various resources and animals, as well as multiple NPC buildings, like temples, huts, and villages. Here's a guide to the biomes you'll find in Minecraft!
Plains

Plains are wide, mostly flat expanses covered in grass and flowers. Here you will find plenty of caves to explore and plenty of livestock to herd, including horses. Plains biomes are home to many villages.
Forest

Forests are usually hilly areas covered in trees, flowers, grass, and mushrooms. Here you'll encounter all types of livestock, including wolves.
Dark forest

These forest variations are made up of dark oak trees and are sometimes referred to as "roofed forests." Find large and small mushrooms here, and be careful when navigating these biomes as they are dark enough to spawn enemy mobs during the day.
Birch forest

This is a variation of the forest biome made up entirely of birch trees.
Desert

Desert biomes can be quite expansive and are made up of sand and sandstone. There are plenty of cacti but usually no trees. Desert biomes are the only place to find desert temples and desert wells. You can also find villages here.
Beach

You will often find a beach where a desert biome abuts an ocean, but beaches can technically be found anywhere there's water. Beaches are almost always made up of sand but can sometimes be made up of gravel.
Cold beach

Cold beaches are snow-covered variations of regular beaches. Don't worry, though, no need to go hunting for warmer clothes.
Stone beach

Also known as a cliff, stone beaches are tall walls of stone that connect to an ocean.
Swamp

Swamps are usually quite flat and consist of pools of green water with lily pads and trees covered in vines. If you're looking for a lot of sugar cane or mushroom, this is the place. Be careful when traversing at night — slimes come out in force.
Jungle

Jungles are extremely lush biomes covered in towering tropical trees. Climb vines, harvest cocoa beans, and find jungle temples full of treasure. If you're looking for melons or a pet ocelot, head for one of these biomes. They're usually pretty easy to spot, thanks to the tall trees, and are generally quite wide.
Mesa

Mesa biomes are extremely rare — they are made up of multiple colors of hardened clay. These biomes are important, as they contain gold ore at any height and can have abandoned mine shafts above ground.
Bryce mesa

The Bryce mesa biome is similar to a standard mesa biome, except it has towering spires of hardened clay.
Taiga

Taiga biomes are usually quite hilly and have plenty of spruce trees. You can find villages here, and wolves are common.
Mega spruce taiga

These biomes have a ton of spruce trees grouped closely together. You'll find podzol on the ground, as well as mossy cobblestone.
Mega taiga

A variation of the standard taiga biome, here you will find enormous spruce trees and podzol blocks rather than grass blocks. Mossy cobblestone can be found here.
Tundra

Tundras are relatively difficult to survive, thanks to a lack of resources and animals. You will find an oak or spruce tree here and there, but for the most part, you'll only find snow and frozen rivers.
Tundra spikes

Tundra spike biomes are small and quite rare, so take a screenshot if you find one! These are basically tundras covered in towering spires of packed ice.
Savanna

The savanna biome is sort of a cross between plains and desert. You won't find much water, and the grass is a darker green. The acacia trees found here make great decoration thanks to their unique color — villages you find here will show this off well. You will also find plenty of livestock, including horses.
Mushroom Island

Found way out in the ocean, mushroom islands are made up of mycelium blocks instead of grass and dirt. Huge mushrooms that resemble trees grow here, and the only mobs you'll find are mooshrooms — a cow and mushroom hybrid animal. If you're looking for a spot to build without being disturbed by enemy mobs, this is the place.
Hills

Hills can be found in most other biomes and take on the properties of that biome. Nothing overly special but a nice calm area to work in.
Mountains

Mountains, also known as extreme hills, are found in many other biomes and can reach all the way up into the clouds. These biomes are very fun to explore and provide a good base for building some wild structures.
How to craft all the things
As the name of the game might suggest, a big part of doing just about anything in this game is gathering the parts to build things that make your life in this world a little easier. This includes weapons, armor, tools, and, in advanced cases, portals to other dimensions. Once you get the hang of crafting, the way you play will change entirely. You'll start thinking about resources as you travel, which makes a big difference for a lot of people and winds up being a ton of fun!
Getting started with crafting
The first thing you should craft are some wood planks, which can be accomplished without using a crafting table. Find some nearby trees and press the RZ button to mine wood from them with your bare hands. Gather at least 12 pieces of raw wood to get started.
Once you have enough raw wood, you can craft the wood planks in your crafting interface. Press the Y button to access your crafting interface. You can switch group types by pressing the L or R button to navigate to the next tab. Use the left joystick to scroll through items and the A button to craft items.
- Press the Y button to open your crafting interface.
- Select the Structures group. It's the first tab.
- Select the wood plank you want to create from the first structure item. Planks you can create will be full color. If you don't have enough material to create an item, it will be grayed out.
- Press the A button to craft the wood plank.
- Press the A button again to create more wood planks until the raw wood runs out.The new material will automatically transfer to your inventory
The next thing you'll want to craft is a crafting table, which allows you to craft more intricate recipes:
- Select the Crafting Table from the Structures group.
- Press the A button to create the crafting table.The crafting table will automatically transfer to your inventory.
- Press the B button to close your crafting interface.
- Select the crafting table from your inventory so you're holding it.
- Press the LZ button to drop the crafting table on the ground.
Now that you have a crafting table, you can craft more intricate recipes. In this example, we'll craft a wooden pickaxe using the crafting table that you've place on the ground:
- Select the Y button to open your crafting interface while standing in front of your crafting table.
- Select Sticks from the Structure group.
- Press the A button to create a stick.
- Select the Tools and Weapons group. It's the second tab.
- Select the Wooden Pickaxe from the Tools and Weapons group.
- Press the A button to create the pickaxe.The pickaxe will automatically transfer to your inventory.
The more raw materials you have, the more tools you can create. Once you have your pickaxe, search out more materials, like stone iron ingots, coal, mushrooms, poppies, and the like. Basically, mine just about everything you come across. You can always drop materials you don't end up needing.
Here is a helpful list of the materials you'll need to make tools, weapons, and armor.
How to craft utility tools
| Name | Header Cell - Column 1 | Resource(s) used: | Used primarily for: | Stackable? |
|---|---|---|---|---|
| Wood planks | Row 0 - Cell 1 | Raw wood | Crafting table, Chest, Sticks | Up to 64 |
| Crafting table | Row 1 - Cell 1 | Wood planks | Crafting | No |
| Sticks | Row 2 - Cell 1 | Wood planks | Torches, Tools | Up to 64 |
| Torches | Row 3 - Cell 1 | Coal, Sticks | Light | Up to 64 |
| Furnace | Row 4 - Cell 1 | Cobblestone | Cooking, Smelting | No |
| Chest | Row 5 - Cell 1 | Wood planks | Storage | No |
| Bed | Row 6 - Cell 1 | Wood planks, Wool | Sleeping | No |
| Bucket | Row 7 - Cell 1 | Iron ingot | Collecting water and lava | No |
| Shears | Row 8 - Cell 1 | Iron ingot | Collecting wool | No |
| Fishing rod | Row 9 - Cell 1 | Sticks, String | Fishing | No |
| Flint | Row 10 - Cell 1 | Iron ingot, Flint | Fire | No |
| Boat | Row 11 - Cell 1 | Wood planks, Shovel | Sailing | No |
| Door | Row 12 - Cell 1 | Wood planks or Iron ingots | Protection | Up to 64 |
How to craft mining tools
All of the following tools can be crafted with either wood planks, cobblestone, iron, gold, or diamond.
| Name | Header Cell - Column 1 | Resource(s) used: | Used primarily for: | Stackable? |
|---|---|---|---|---|
| Shovel | Row 0 - Cell 1 | Sticks, Wood planks (etc.) | Digging dirt | No |
| Axe | Row 1 - Cell 1 | Sticks, Wood planks (etc.) | Chopping trees | No |
| Pickaxe | Row 2 - Cell 1 | Sticks, Wood planks (etc.) | Mining stone | No |
| Hoe | Row 3 - Cell 1 | Sticks, Wood planks (etc.) | Farming | No |
How to craft weapons
Swords can be crafted from wood planks, cobblestone, iron, gold, or diamond. Bows and arrows can only be crafted using the materials listed below.
| Name | Header Cell - Column 1 | Resource(s) used: | Used primarily for: | Stackable? |
|---|---|---|---|---|
| Sword | Row 0 - Cell 1 | Stick, Wood planks (etc.) | Slashing | No |
| Bow | Row 1 - Cell 1 | Sticks, String | Shooting | No |
| Arrows | Row 2 - Cell 1 | Stick, Feather, Flint | Ammo | Up to 64 |
How to craft armor
All armor can be crafted using either leather, iron, gold, or diamond.
| Name | Header Cell - Column 1 | Resource(s) used: | Used primarily for: | Stackable? |
|---|---|---|---|---|
| Helmet | Row 0 - Cell 1 | Iron ingots (etc.) | Protection | No |
| Chestplate | Row 1 - Cell 1 | Iron ingots (etc.) | Protection | No |
| Leggings | Row 2 - Cell 1 | Iron ingots (etc.) | Protection | No |
| Boots | Row 3 - Cell 1 | Iron ingots (etc.) | Protection | No |
How Redstone works
Redstone is an amazing resource found in the Minecraft world that lets you create basic or complex contraptions. Create a hidden door to help protect your castle, or create a functioning calculator to help you with your homework. While some of these contraptions are incredibly difficult to build, we're here to help you get off to a good start with redstone!
- Where to find redstone
- How redstone works
- Common power sources
- Blocks not compatible with redstone
- Tips and tricks
Where to find redstone
Redstone ore blocks are found in the bottom 16 layers of the Overworld. Use either an iron or diamond pickaxe to mine the block.
To find iron or diamonds, you'll need a stone pickaxe and a torch (torches need sticks and coal, which is made from furnaces, which are made from raw stone material). Once you have a torch and a stone pickaxe, dig down four or five layers to find iron ore or diamonds. Use your stone pickaxe to mine the blocks. Once you've created at least one iron or diamond pickaxe, dig down really deep to find raw redstone.
Hint It's a lot easier to find iron ore, diamonds, and ultimately redstone, by finding caves that are already built into the landscape.
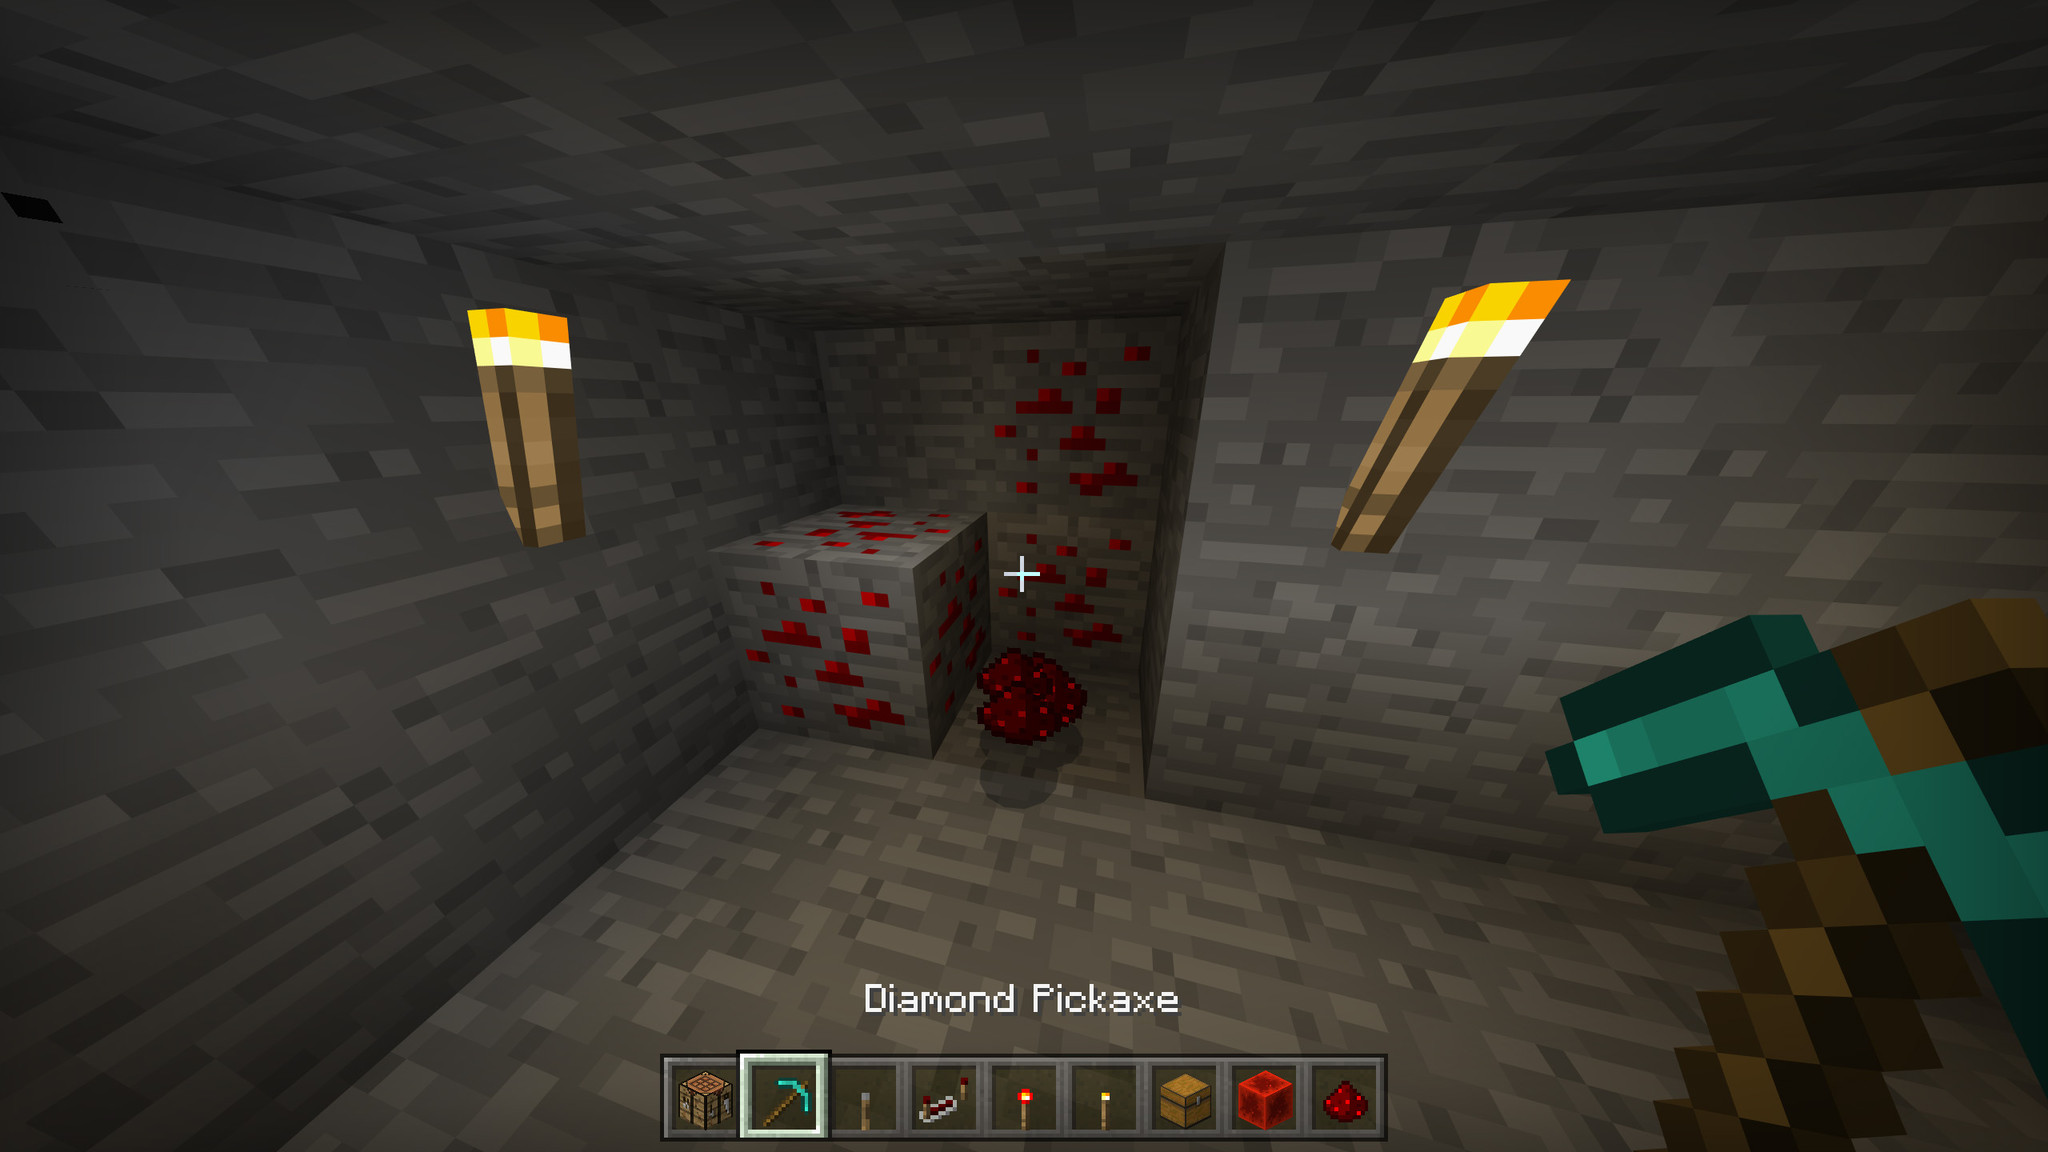
Each block of redstone ore, when mined, will drop four or five pieces of redstone. If you're not into mining that deep, you can also get redstone from killing witches, trading with villagers, or looting chests found throughout the world. There are also 15 pieces of redstone in every jungle temple.
How redstone works
Redstone is used in plenty of recipes, but using it to create contraptions is where things really get fun. When you place redstone on the ground, it creates a line of redstone dust that can transmit power. It's sort of like an electrical line. When you have a power source at one end of the redstone line, it will travel across it
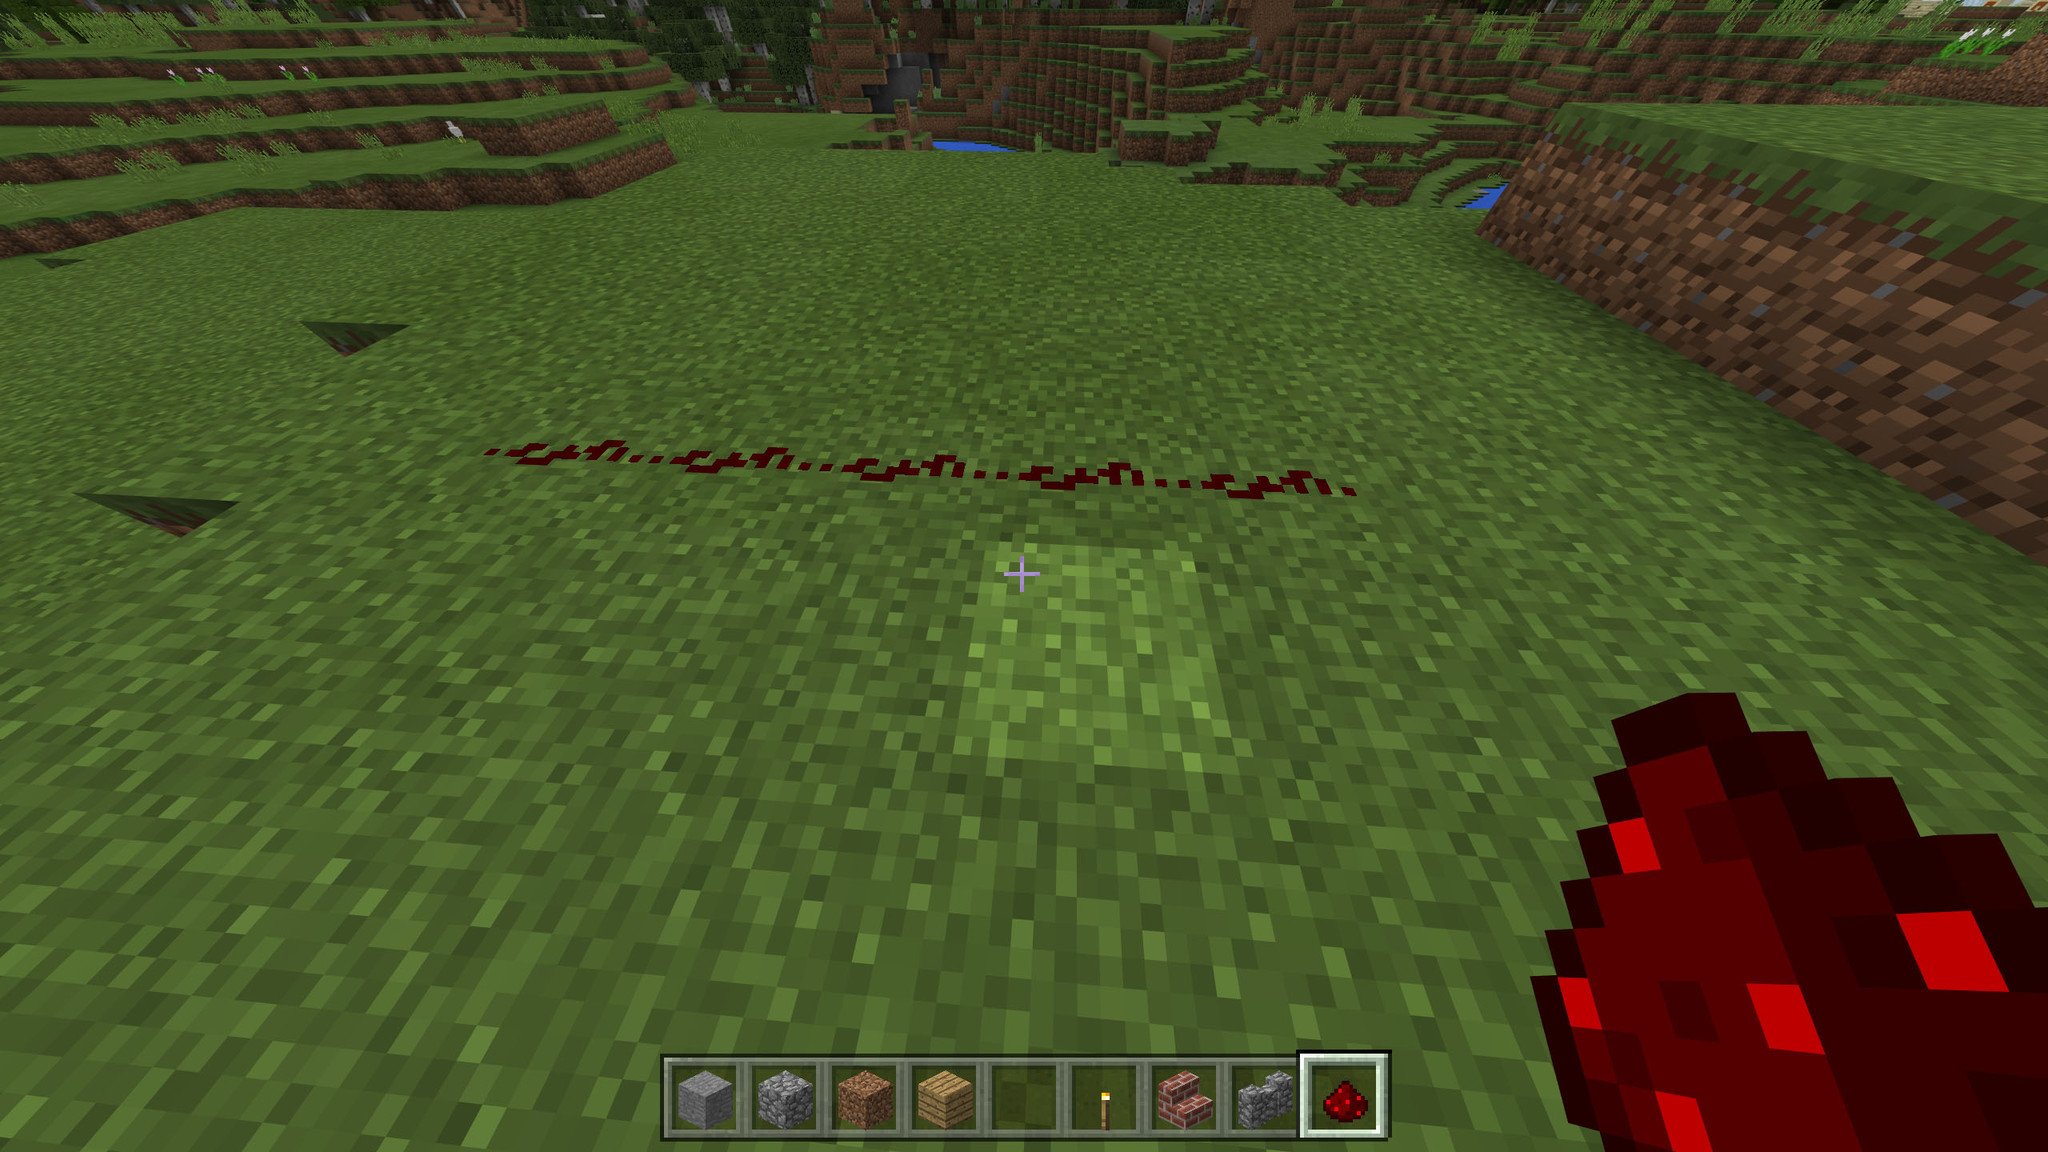
Redstone dust can turn 90 degrees.
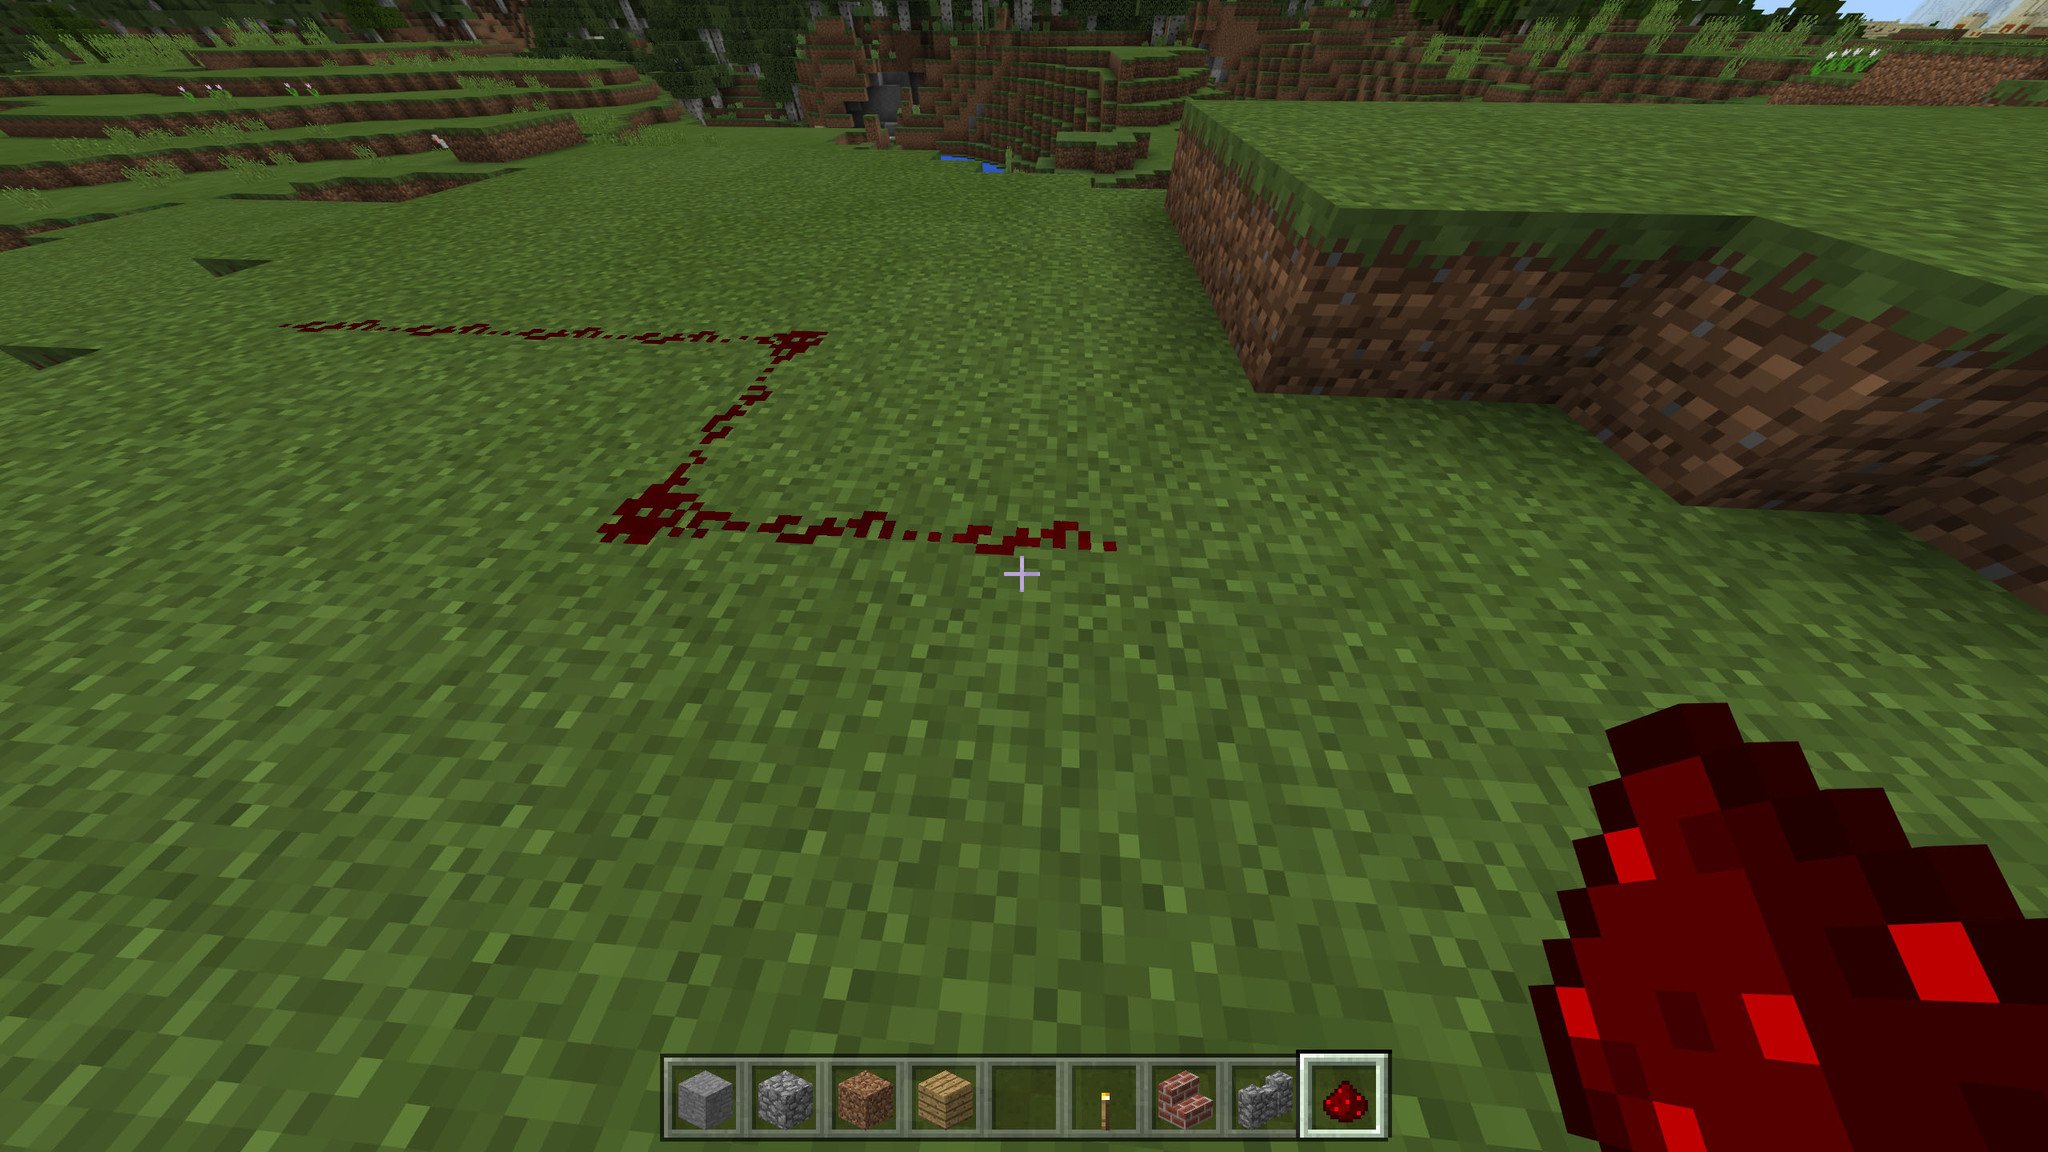
Redstone dust can climb one block at a time.
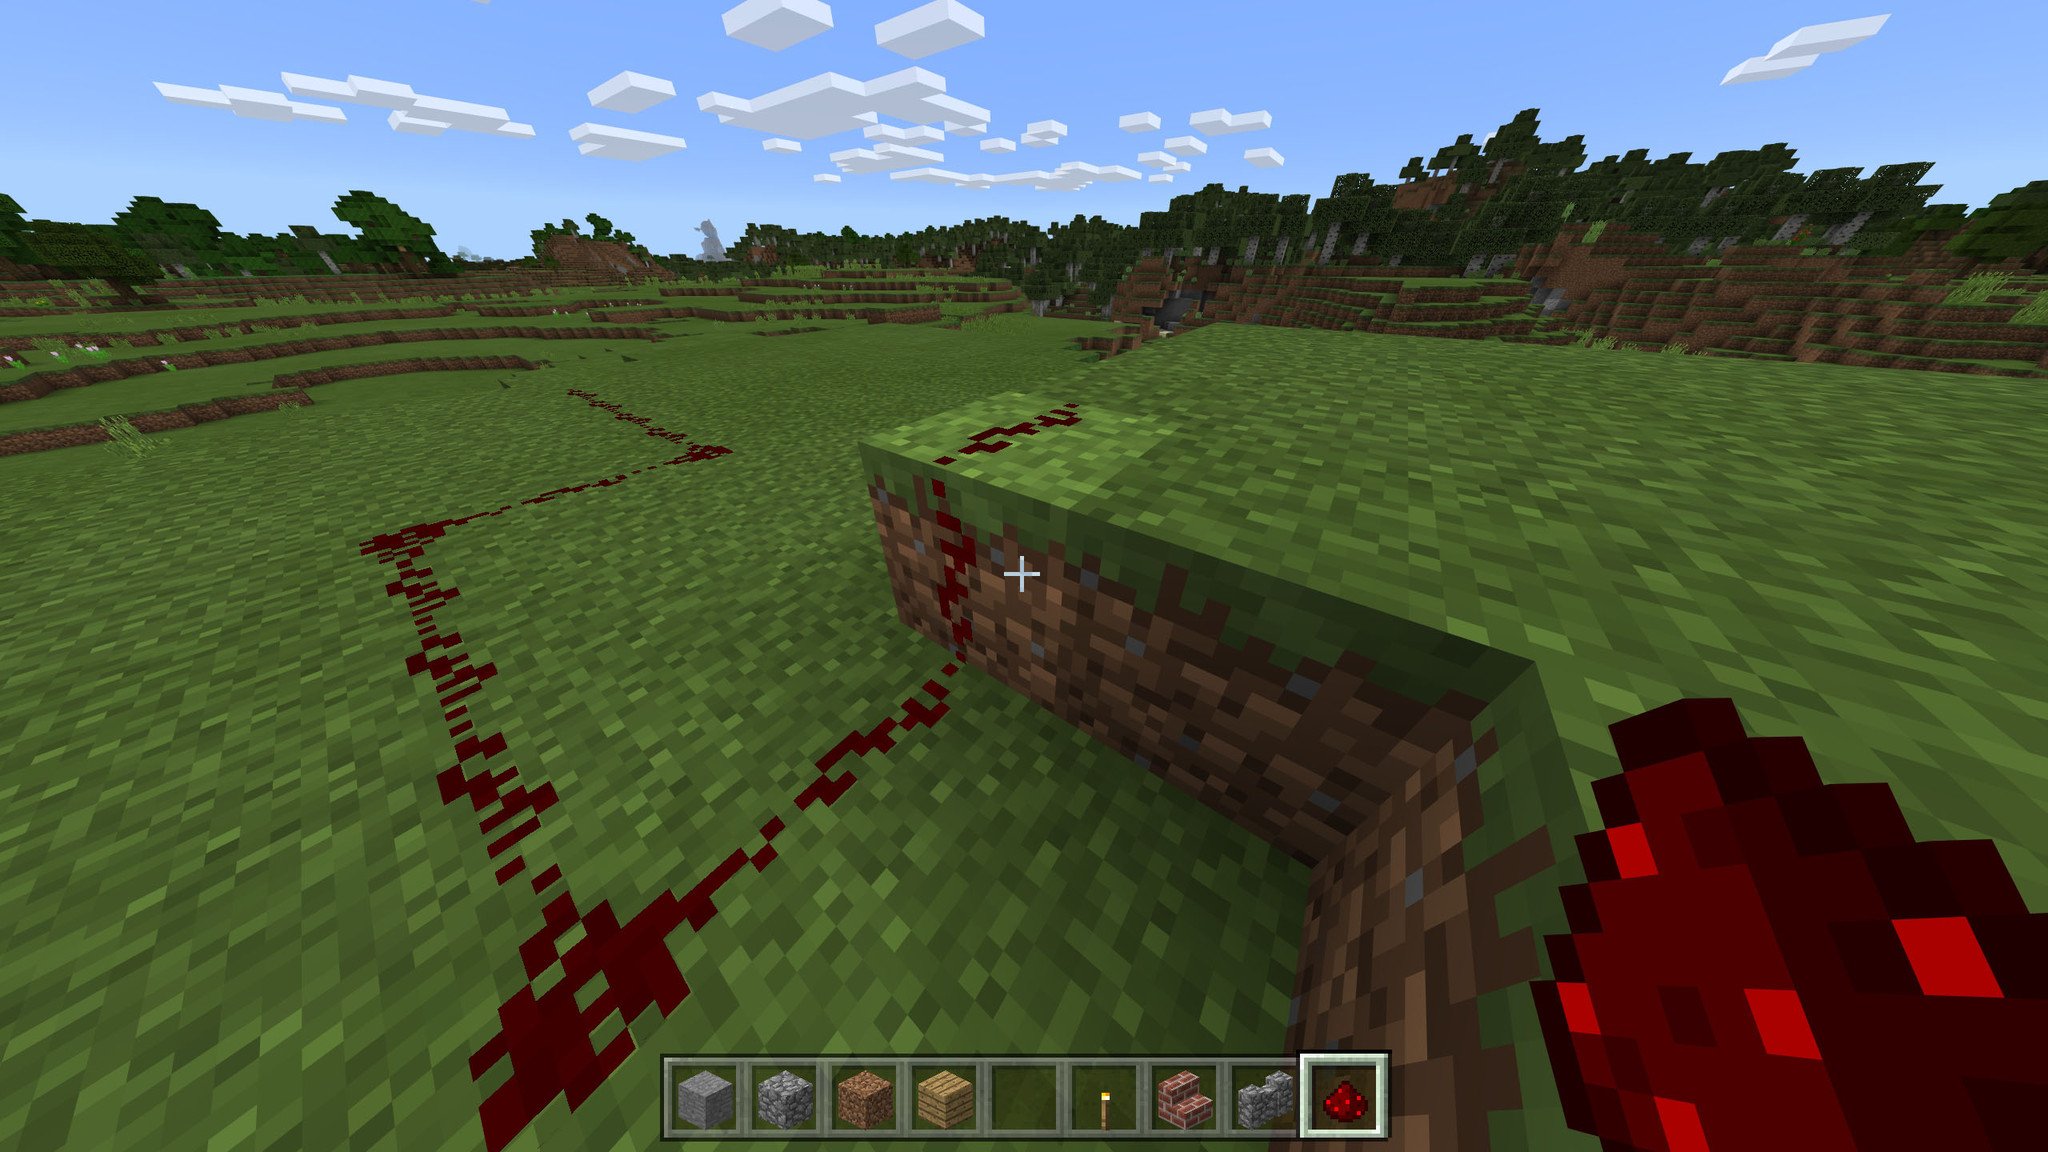
You must attach a power source to the redstone in order to power it. Power can be transmitted up to 15 blocks away. The light in the redstone dust dims until the last piece becomes completely unpowered.
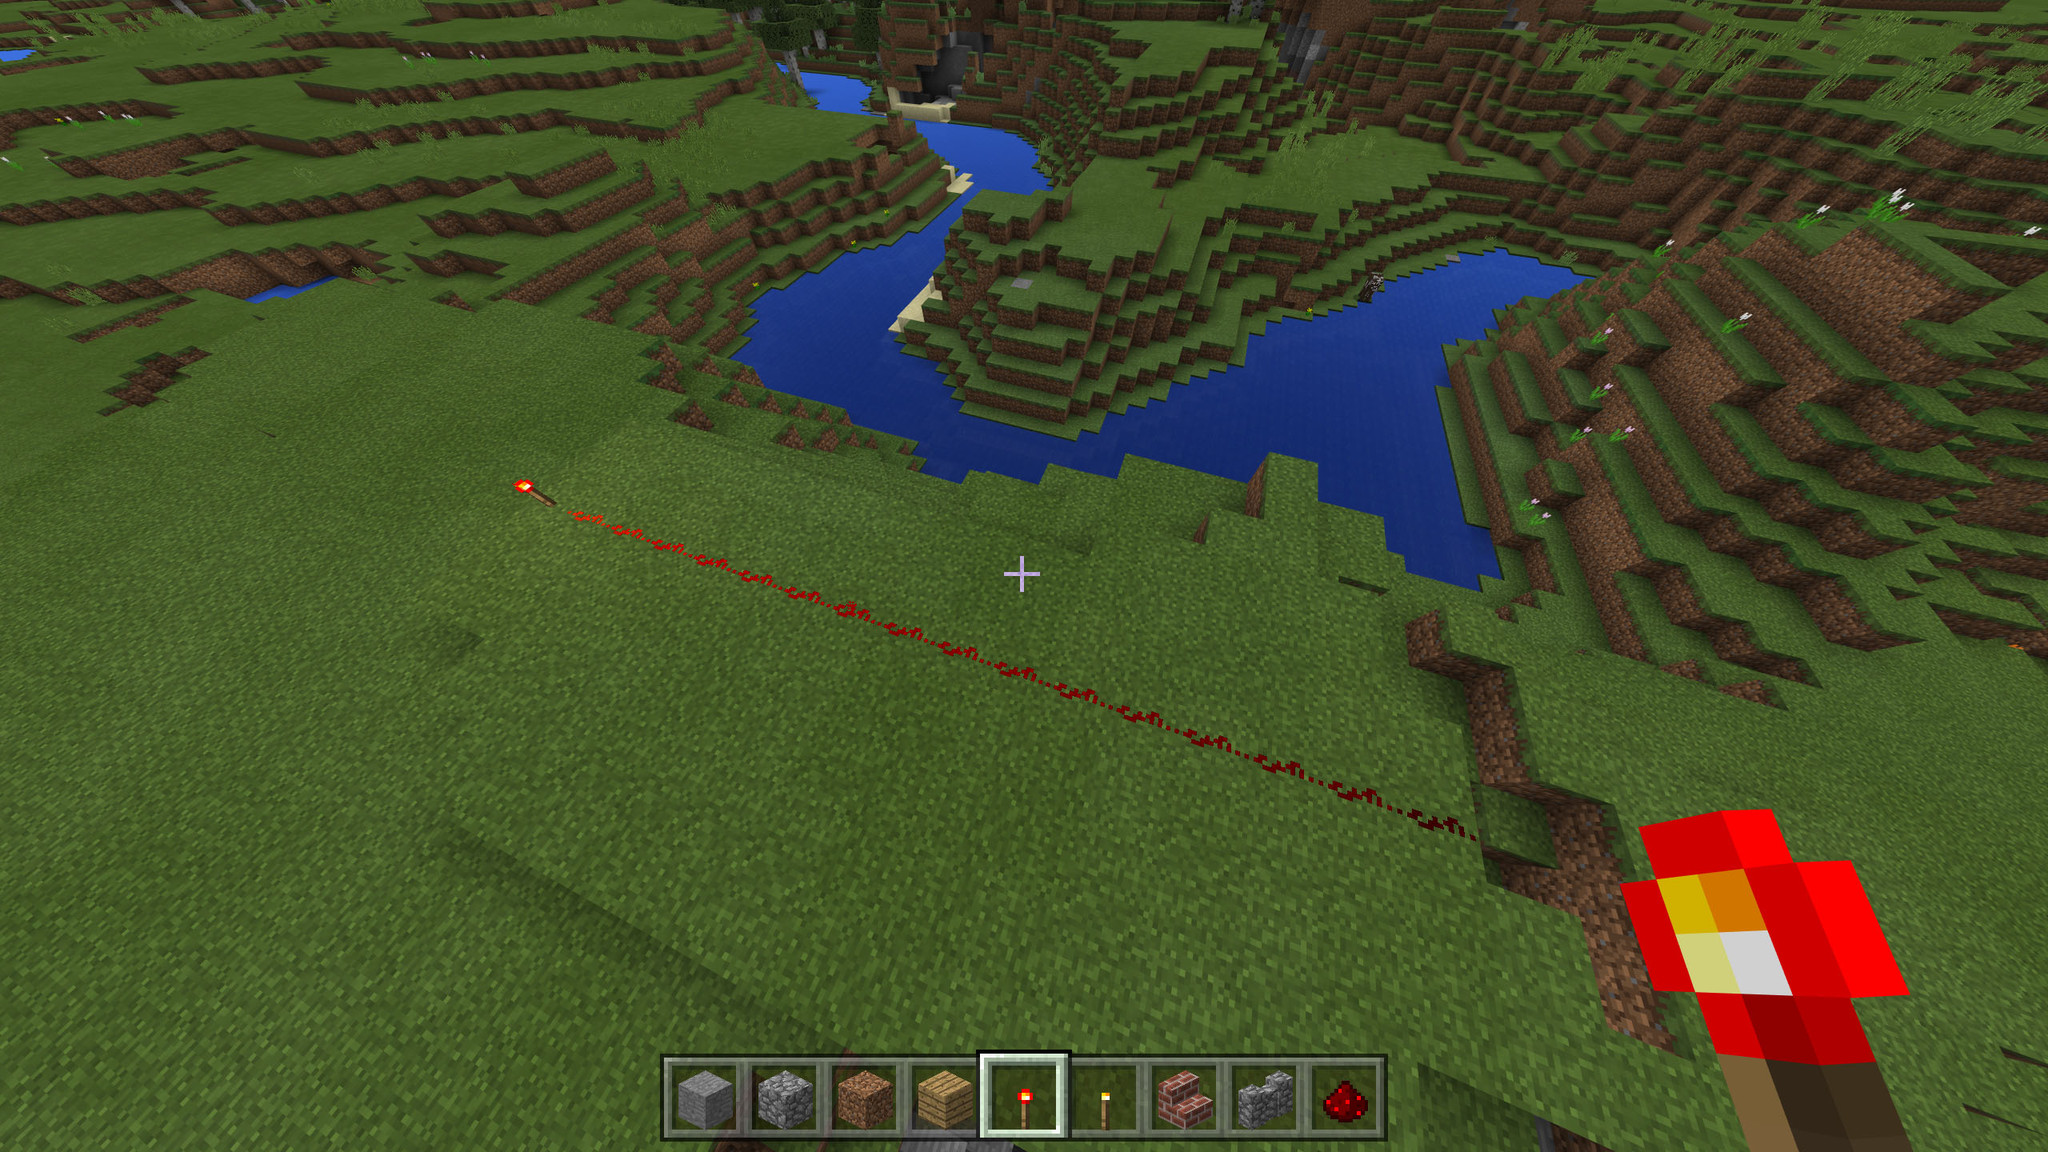
Power carried by redstone will transmit to blocks adjacent to it.
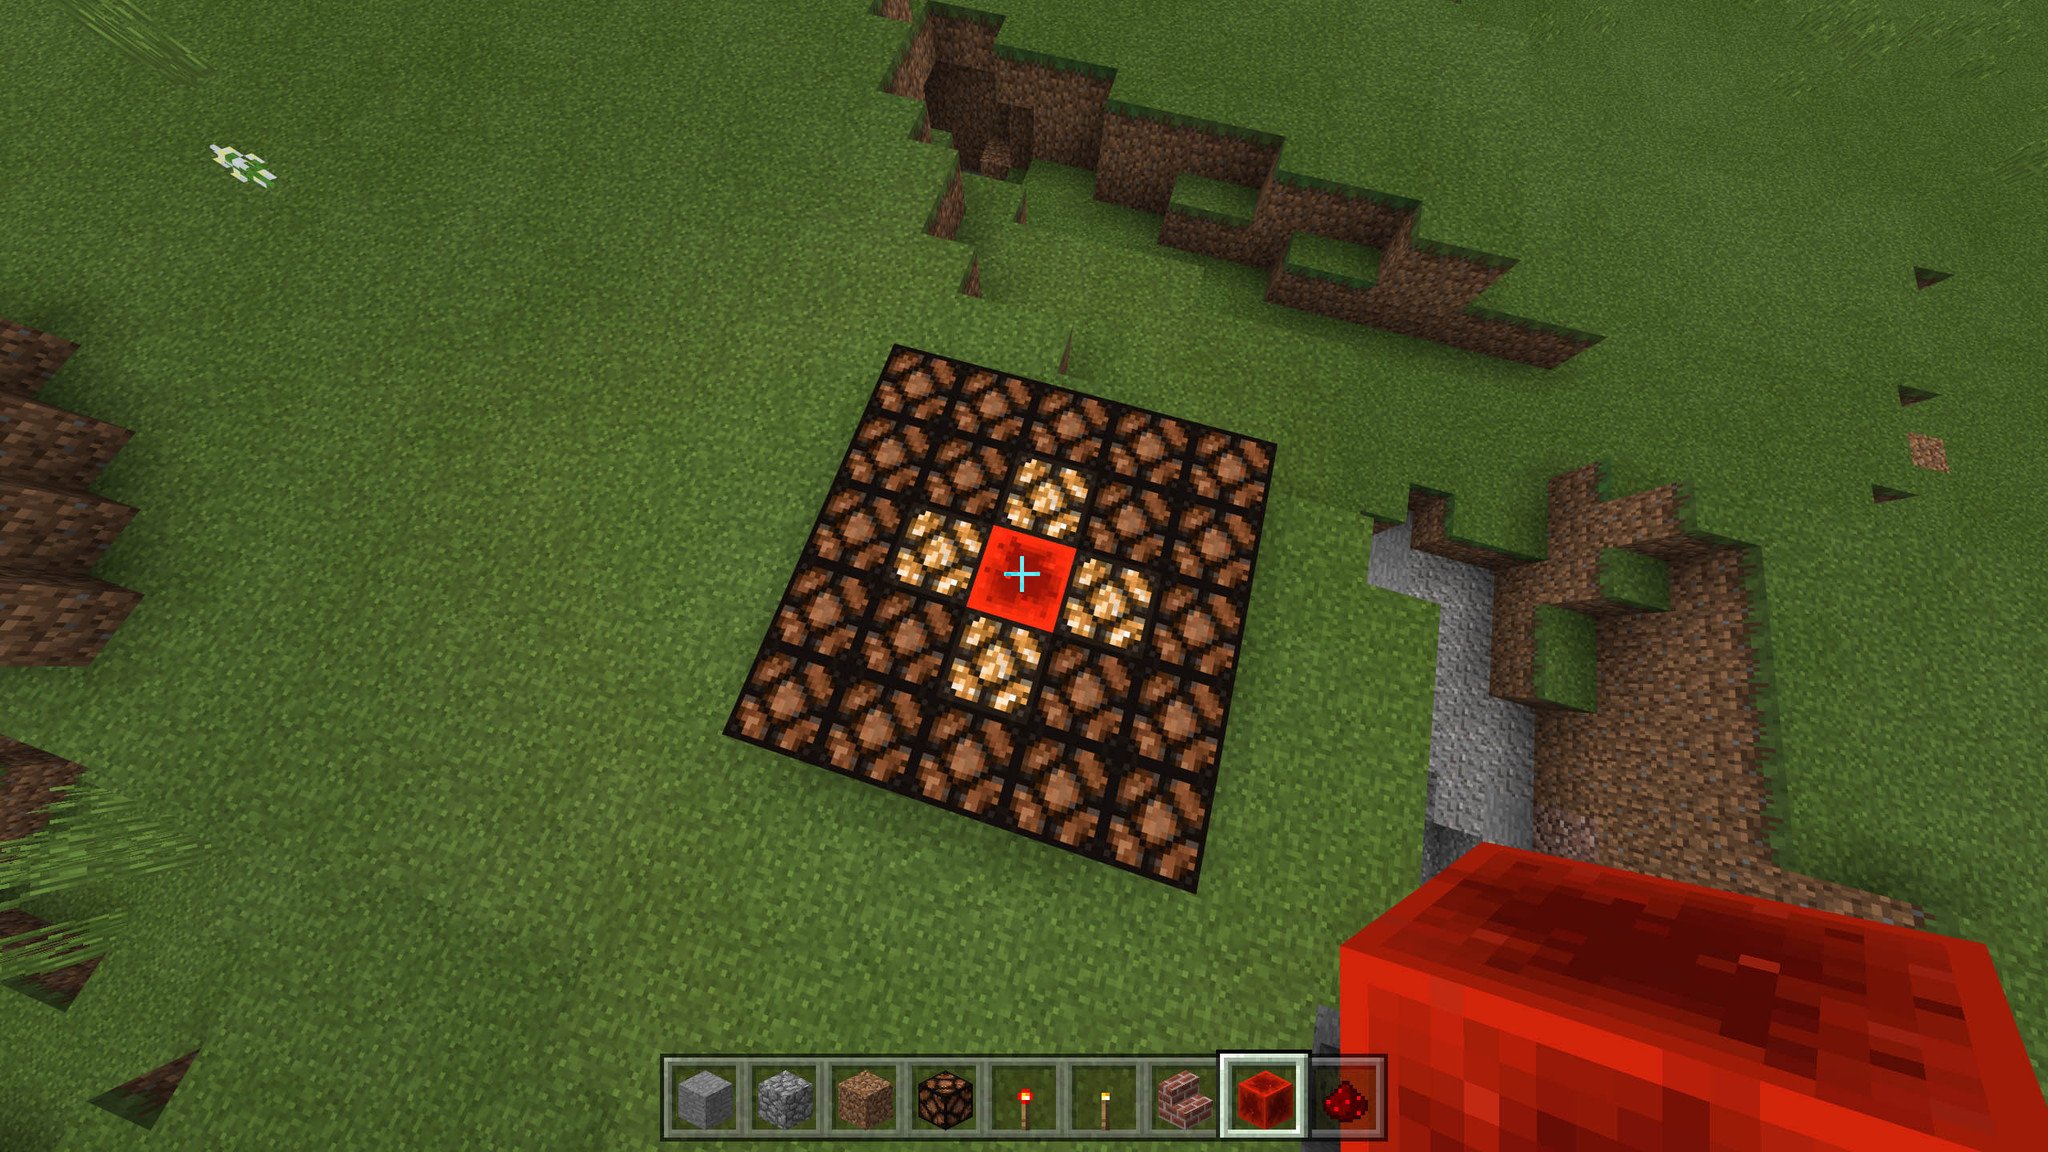
Some power sources also give power to other blocks. As you can see below, the blocks around the block the lever is attached to also receive power.
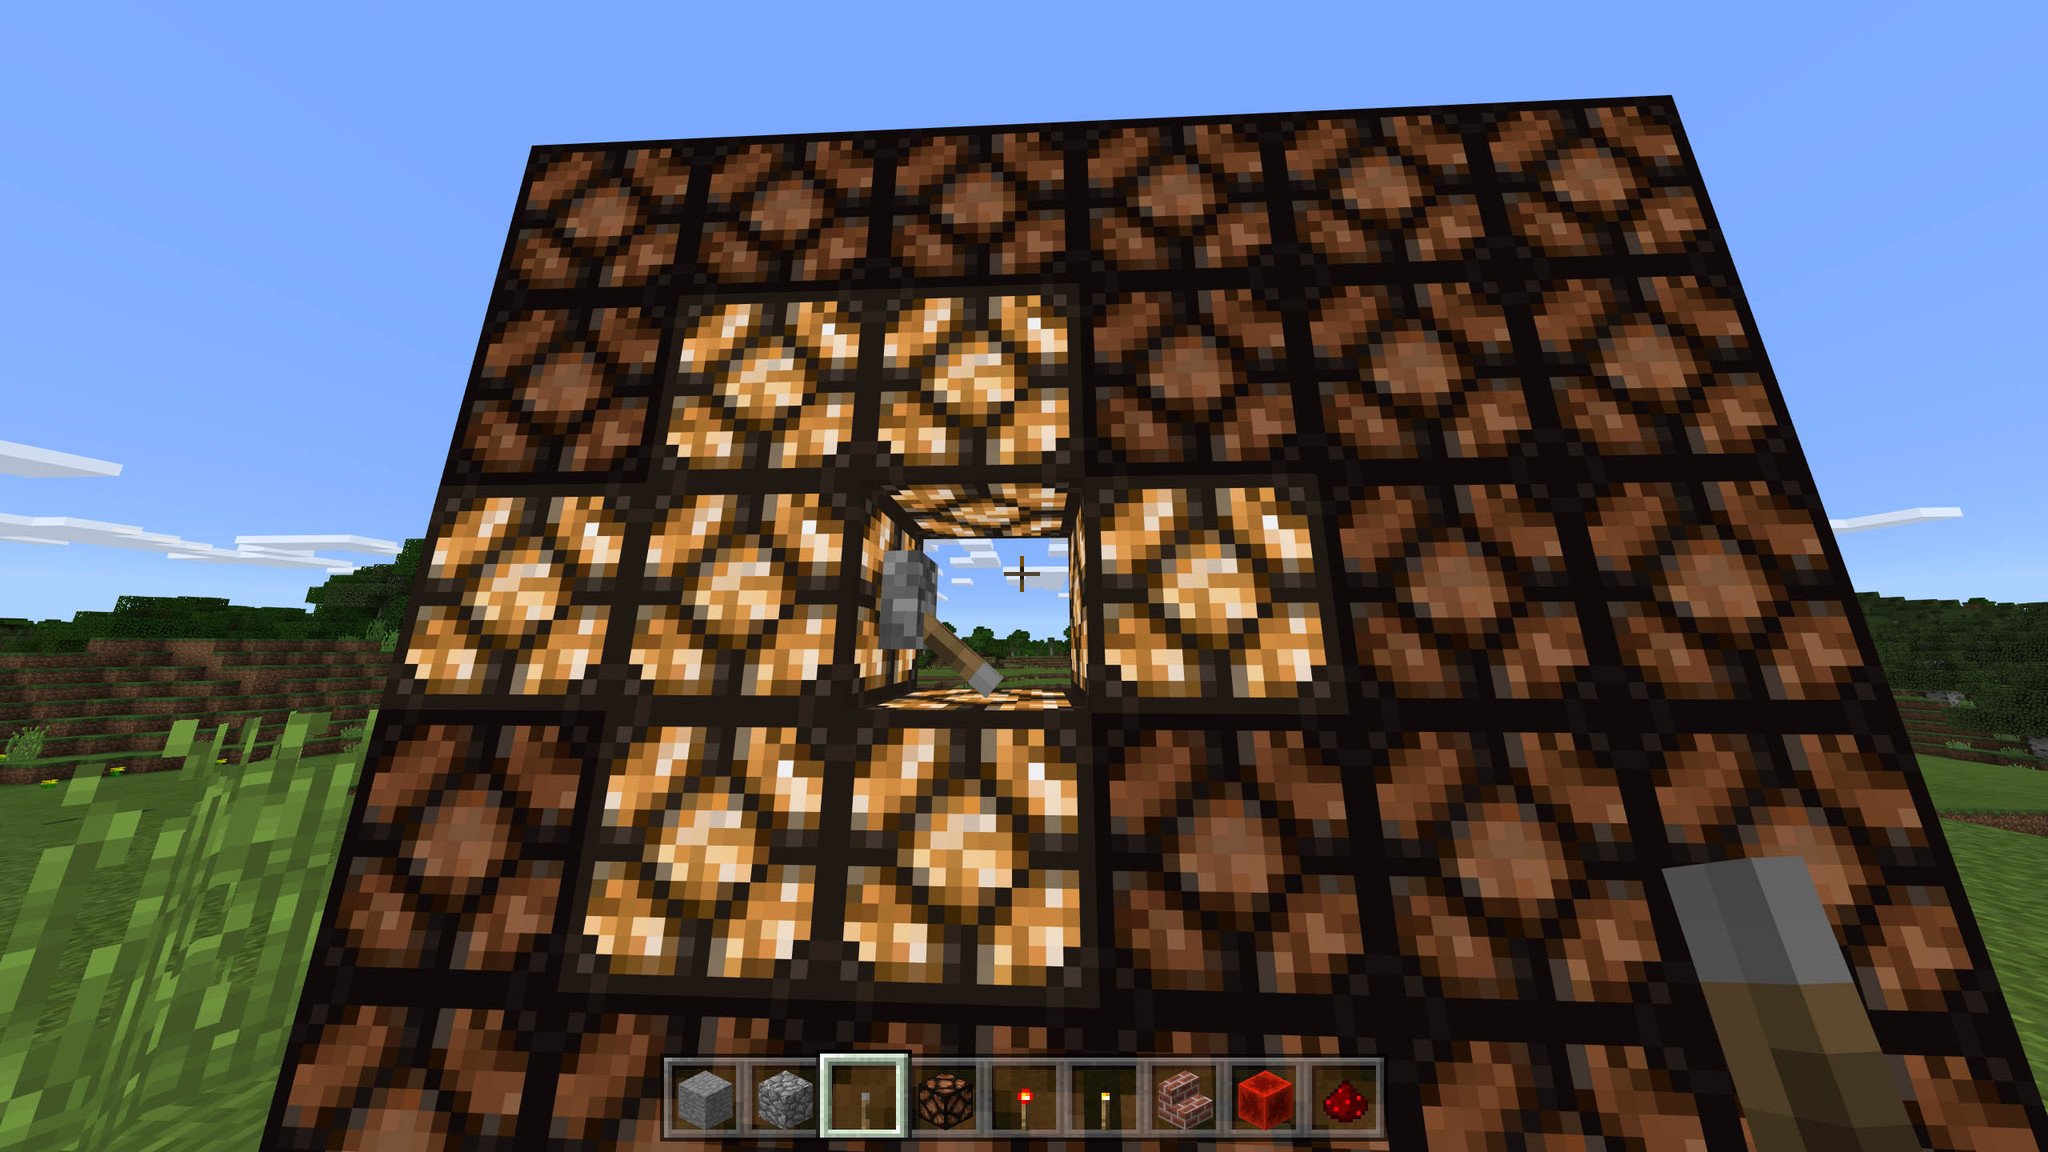
If one of the redstone lamps that are lit up were, say, a piston, it would be extended because it is receiving power.
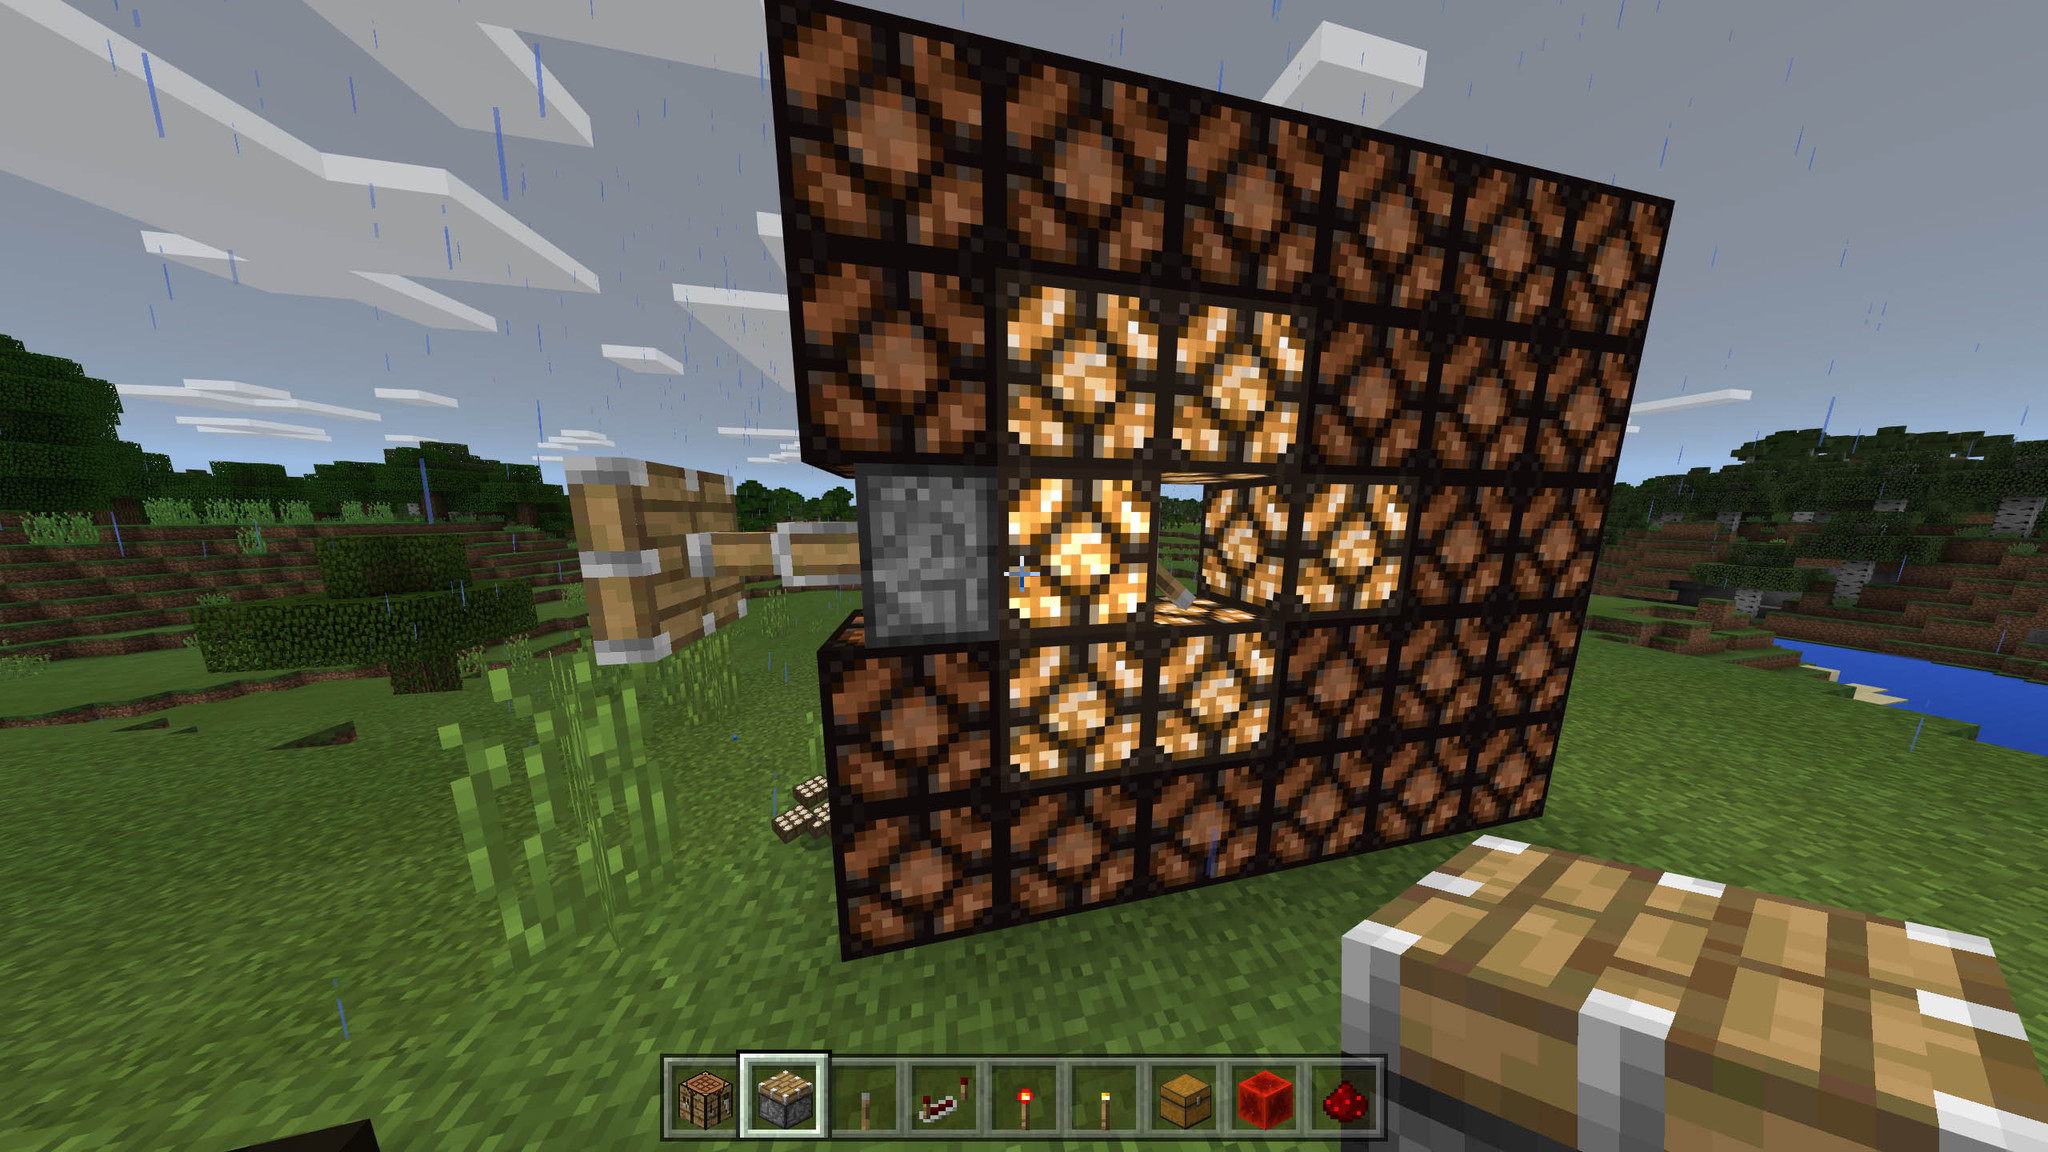
Common power sources
You don't necessarily need actual redstone to create a powered contraption. You can, for example, craft a lever, attach it directly to a piston, and switch it on. Redstone really comes into play when you need to link several small devices together to create a complex contraption. Here are a few sources of power that you'll use most when experimenting with redstone.
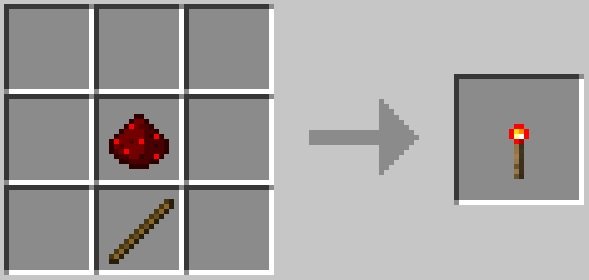
Redstone torch: Craft one of these from a stick and a single piece of redstone. These provide constant power.
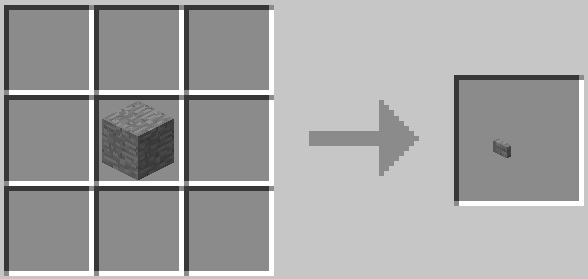
Button: Buttons are great when you want to activate your redstone contraption for only a few seconds.
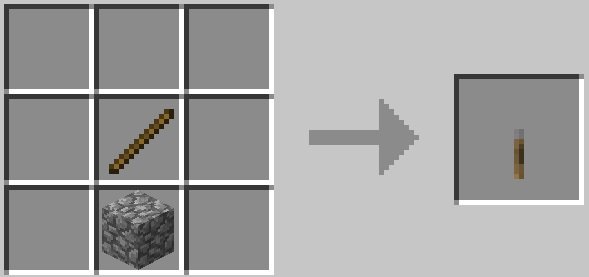
Lever: Place a lever in a redstone contraption when you want to be able to turn it on and off.
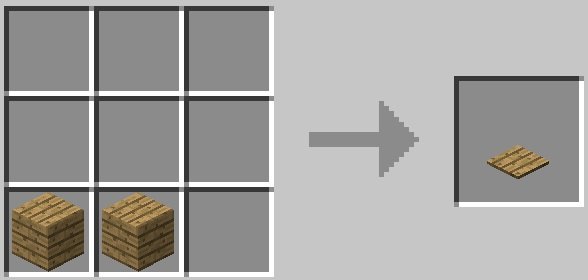
Pressure plate: Pressure plates can be used to trigger redstone contraptions. Try one of these with a door so that you can enter your home with ease when you approach.
Blocks not compatible with redstone
Pretty much every block in Minecraft will let you put redstone on it and will conduct power. A good general rule to follow is if you can't see through it, it works. There are, however, some exceptions:
- Chests
- Glass
- Glowstone
- Hoppers
- Pistons
- Slabs
- Stairs
If you're building a contraption and can't figure out why your power isn't where it's supposed to be, ensure all the blocks you're using are compatible with redstone.
Tips and tricks
Here are a few tips and tricks to help you build a great redstone contraption!
Extend your power
If you need to extend the range of your redstone power, you can use a redstone repeater.
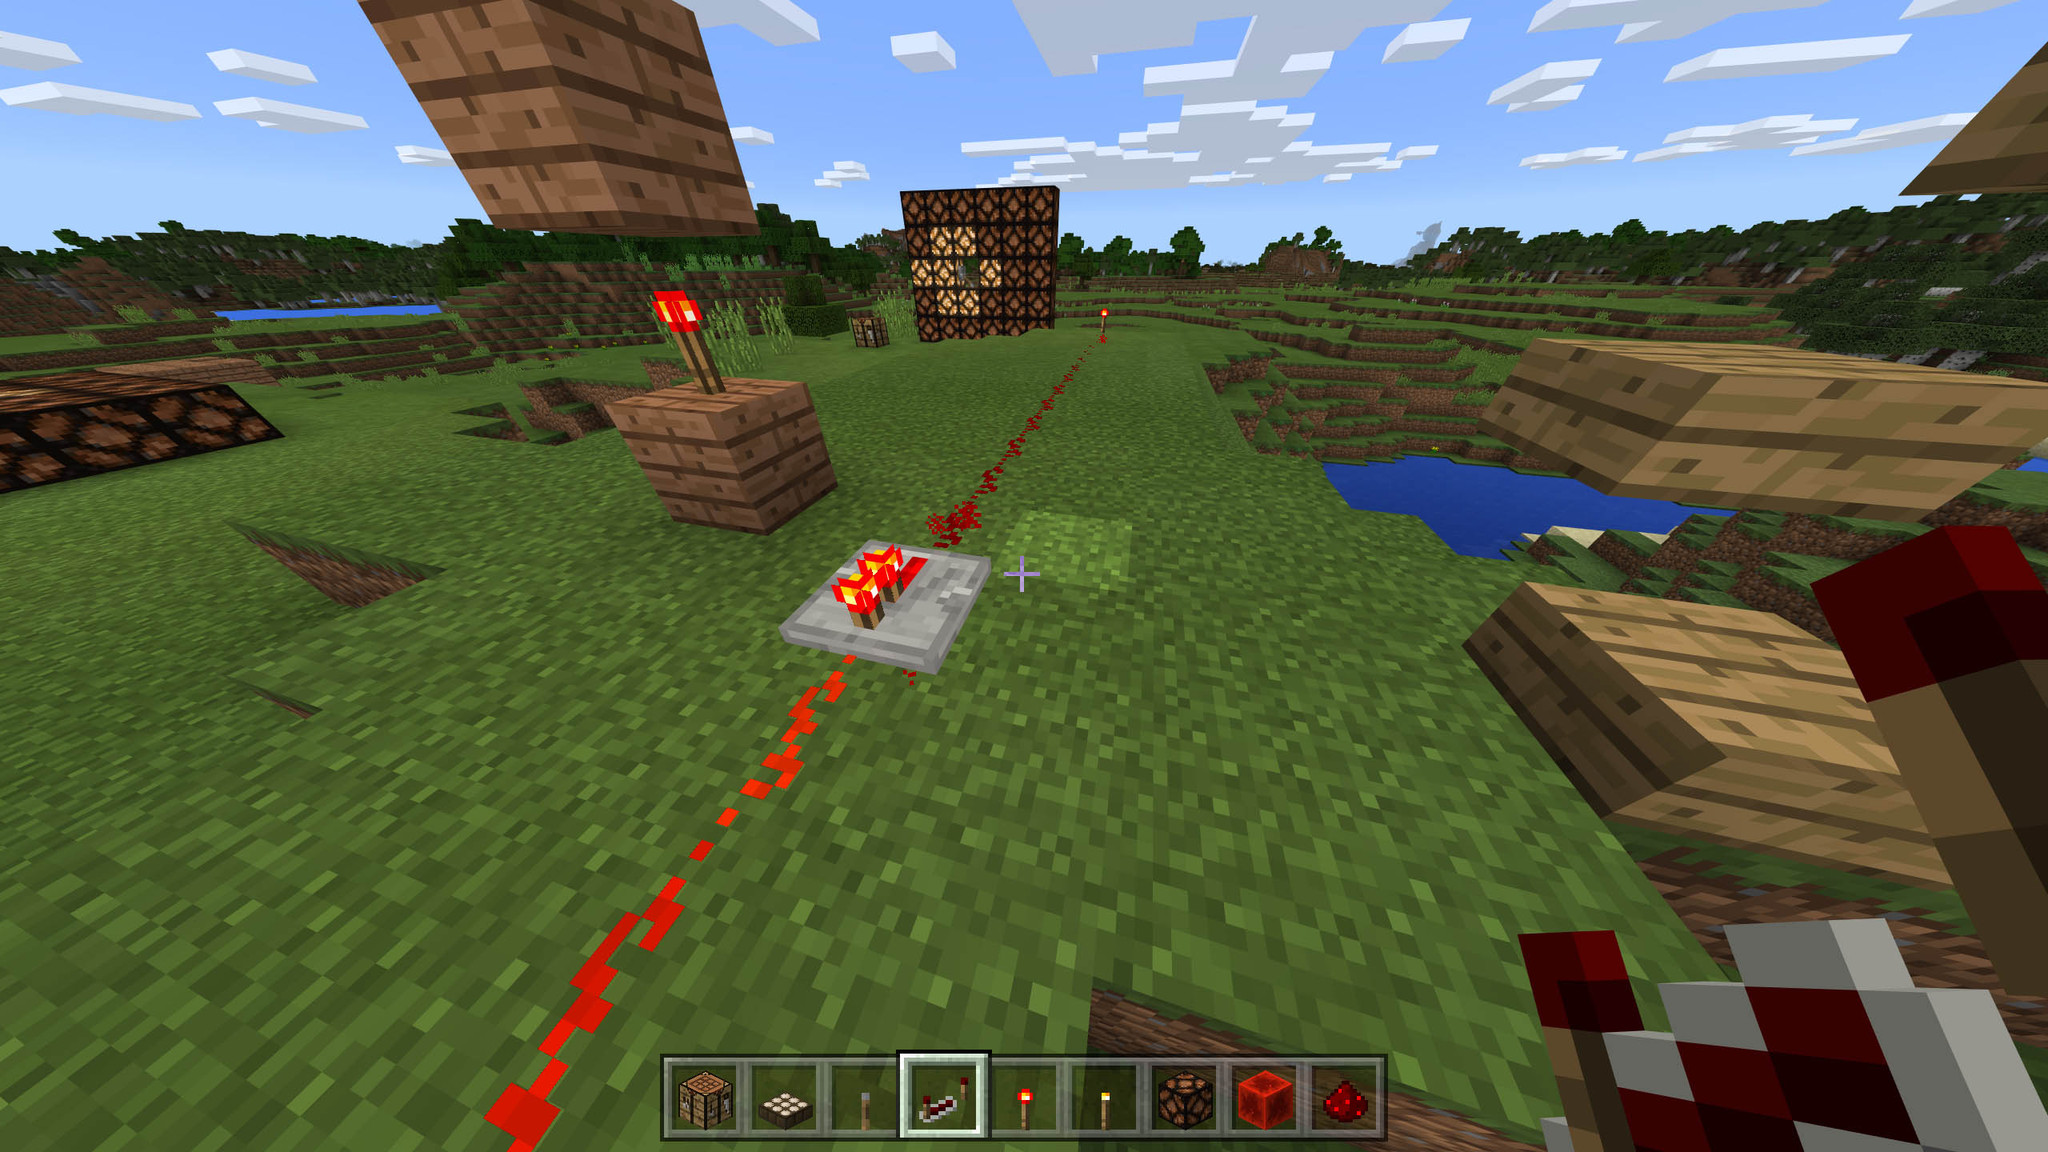
This will carry the current another 15 blocks past the repeater.
Create a tower
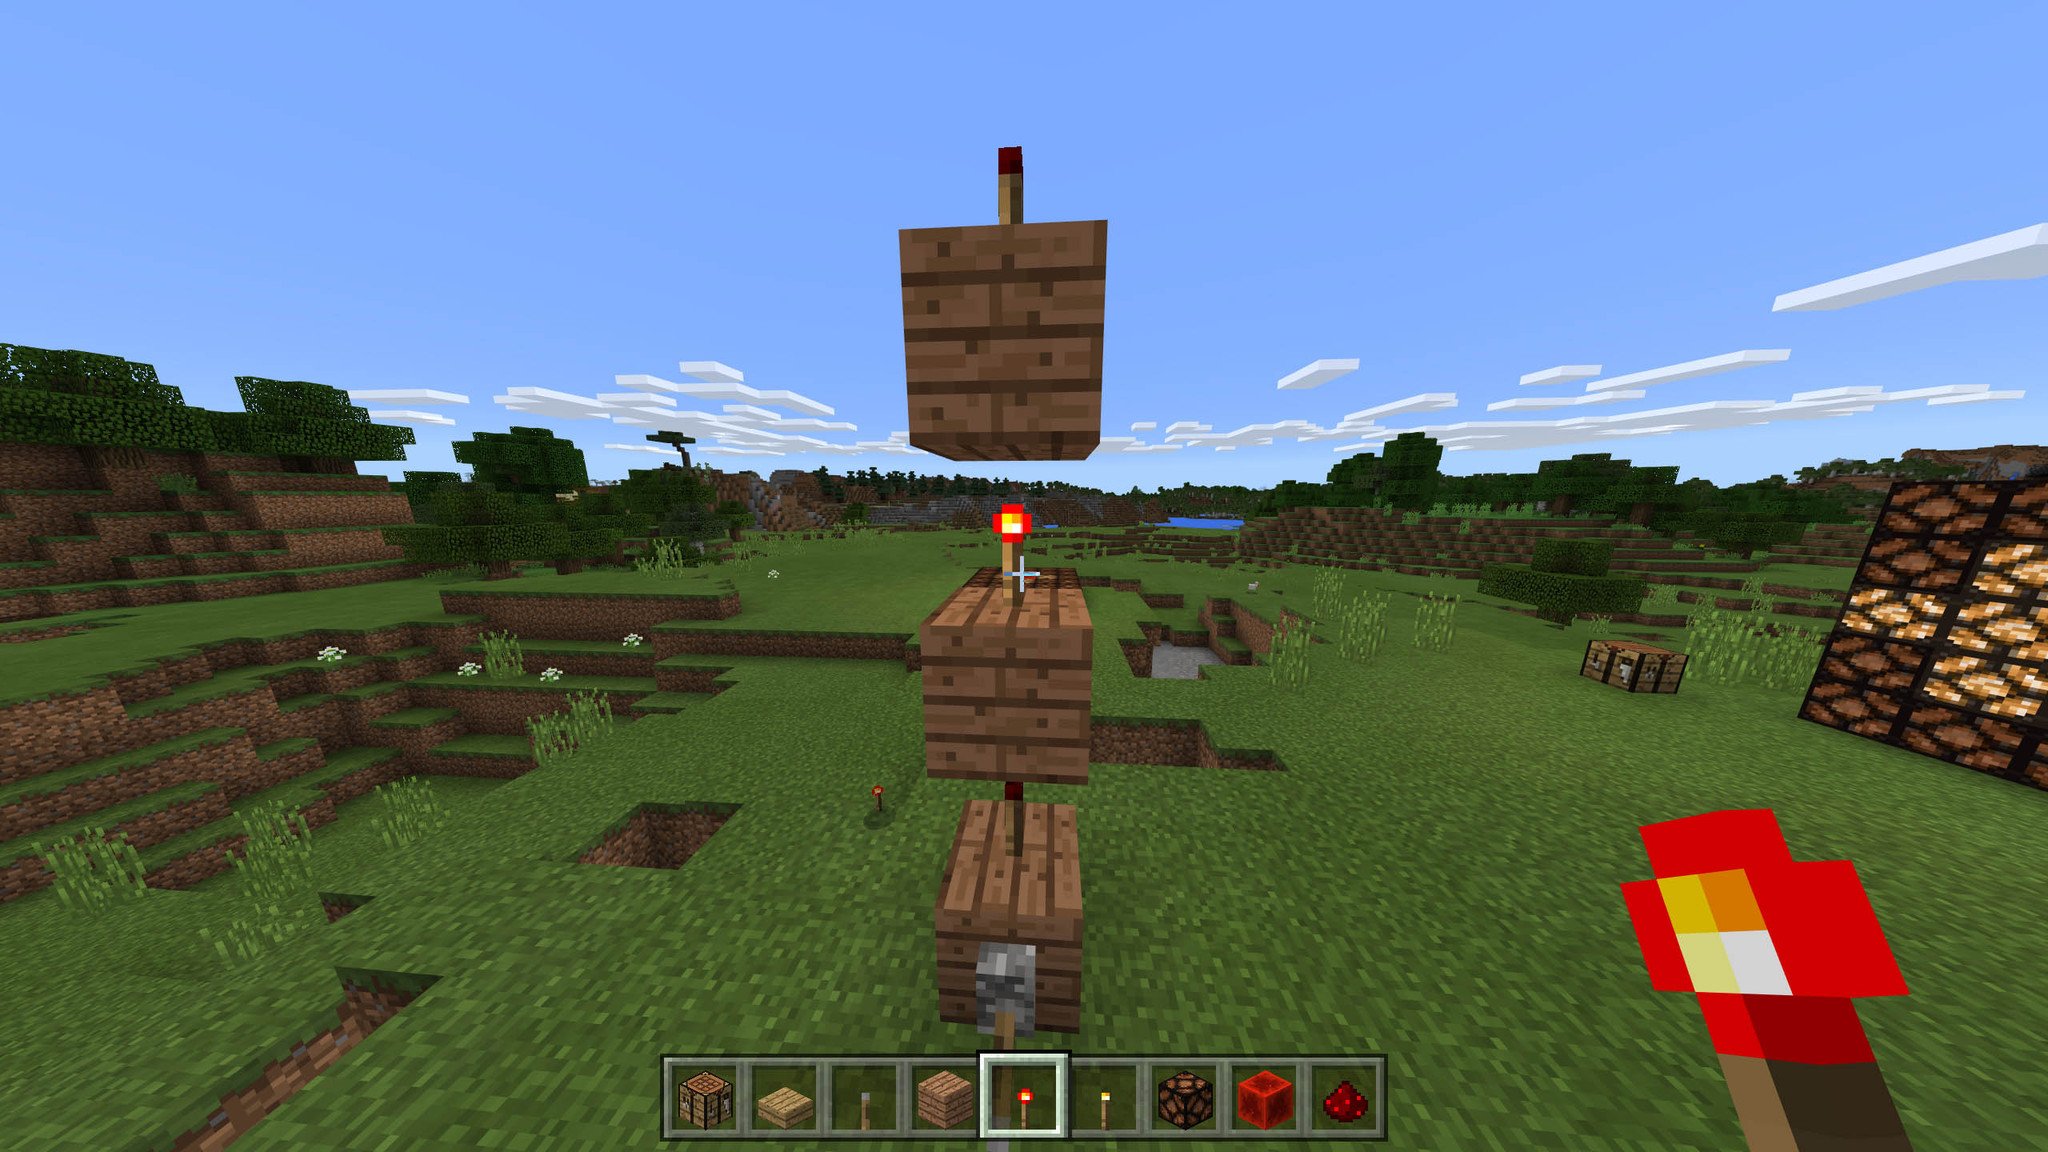
Sometimes you need power on the upper floor! Creating a stack of blocks with redstone torches between lets you transfer power straight up. Hitting the lever at the bottom will cause the torches to all switch on or off, so plan accordingly.
Use a daylight sensor to create automatic lighting
Want your house to light up when night falls? All you need is a daylight sensor, some redstone, a redstone torch, and a redstone lamp.
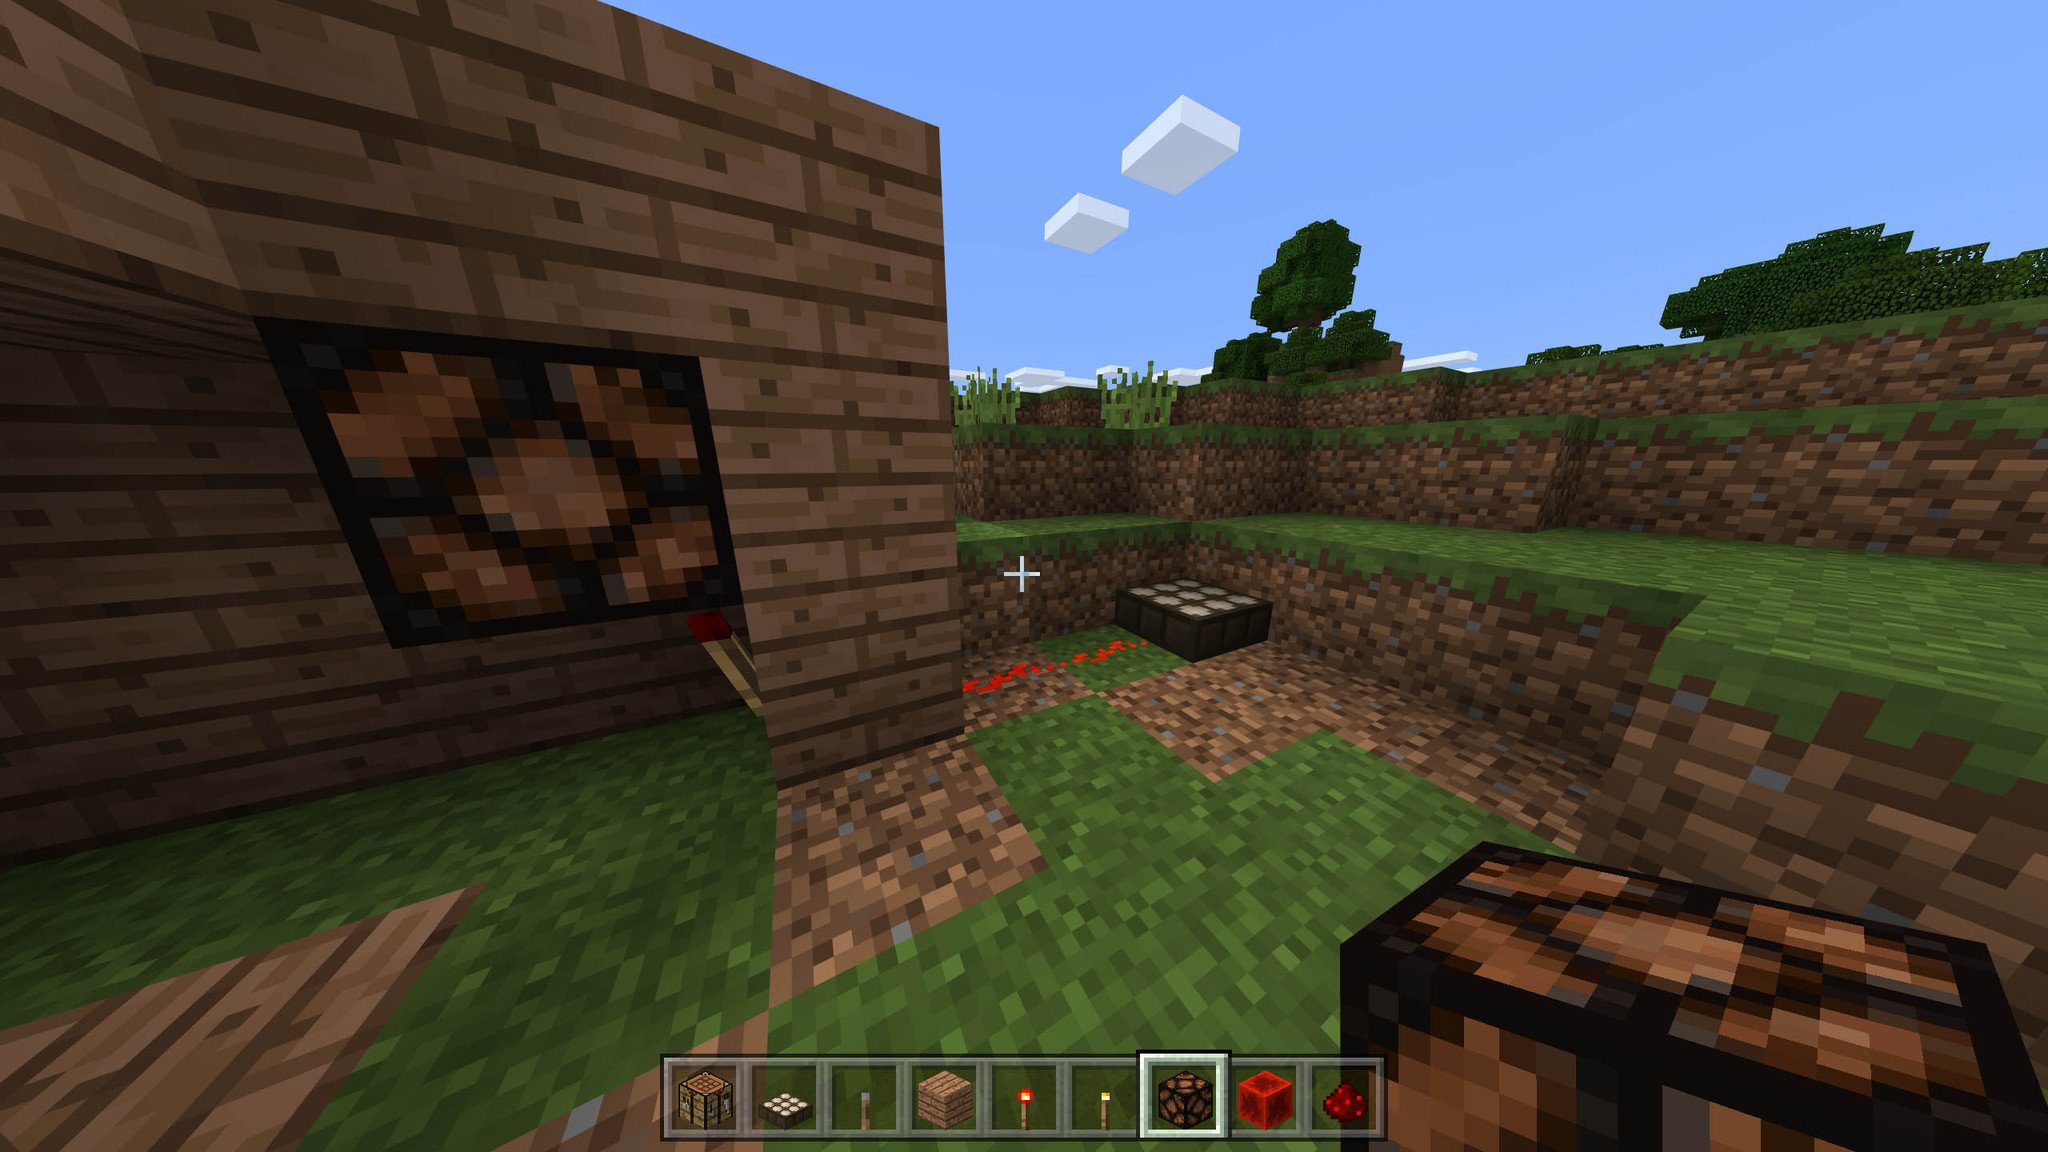
The torch is on by default, so when it receives power from another source, it turns off. When night falls, the power to the torch will stop, and the polarity will change — the torch will turn on again and the redstone lamp will light up.
Thinking with Pistons
If you're looking to create some redstone contraptions in Minecraft, you'll likely want to employ pistons in your design. Create hidden doors, hidden stairways, and even traps with these versatile machines. Here's how to craft and use pistons to help you get started with your contraption.
How to craft pistons
There are two types of piston you can create: regular piston or sticky piston. Regular pistons will simply push a block away when engaged, whereas a sticky piston will push away and pull back a block when engaged.
Regular piston
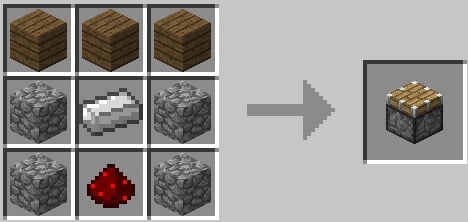
This recipe is made up of any three wood planks, four cobblestone, one redstone dust, and one iron ingot.
A piston can push up to twelve blocks in a row when engaged — powered with redstone — but will not pull any blocks back when disengaged.
Sticky piston
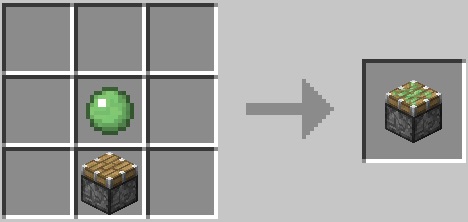
This recipe is made up of a regular piston and a slime ball. Slime balls can generally only be found underground or in swamps during the night. Pro-tip: swamps will be full of slime during full moons.
A sticky piston can push up to twelve blocks in a row when engaged but will only pull one back with it when disengaged unless you're using a slime block.
How to place pistons
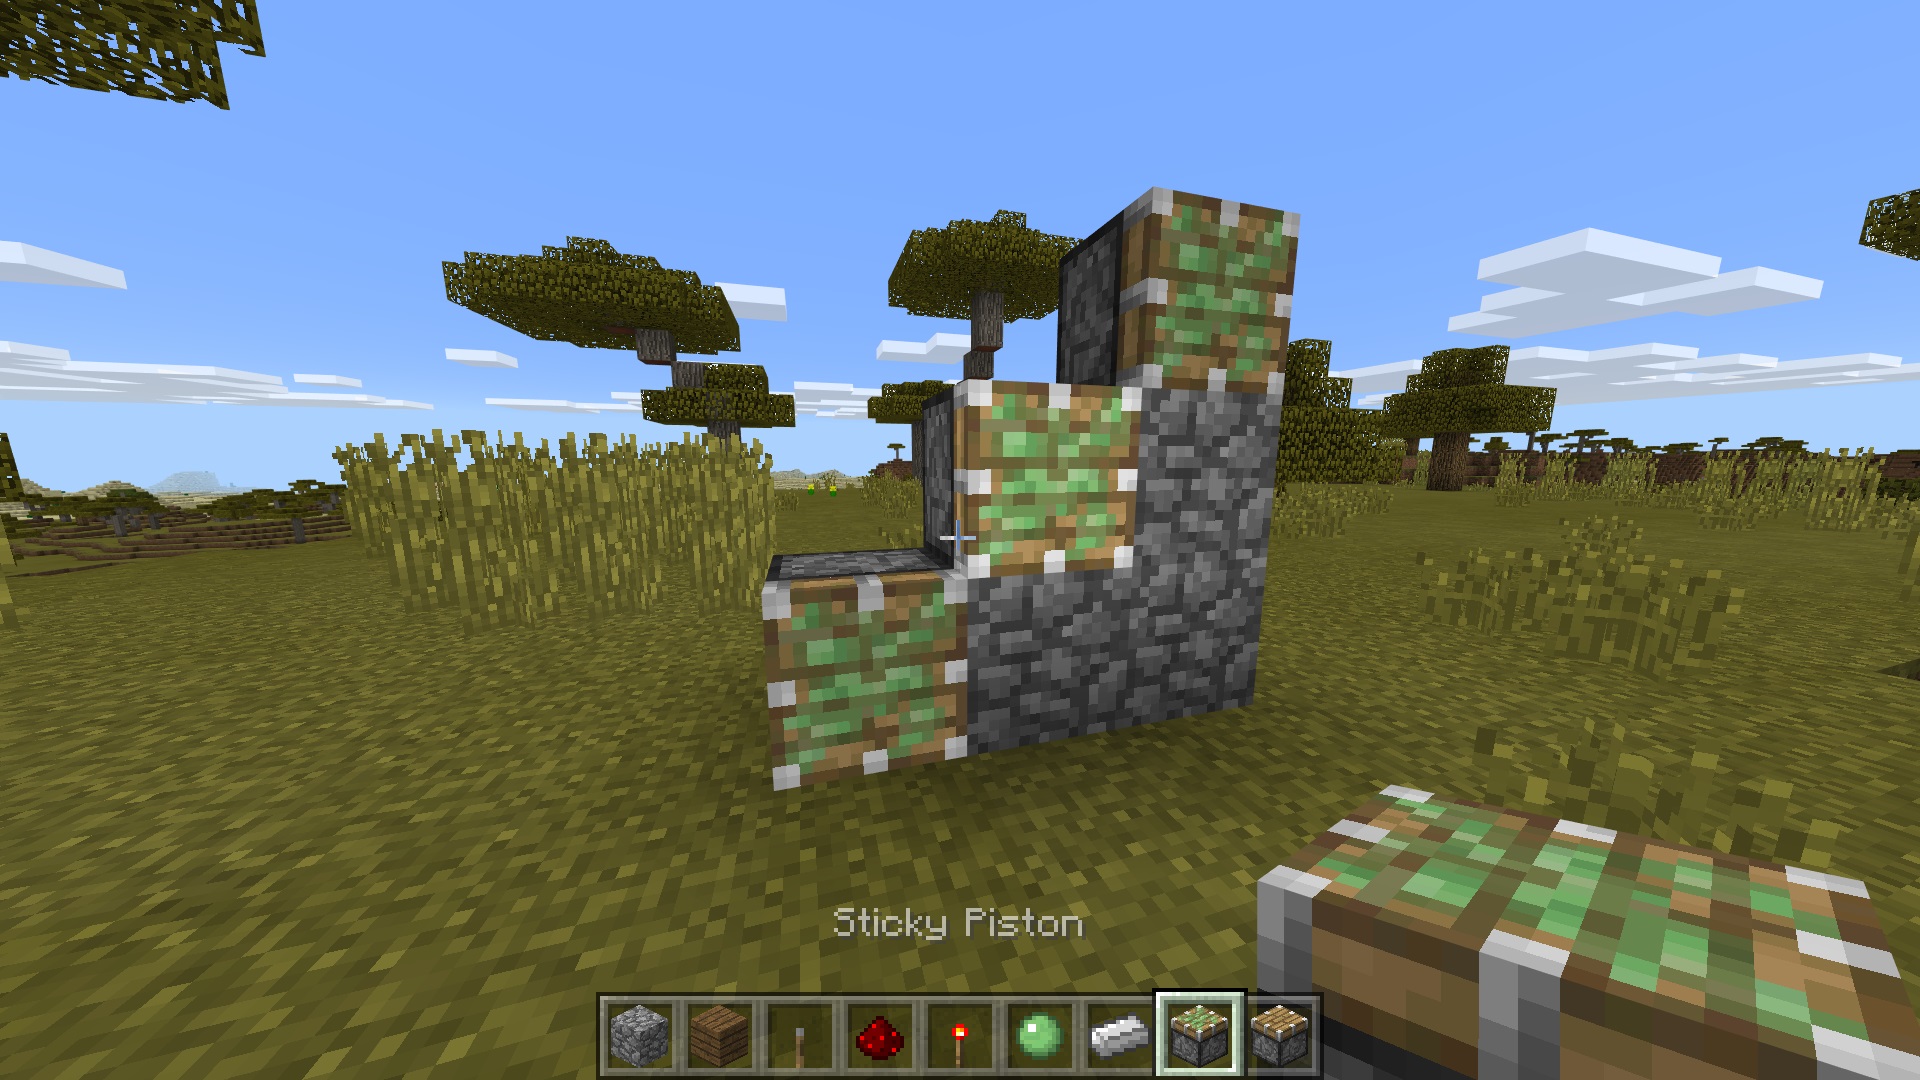
Place the piston in your hotbar (the item bar at the bottom of the screen when you are in the world), then select the piston so you are holding it. Press the LZ button to place it on the ground or against another block. When placing a piston, the head will always face you no matter where you aim your crosshair. This can cause some tricky building, but at least you have a constant idea of how the piston will sit.
How to power pistons
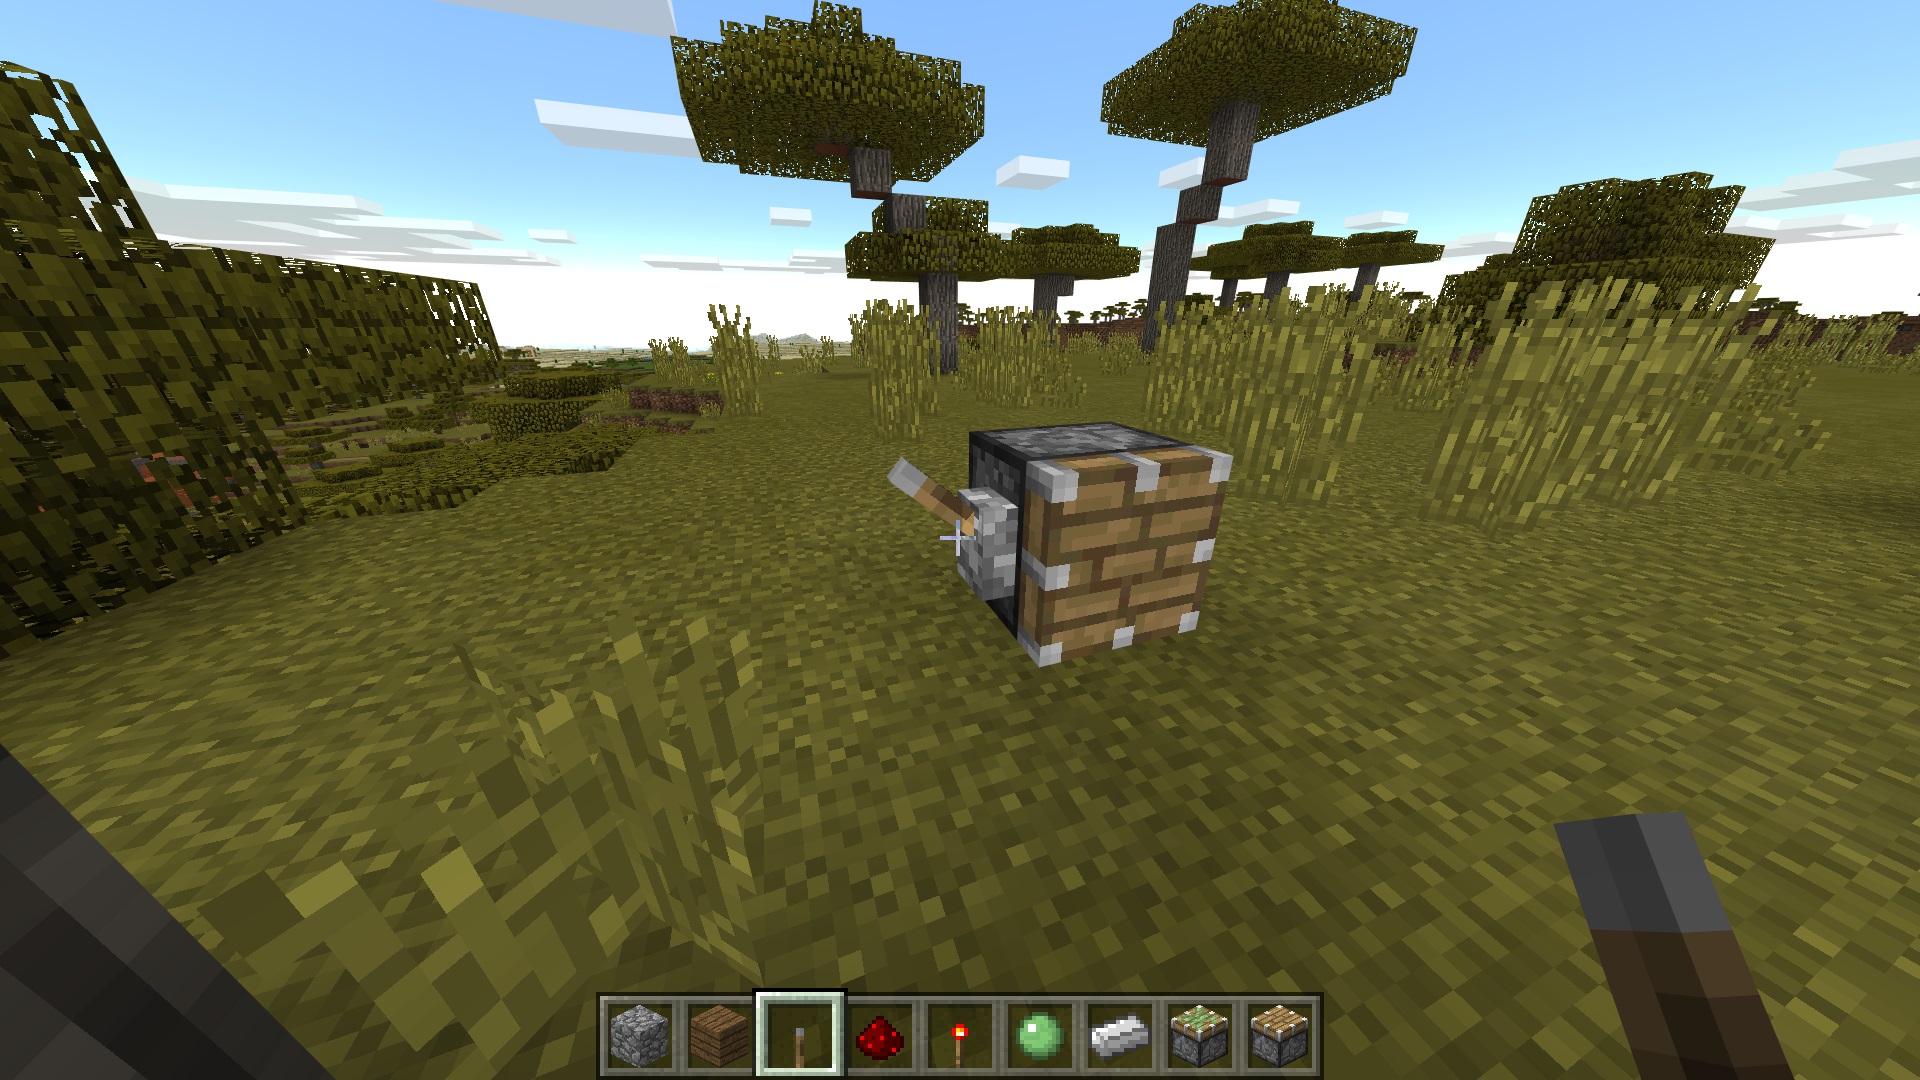
The piston must be connected to either powered redstone or to a lever or other redstone switch. In the Nintendo Switch version of Minecraft, you can attach levers or other redstone switches directly to a piston.
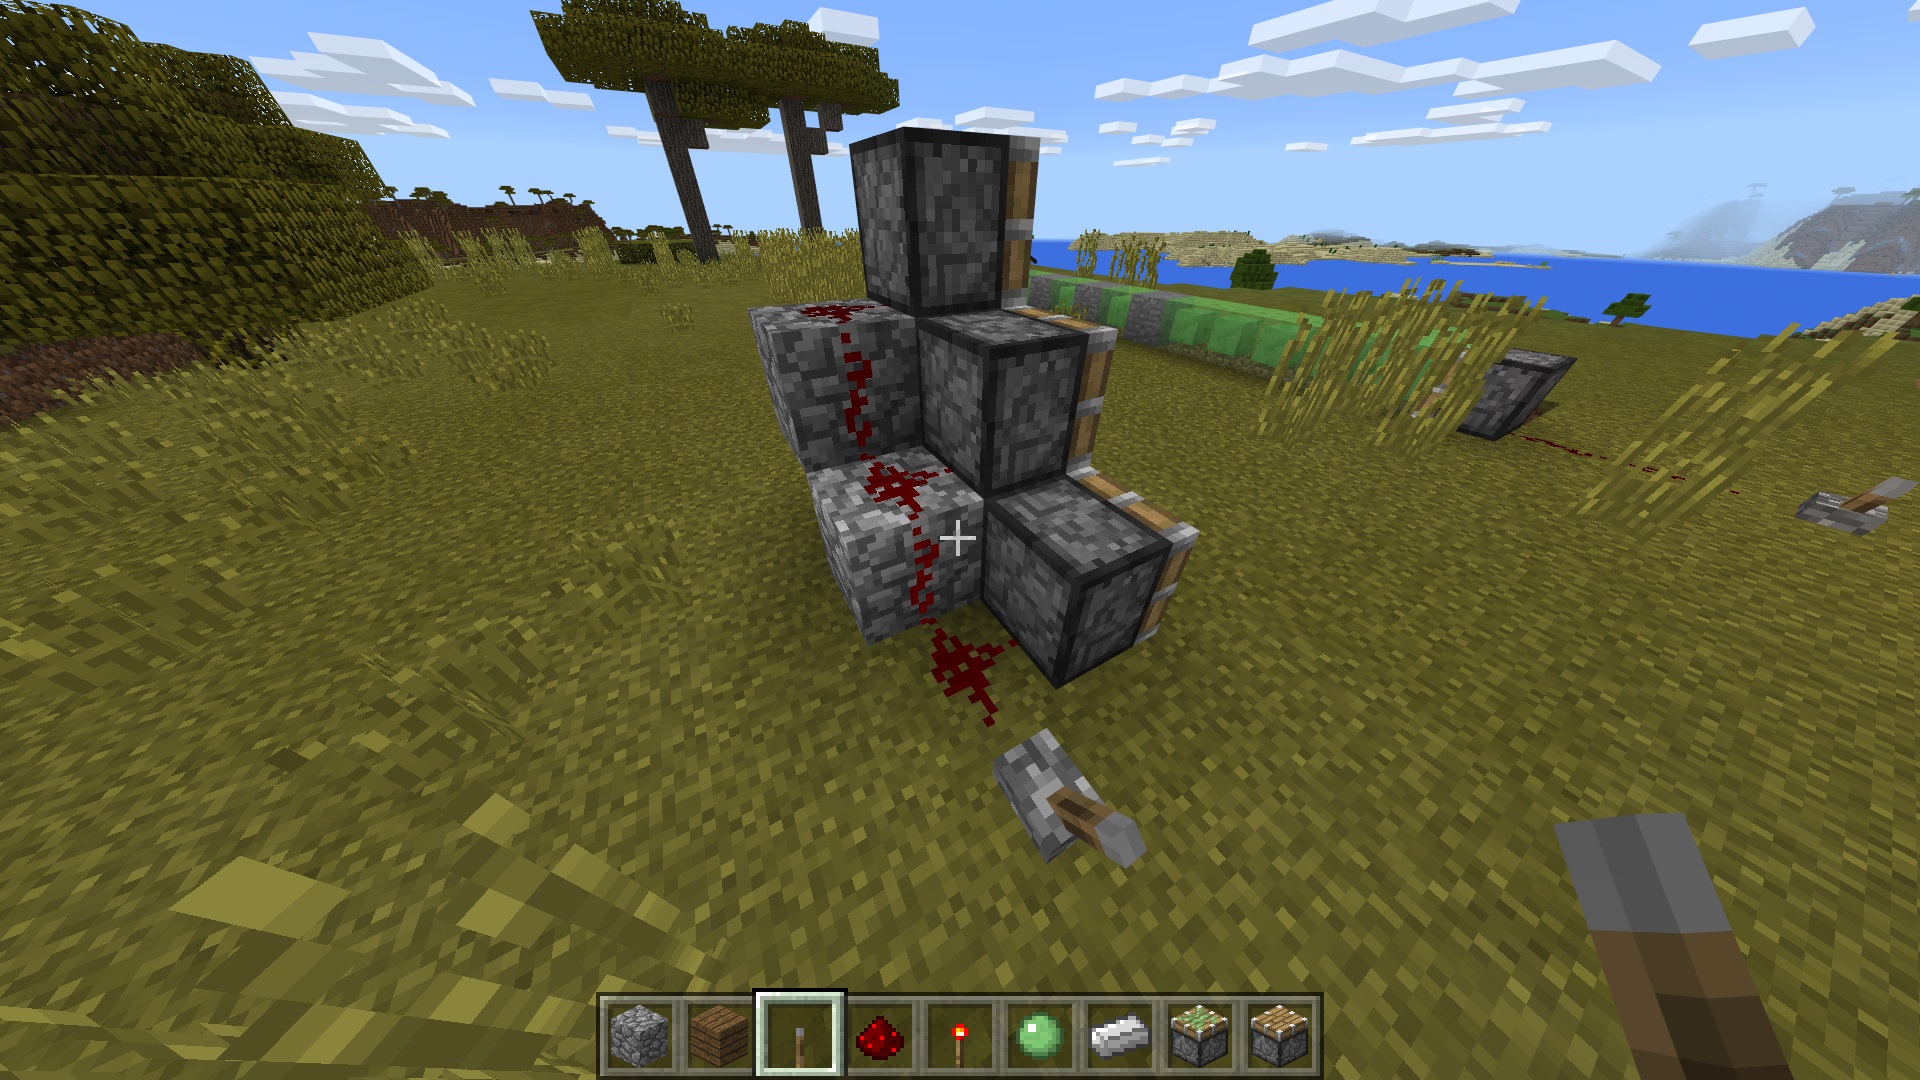
If you want one redstone switch to control multiple pistons, you will have to link the pistons with redstone dust and power it. Contraptions using pistons and redstone can be unbelievably intricate, but a good starter project is to create a hidden staircase or hidden door.
Blocks that cannot be used with pistons
Most blocks in the Minecraft world can be pushed and pulled by pistons. There are, however, a few exceptions.
Blocks that will break if pushed or pulled
These blocks, when broken, will turn into a drop that you can pick up and use again, just as if you'd hit it with the applicable tool.

Bed

Cactus

Cake

Door

Item frame

Jack o'lantern

Flower

Flower pot

Melon

Pressure plate

Pumpkin

Mushroom

Redstone comparator

Redstone dust

Redstone repeater

Sugar cane

Torch

Weighted pressure plate
Blocks unaffected by pistons
Some blocks will simply not move or break when used with a piston.

Bedrock

Enchantment table

End portal frame

Monster spawner

Obsidian
How to use slime blocks with pistons
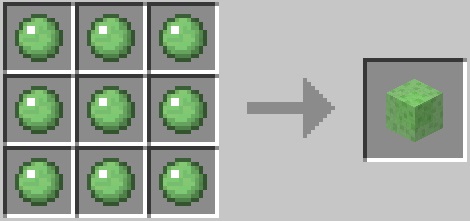
If you manage to collect nine slimeballs, you can craft a slime block.
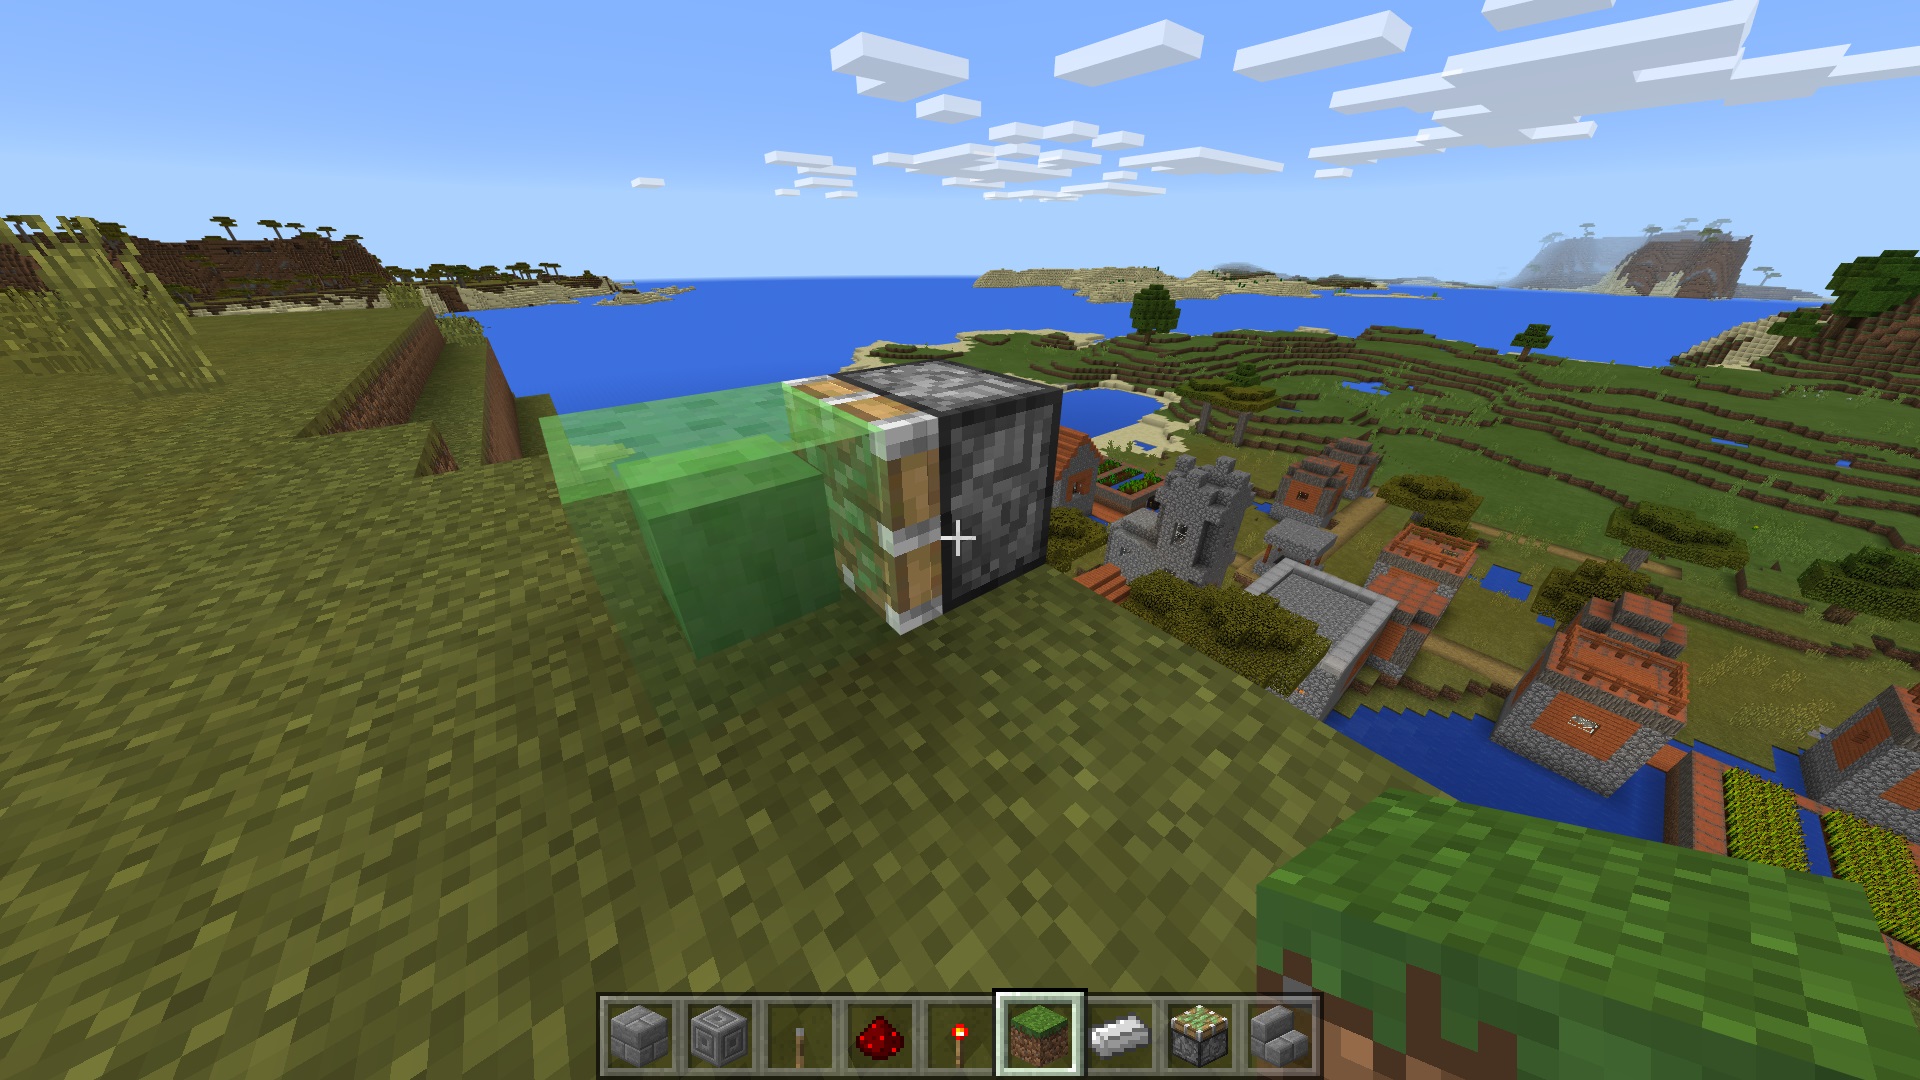
Attaching a slime block to a sticky piston allows you to move blocks directly adjacent to the slime block.
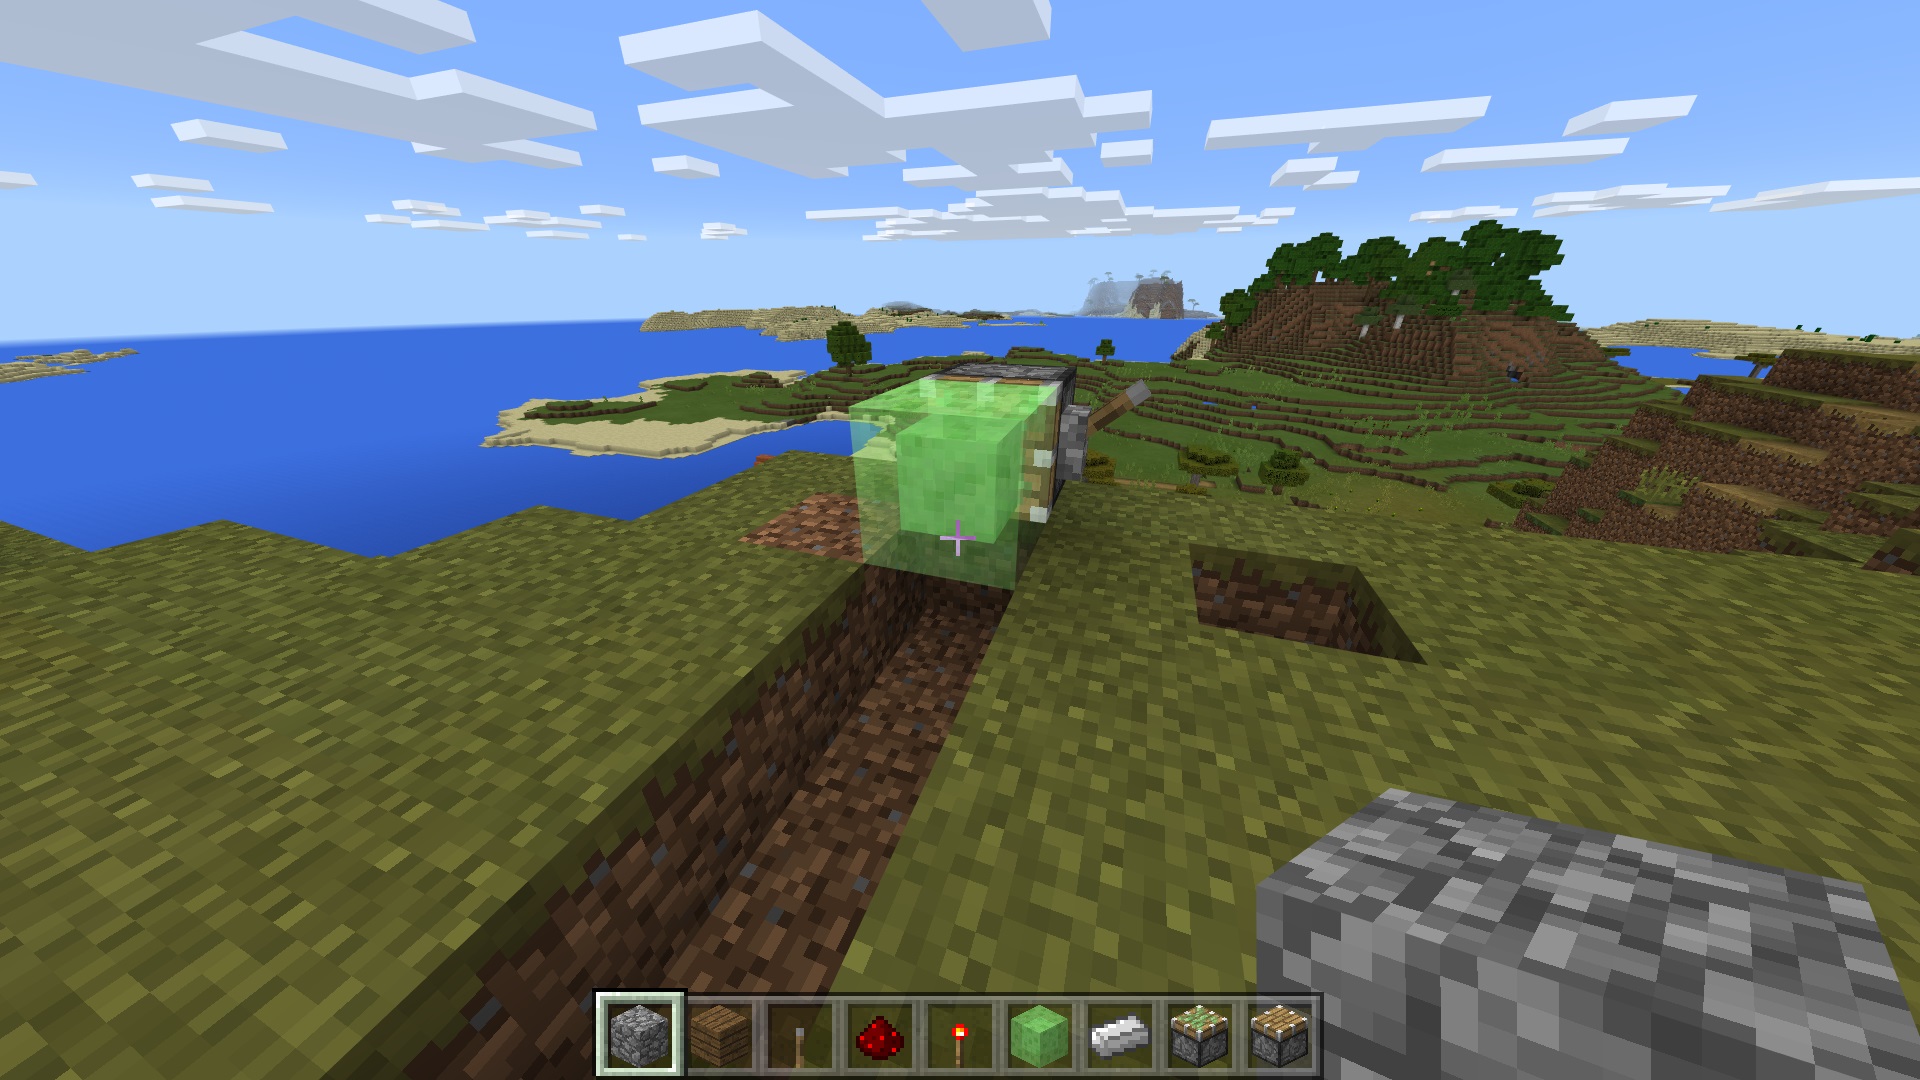
Keep in mind that a piston can only move 12 blocks in a row, so if you place it on the ground, it will not move. You must create a channel beneath the slime block to allow its movement.
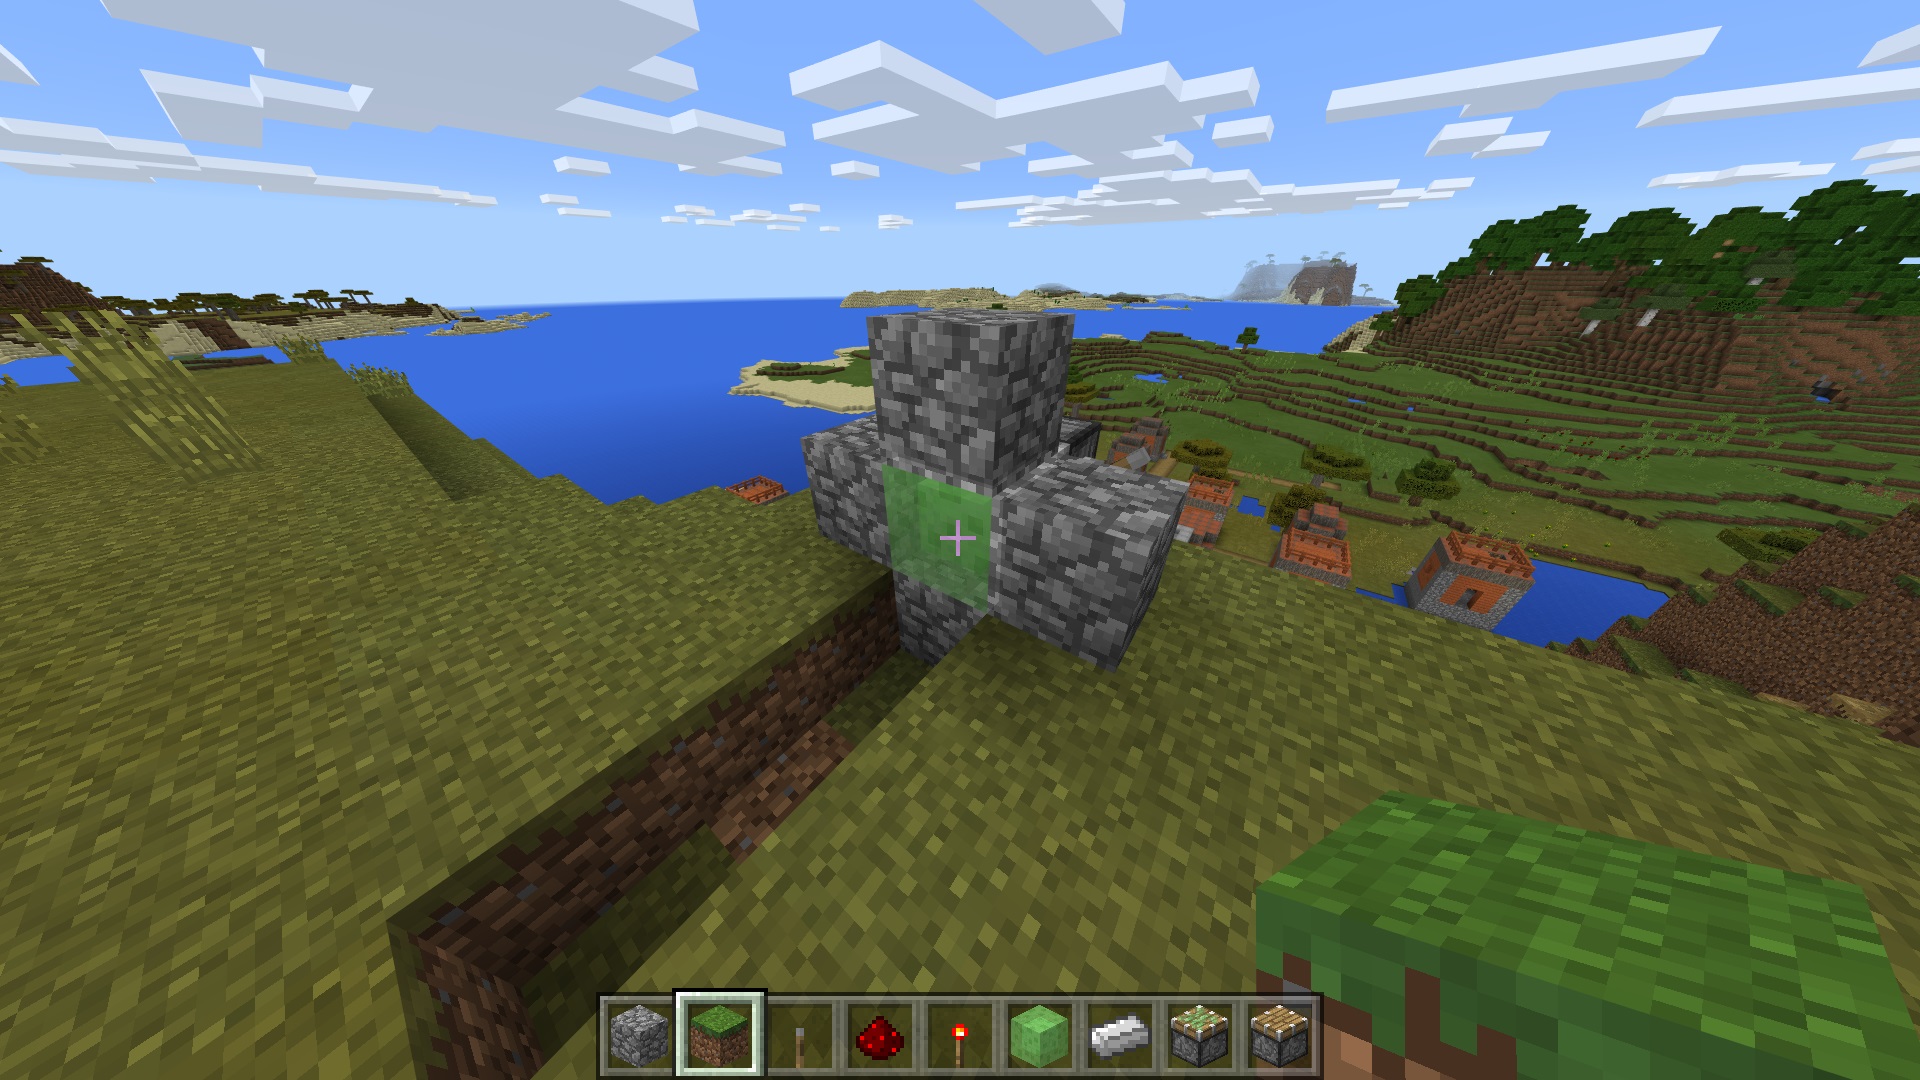
Once you've made the channel beneath the slime block, you can attach the blocks you'd like to move.
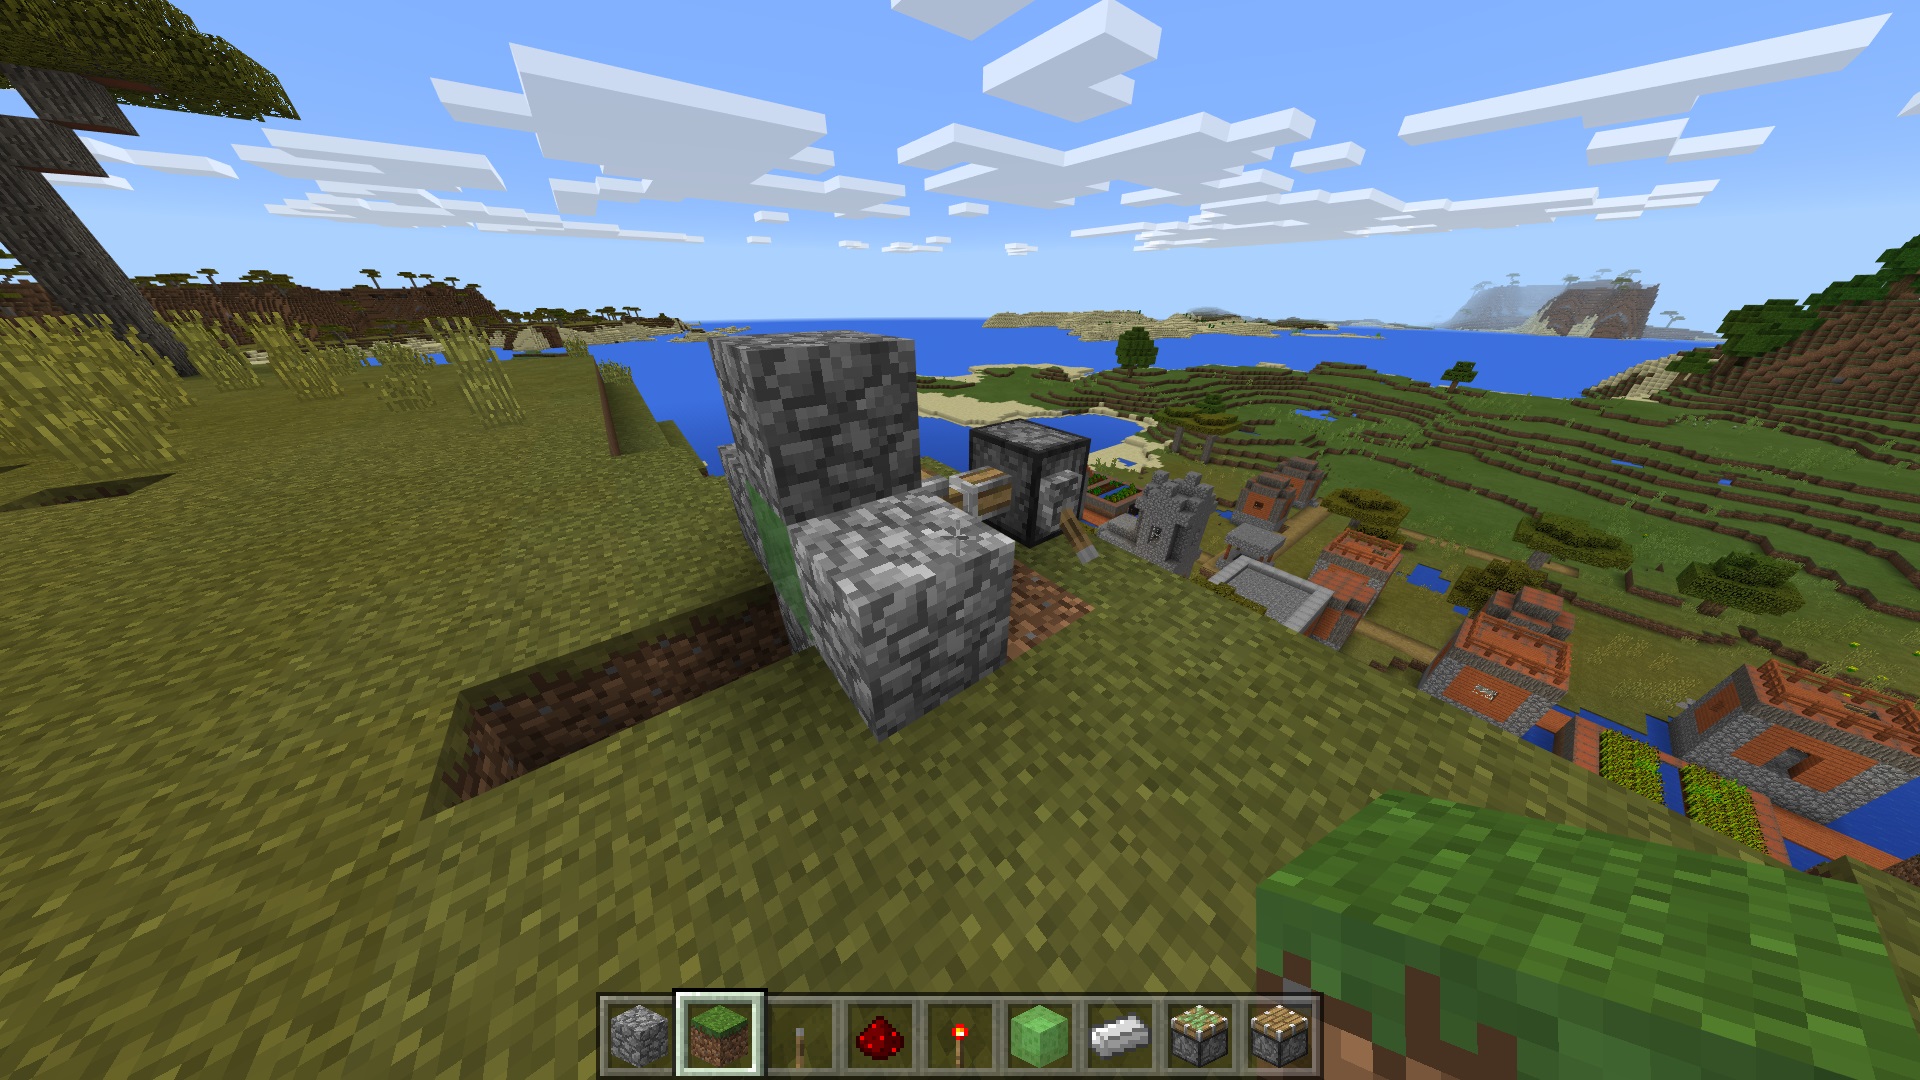
When you engage the piston, it will push the slime block as well as any attached blocks. All blocks touching the slime block will return to their regular position when the piston is disengaged.
Any questions?
Do you have any questions about getting started with Minecraft: Nintendo Switch Edition? Drop them in the comments and we'll help you out.
Updated June 2018: Updated for Minecraft Bedrock Edition.
Russell is a Contributing Editor at iMore. He's a passionate futurist whose trusty iPad mini is never far from reach. You can usually find him chasing the next tech trend, much to the pain of his wallet. Reach out on Twitter!
