How to screenshot your iPhone
Want to screenshot your iPhone's current image? Here's how to do it.

Knowing how to screenshot your iPhone is valuable with countless reasons for doing so. You might want to show your WhatsApp group chat a conversation you've had with someone else, you may simply want the memory of a sweet high score in a game, or you might want to report a bug you've spotted on your favorite app. Being able to take a screenshot with your iPhone is as useful as being able to take a screenshot on a Mac.
We've taken a look at how to take screenshots on your iPhone below. Different iPhone models have different methods for taking a snap of your screen, so we've detailed the various ways of doing so, depending on the iPhone you use. The difference mostly comes down to whether your iPhone has a Home button or not so the process isn't too tricky to figure out. If you already know how to take a screenshot on your iPad, the method is very similar.
Check out everything you need to do below.
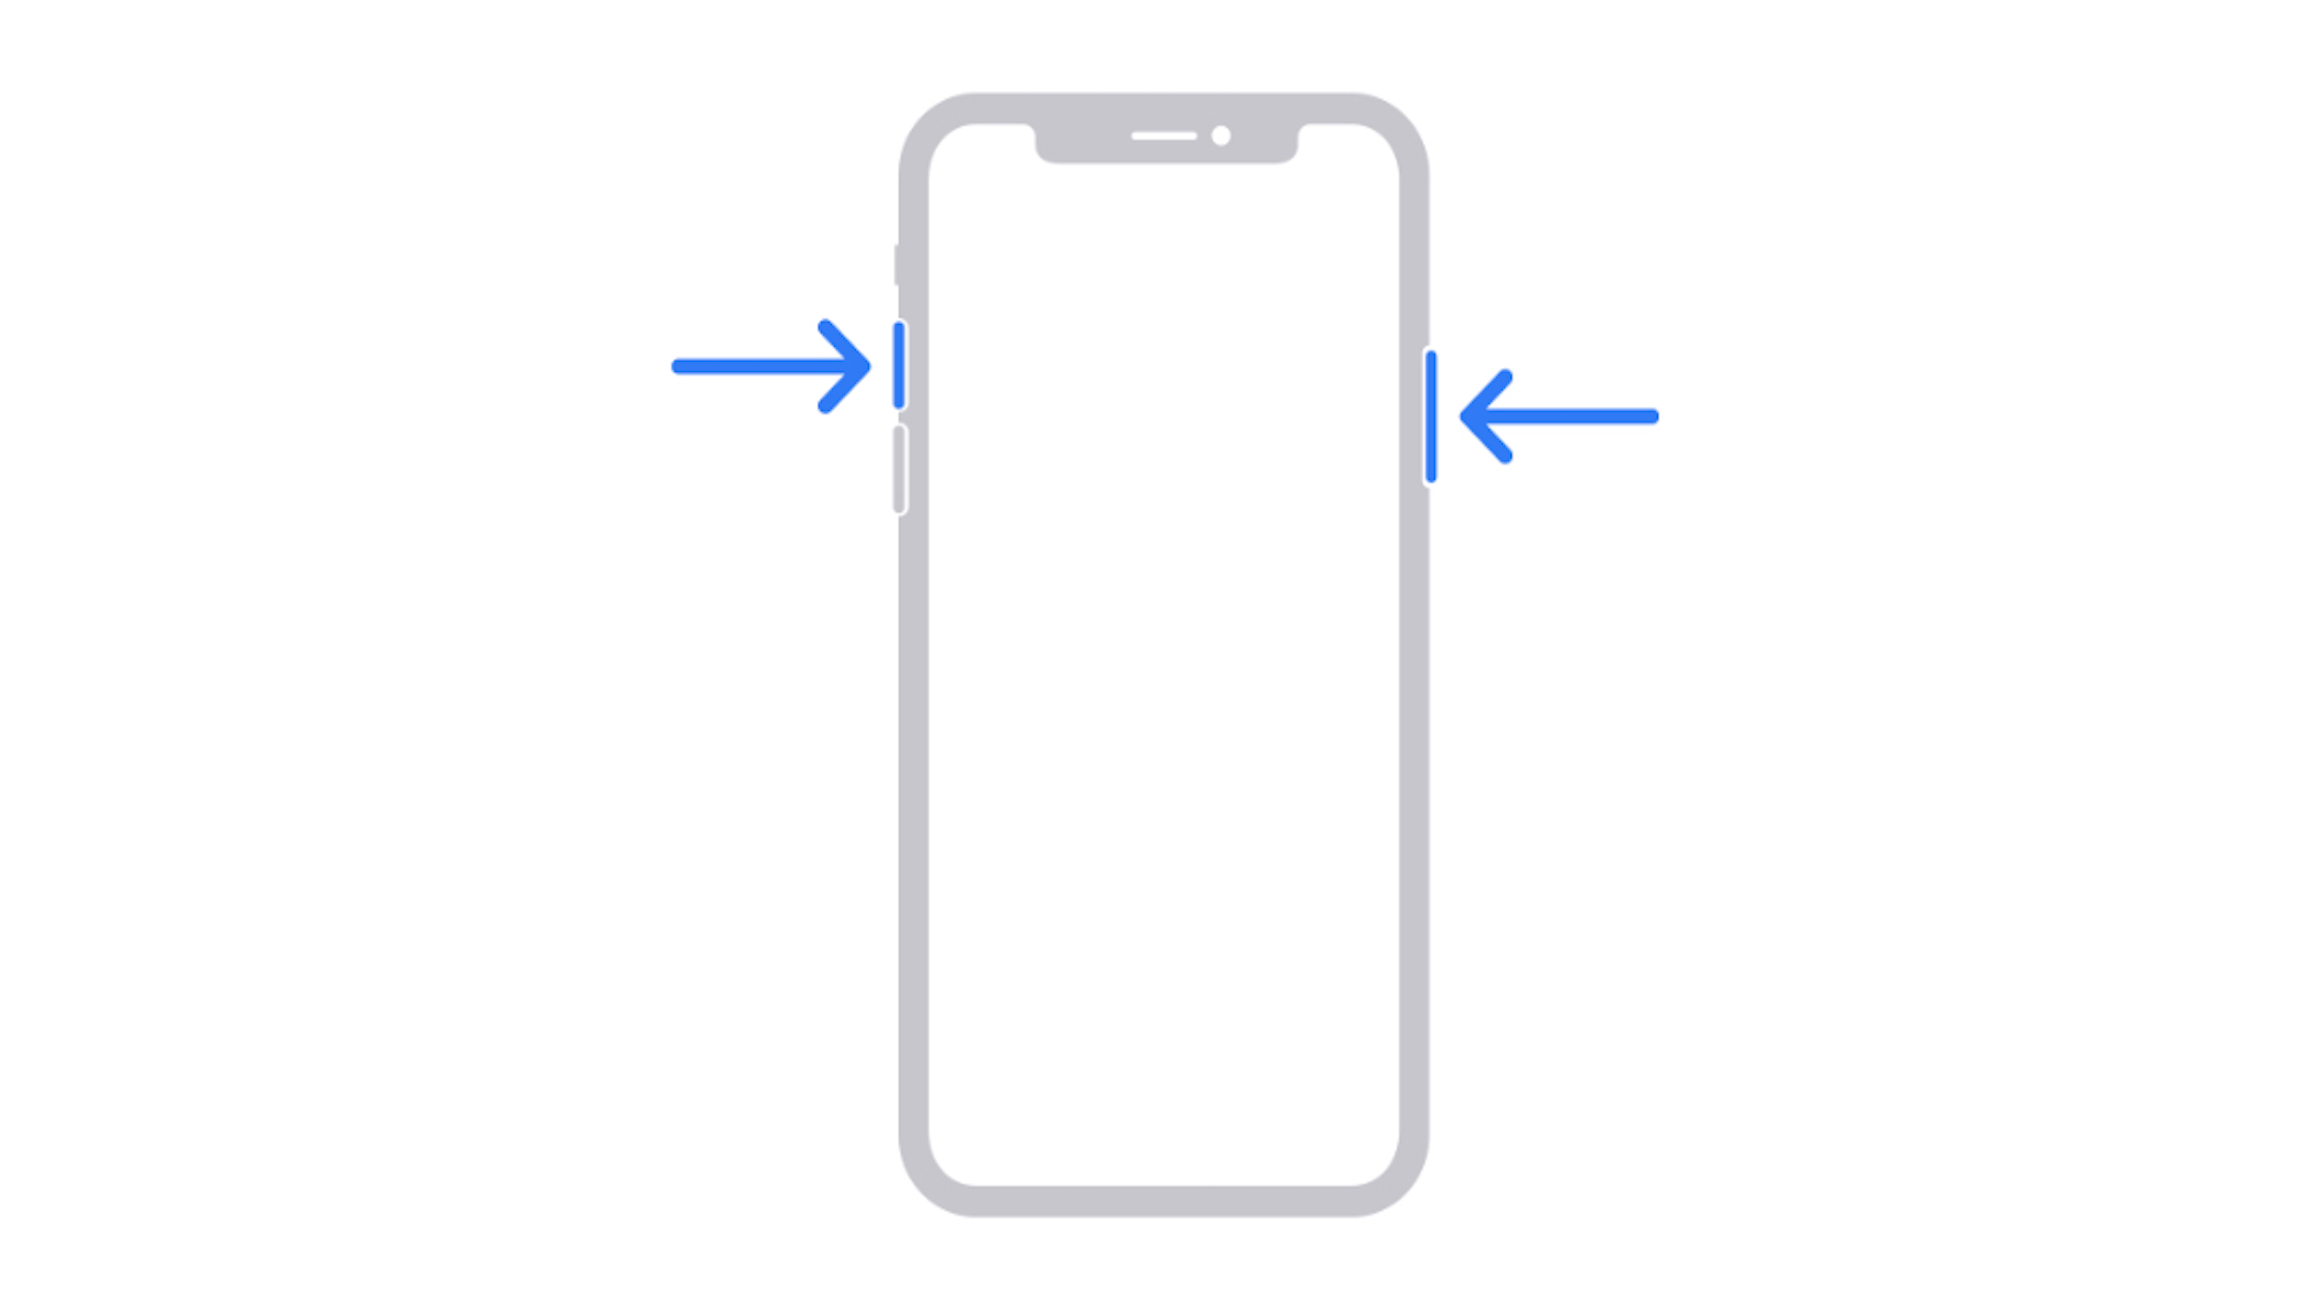
How to take a screenshot on iPhone X and newer
If you have an iPhone with Face ID, including the latest iPhone 15 Pro, all things iPhone 14, and all the way down to the ageing iPhone X, you'll need to follow a specific method listed below.

Because iPhones with Face ID don't have a Home button, you have to use the side volume up button to take a screenshot instead.
- Open the app or screen you want to capture.
- Set up everything exactly the way you want it for the shot.
- Press and hold the side button on the right side of the iPhone with Face ID.
- Click the Volume Up button at the exact same time. (This replaces the Home button step from previous iPhones).
- The screen will flash white and you'll hear the camera shutter sound (if your sound is enabled).
- Your screenshot will instantly appear in the bottom left corner of your screen.
How to screenshot on iPhone 8, iPhone SE and earlier
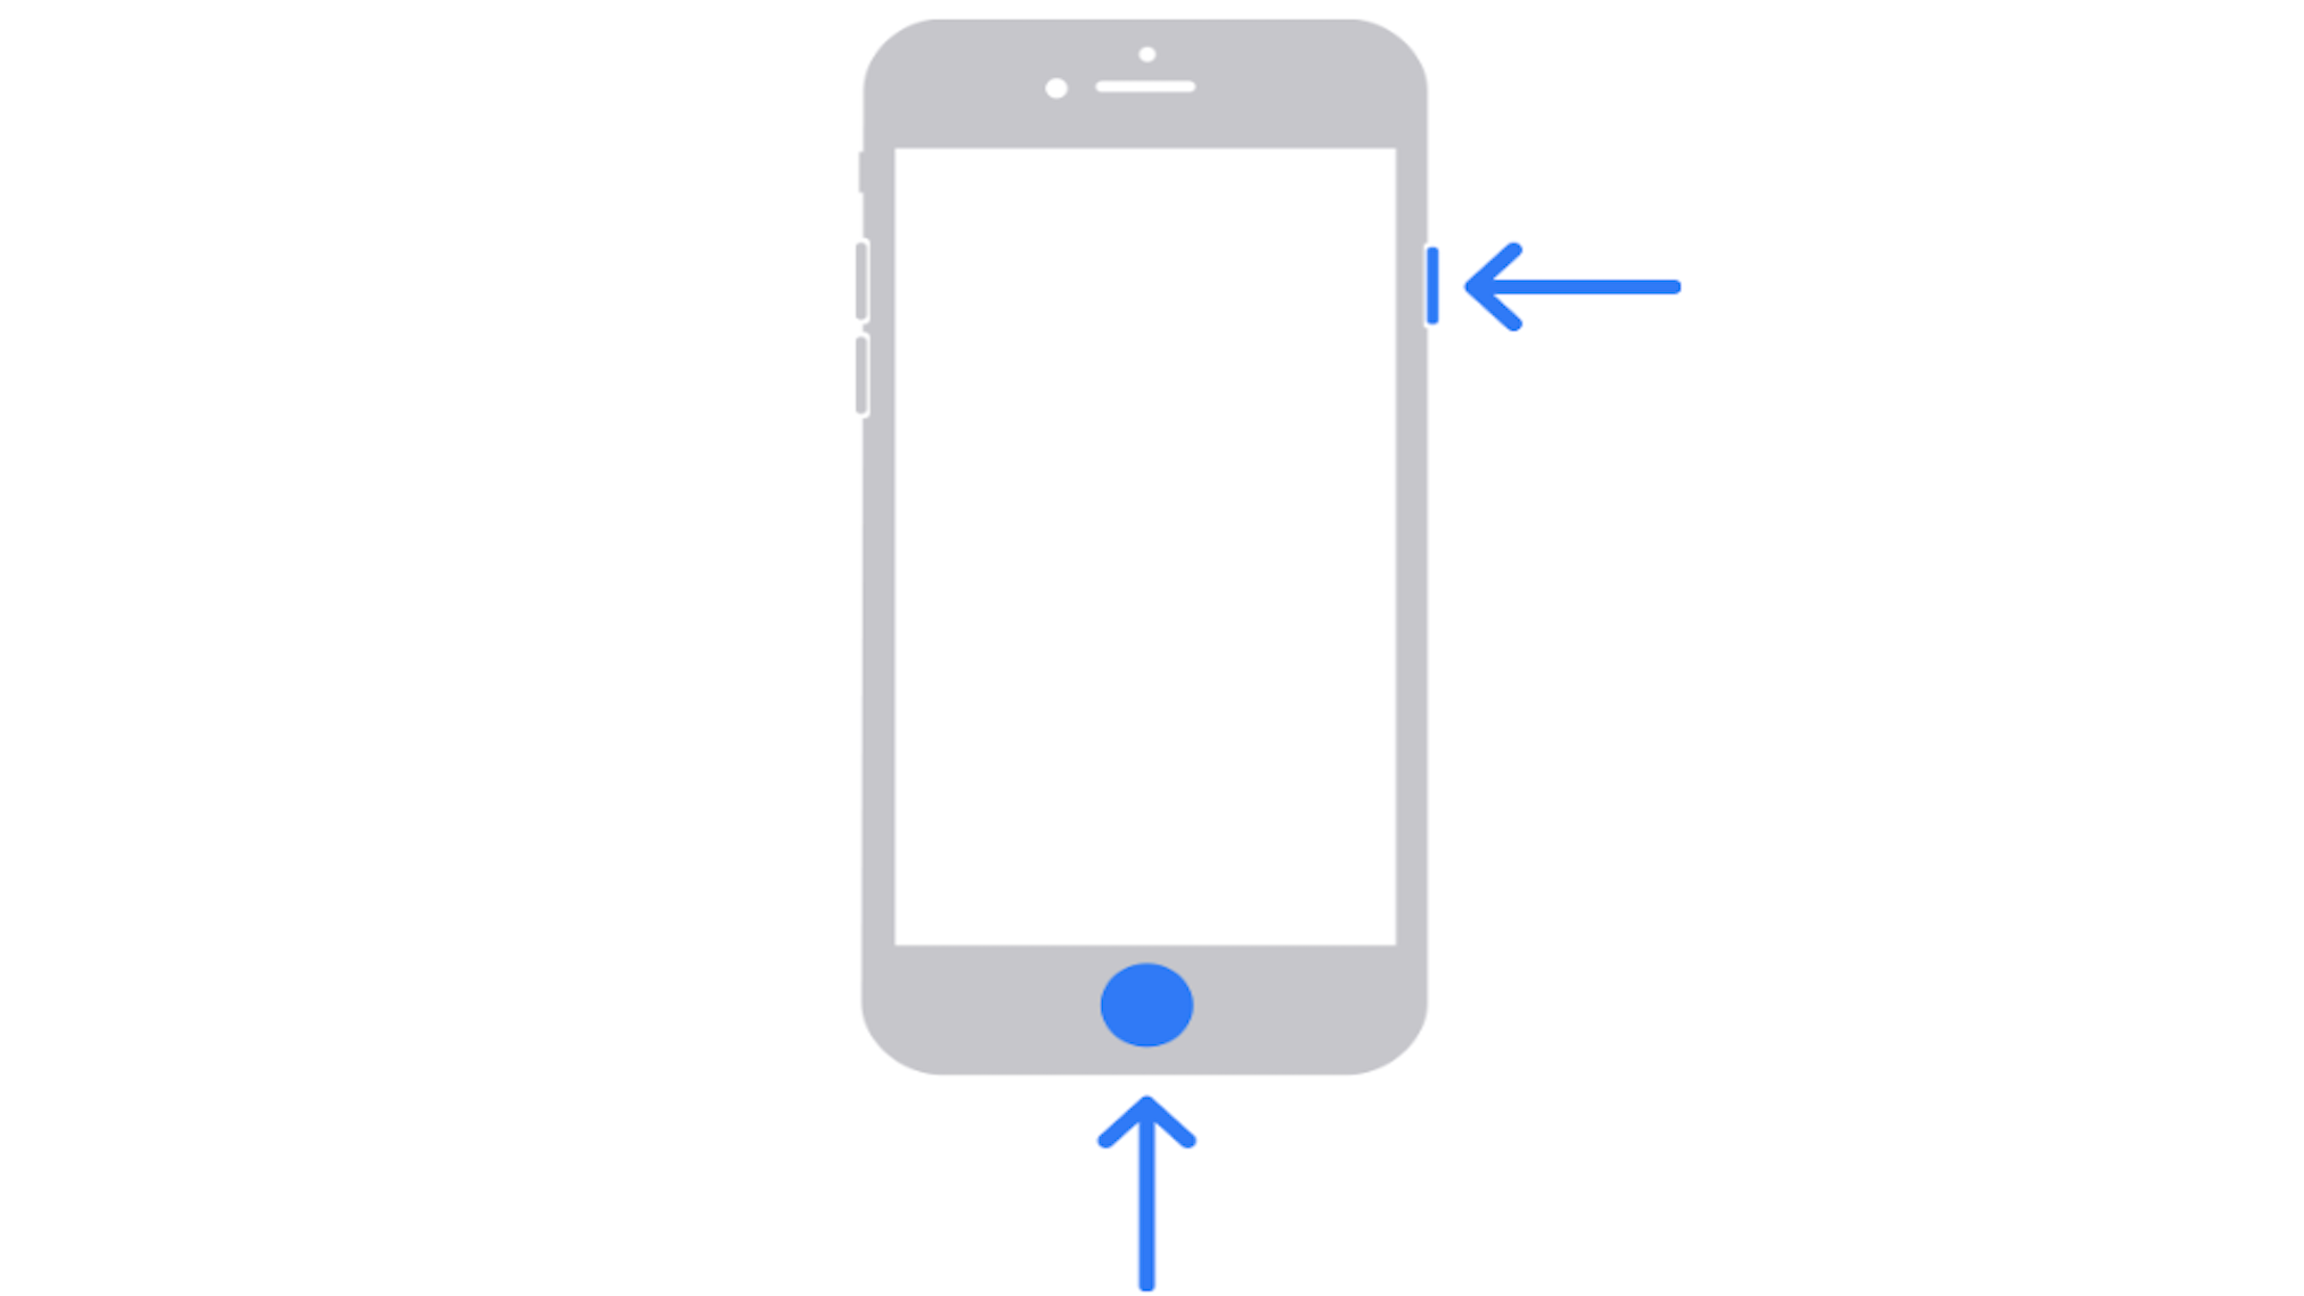
All iPhones from the original released in 2007 through iPhone 8 and iPhone 8 Plus in 2017 all use exactly the same method to capture the screen. The same goes for the iPhone SE (2022), which also has Touch ID.

- Open the app or screen you want to capture.
- Press and hold the Power button on the right side and click the Home button at the exact same time. (This helps to ensure you don't activate Touch ID or Siri by accident while trying to take your screenshot.)
- The screen will flash white and you'll hear the camera shutter sound (if your sound is enabled).
- If you're on iOS 10 or earlier, the screenshot will be saved to your All Photos album (or Camera Roll if you're not using iCloud Photo Library). If you're using iOS 11 or above, this process will be slightly different.
How to view and edit screenshots
You can instantly view and edit your screenshot right after you've snapped it. A tiny version of your screenshot will instantly appear in the bottom left corner of your screen.
Master your iPhone in minutes
iMore offers spot-on advice and guidance from our team of experts, with decades of Apple device experience to lean on. Learn more with iMore!
- Locate and tap your screenshot on the bottom left corner of your screen.
- Editor will instantly open.
- Edit your photo.
- You can share or delete your screenshot from this screen as well.
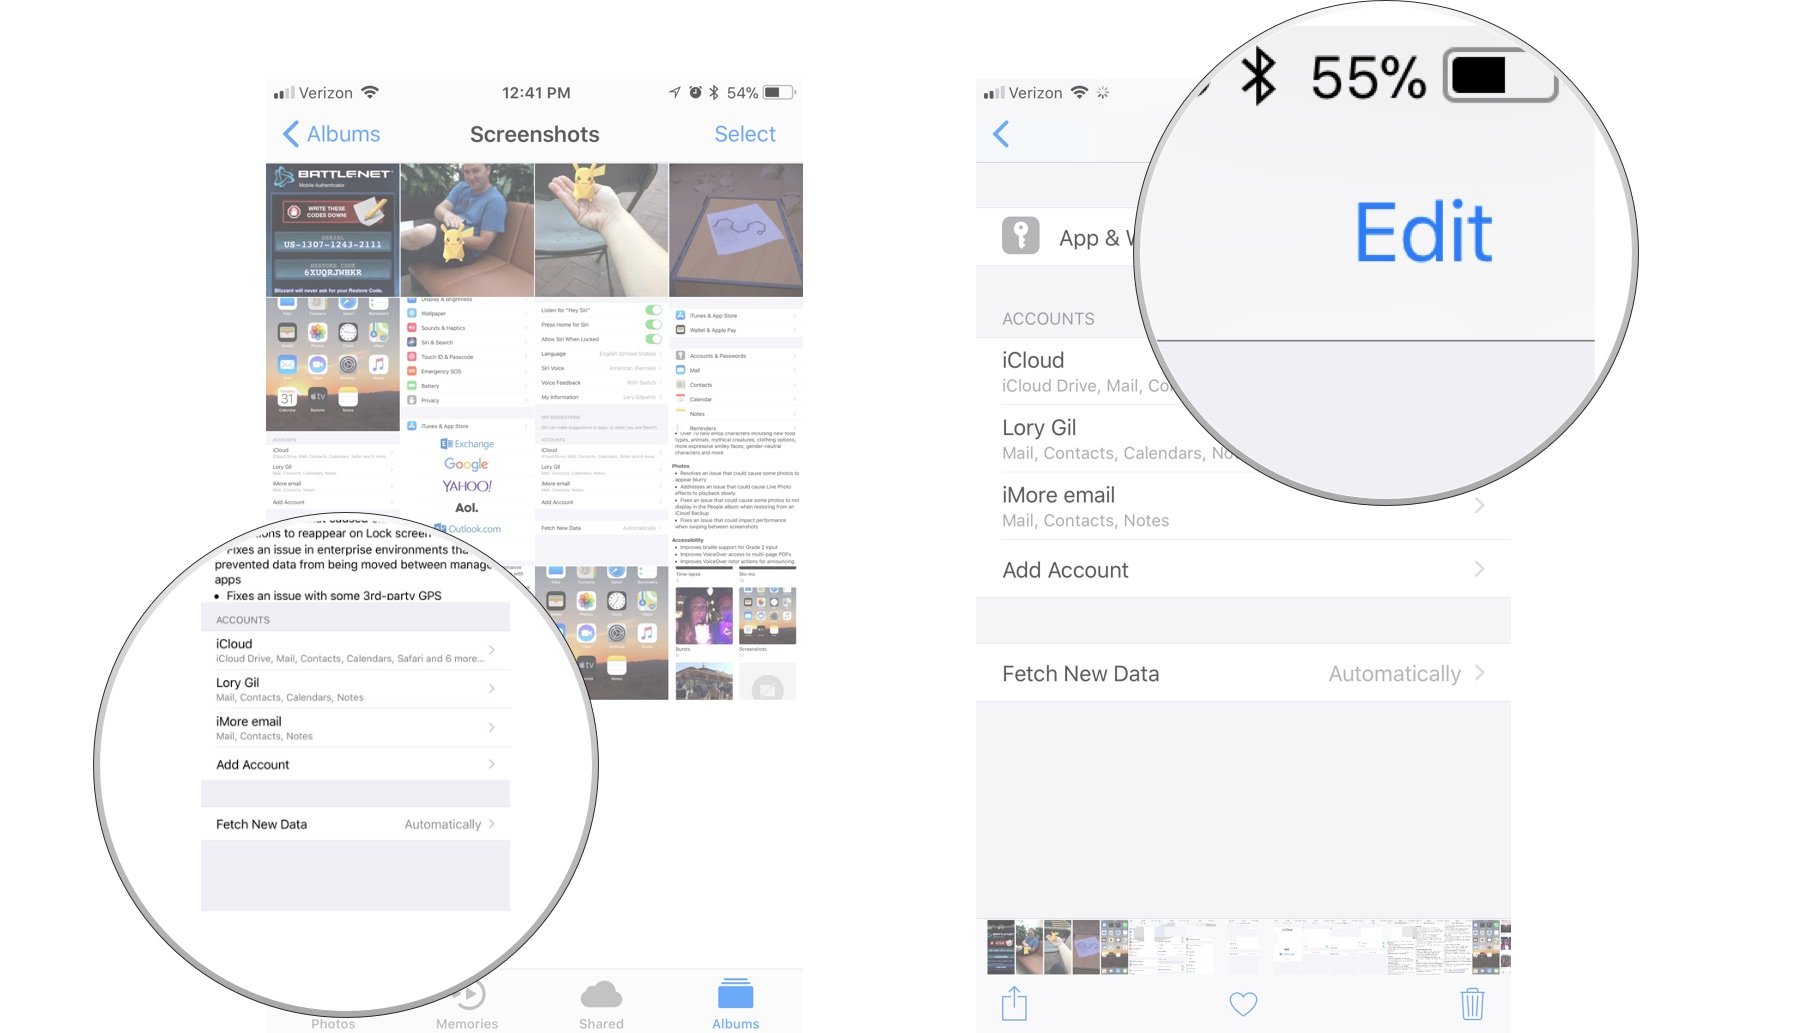
Your screenshots will also automatically be saved in your Photos app and your screenshots album unless you opt to delete them immediately.
- Open the Photos app.
- Your screenshot will be the last photo taken.
- Or you can access all of your screenshots via your Screenshots album.
- Select a screenshot to view, favorite, edit, or share.

You can also tap the camera icon or use the edit menu in apps like Messages or Mail to insert your screenshot into texts, email, and more.
How to take screenshots with iPhone, iPad, Apple Watch, Apple TV, and Mac
Above, we've covered everything you need to know about how to take a screenshot on your iPhone. You can also take screenshots on all your other Apple devices. Yes, even your Apple Watch.
If you're looking to snap a screenshot on your Apple Watch, the process leads to the photo being stored on your iPhone which is convenient. Alternatively, you can also grab an image from your TV by learning to take an Apple TV screenshot.
Perhaps the most likely to be used, there's also a simple method for taking a Mac screenshot and you can even edit it easily enough or only take a snap of a certain part of the screen.
Whatever your plan, Apple has made sure there are simple ways to take screenshots of everything you're doing on your Apple device. Easily stored too, they're handy if you want to keep some memories or you're simply trying to show someone an issue you're running into.

Nicolette is a freelance writer for iMore. She's been hooked on Apple products since she got the very first iPhone in 2007 and made the switch from PC to Mac in 2008 after inadvertently dousing her laptop with a hefty dose of water. A dedicated creative, Nicolette has had the pleasure of working with some of the top websites, studios, and brands in the industry throughout her career, and enjoys writing about all things: Apple, health, fitness, audio, and home. With over a decade of high-level experience as a health and fitness professional, Nicolette specializes in tech pertaining to the field. If she’s not working, you can find her sipping a glass of wine, enjoying a concert, or hanging with her family.
- Lory Gil
- Rene RitchieContributor
