Speed up iCloud access with macOS High Sierra content caching!

Do you have a lot of Apple hardware devices to maintain? Are you in a small office that manages numerous similar Apple devices? You can speed up the updating of your Macs and iOS devices, the downloading of your apps, and access to your iCloud data while at the same time reducing your internet bandwidth usage by setting up content caching!
- What does content caching do?
- How to install macOS High Sierra on your Mac
- How to set up content caching
What does content caching do?
In my household, we have (in their various forms): 4 iPads, 4 iPhones, 3 AppleTVs, 3 MacBook Pros, 2 MacBook Airs, 1 MacBook, and 1 iMac. That's a lot of downloading to do for iCloud synchronization and system updates across all of those devices. You may have a metered internet package or you might need to make certain your Apple-related downloads don't use up all of the bandwidth.
Content caching helps by keeping a local network copy of app downloads, system updates, iCloud data, iBooks purchases and the like. Once one iPhone downloads a newly purchased app or goes on to synchronize documents in iCloud, content caching will automatically save a copy of the file on its hard drive and the rest of your devices will automatically look to a local macOS High Sierra computer the has content caching set up to download it rather than downloading it from the internet. This speeds up installation and synchronization on all subsequent devices by many times!
How to install macOS High Sierra on your Mac
If you haven't already done so, you'll need to install macOS High Sierra on one of your network Macs. You can follow our detailed guide if you need a little more help, but here is the express version.
- Click on the Apple icon in the upper left corner of your screen.
- Click on App Store...
- Click on Featured.
- Click on macOS High Sierra in the Mac App Store.
- Click on Download under the Sierra icon.
- Wait for macOS High Sierra to finish downloading.
- Click Install to begin the installation process.
How to set up content caching
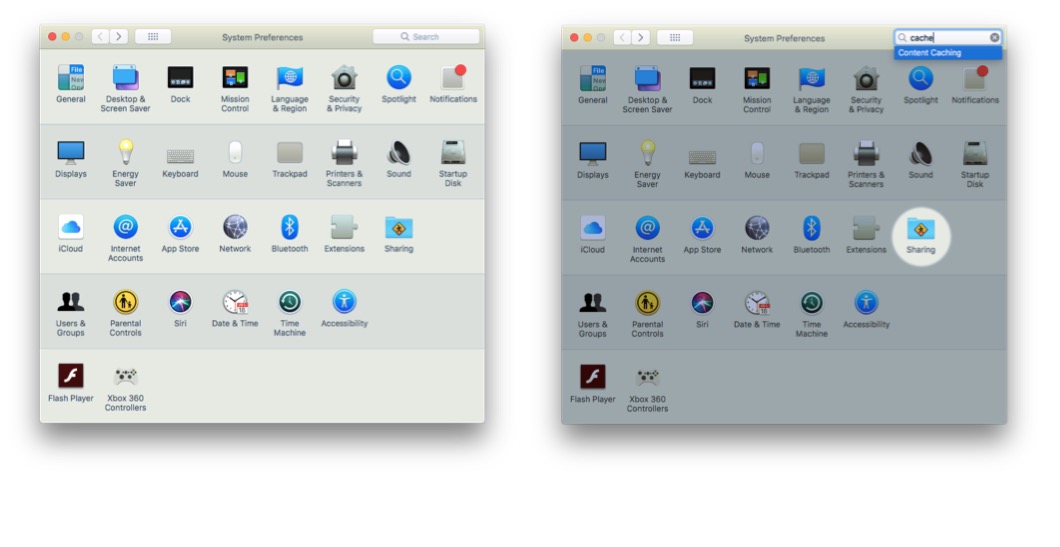
- Launch System Preferences
- Select Sharing.

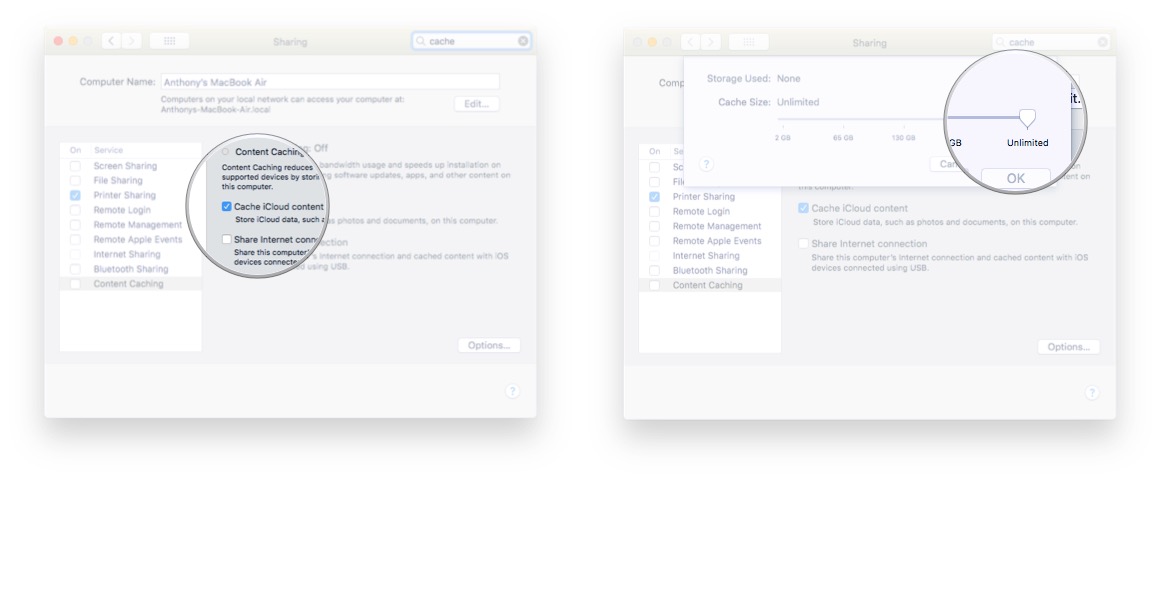
- Make certain that Cache iCloud Content is checked.
- Click Options.
- Set the Cache Size slider to the amount of local disk space to use for content caching.

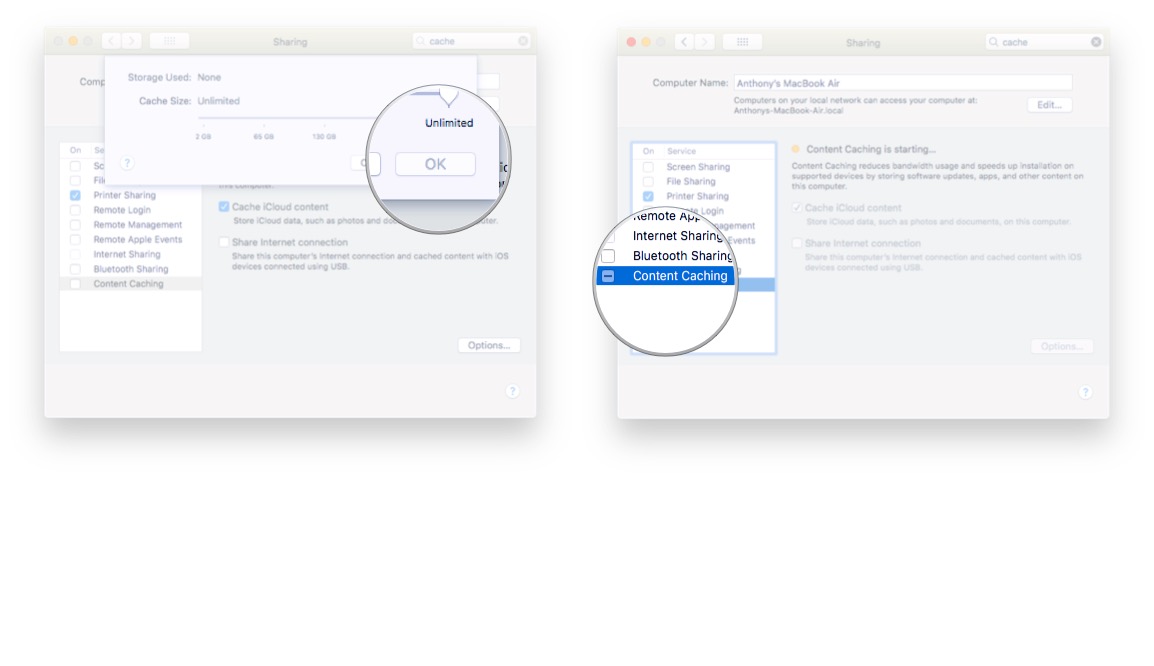
- Click OK
- Enable the service by checking Content Caching.

- Restart all of your Apple devices so that they can detect the caching service running on your network.
With that, your devices will automagically start using and storing data and files on your content caching enabled Mac. Unfortunately, you can no longer see what type of file and how much space is being used for each type of data populating your Mac as was the case in macOS Server. If ever you need to reset the data in the cache, you need to simply click on Reset in the Options section of the content caching system preferences.
Any comments or questions?
This is by far one of the most useful and simplest feature to set up on your Apple-centric network. It's also one of the most impactful since the bandwidth and time saved can be dramatic across all of your hardware. If you have any questions or comments, leave it below!
Master your iPhone in minutes
iMore offers spot-on advice and guidance from our team of experts, with decades of Apple device experience to lean on. Learn more with iMore!

