How to speed up your productivity with Finder on the Mac
The Finder is probably the Mac's most flexible application when it comes to setting up windows and their content just the way you want. But you can go beyond the basics and make your use of the Finder faster and easier. We can't possibly cover every Finder tip in this article, but here are a few favorites.
"I'll have What She's Having"
Yes, it was one of the greatest one-liners in the history of movies.
But imagine if every time you went to a restaurant you simply looked around at other people's tables and only ordered food based upon what you saw, never looking at a menu. If a restaurant served an excellent chicken cacciatore you'd never know it...unless you saw it in front of somebody else.
Now imagine using your Mac without using menus.
The menu bar at the top of every Mac's screen is easy to overlook. It just sits there, out of the way. But it contains powerful commands.
Get Info
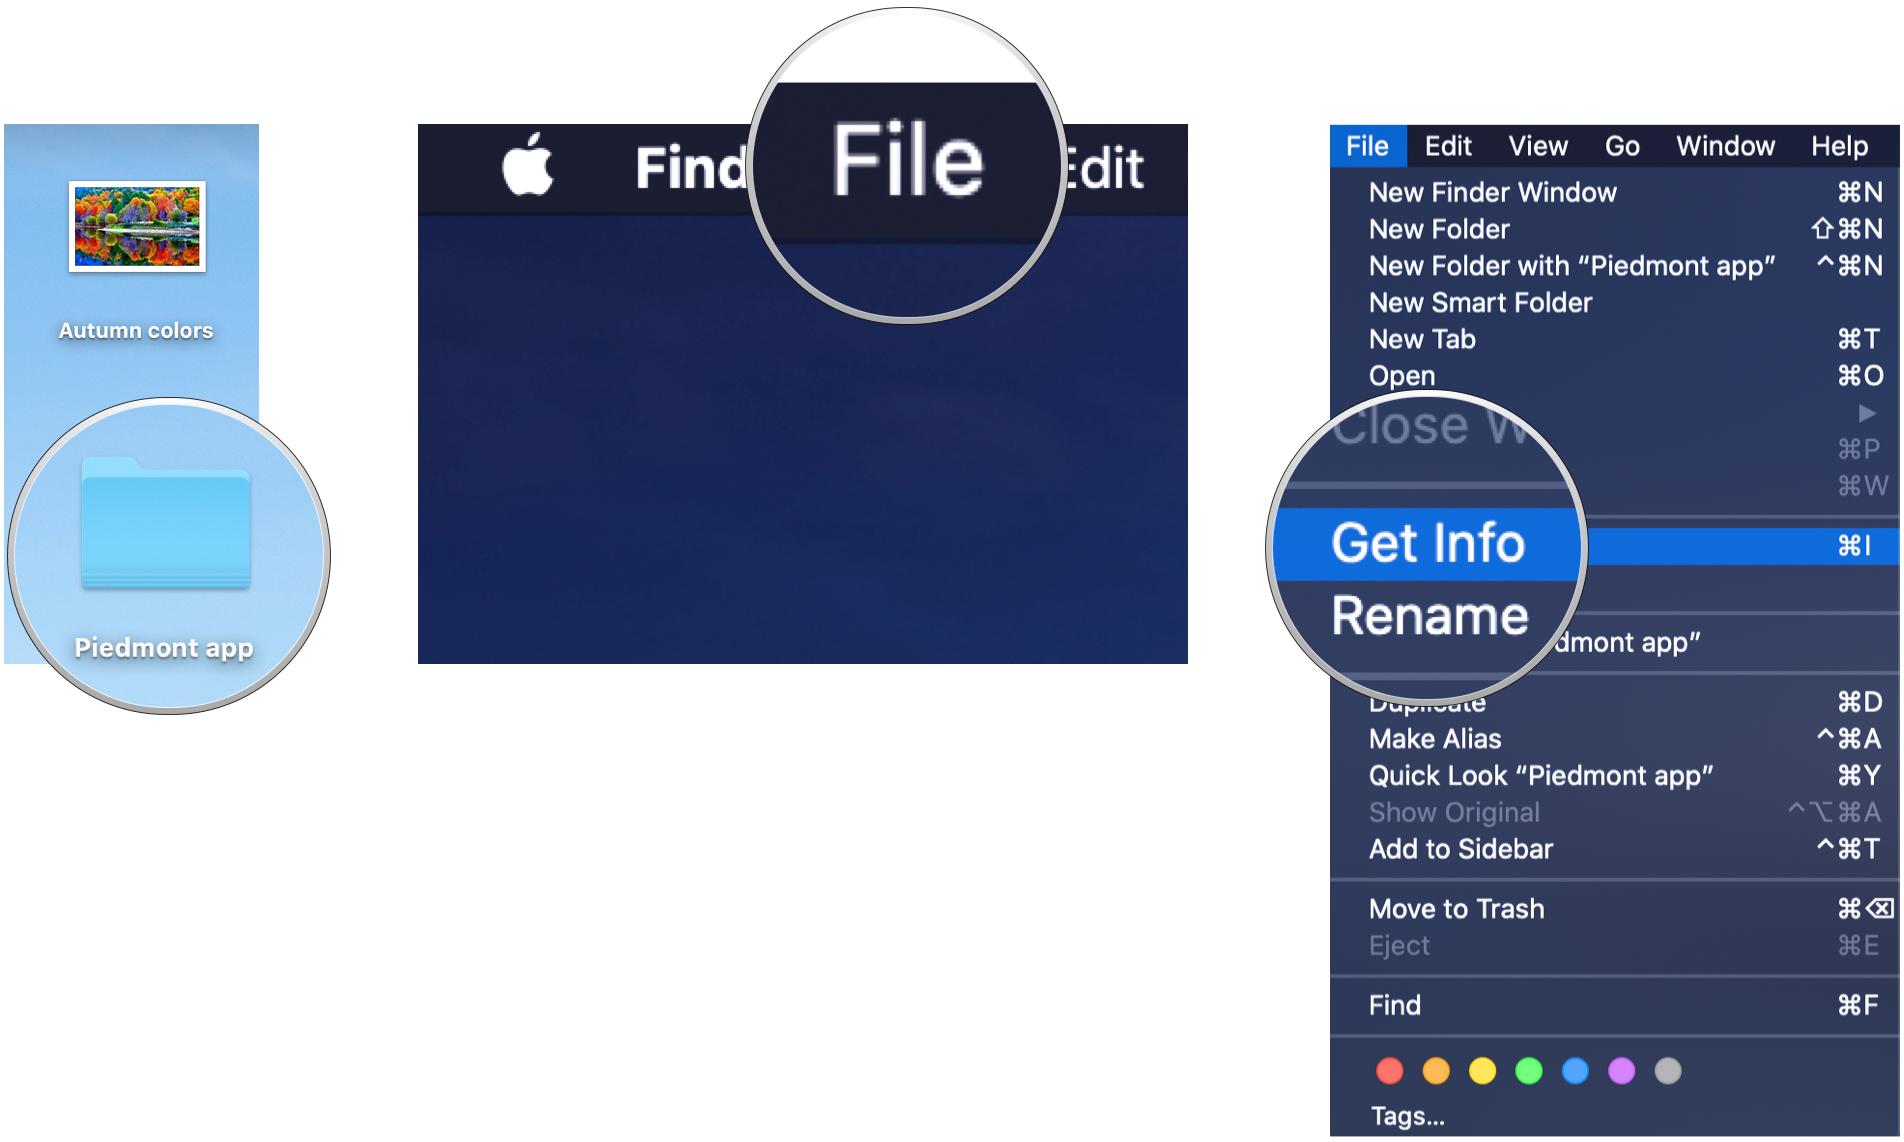
Everyone has a story. So does every file and folder. Here's how to get the details using the Finder:
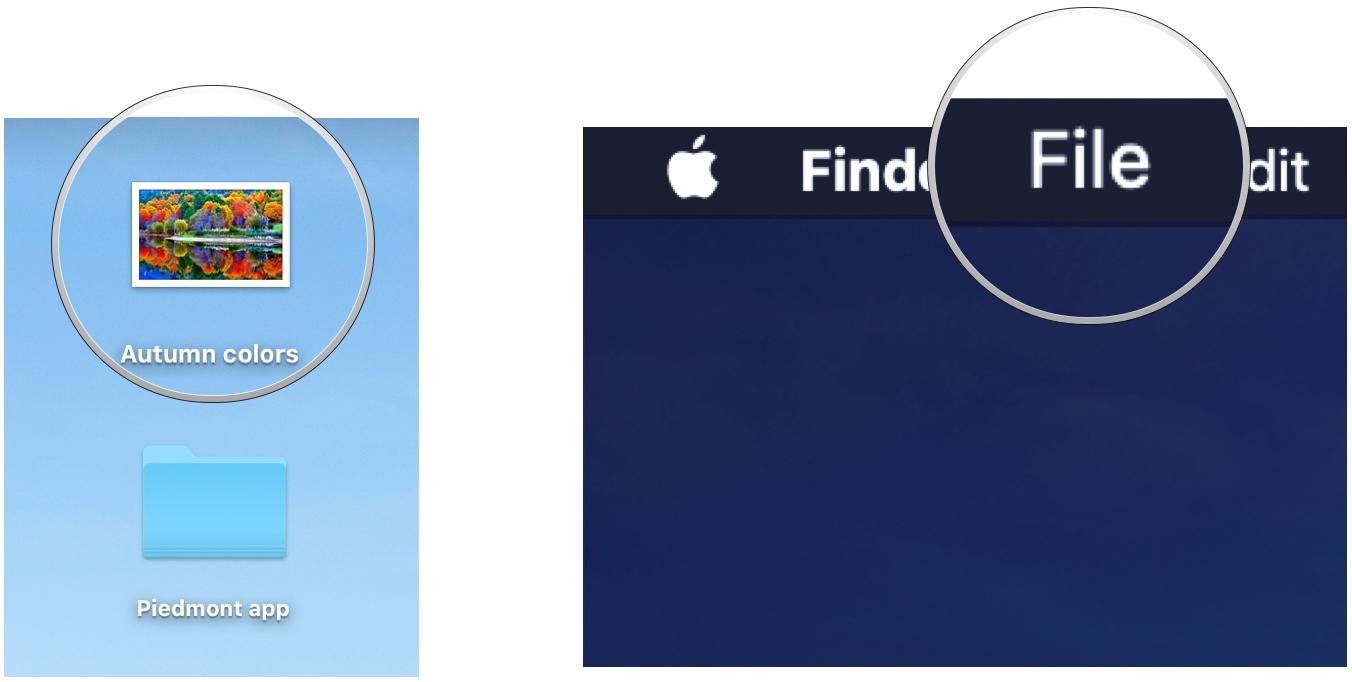
- Click an item to select it.
- Click the File Menu.
- Click Get Info.
Depending in the item you've selected, you'll see a slightly different set of information.
iMore offers spot-on advice and guidance from our team of experts, with decades of Apple device experience to lean on. Learn more with iMore!
Here's one cool thing (among many) you can do with the Get Info window for a folder, a document, and an image, respectively.
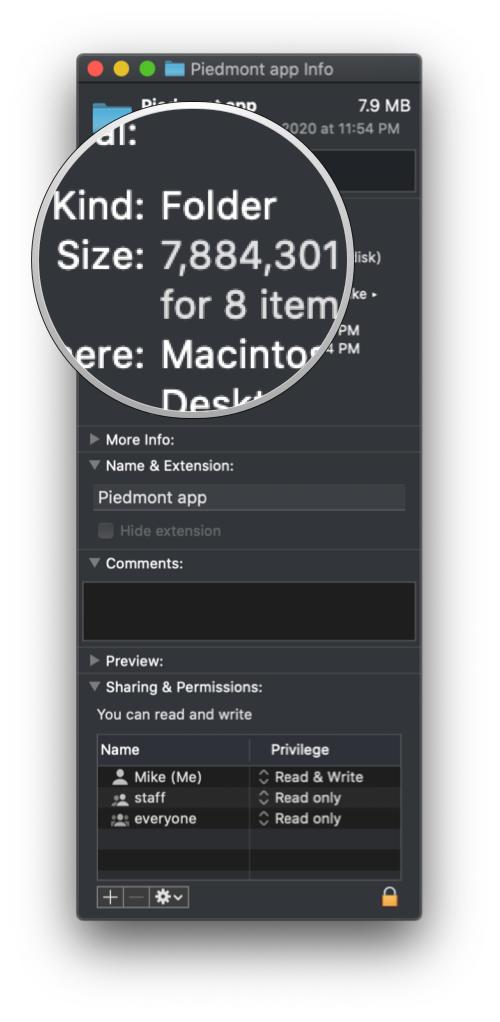
Folder
By default, the Finder will not display the size of folder and the number of items it contains. But you can find that out in the Get Info window.
Document
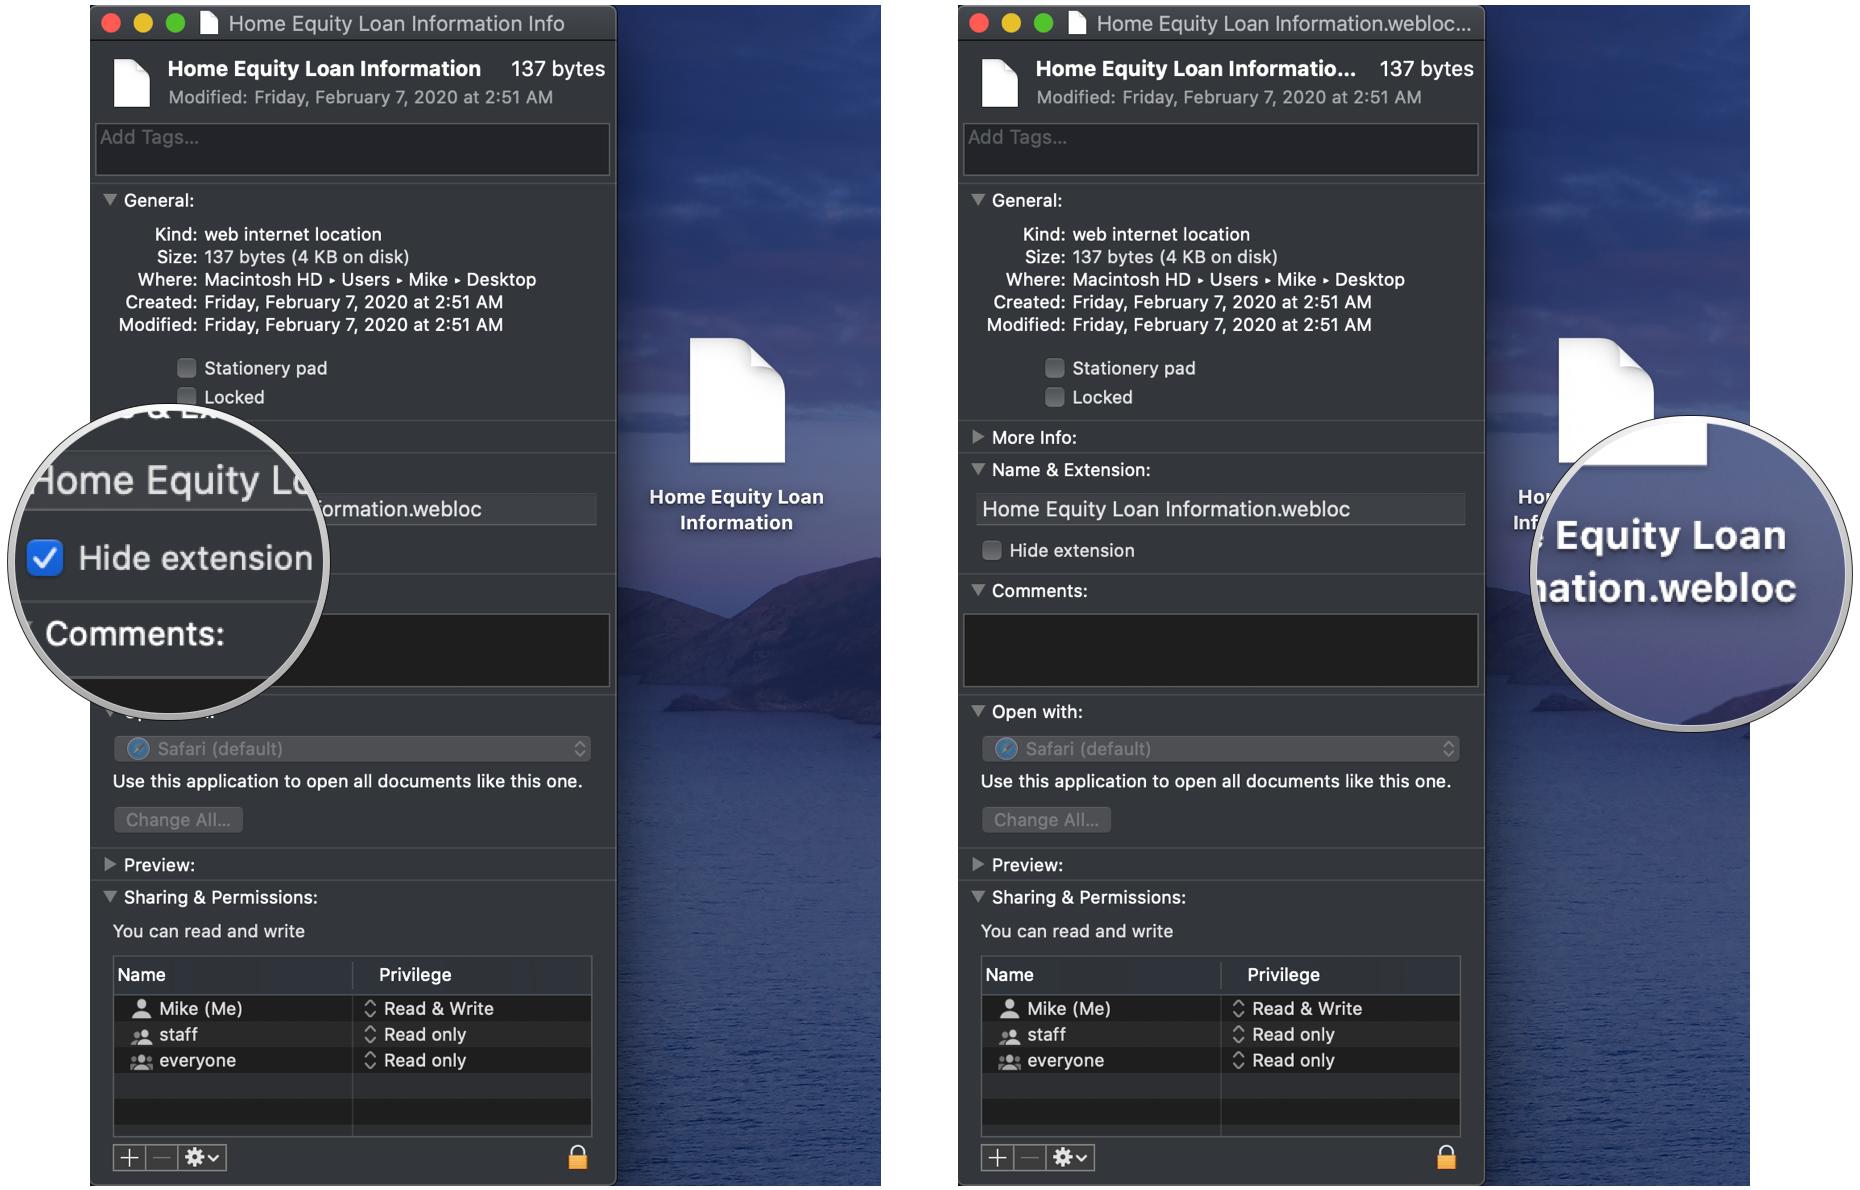
Every document on your Mac has a file extension. Usually, it begins with a period and is three or four letters long (though it can be longer) and appears at the end of the document's name. File extensions are hidden by default, but you can show the extension for a particular file.
- In the Name and Extension section, uncheck the box for Hide extension.
Image
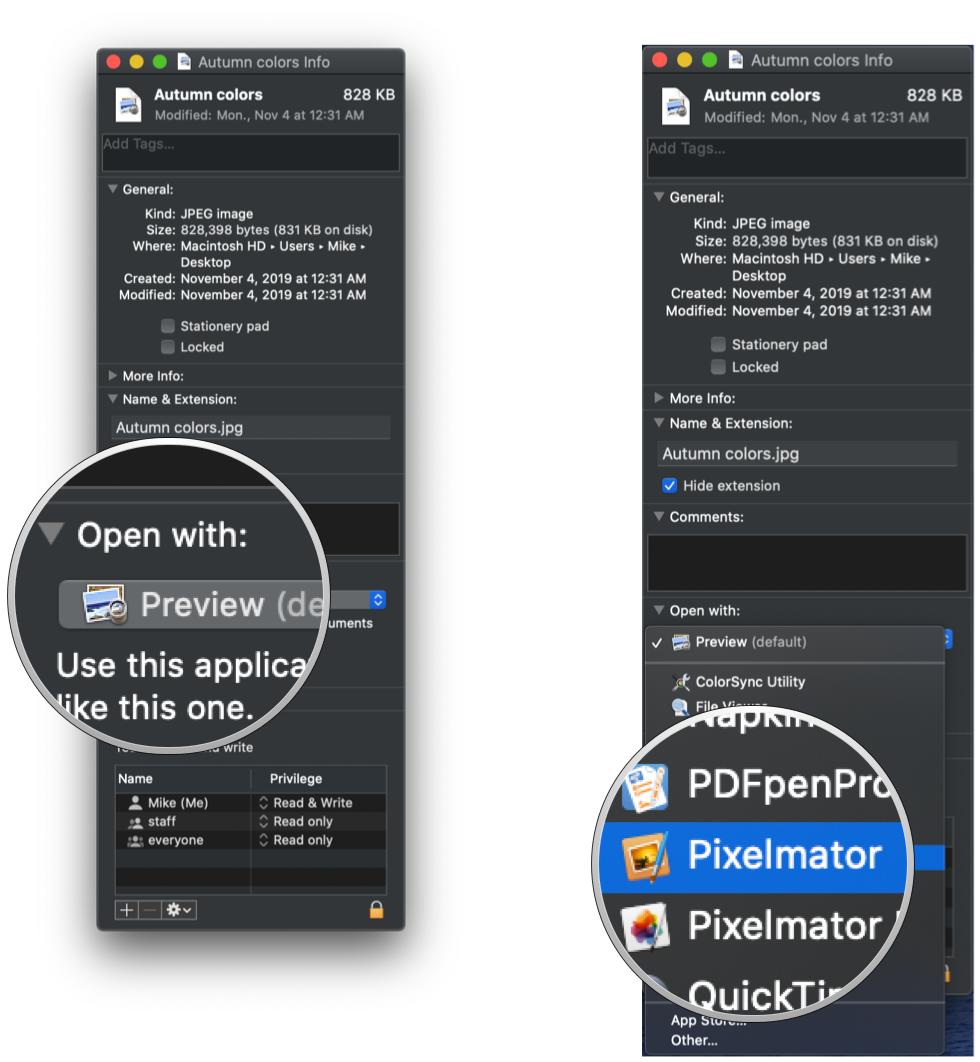
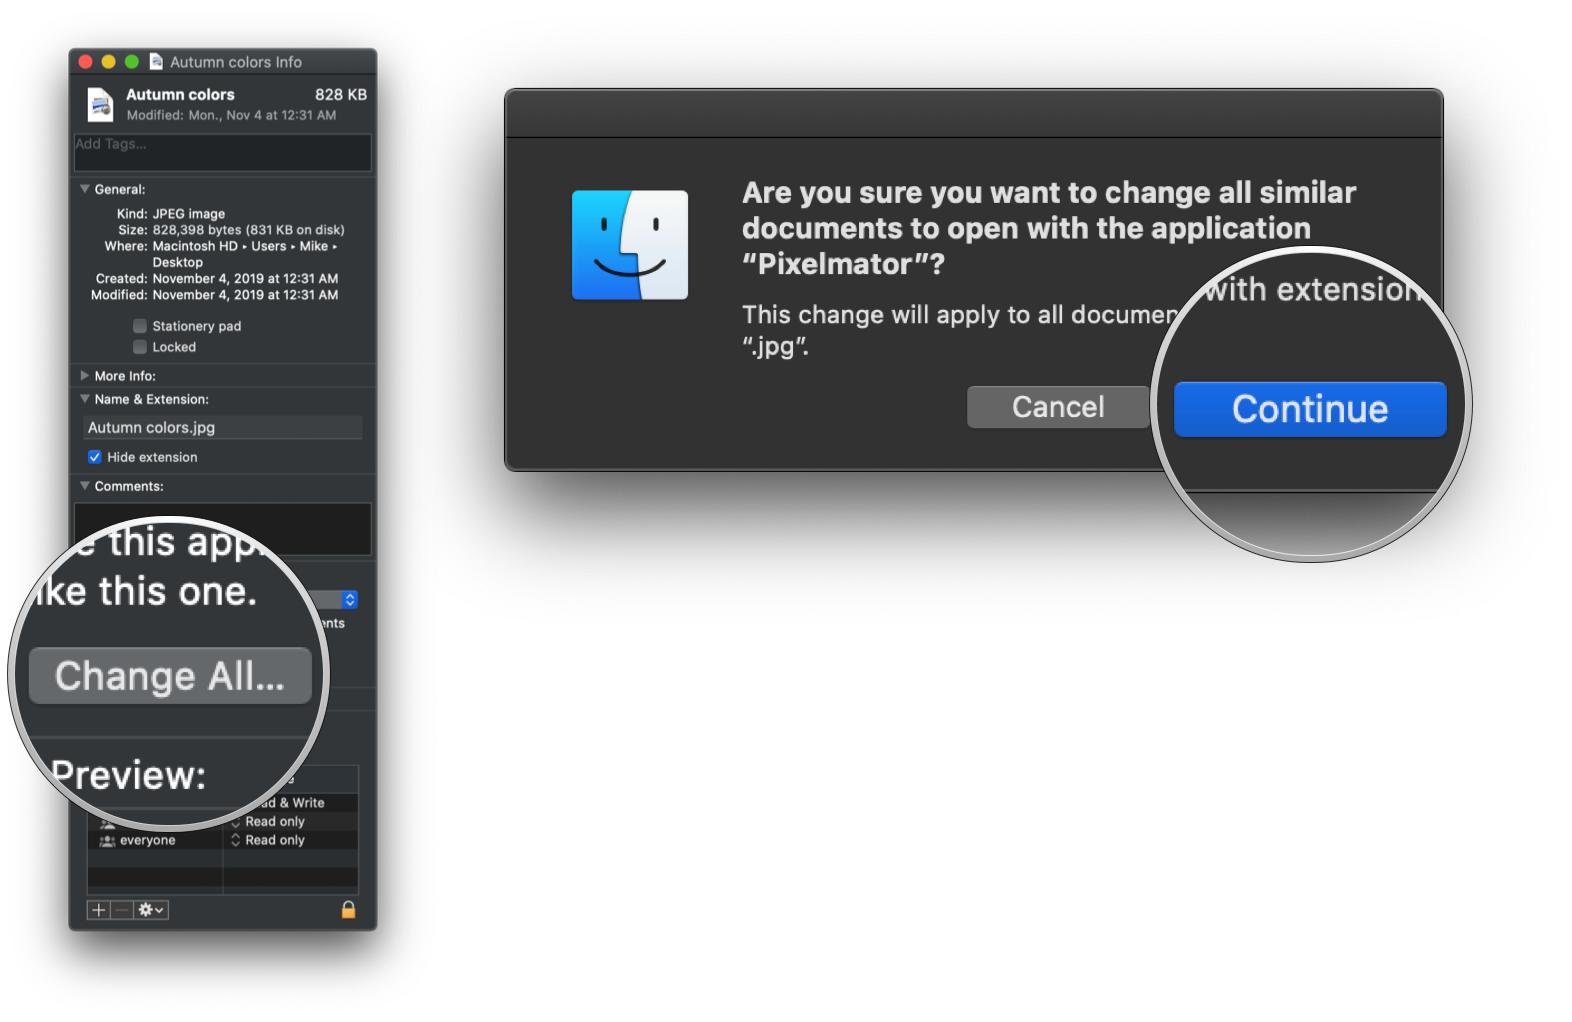
Each document is set to open with its default application. You can change this if you want...and make the change for all documents of that type. For instance, if you wanted your Mac to open all JPEG files with an image editing program on your Mac rather than with Preview, you can. Here's how to do it using Pixelmator, an image editing application, as an example.
- Under the Open With section, click the pop-up menu.
- Click Pixelmator.
- Click Change All....
- In the dialog box that appears, click Continue.
Get Info...with less clutter
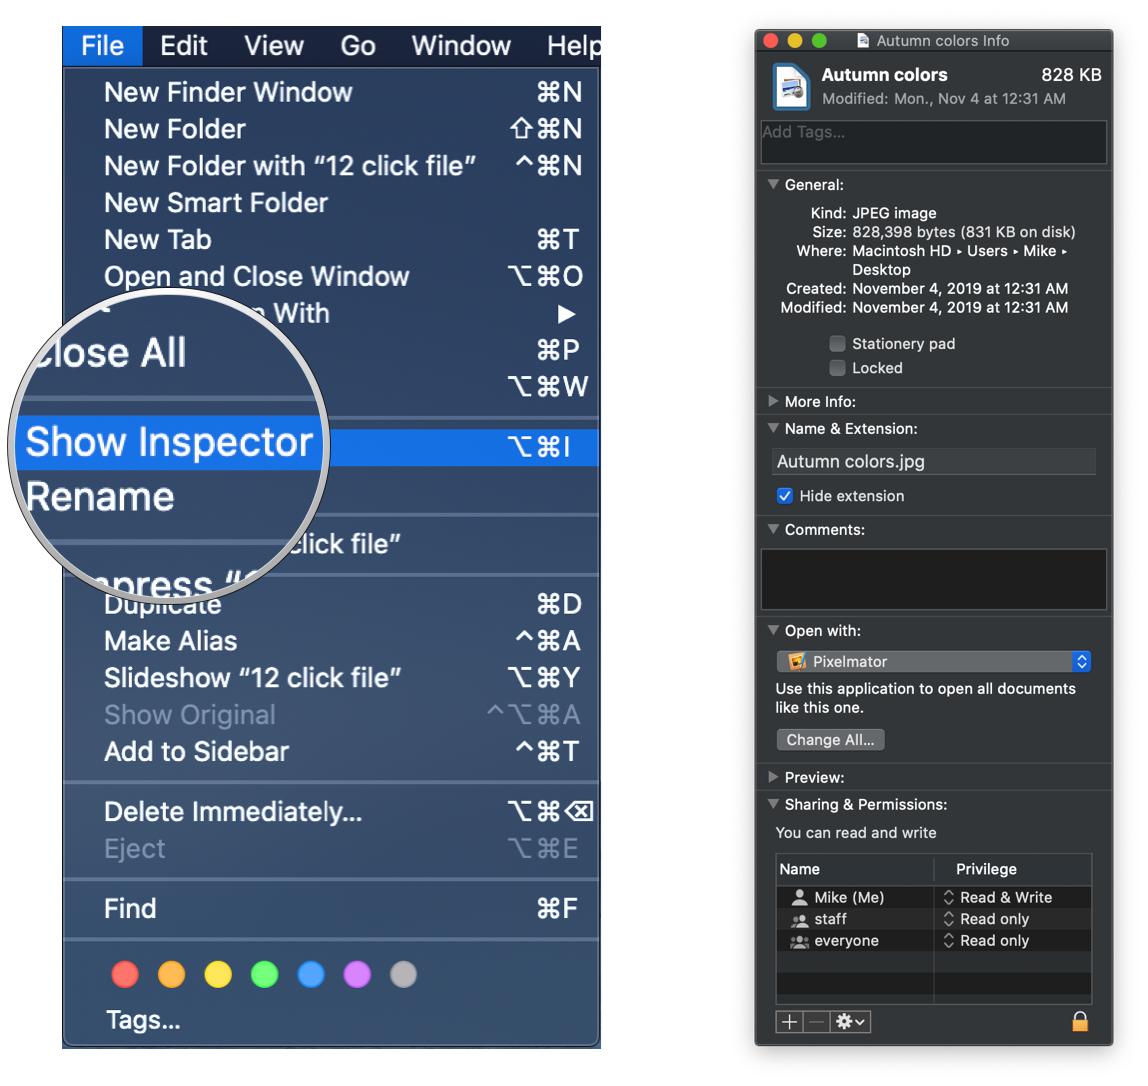
If you don't want Get info windows cluttering your screen, you can use the Inspector Panel instead.
- Click an item to select it.
- On your keyboard, hold down the option key and click the File Menu.
- Click Show Inspector.
Other than its slightly different title bar, the Inspector Panel is identical to a Get Info window. When the Inspector Panel is open, its contents will change when a different Finder icon is selected.
Oh, the places you'll go
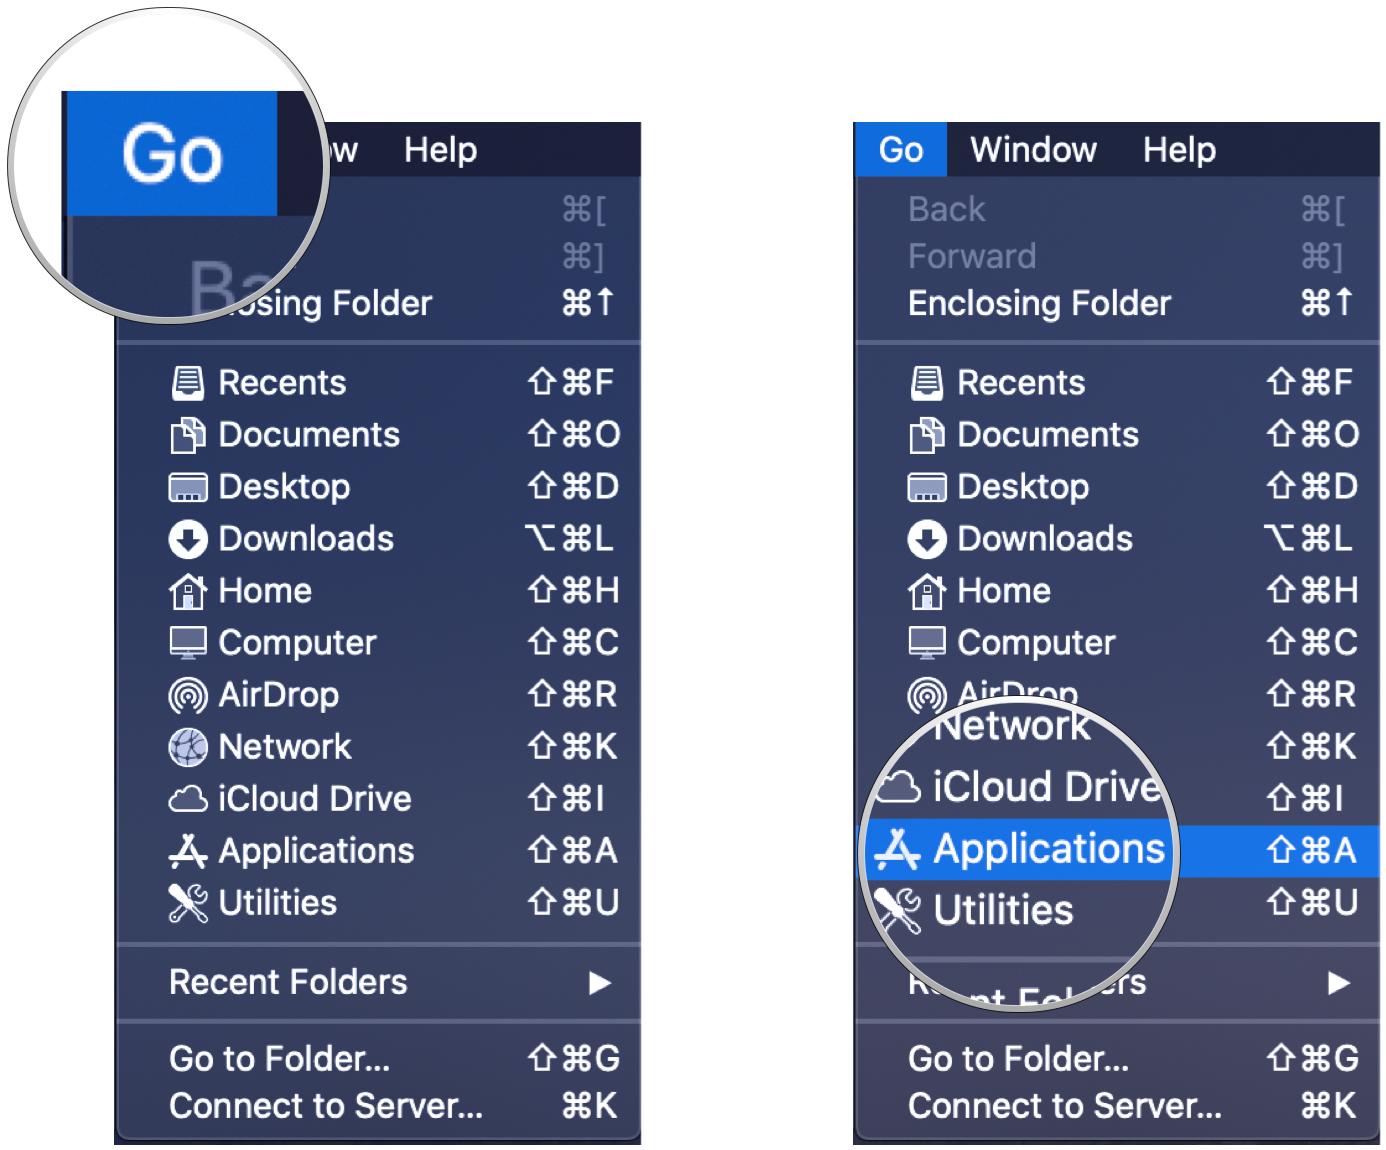
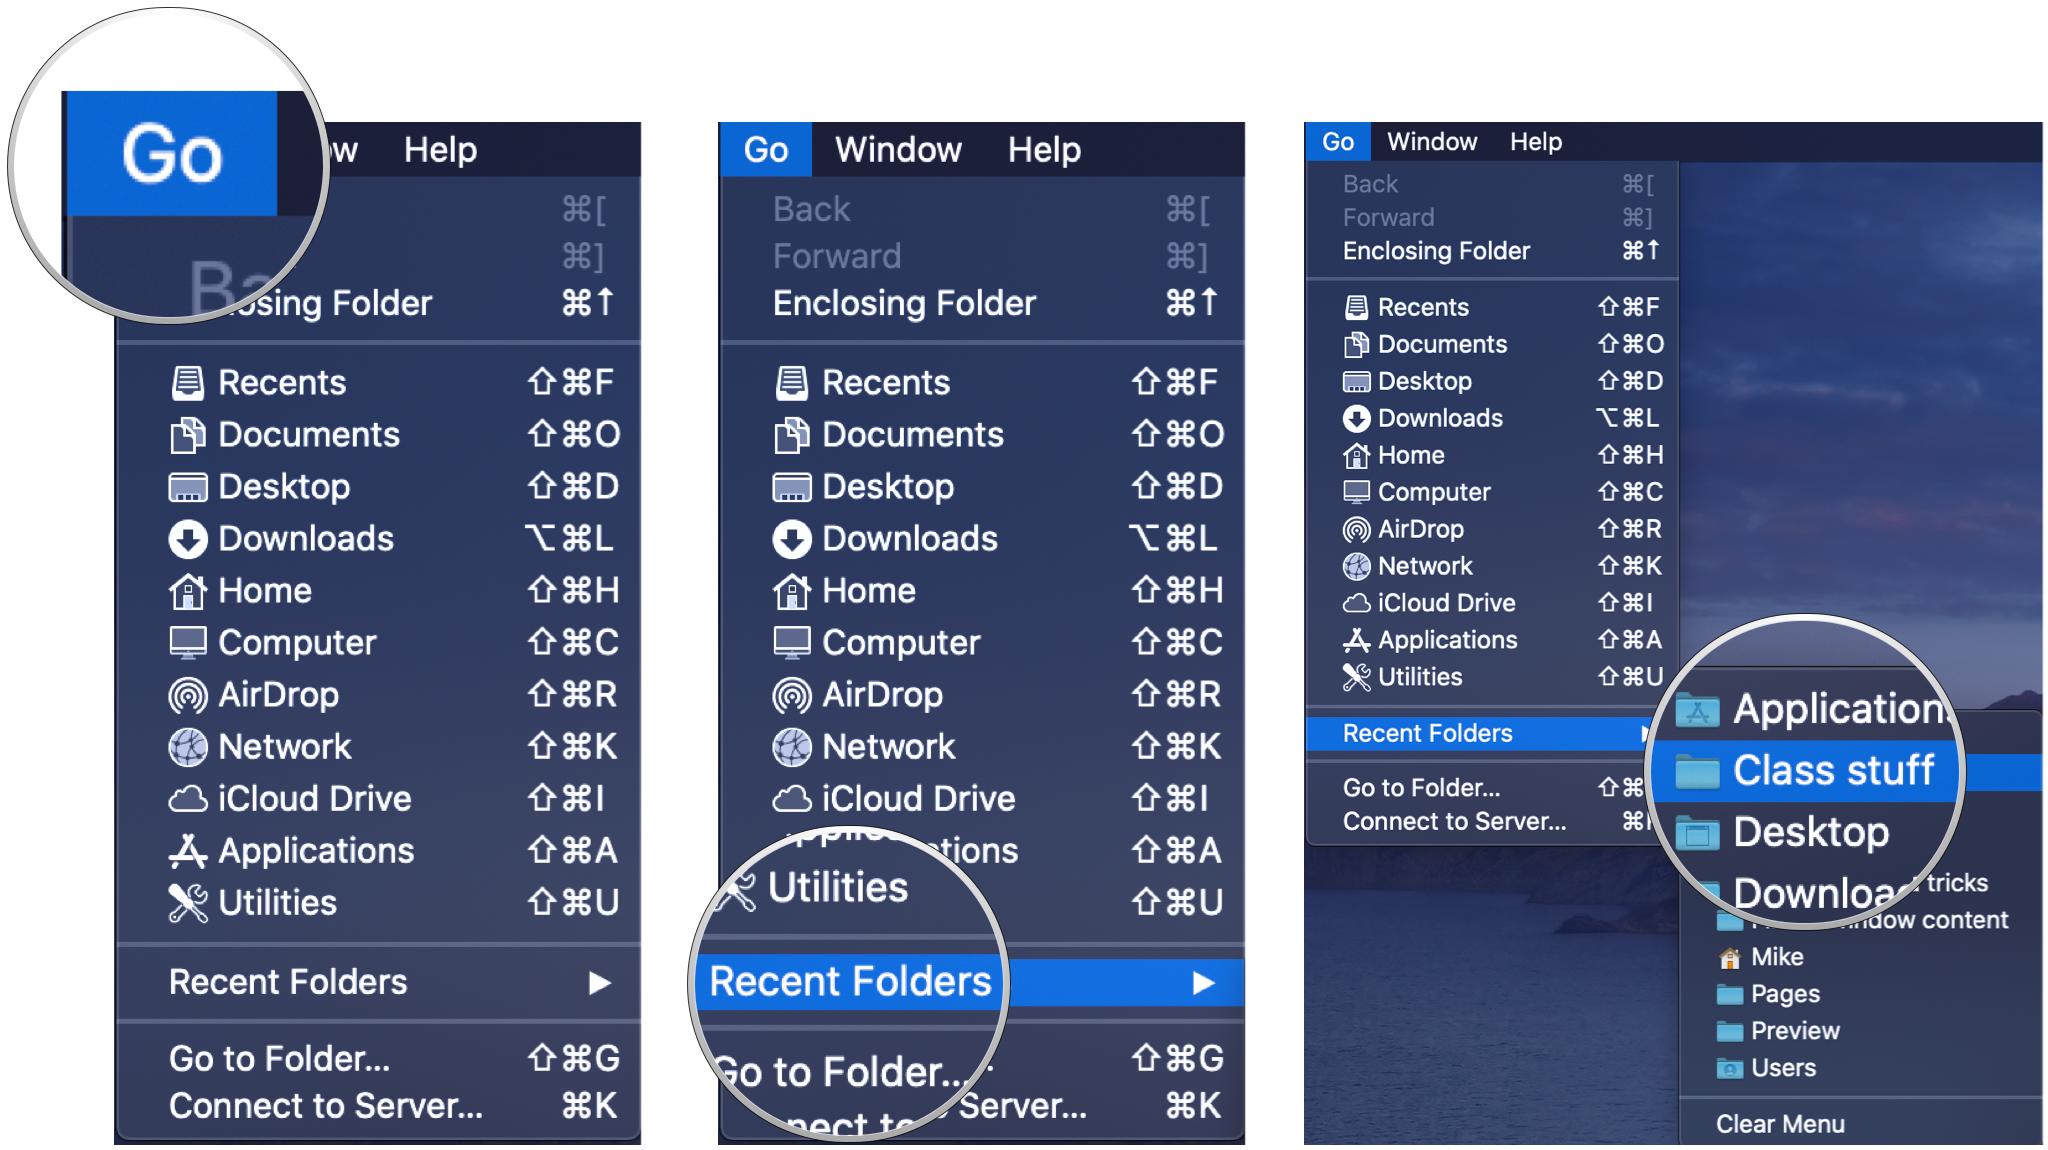
We know the benefits of a Finder window's Sidebar, but if a Finder window isn't open, you can get to those favorite places—such as the Applications folder—with the Go menu.
- Click the Go Menu
- Click Applications.
All well and good, but the Go menu also can give you access to a recent folder you opened, maybe even one opened a few days before.
- Click the Go Menu
- Click Recent Folders.
- Click a folder.
Quicker access to menus
We've all spent time moving the pointer from the bottom half of the screen all the way to the top to access various menu commands. And the bigger the screen, the longer the move.
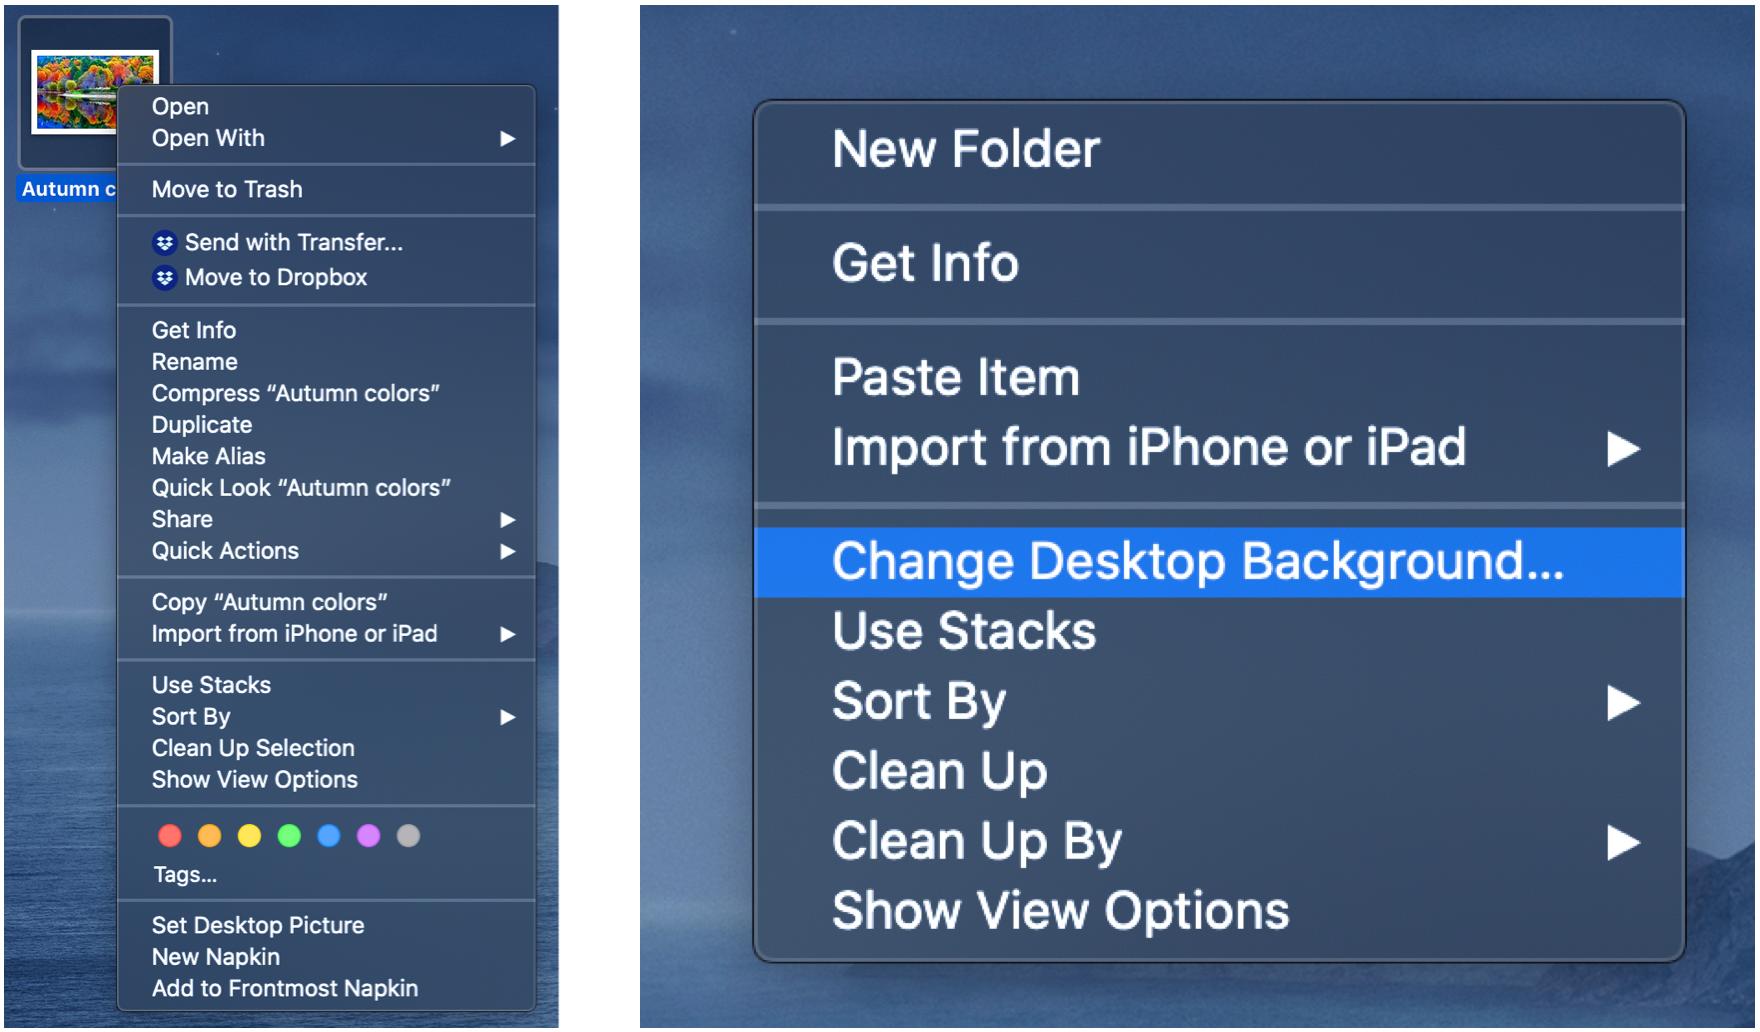
The Finder—like every program on the Mac—makes use of shortcut menus that offer commands that are relevant to the item that is selected. Pretty much every mouse and trackpad can be programmed to take advantage of this "secondary click". Here's how to enable it on Apple's trackpad:
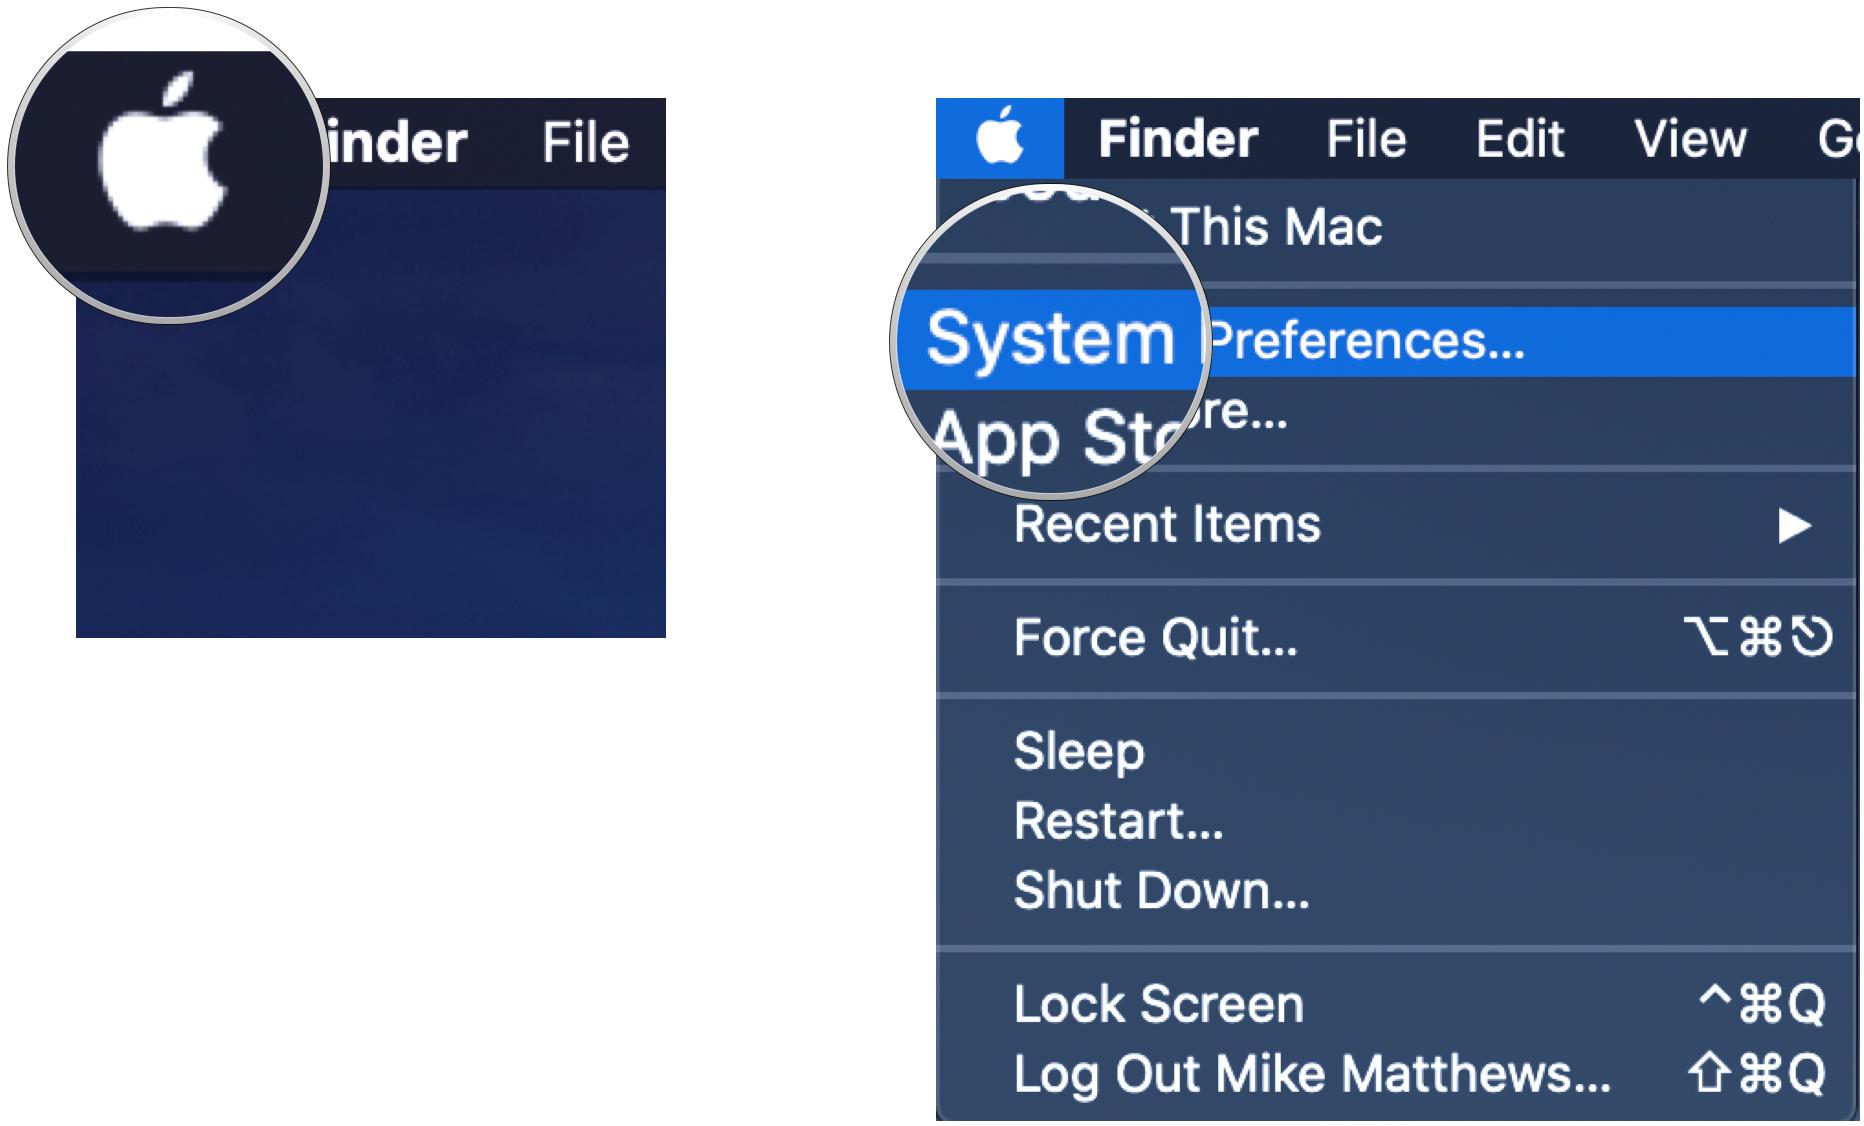
- Click the Apple Menu.
- Click System Preferences.
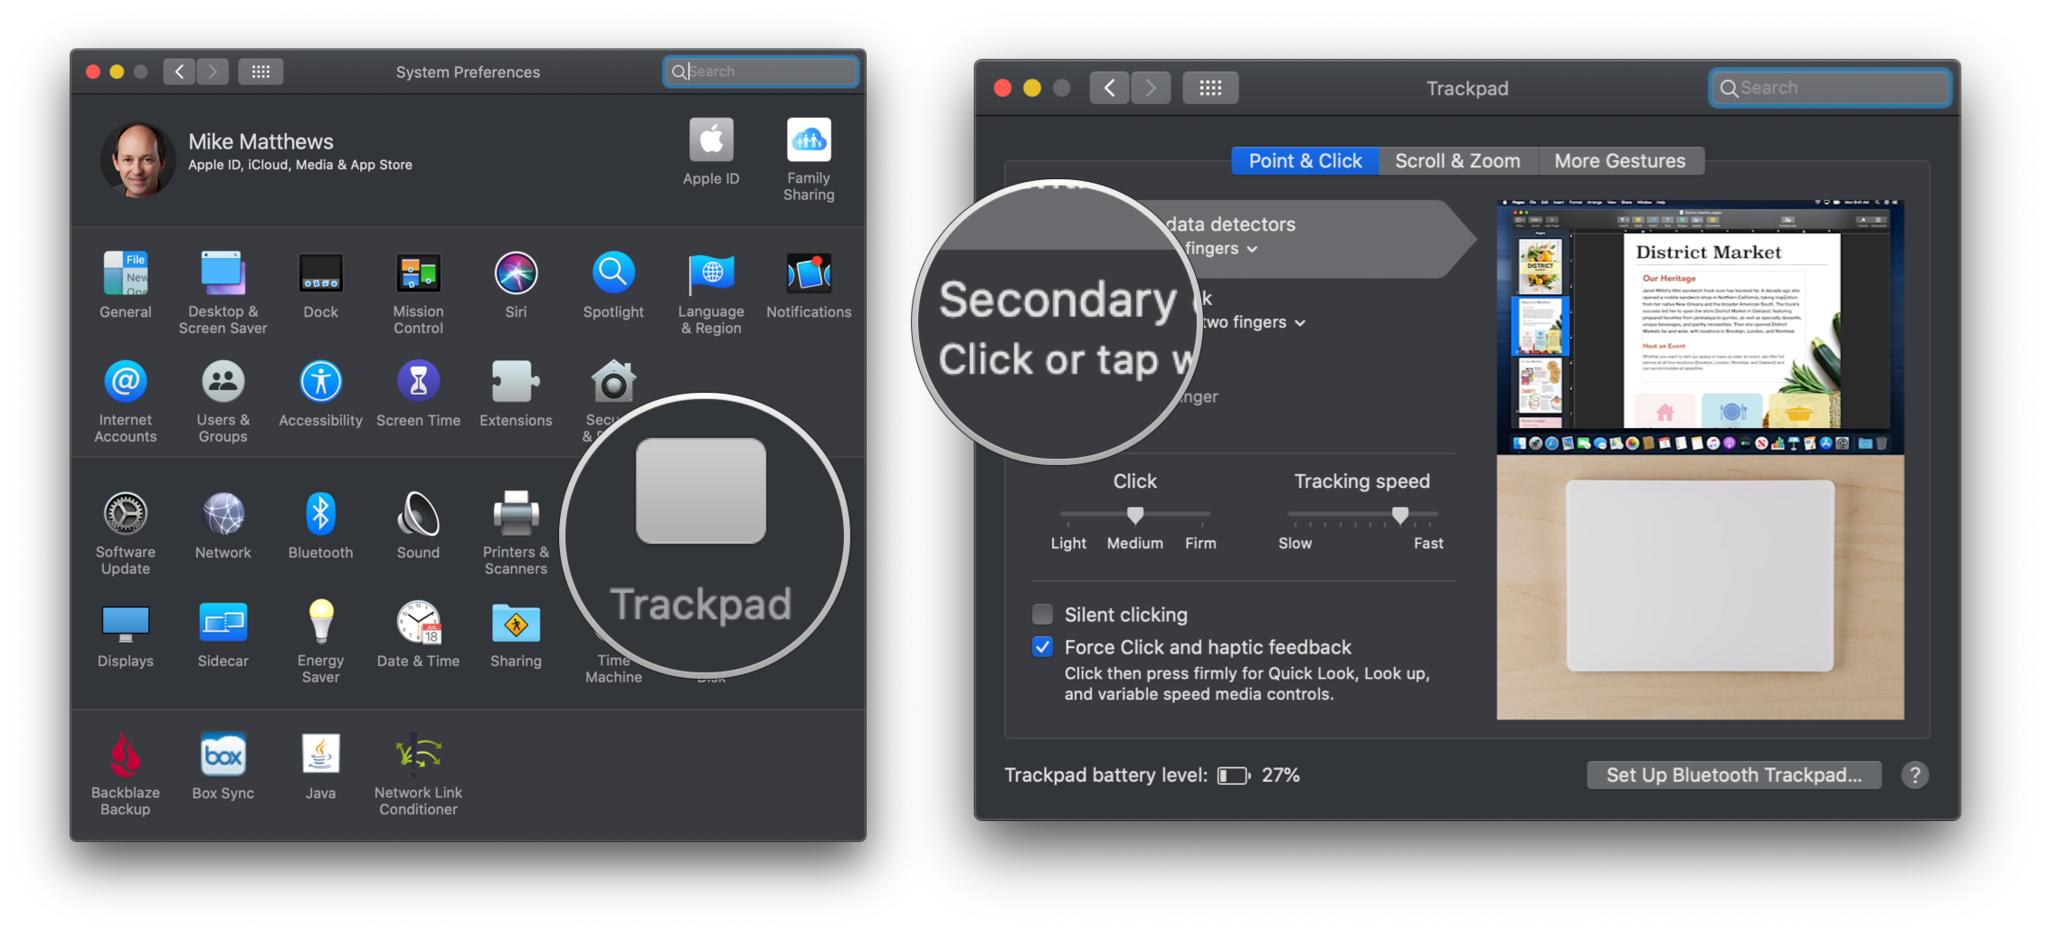
- Click Trackpad.
- Click Point & Click.
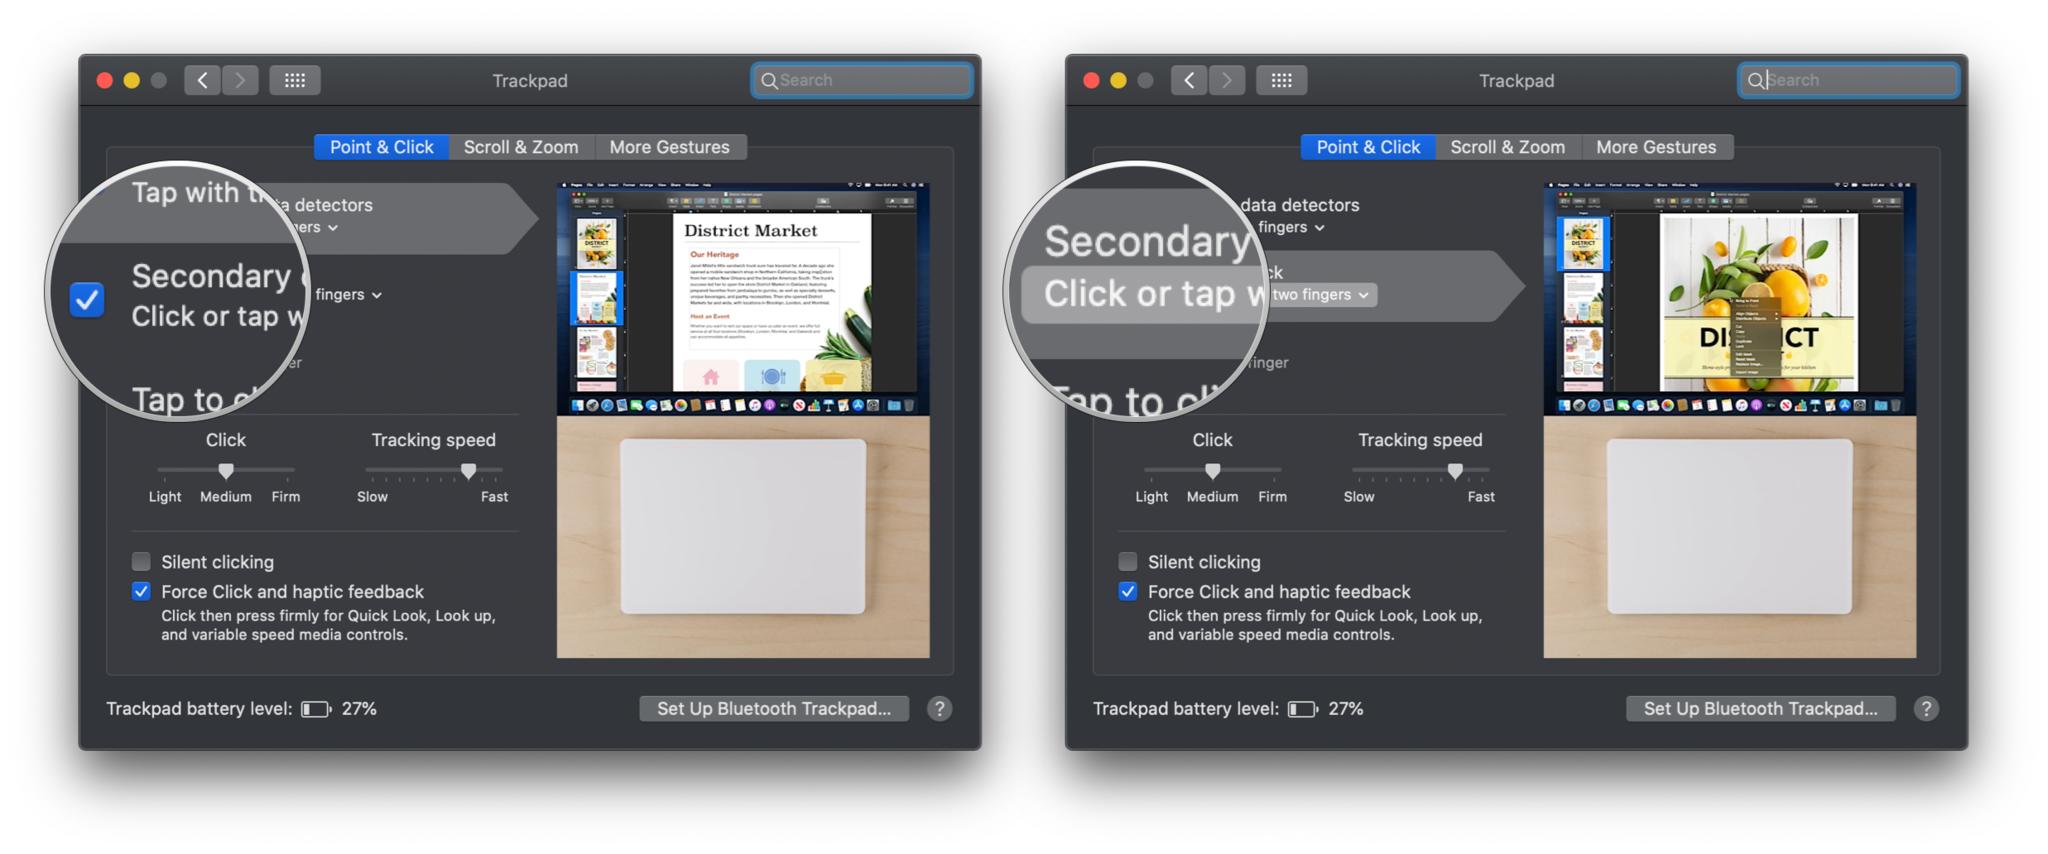
- Check the box for Secondary click
- Click the drop-down menu to pick a gesture to activate a secondary click.
Now, when you secondary-click an item, a shortcut menu will appear with commands that are relevant to that item.
Even quicker access to menus
Getting even quicker access to menus involves not even opening a menu. Using just the keyboard, you can execute many commands by using these modifier keys:
⌘ Command
⌥ Option
⇧ Shift
ˆ Control
⇪ Caps Lock
fn Function
The symbols on the right end of menus are called keyboard shortcuts. Holding down these modifier keys in conjunction with another key on the keyboard has the effect of choosing that command from the menu.
For example, you can go to the Applications folder by holding down the shift, command, and A keys on the keyboard. You can close the active window by holding down the command and W keys. You can select all icons in a window by holding down the command and A keys.
Apple publishes a wide-ranging list of common keyboard shortcuts, including a batch for the Finder and system.
Quick Look
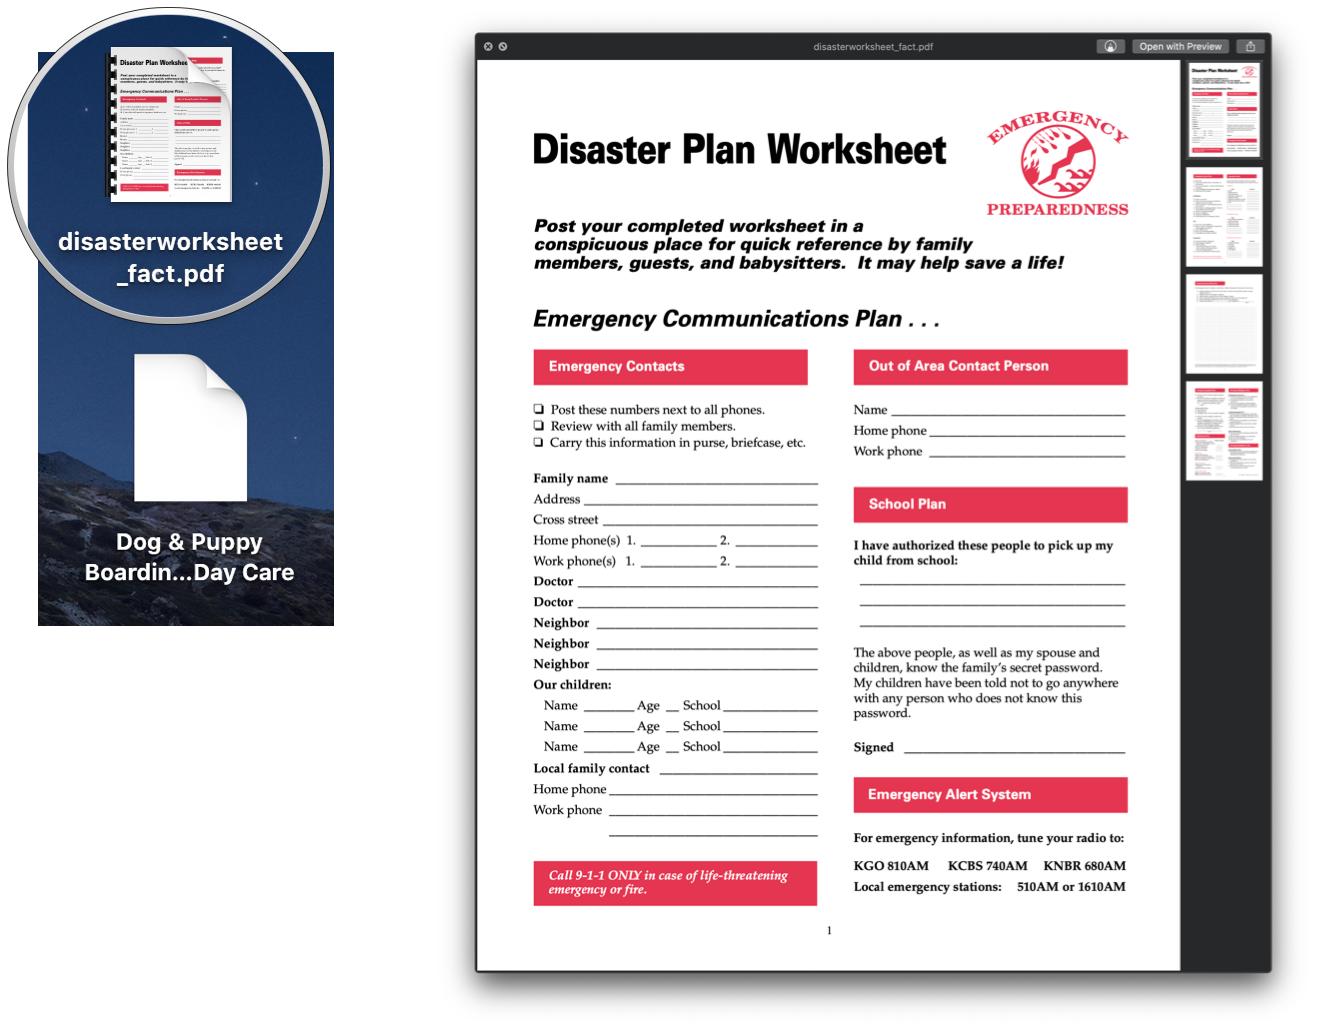
Do you have a raft of icons on your desktop and you either don't remember or can't tell what they are? You could open them up, but it looks like they might have been created with a bunch of different applications, and who has the time to wait for a bunch apps to launch?
Enter Quick Look.
You could use menu commands to peek into the contents of a document for a closer look. But here's the power-user move:
- Click an icon for a document.
- Press the space bar.
Multi-page documents have a series of thumbnails you can click to navigate your way through the document. Depending on the type of document you're quick-looking at, you might have the option to markup the document, share it with others, or open the document in its native application.
Tabs as destinations
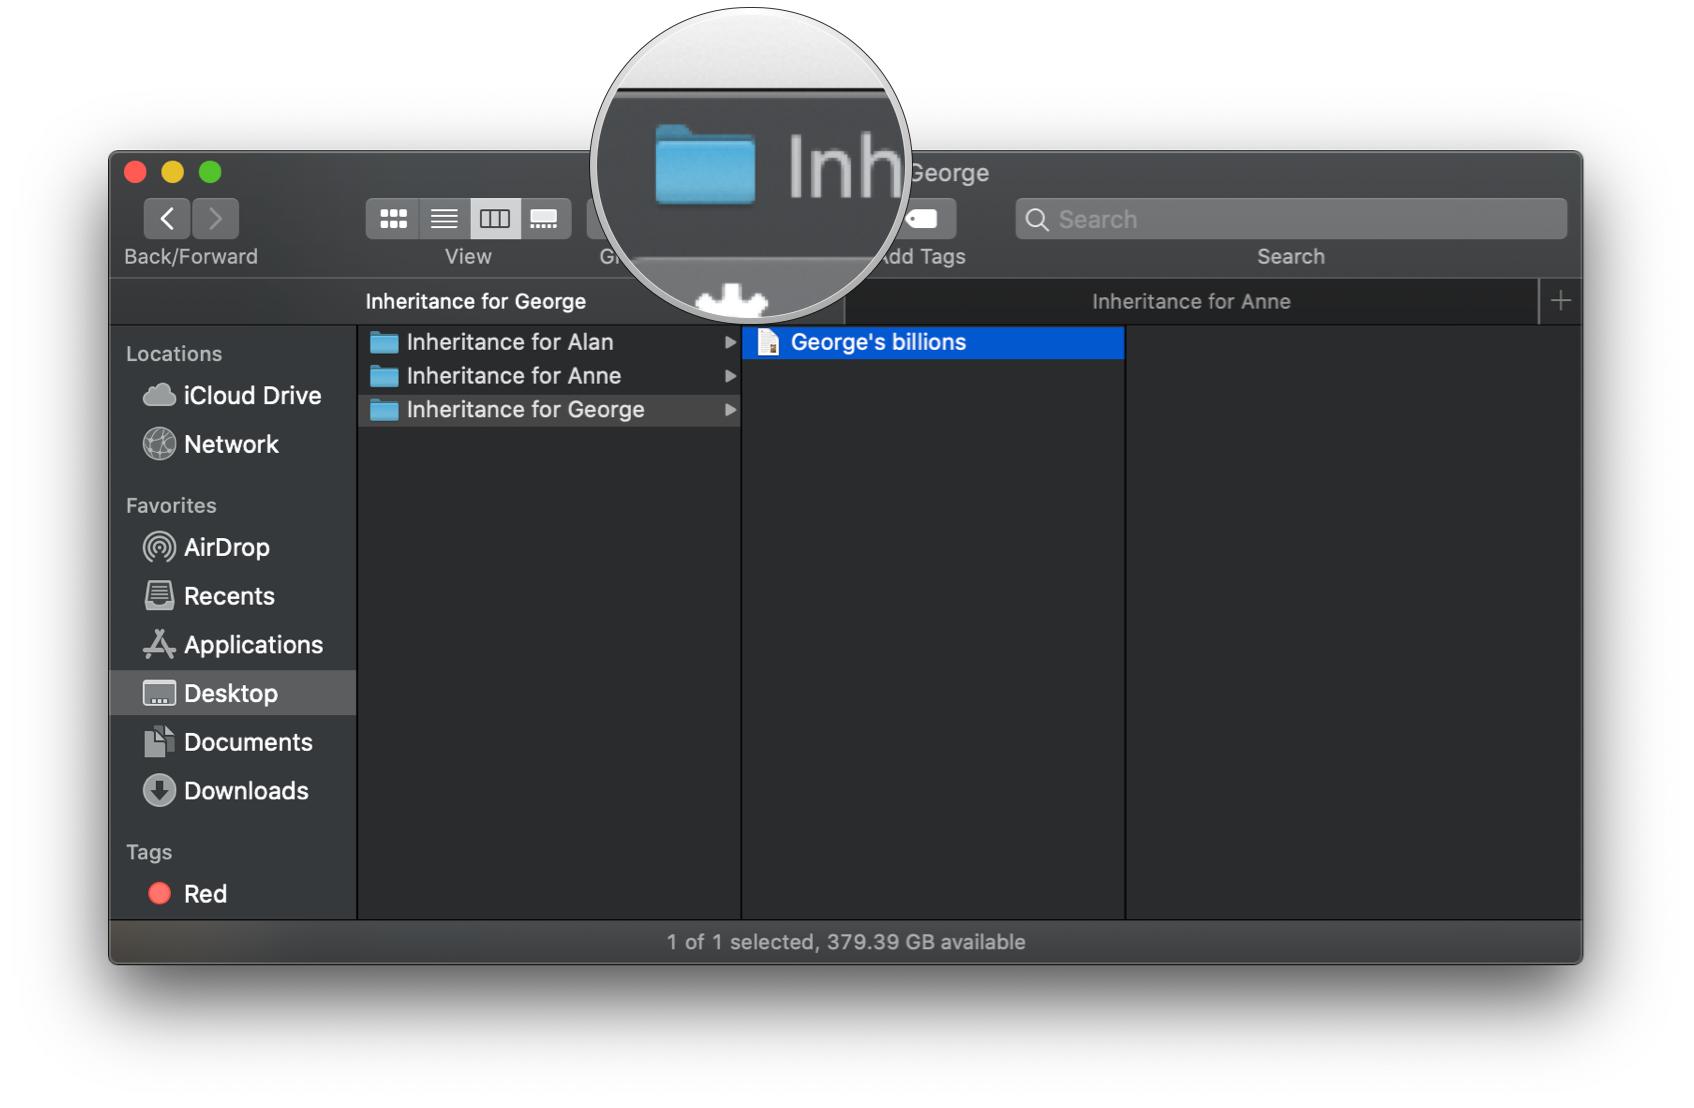
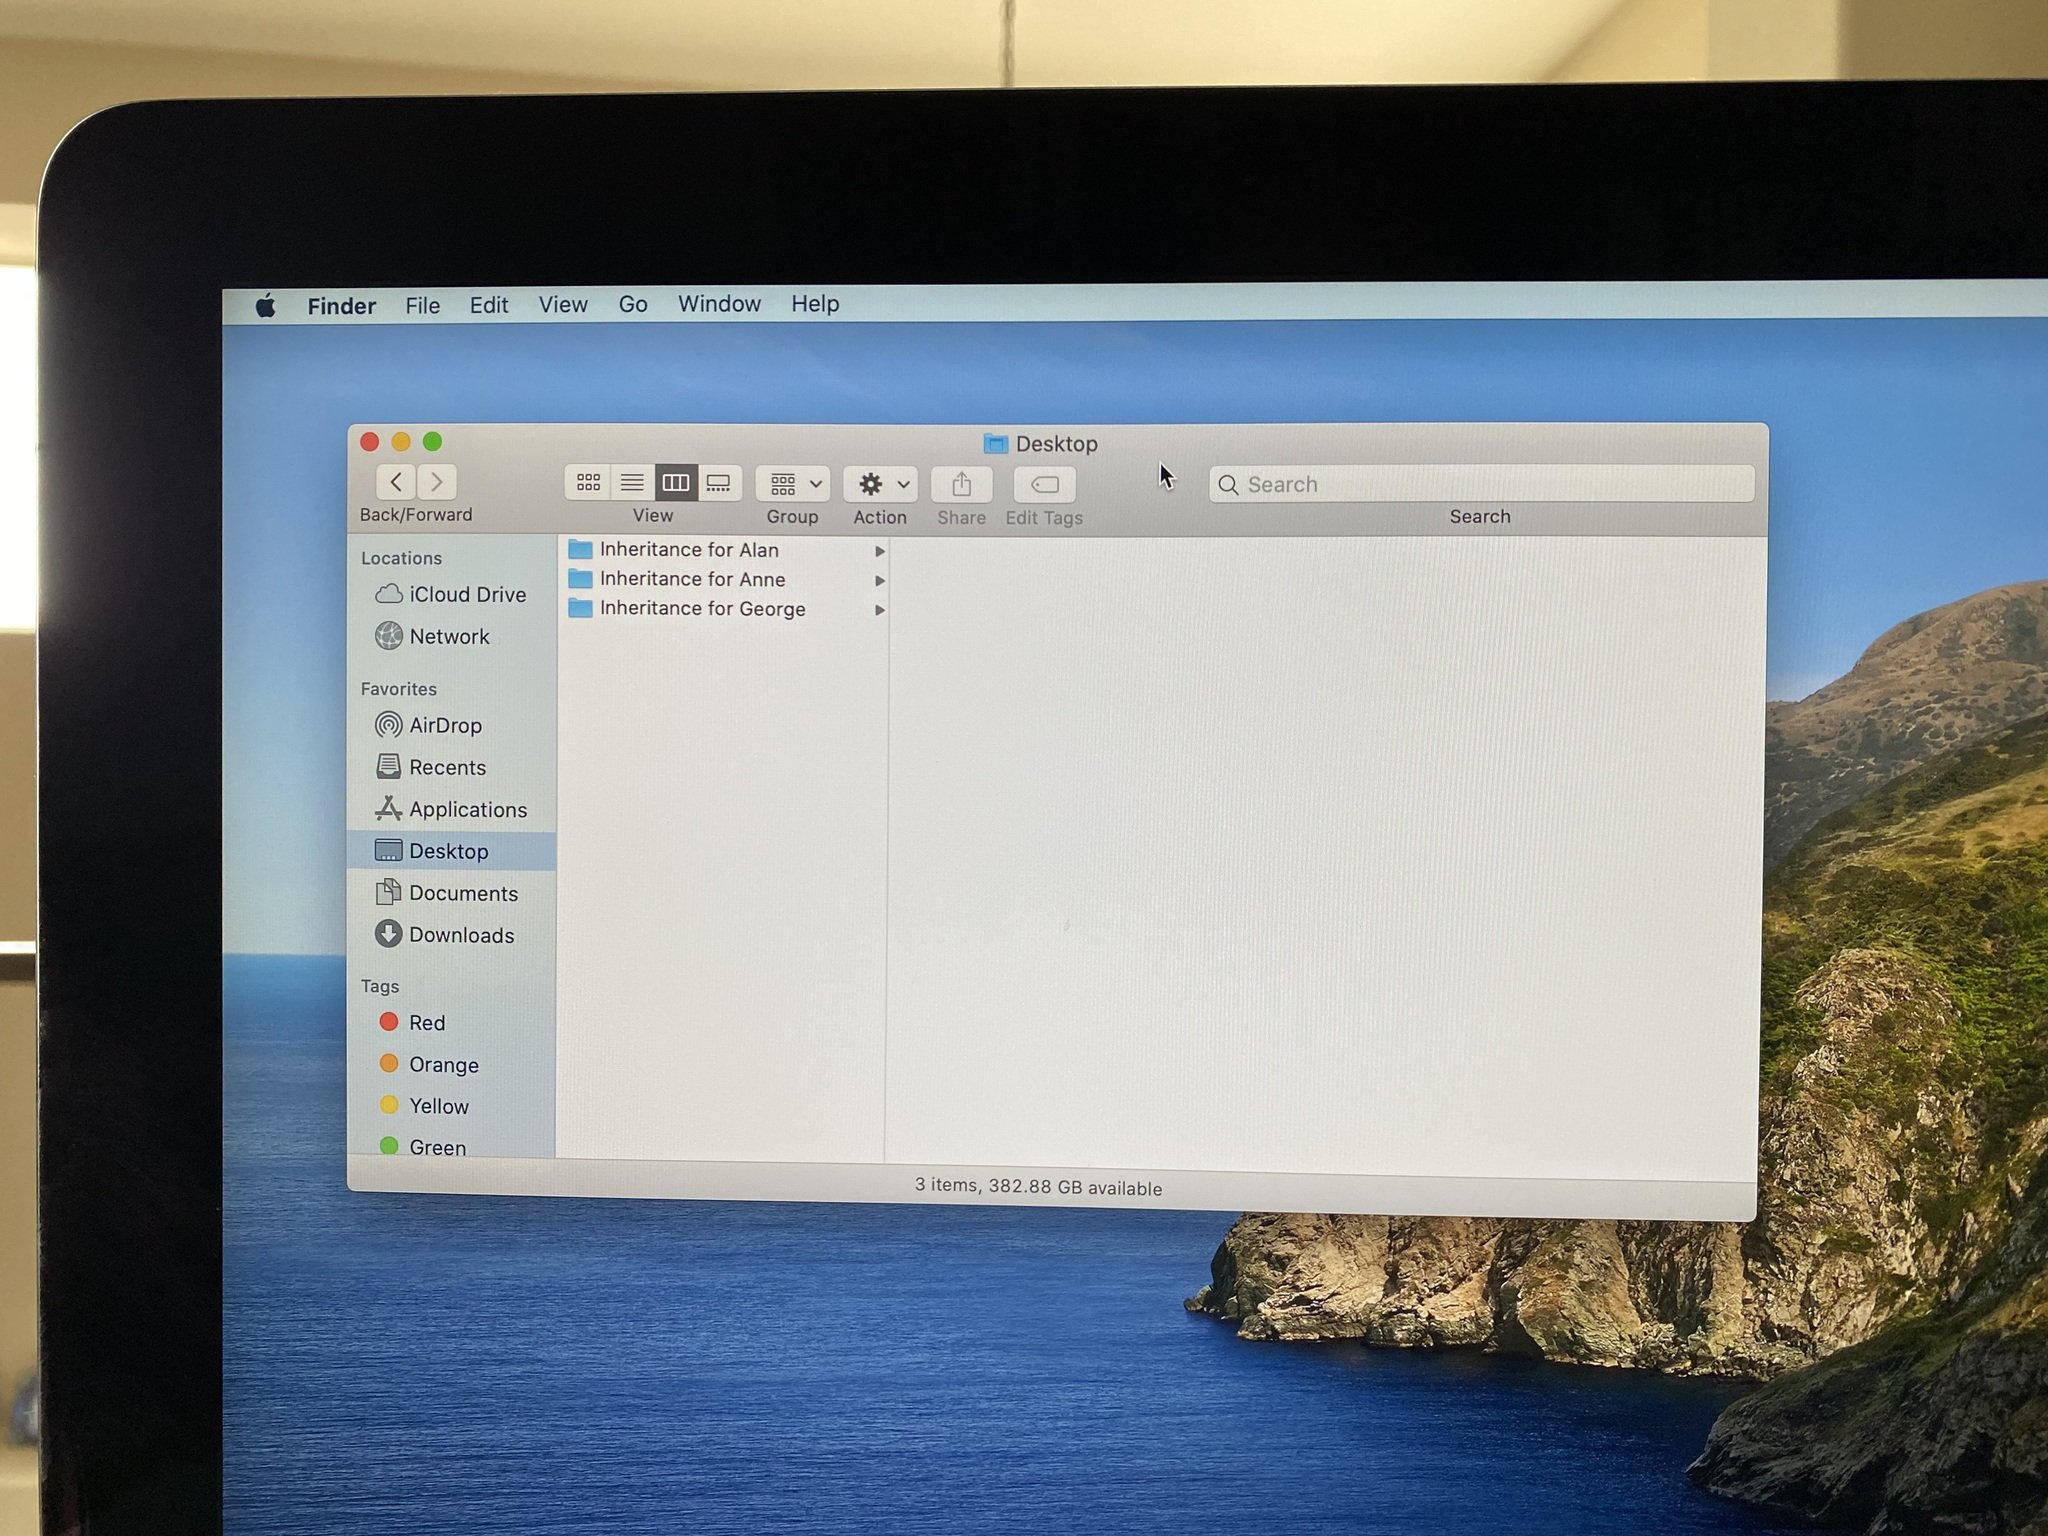
We already know that tabs are a great way to reduce window clutter. But they can do more than that—they can serve as a landing spot when dragging icons around in the Finder. Here's how to do it.
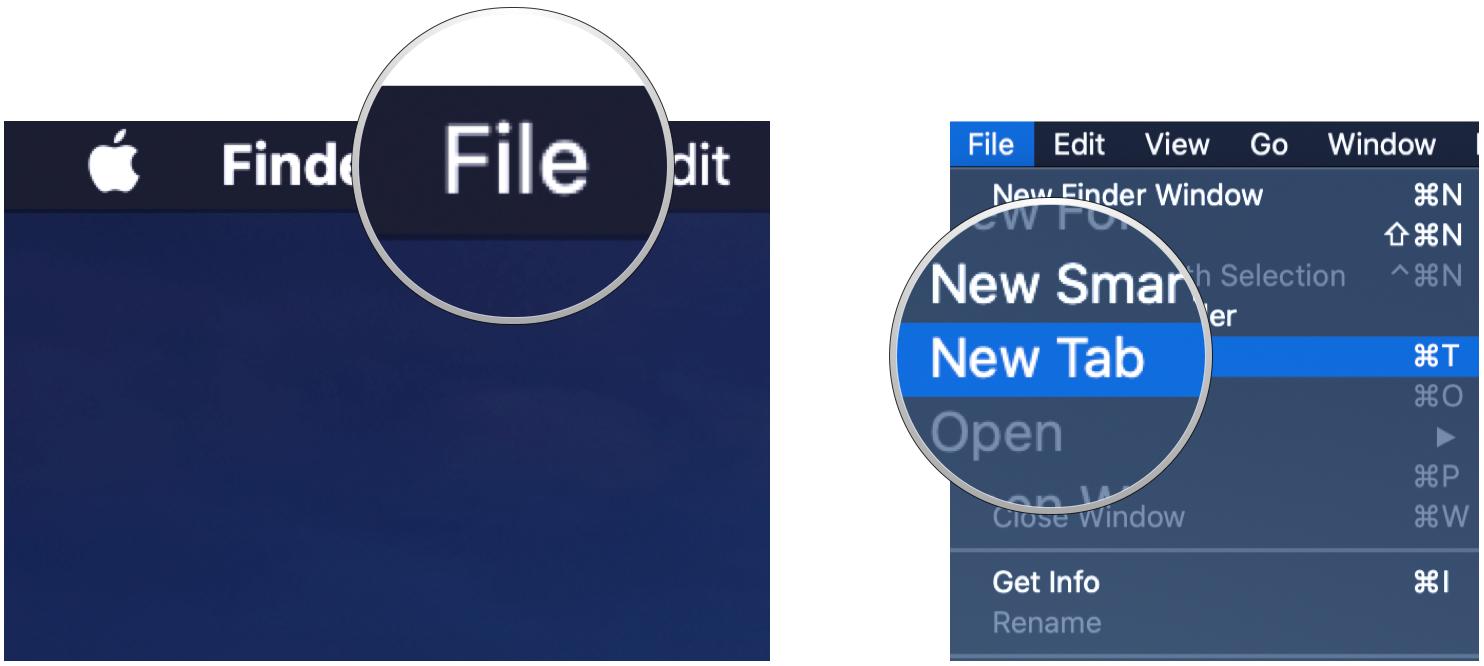
- Click the File Menu.
- Click New Tab.
- Select a folder.
- Click the New Tab button to make a second tab.
- Select the folder where you plan to drop an item.
- Click on the first tab.
- Drag the item you want to move onto the second tab.
And, voilà, you've just taken the first step to deprive George of his inheritance.
Proxy icon
See this little guy...?
It's much more than just ornamental. It actually has a function, and a name: proxy icon. You can perform actions with the proxy icon, just as if you were using the actual Finder icon it represents. You'll also find proxy icons in the title bar of documents for many apps. Here are a few examples to help you put proxy icons to work.
Move a file
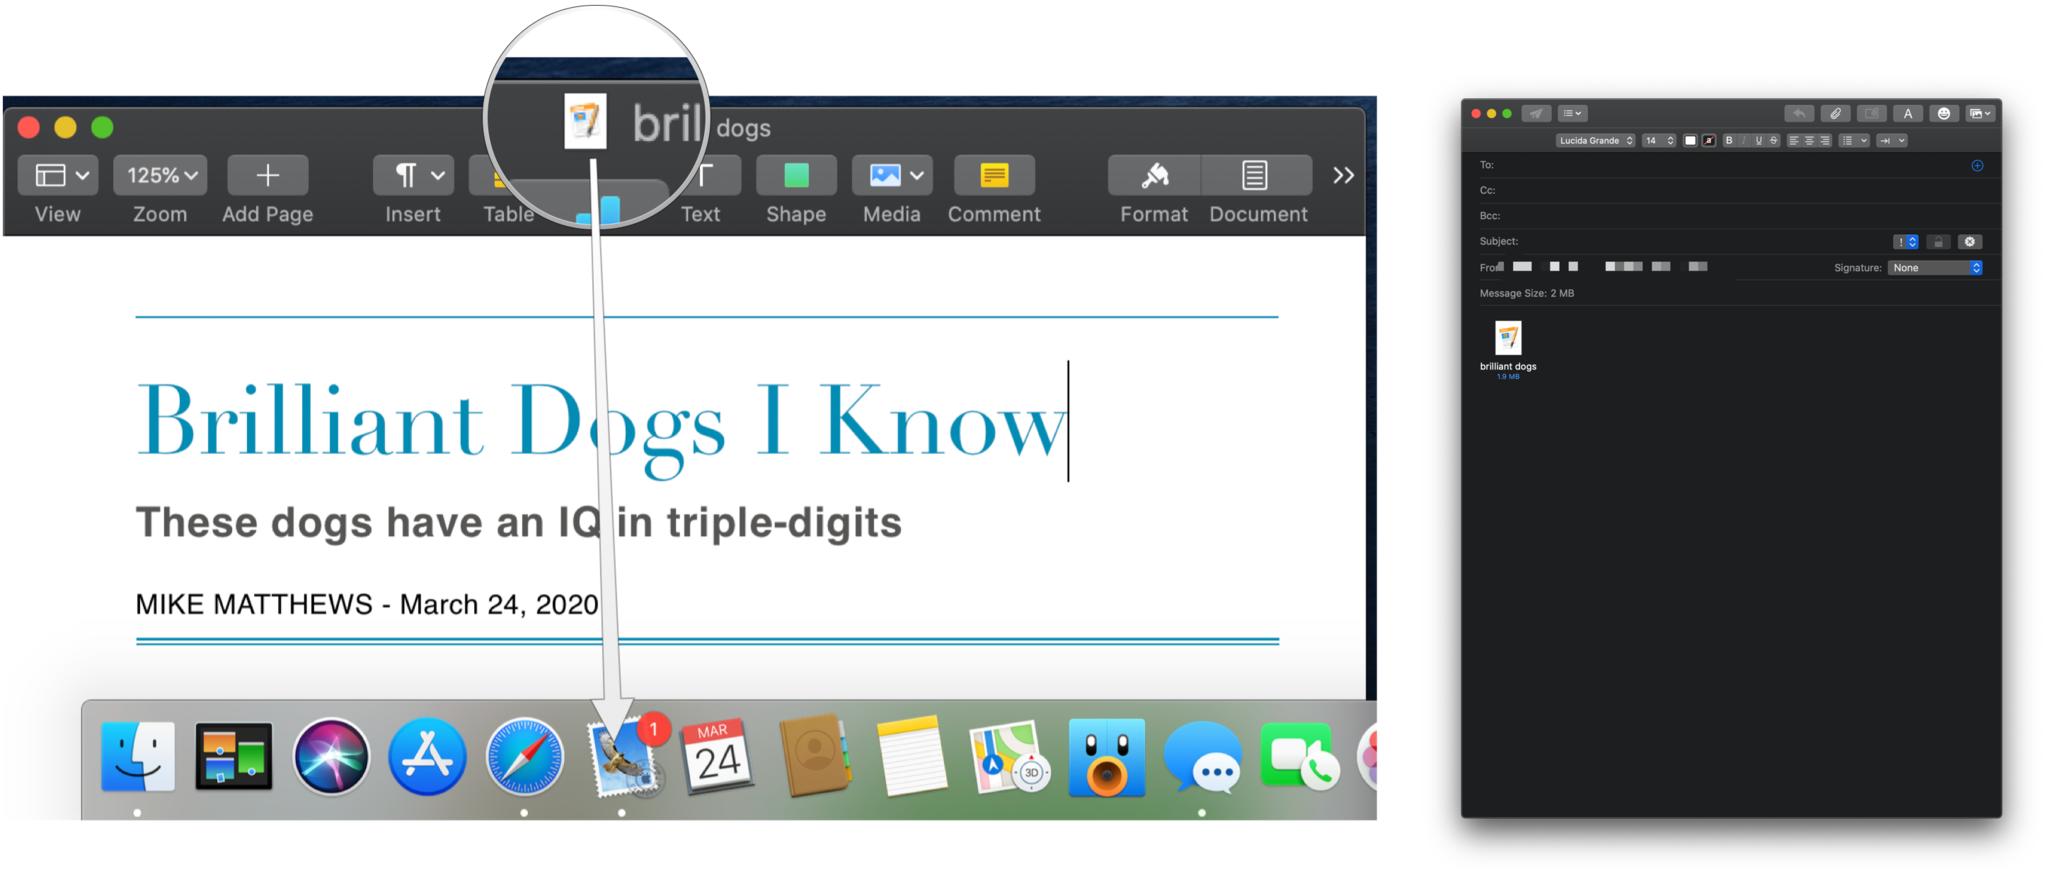
Imagine you were working on a Pages document that was buried somewhere deep in a folder on your hard drive, and you wanted to bring it to the desktop. Rather than dig through layers and layers of folders, just use the proxy icon.
- Drag the proxy icon to the desktop.
Email a file
You've just finished your million-dollar manuscript and saved it to your Mac. Now you need to send it off to your agent so he can sell it and get his 20 percent. Here's a quick way to get it to him.
- Drag the proxy icon onto the Mail app icon in the dock.
A new mail message will open, with your document automatically attached. Address it, add any additional text to the body, and send it. This trick also works for the proxy icon of a folder.
Open enclosing folders
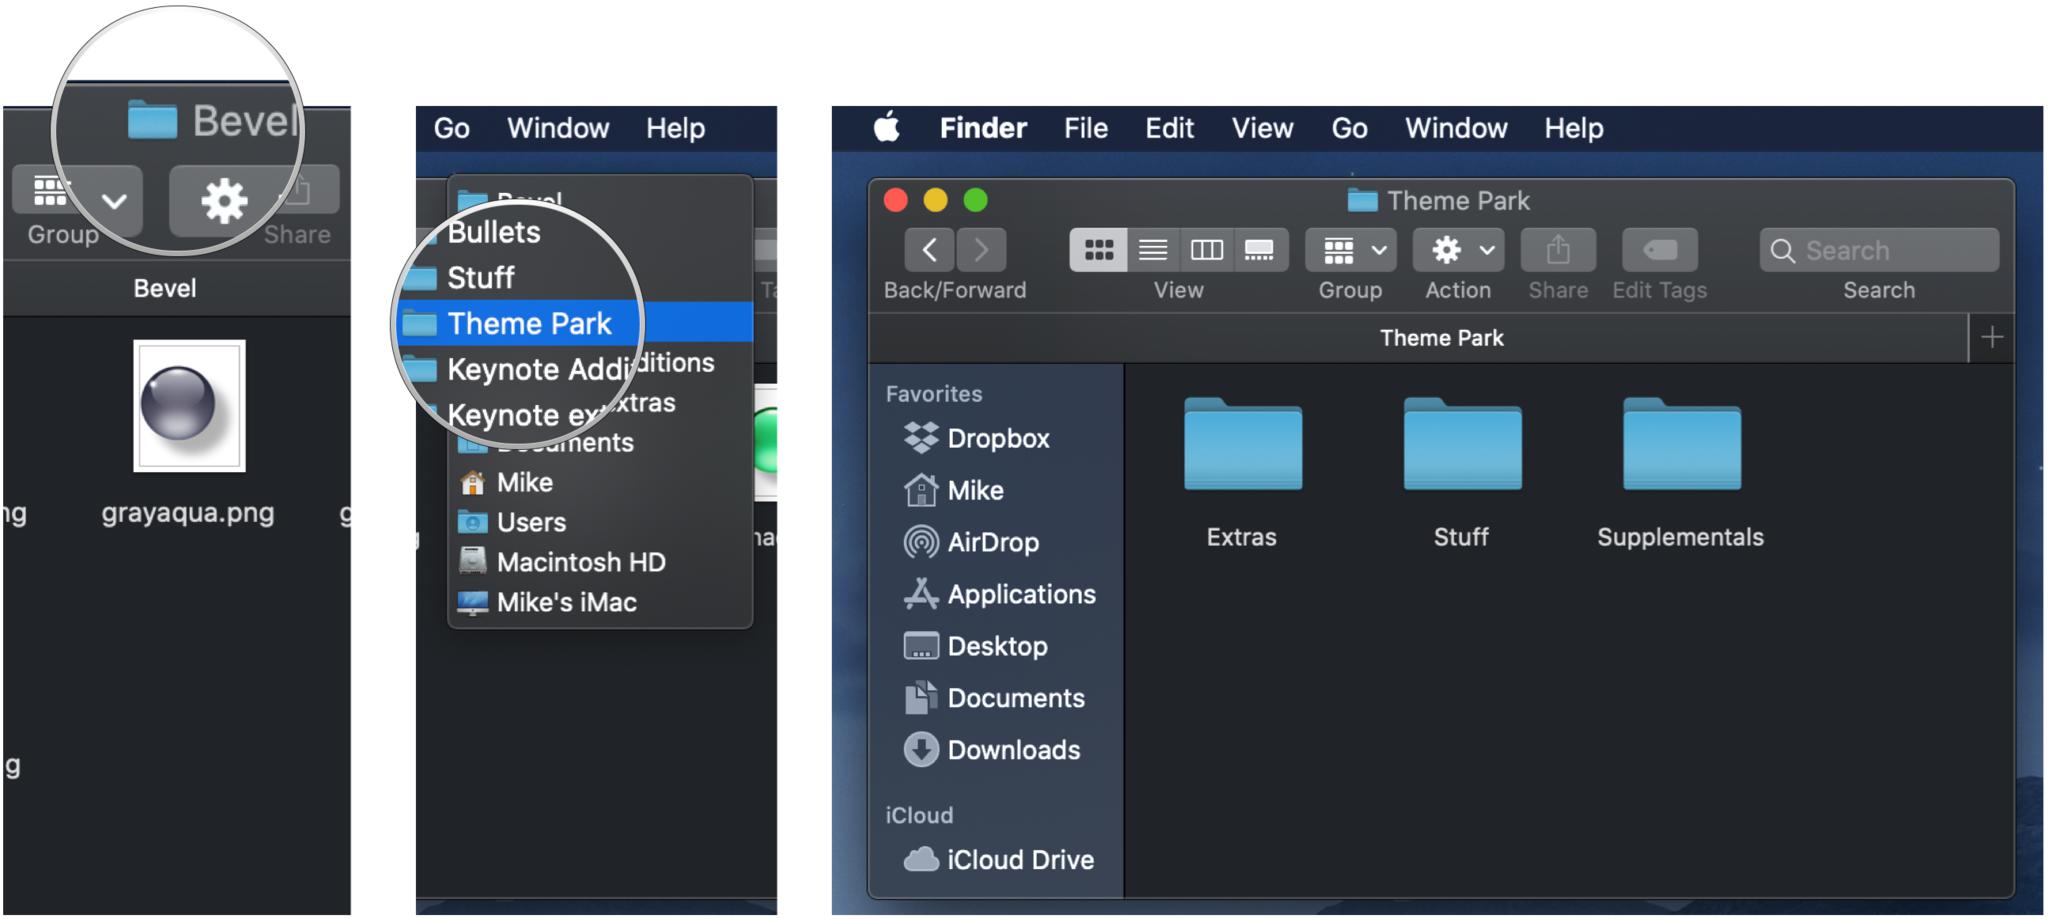
Eagle-eyed readers may have noticed the command to open the enclosing folder in the Finder's Go menu. But the proxy icon goes one (or more levels) better. To see the full path to a folder or file's location, do this:
- Hold down the command key and click the proxy icon.
- Click an enclosing folder in the pop-up menu to switch to it.
What's your favorite?
We've barely scratched the surface with this article. What's your favorite way to speed up working with the Finder? Share it in the comments below.
Mike Matthews is a writer at iMore.com. He has used Apple products all the way back to the Apple II+. He appreciates no longer having to launch apps by loading them from a cassette tape recorder.
