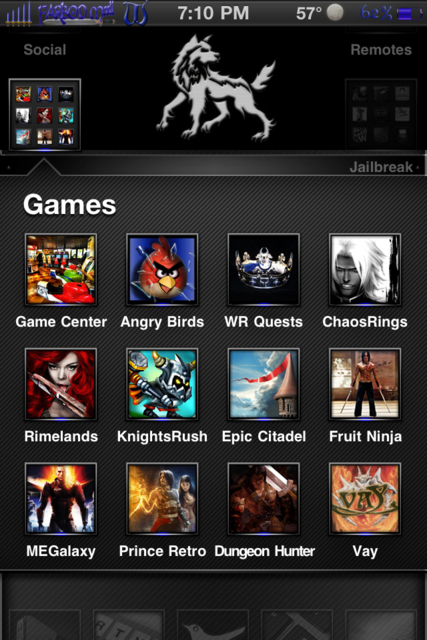
Ever hated an iPhone, iPod touch, or iPad app icon and wondered how you could change it, or gotten tired of a low-res icon on your gorgeous Retina Display and wished you could set up something custom? Well if you're jailbroken and running Winterboard, you can. We'll show you how after the break!
Winterboard lets you customize many aspects of your iPhone and iPad's appearance, including custom icons. Custom icons will not replace the actual image files and can be turned on and off through Winterboard. As icons are usually part of a theme, you should know that only icons for apps purchased through the App Store are automatically skinned by most themes. iOS apps such as Photos, Compass, Settings, etc. will not be automatically skinned and must be specially done for each theme. All jailbreak apps (apps from Cydia) will likewise not not be auto-skinned and must be made to fit your theme if that is what you are trying to accomplish.
Before we get started you will need to SSH into your phone and have Winterboard installed. SBSettings and iFile are greatly recommended but not absolutely necessary.
Creating Your Theme
- Go to: /private/var/stash/Themes
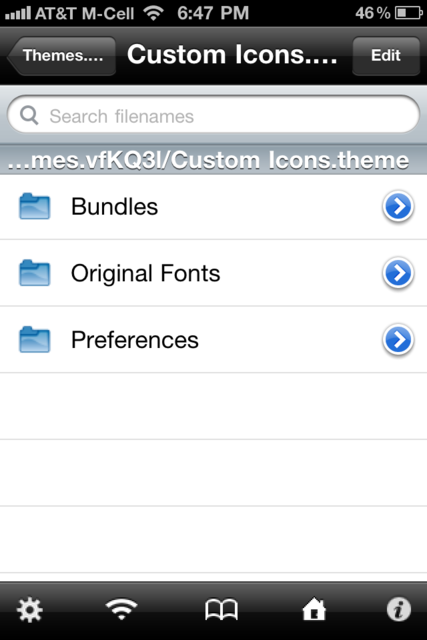
- Create a Folder labeled "Custom Icons.theme"
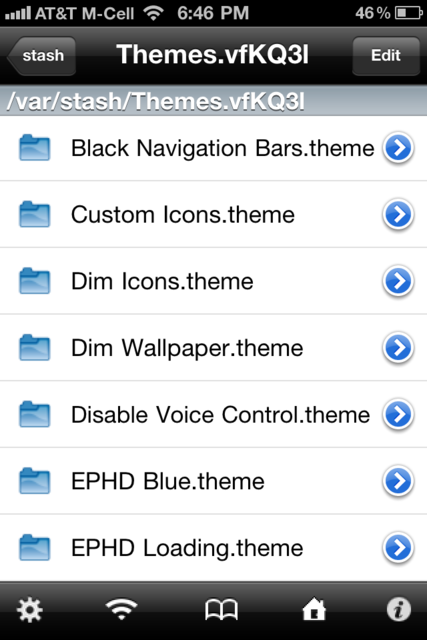
- Inside that folder, create a folder labeled "Bundles" - All your icons will be put into this folder which will direct winterboard to skin them accordingly.
Finding Icons to Skin
There are online databases for this information, but since icons and apps are often updated, this method will show you how to find them on your own.
The best method is to use SBSettings and click the "More" icon.
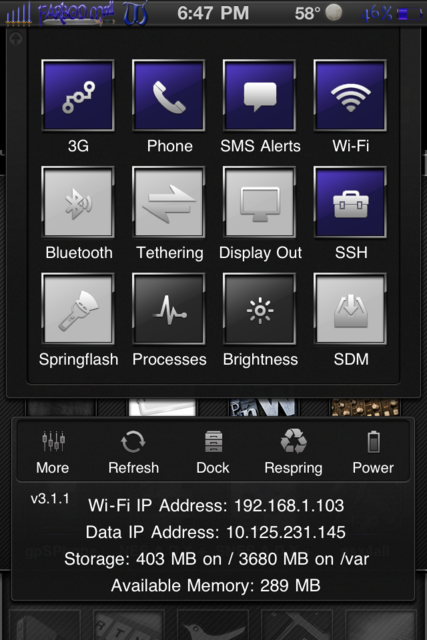
- Scroll to the bottom and click on "App Folders"
- Click on the app you are looking to skin, and mark down the folder name.
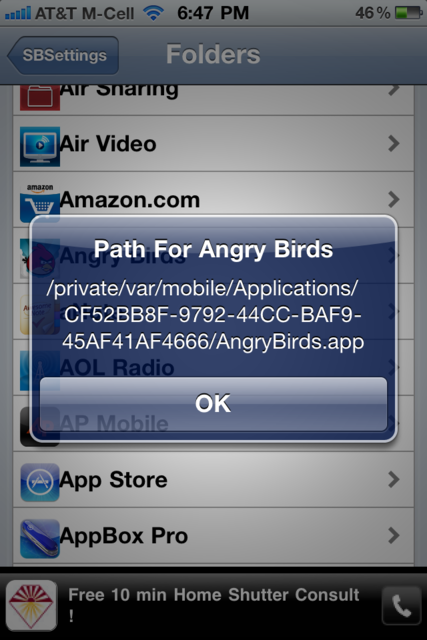
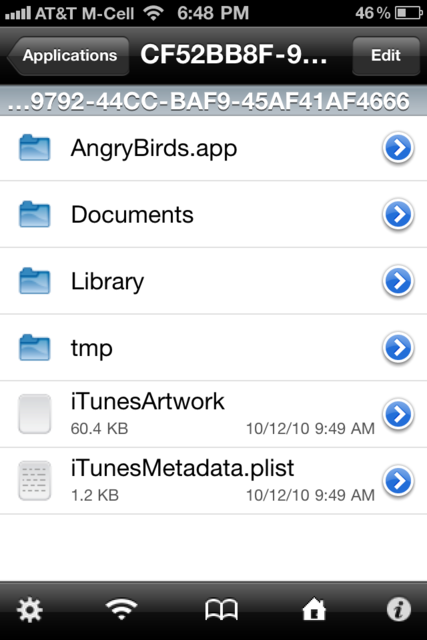
- Use iFile or your SSH browser and go to the location you marked down.
- Inside that folder there will be another folder, usually the name of the app with ".app" after it. Open that folder.
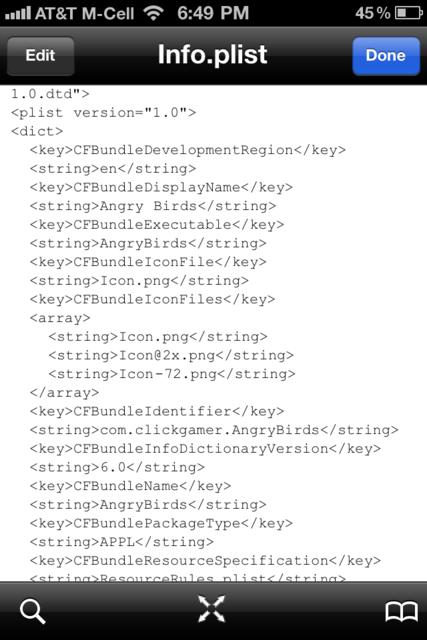
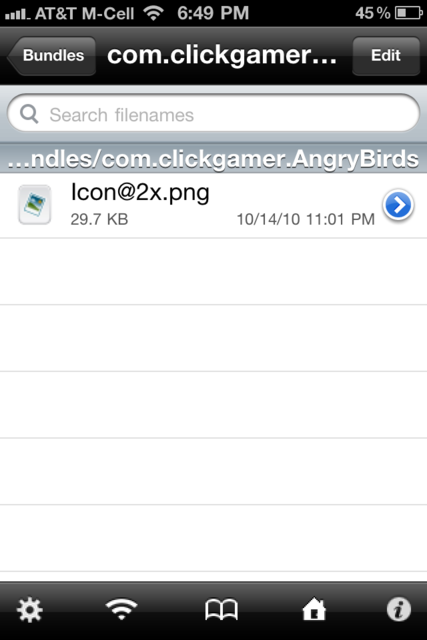
- Find Info.plist and open it. You will be looking for a line labeled "CFBundleIdentifier" and the string directly below it. Mark down the name of the bundle listed in the string, it will look something like "com.company.appname" This will be the name of your bundle folder that you will be making.
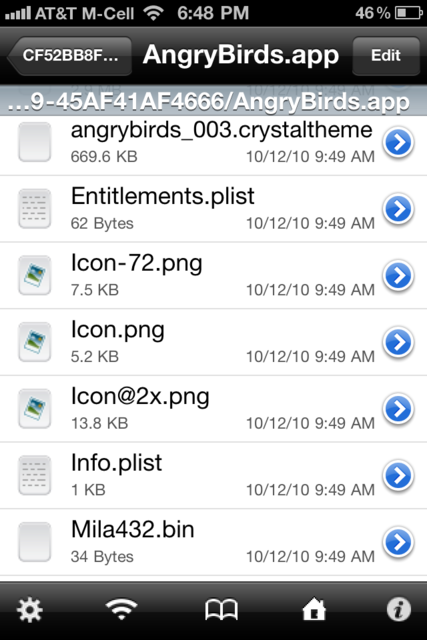
- In the same folder where you found Info.plist, find the icon you wish to replace. This step is often tricky, and might require trial and error until the correct file name is found. Usually the icon will be labled Icon.png or Icon@2x.png if it is a retina quality icon. Remember this file name is case sensitive.
- Go back into your Custom Icons.theme/Bundles folder and make a new folder labeled with what you found to be the CFBundleIdentifier (i.e. "com.company.appname"). Your Icon will go here. Now that you have both the icon name and the bundle name, its time to make an icon.
Making Icons
- If you are making icons for a device with a Retina display you can make them 118x120. If on a non-retina display, they should be 59x60. I use Adobe Photoshop to make my icons from pictures I find on the web. It does not matter what size the original icon is. Only what device you are currently on. You can skin a non-retina quality (59x60) icon with a retina quality (118x120) icon.

- Once you have your icon, you need to label it exactly like the icon you are skinning, again it must be case sensitive.
- Place the icon in your newly created bundle folder.
Using Winterboard to Implement Theme
- Open Winterboard and make sure the Custom Icons Theme is checked and above any other theme, as themes will override each other depending on which theme is listed above the other.
- Your device will respring and your icon should now appear. If it did not appear, double check the icon and bundle name to make sure they are exactly the same as the ones you have created.
I hope you found this tutorial helpful and remember to have fun! If you have any questions ask in comments or get expert help in our Jailbreak Theme Forum!
Tips of the day will range from beginner-level 101 to advanced-level ninjary. If you already know this tip, keep the link handy as a quick way to help a friend. If you have a tip of your own you'd like to suggest, add them to the comments or send them in to dailytips@tipb.com. (If it's especially awesome and previously unknown to us, we'll even give ya a reward.)
Master your iPhone in minutes
iMore offers spot-on advice and guidance from our team of experts, with decades of Apple device experience to lean on. Learn more with iMore!

iMore.com is your source for all things Apple, and the IM Staff author represents our collective hivemind, for those occasions when the whole team speaks with one voice to bring you important updates about the site, editorial policies, awards, promotions and more.
The iMore team of Apple enthusiasts and experts shows you how to get the most out of your tech life by using Apple products and the apps, services, and devices they connect with to their fullest. iMore is a mainstay in the Apple community for good reason. Every single iMore writer and editor takes their job seriously, and we prioritize accuracy and editorial independence in everything we do, never receiving compensation for coverage and never pulling punches.
As well as our amazing group of regular contributors, the iMore staff team currently consists of: Gerald Lynch — Editor-in-Chief Stephen Warwick — News Editor Daryl Baxter — Features Editor John-Anthony Disotto — How To Editor Tammy Rogers — Senior Staff Writer James Bentley — Staff Writer
