Vision features for macOS explained

Making computers accessible to all is one big part of Apple's strategy. Year after year, it strives to create accessible software for as many people as possible. This includes making the software for people with physical impairments, like vision loss. To make computers for the visually-impaired, the Cupertino giant has added several accessibility features on Mac. Here are the available features and how you can enable them.
Using VoiceOver
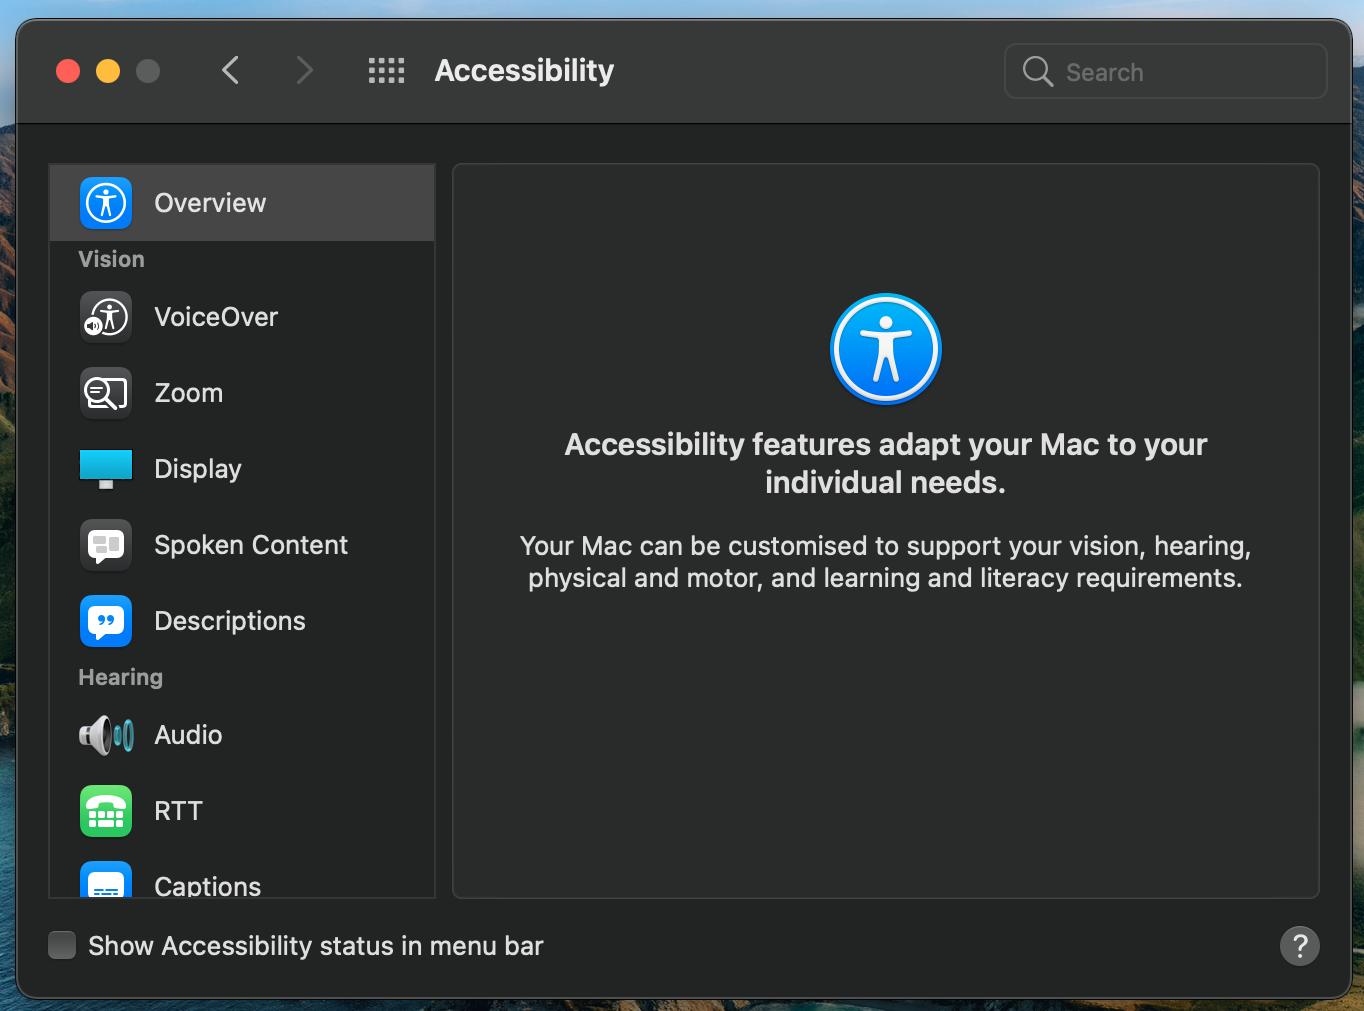
VoiceOver is an accessibility feature that makes it easier for blind and sight-impaired people to browse their Mac. It reads the interface elements like menus, tabs, links, and more to improve usability. Here's how you can activate VoiceOver and use it!
How to enable Voiceover
In a single step, you can hold Command and press the Touch ID three times to enable VoiceOver on your Mac. To enable VoiceOver more conventionally:
- Click the Apple menu button on the top left corner of your screen.
- Click on System Preferences.
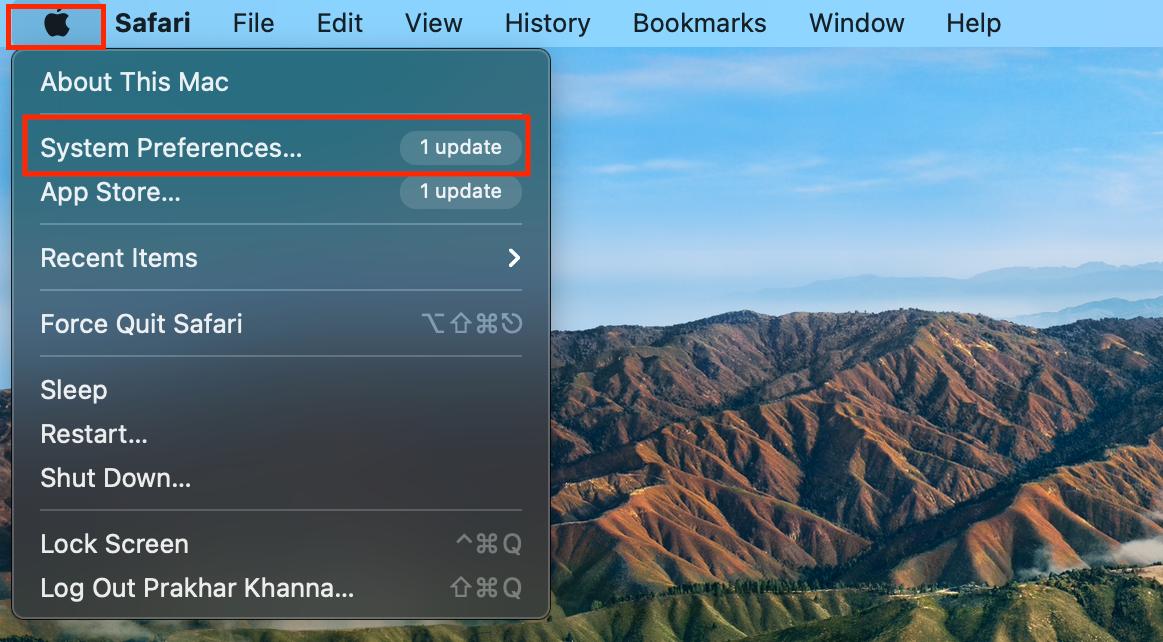
- Select Accessibility. It is present in the second row and fourth column.
- Click VoiceOver under Vision.
- Tick on the checkbox to enable the feature.
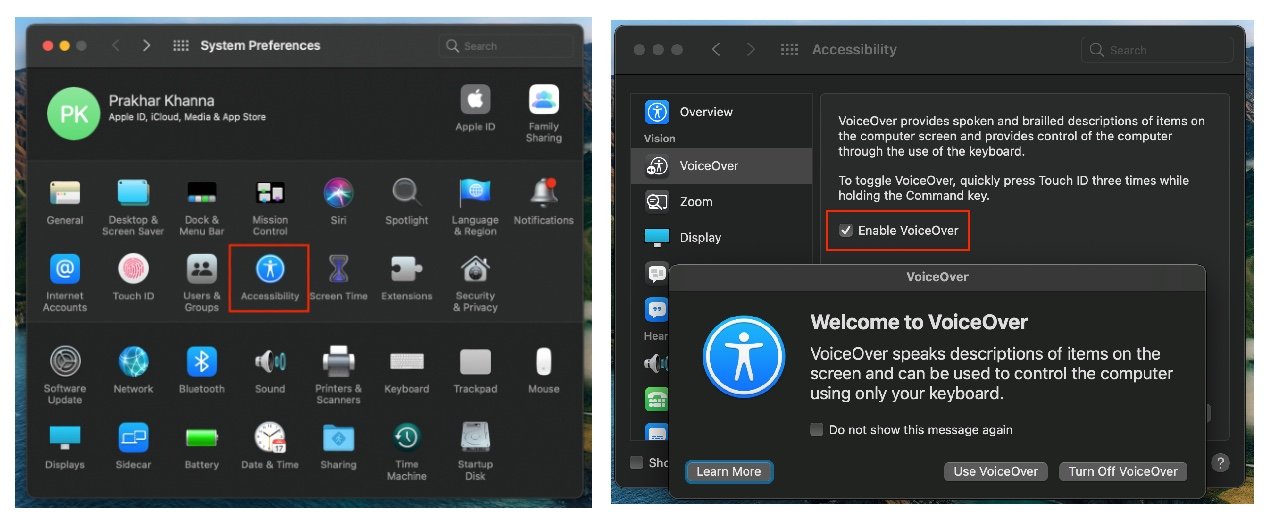
Now, you might need to get accustomed to using this accessibility feature. Therefore, you can click on Open VoiceOver Training to go through the tutorial. You can practice the various VoiceOver controls as instructed. You can also customize VoiceOver to your liking by clicking on the second button, Open VoiceOver Utility.
General
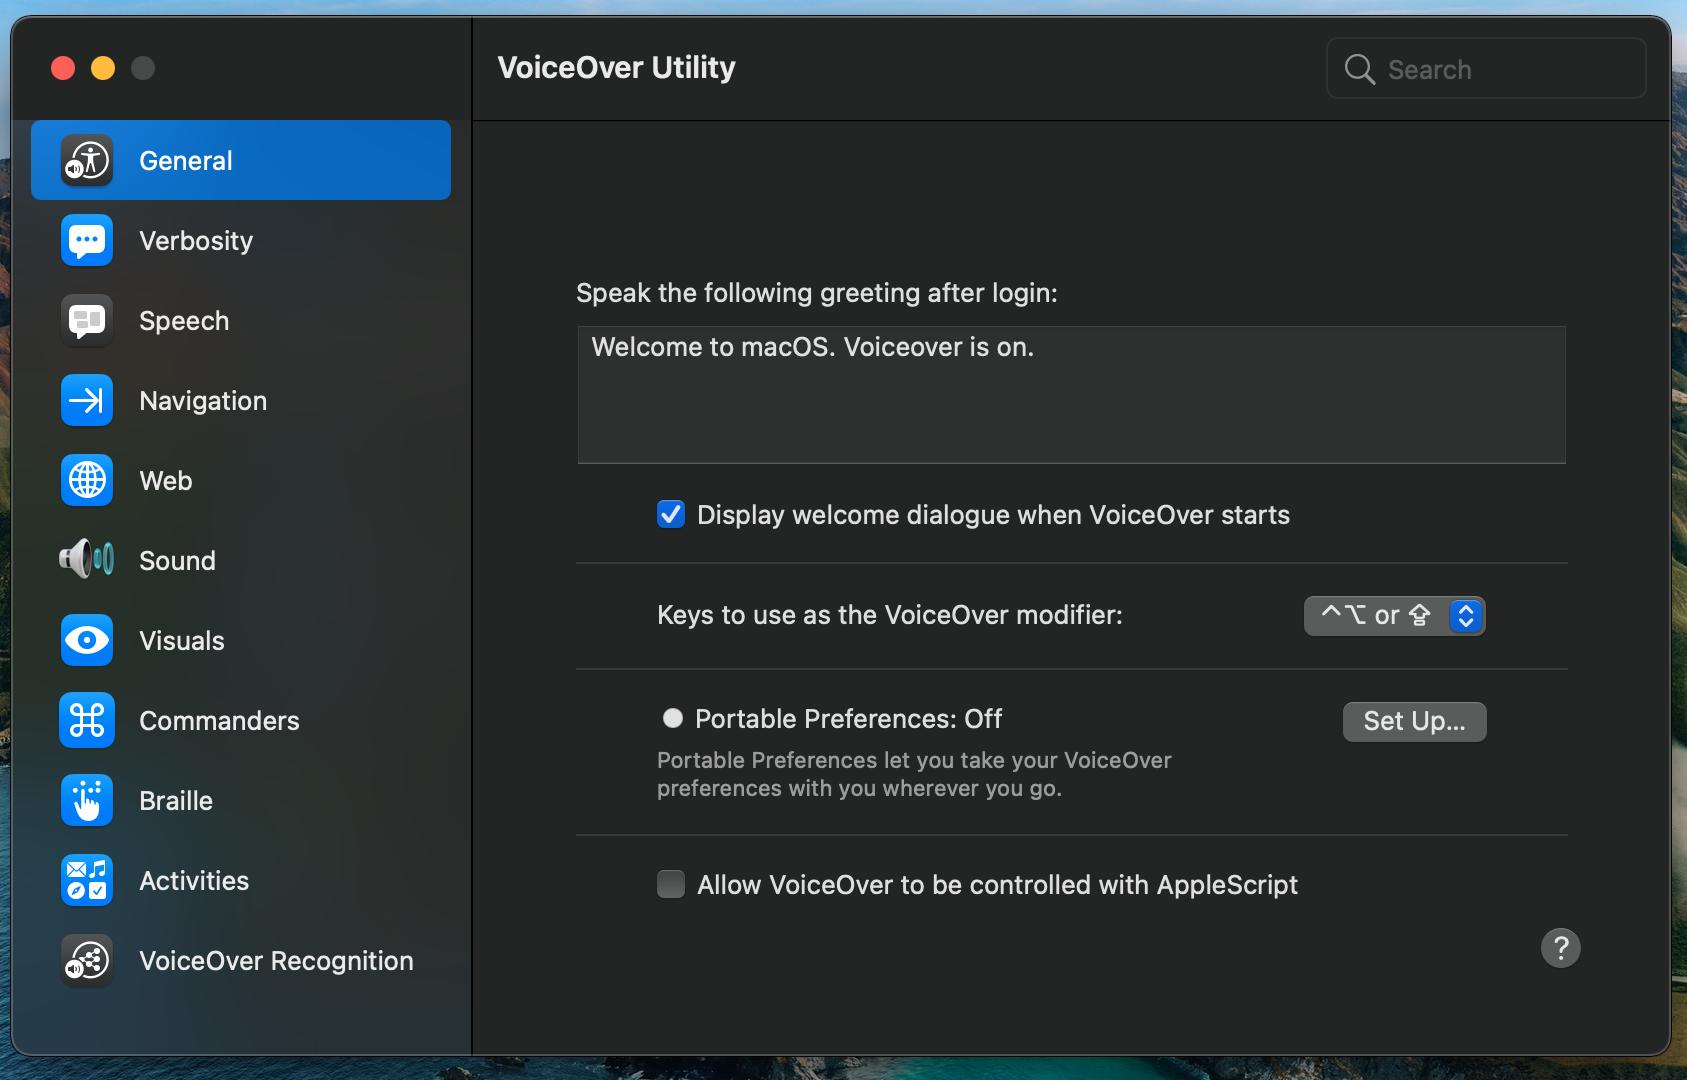
There are several options that you'll get here. Let's go through them one by one. First, you can adjust the greeting for login. By default, it is set as Welcome to macOS.VoiceOver is on. You can enable/disable display welcome dialogue when VoiceOver starts by checking/unchecking the box.
Next, there is an option to modify keys for VoiceOver modifier. By default, it is set as Control + Option or Caps Lock. Finally, you can enable portable preferences to let you take your VoiceOver preferences to wherever you go.
Speech
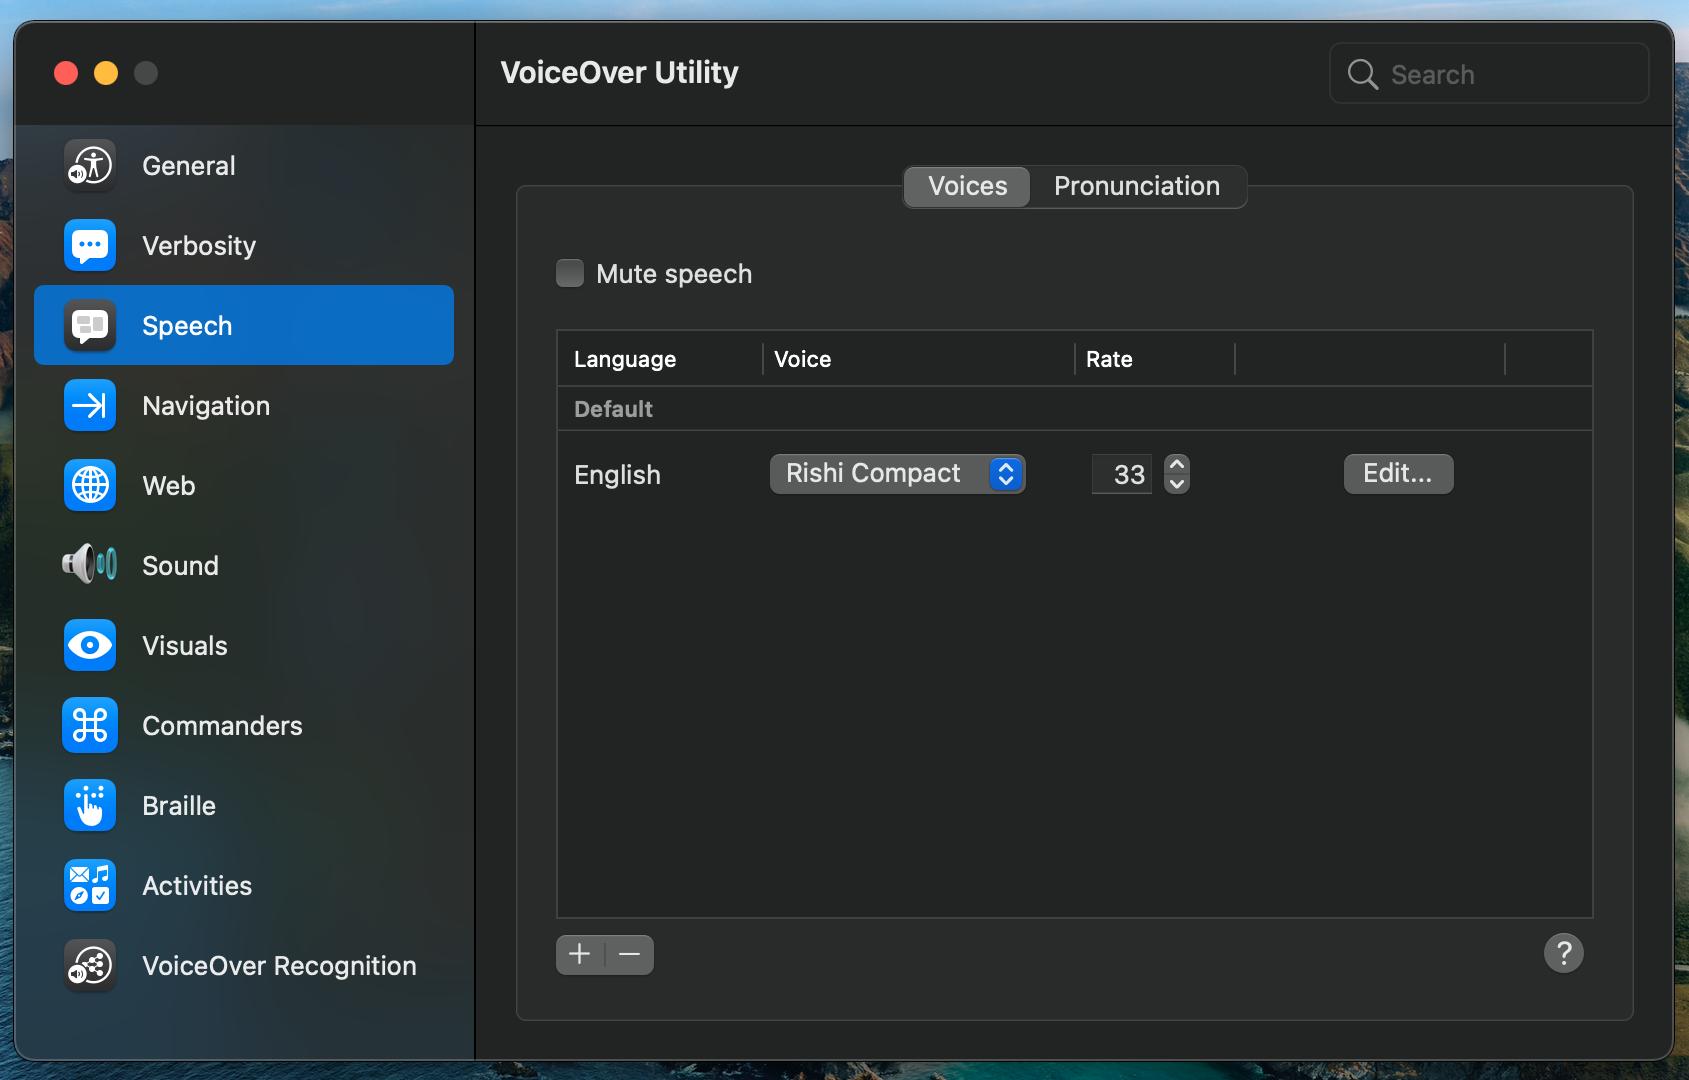
This option can be used to adjust the voice and language used for VoiceOver. You can also adjust pronunciations for various emoticons and GIFs.
Master your iPhone in minutes
iMore offers spot-on advice and guidance from our team of experts, with decades of Apple device experience to lean on. Learn more with iMore!
Verbosity
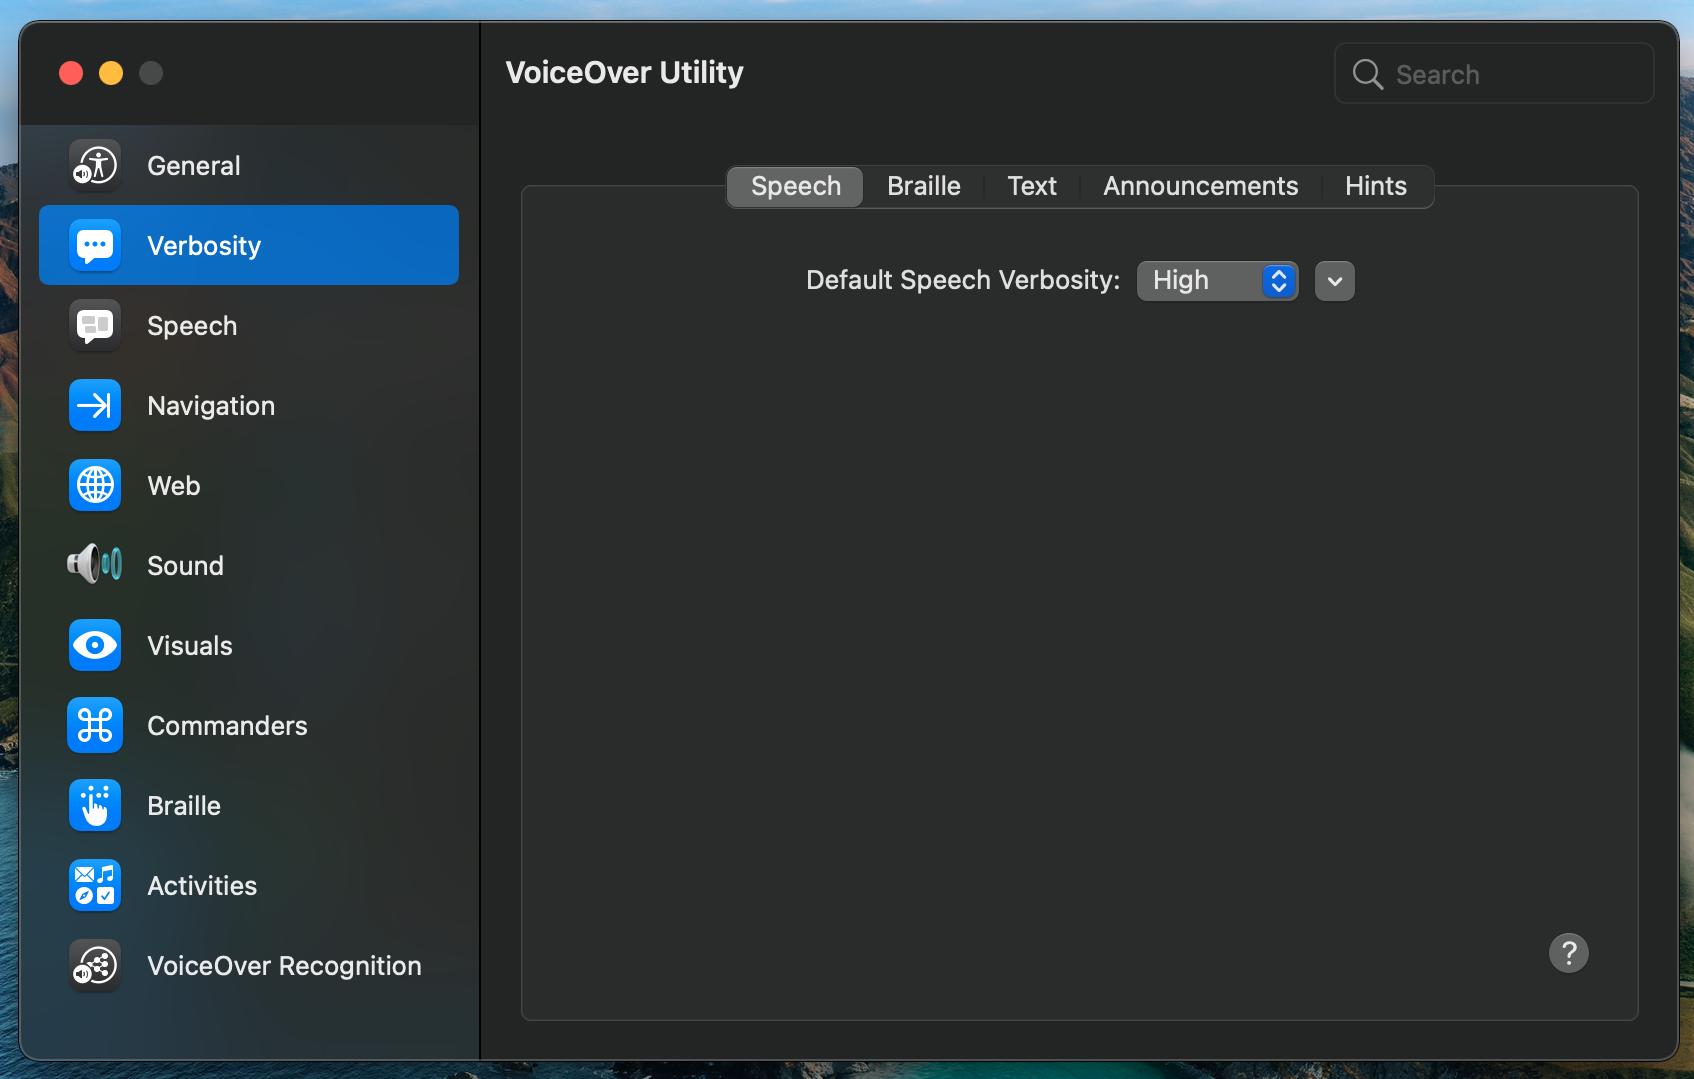
Verbosity is essentially how much information is read to you. It can read out every UI element from Apps to tickbox. There are various more elements inside this to adjust verbosity of speech, braille, text announcements, and hint. Speech and braille have three options to choose from high, medium, and low.
In-text, you can assign what happens when there is a punctuation, for instance, or what VoiceOver speaks while typing. Further, announcements can be used to announce when the mouse cursor enters a window or when a modifier key is pressed and more.
Navigation
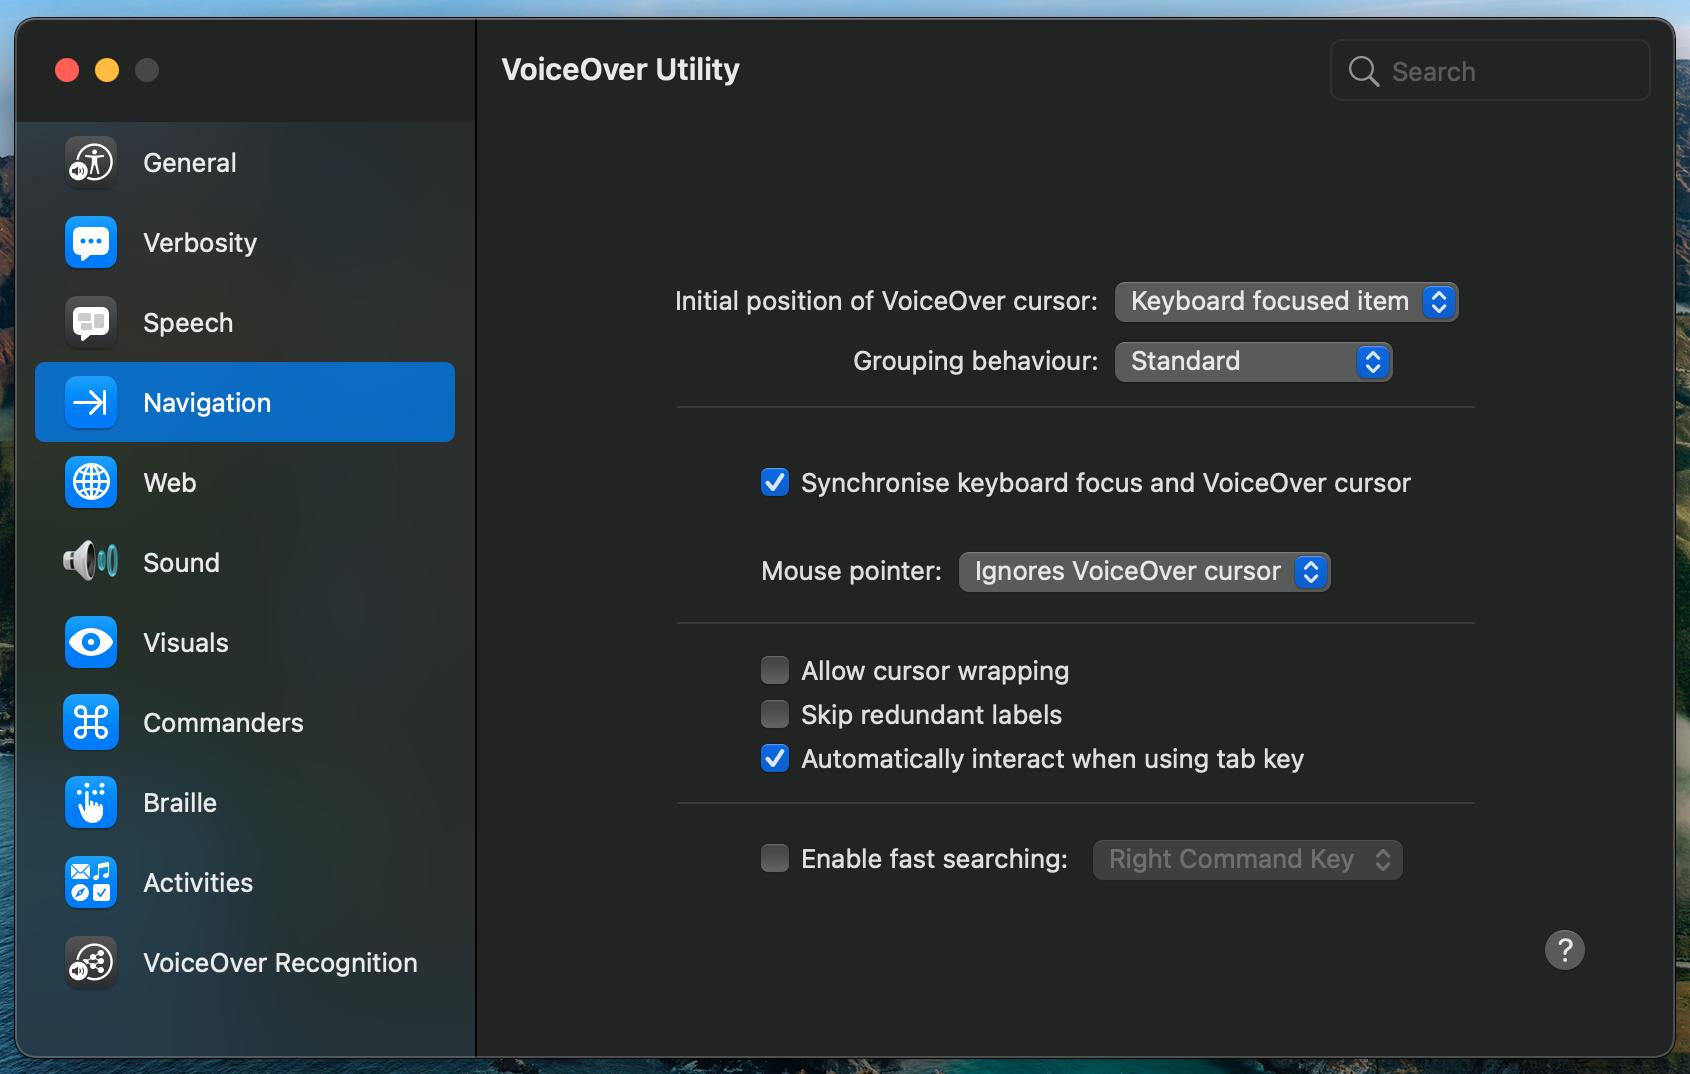
With Navigation, you can select how VoiceOver interacts with several elements of the interface. For instance, you can synchronize keyboard focus and VoiceOver cursor. Users can adjust the initial position of the VoiceOver cursor as well as the grouping behavior.
Web
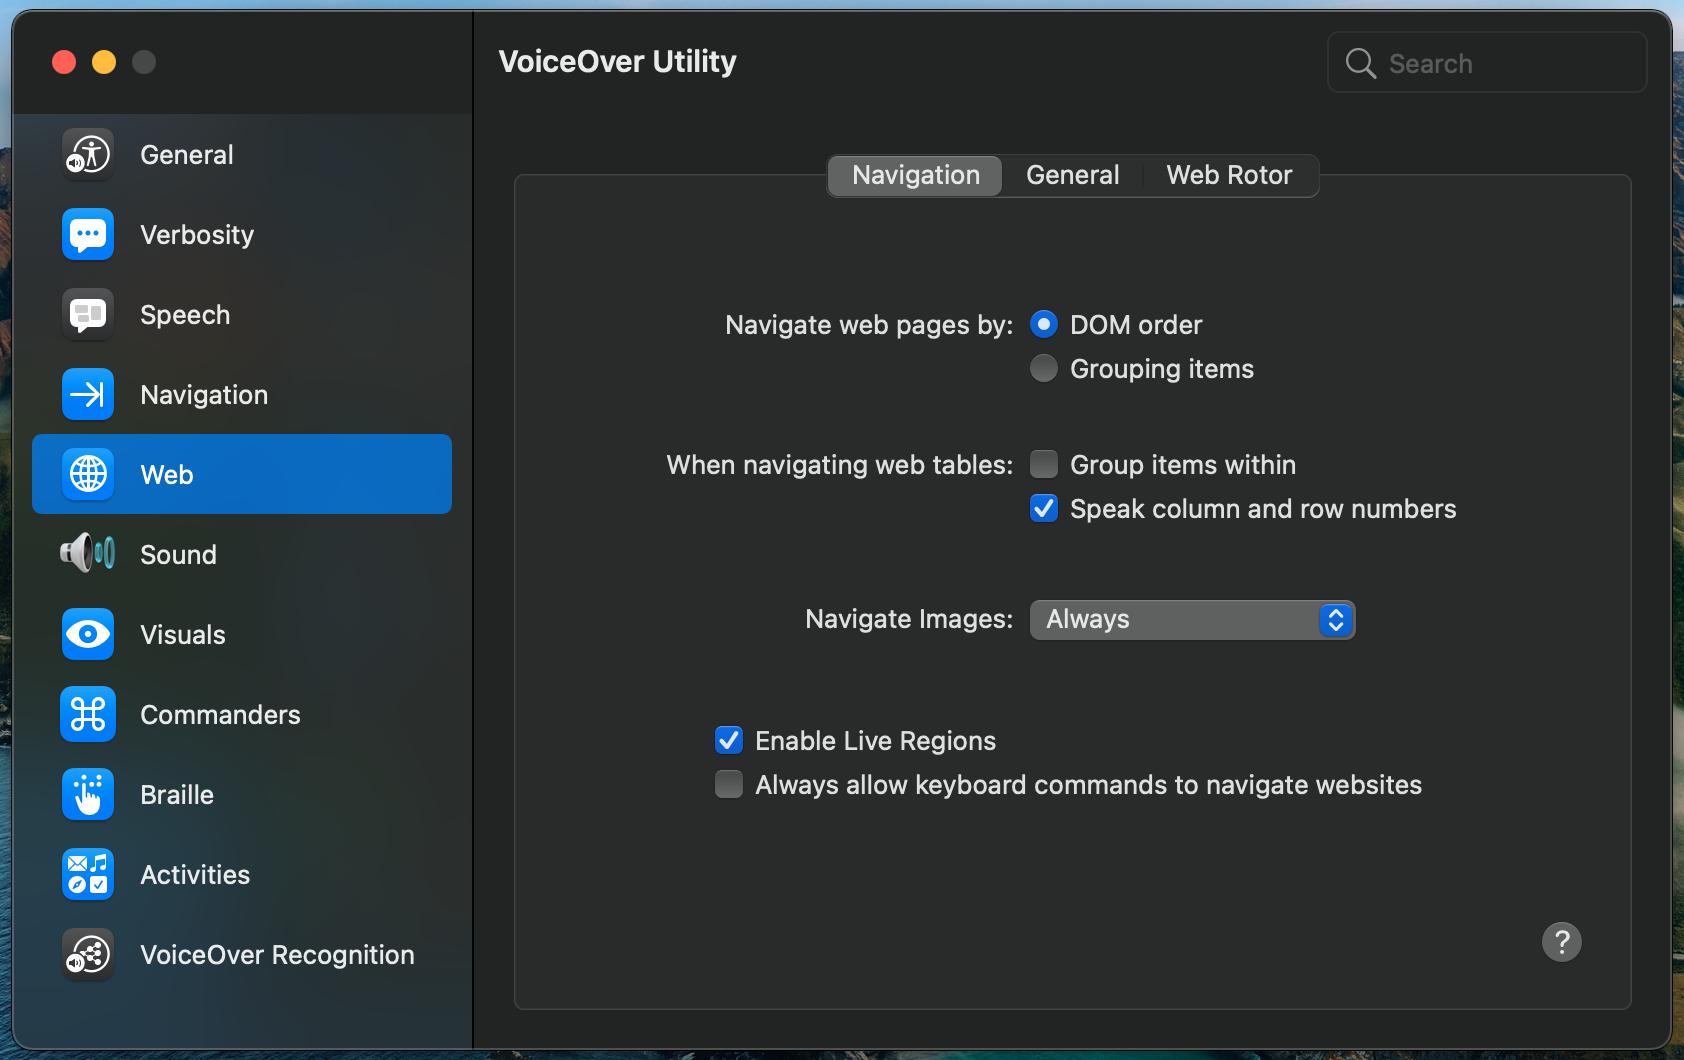
Here, you can choose how Voiceover interacts with websites. You can enable VoiceOver to speak rows and column numbers when navigating with tables or simply group items together. Moreover, you can select if VoiceOver reads out the webpage to you or the webpage summary. Furthermore, you can adjust the Web Rotor.
Sound
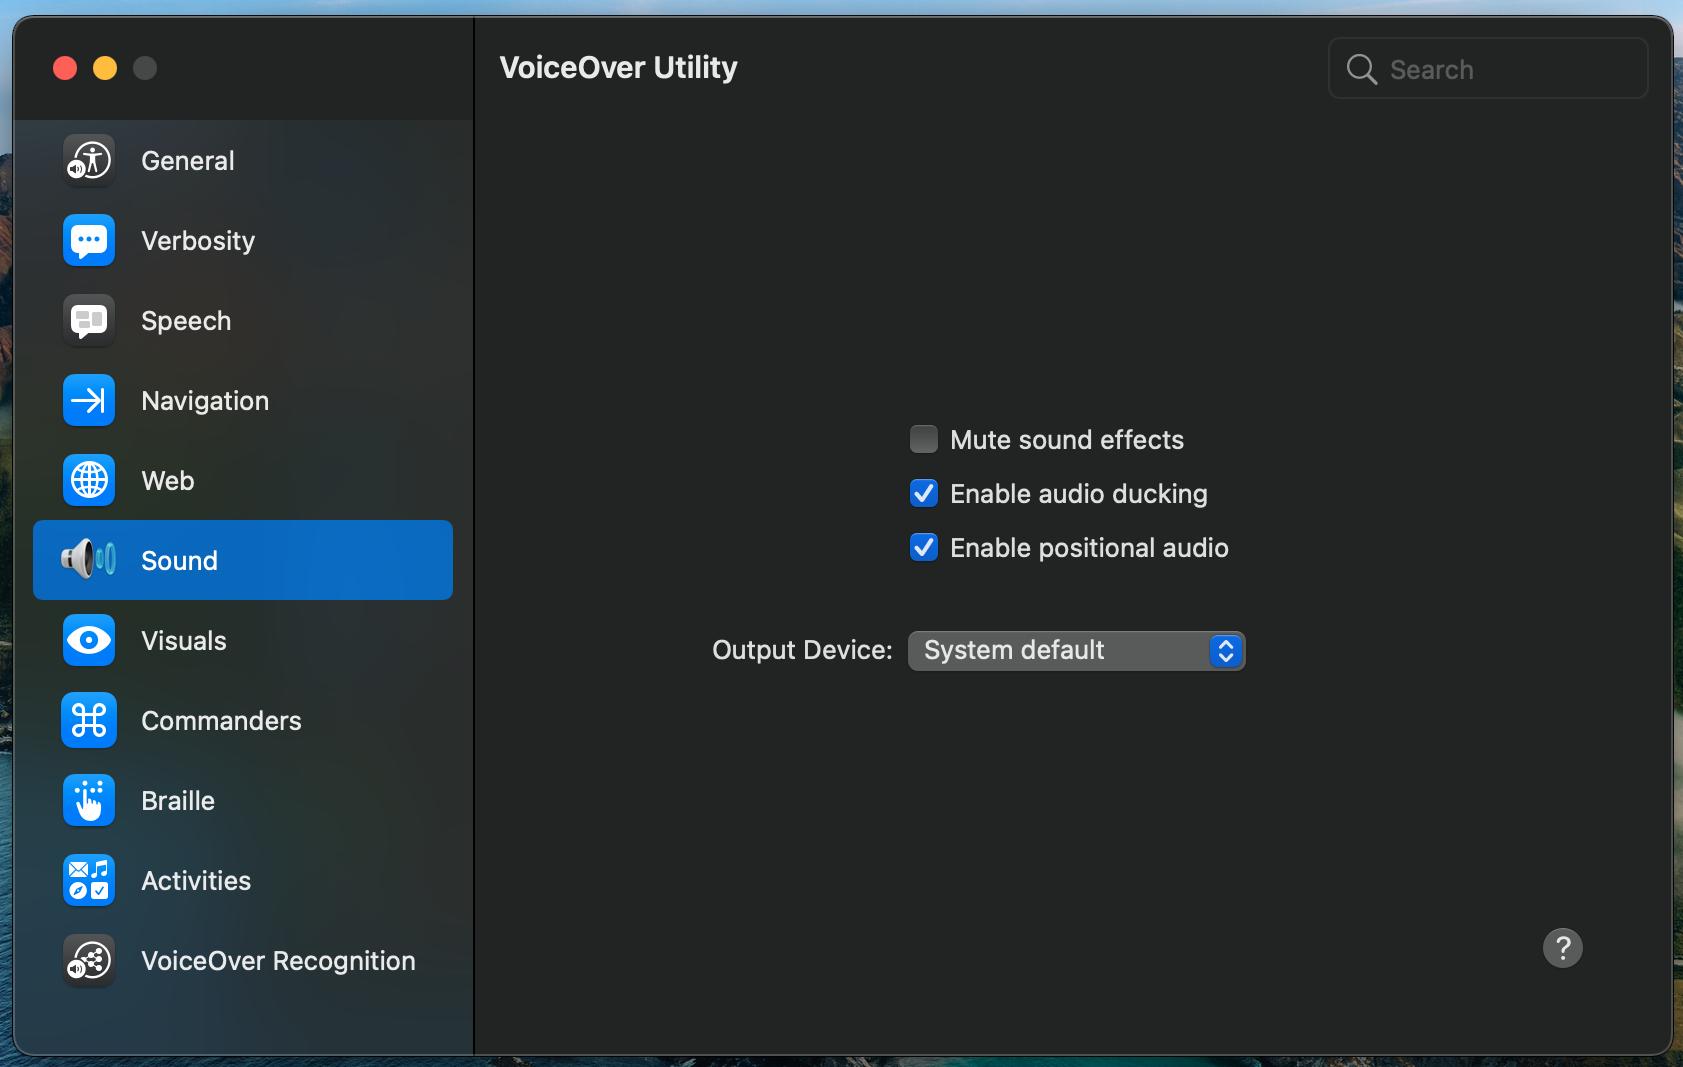
In the sound option, you can mute sound effects altogether. Plus, you can enable audio ducking and positional audio. Moreover, you can change the output device if you have a speaker or a headphone connected to your Mac.
Visuals
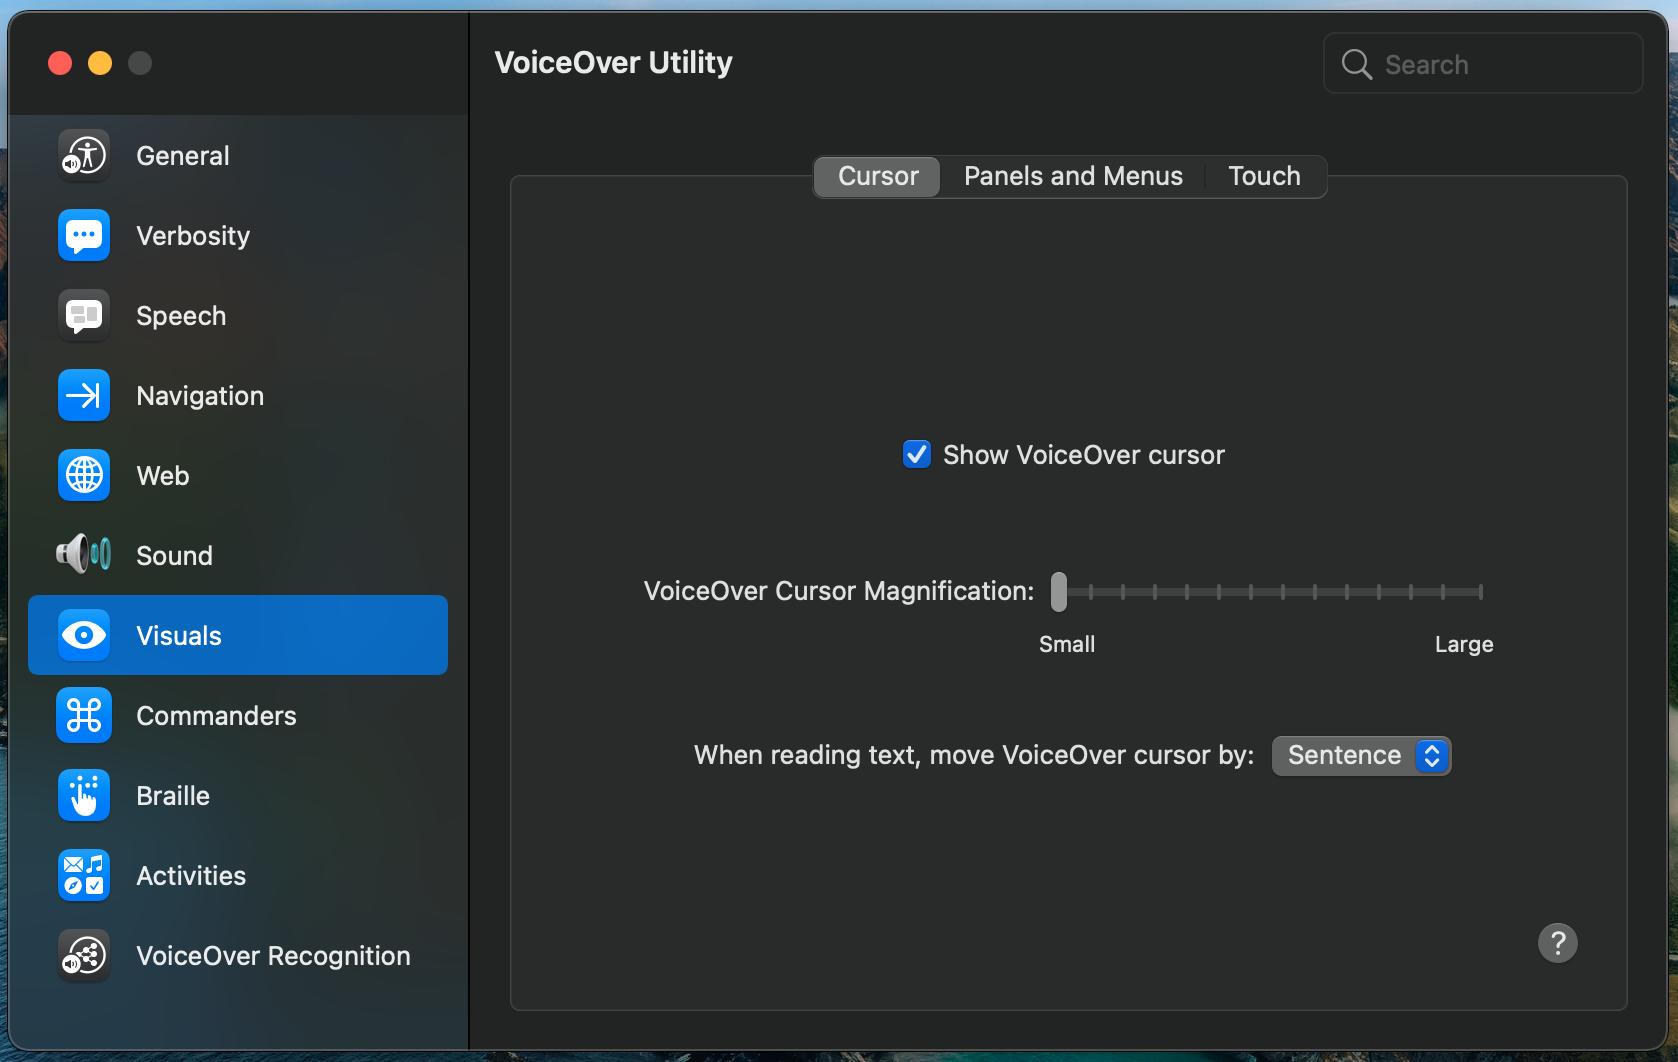
In Visuals, you can adjust the VoiceOver Cursor Magnification. You can also tell the computer if you need to move your cursor by word or by sentence. There are options to adjust the braille panel and its point size as well.
Commanders
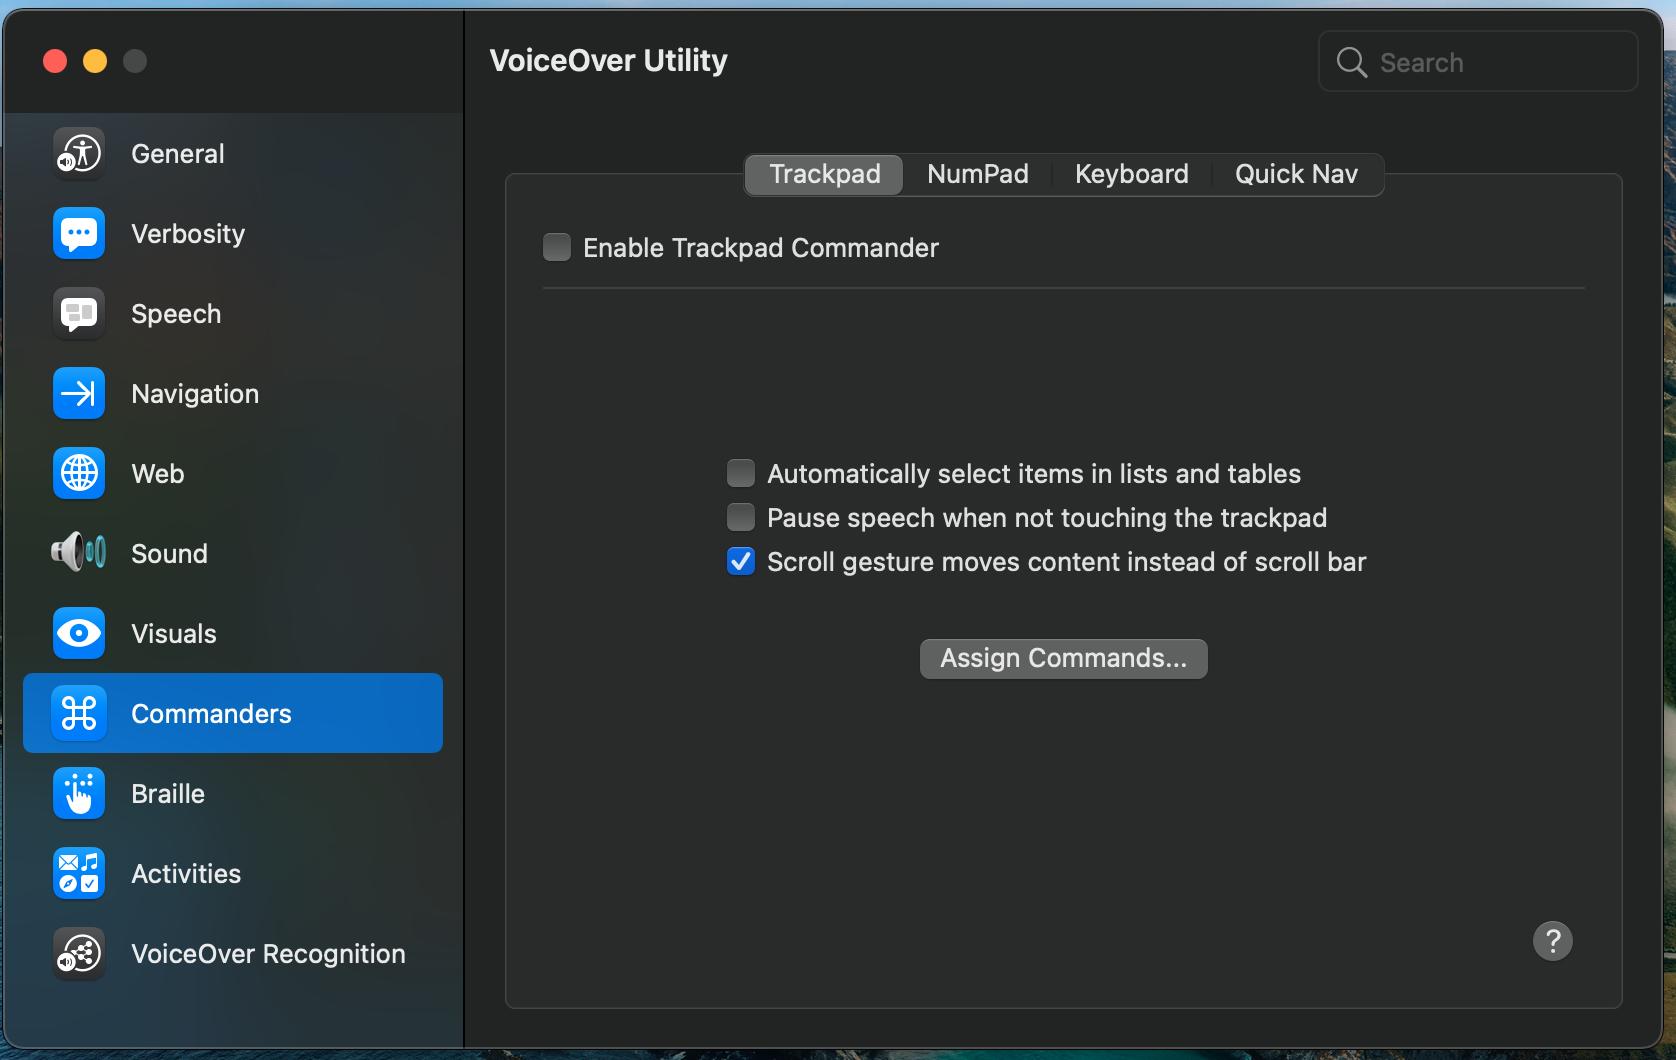
Under Commanders, you get a list of commands associated with various keys and combinations and the trackpad and numpad. You can also assign commands.
Braille
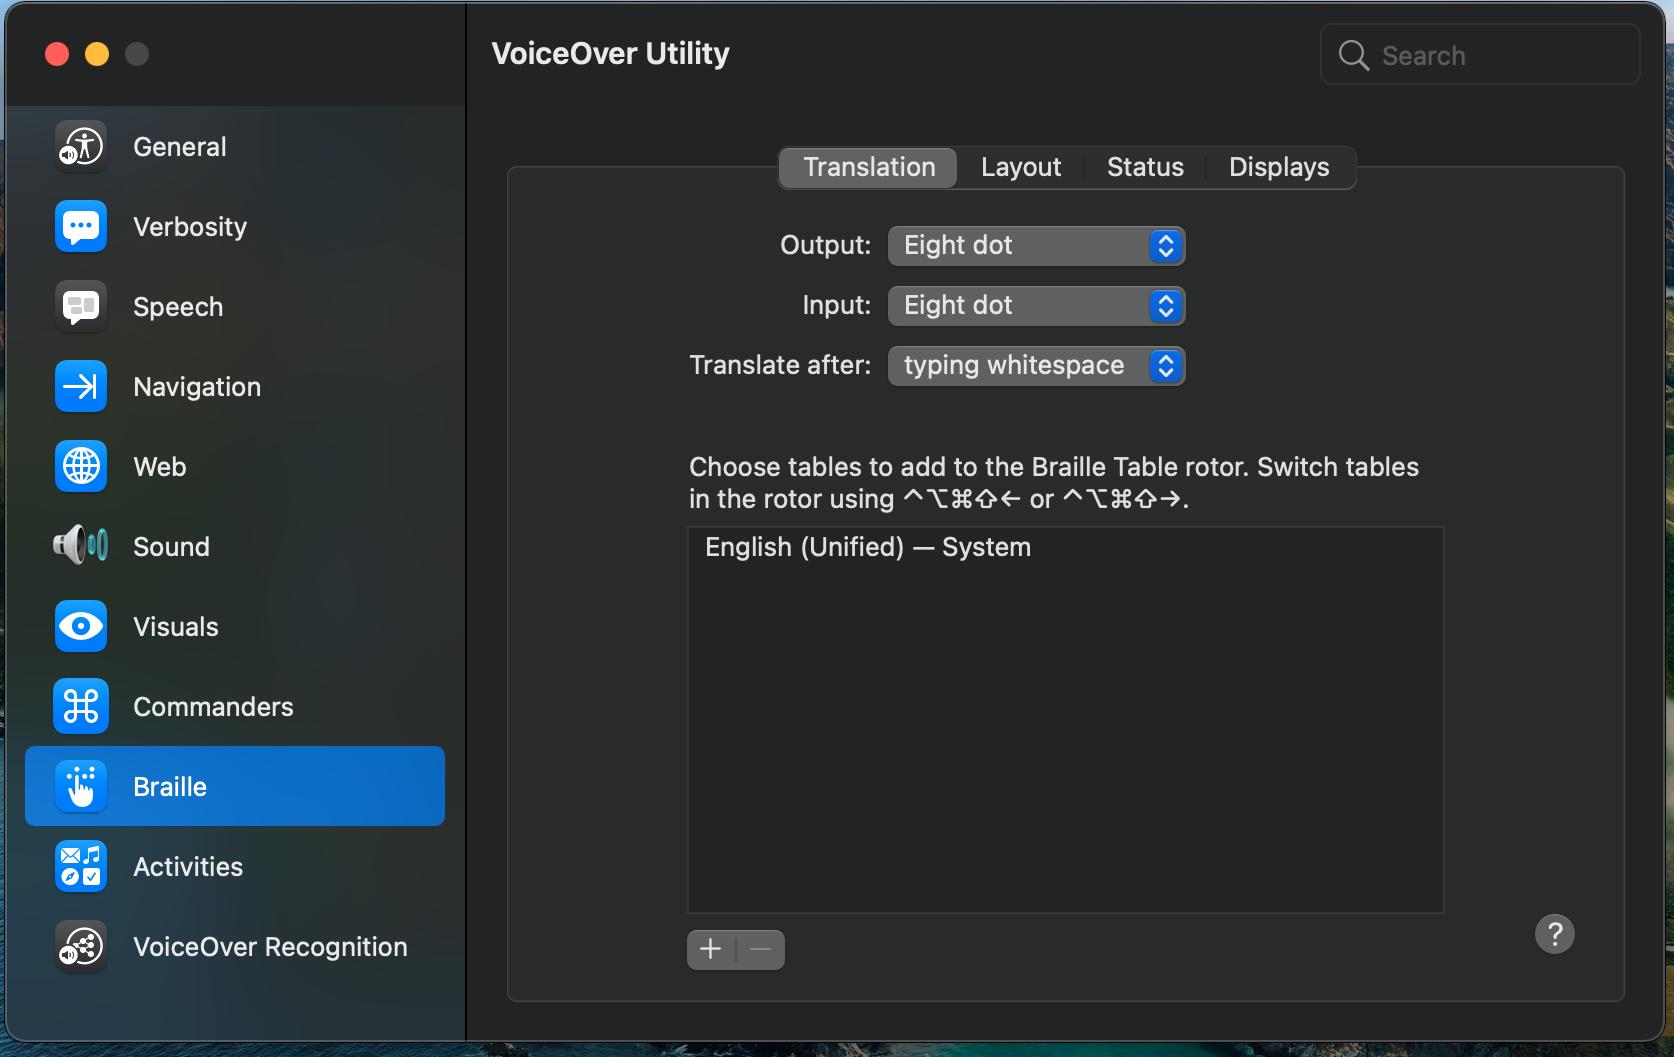
In Braille, you can adjust the translation, layout, status, and displays for your braille input.
VoiceOver Recognition
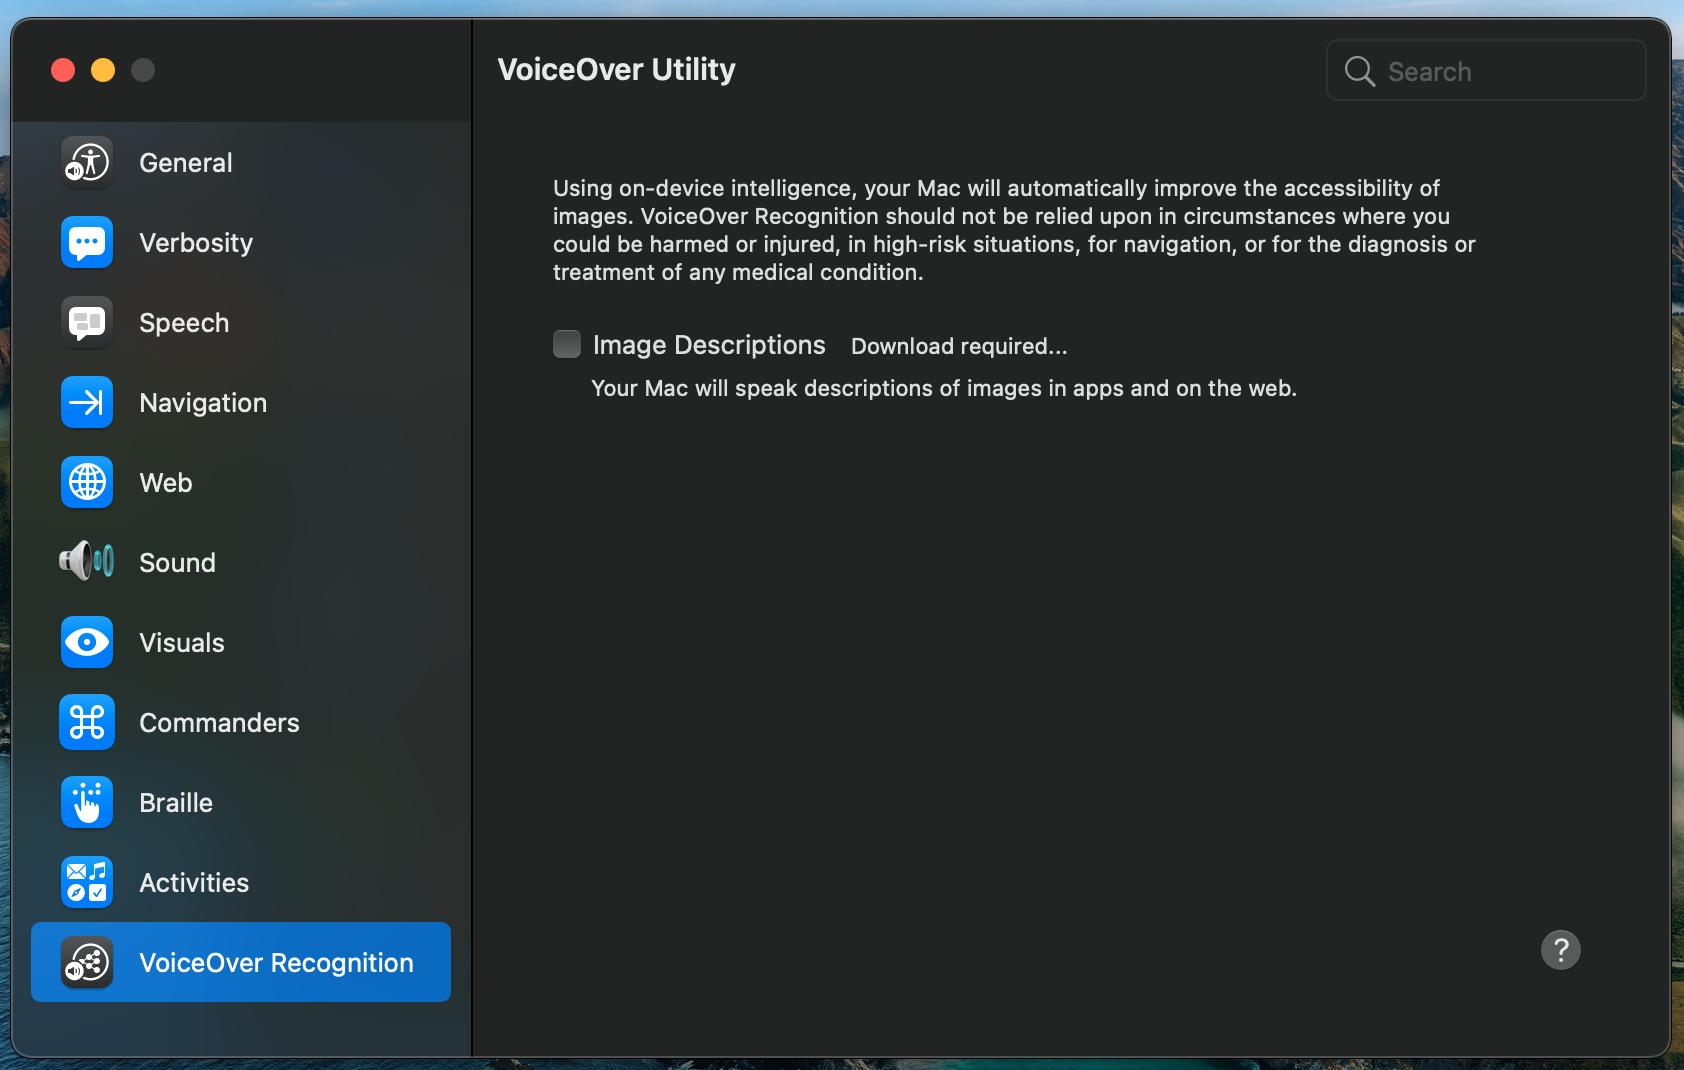
This option uses on-device intelligence to improve the accessibility of images automatically. You can check/uncheck image descriptions to enable/disable VoiceOver to speak descriptions of images in apps and on the web.
Zoom
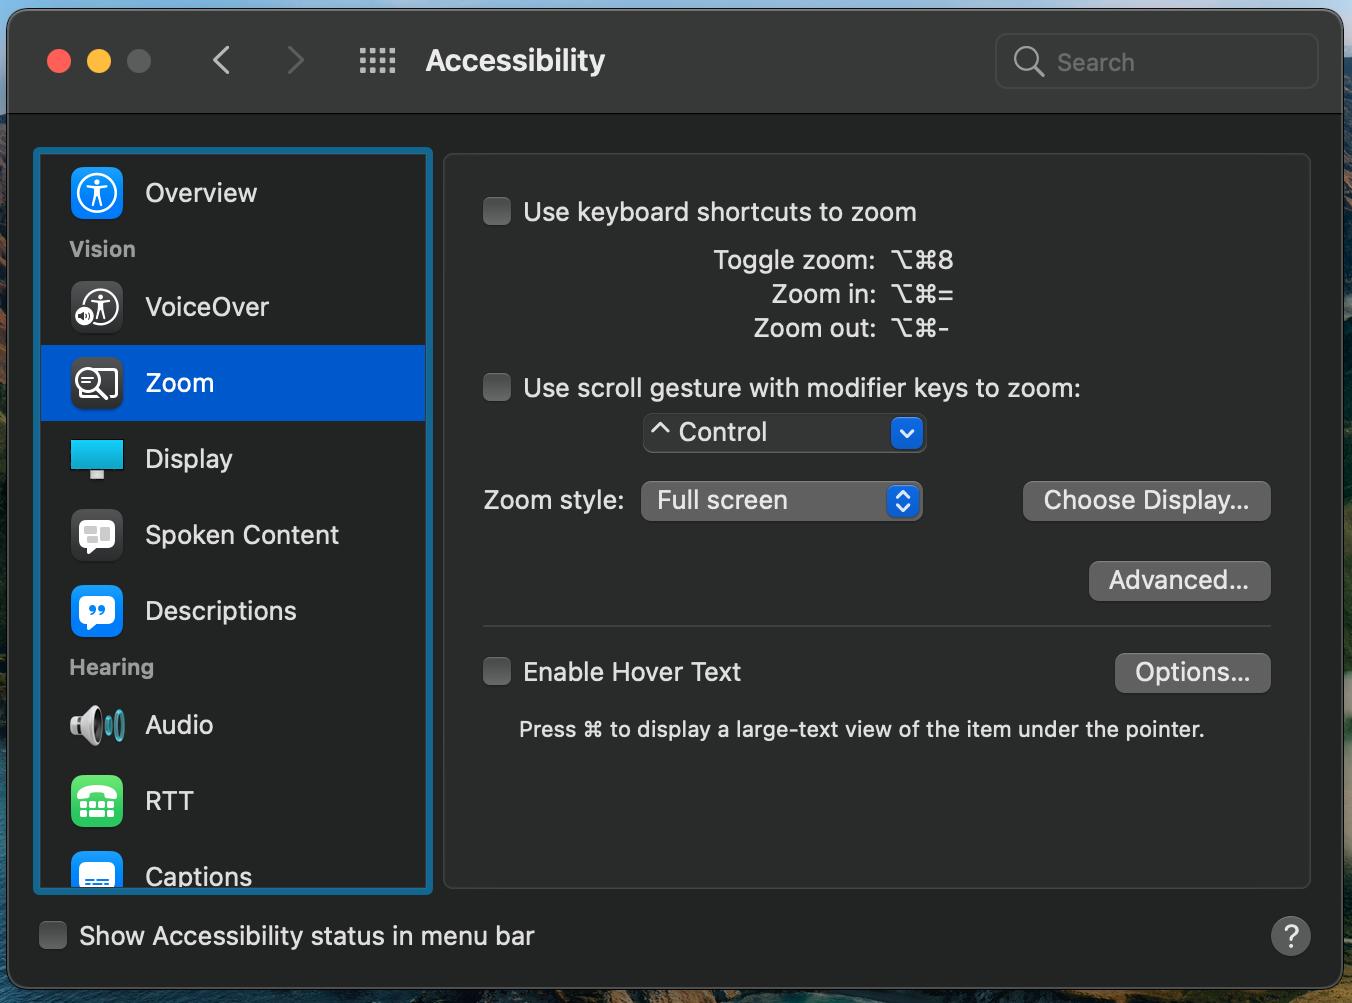
If you have trouble reading text on your Mac, Zoom allows you to magnify the screen for easier visibility. You can also move it around and control zoom. Here's how you can enable this feature:
- Click the Apple menu button that can be found in the top left corner of your screen.
- Click on System Preferences.
- Select Accessibility. It is present in the second row and fourth column.
- Click on Zoom under Vision.
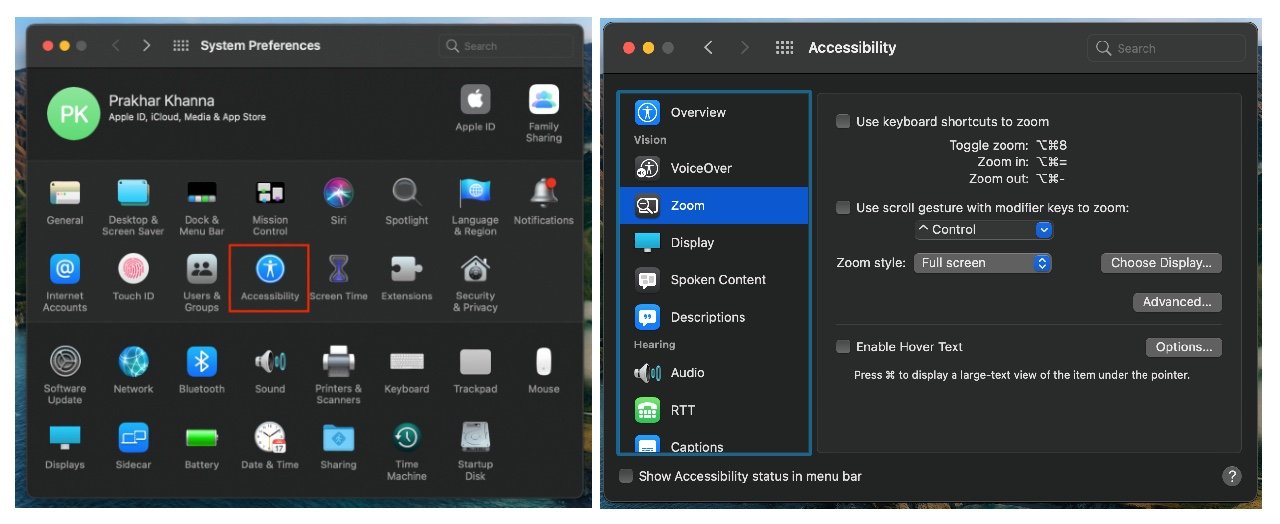
Now, you'll see various options with the first one being the checkbox for keyboard shortcuts to Zoom. These include:
- Toggle Zoom: Option + Command + '8'
- Zoom in: Option + Command + '='
- Zoom out: Option + Command + '-'
You can also set Zoom preferences of whether you want to apply the feature to full screen, split-screen, or picture-in-picture. It allows users to enable Hover Text and has advanced options for Appearance and Control options.
Display
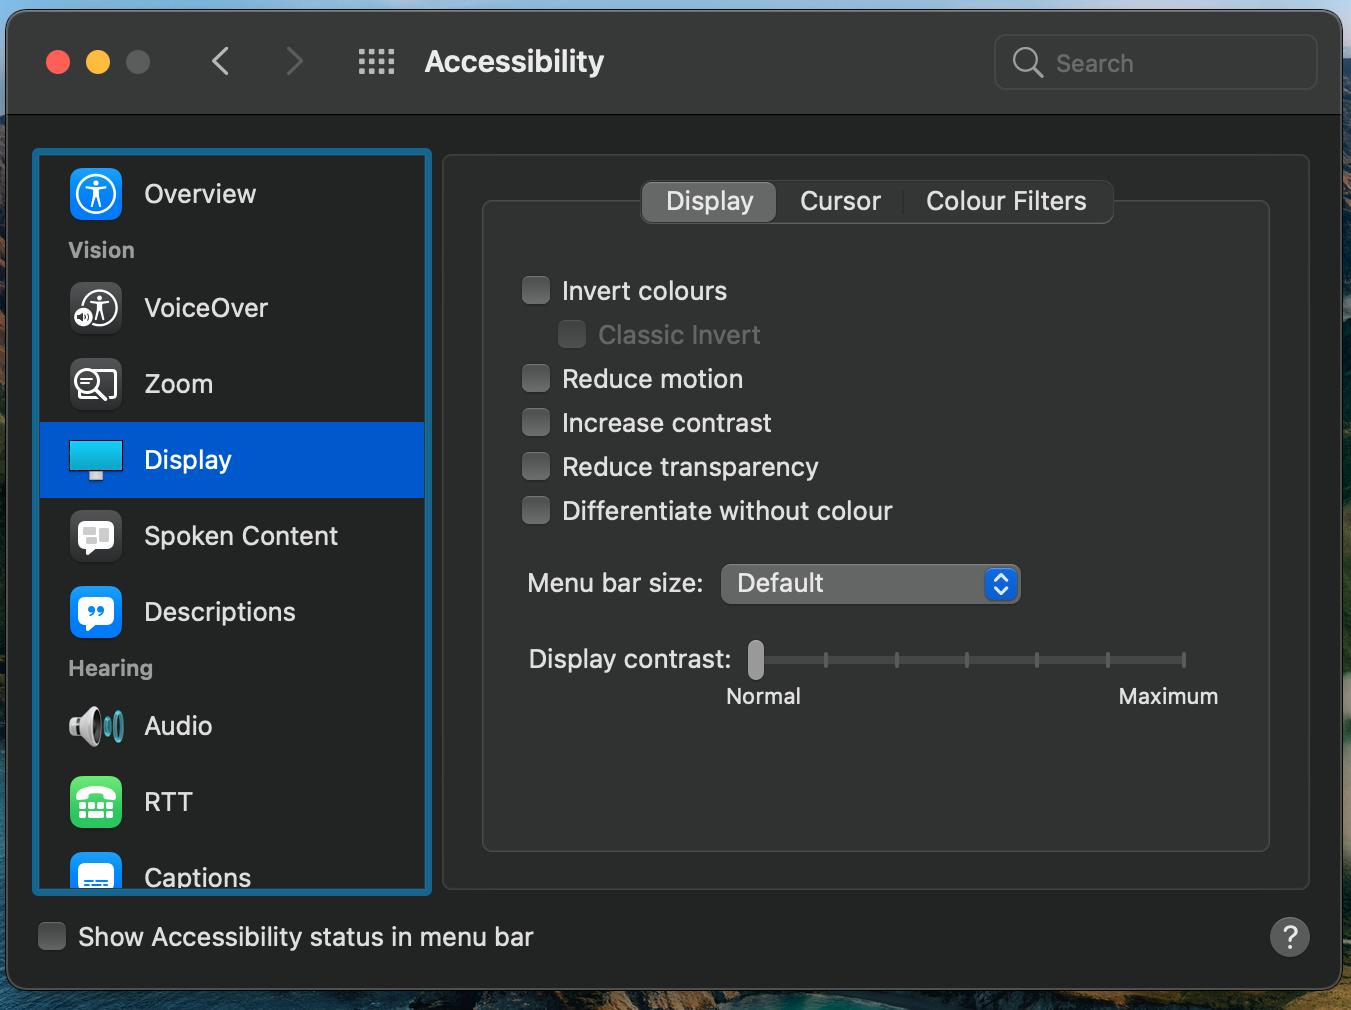
This is for those who have trouble seeing certain shades of colors mixed with other colors. It allows you to invert colors on your Mac. Moreover, you can adjust the cursor and color filters. Here's how you can reach this setting:
- Click the Apple menu button that can be found in the top left corner of your screen.
- Click on System Preferences.
- Select Accessibility.
- Select Display under Vision.
You'll see various checkboxes to invert colors, reduce motion, increase contrast, reduce transparency, and differentiate without color. You can also adjust the menu bar size and display contrast. Plus, go to the color filters option on top, and you can select filter type for your screen from four options. There are pre-applied color filters for people with protanopia, deuteranopia, tritanopia, and color tint.
Spoken Content
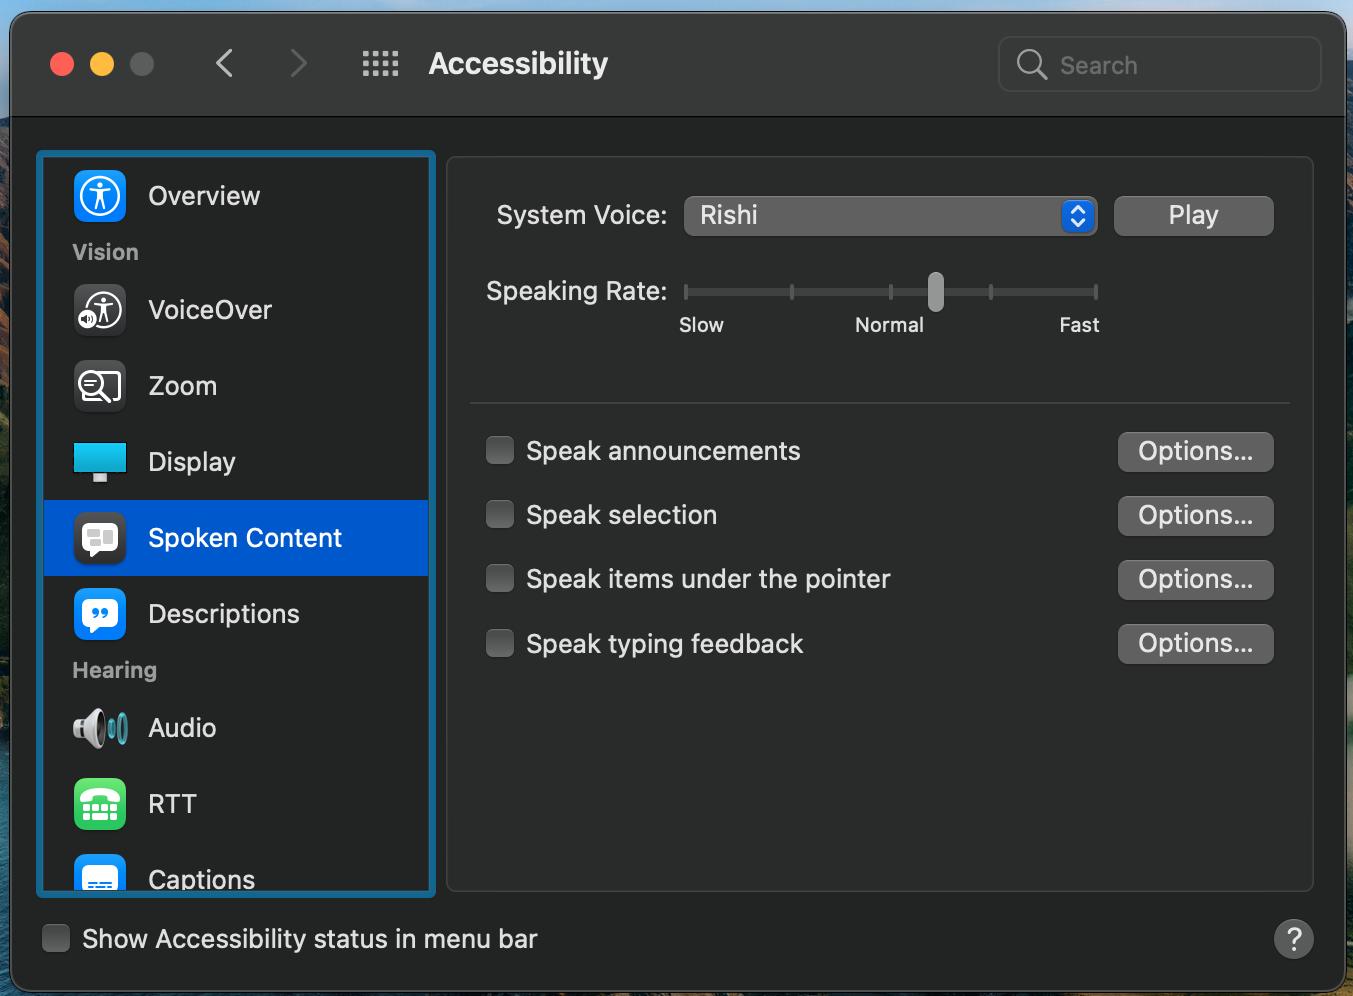
With spoken content, you can personalize your VoiceOver. It allows you to adjust the speaking voice as well as the speaking rate. You can tick checkboxes to speak announcements, selections, items under the pointer, and the typing feedback.
How to personalize VoiceOver
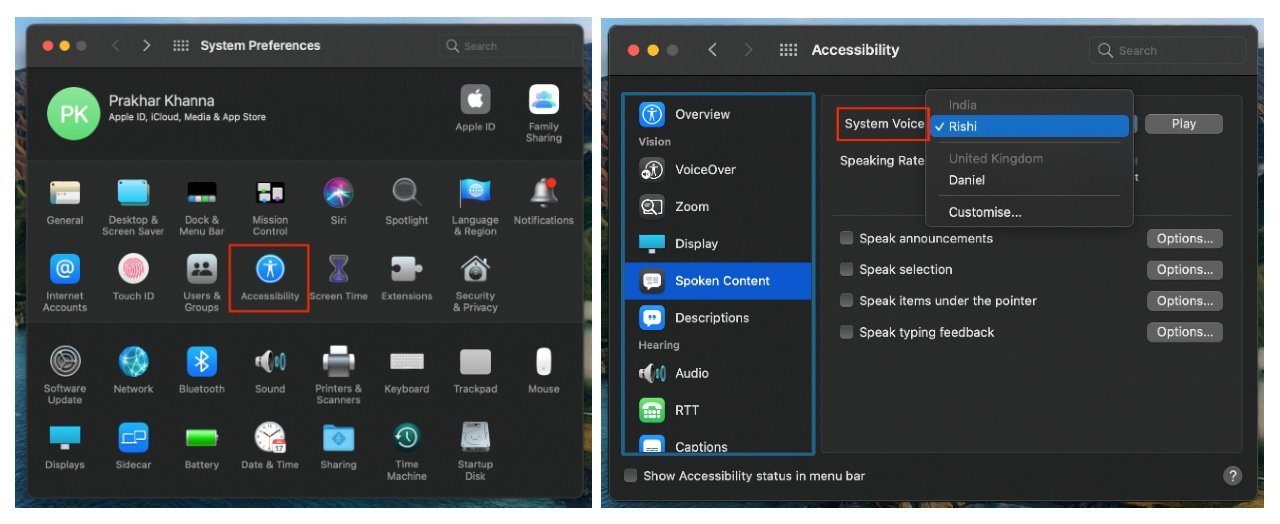
- Click the Apple menu button that can be found in the top left corner of your screen.
- Click on System Preferences.
- Select Accessibility.
- Click on Spoken Content under Vision.
- Go to System Voice and select your preferred option.
Description
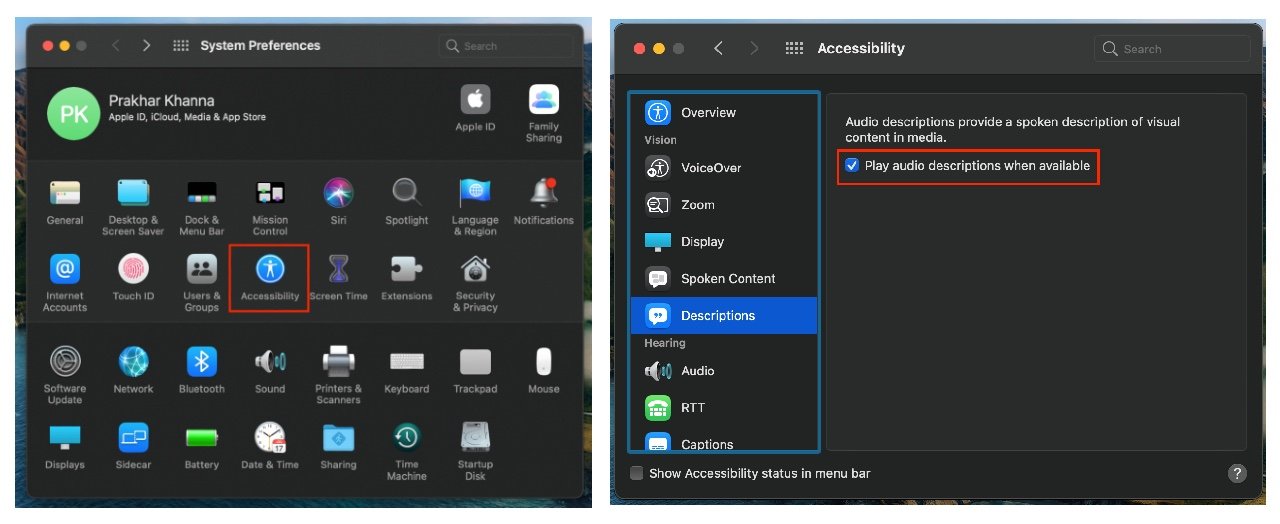
This feature provides a spoken description of visual content in media. To play audio descriptions:
- Click the Apple menu button that can be found in the top left corner of your screen.
- Click on System Preferences.
- Select Accessibility.
- Click on Descriptions under Vision.
- Tick on the checkbox for play audio descriptions when available.
Any questions?
These are all the accessibility features available for the visually-impaired. You can set these up not only your Mac, but youriPhone or iPad, your Apple Watch, and Apple TV as well. If you have any questions about any of these features, shoot them in the comments below.

